Hello again, Steemians!
It's ya girl, Absolute Ama!
Today I thought I would share with you my painting process when it comes to painting with watercolors. This has been honed over a year of exclusively painting with watercolors almost everyday. Im no pro and I still have a ton of areas to improve on, of course!
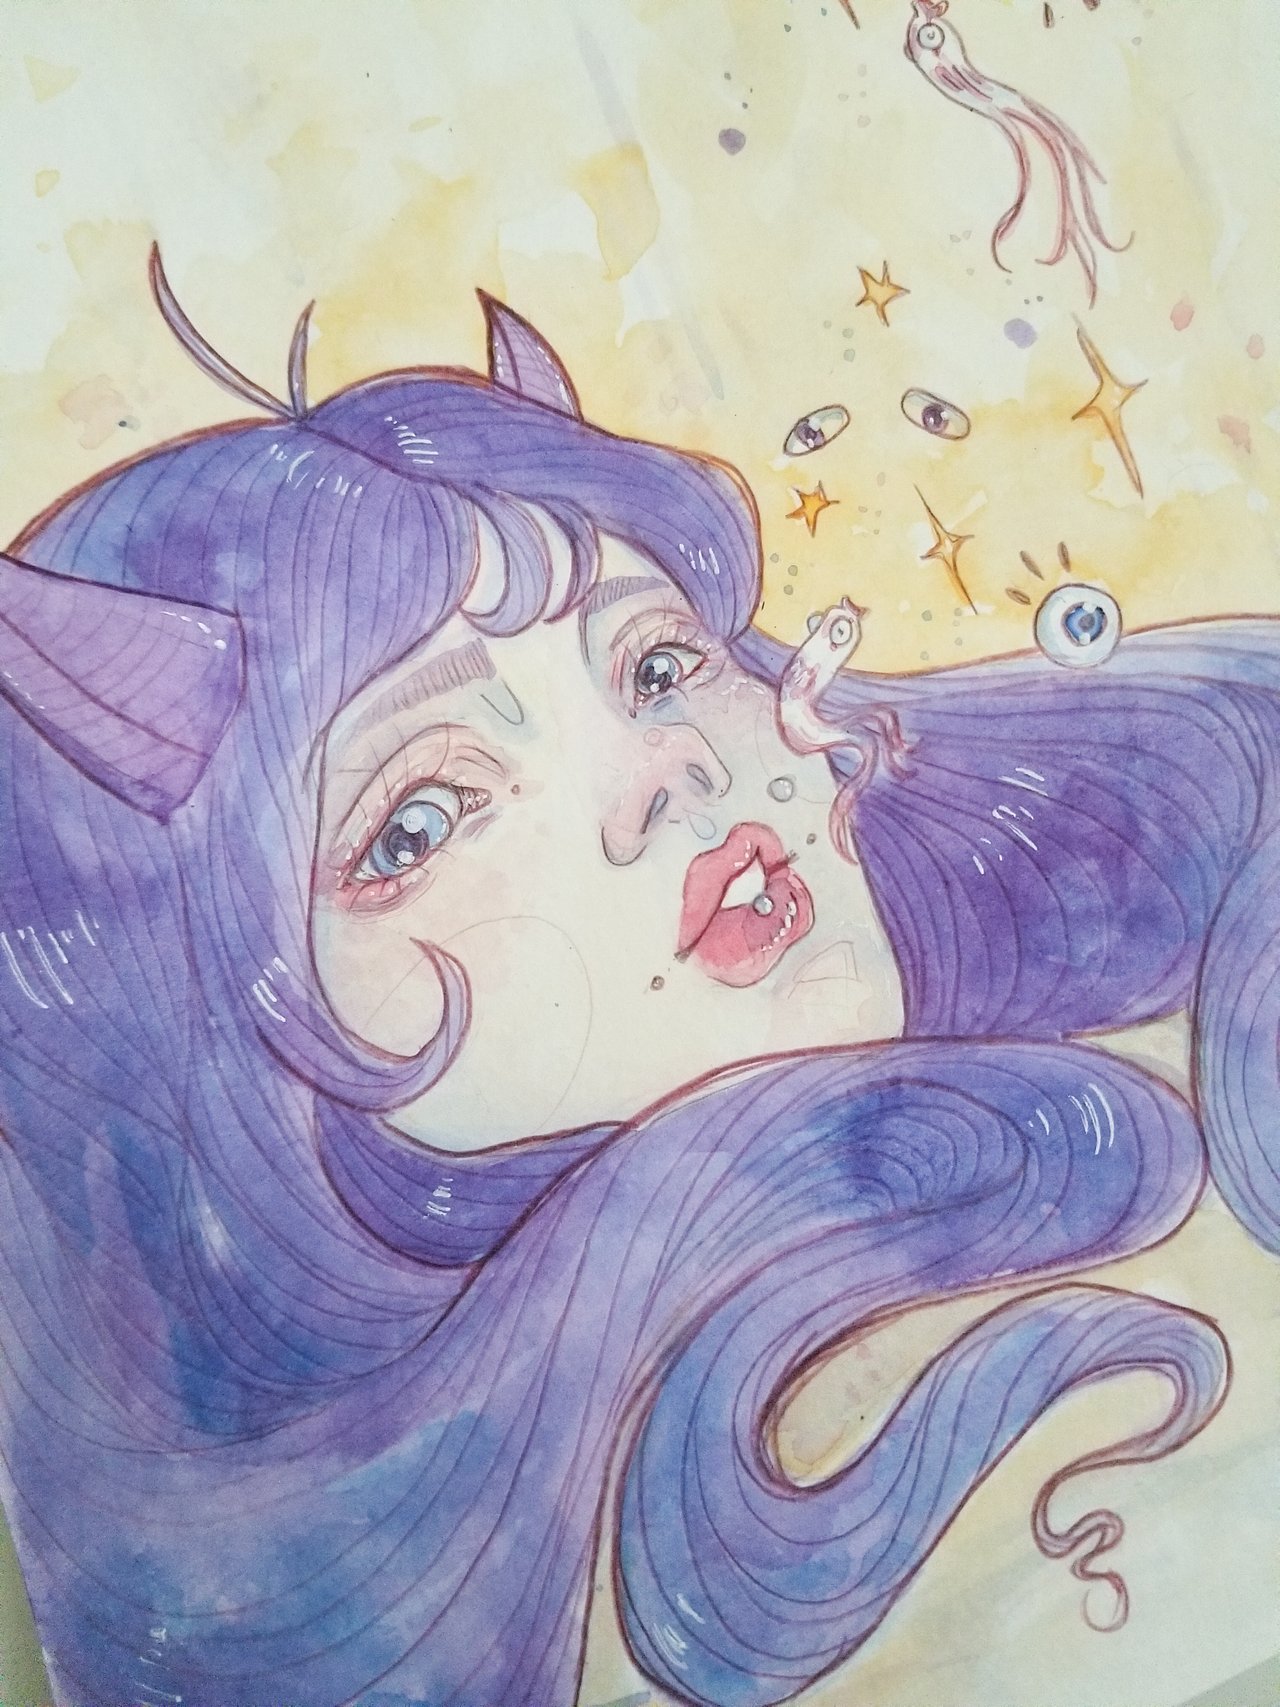
I took pictures of one of my recent paintings called 'WHISPER ME SWEET NOTHINGS' and while I normally keep process photos for Patrons, I thought JUST this once, it would be best to start with this so you can get a feel of how I create.
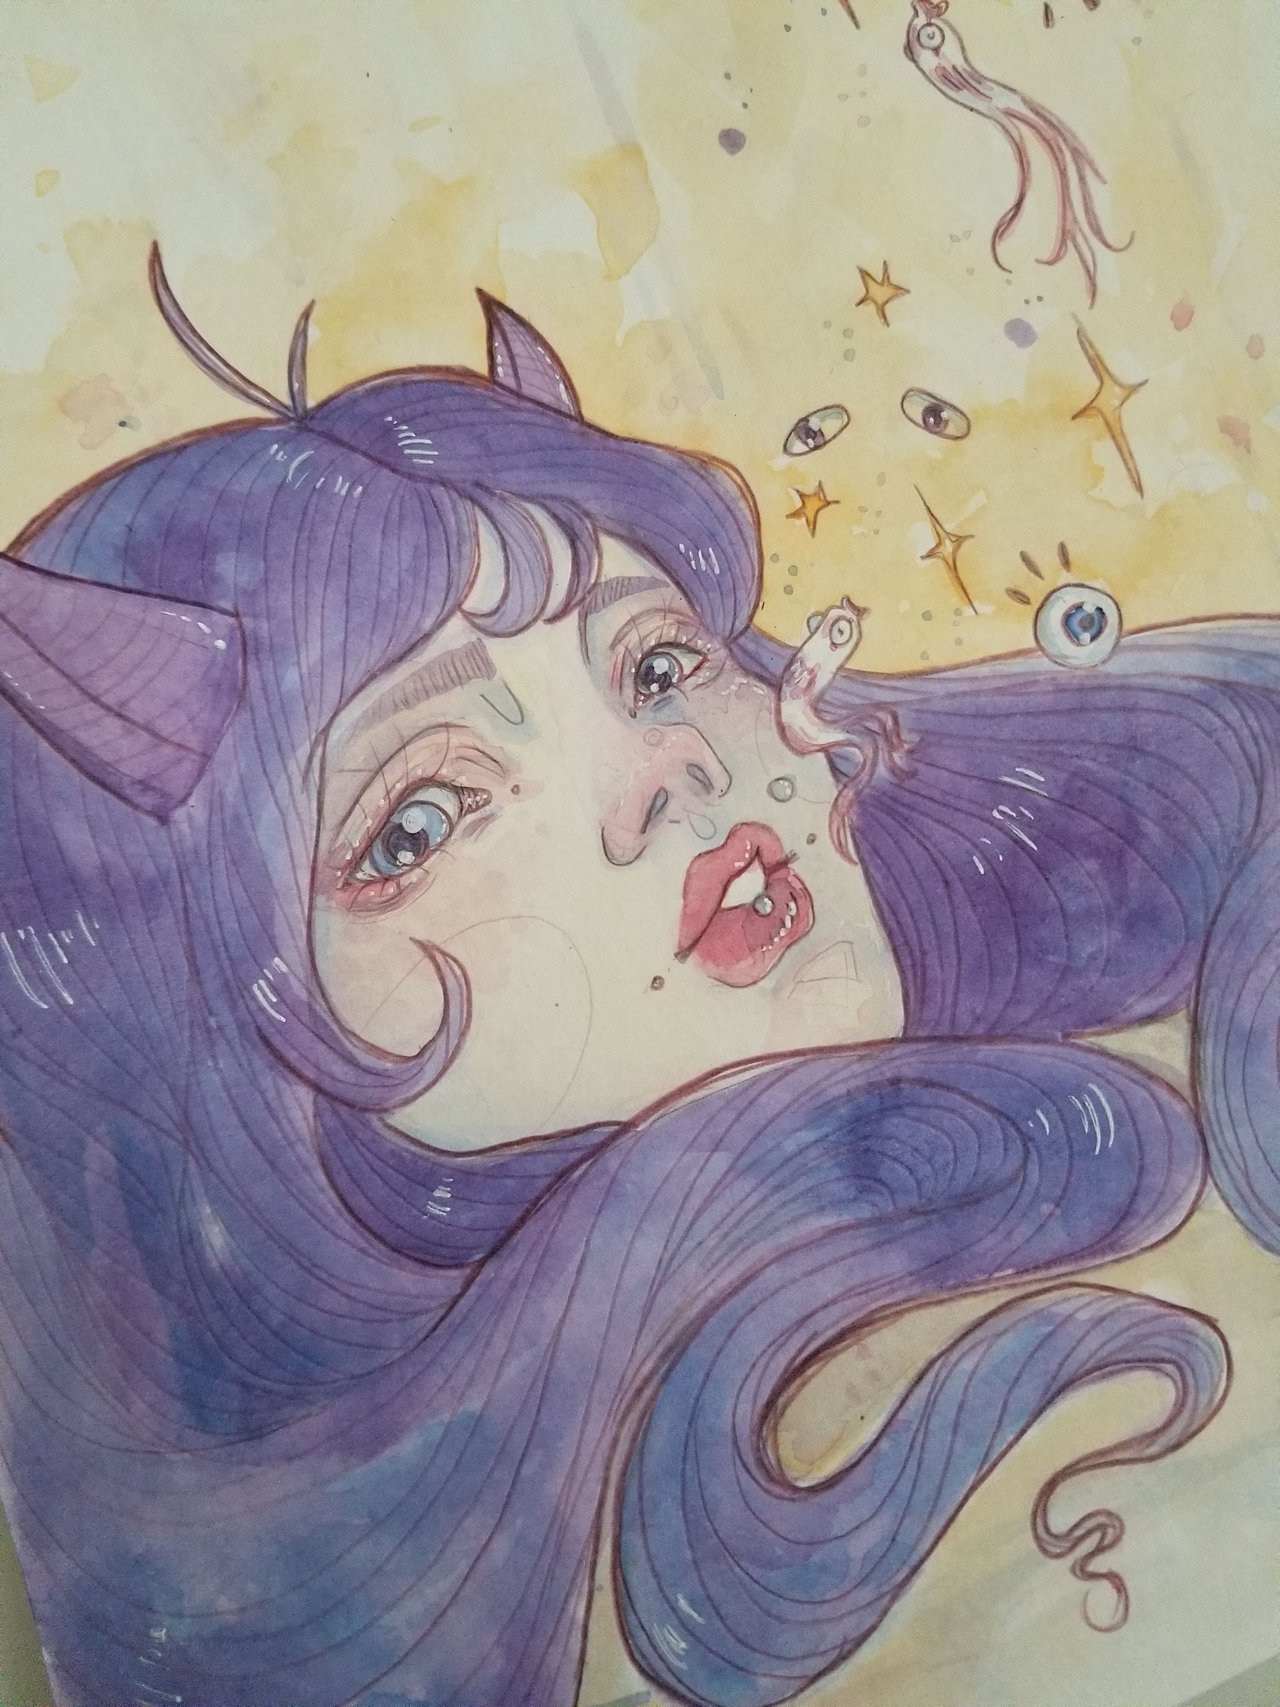
Here's the completed piece in case you aren't interested in the photo spam, otherwise enjoy!
I usually start with a light sketch of a concept. It's super simple, no crazy linework but will help guide me as to where to paint.

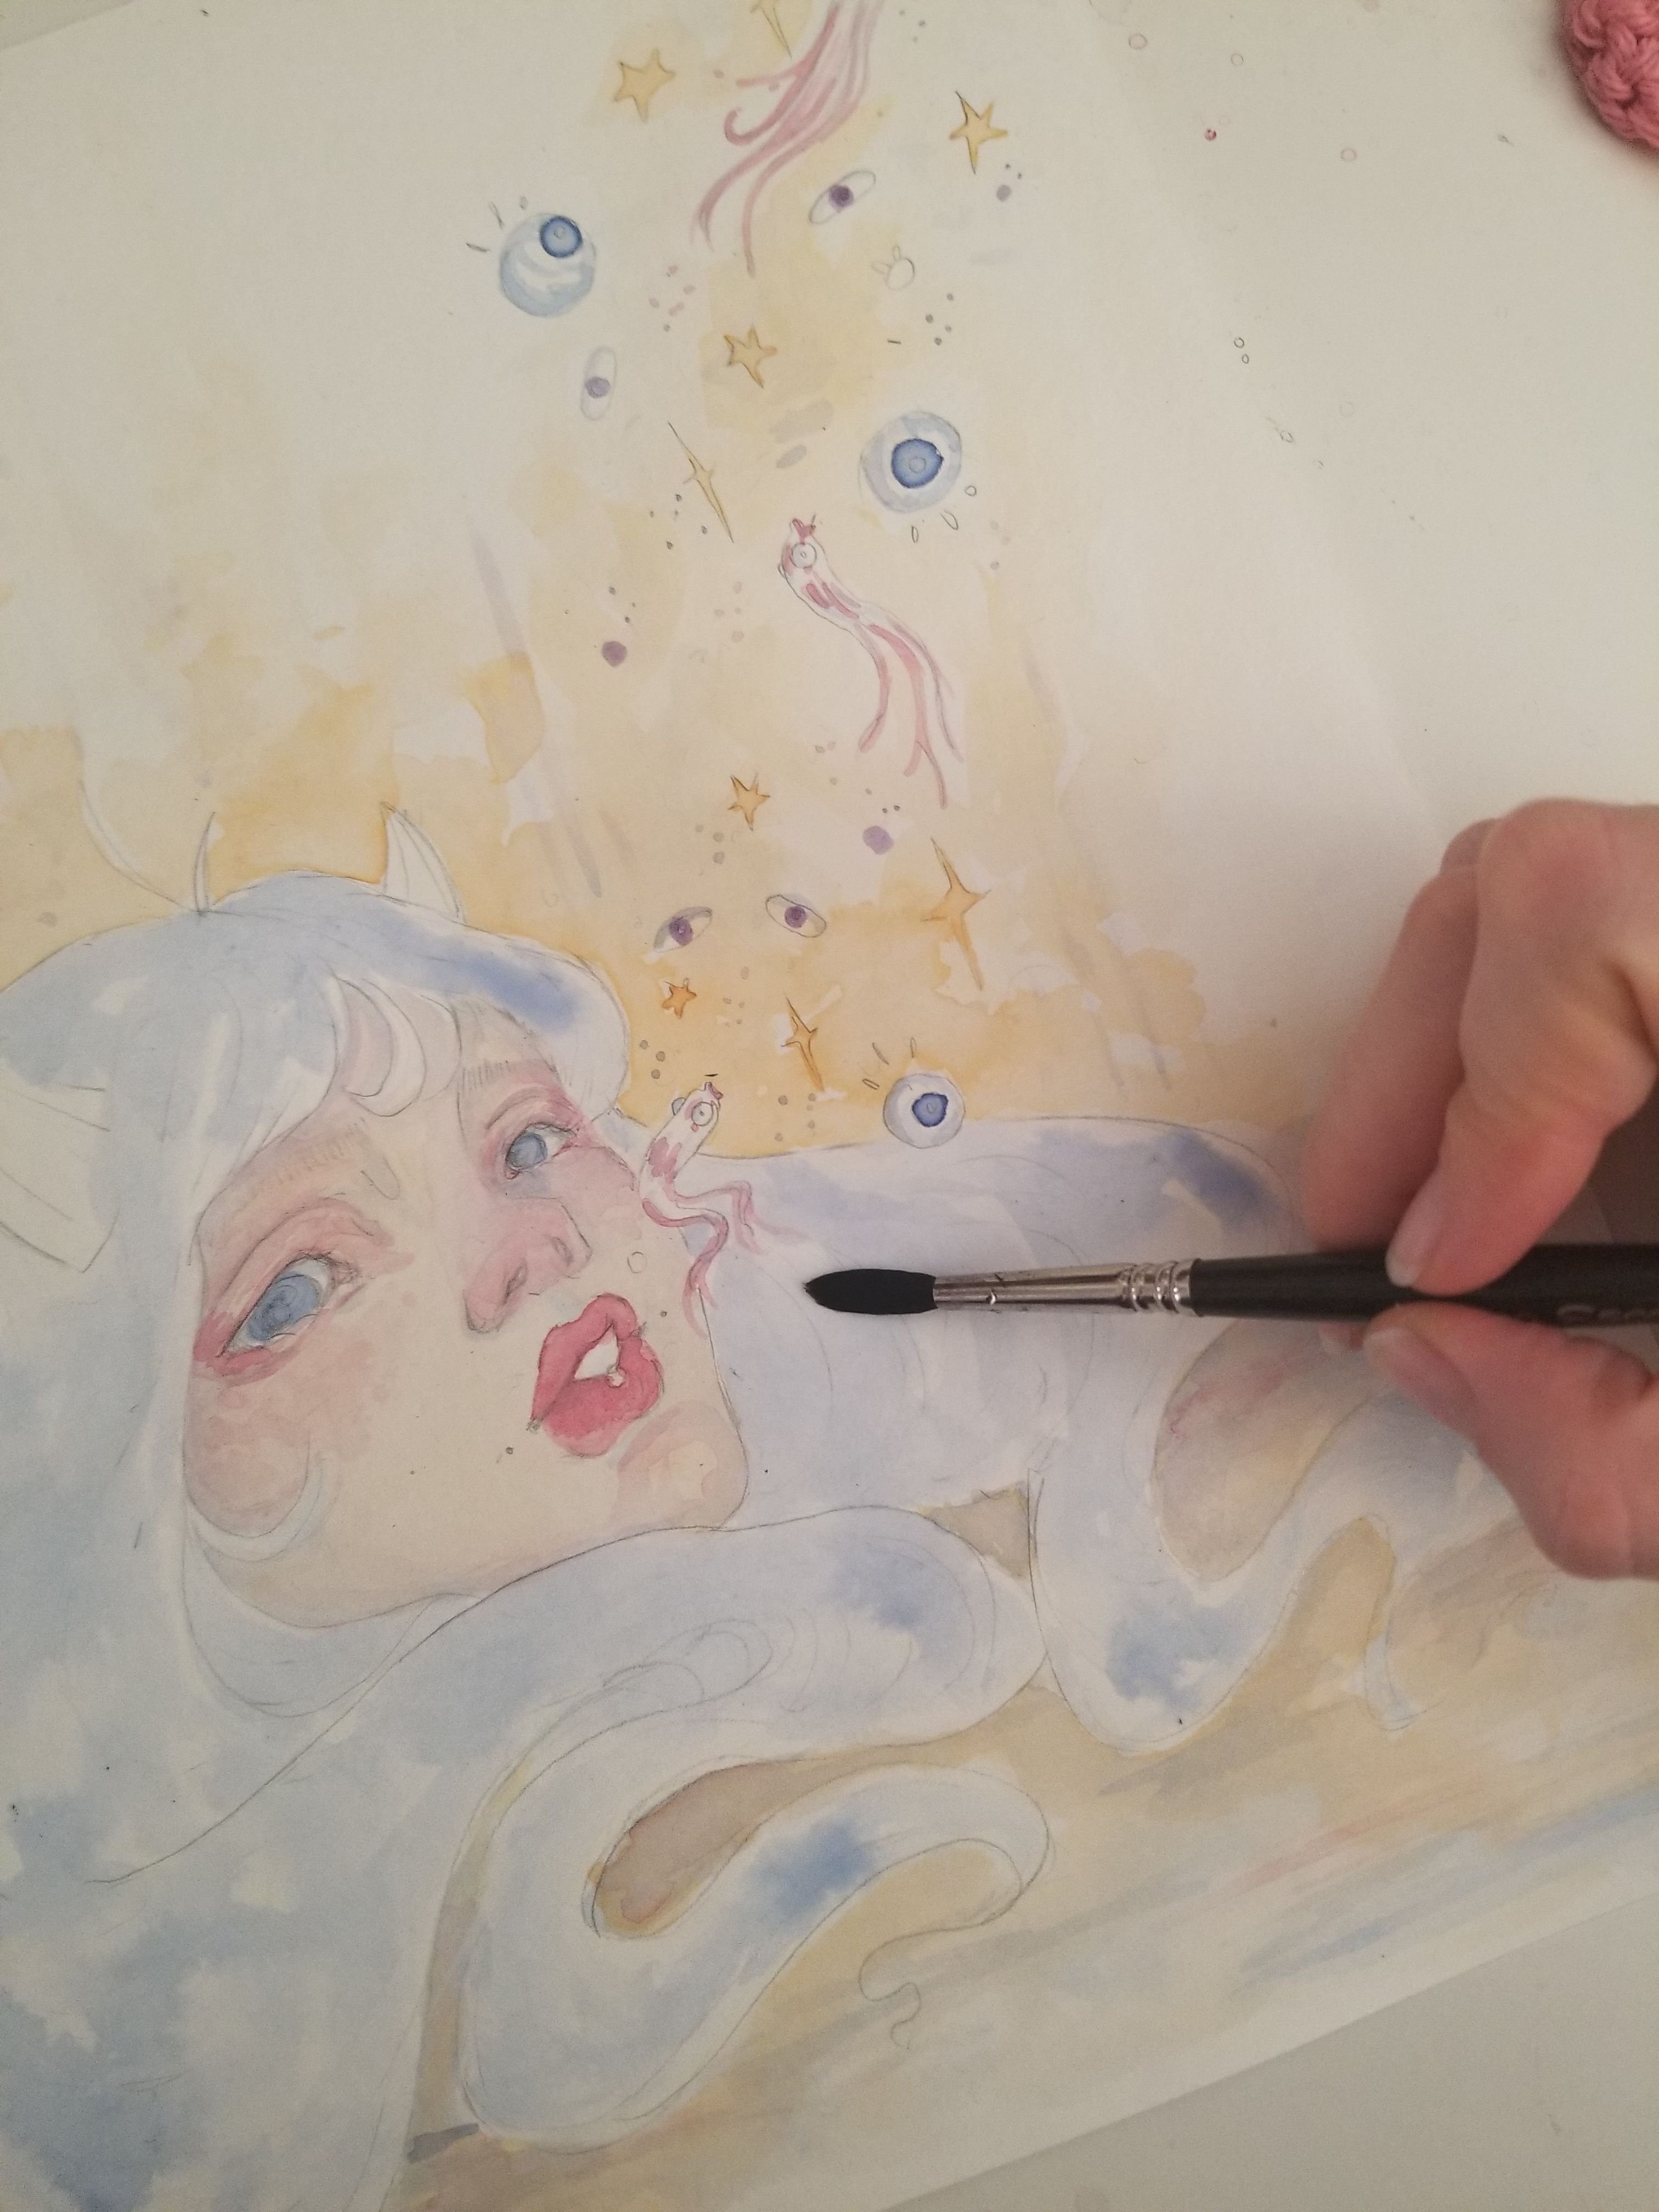
At this moment I've been using a yellow color for my backgrounds. It breaks up the harshness of a white background but also allows me to center around the main subject. I also use the same yellow for the starting fleshtone, but diluted a bit with water.
To note: I currently use Drphmartins hydrus watercolors if you were curious.
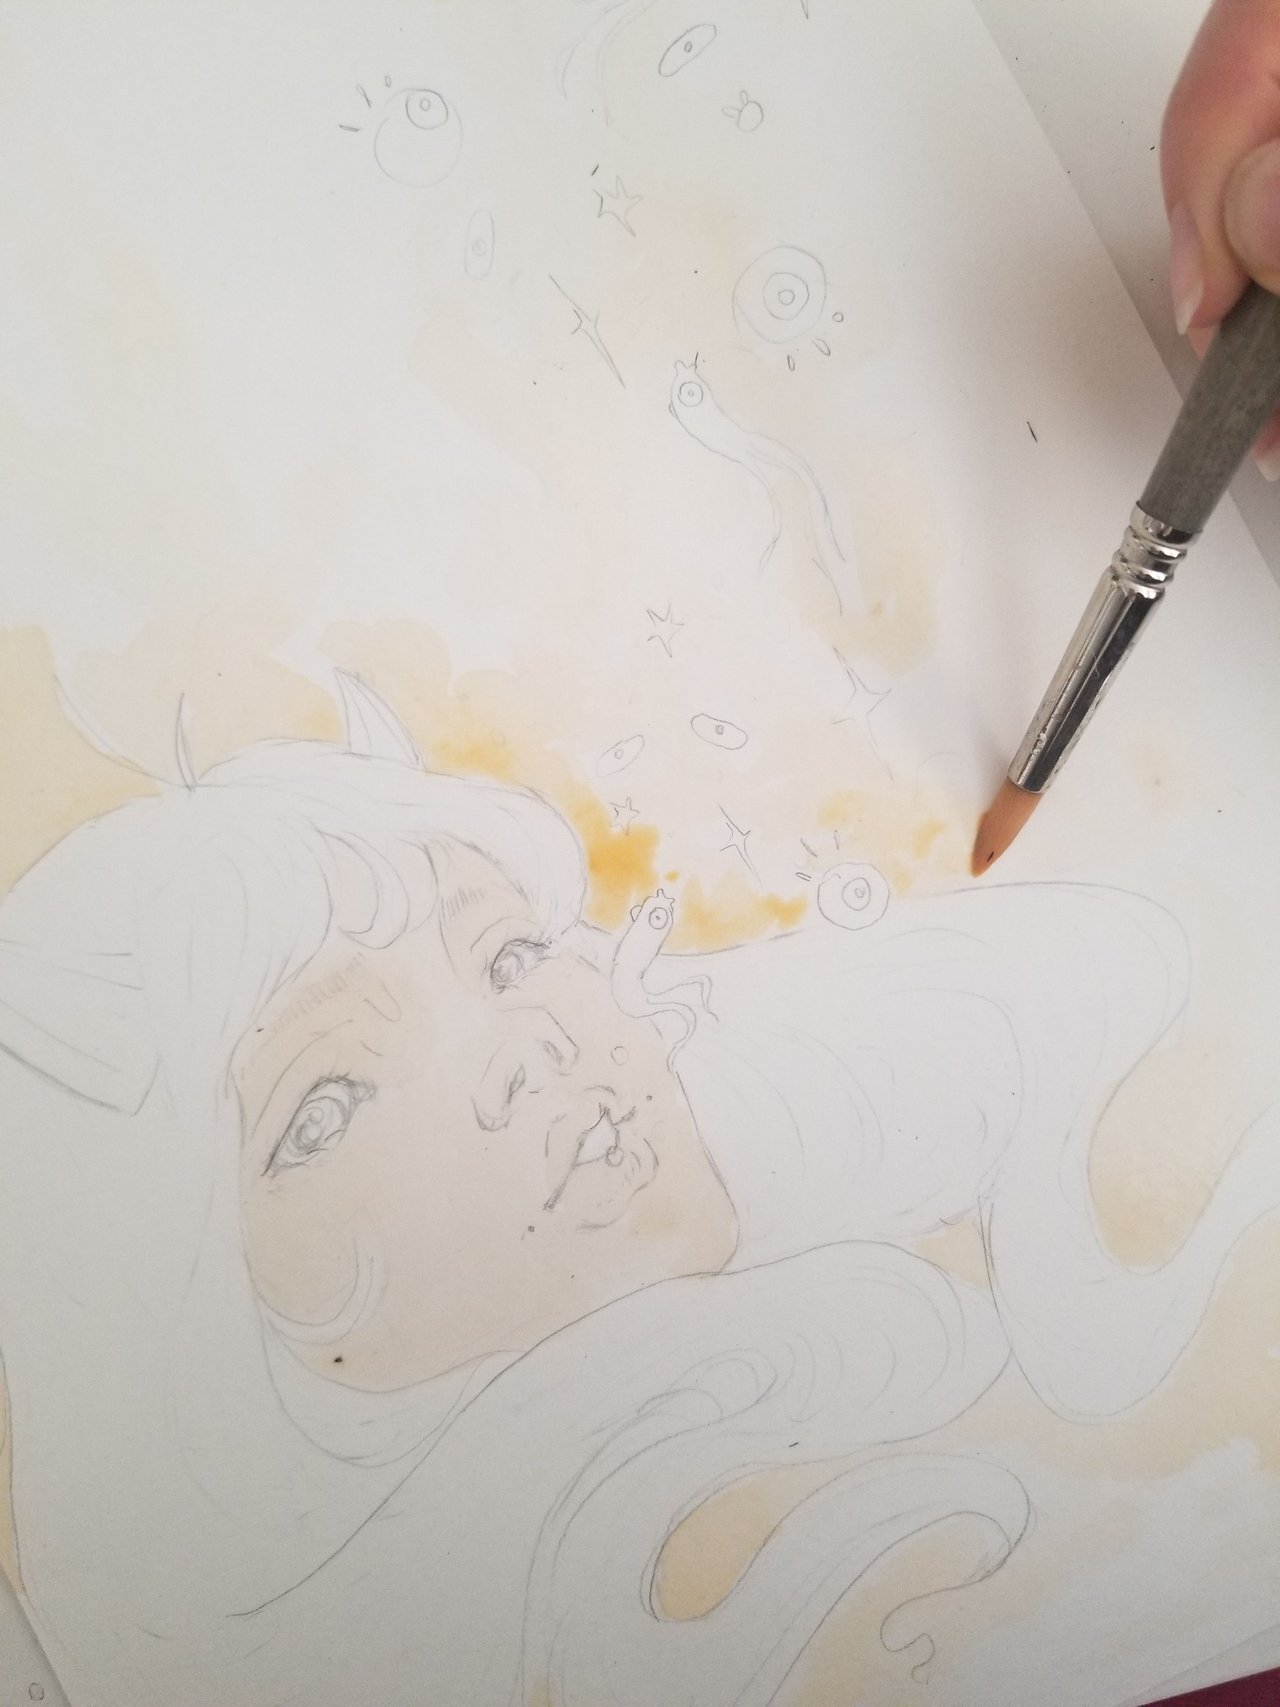
After that dries (which might I add, allowing your watercolor painting to COMPLETELY dry before progressing is crucial! You will avoid accidental bleeds and muddy colors 👌), I go in and start shading in blue. The blue is diluted to be it's faintest. You want to work light to dark when using this medium.
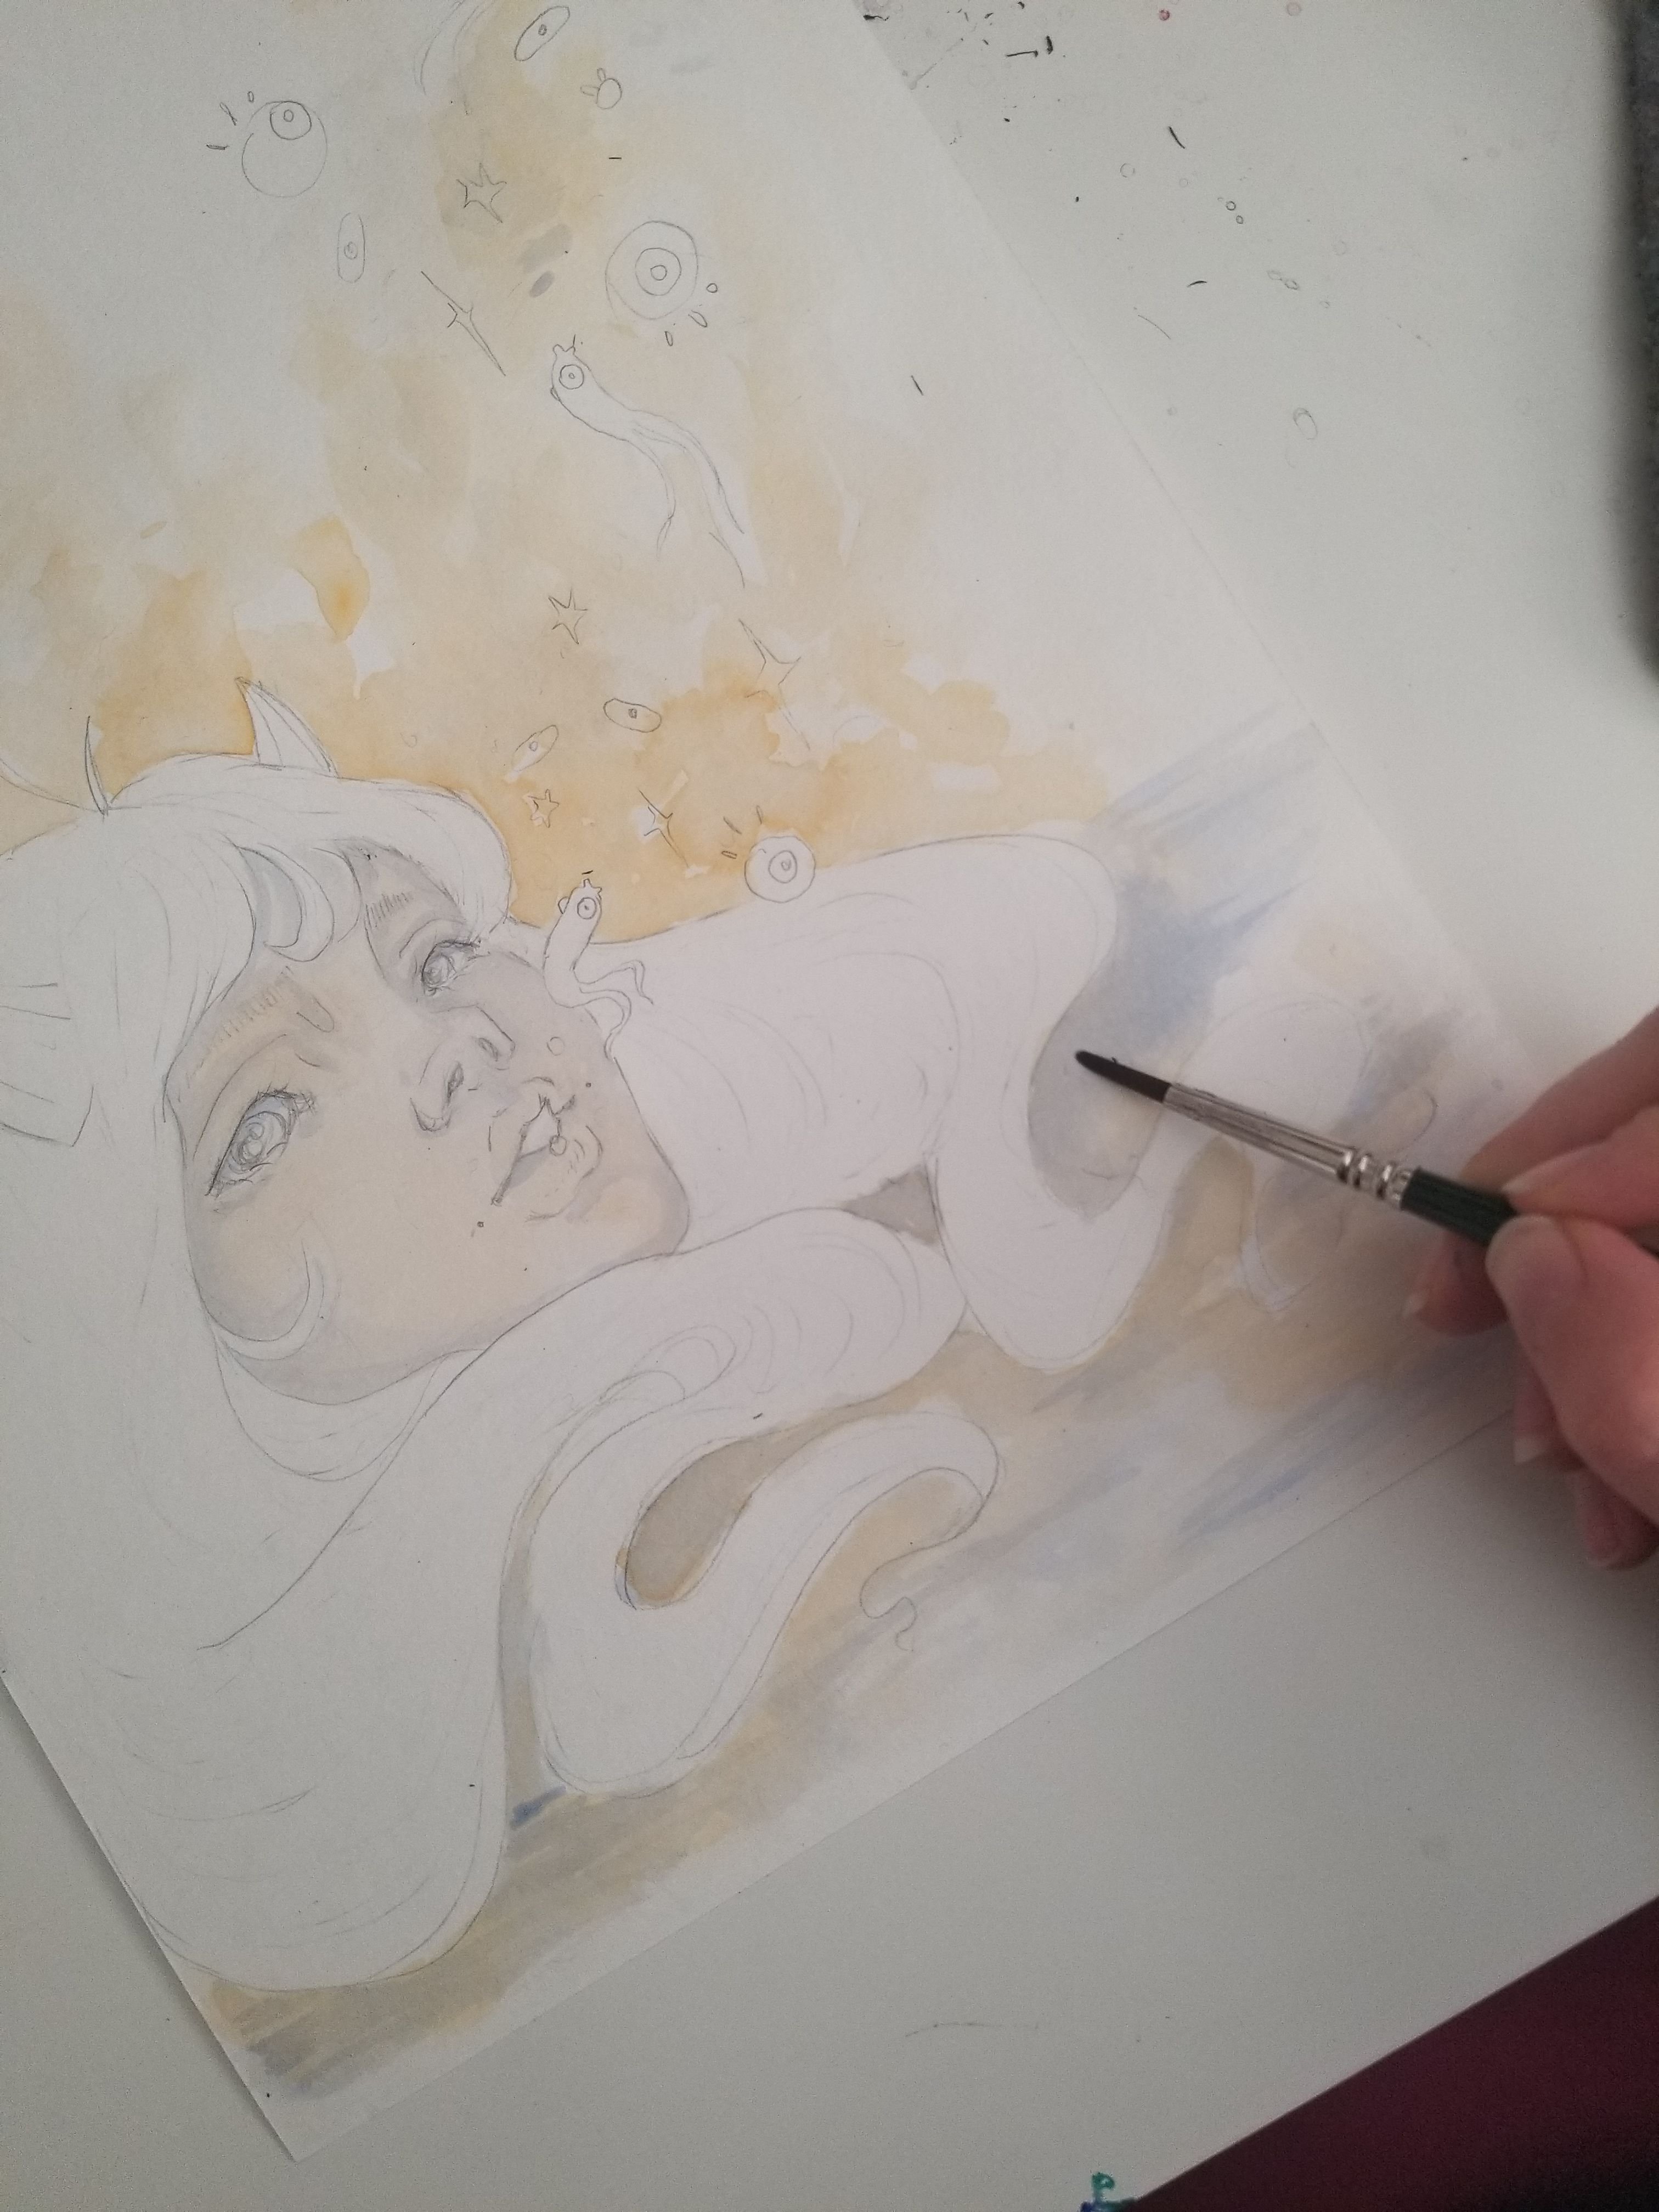
Once the blue is dry, I start working on the blush. This is one of my favorite parts with building flesh! I love myself some cute rosy cheeked girls! Working light, I line around the eyes, nose, lips. Then I add water to allow the red pigment to bleed out. This process usually take about 5 layers, allowing each one to dry, then blending awkward areas to fade into each other nicely (it's kinda weird trying to put this into words, if ya know what I mean?).
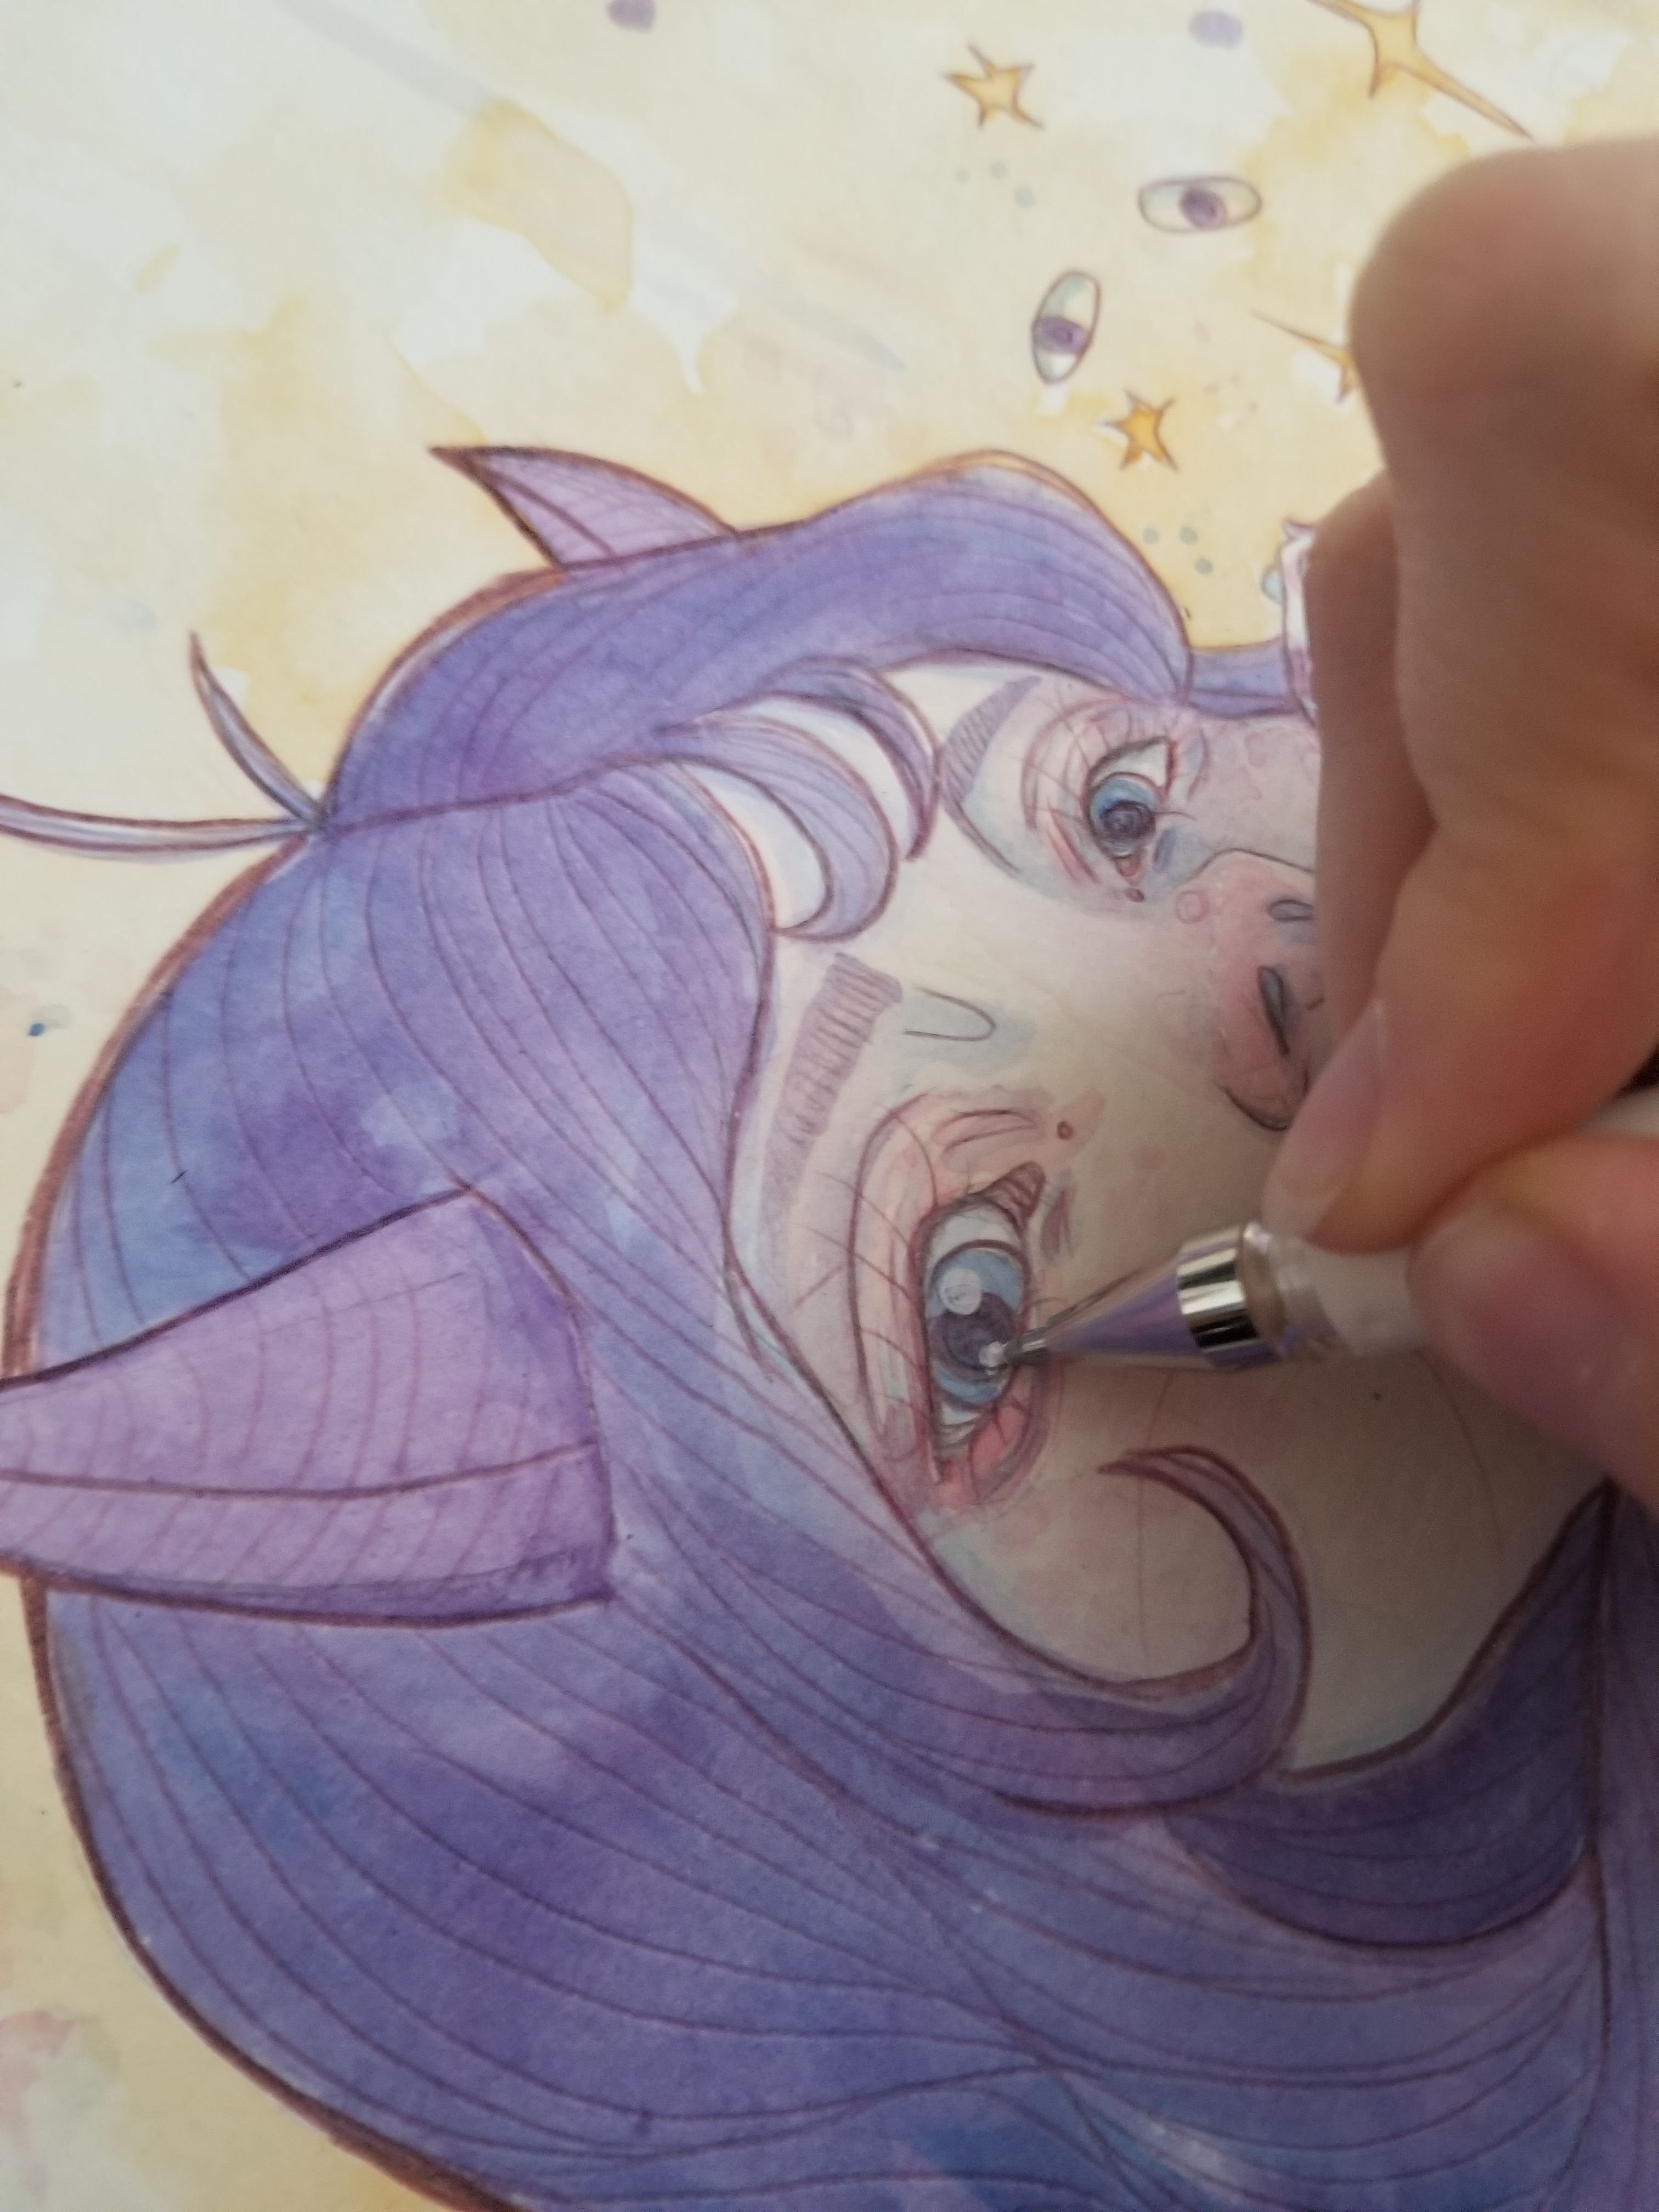
Last but not least! I paint the hair. I didn't capture ALL the process of building the hair because at this point I regretted not leaving her hair white. 😧 so I painted over it in purple, which made it worse??? One of my biggest struggles is figuring out what hair color to paint. 🤣
With each layer of color applied to the hair, I worked on the other components of the piece as well. Like the floating eyes and such. They are nice to add in because it takes awhile for each area of the girl to dry, so I'm able to add layers to the magical pieces during waiting times.
Once I'm satisfied with the hair, I allow a few hours for the piece to dry (or you could use a hair dryer, but I notice it pushes pigment around a lil bit so I just stick with allowing it to do its own thing).
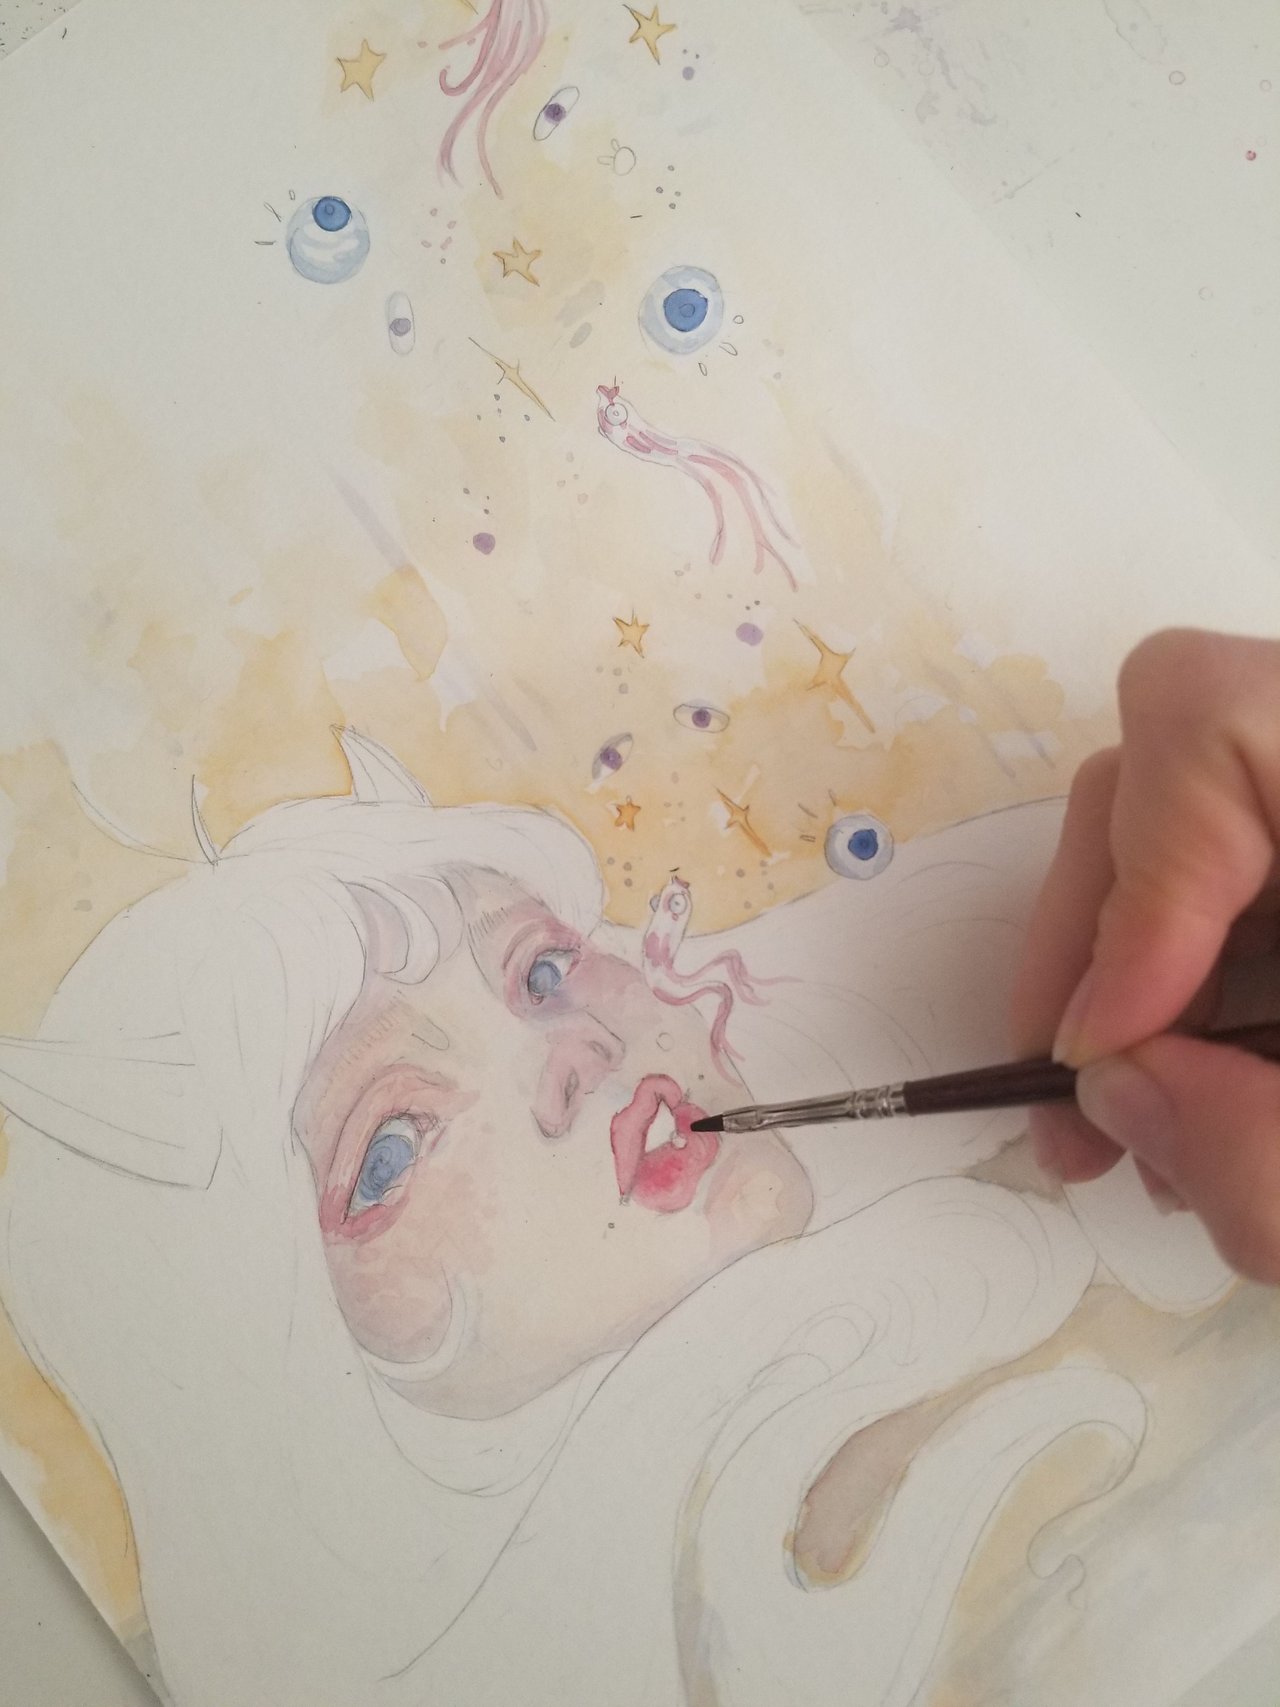
I then grab my favorite colored pencil OF ALL TIME!!!! The col-erase colored pencil in the color 'Tuscan Red.' Alot of people mistake the linework for pen but it's actually just colored pencil! I start lining the facial features, and spend a decent time creating a whimsical-
feeling movement for the hair. Make sure to have a sharp pencil at all times for cleaner, thinner lines.

Lastly, I add the final touches which are gel pen highlights. Eyes, nose, and flicks in the hair really bring out the subject, I feel!
Annnnnnd, that's about it! If you made it this far, I applaud You! 👏👏👏
Hope this was found useful and possibly make you want to play around with this crazy medium if you don't already!
Have a good day!
XOXO
AMA
Instagram: https://www.instagram.com/absolute_ama/
Patreon: https://www.patreon.com/absoluteama