Hello friends.
I figure if you're going to be on Steemit you need to be posting about and doing stuff that you enjoy doing. For me it is doing art, but I think even more than doing the art, I enjoy teaching art. Which leads to the series I am titling:
Learn Art with Me
Each series will show step by step pictures (and later video) of the processes that I take. This is definitely a work in progress. And I would love to get any feedback in the comments below; suggestions, ideas, etc.
I fully believe that anyone can learn to draw/paint, etc. It just takes some instruction and practice.
In the future I will post my contour drawing on here, which you can then download and transfer to your paper so you can follow on on the exact same drawing I am doing and use the exact same techniques that I am teaching. Unfortunately, I apparently failed to take a picture of the base drawing, and so I can't do that for this one (like I said, this series is a work in progress!).
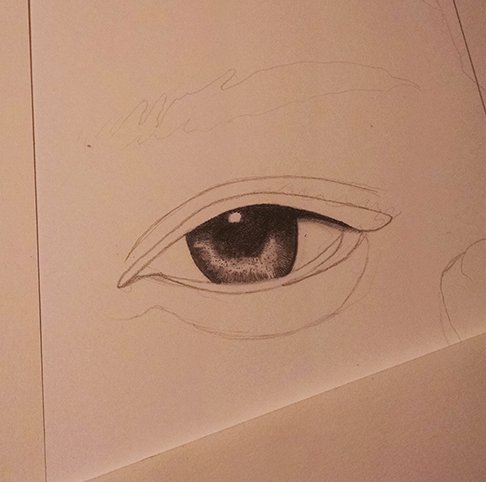
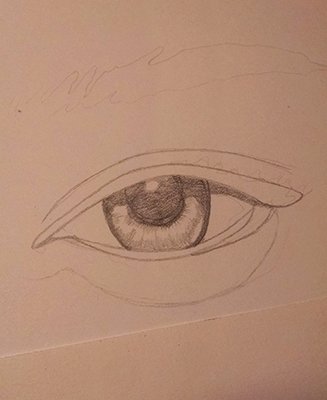
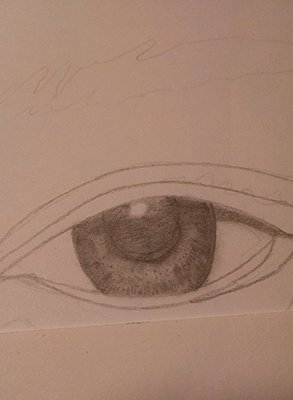
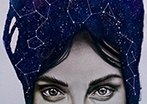
First, I want to show where we will end today:
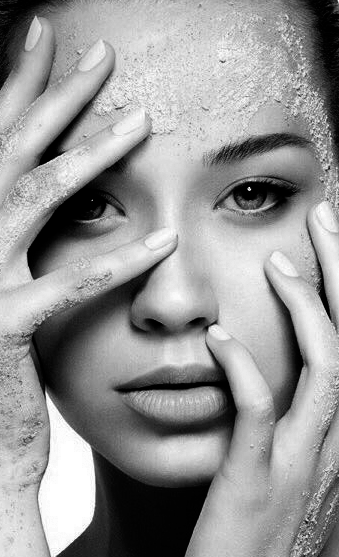
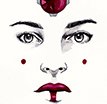
Although I couldn't provide the base drawing this time, here is the reference photo:
We will be working on the right eye first.
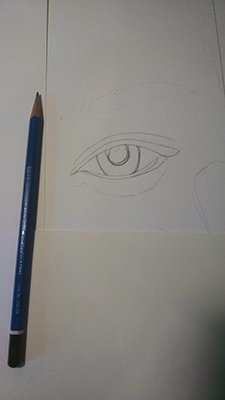
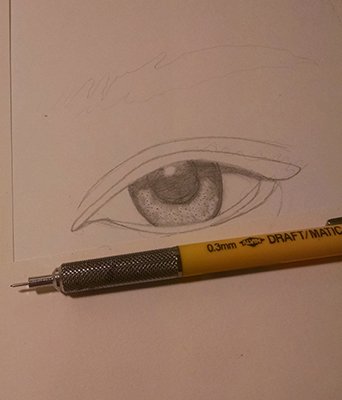
Here are the materials that will be used: .3mm Mechanical Pencil Blending stump Kneaded Eraser~HB, 2B, 6B pencil

The first thing is to create a clear contour drawing of whatever it is you want to draw. You can freehand it, use a grid, tracing paper, whatever you want to do and however you want to challenge yourself.
First I am picking out the dark shadows and placing them in:
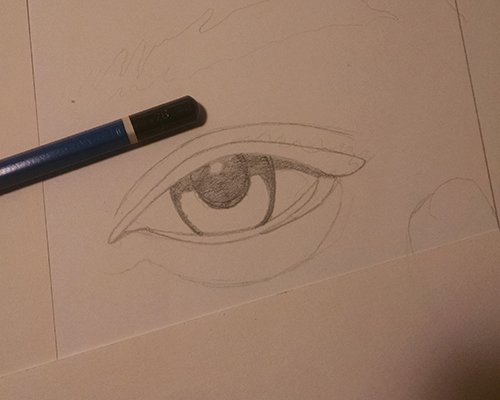
Next I am placing in some of the midtones; notice that I haven't done any shading or blending upto this point:
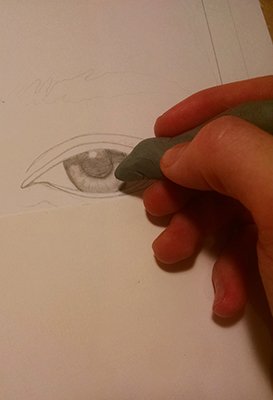
After doing some slight shading with the blending stump (sorry forgot the picture on that one) I take my kneaded eraser and pick up some highlights; I am really just dabbing the eraser, as opposed to "rubbing" it on the paper.
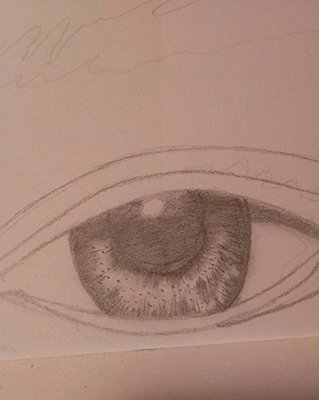
I take the mechanical pencil and I dot the iris to create some texture:
Closer look:
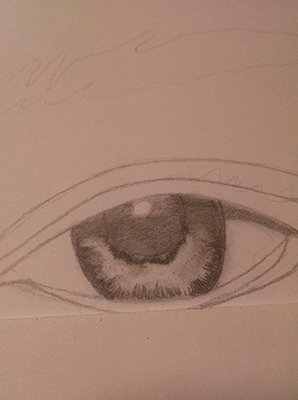
I blend it in with the blending stump. I'm not terribly worried about the shadows and highlights at this point, right now I am working on building some layers.
Now I go back and I pick some of the graphite up with the kneaded eraser again, notice that the highlights are back:
I dot some more with the mechanical pencil (just creating another layer) and I go back in and I use the blending stump to blend the darker areas together and you can see that it instantly makes the highlights in the eye standout more because of the stronger contrast:
This is where I am leaving off today, but we will work some more on the eye and I will go even more in depth on my process and procedures in future posts, consider this post somewhat of a "pilot".
I hope you enjoyed it and if you want to support this initiative of mine then please, upvote, follow, and resteem!
I appreciate every person who takes the time to look at my posts!!!
If you'd like to see more like this, please follow me @allstarrunner!
Please check out some of my other art:
|
|
|
|