Fundamental Foundations Of Art
Will you join me artists for the next fundamental art lesson!

This post is for beginner level artists looking to learn how to draw perspective and illusion of depth. These tips are explained in a way in which you will be able to carry with you continuing on with future art projects.
Todays lesson: FORESHORTENING
What is Foreshortening?
In art it is basically just using methods to trick the eye into seeing depth.
Follow along in drawing these simple shapes on the page and I am sure I will be able to get you drawing convincing foreshortened forms!
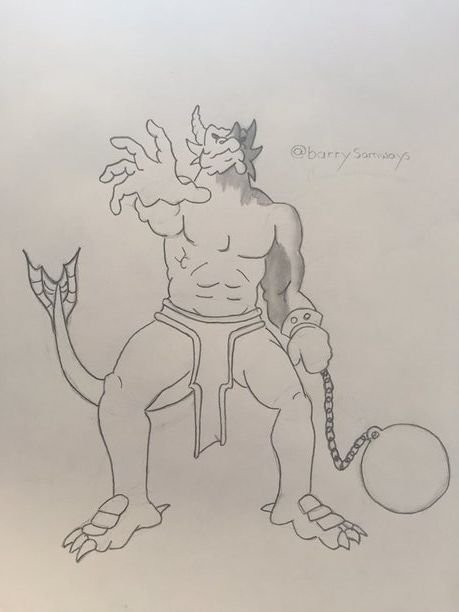
Often times I see art pieces where the face is really well done, but then the connecting body and arms just don't look organic, something looks unnatural. This is the result of poor foreshortening. Once you master the ability to map out proper foreshortened depth your drawings will take on a more realistic and believable form.
Using these methods will prevent flat looking art work, and step up your game a notch.
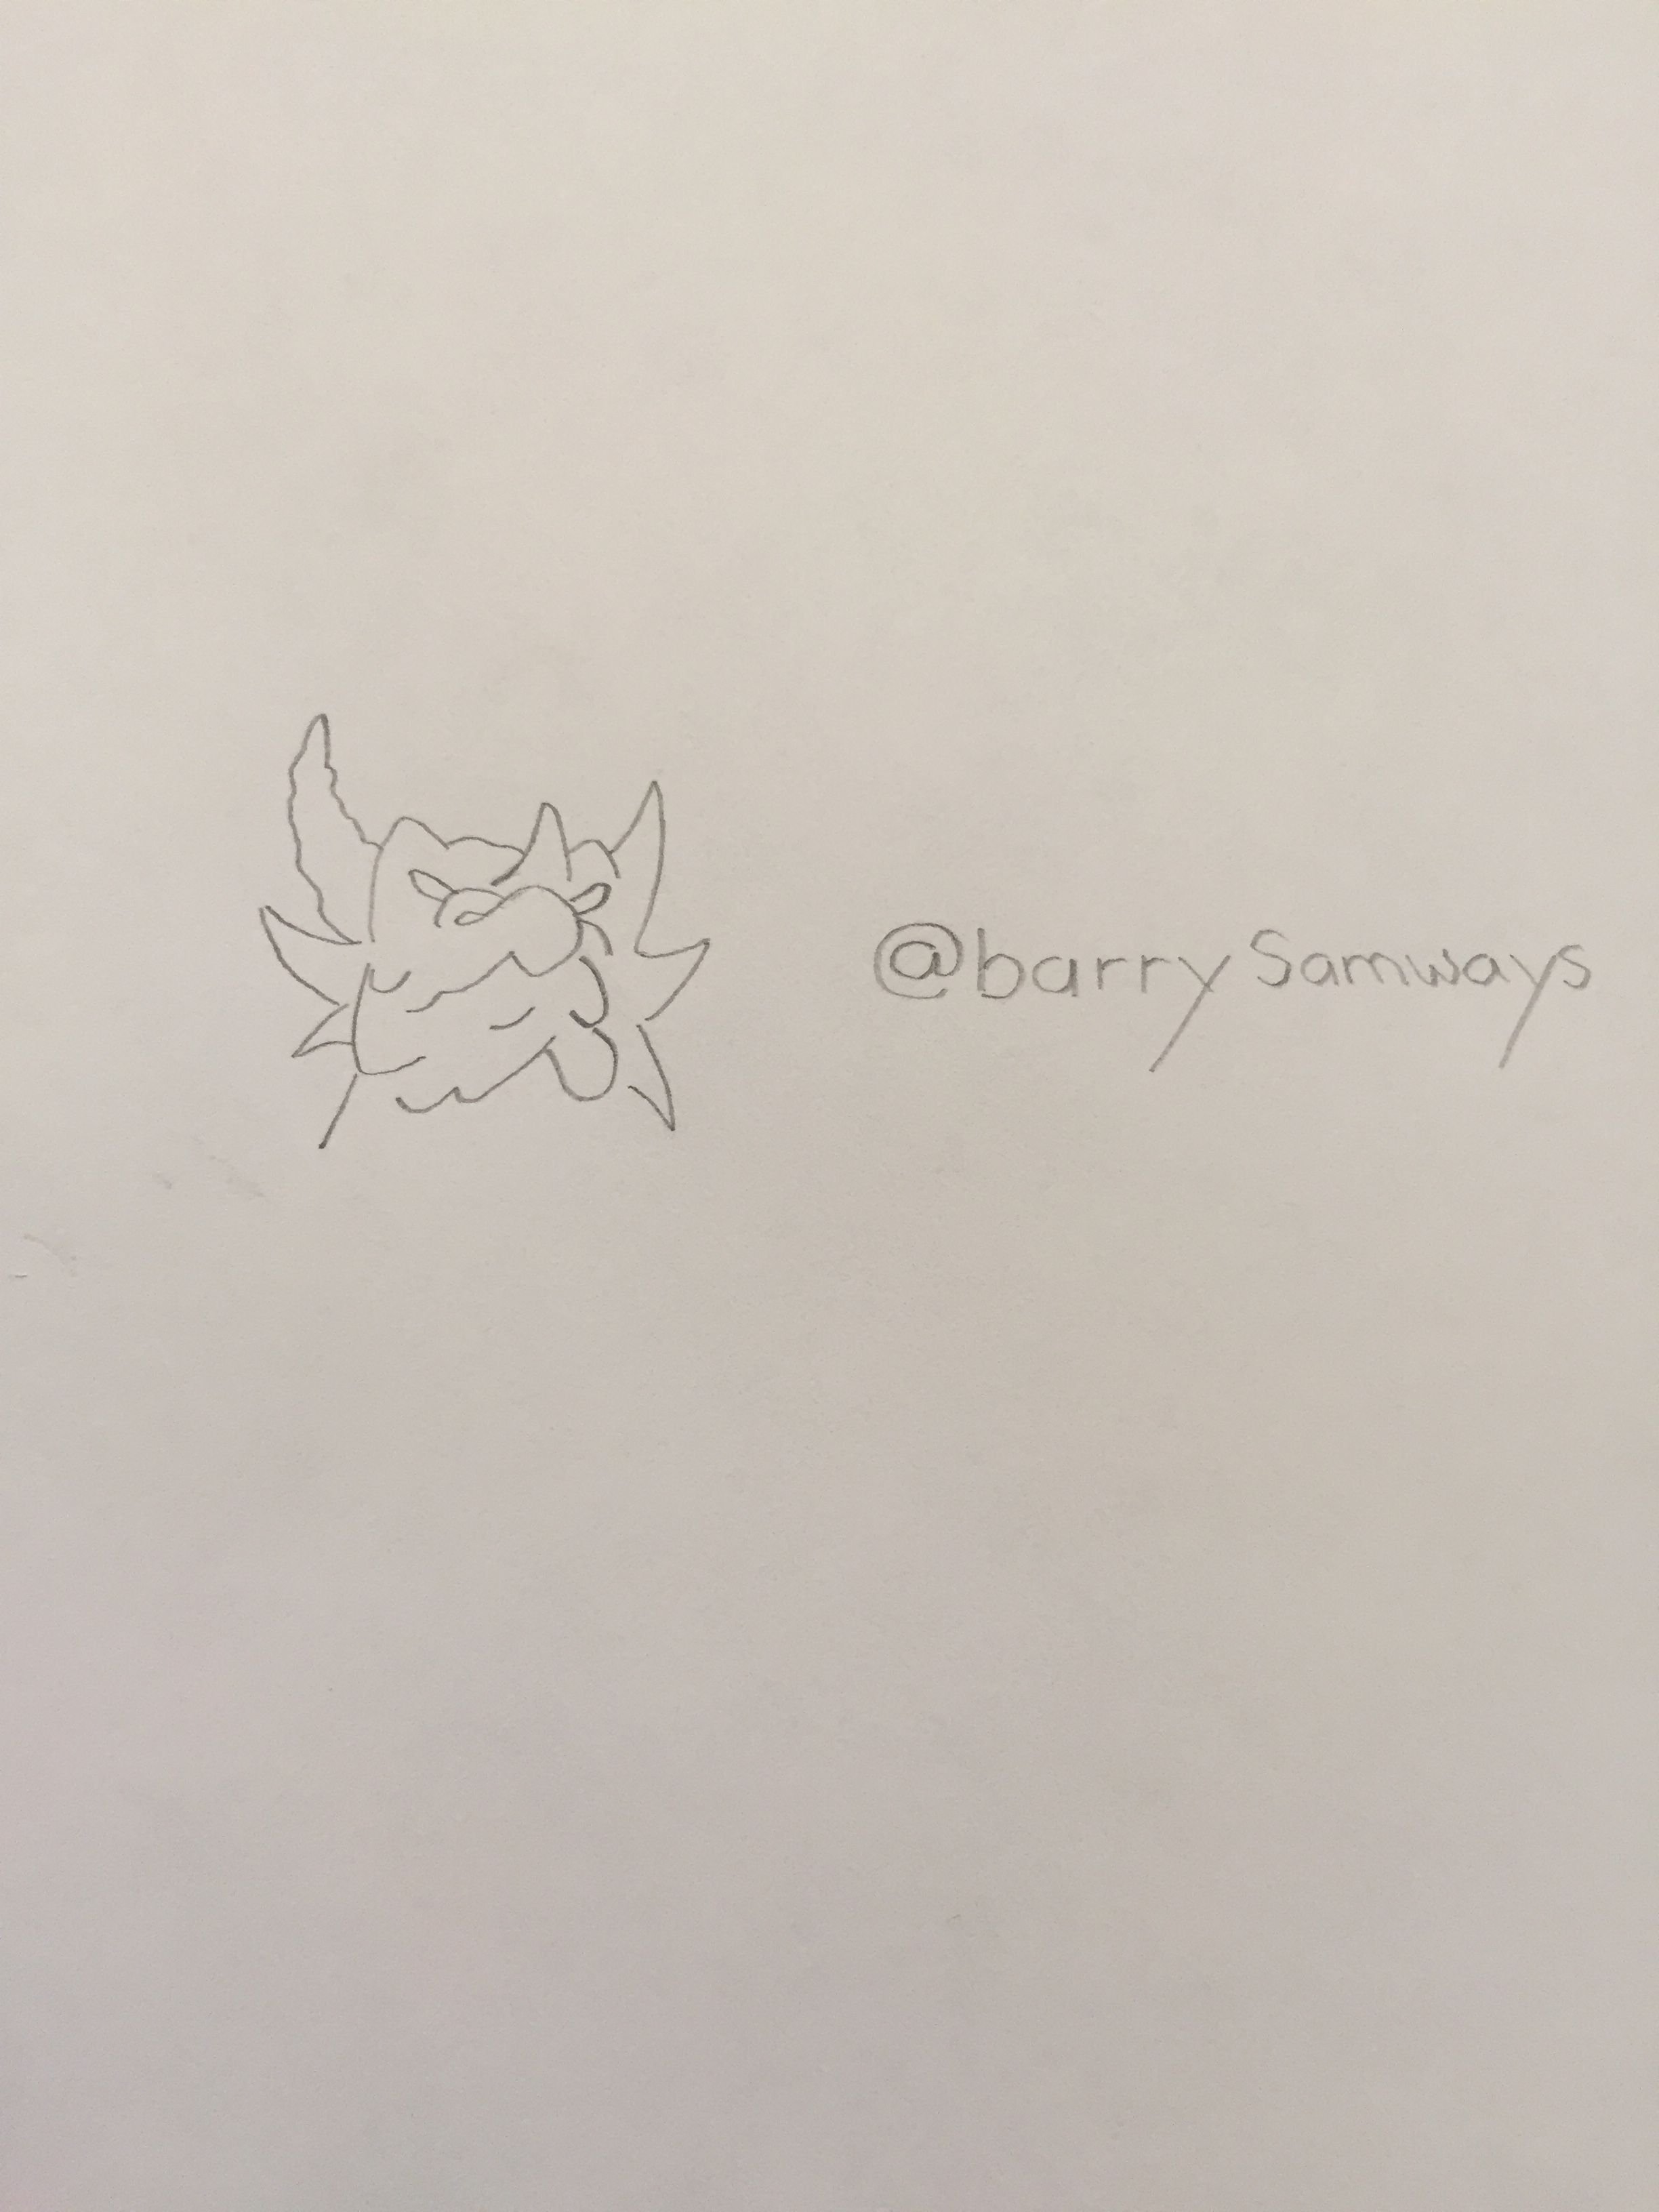
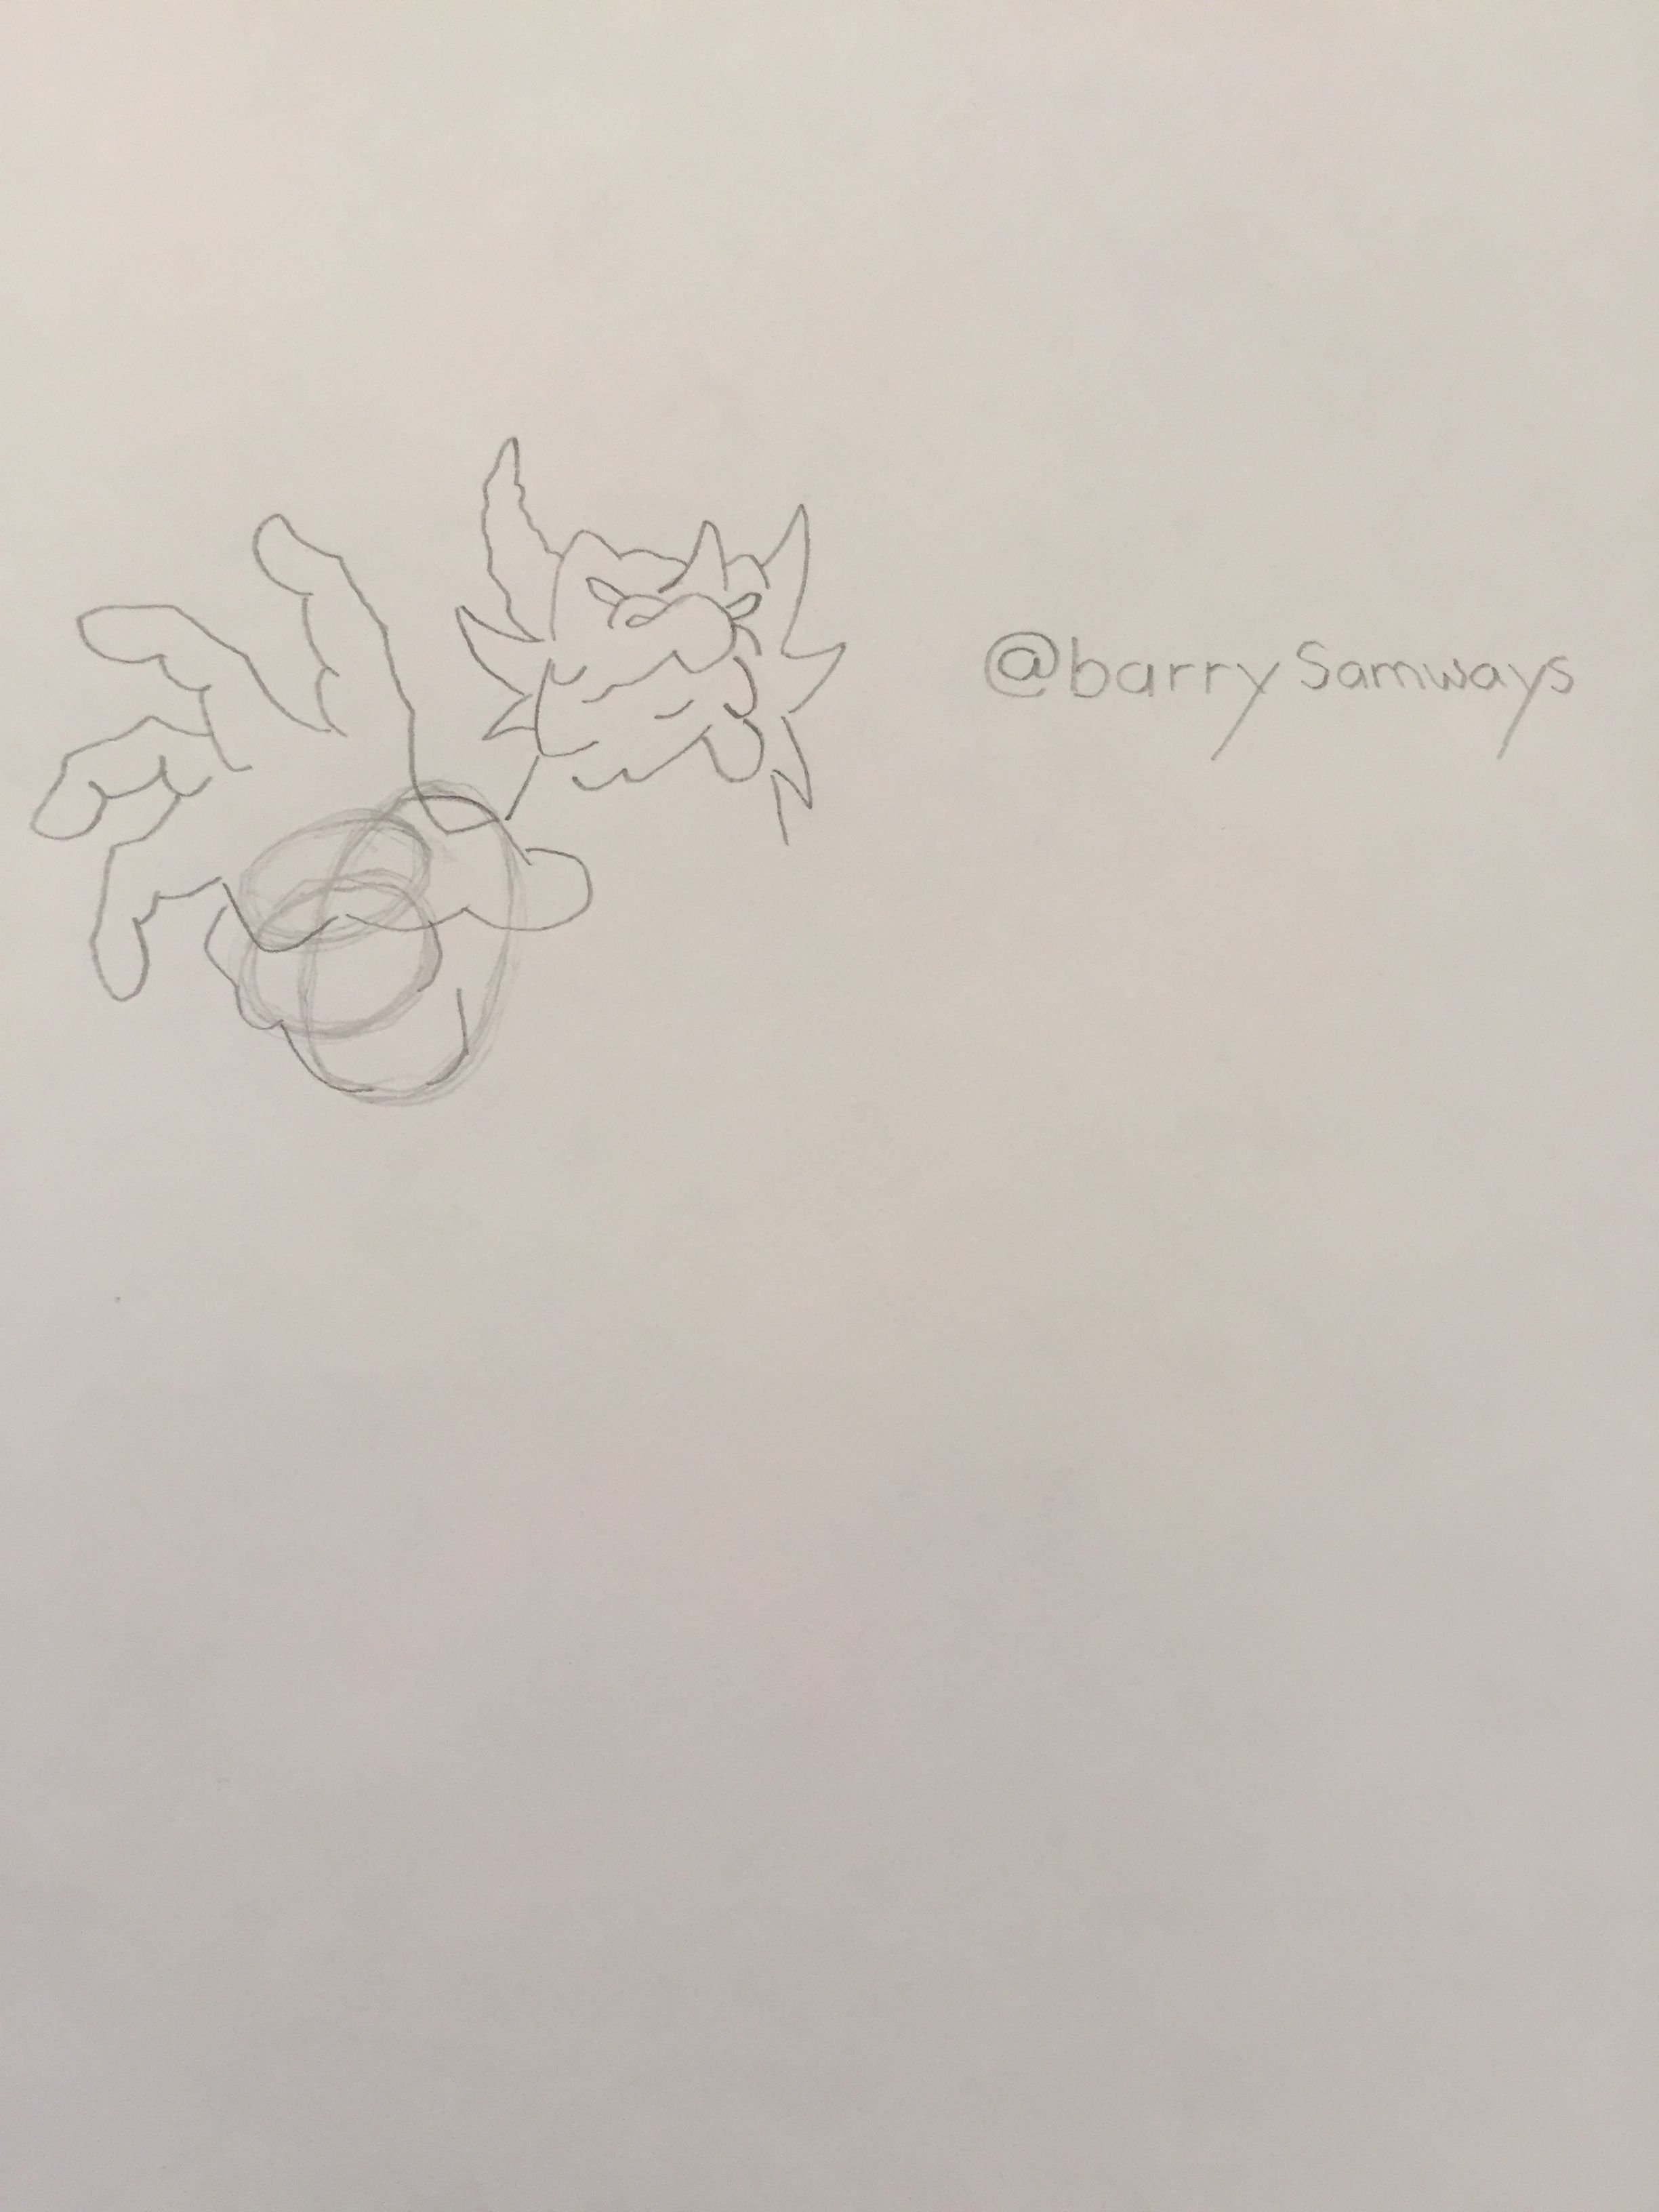
Start by drawing this simple demon face.
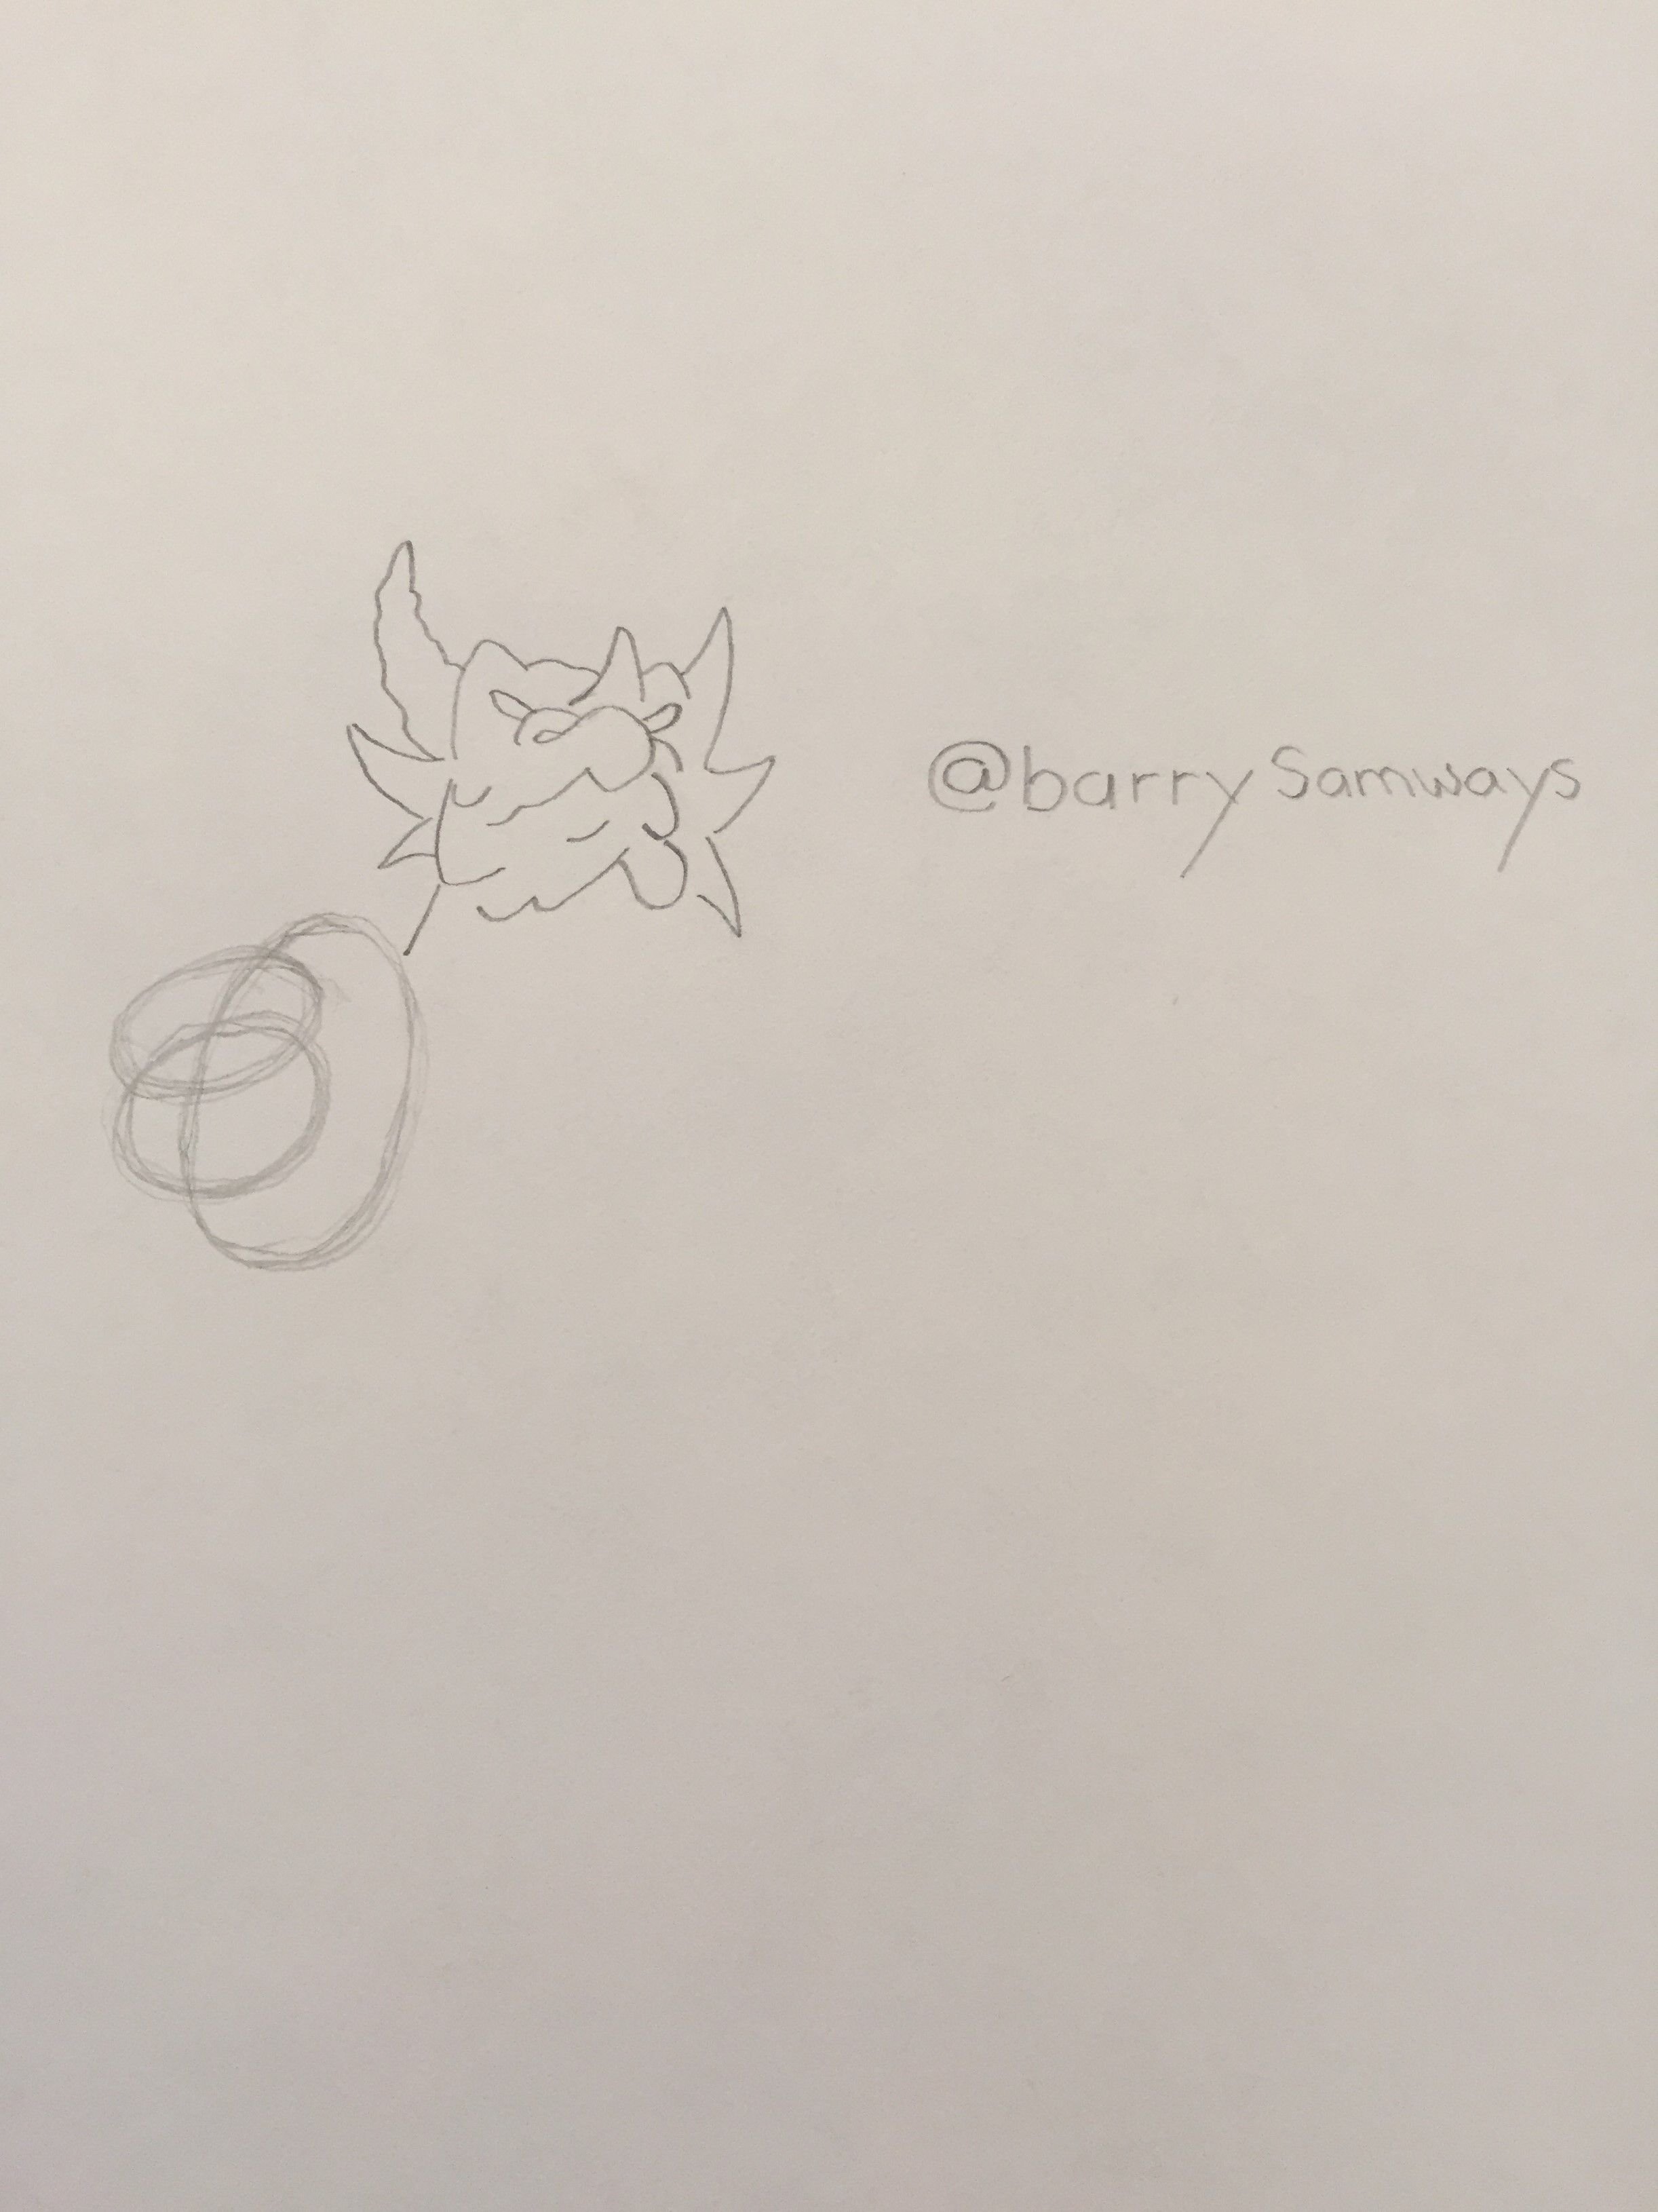
Now here is the trick!
Draw circles at each arm joint starting at the shoulder then elbow and wrist.
When you draw these circles imagining you are drawing around and through the back of a 3 dimensional shape.
The closer these circles are the more straight out the arm will look.
Now you can connect these circles with organic shapes. Drawing the hand now on top of the wrist circle will give you the perfect positioning for a foreshortened look.
We can do the same on the right side blocking in the mass of the arm first to make sure things are in the right position.
To make sure the hand has depth make your wrist circle close to the elbow joint. Like before the closer the circle the more straight out it will look place it in the desired position for your vision.
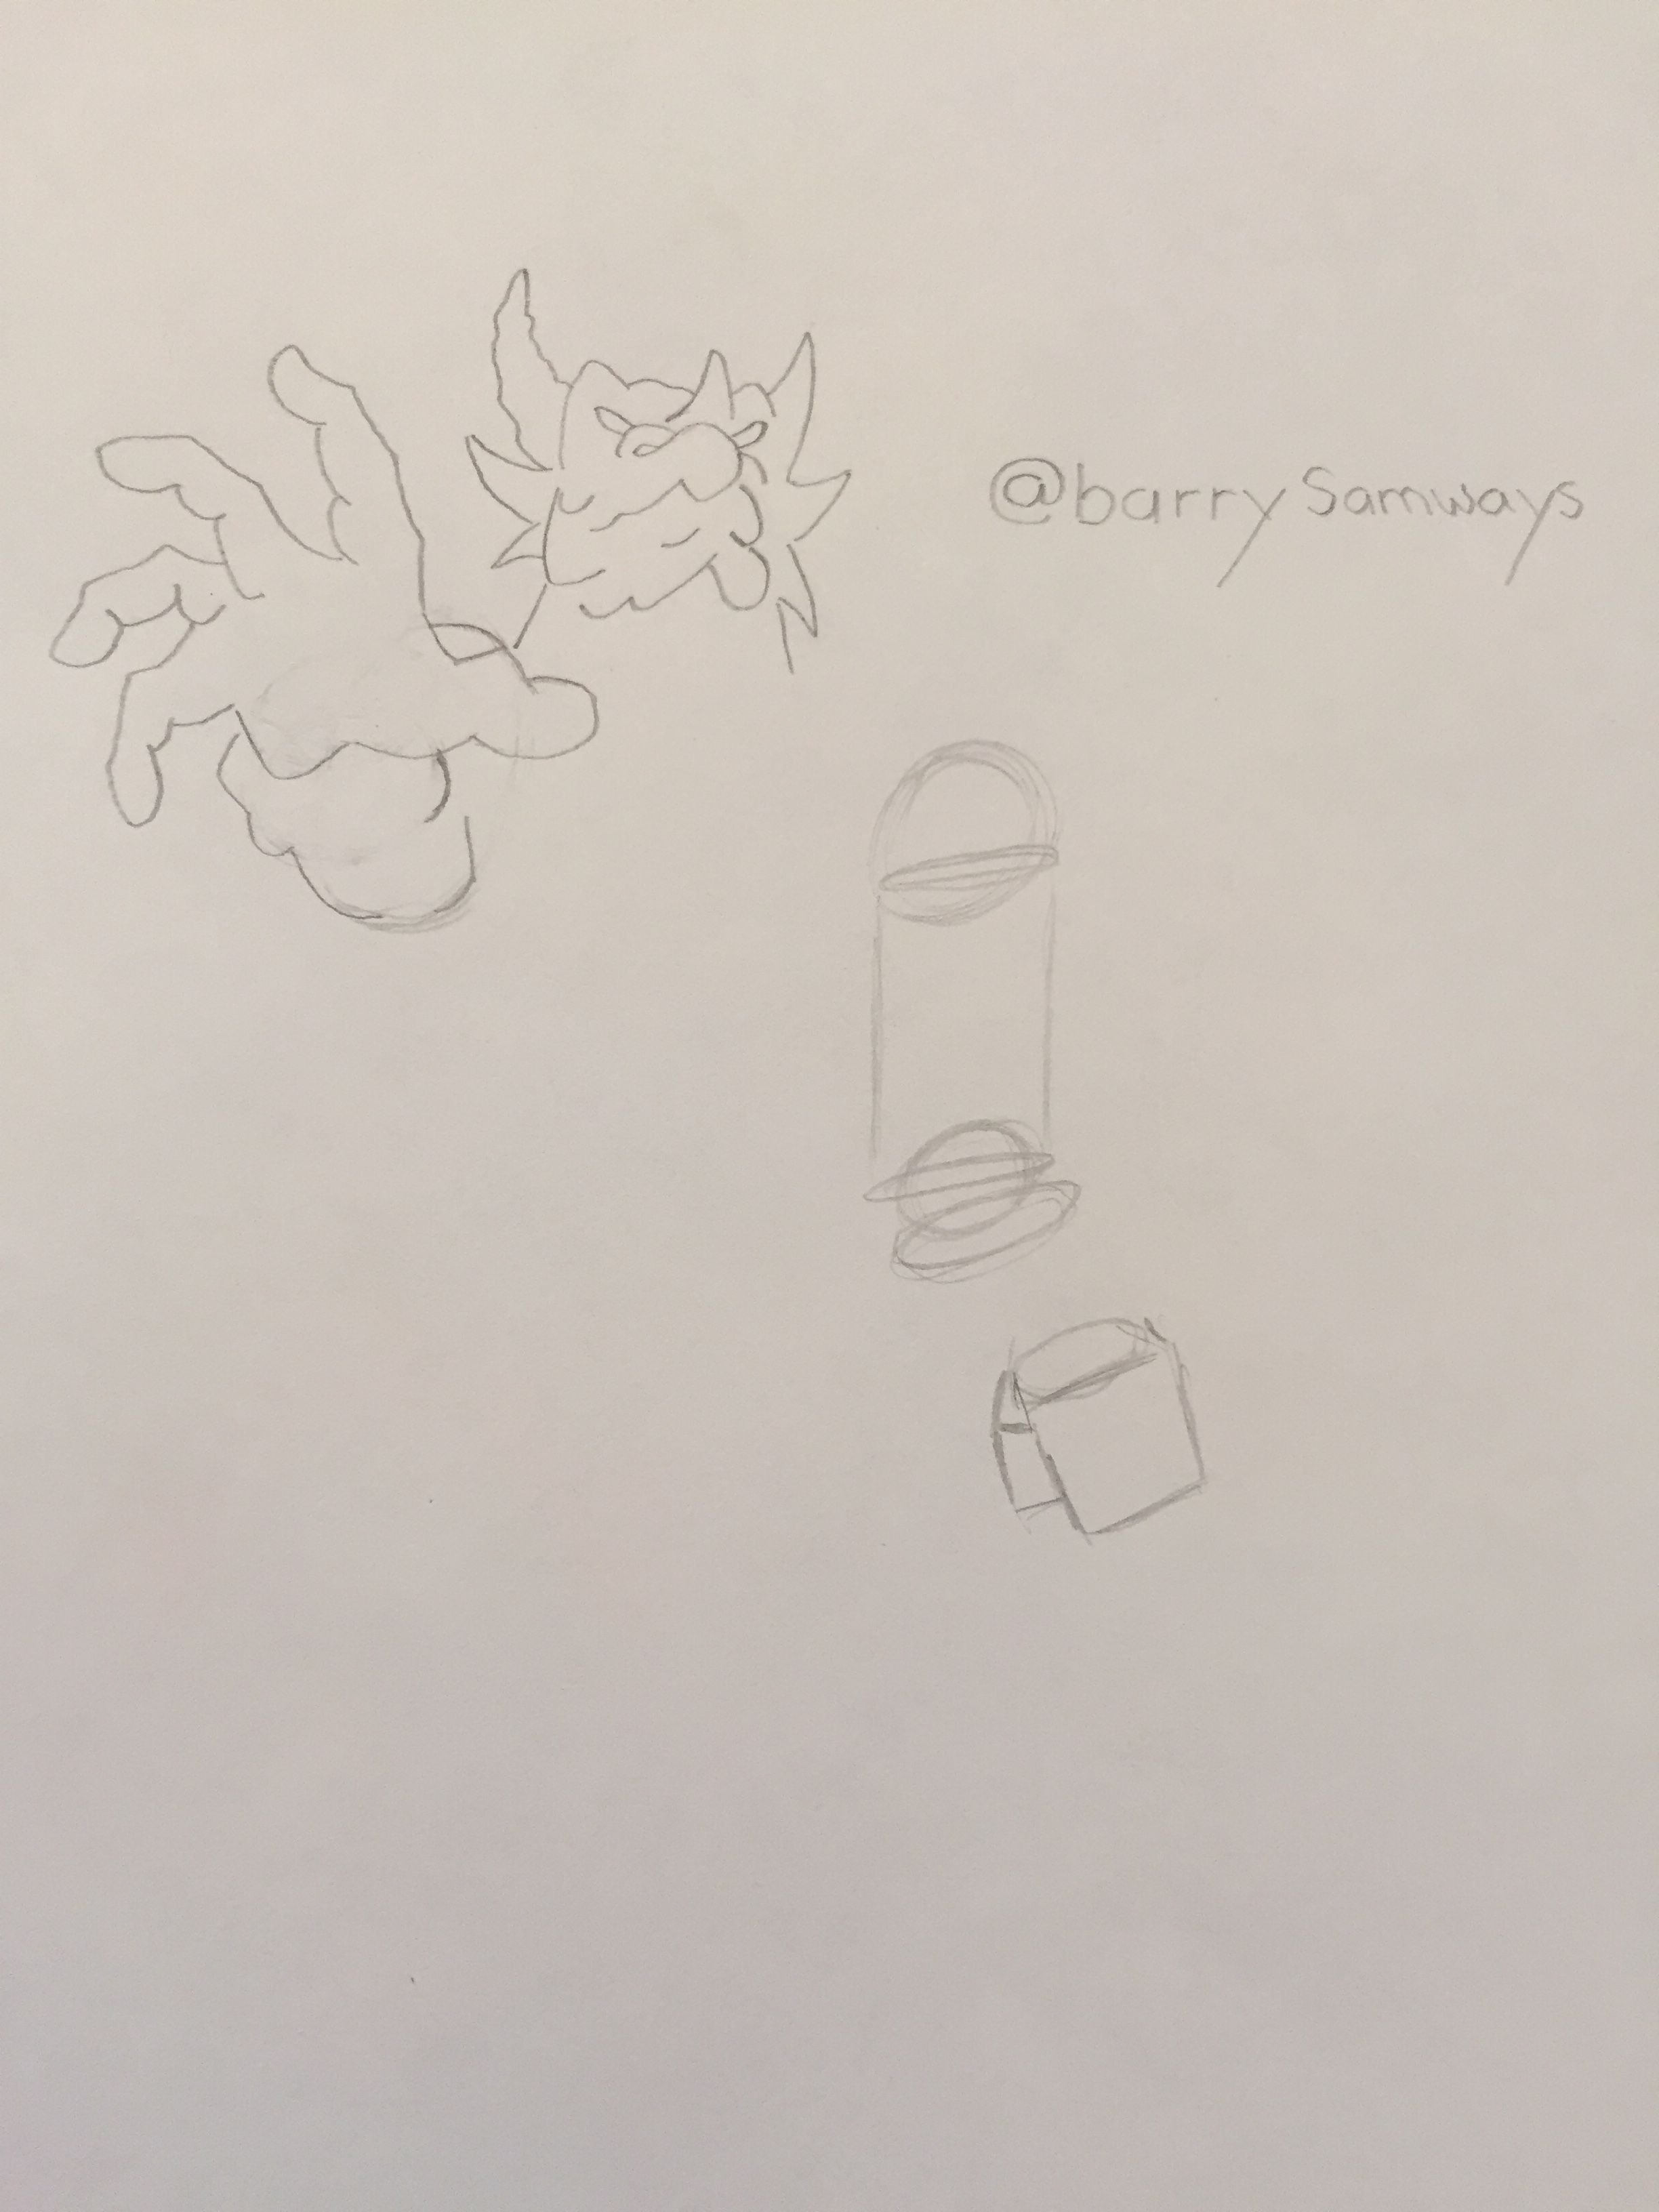
Draw in the rest of your arm and now you can fill in your torso area.

Draw through the back of your torso and then create the circles where your legs will connect. this creates your hip area.

continue with the same method of mapping your joints for the legs. Initially just block in where your feet will be.
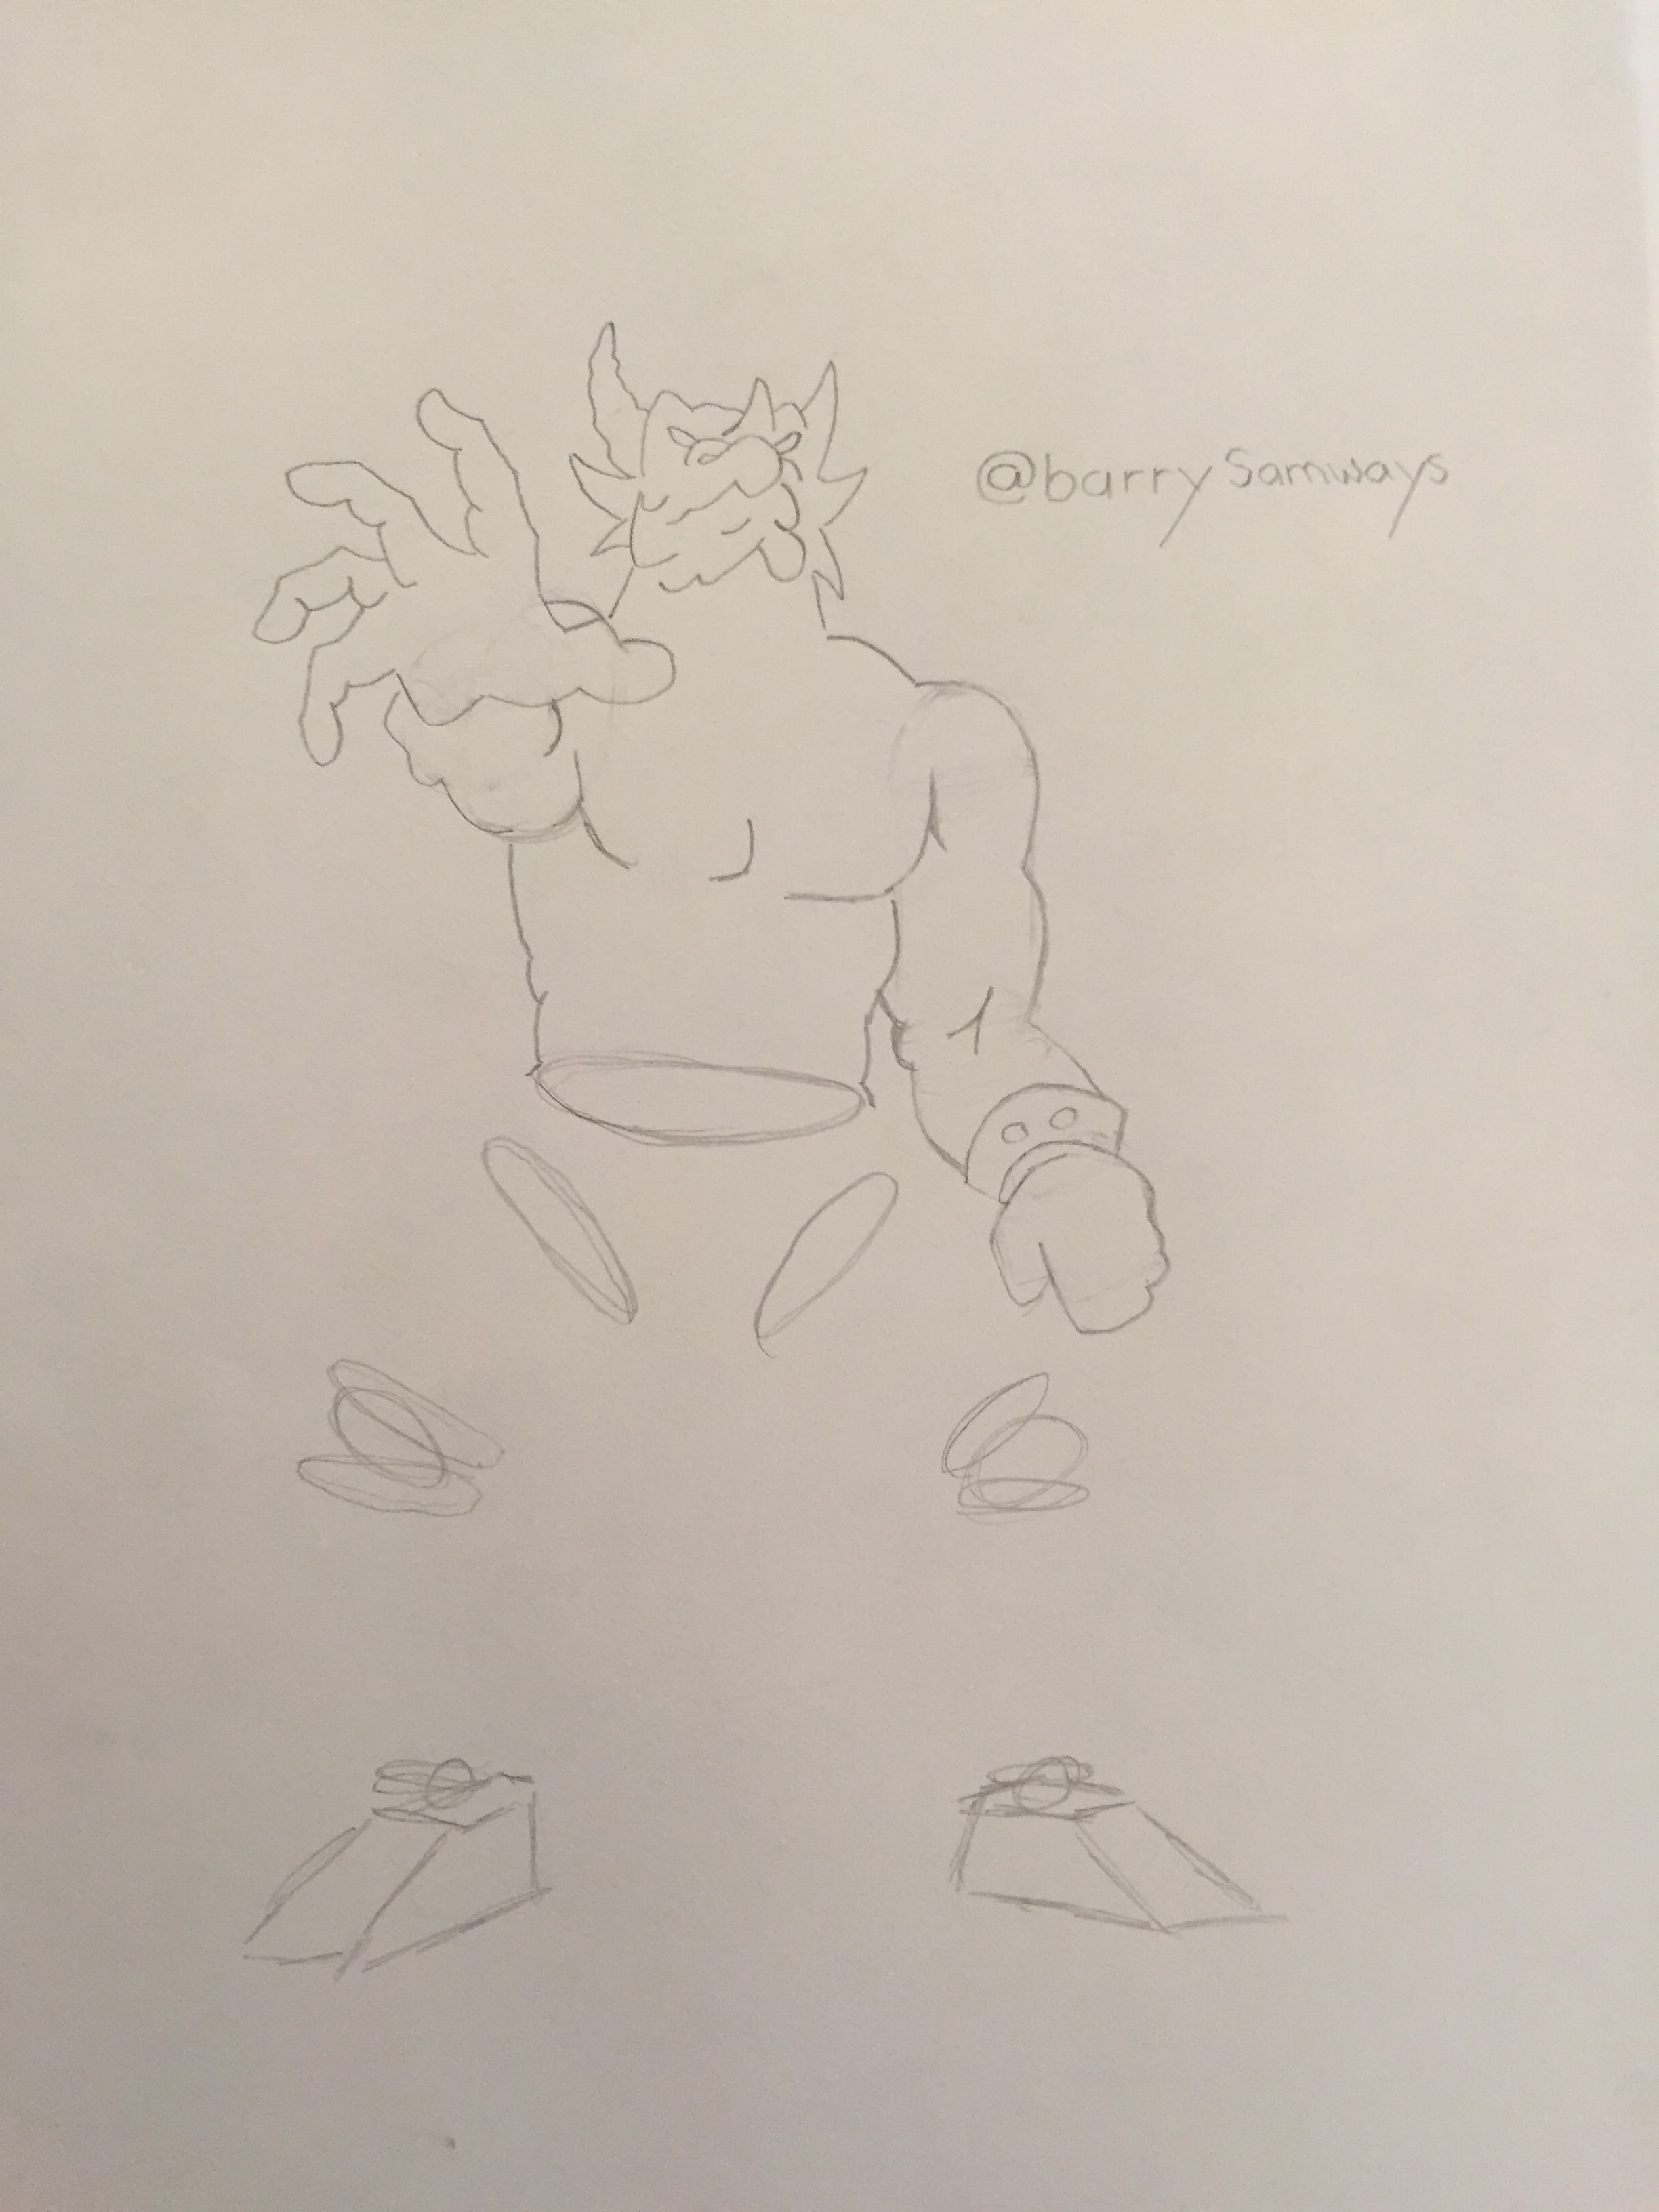
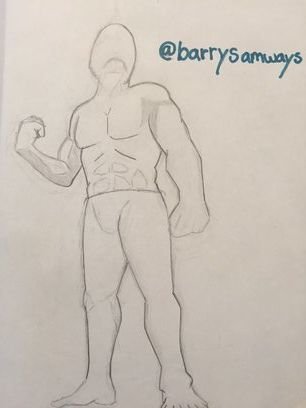
You have built a map for a realistic body form that you can now confidently start to add in details on knowing you conveyed a convincing 3 dimensional form with depth.
Starting out just for practice you could try even just drawing a foreshortened pencil or sword. apply these principals and you should be successful
Now go ahead and try out some foreshortening.
You will be amazed by the possibilities your pencil has to create illusions of depth on a page.
I hope you all enjoyed the Fundamental Foundations Of Art #2 if you have any ideas for future topics you would like to see demonstrated in detail I would love to hear them!
Good Luck Everyone, and have fun!
Barry F Samways