Having bought a 3dprinter (an Ultimaker2) I decided that it would make sense to try and make a workflow for designing, printing and casting parts for swords. The First attempt at this was the sword Gyldenklo which I have previously mentioned in this post. There were several issues which could be improved so i decided to have another go at bronze casting.
First issue was that the fittings for the sword (which I hope to describe in much more detail in a future post) was made in two parts and thus needed soldering or brazing. This resulted in a thin line of a different colour, because the solder is a different metal from the casting bronze. Thus I wanted to be able to cast in one piece.
I use sandcasting in a two piece mold and it turned out quite nice when I tried this. I even had a piece of scamolex(a brittle heatresisting material) down the middle to save me the bother of having to drill a hole after casting.
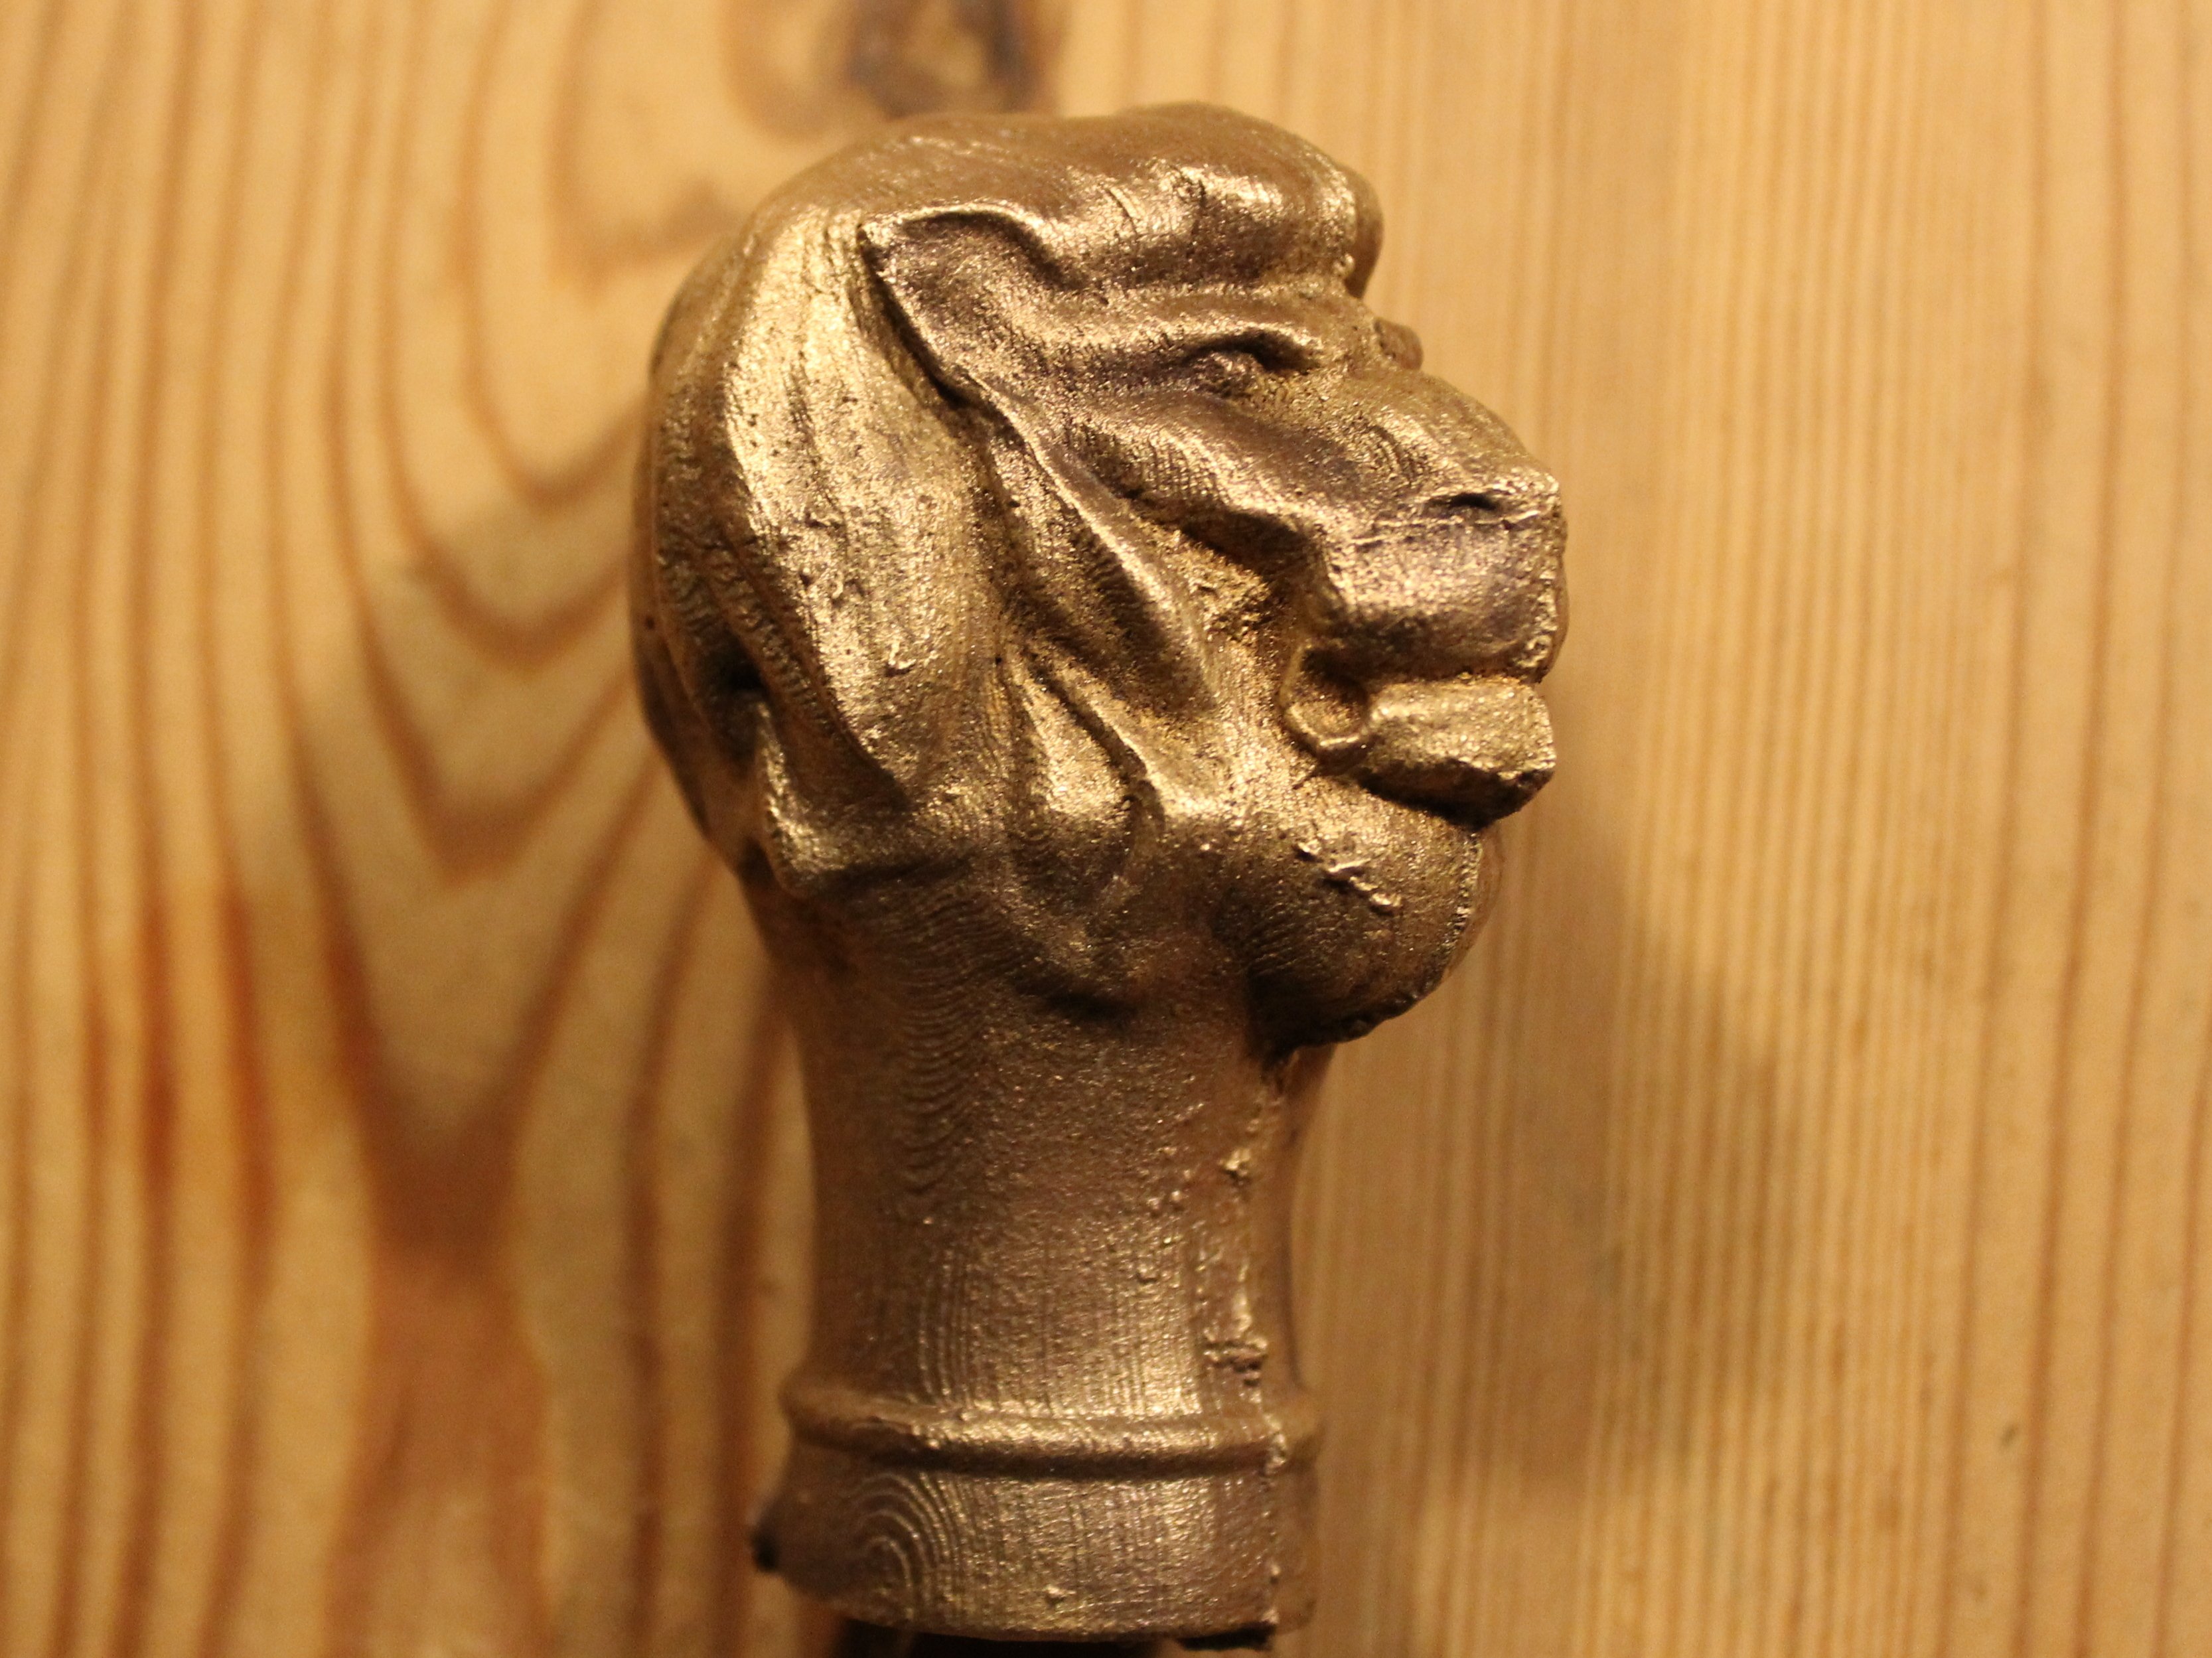
One thing I was not expecting was that the casting was actually so precise that the print lines from the master(for those not into casting the master is the original from which you make the mould) was clearly visible in the finished model.
Afterwards I have found out that one should varnish and polish the master as much as possible before casting. here you can see a closeup with the printlines clearly visible.
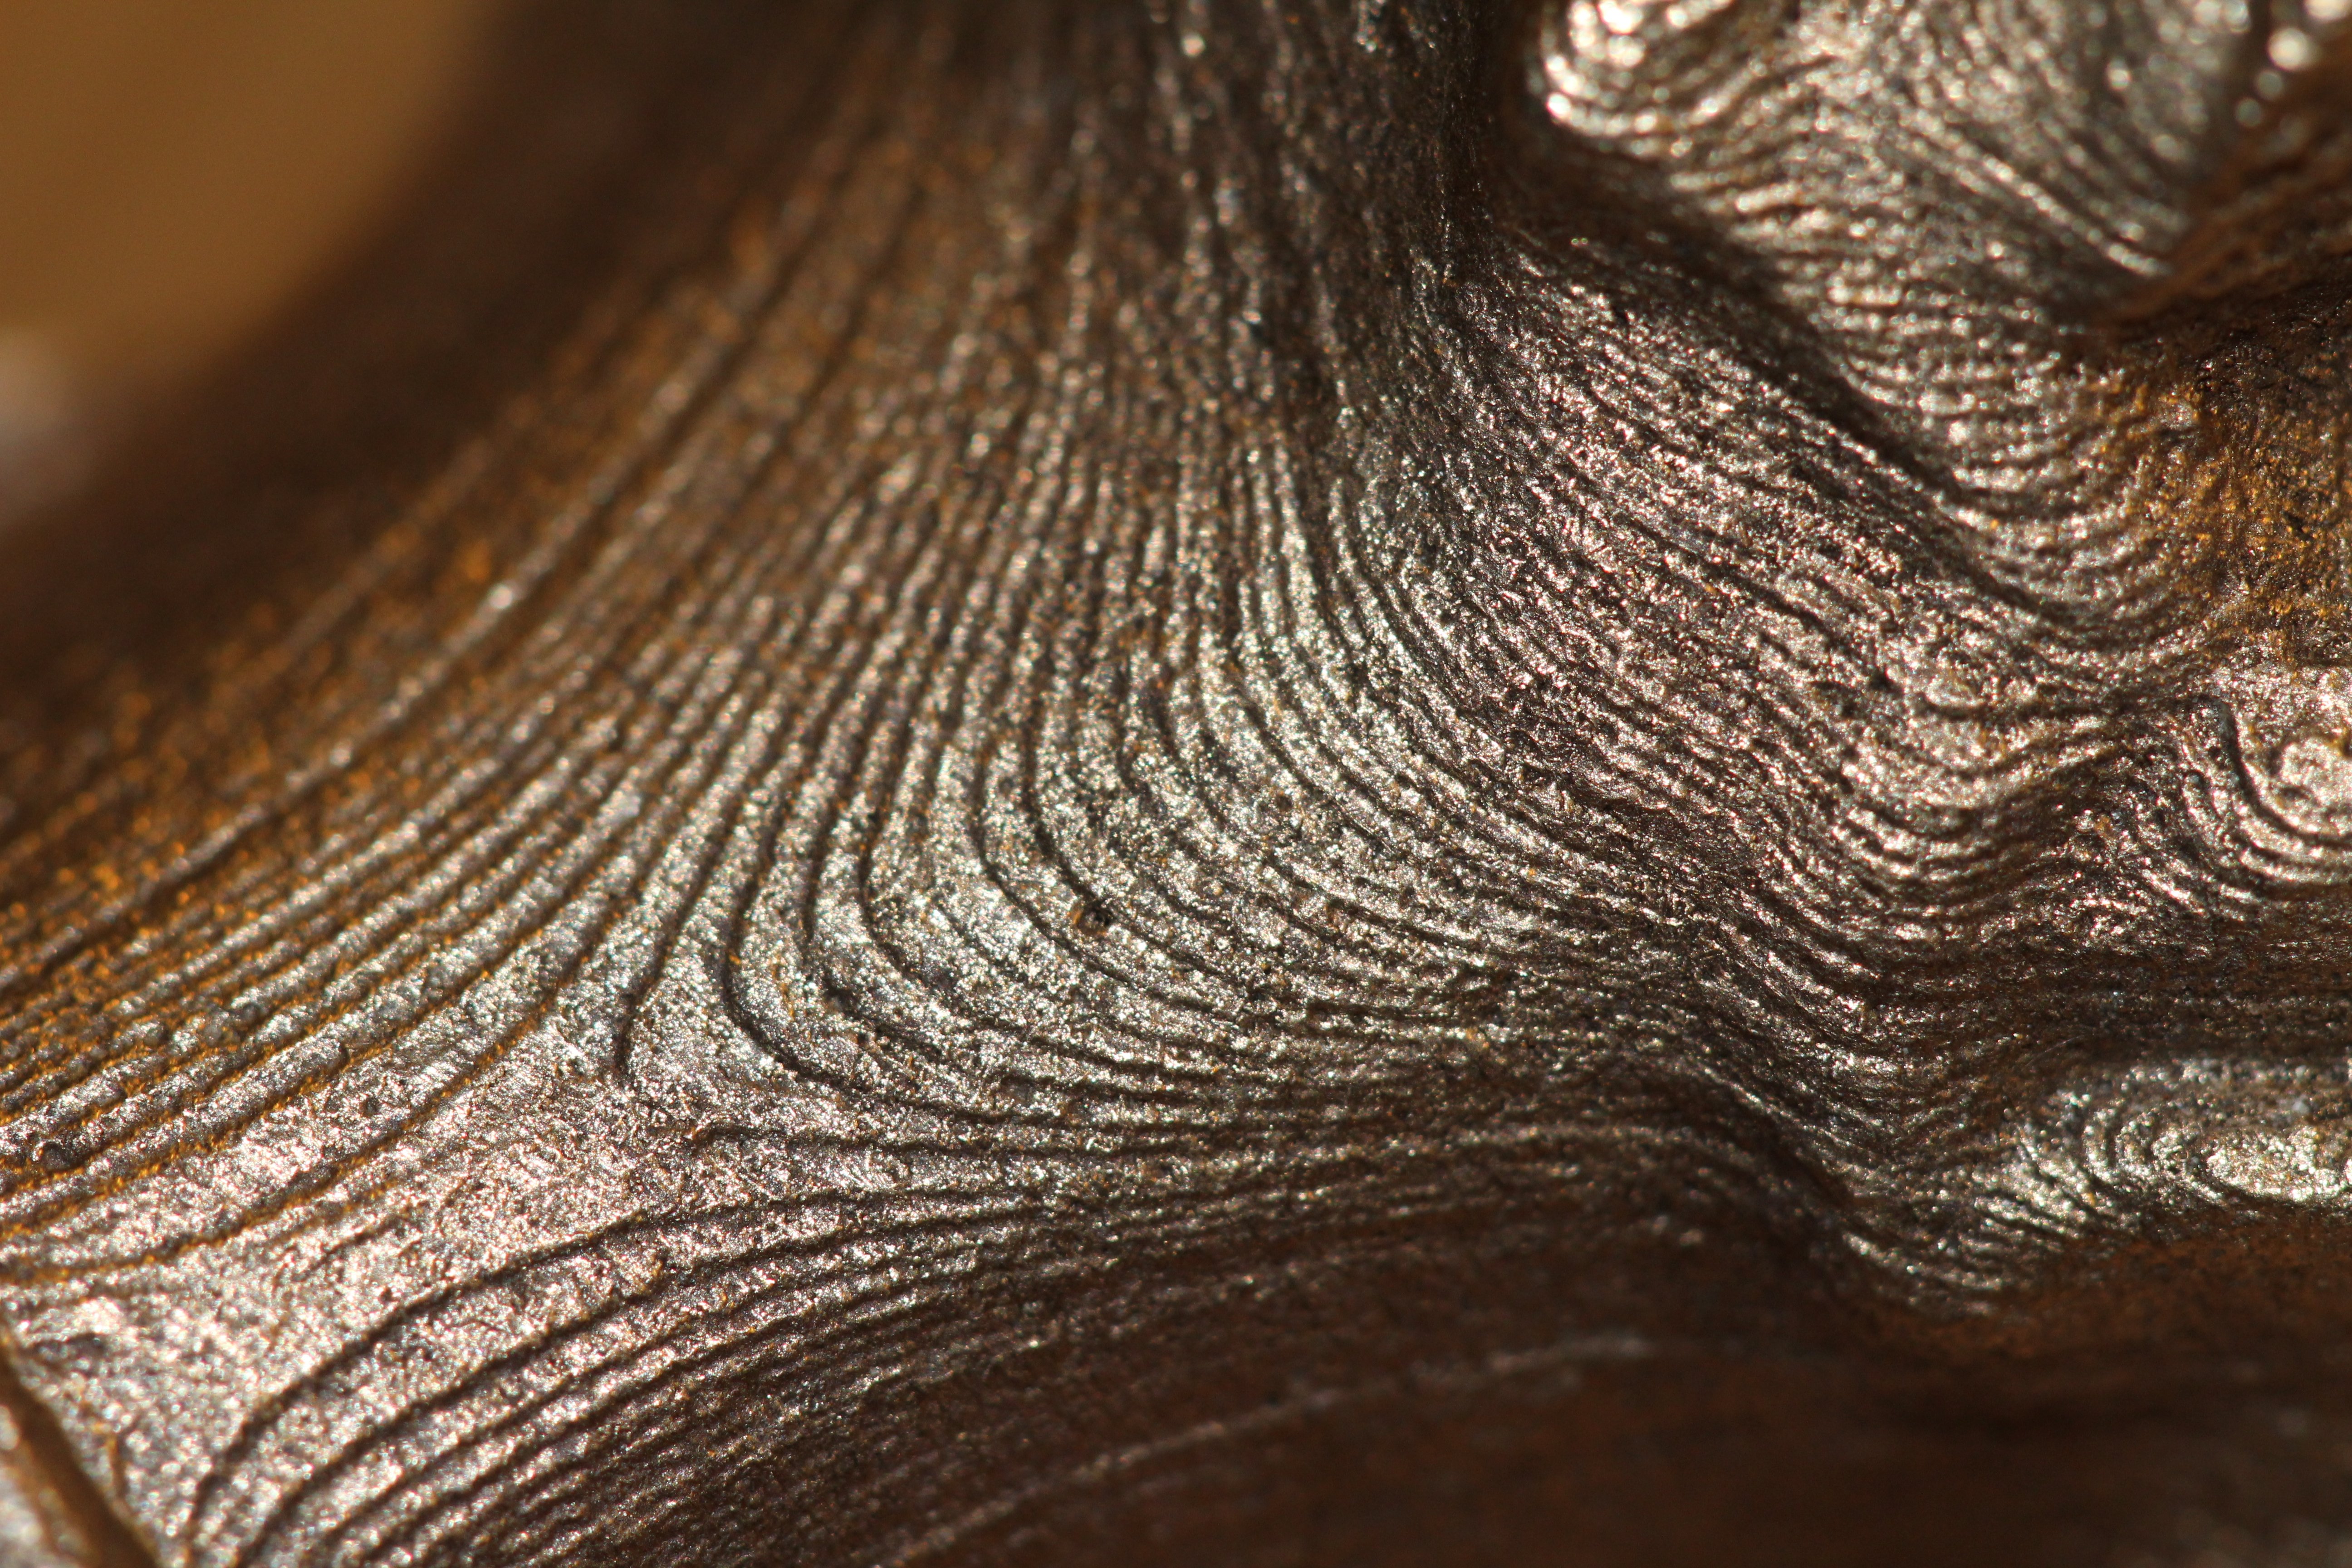
Because of this it took me a lot longer to clean up the pommel after casting.
Remember always make your masters perfect. You need only do this once since it can be used many times but if you dont you will have to do the work on every single casting, which is kind of a bummer.
Thats all for now.