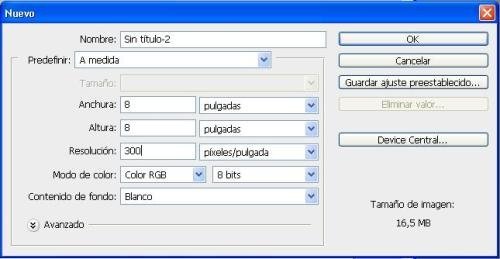
First step: We started by creating a canvas of 8 x 8 inches and a resolution of 300 px.
Step 2: Fill the layer created with black, menu Edit & gt; Fill in and select Black.
Step 3: Duplicate Layer, Layer Menu & gt; Duplicate layer or press Ctrl + J.
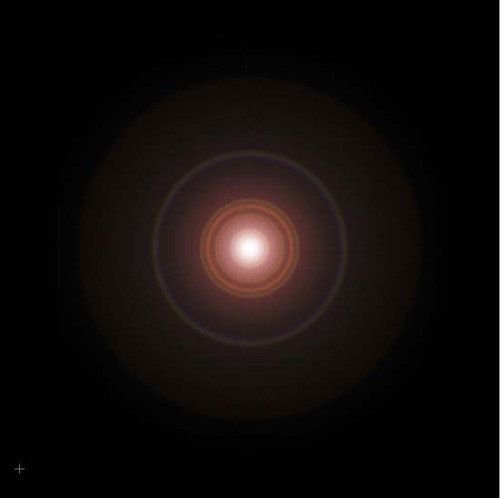
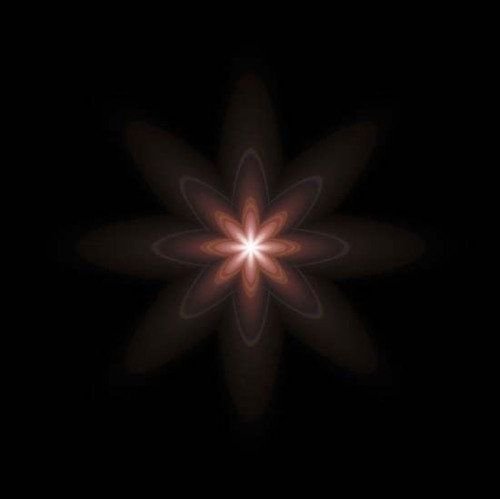
Step 4: Now go to the Filter menu & gt; Interpret & gt; Flash and move the cross until it is in the center of the circles.
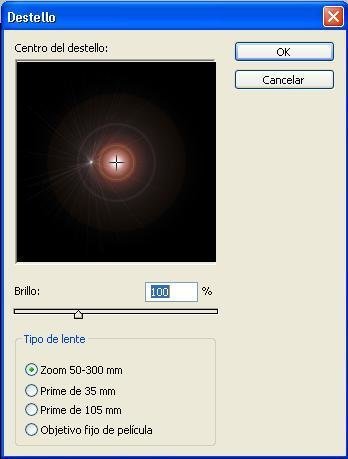
It should look like the picture below.
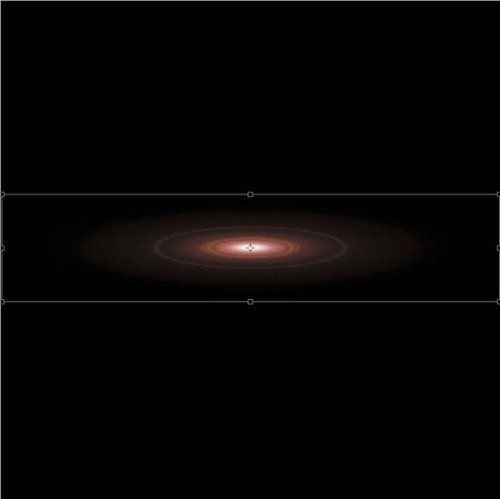
5 step: We transform the created image more narrowly vertically, menu Edit & gt; Transform Ctrl + T and flatten the image a bit making sure it is centered.
6 step: Duplicate the Ctrl + J layer and then transform it Ctrl + T and rotate until it is vertical and form a cross with the layer below, then press Enter. Then change the layer mode to Clear.
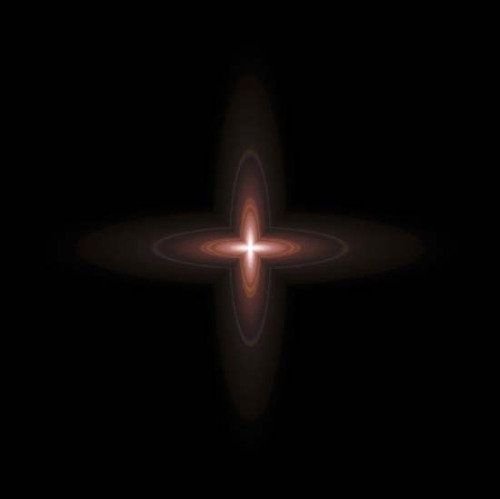
7 step: We duplicate the layer Back copy and we rotate 45 degrees, we do this twice, in the first 45 and the second -45. To both layers you have to change them to the Clarify mode and in the end they must have been something like this.
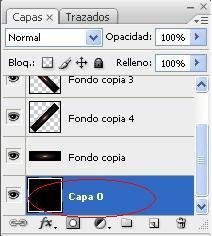
Step 8: Unlock the Background layer by clicking on it and then on OK. As you see the name of the layer changed to Layer 0 and the padlock disappeared.
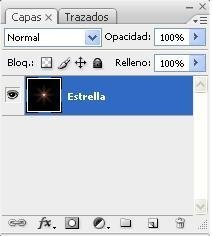
9 step: Go to the Layer menu & gt; Combine visible. We will have a single layer that we rename for Estrella.
10 step: Resize the image with Ctrol + T 235% and for the change to be horizontal and vertical click on hold proportion at the top of the screen.

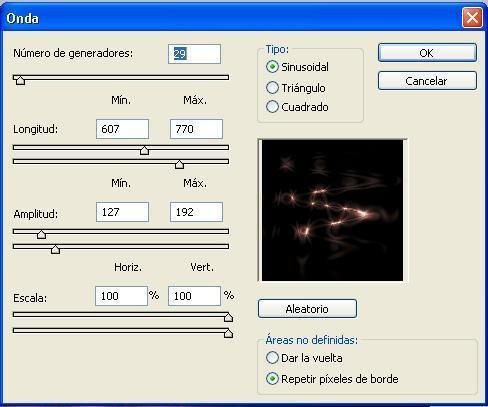
Step 11: The next step is to give wave effect, then go to Filter menu & gt; Distort & gt; Wave and leave the values as those of the following image, but if you want you can experience other adjustments.
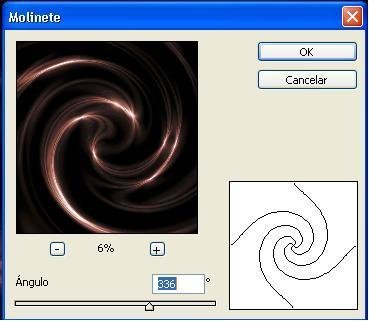
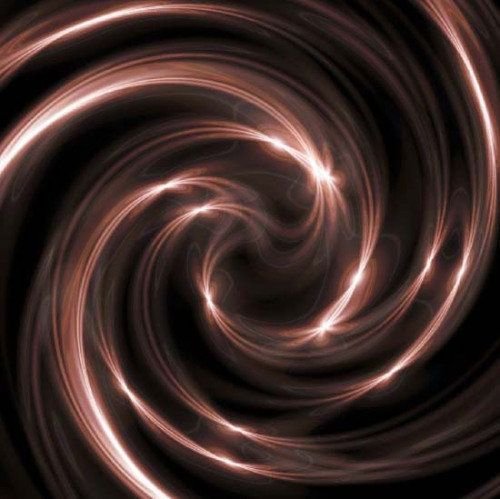
12 Step : Now we give you a mill effect, Filter Menu & gt; Distort & gt; Windlass and move the slider so that light clusters are not lost.
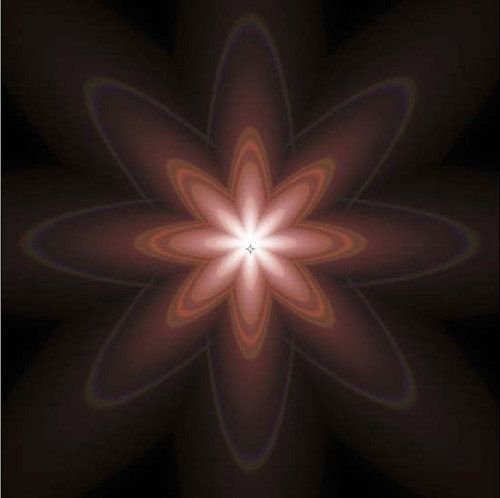
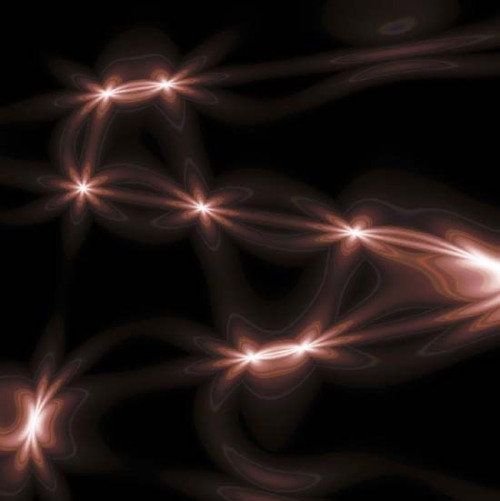
So far his image must look something like this.
13 Step : Duplicate our Star layer with Ctrl + J and then go to the Edit menu & gt; Transform & gt; Rotate 90 AC and change the layer mode to Plot.
Step 14: Repeat the previous step but this time rotate the new layer Horizontally and change it to Plot, then do it Vertically and if you want 180 degrees until you get a really fantastic result.
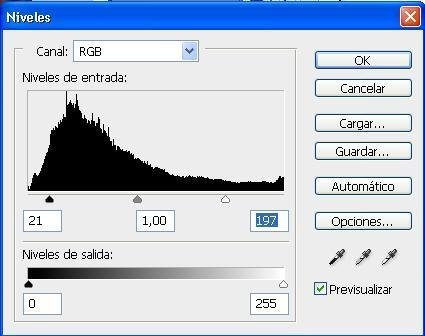
Step 15: Create an adjustment layer for Levels in the Layer menu & gt; New Adjustment Layer & gt; Levels.
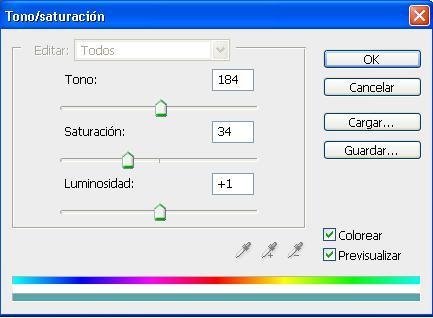
16 step: Now create an adjustment layer but this time Tone / Saturation.
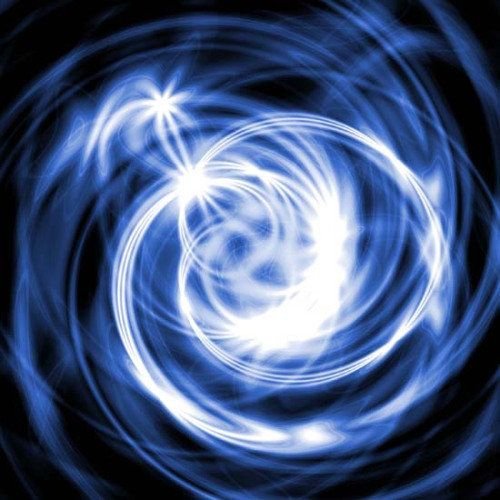
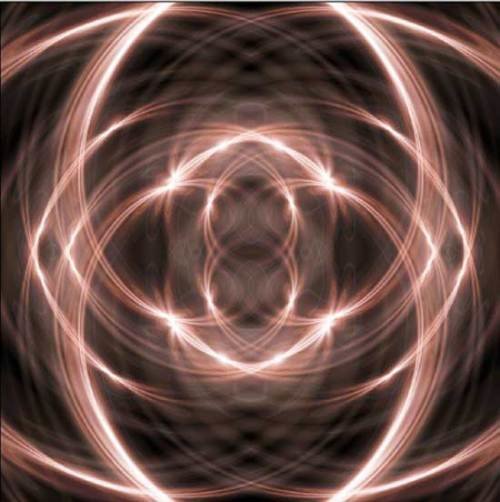
And here the result.
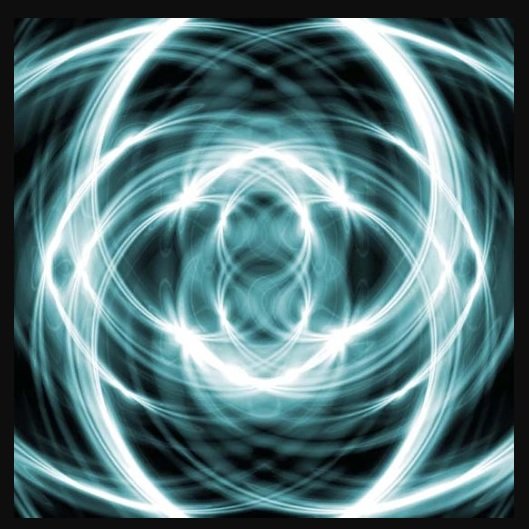
Another example.