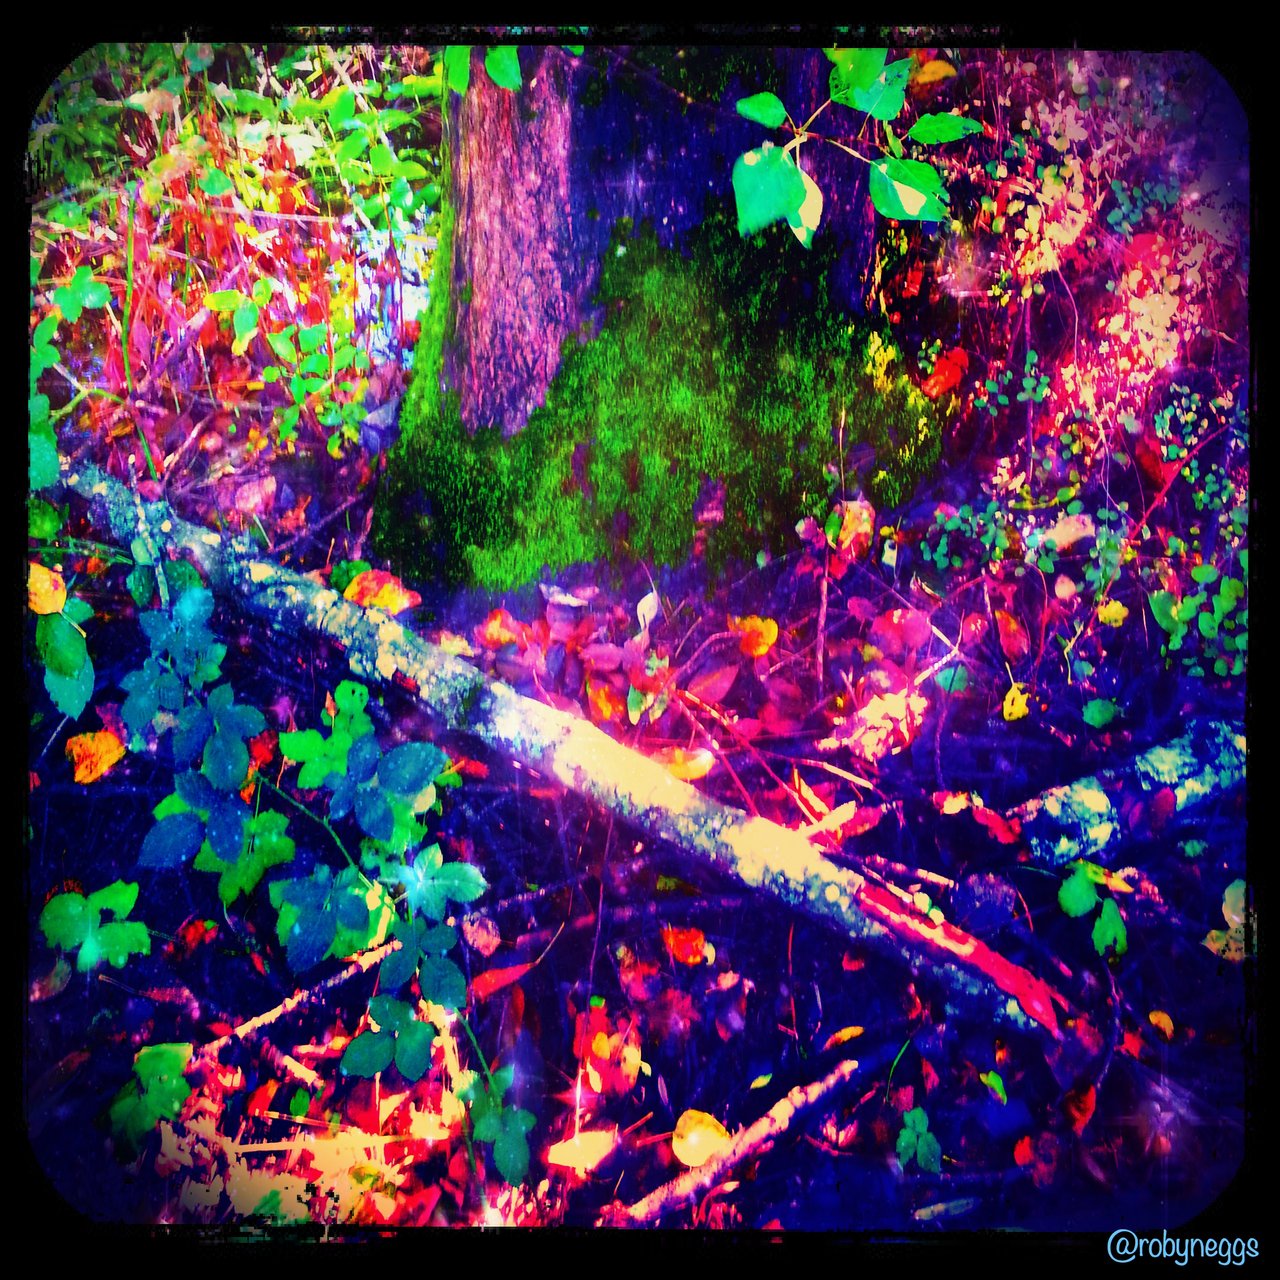
Today I want to show you how I made last night's color art using Pixlr!
I just love using the Pixlr app. You can use it on your phone or your desktop computer. I finally started using the desktop version after almost a year of using it on my phone. Pixlr is great for just editing one photo at a time. It is not efficient for producing whole sets of professional shots. That being said, it is my number one go-to app for creating graphic art! I love it because it has wonderfully colorful filters, like "space" which I use in this tutorial.
(Level of patience required: medium)(12 screenshots total)
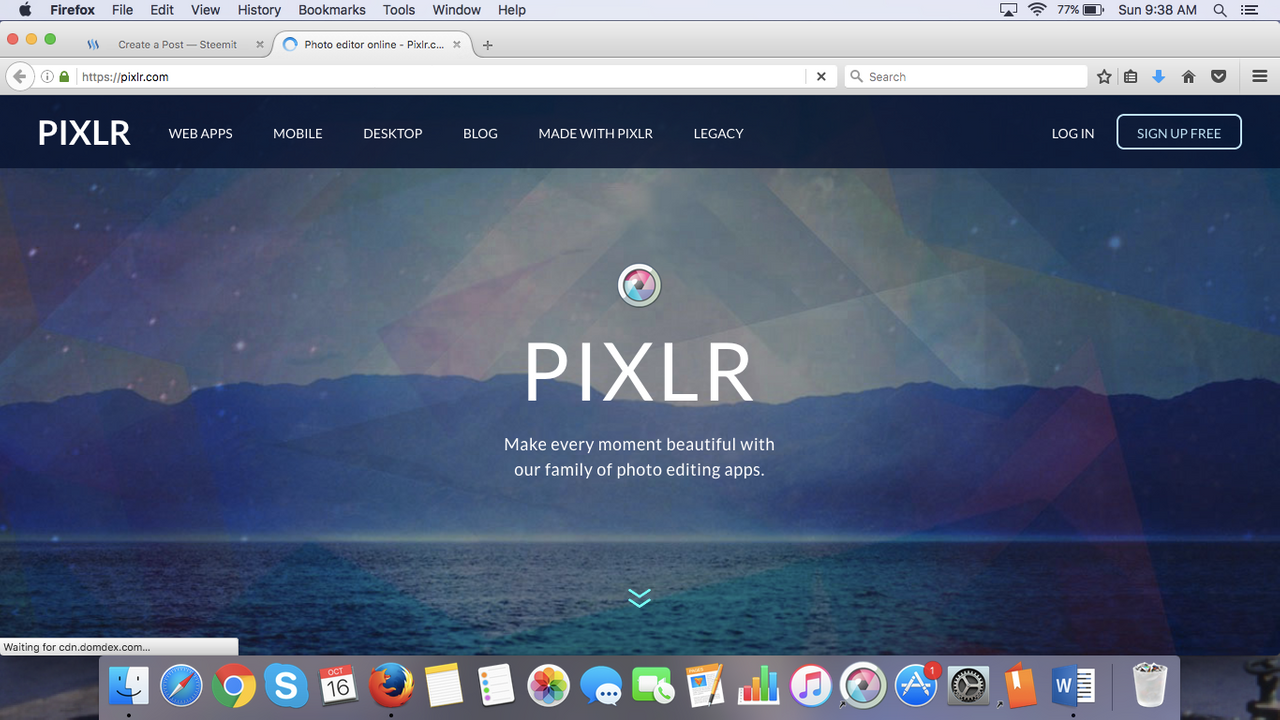
- Download the Pixlr app on your phone or computer (desktop version seen below)
- Open the image you would like to edit
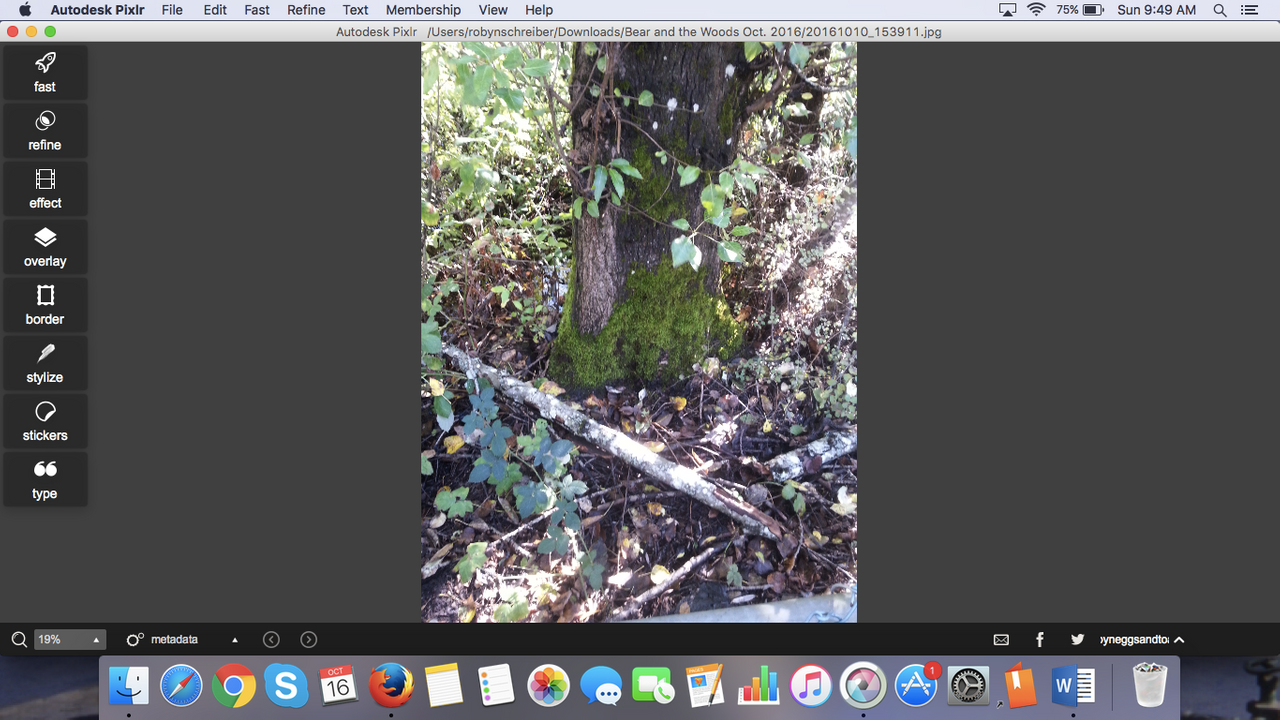
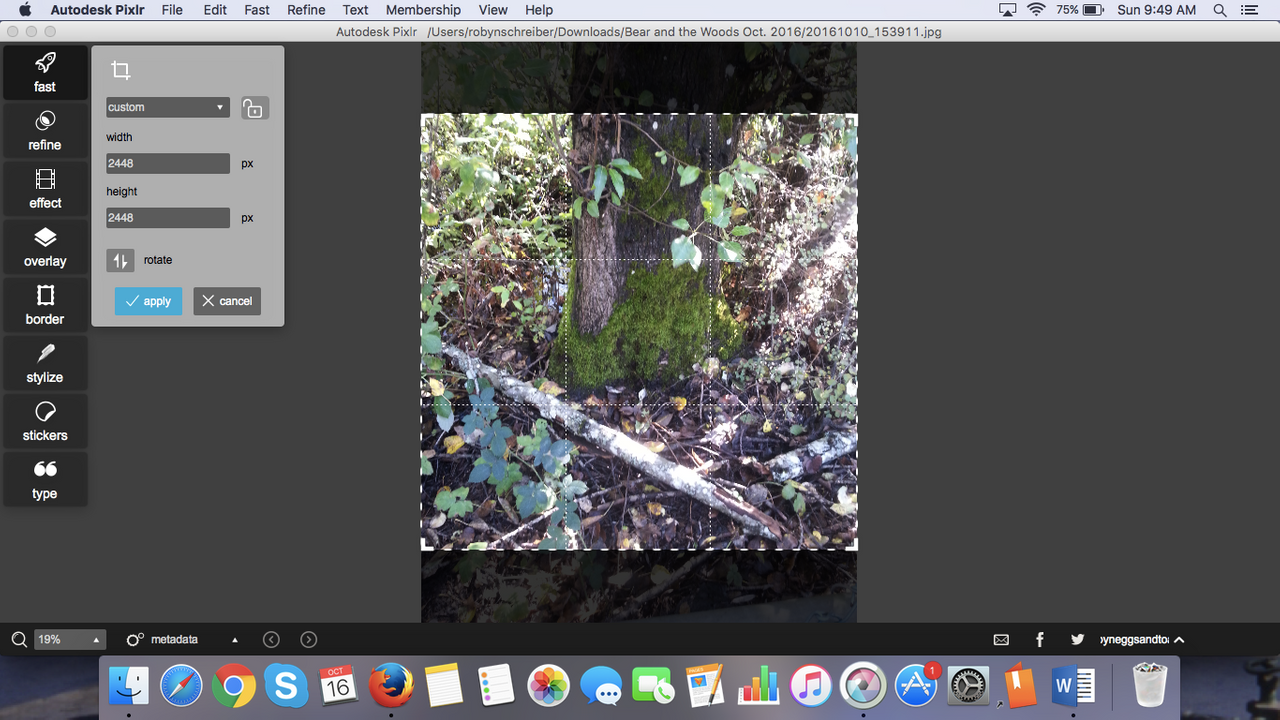
- Crop the image into a square (this is how I do it most of the time, but it is not required)
- From there, click "Refine" then "Color". Turn these two all the way up:
Saturation: 100%. Vibrance 100%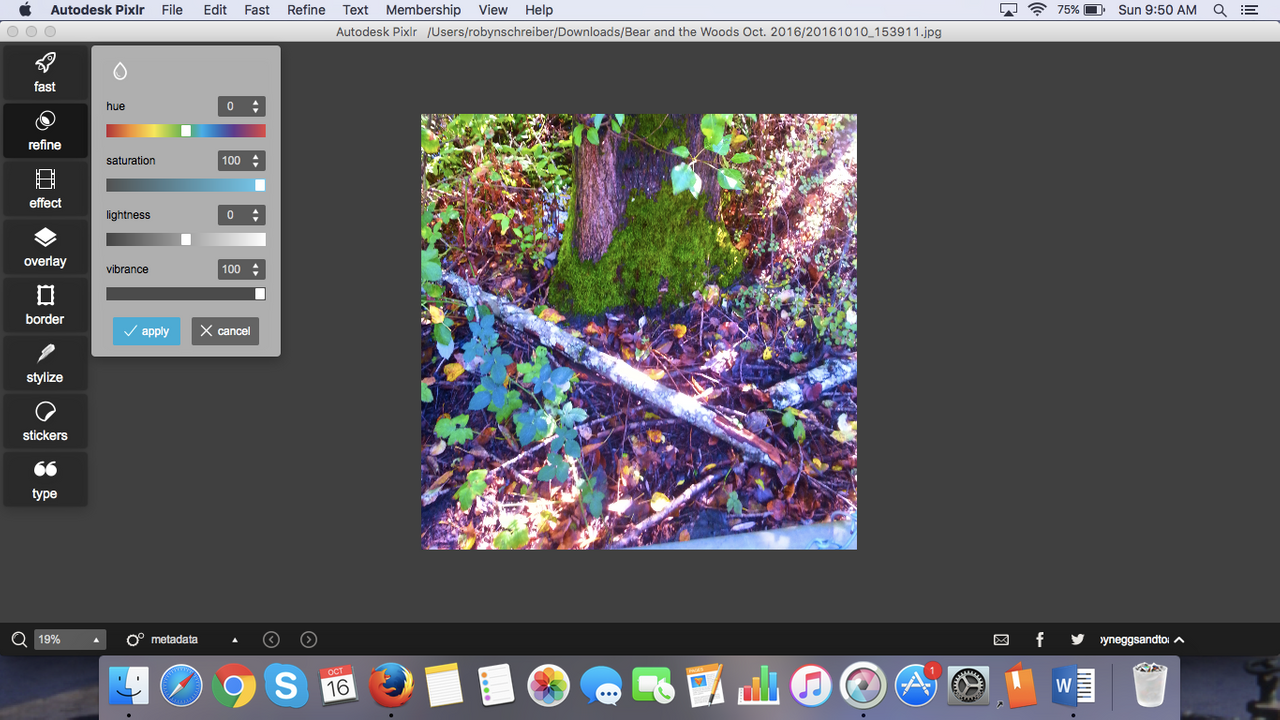
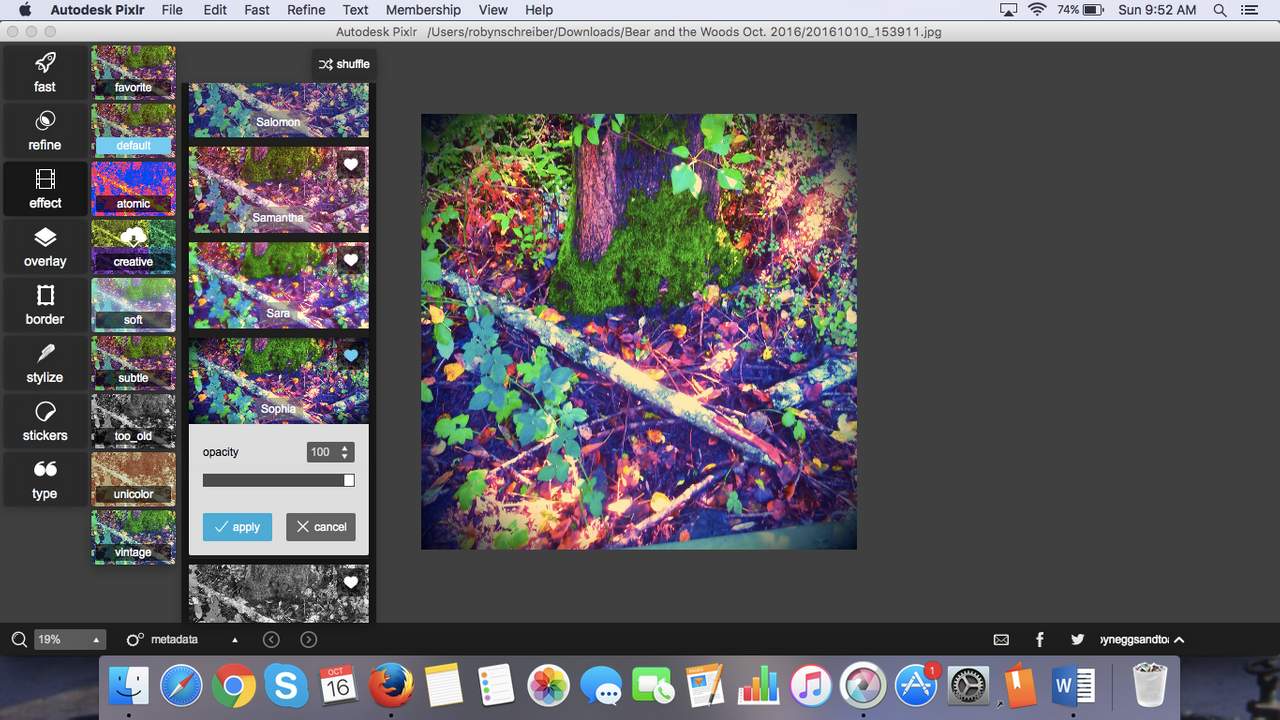
- Now add a filter or two, using "Effect". The effects I used, in order, are:
"Subtle" (category name) - "Adrian" (filter name)
"Default" (category name) - "Sophia" (filter name)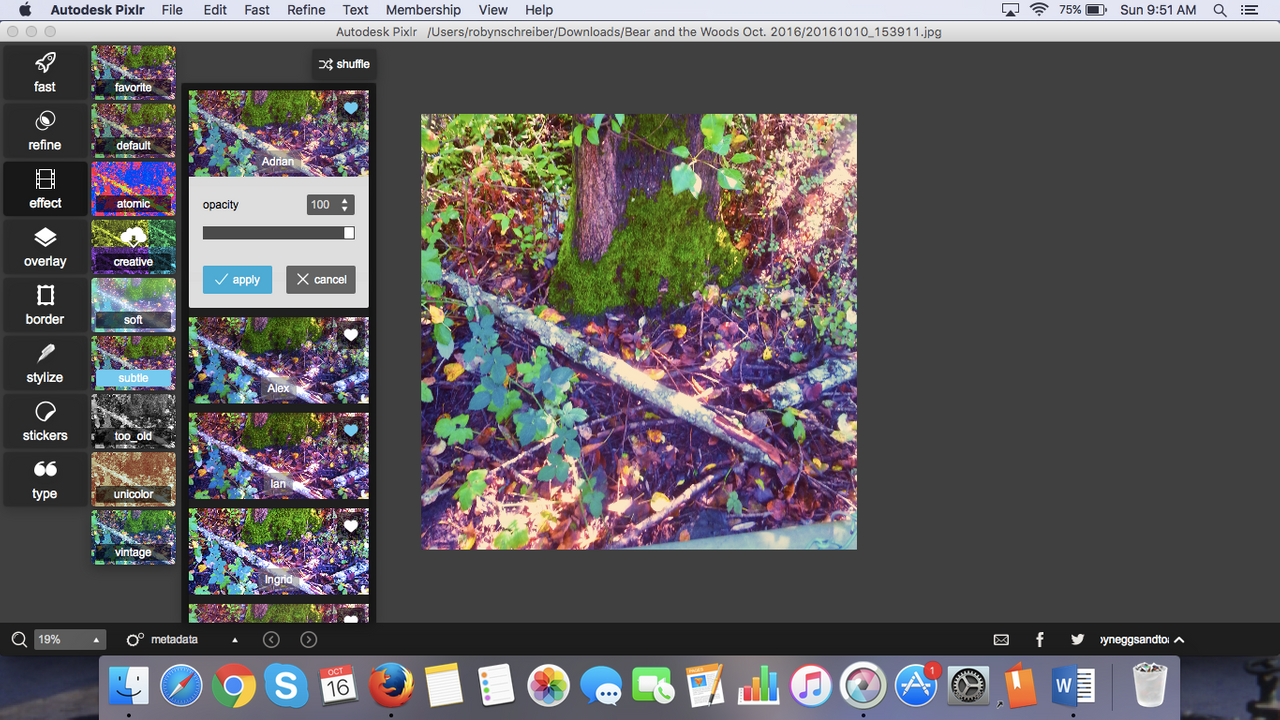
- Now add an "Overlay". My favorite overlay to use is one from the "Space" category. I have used other ones from the "Chem Burn" category too.
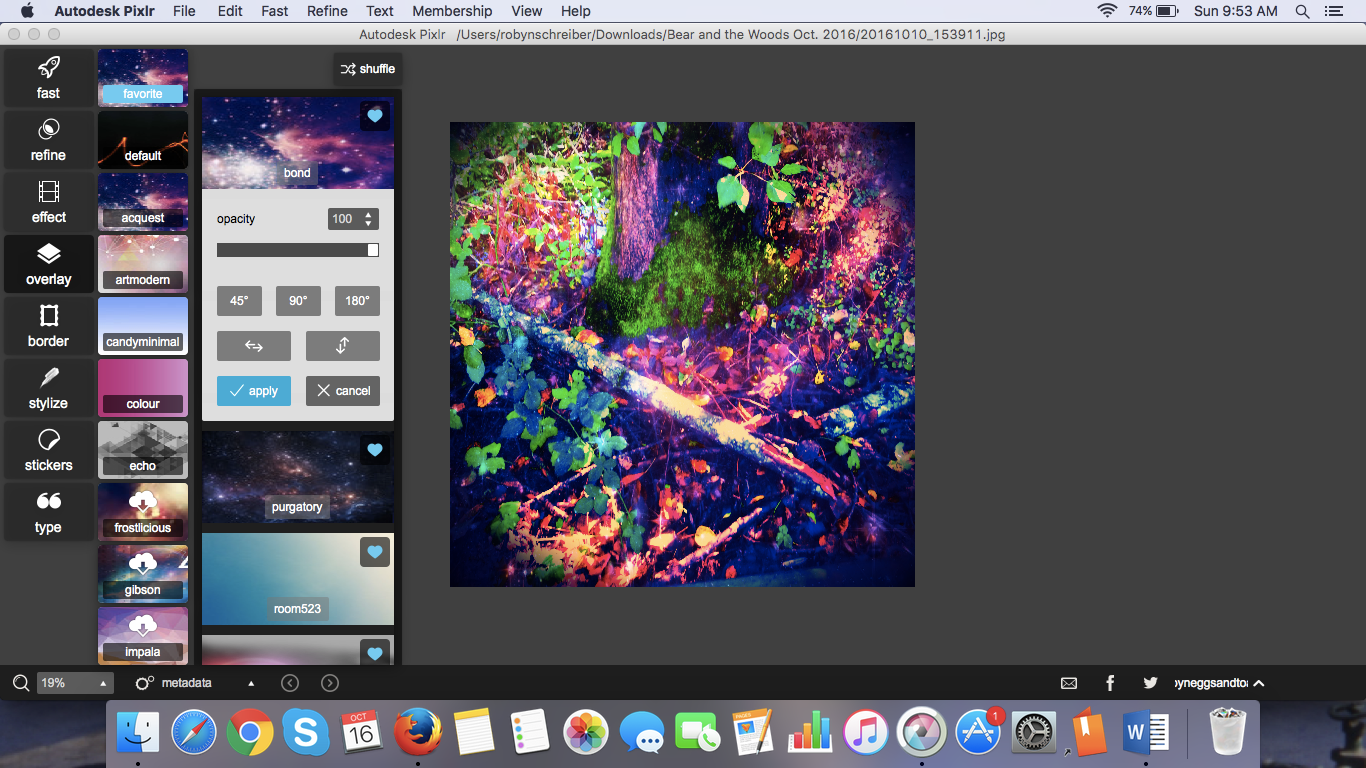
- Now for the border - almost finished! I used "Default" (category name) - "Ground" (border name)
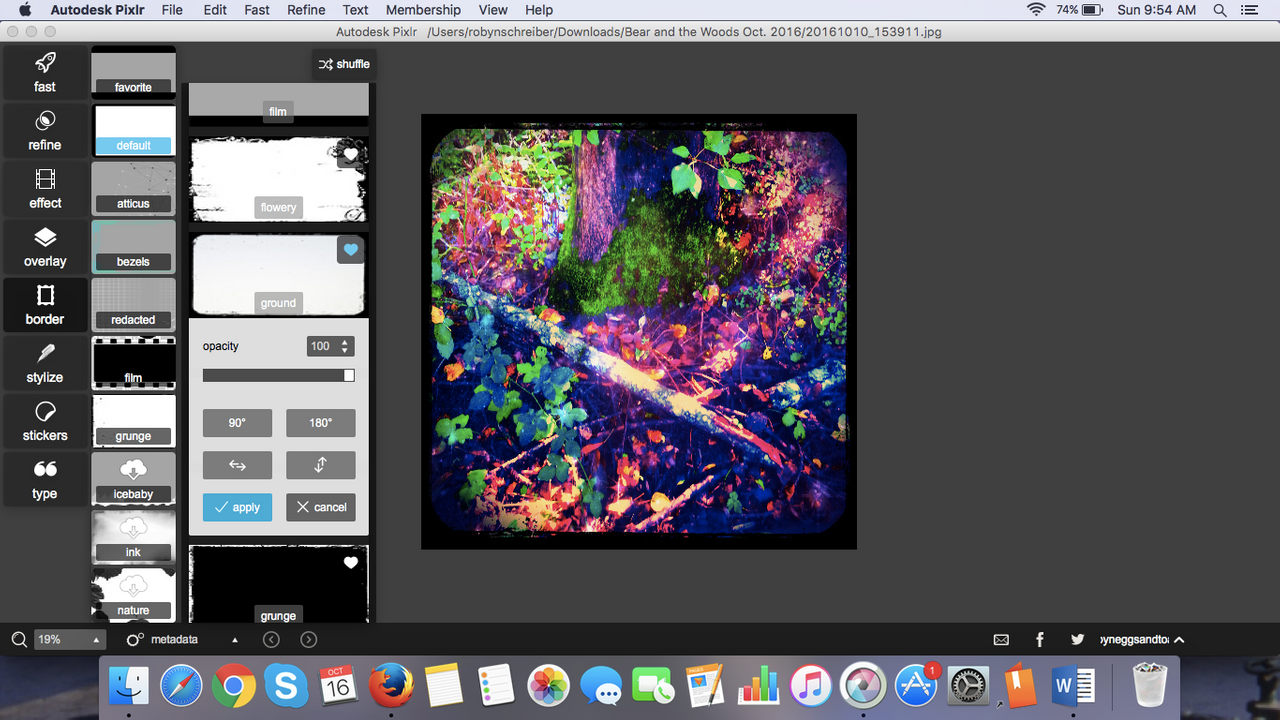
- Don't forget to add your brand name, using "Type"
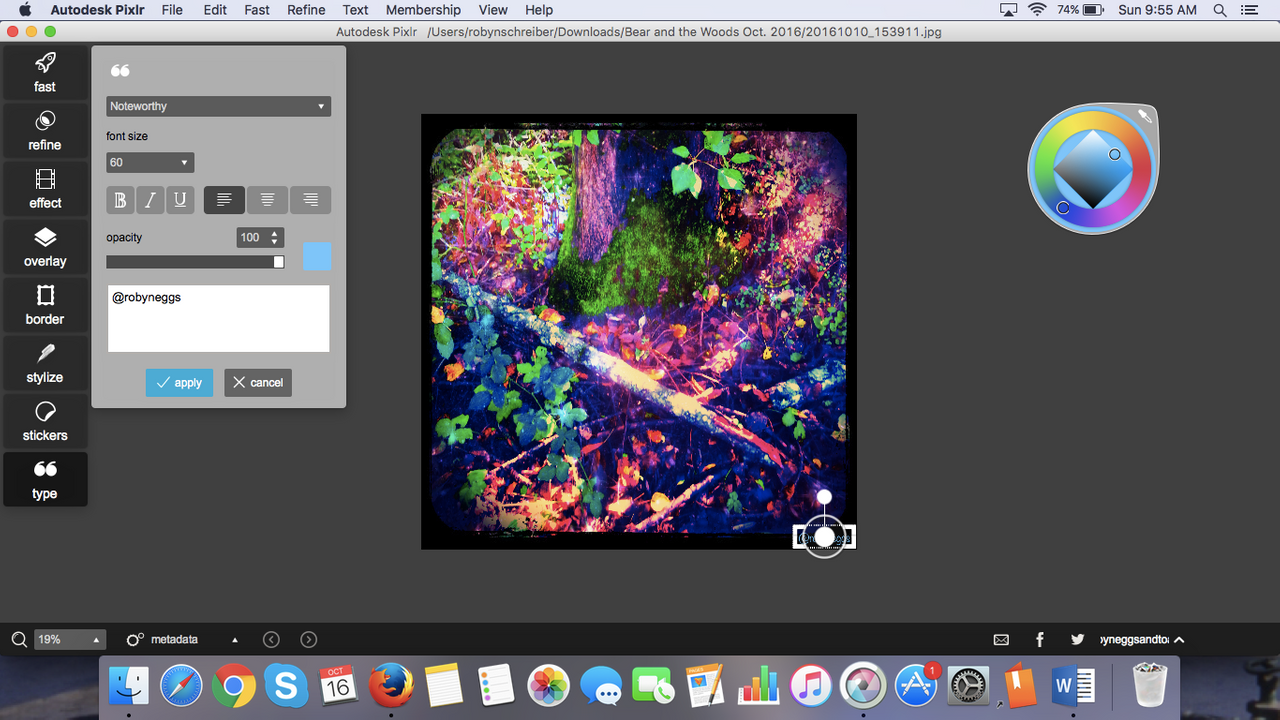
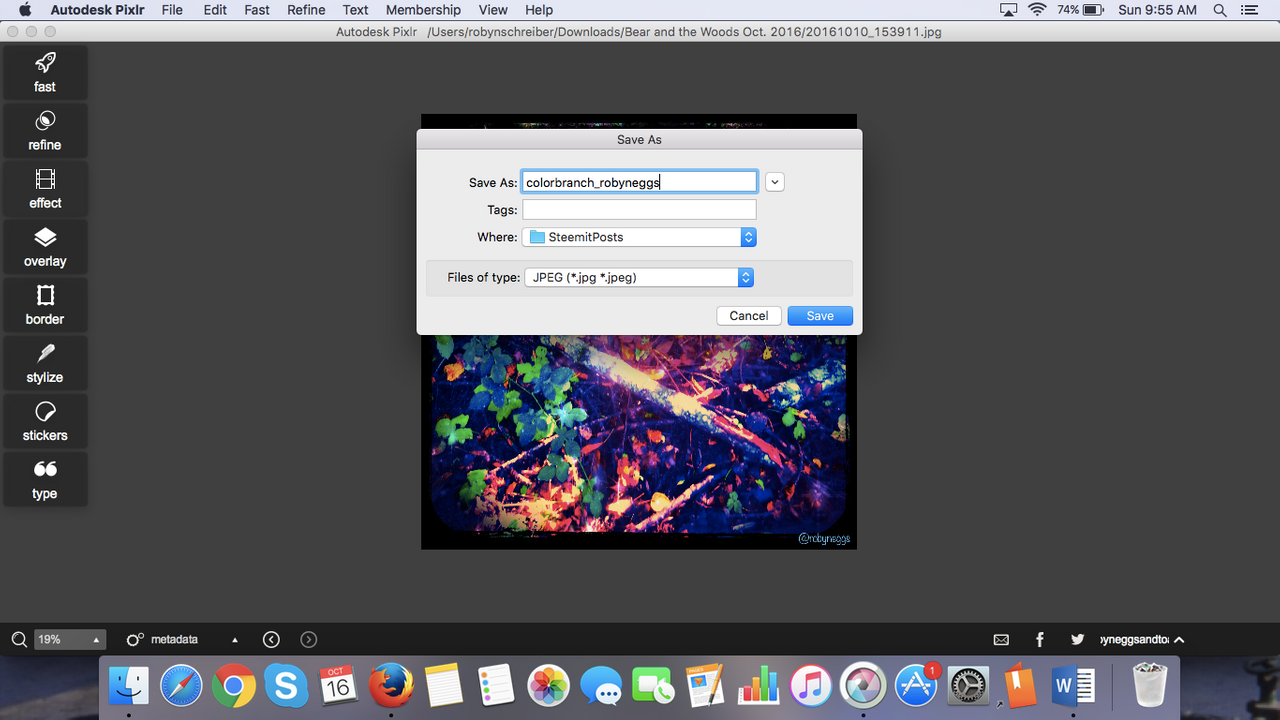
- Now save your masterpiece
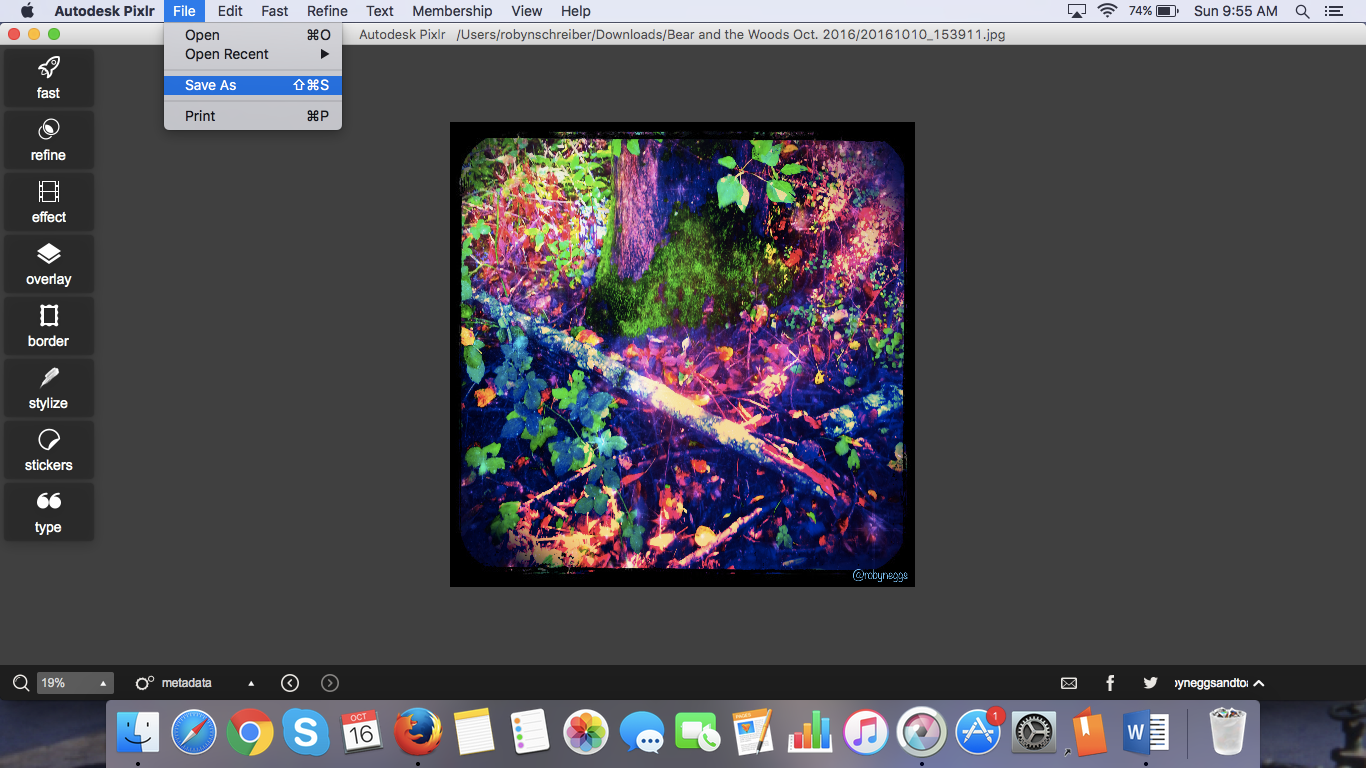
- Call it something amazing
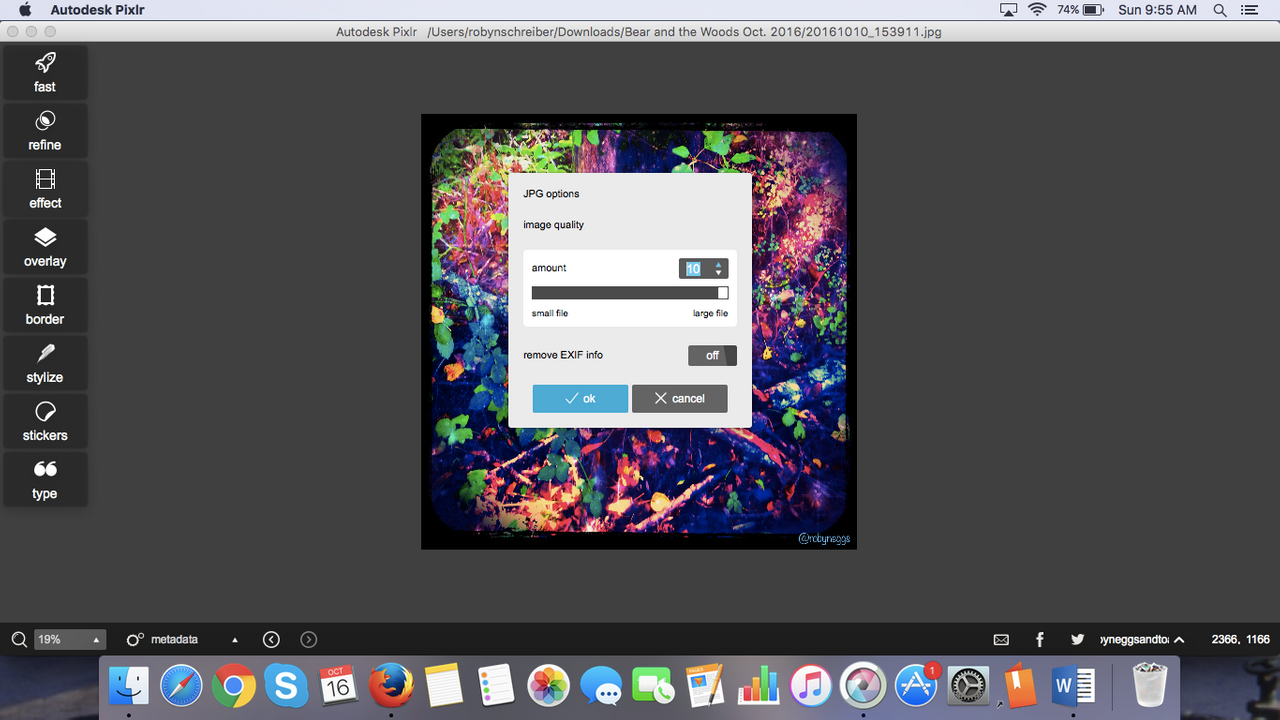
- Oh, and at the end it will ask you about quality level, choose the best
Hope you enjoy this little How-to...
...on making incredible color graphic art from interesting nature shots!!!
CHEERS FROM ME TO YOU! XOXOXOXO
Follow ze @robyneggs for more posts of interest!

