I love to recycle/upcycle, as much as possible. In this article I will show you how I am using soda cans to create beautiful fridge magnets. Enjoy!
Ok... this is the magnet I made recently. The final product looks like this:
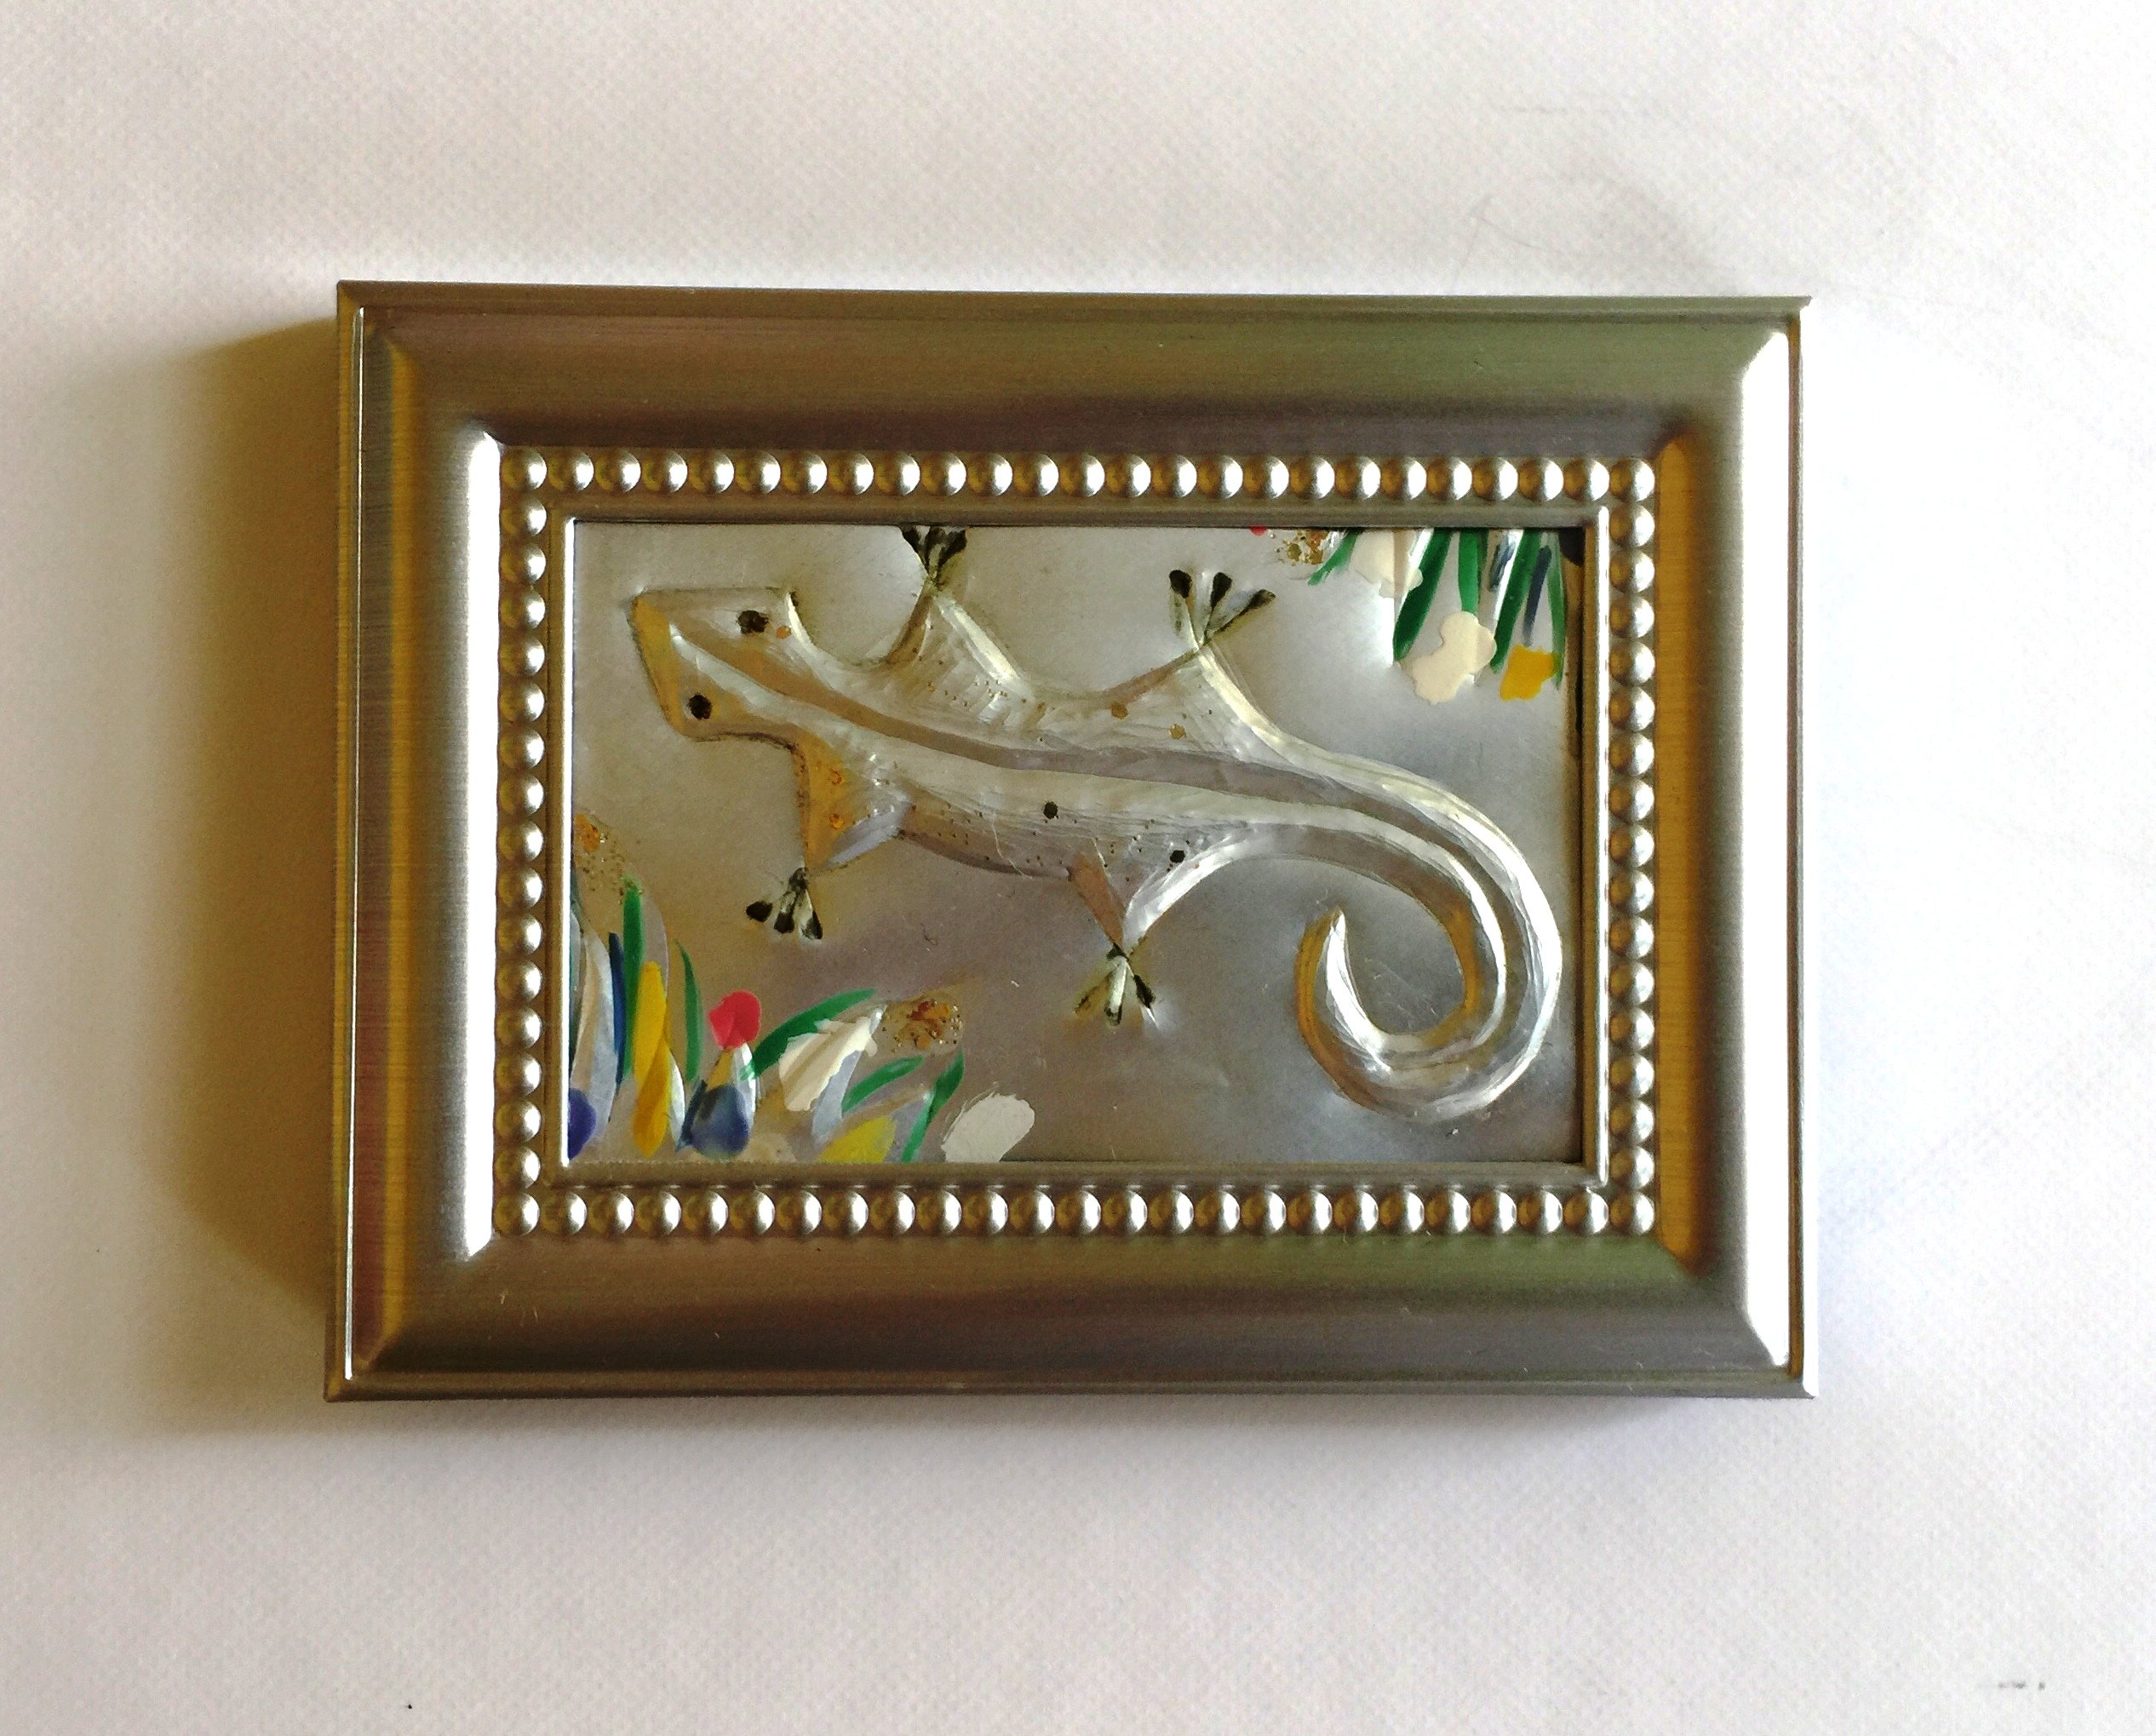
... a cute lizard...
These are the parts that form my magnet: a frame, a magnet and the foil.
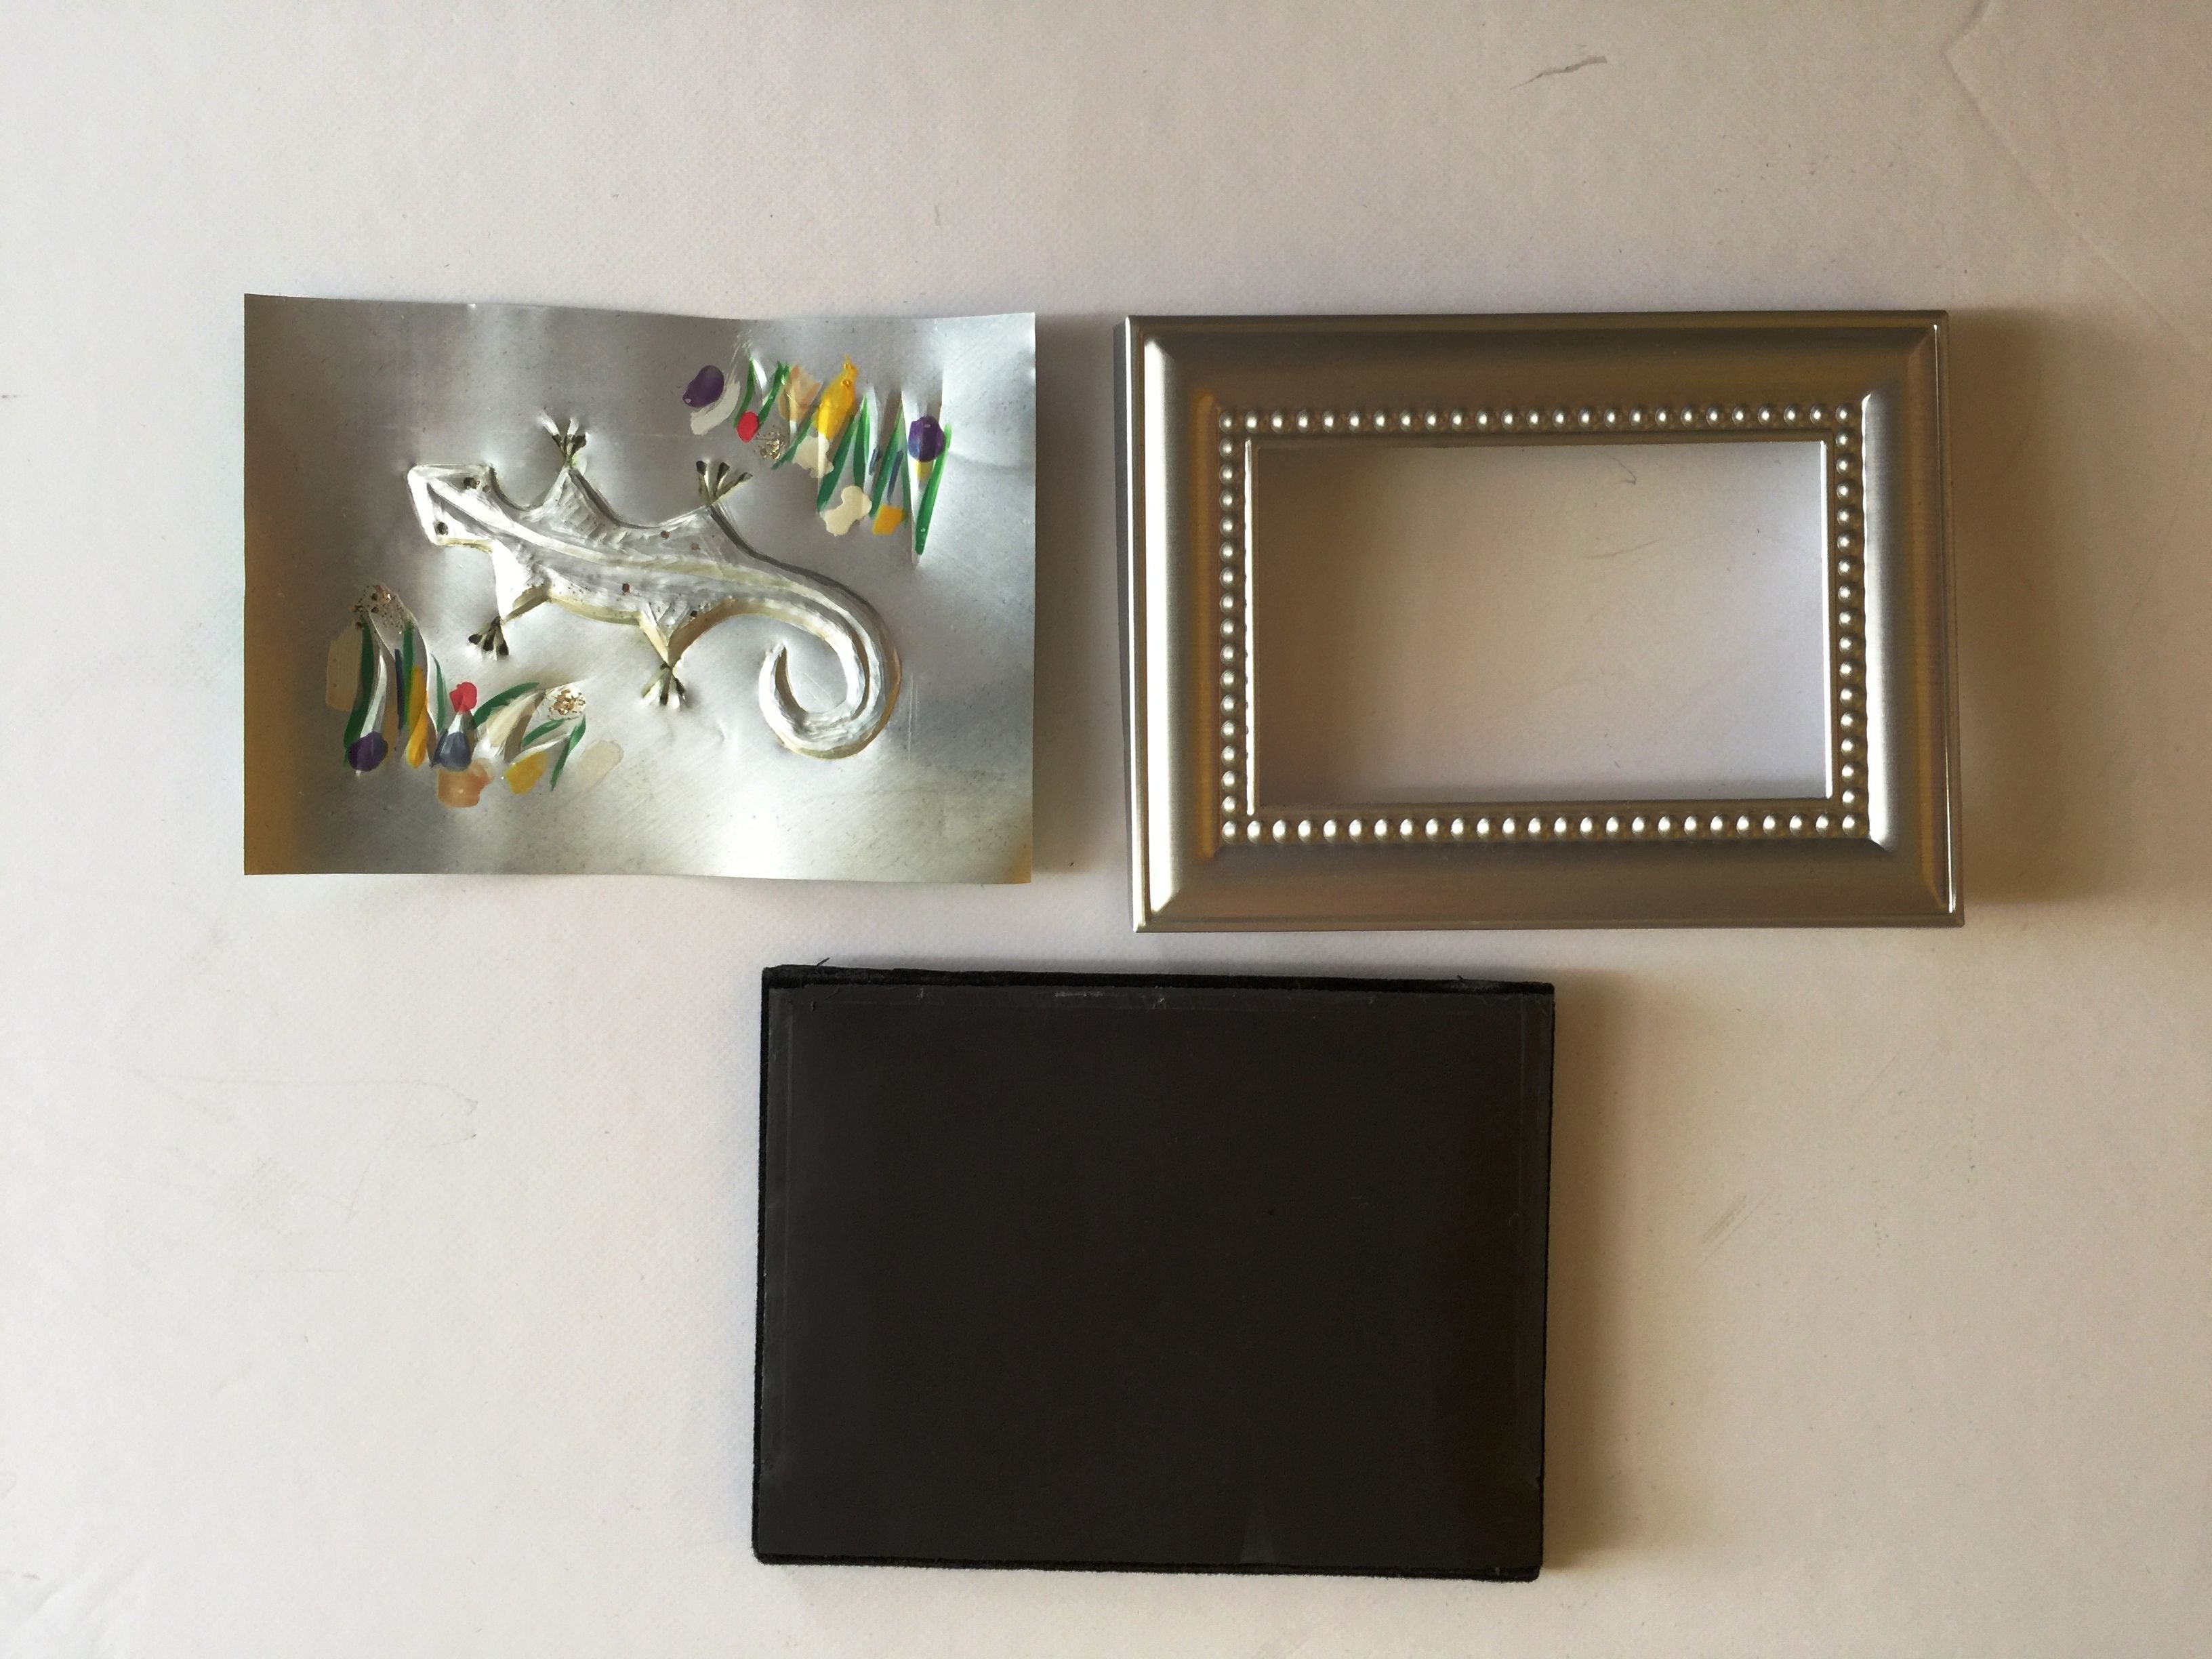
The frame is one of those 'wedding favor' frames, you can buy them in bulk online. The magnet? You buy in self-adhesive sheets. Measure, cut and glue the magnet on the back of the frame.

The aluminum foil is the center of attraction. This particular one came from a Sprite soda can. Cut the can carefully with scissors, you will get a rectangle. Measure to fit the frame.
Now the fun part begins!
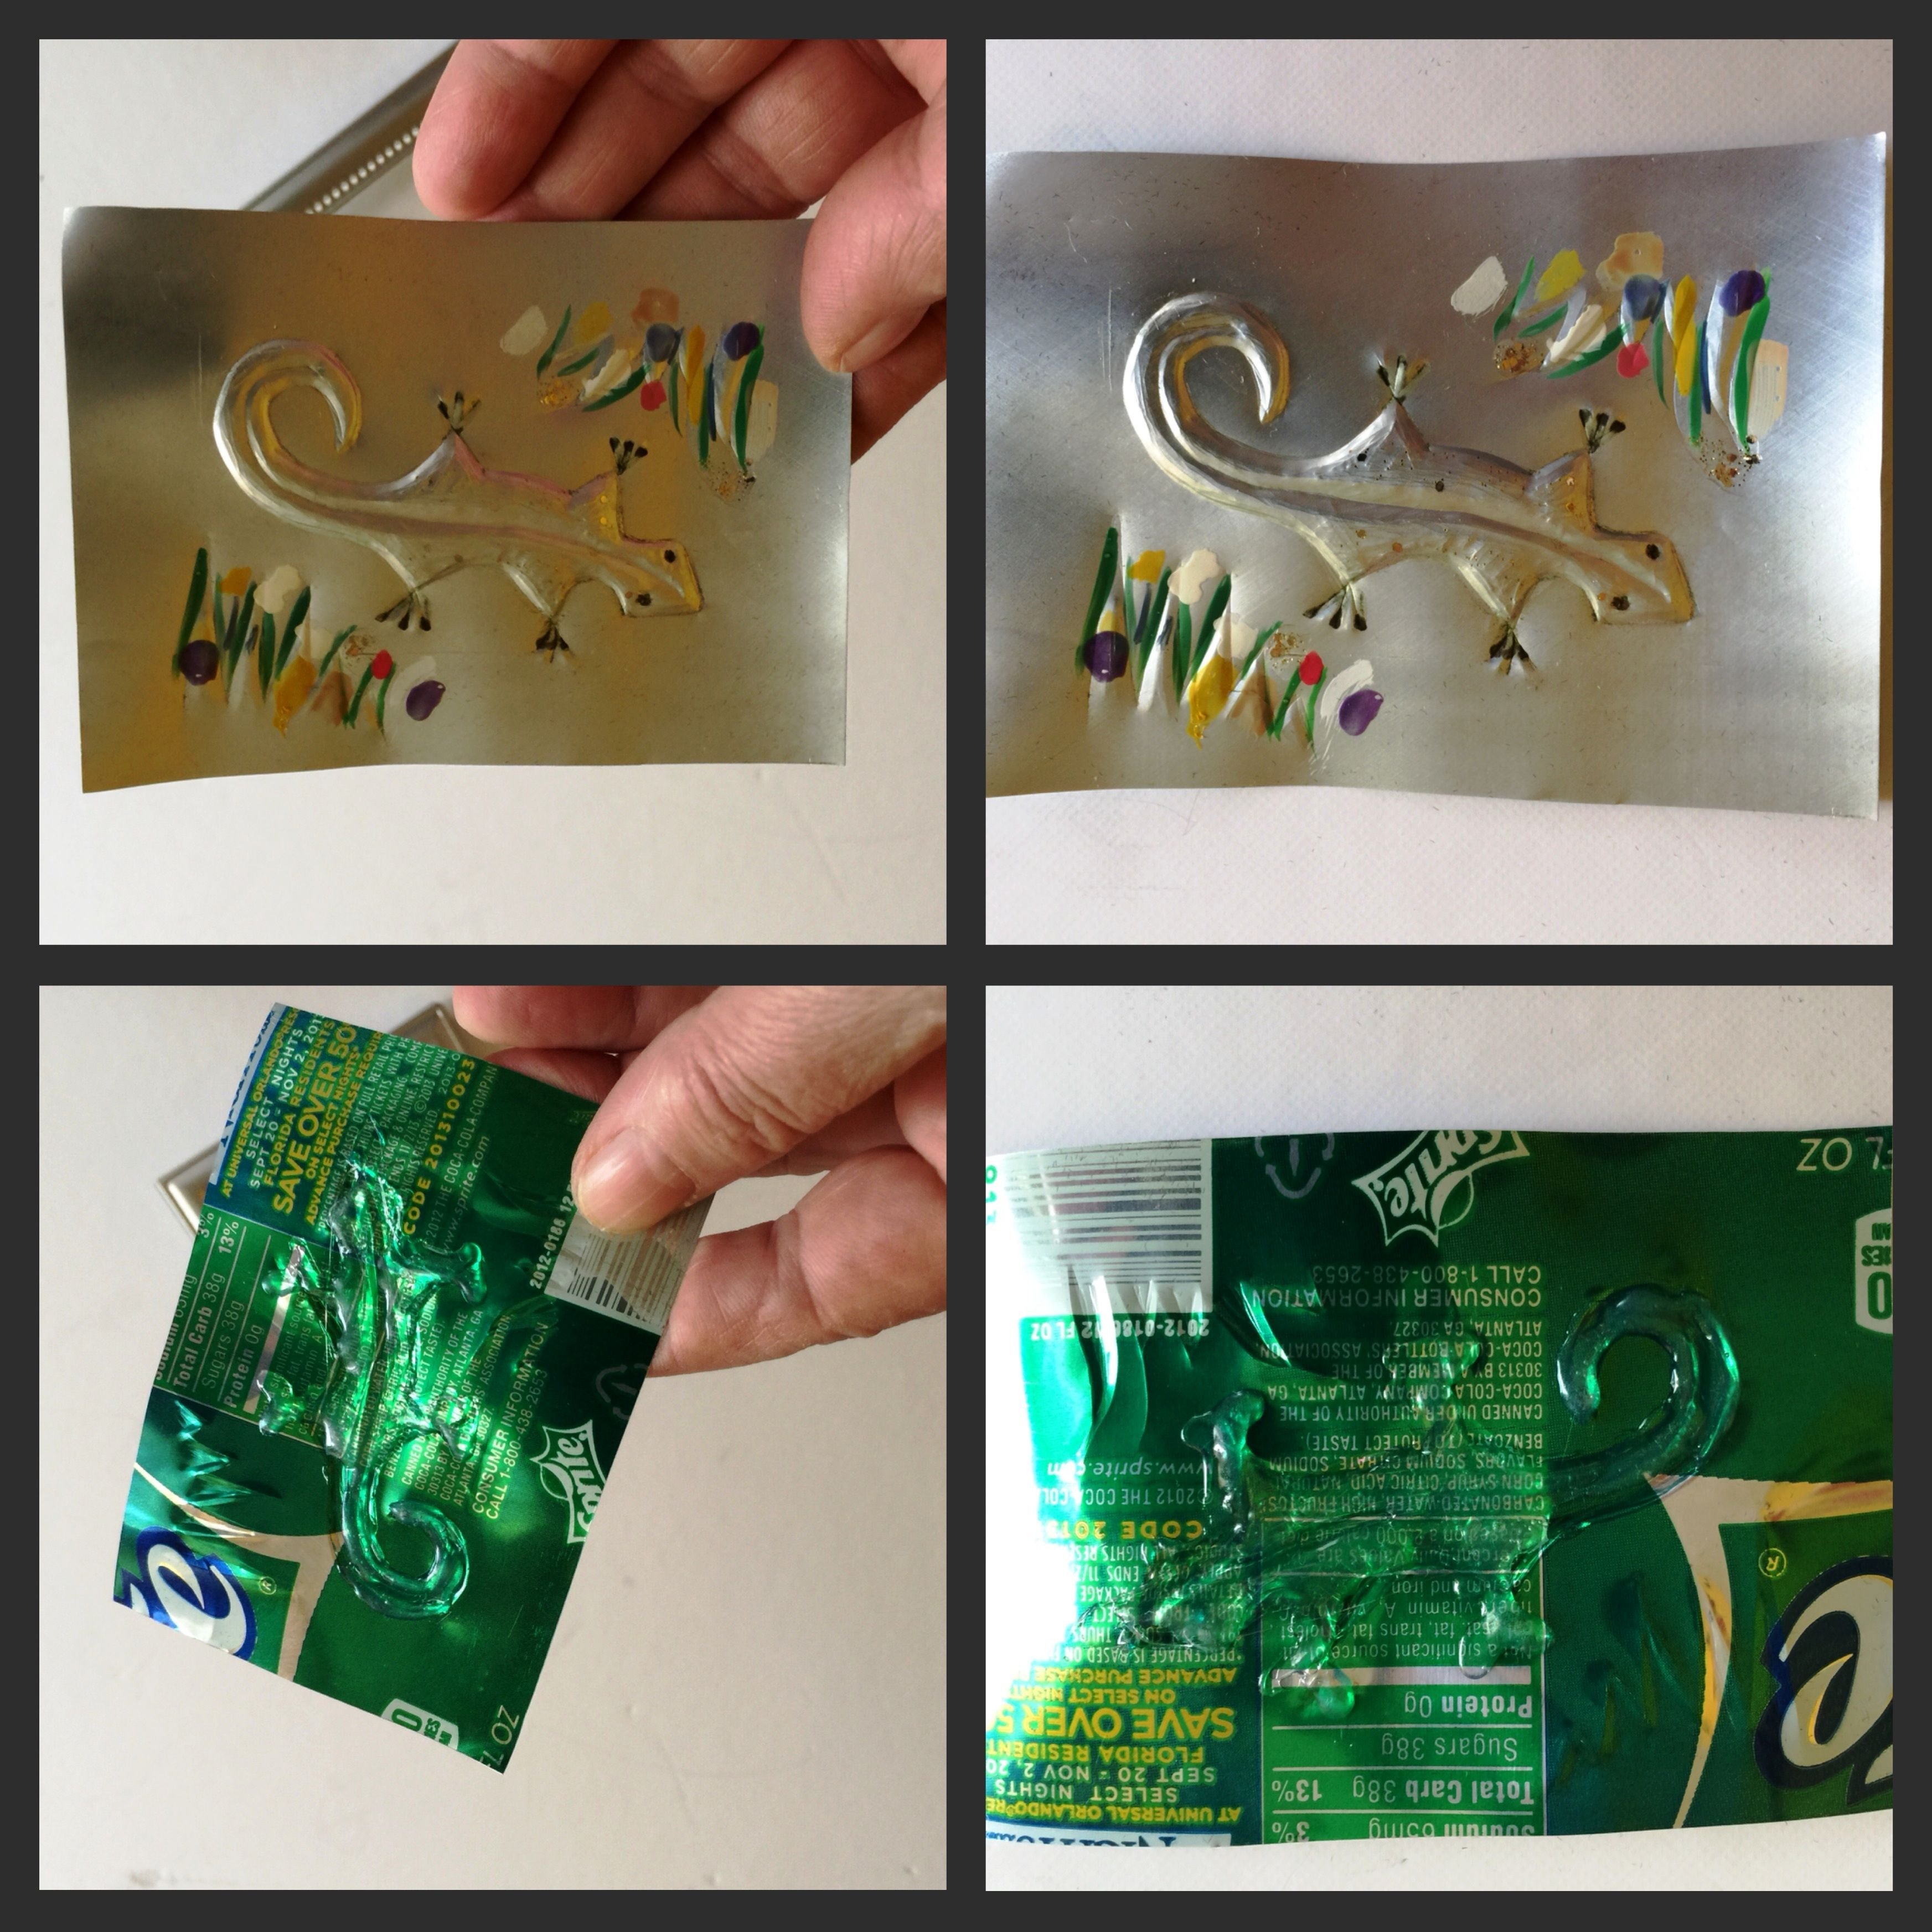
Draw the lizard on a piece of paper, cut it out and place the lizard on the colorful part of the soda foil. Draw the contour with marker. Then use an embossing tool or just a wooden stick or pencil (not very sharp), and press gently inside the contour, until you see the lizard taking shape on the other side. This is the basic embossing method.
Once the lizard is ready, pour some glue and let it set. I like to used a glue gun with hot glue because it cools fast.
Once the glue is set, you are sure that the lizard will always stay in place ;)
Now you can decorate your lizard with some little paintings, like flowers. I use nail polish, it works best for tin foil! I also like to emboss the flowers, just a little, to add some more dimension.
So here you have it. Cool project, try it!
 Follow me and my stories @starjewel