
Hello #steemians! I am here again and I am going to share my work with a written pattern.
For today's share I am going to make a crochet baby shoes that will fit for 3-6 months old baby.
It is so cute and I am sure that the person who will receive this crochet baby shoes will be definitely be happy.
Crochet is already my daily routine. I woke early in the morning, doing my responsibility being a mother and a wife, and ofcourse after doing all of those things I will get my hooks and yarn and crochet the whole day!
I am not comfortable if I missed crocheting in one day, my hands are shaking and that is really true.
So I think let's start and let's learn together...
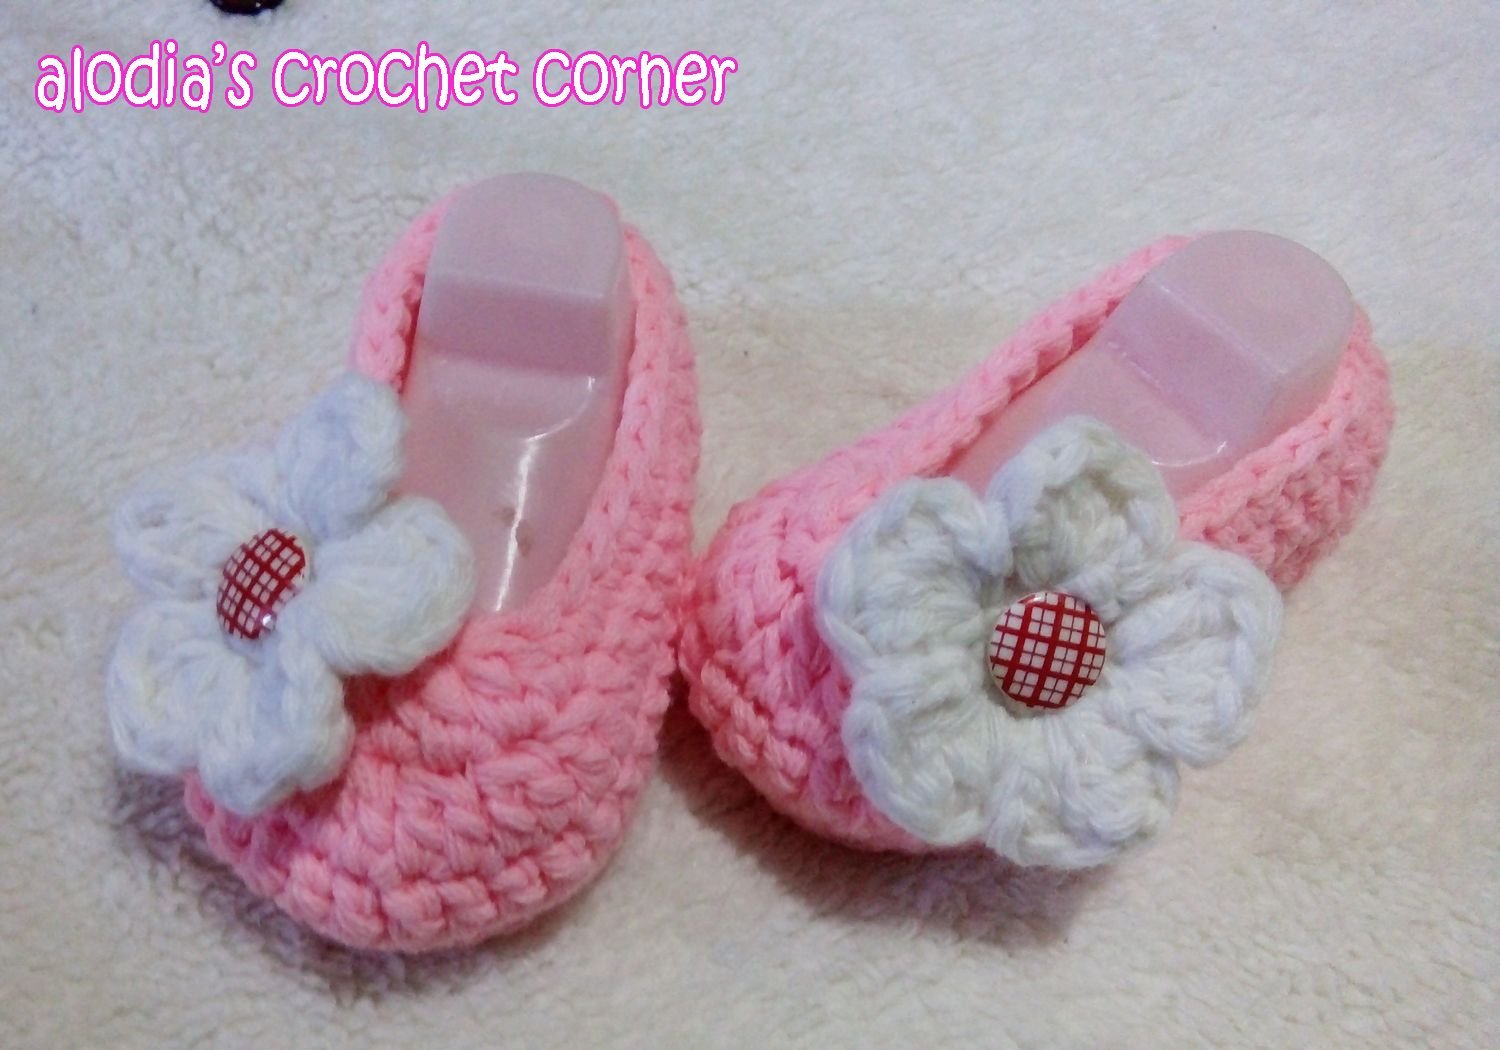
This baby shoes are so easy and so fun to make. It is quiet challenging for the beginner but I have attach video tutorials from youtube so beginners can follow.
This crochet baby shoes is my own pattern and I am going to share it to all of you for free. Because giving is also a sign of love. And because I love what I am doing I am also happy to serve and teach to anyone who is interested.
The materials I used are the following:
- indophil acrylic yarn
- 4.5mm crochet hook
- tapestry needle
- scissors and buttons
Abbreviations:
ch- chain
sc - single crochet
hdc - half double crochet
dc- double crochet
trc - triple crochet
sl st- slip stitch
So first thing to do is to create a sole for this baby shoes.
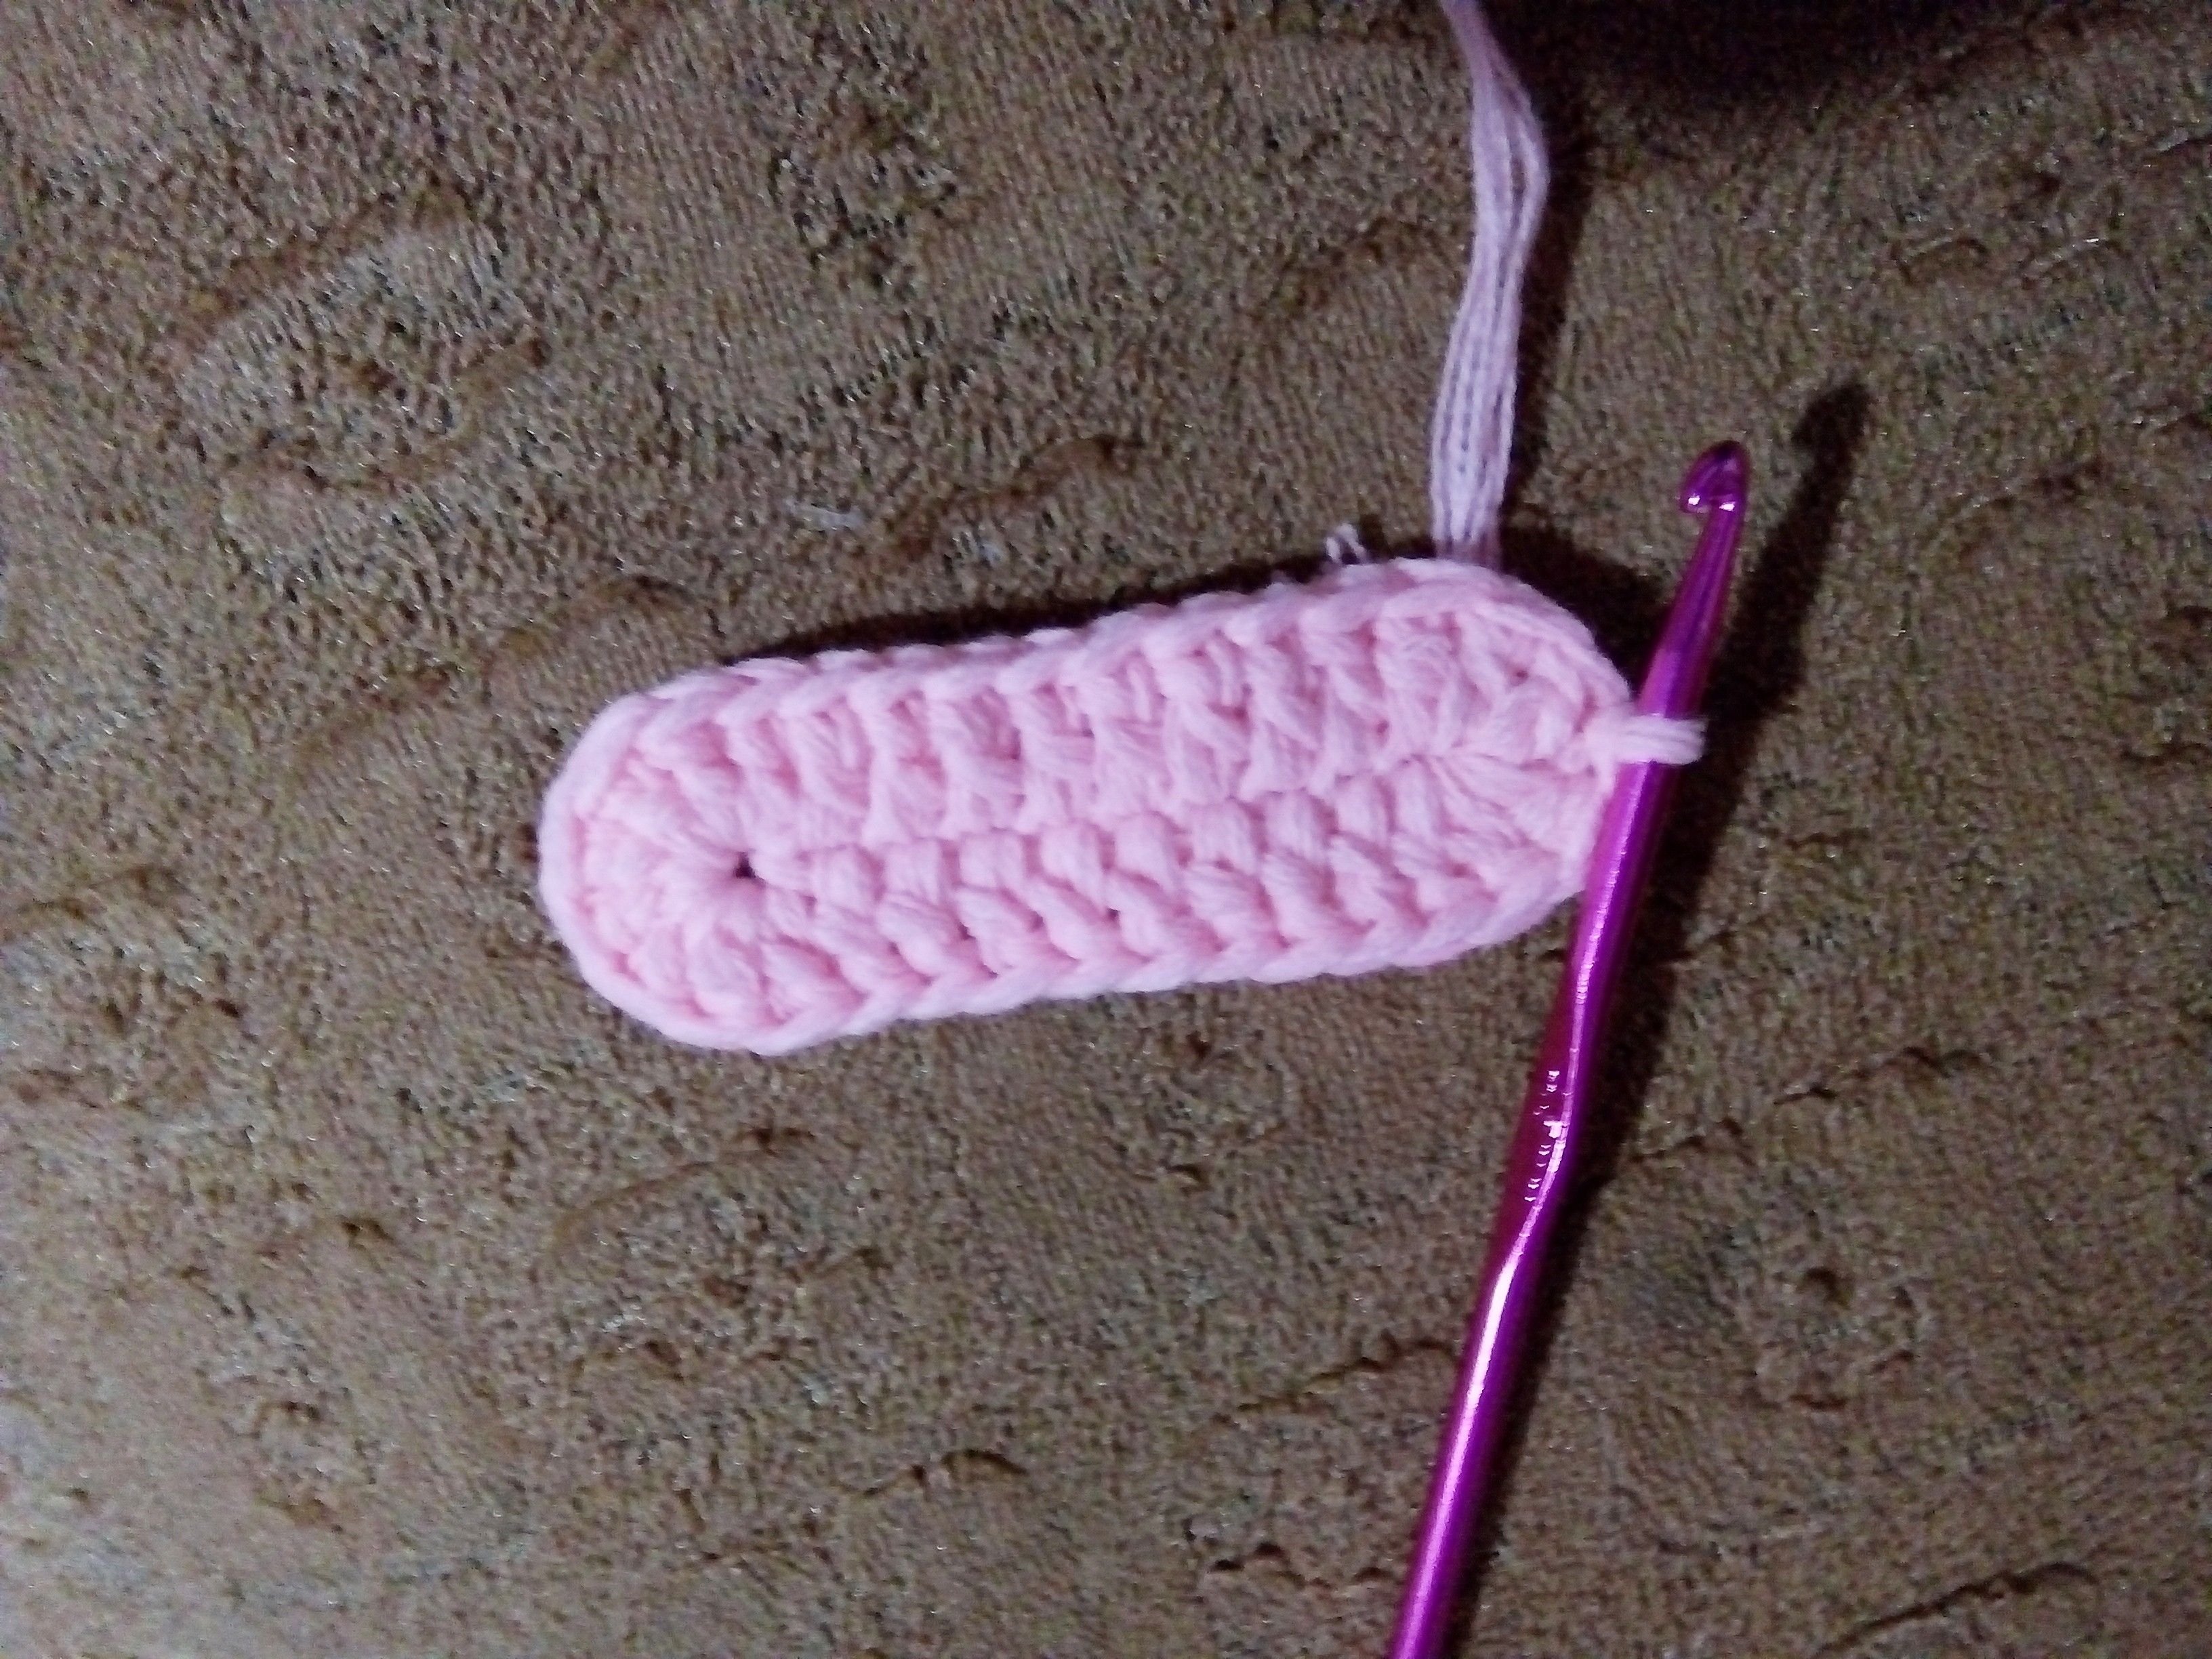
Row 1:
make a slip knot, chain 12
Dc 3rd chain from the hook (3x)
Dc in the next 8 stittches
in the last stitch dc 8 times
This is a continuos round so don't turn
dc in the next 8 stitches
in the last stitch dc 3 times
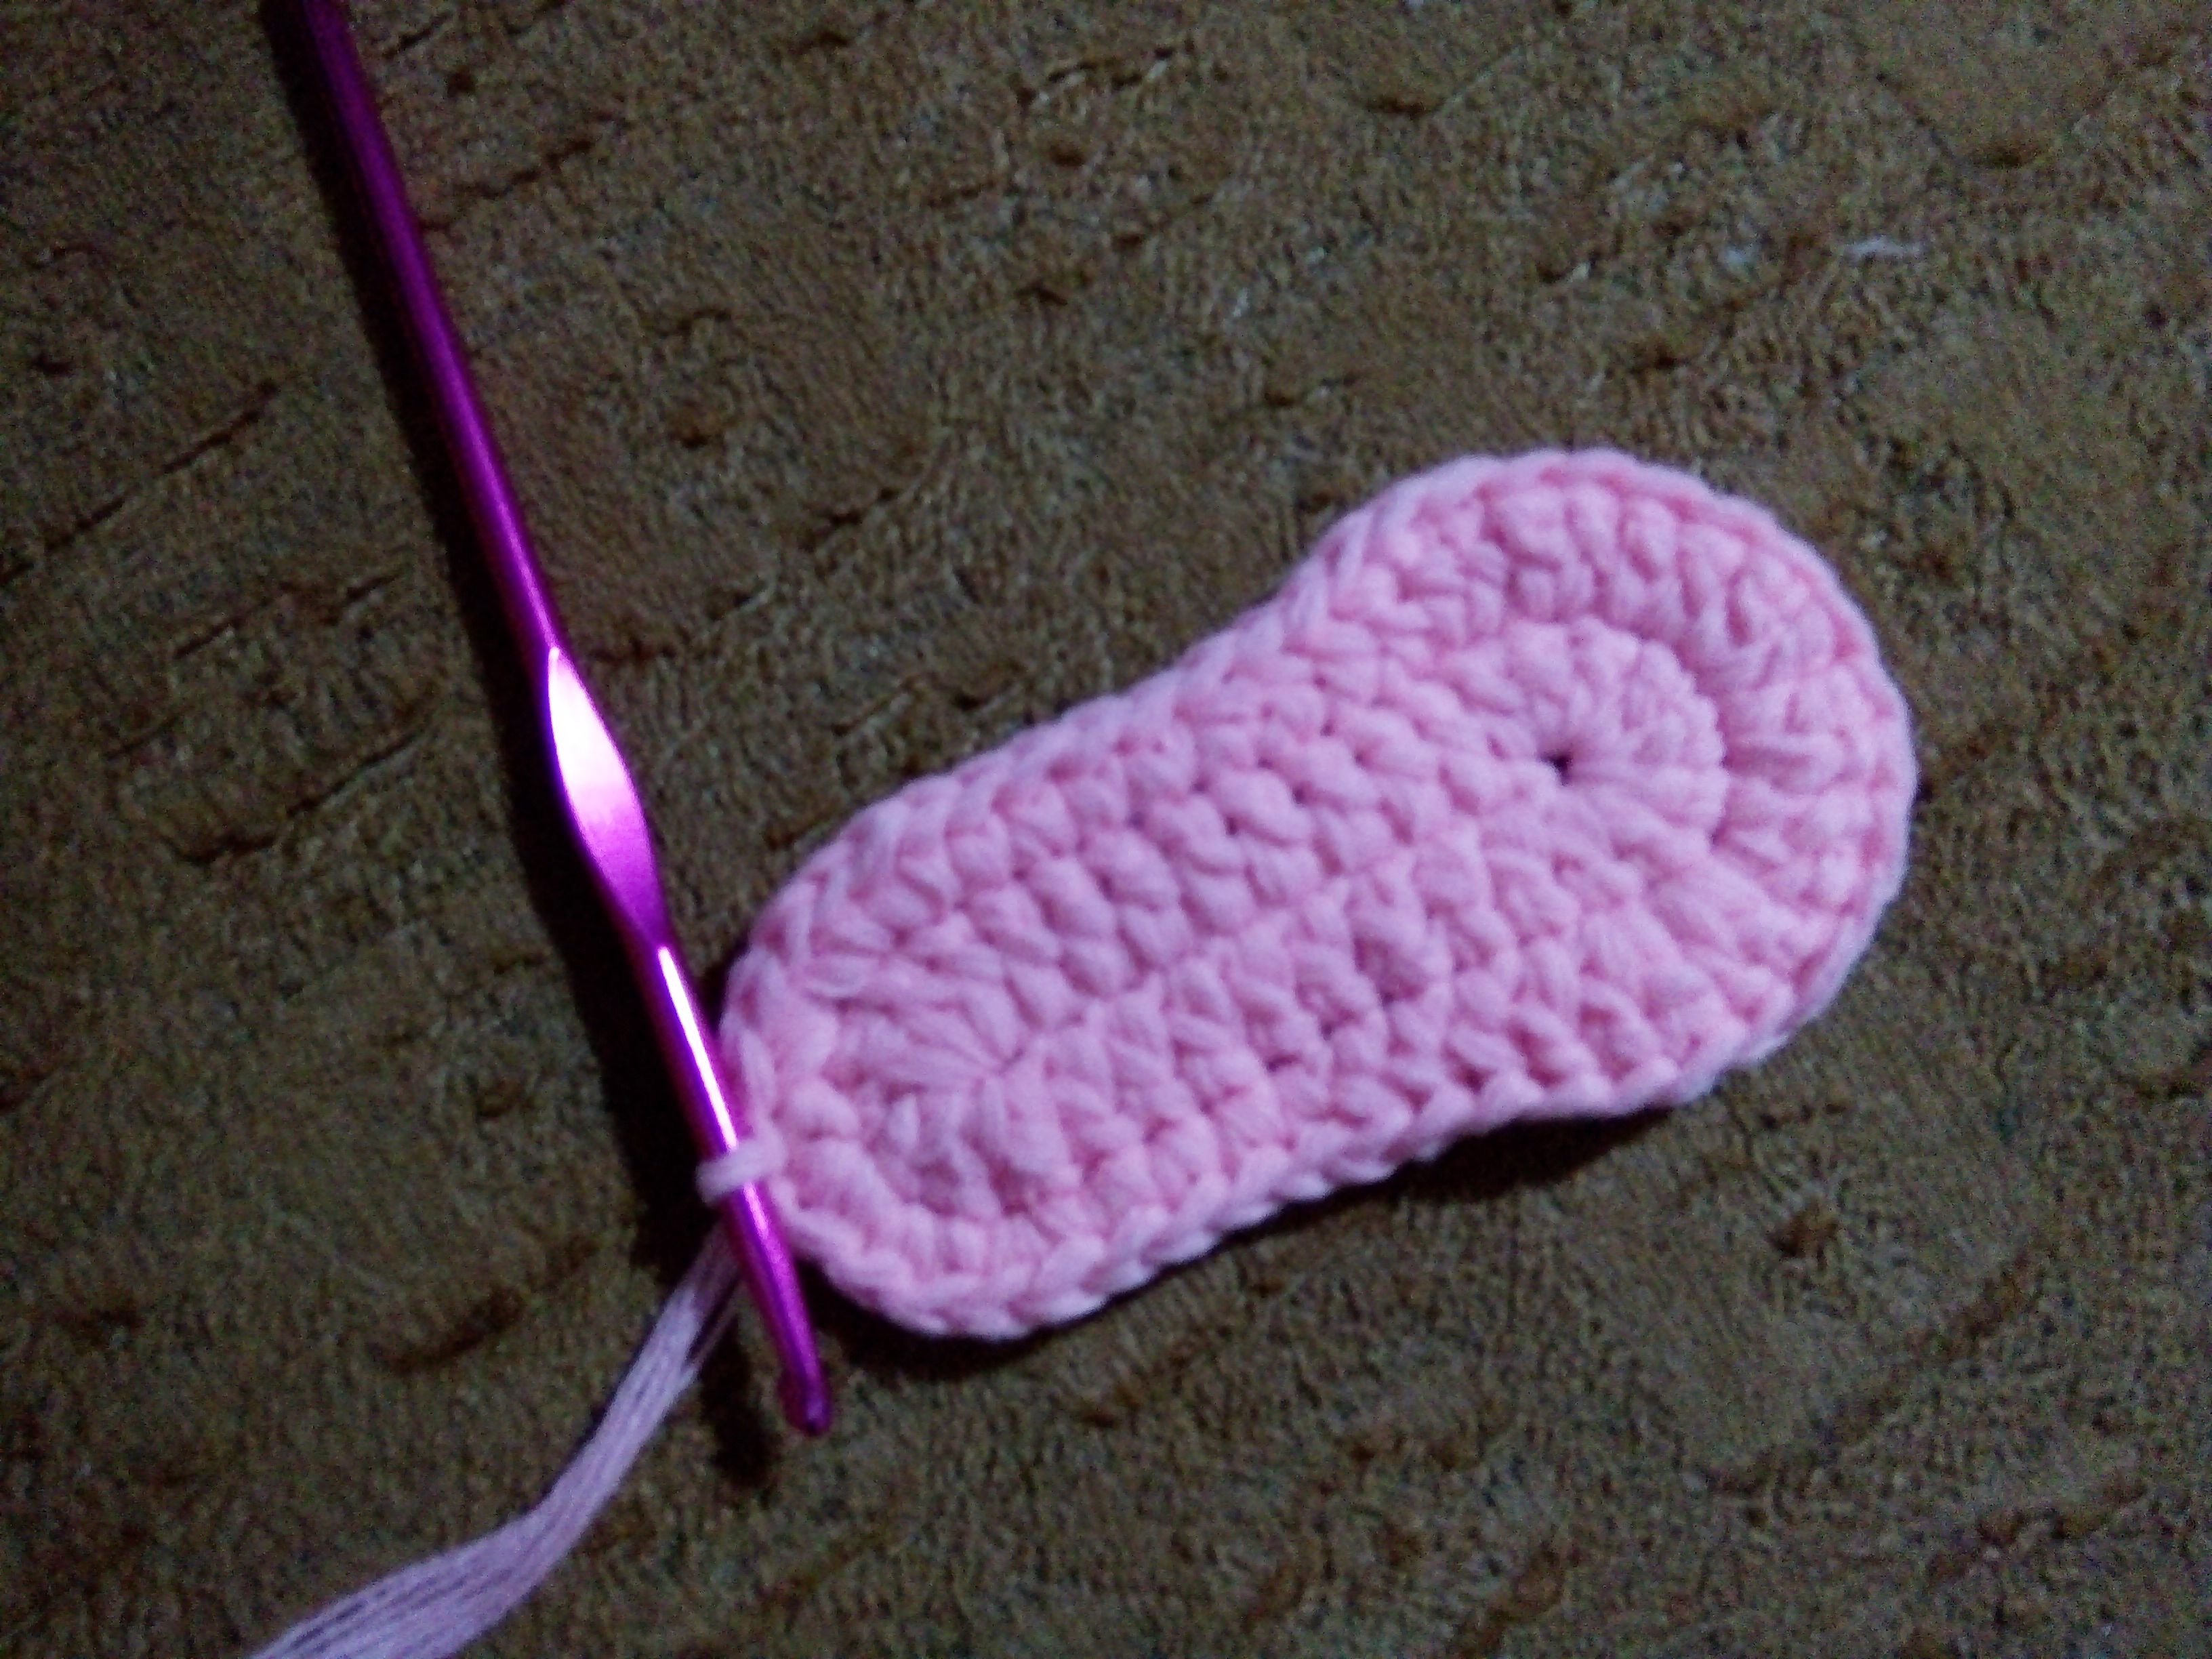
Row 2: chain 1, sc 2 times in the first stitch
2 sc on the next 2 stitches
sc 1 in the next 4 stitches
hdc 1 in the next 3 stitches
dc 1 in the next stitch
dc 2 times in the next 8 stitches
dc 1 in the next stitch
hdc 1 in the next 3 stitches
sc 1 in the next 4 stitches
sc 2 times in the next 3 stitches
slip stitch on top of the chain 1 of the previous round.
 Row 3: chain 1, single crochet all the way round Back loops only.
Slip stitch on top of the chain 1 you made.
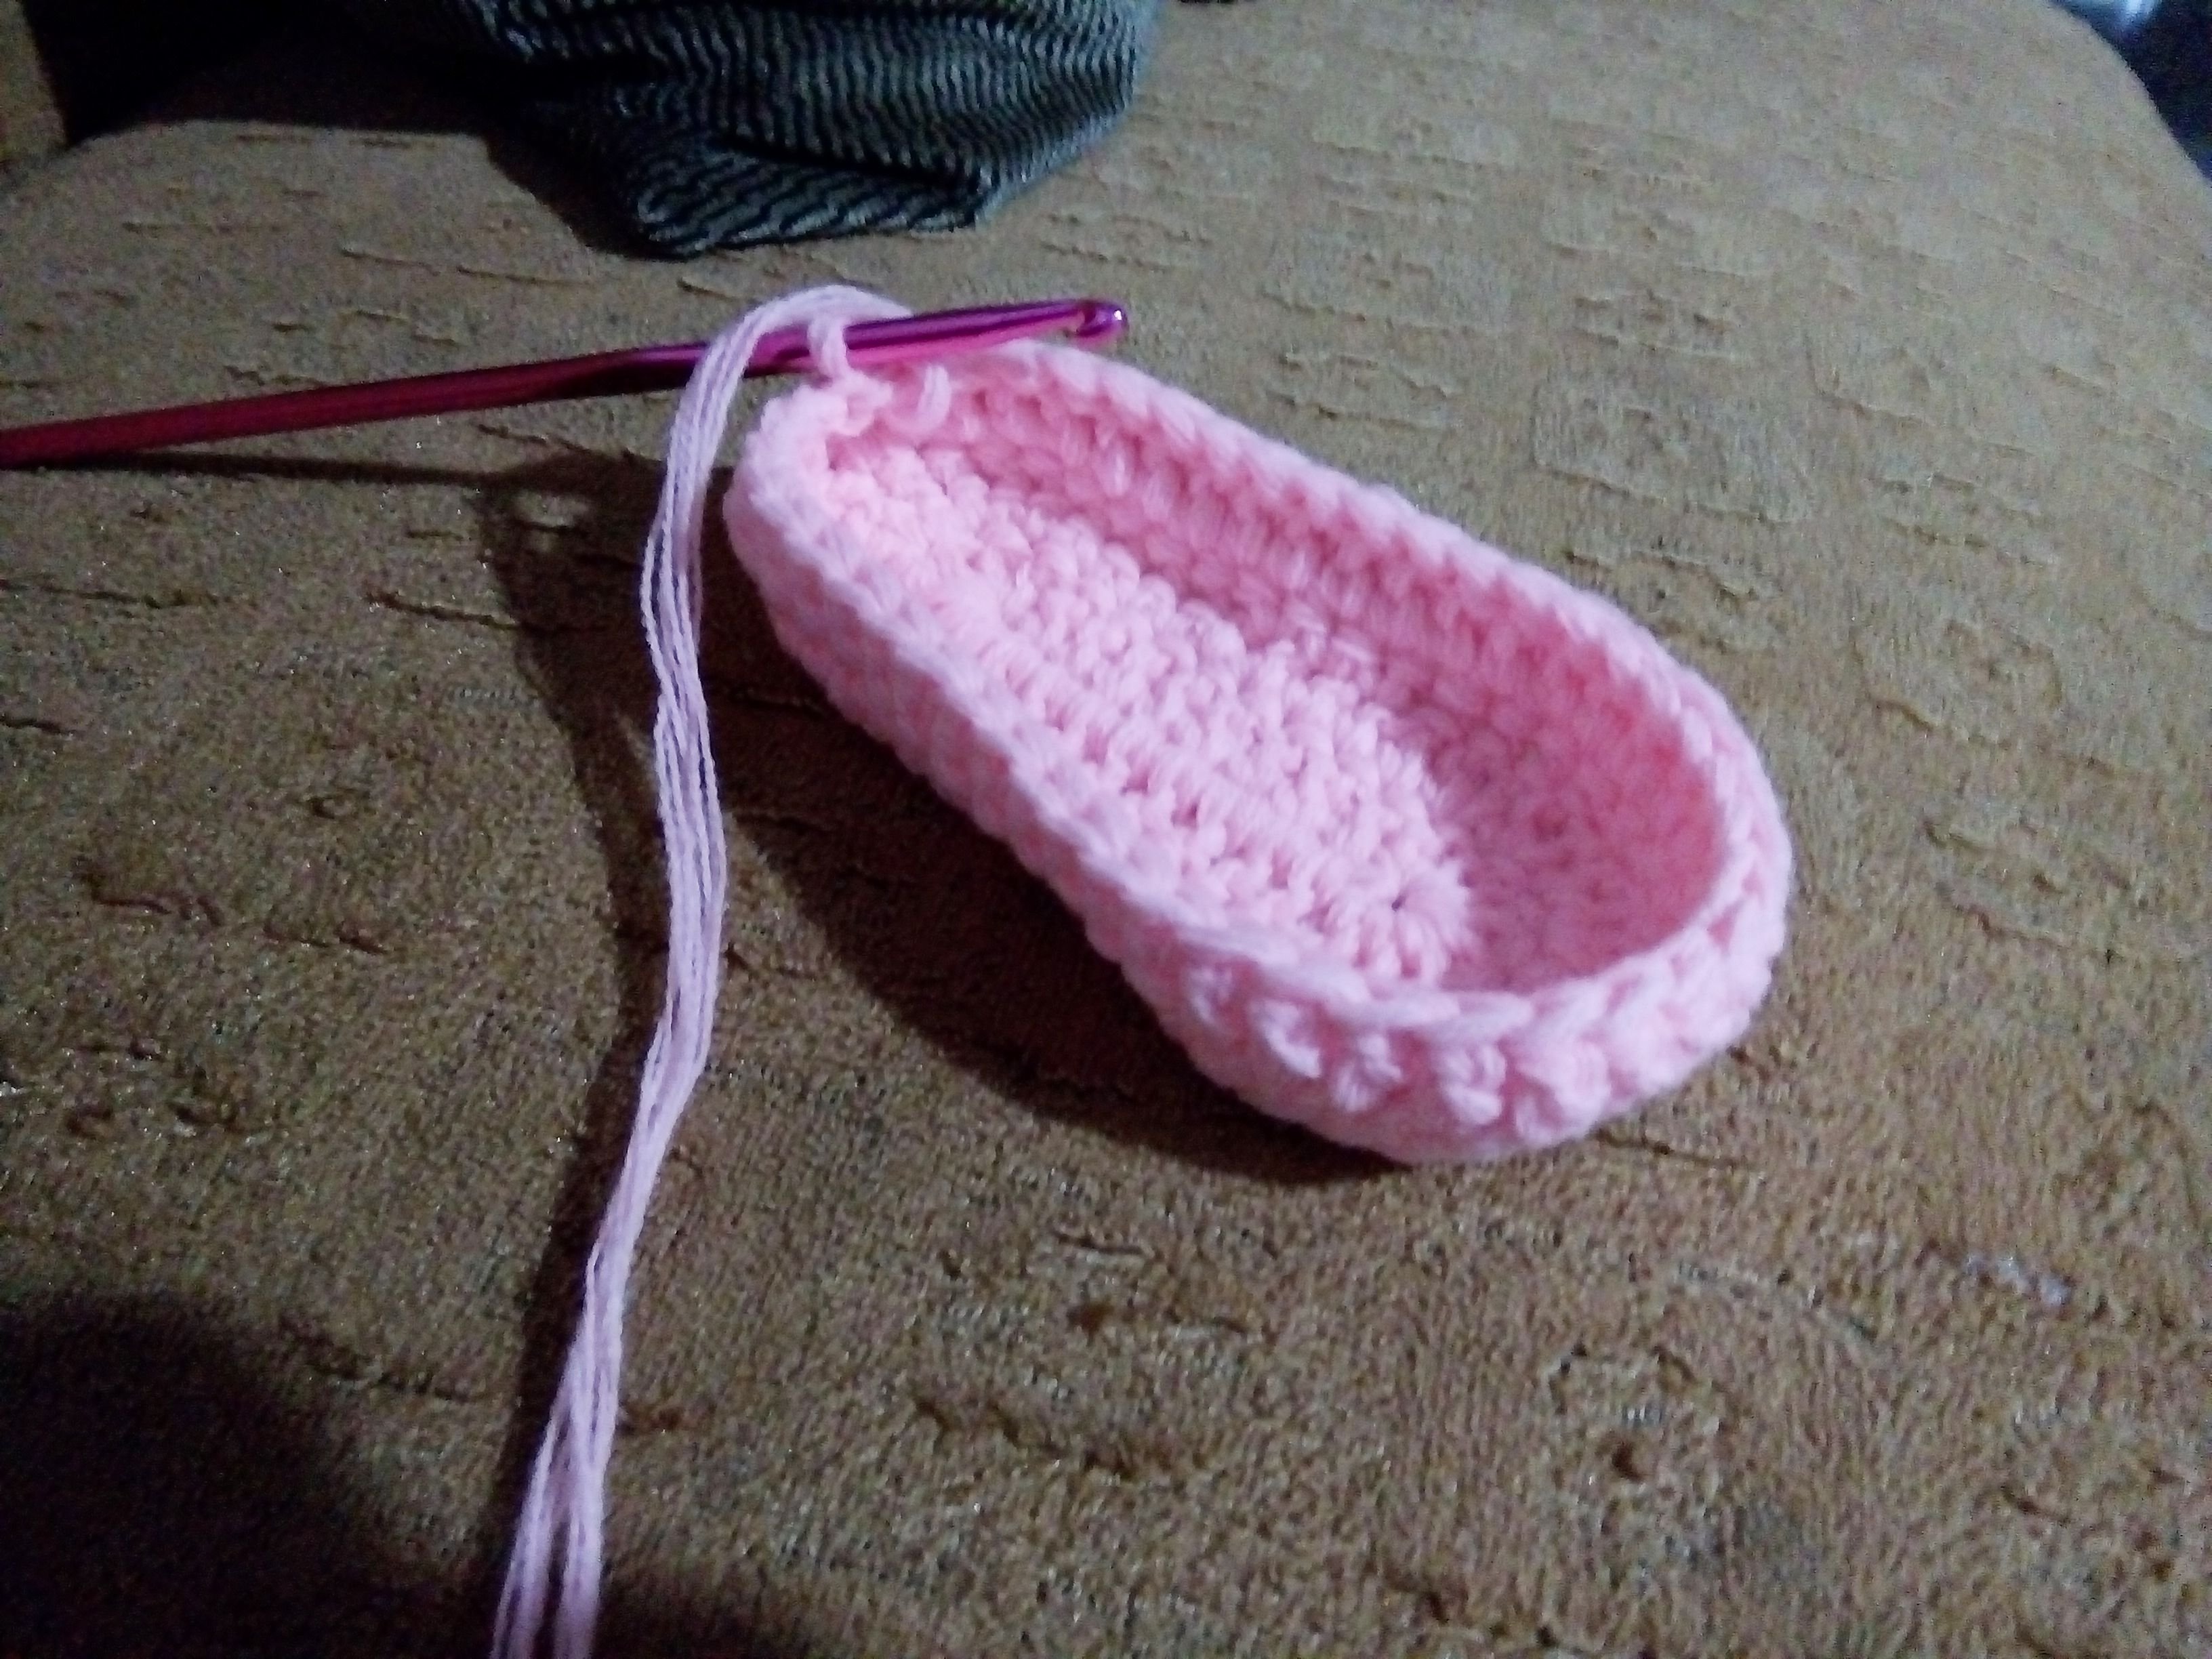
(I AM SORRY I HAVEN'T CAPTURED A PHOTO FOR THIS ROW BUT I PLEASE CLICK THE LINK I WILL GIVE ON HOW TO MAKE THE DC2TOG OR DOUBLE CROCHET 2 TOGETHER)
https://www.youtube.com/watch?v=W7c_GJND3w4
Row 5: chain 2, dc same stitch
dc in the next 13 stitches
dc2tog in the next 16 stitches (8dc2tog)
dc in the next 14 stitches
slip stitch on top of the chain 2
Row 6: chain 1, sc on the next stitch
sc on the next 12 stitches
dc2tog on the next 8dc2tog made a while ago (4dc2tog)
sc on the next 13 stitches
slip stitch on top of the chain 1 made.
Fasten off and weave ends.
Make 2 to make it a pair of course. Just go back with the pattern.

For the crochet flowers on both sides of the crochet shoes:
Row 1: make a magic ring and chain 1
10 sc on the magic ring
slip stitch on top of the chain 1
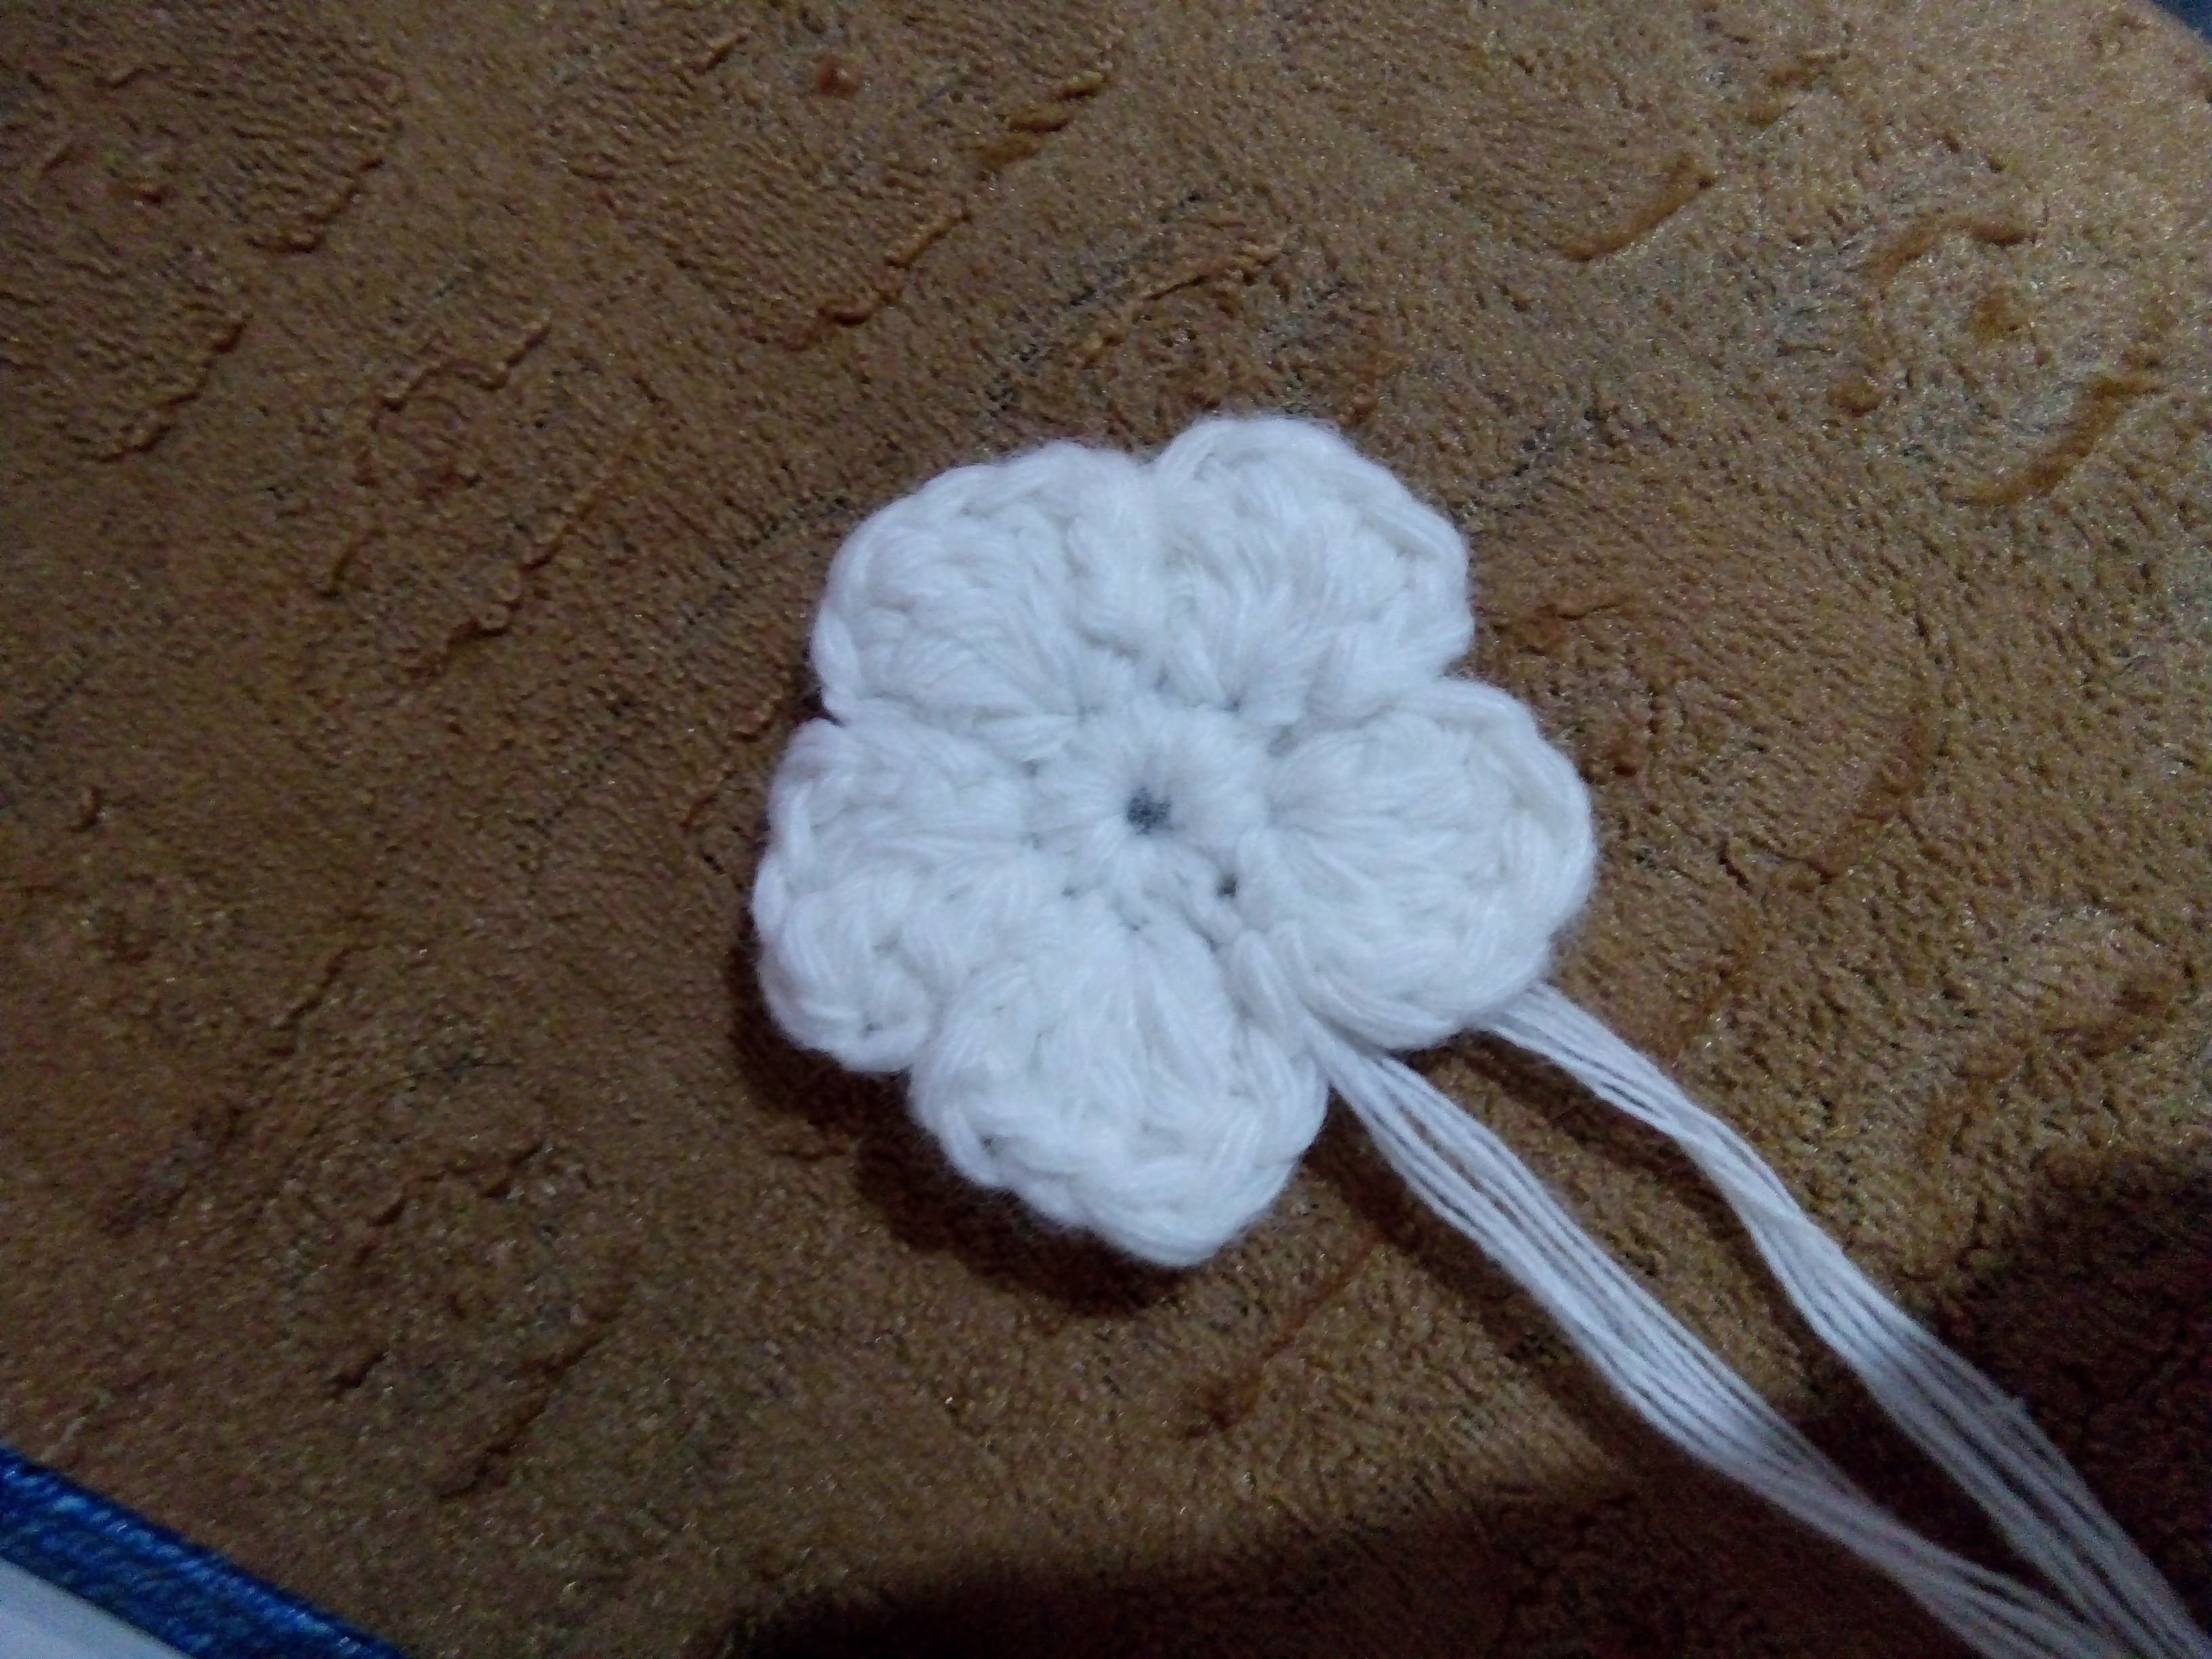
Row 3- 5: sc on the next stitch
chain 2, 2 dc, 1 trc, 2 dc on the same stitch
slip stitch on next stitch
Fasten off and weave ends.
Make 2 for both sides and you can put some buttons for additional designs.
Link for another idea of crochet flowers :
https://www.youtube.com/watch?v=TkKRiQOTYNY
Note: Those link I have paste on this tutorials are not mine and just copied to youtube for reference only!
So you are already done with your crochet baby shoes. I hope this simple crochet tutorial I made could help especially on beginners who are willing to learn just atleast simple things.
I would like to share this photo.. My client ask me to make her baby a set of crochet items, dress, headband and shoes.
The shoes she is wearing is like the shoes I made in this tutorial.

This is one of the most overwhelming part of being a crocheter, because your client is giving you good feedback and ofcourse sharing the photo wearing your handmade items...
So that's it for today #steemians! Let's bring happiness to each and everyone of us.
Always remember that "Whatever things you do, It will surely bring happiness".
.png)
.gif)
