
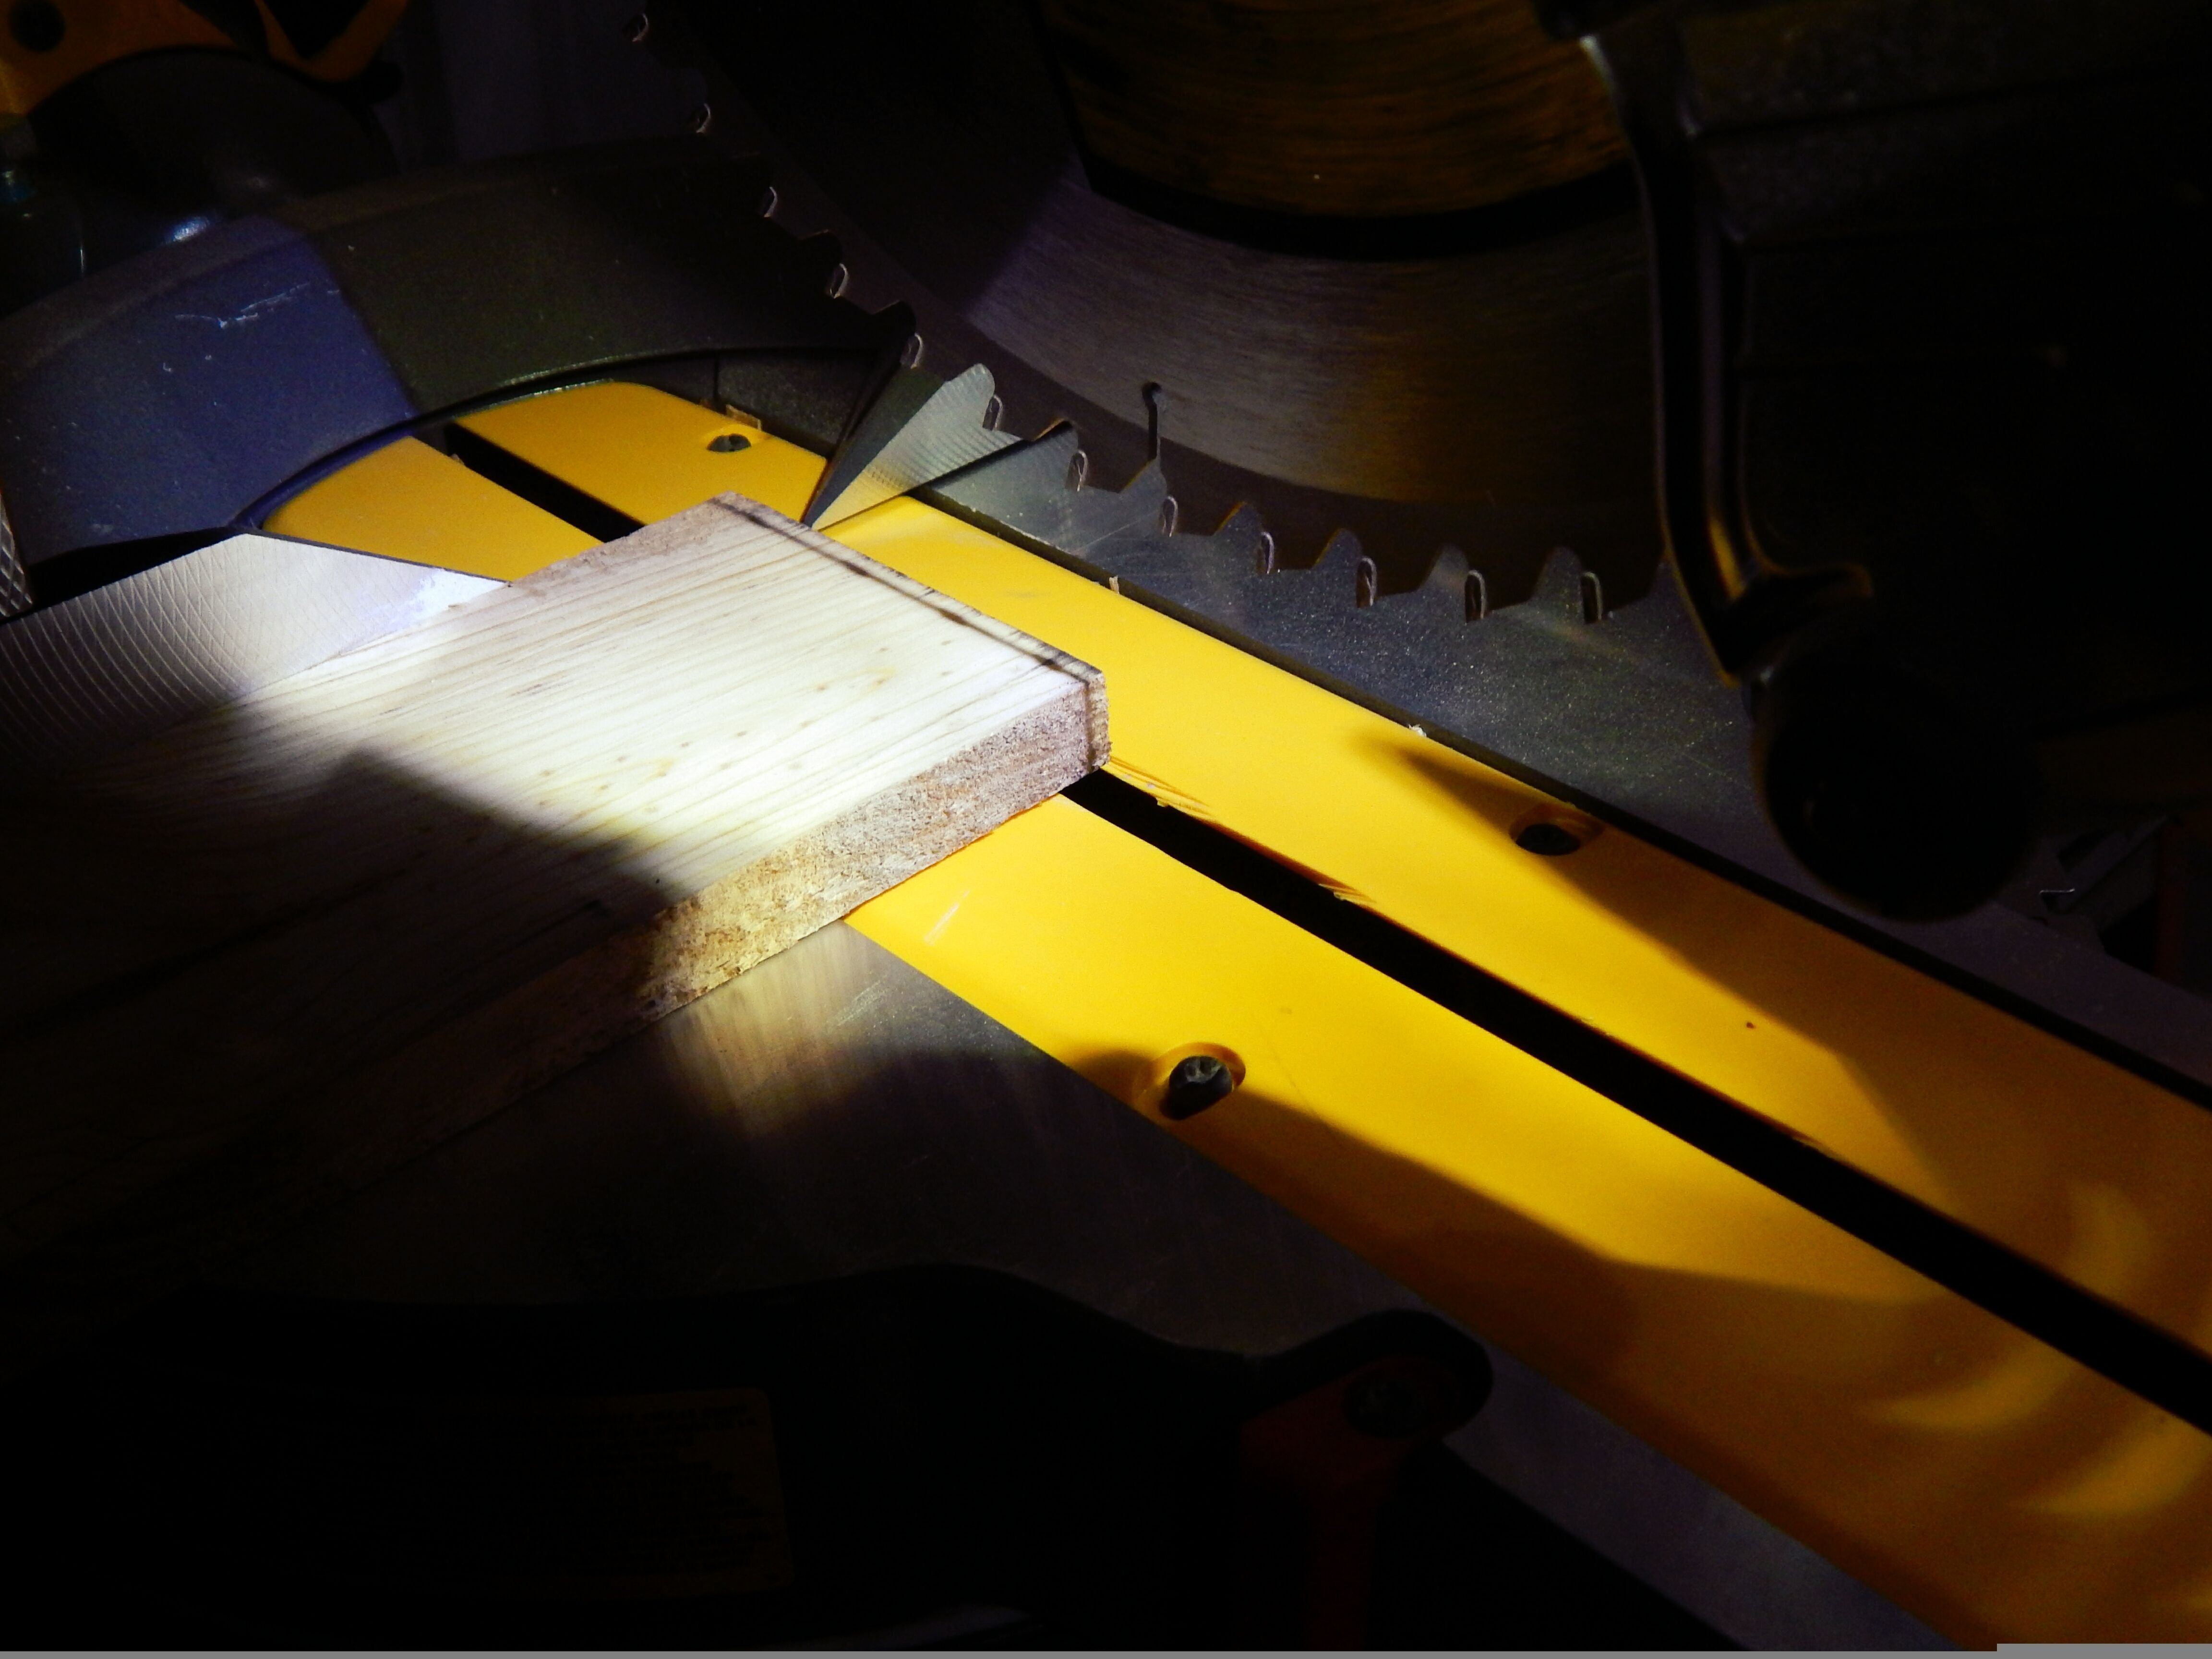
Step One
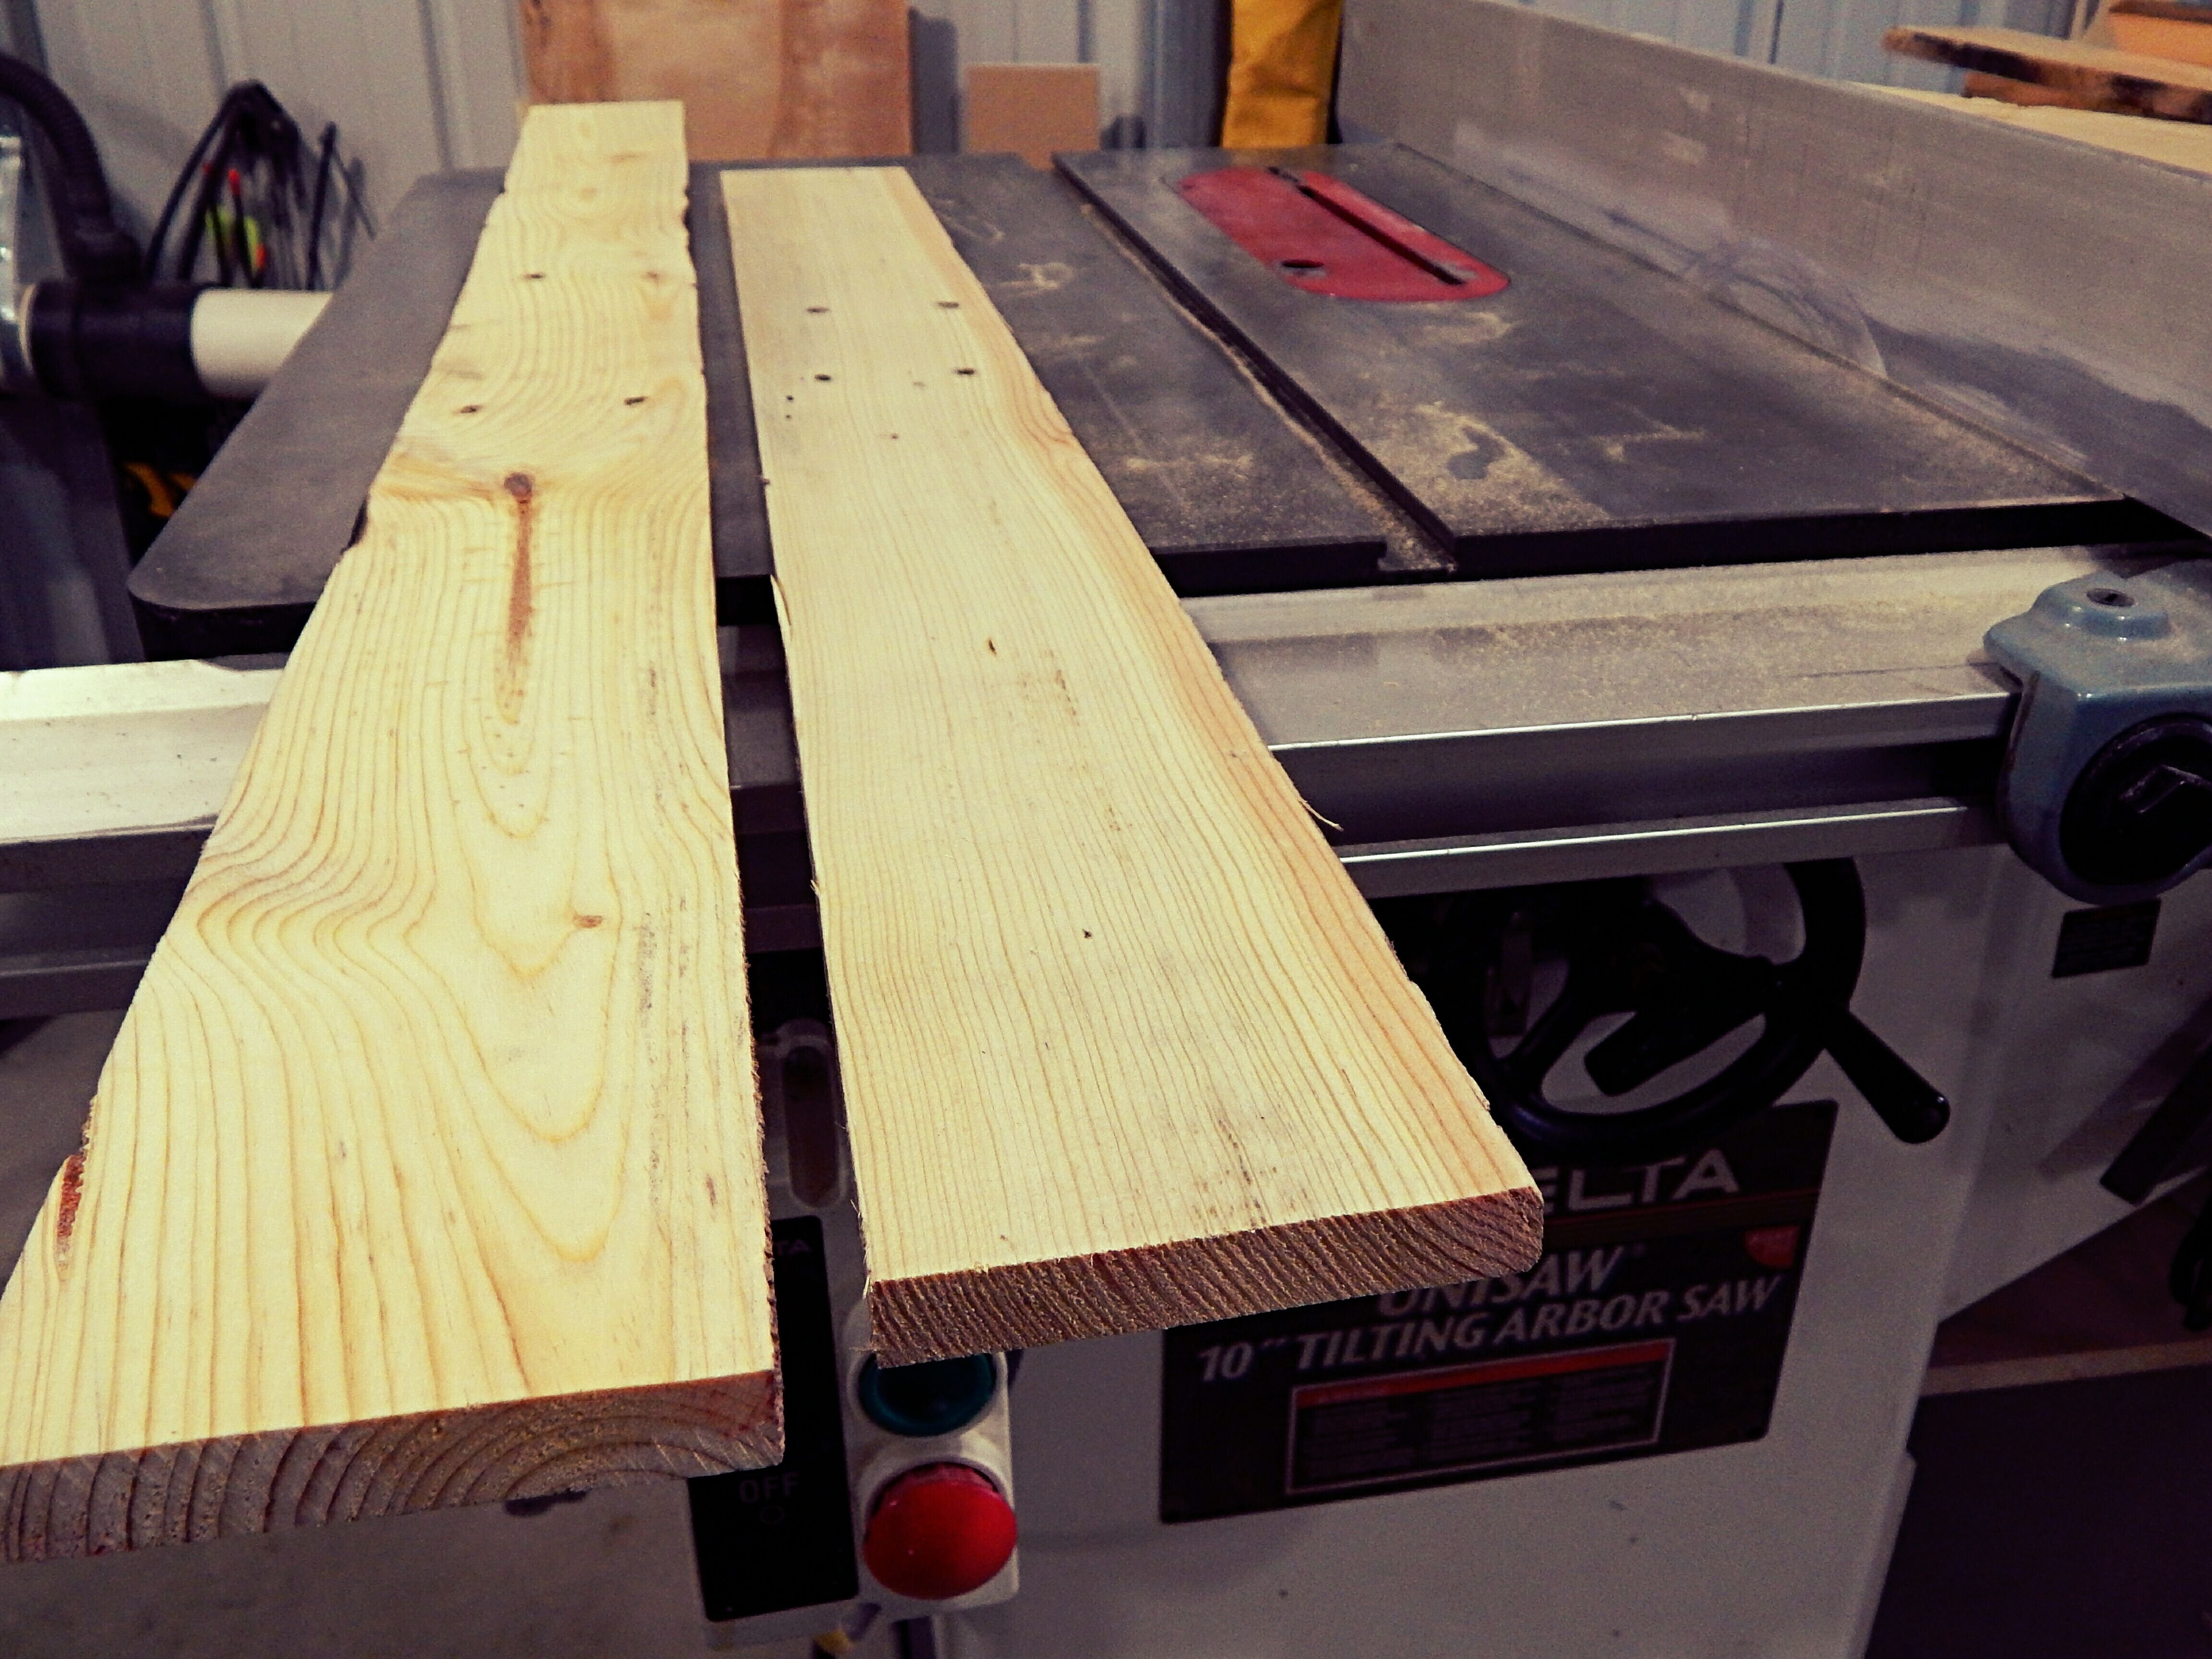
We need to ensure we have a straight edge, we will do that by cutting off the rough edge of the board, leaving a smooth surface to work with.
Then we need to measure the board to 19" and cut off excess using a miter saw or table saw.
Step Two
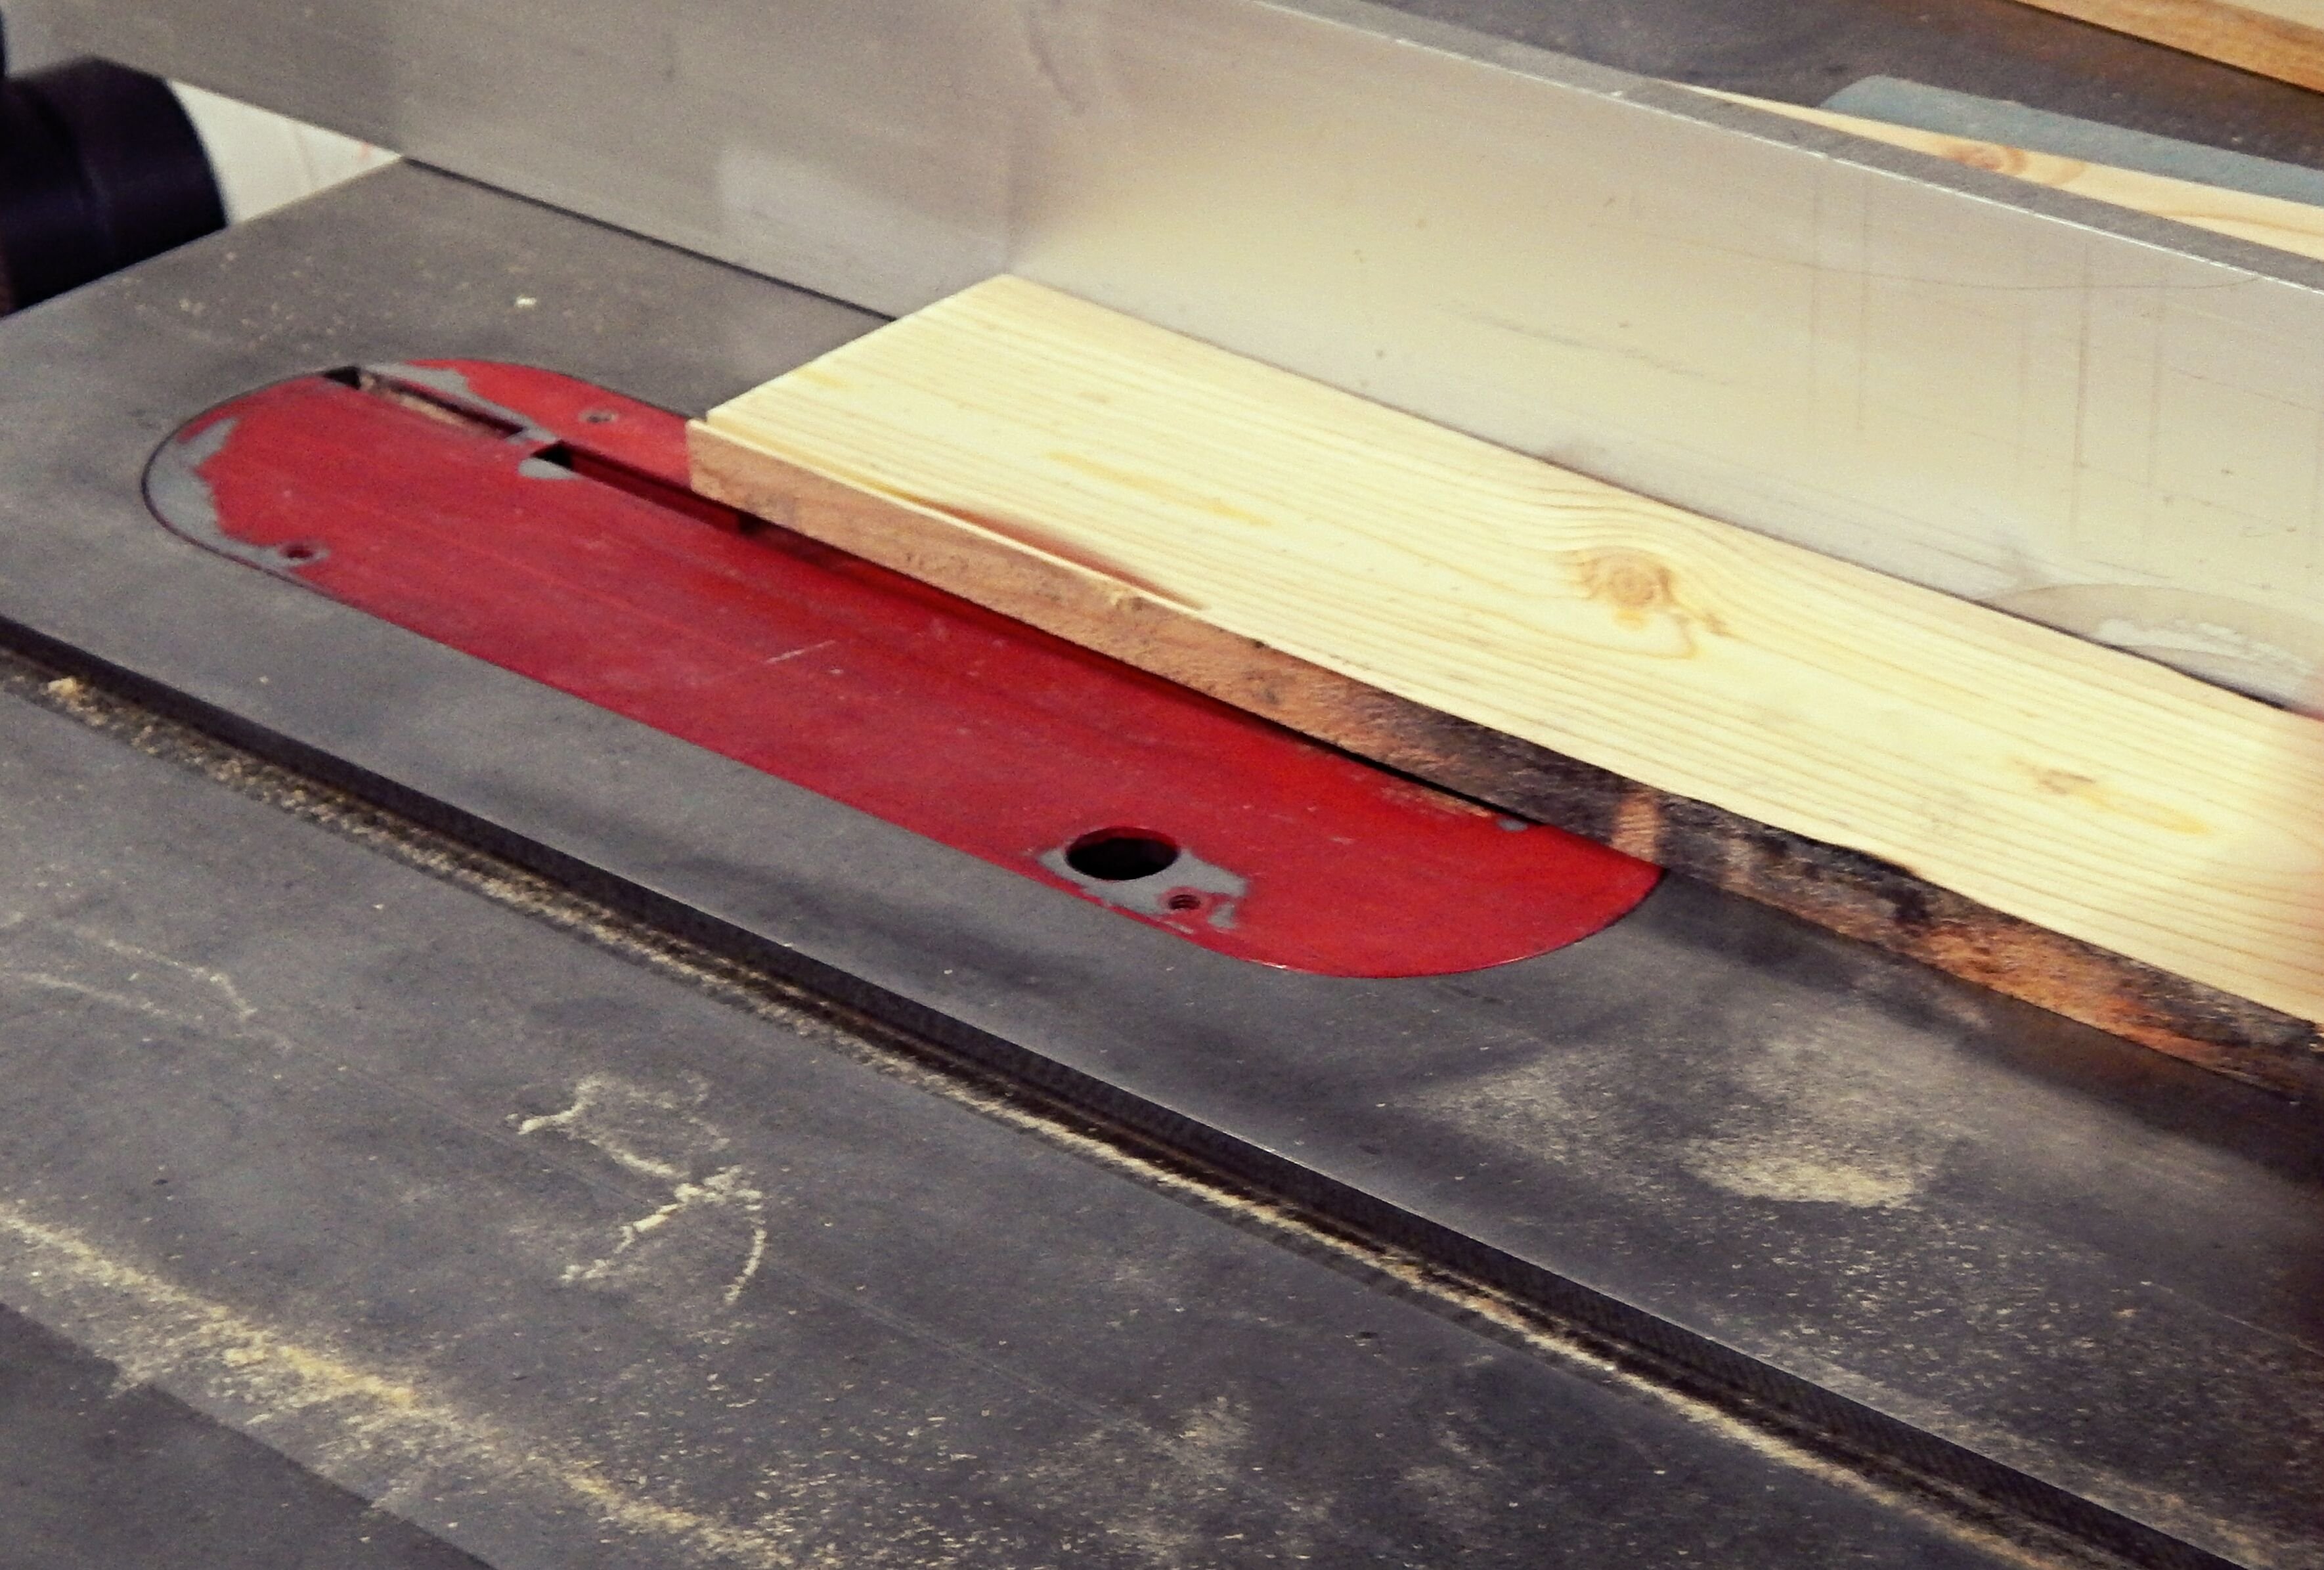
Next, We are going to rip our board to 1" width...
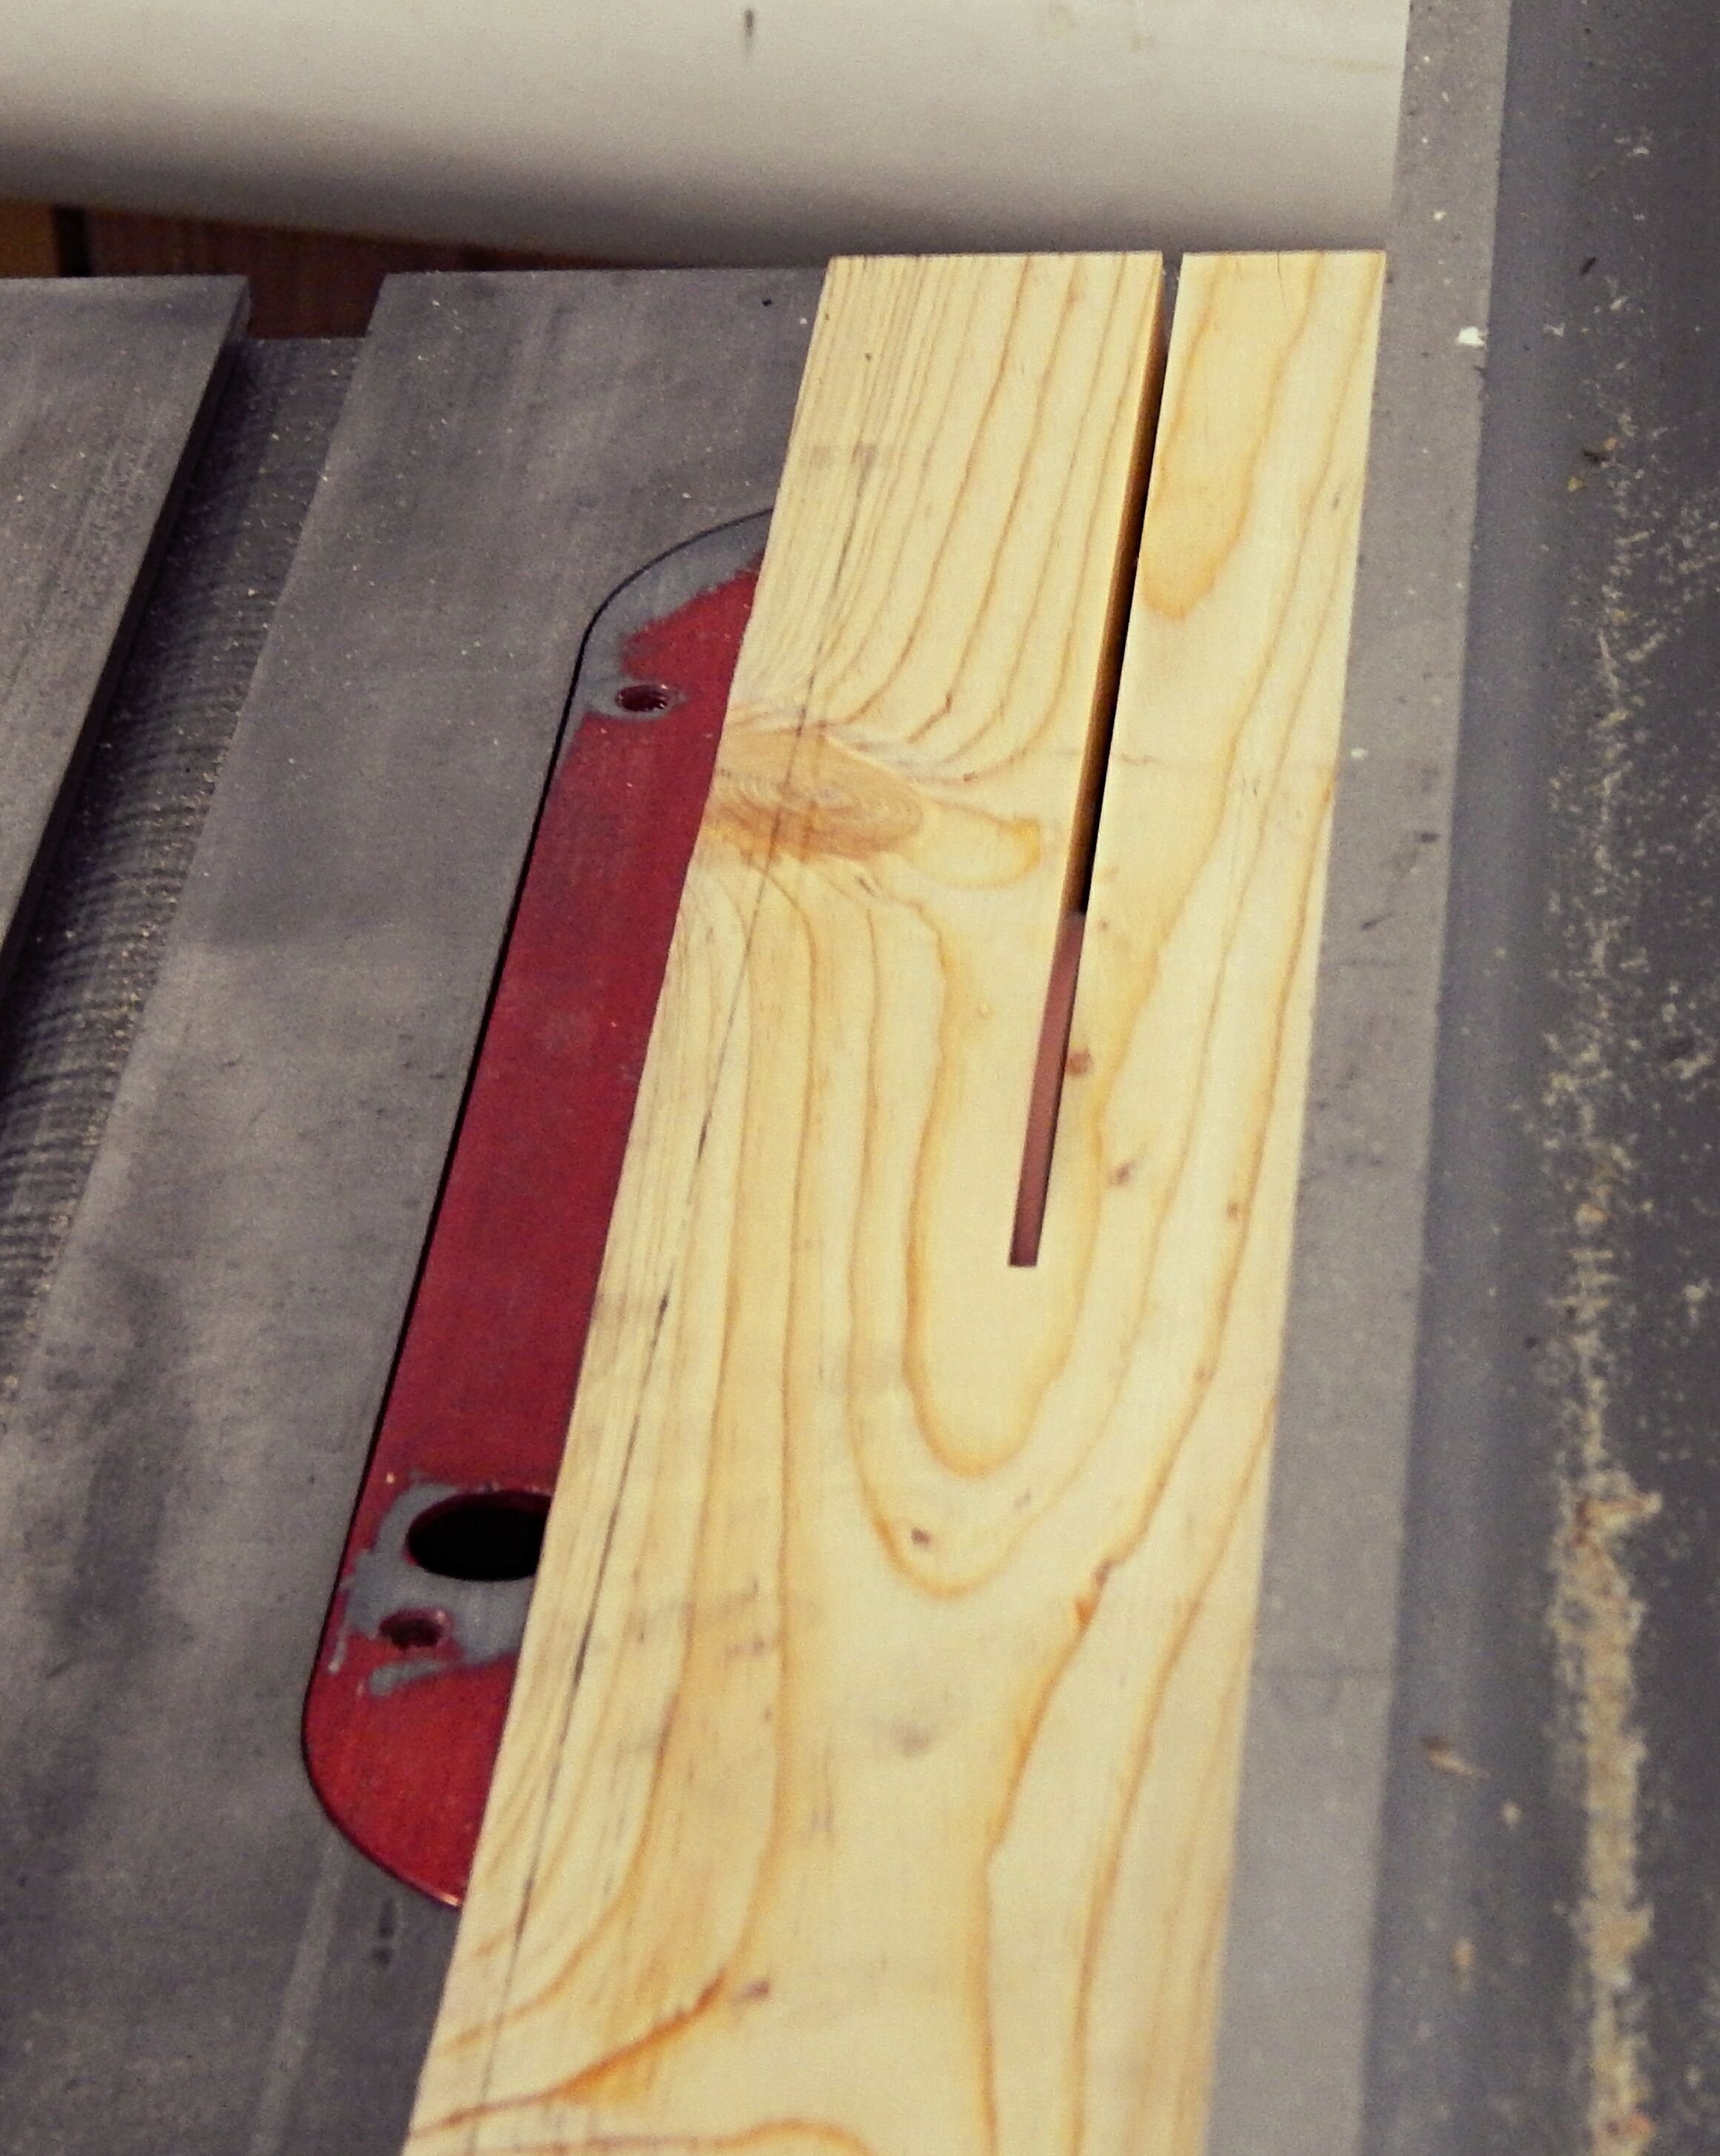
followed by additional cuts of
3/4" width
1 3/8" width
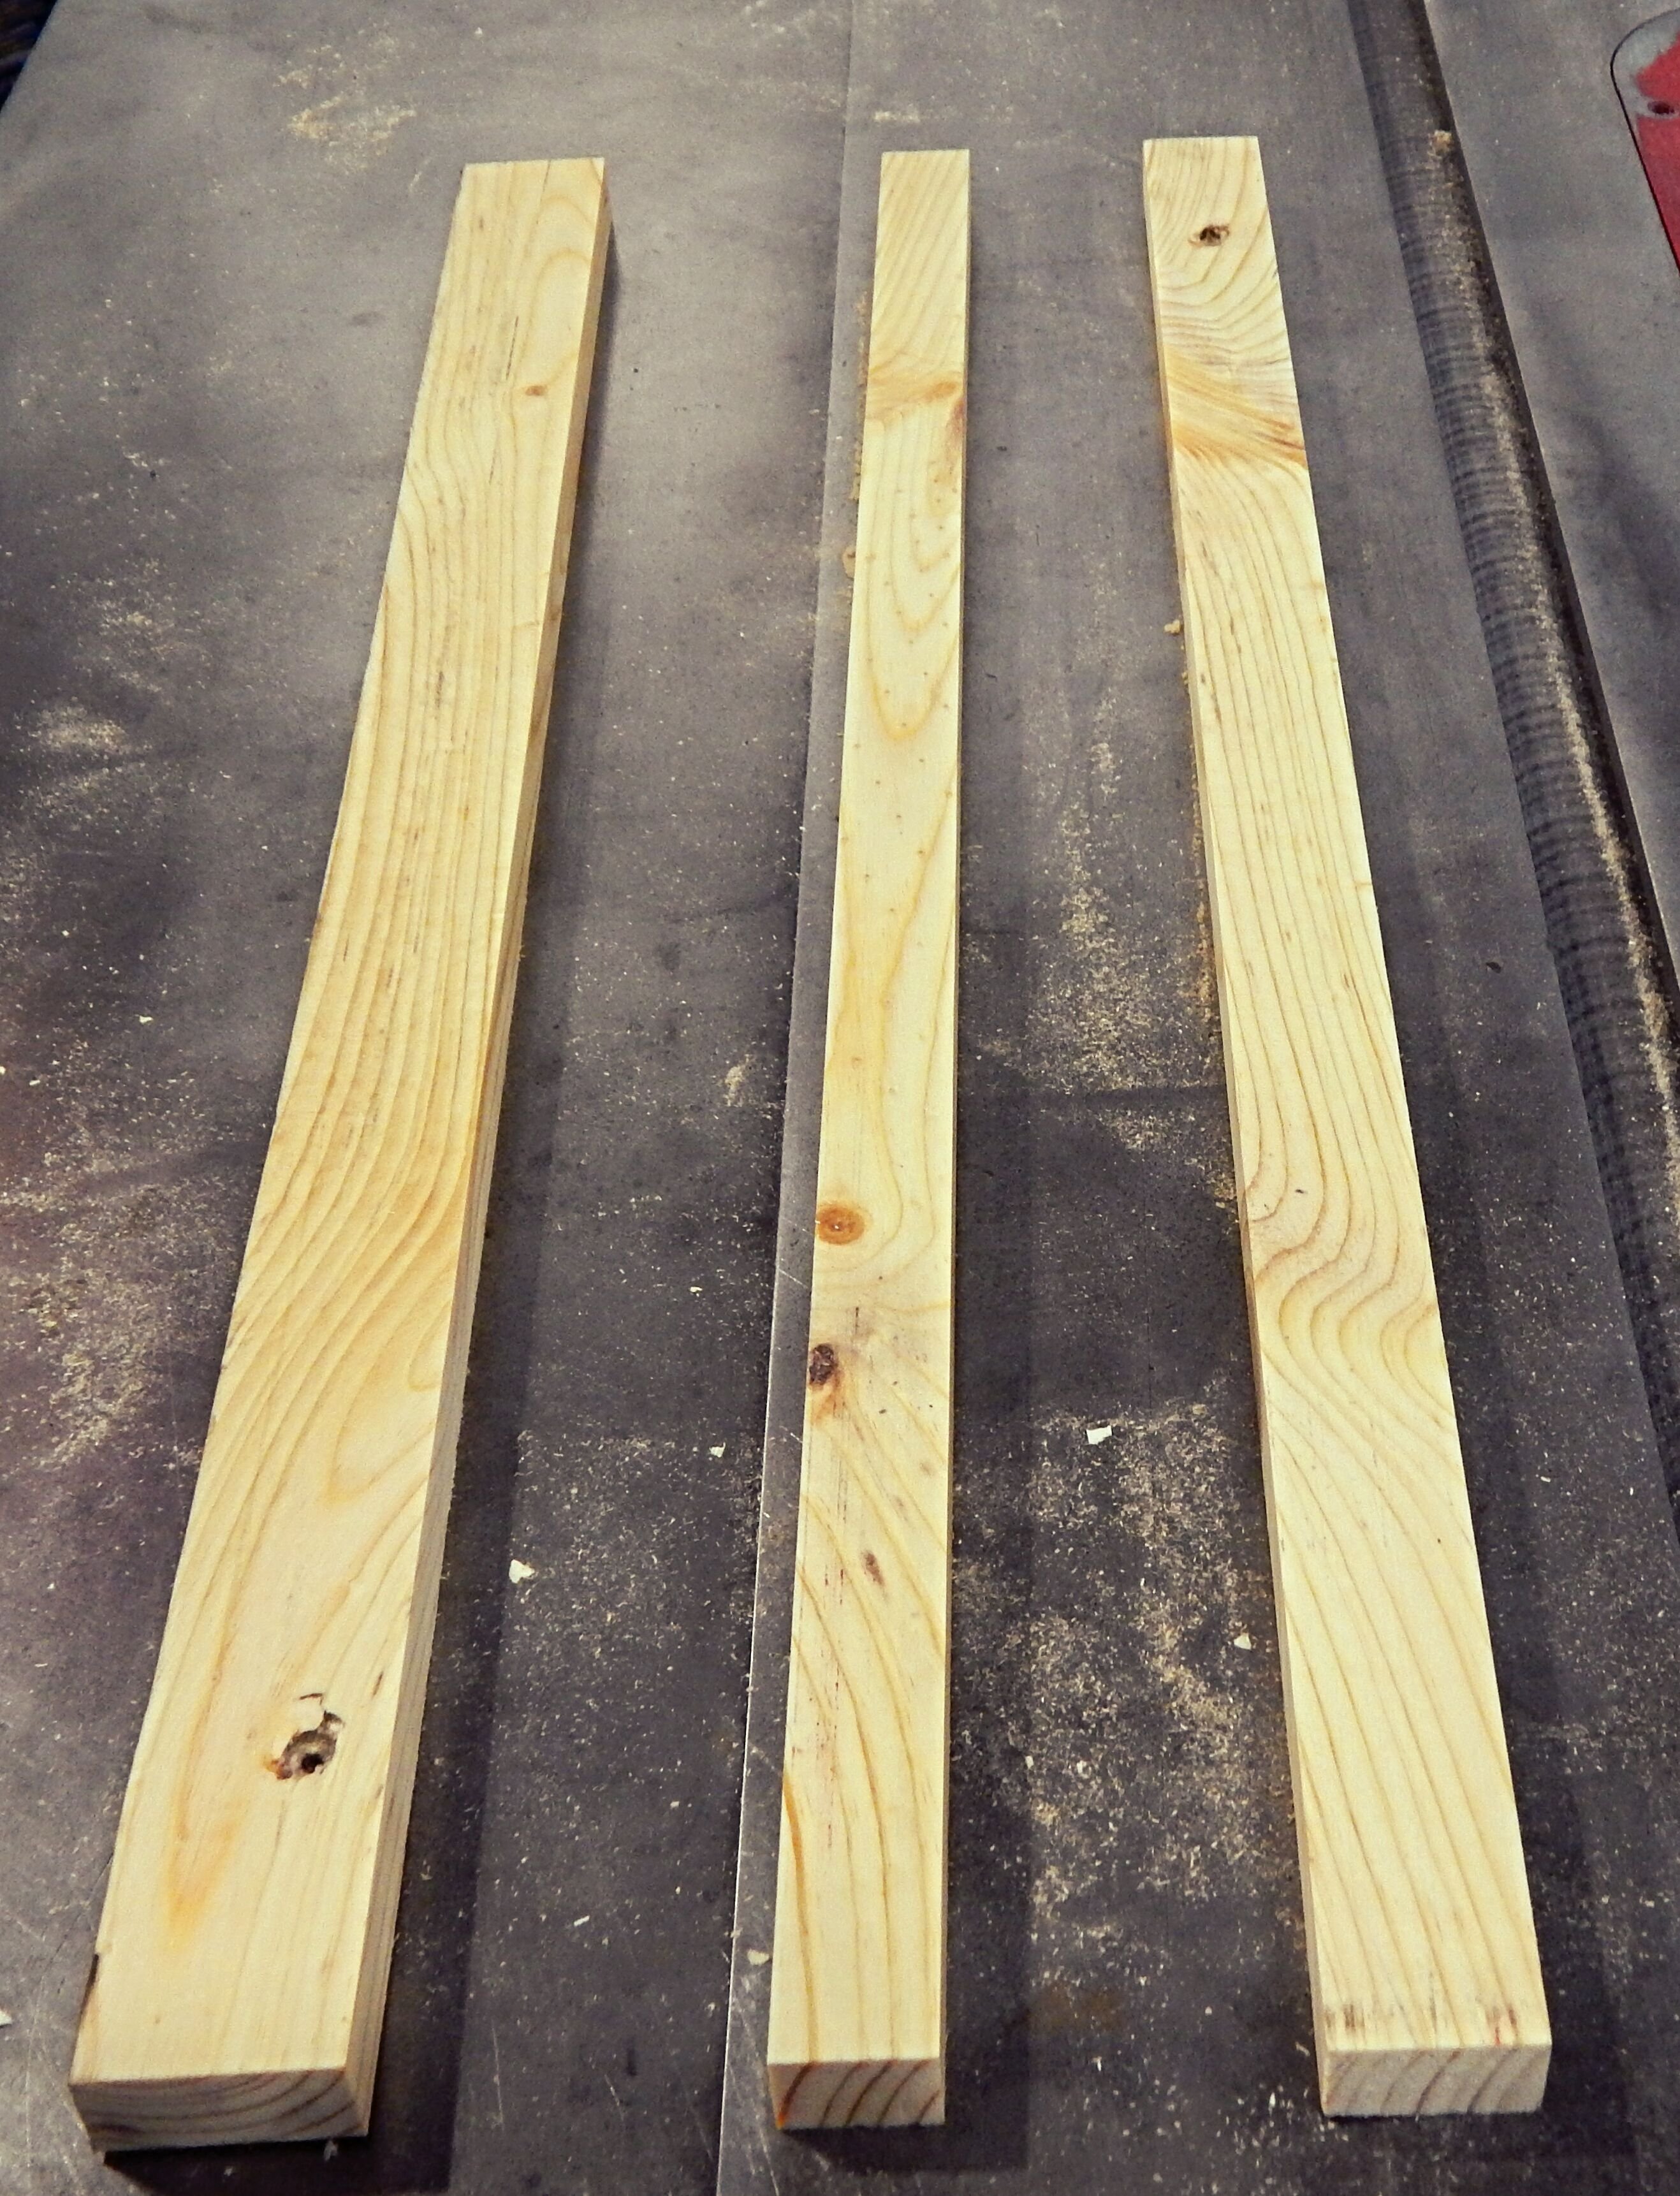
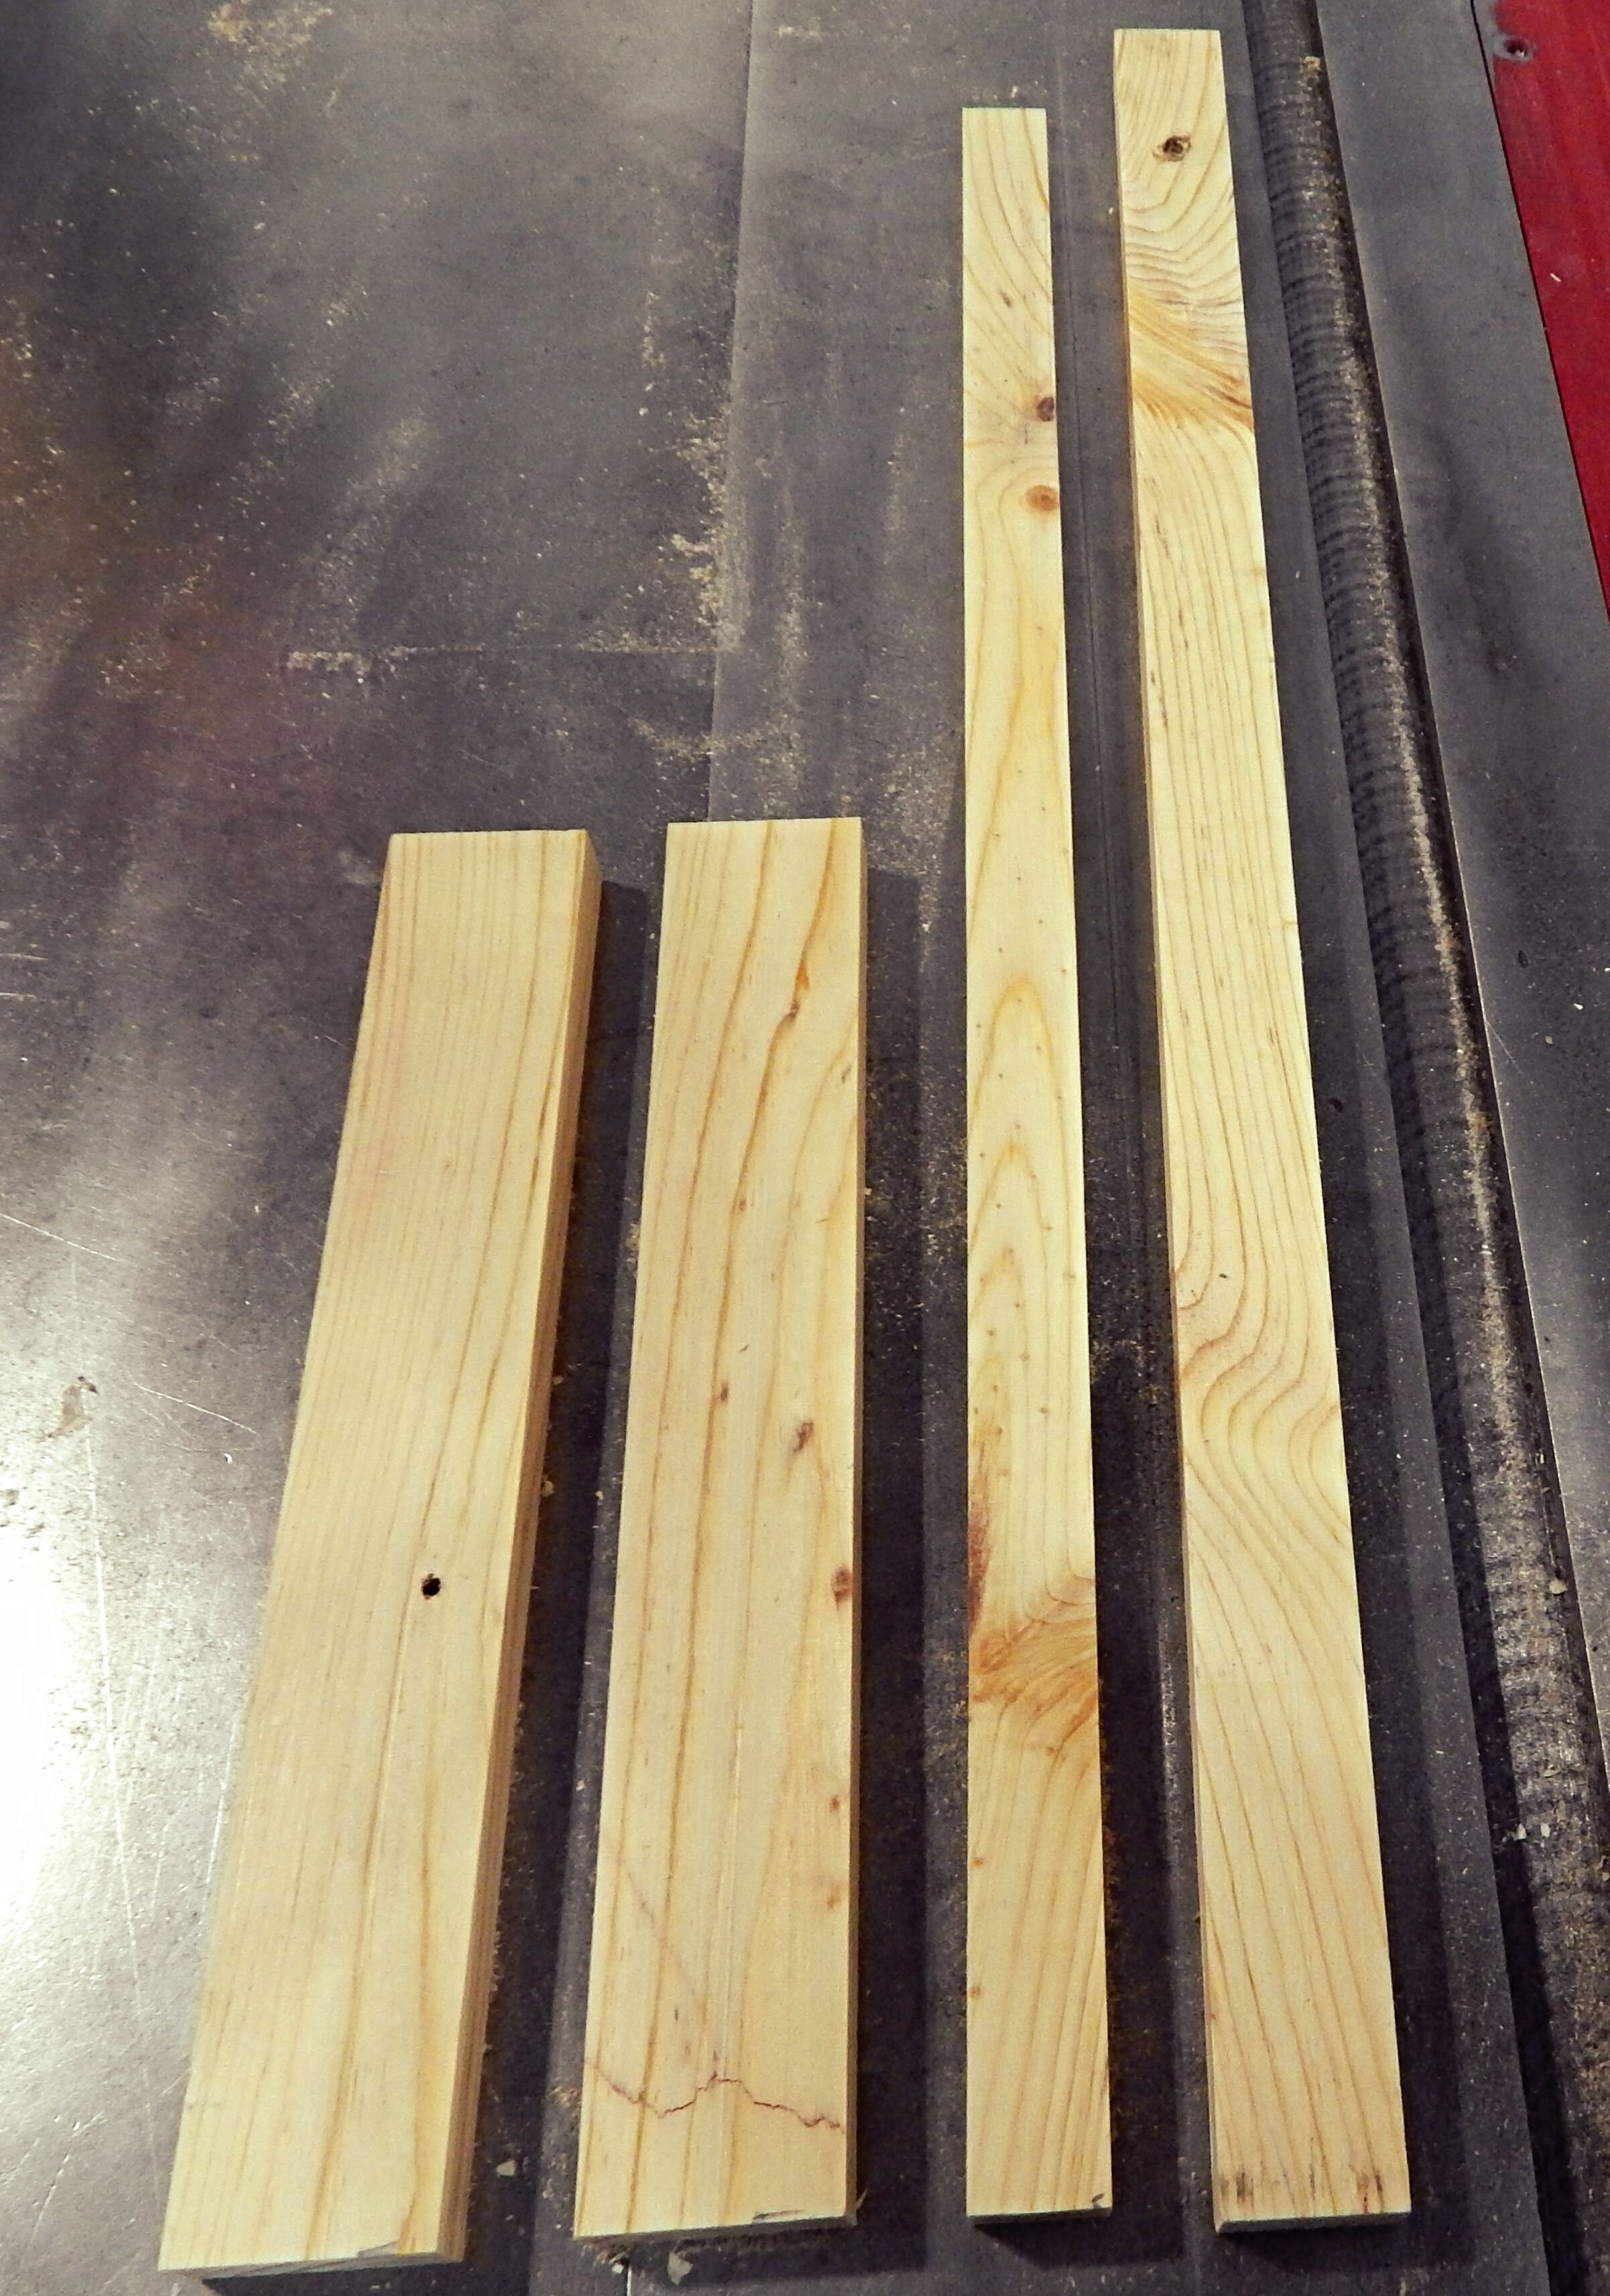
Leaving you with three pieces like so;
Step Three
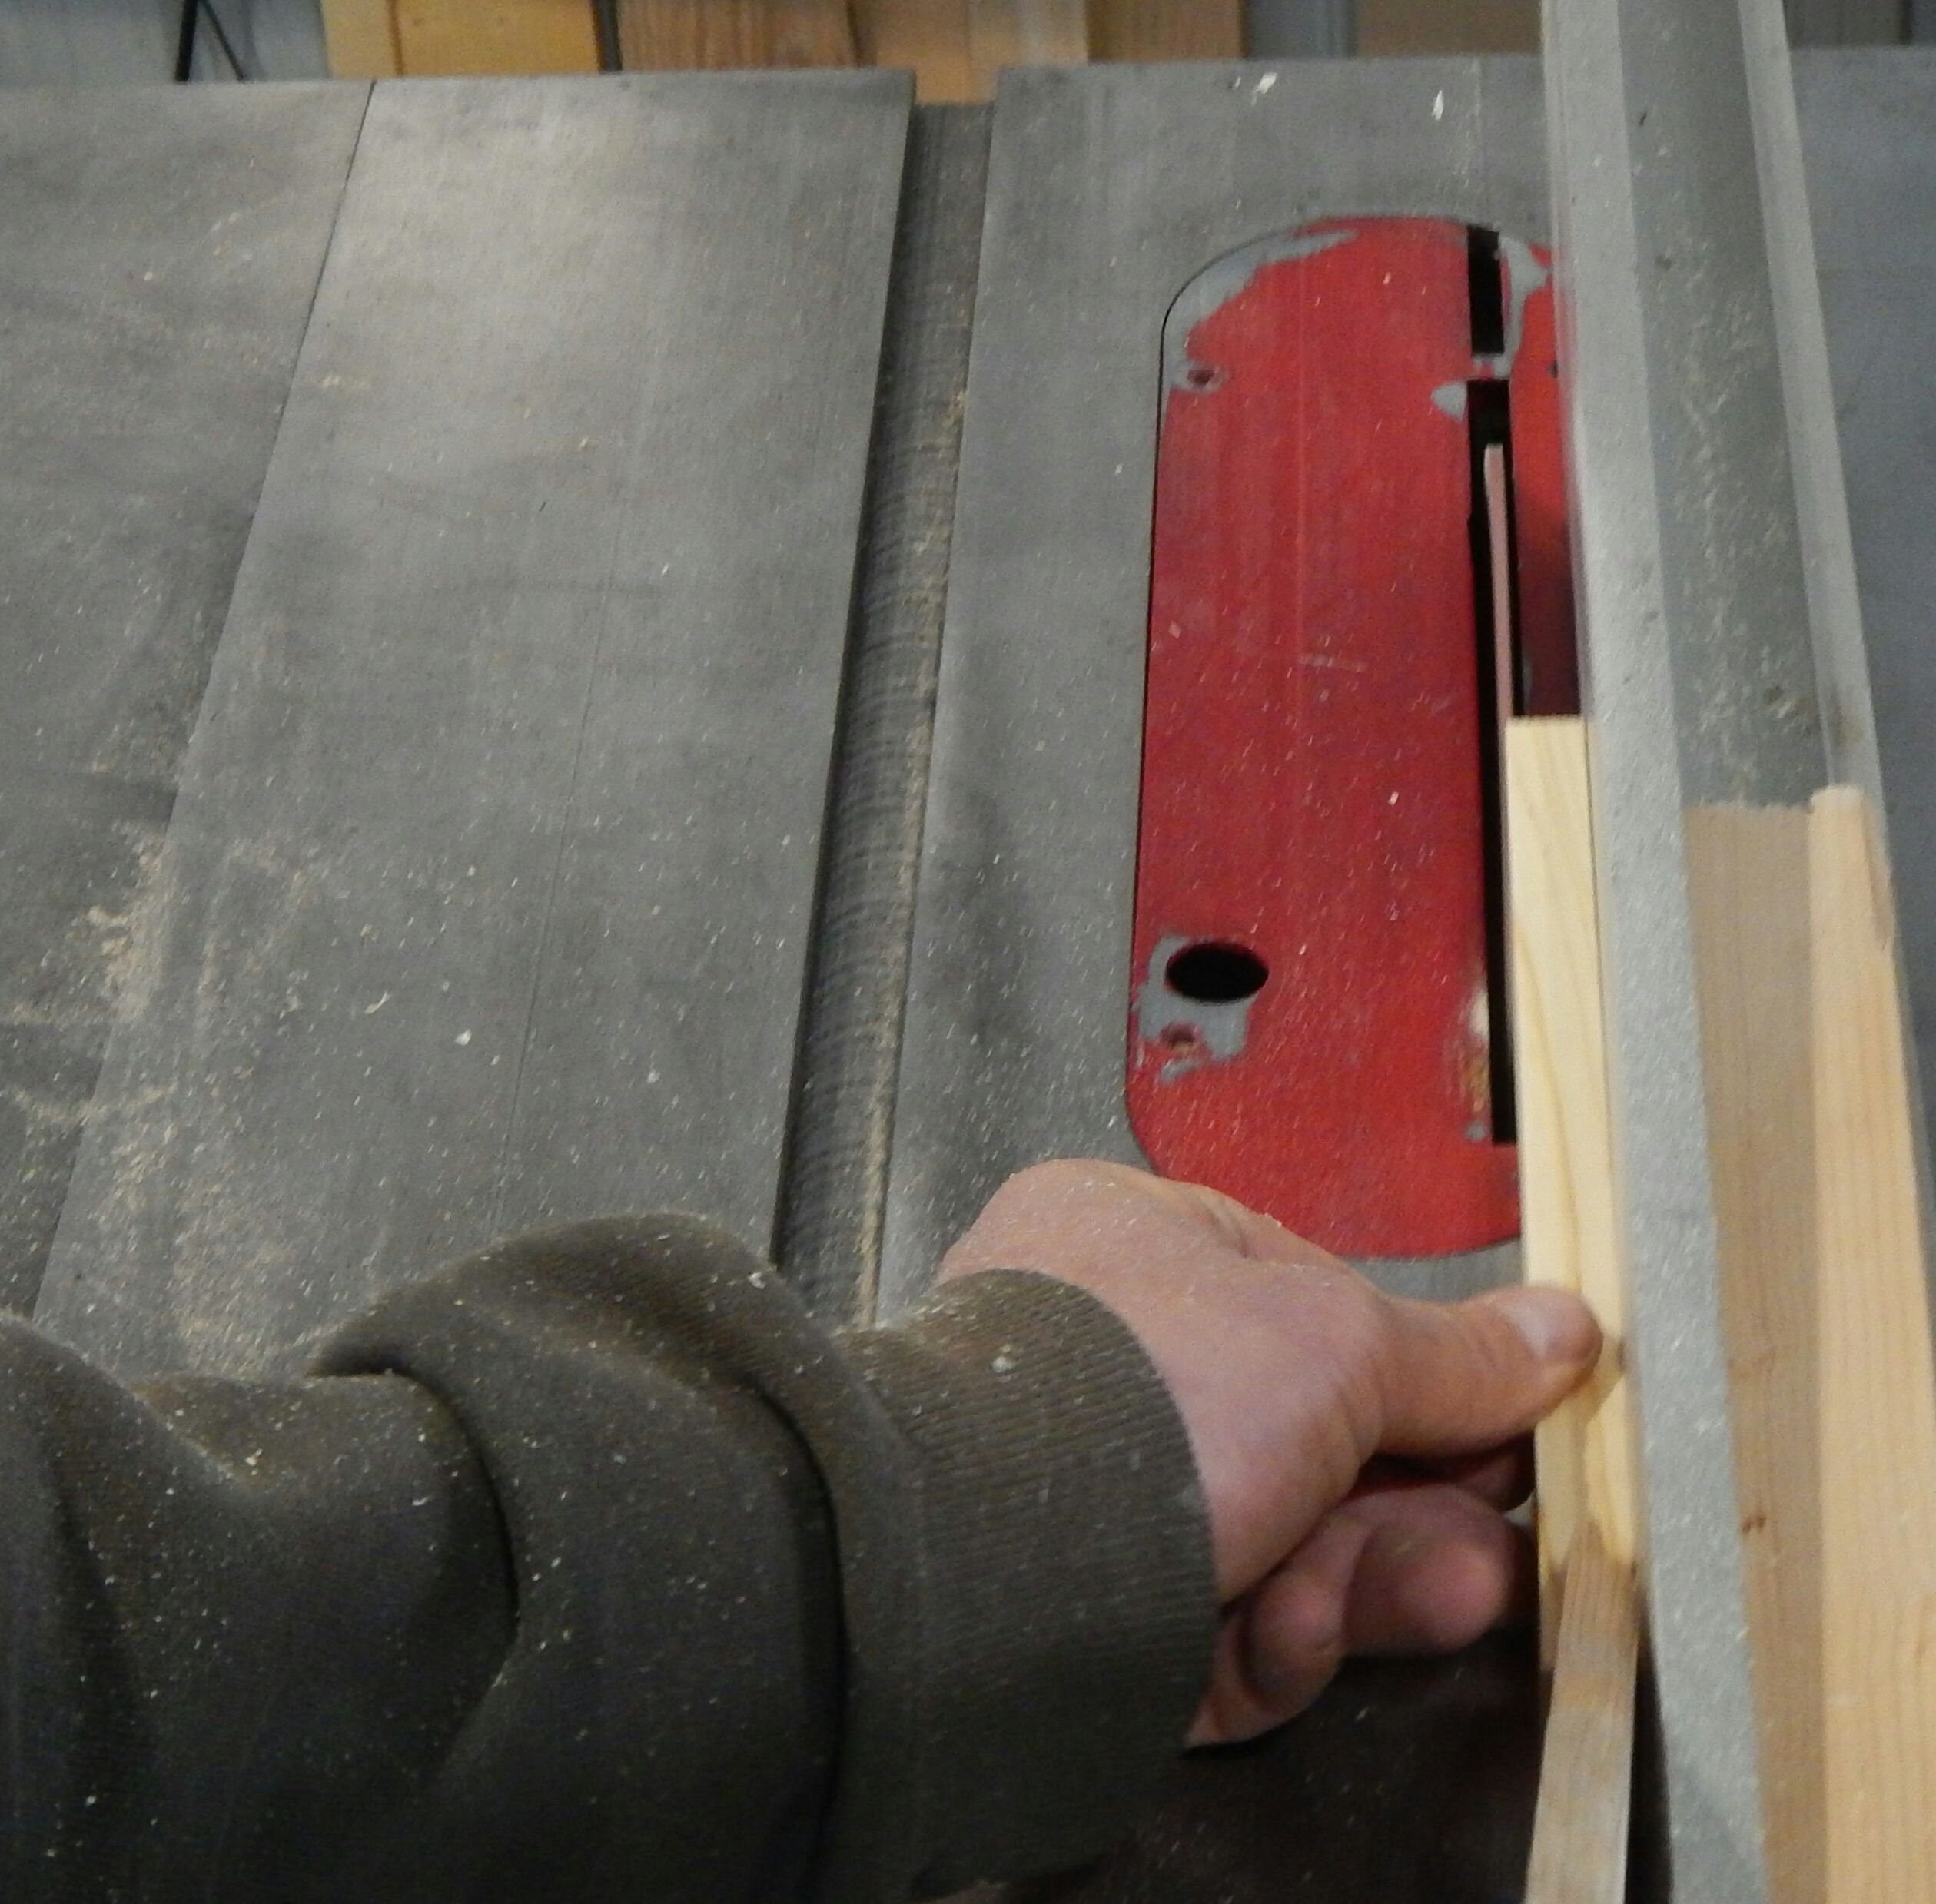
We then need to rip each piece to 1/2" thickness. If you have access to a planer you can simply plane the pallet board to 1/2" thickness, skipping this step altogether. We do normally use a planer instead, but wanted to show how it could be done with just a table saw for those who don't have access to a planer. So, using a table saw set your fence to 1/2" rip and run each board through. If you have extra material rip both sides of the board to leave you with a smooth clean finish. If you do not have enough material, you can sand the board down till smooth.
Step Four
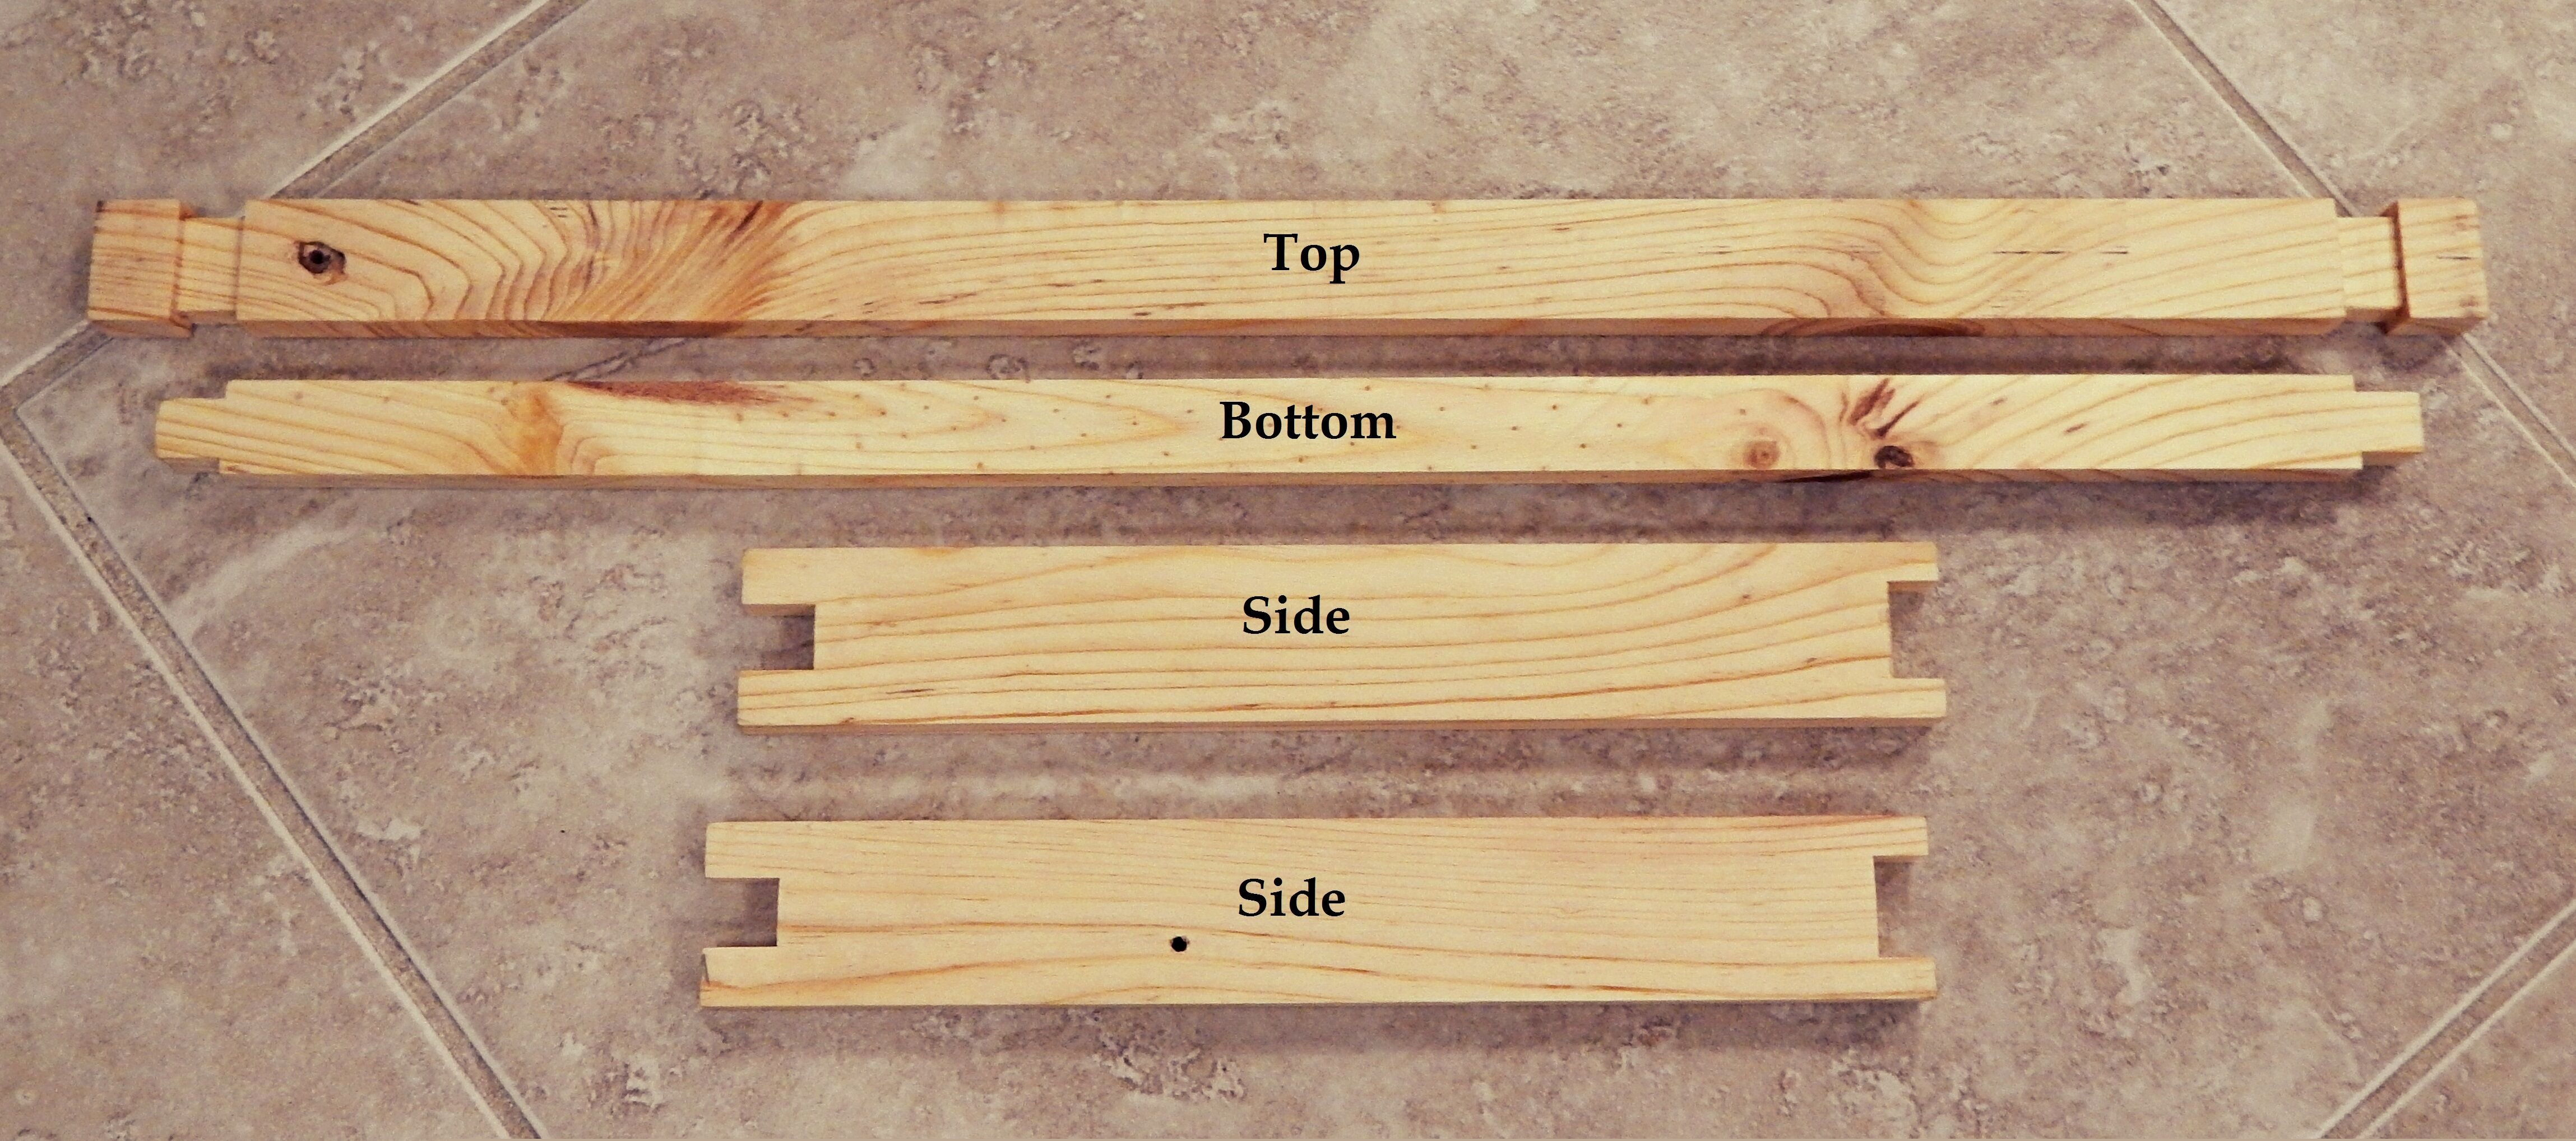
We then need to cut our board with 1 3/8" width into (2) 9 1/8" Length pieces, making the sides. Then cut our board with 3/4" width to a 17 3/4" length, making the bottom piece.
Leaving you with the following (4) pieces...
(1) 19" x 1" x 1/2"
(1) 17 3/4" x 3/4" x 1/2"
(2) 9 1/8" x 1 3/8" x 1/2"
Step Five
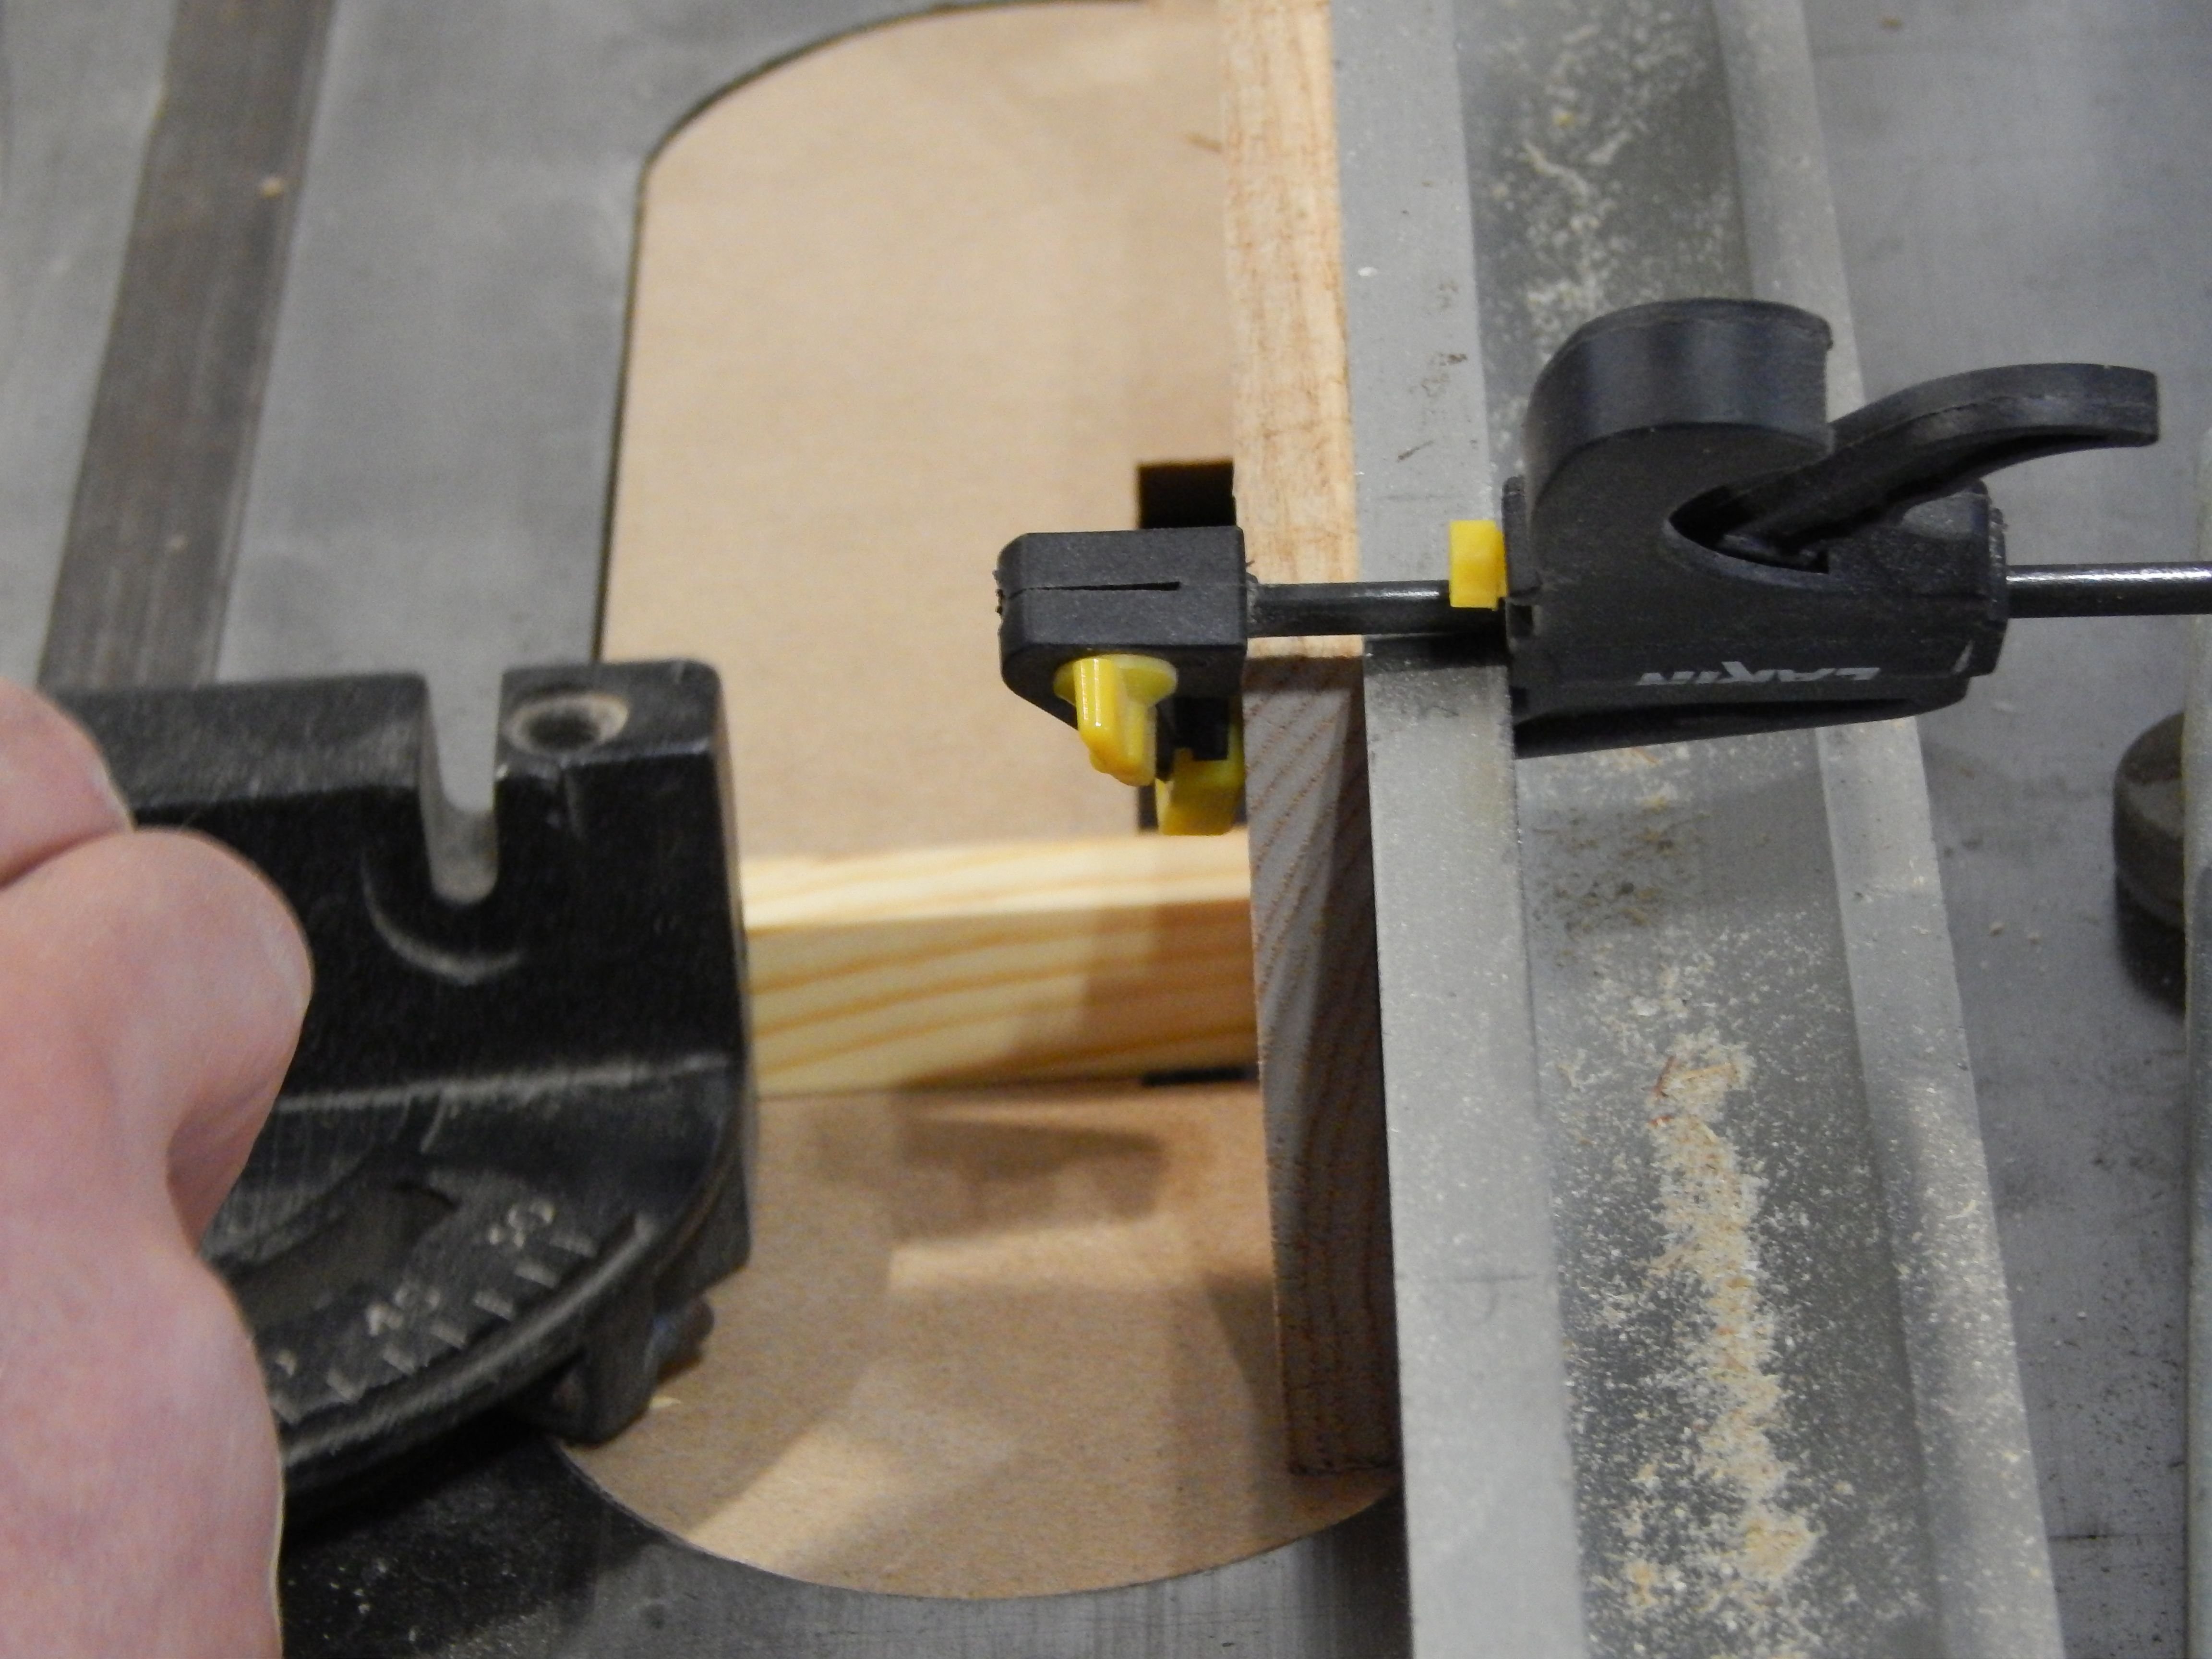
Next we are going to switch out our table saw blade for a 1/2" Dado Blade. We originally did the following cuts on a table saw blade, making several cuts.. but recently purchased a Dado Blade to make the process easier, it can also be used for other projects down the road. Dado Blades can be found relatively inexpensive depending on what brand and model you get. If you do not have access to a Dado Blade you can make several cuts to get to the width specified below.
We have the 1/2" Dado Blade set to 1/2" up and 7/16" off the fence. Using a homemade jig we pass the two side pieces over the Dado Blade

leaving you with this...
We are going to set the side pieces aside and finish the rest of our 1/2" cuts, coming back to these at the end to finish the opposite side with the 3/4" cut.
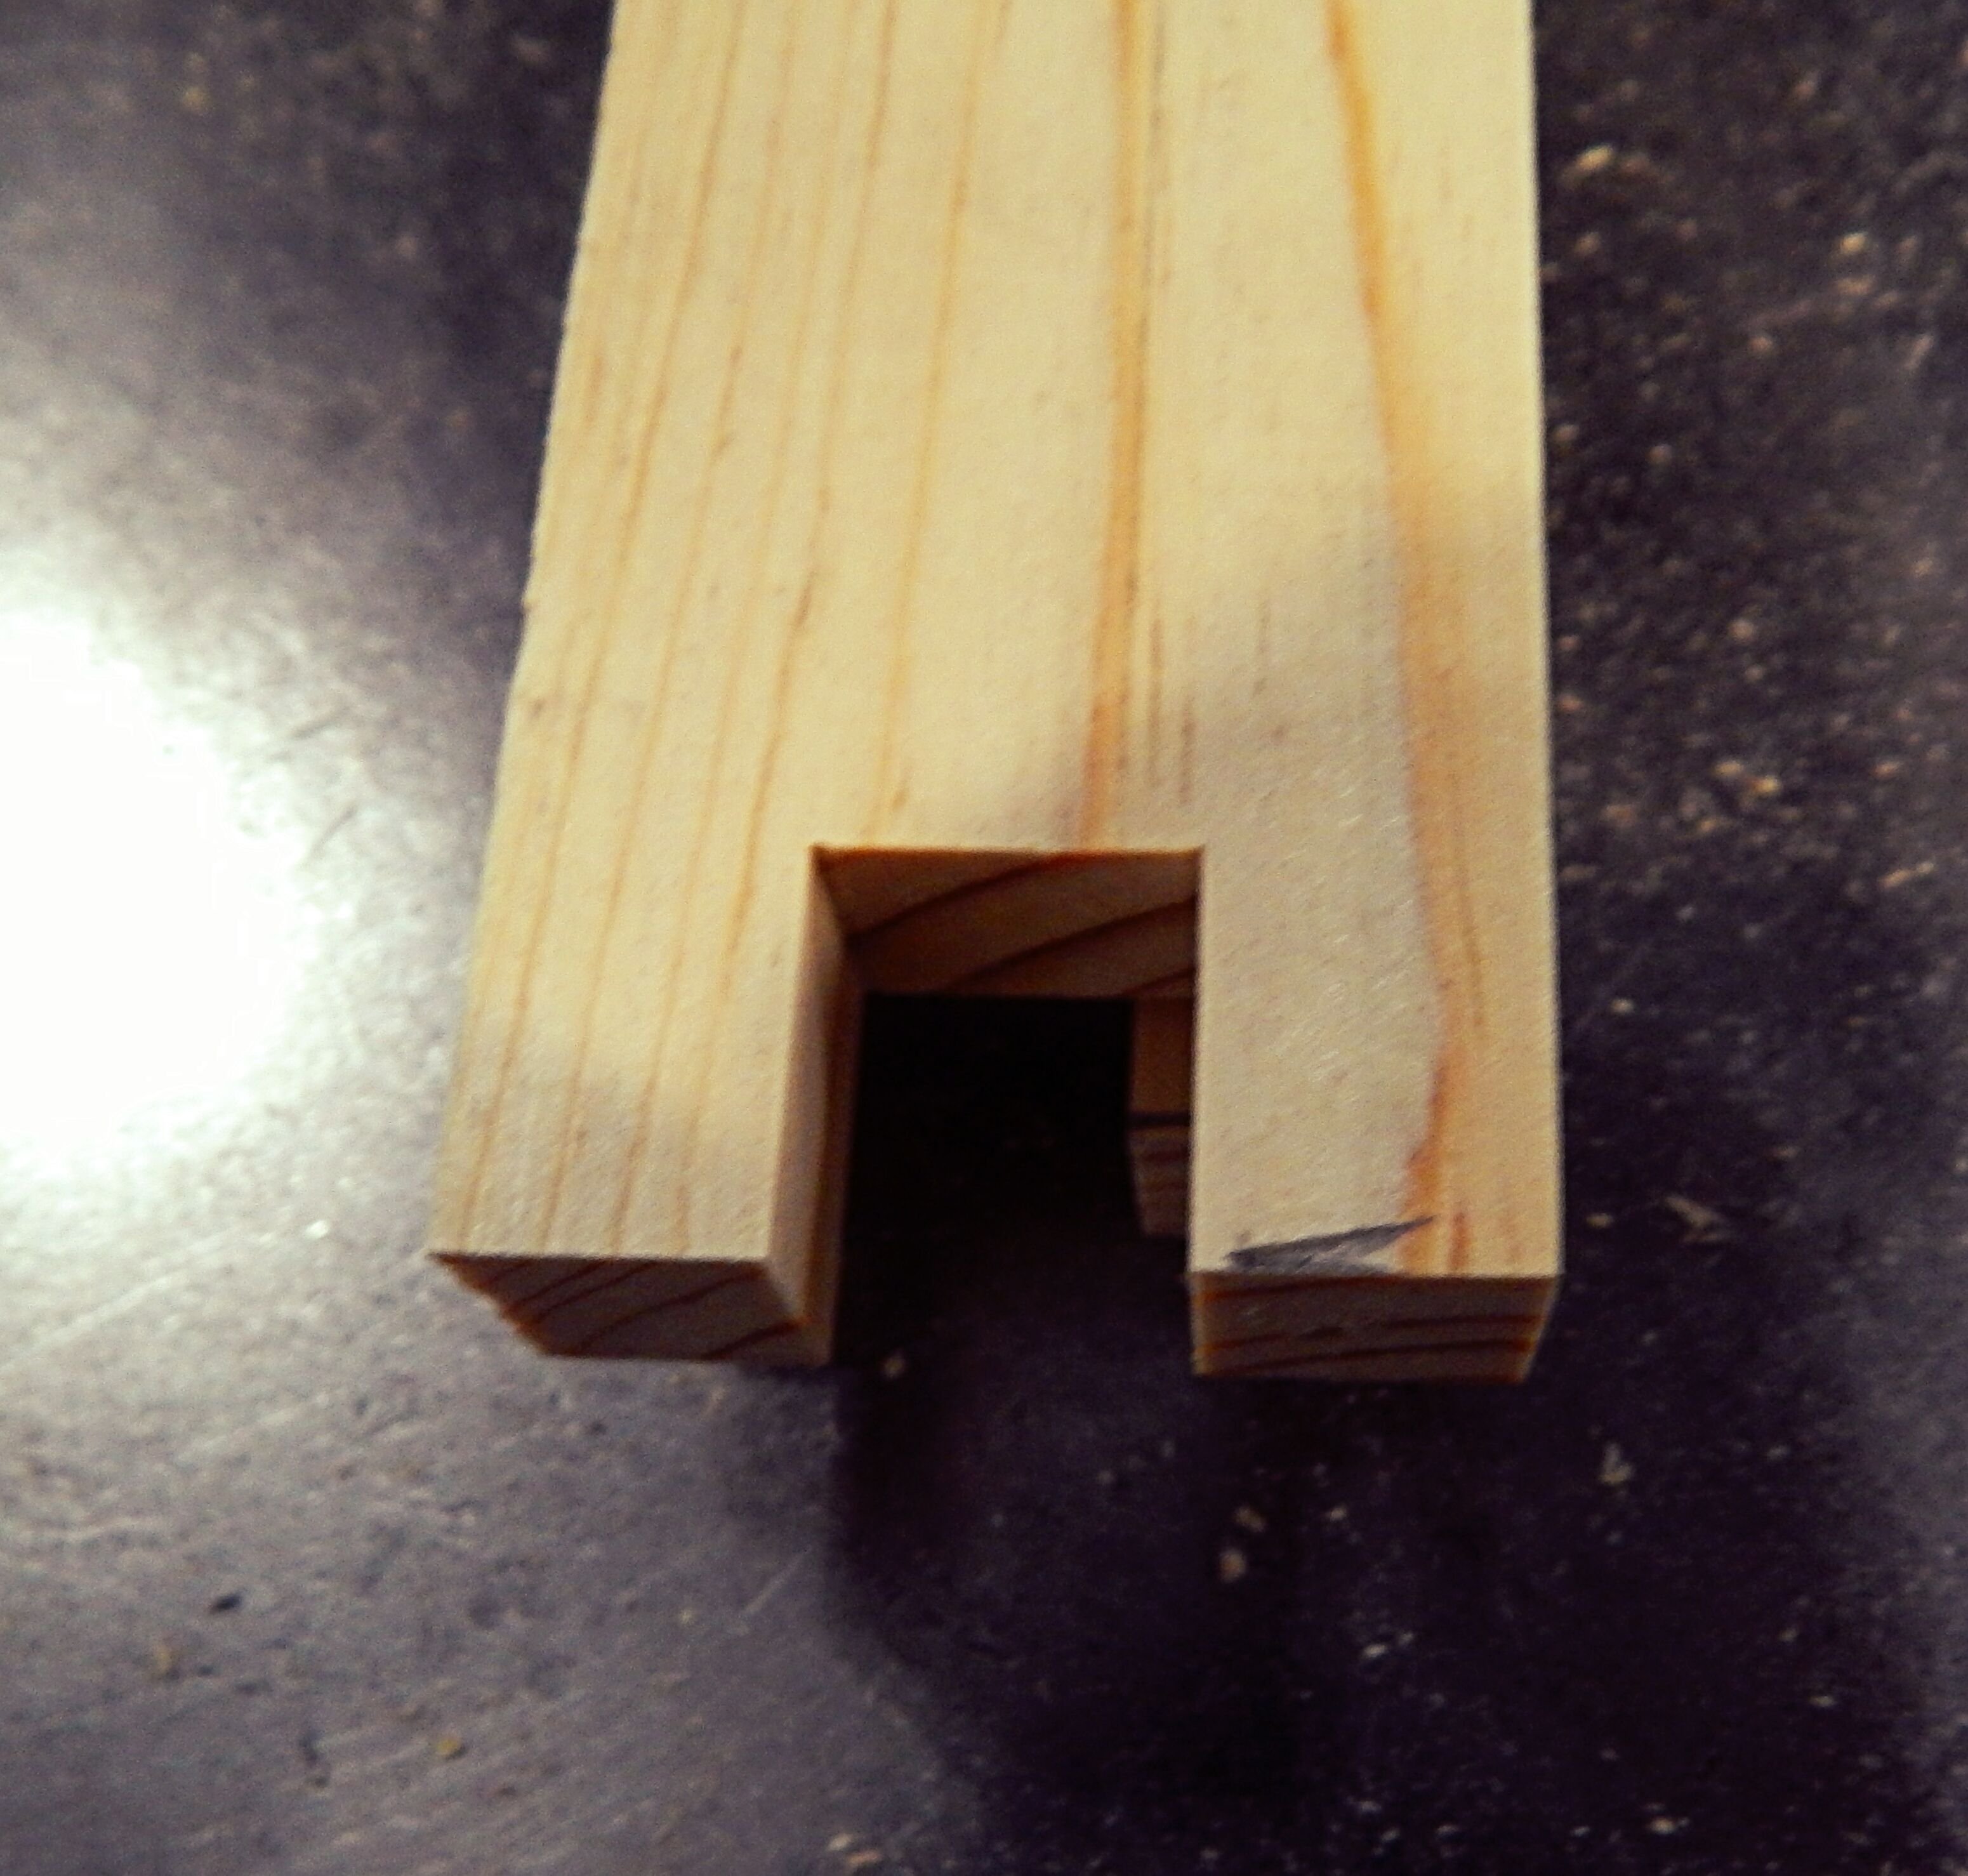
Step Six
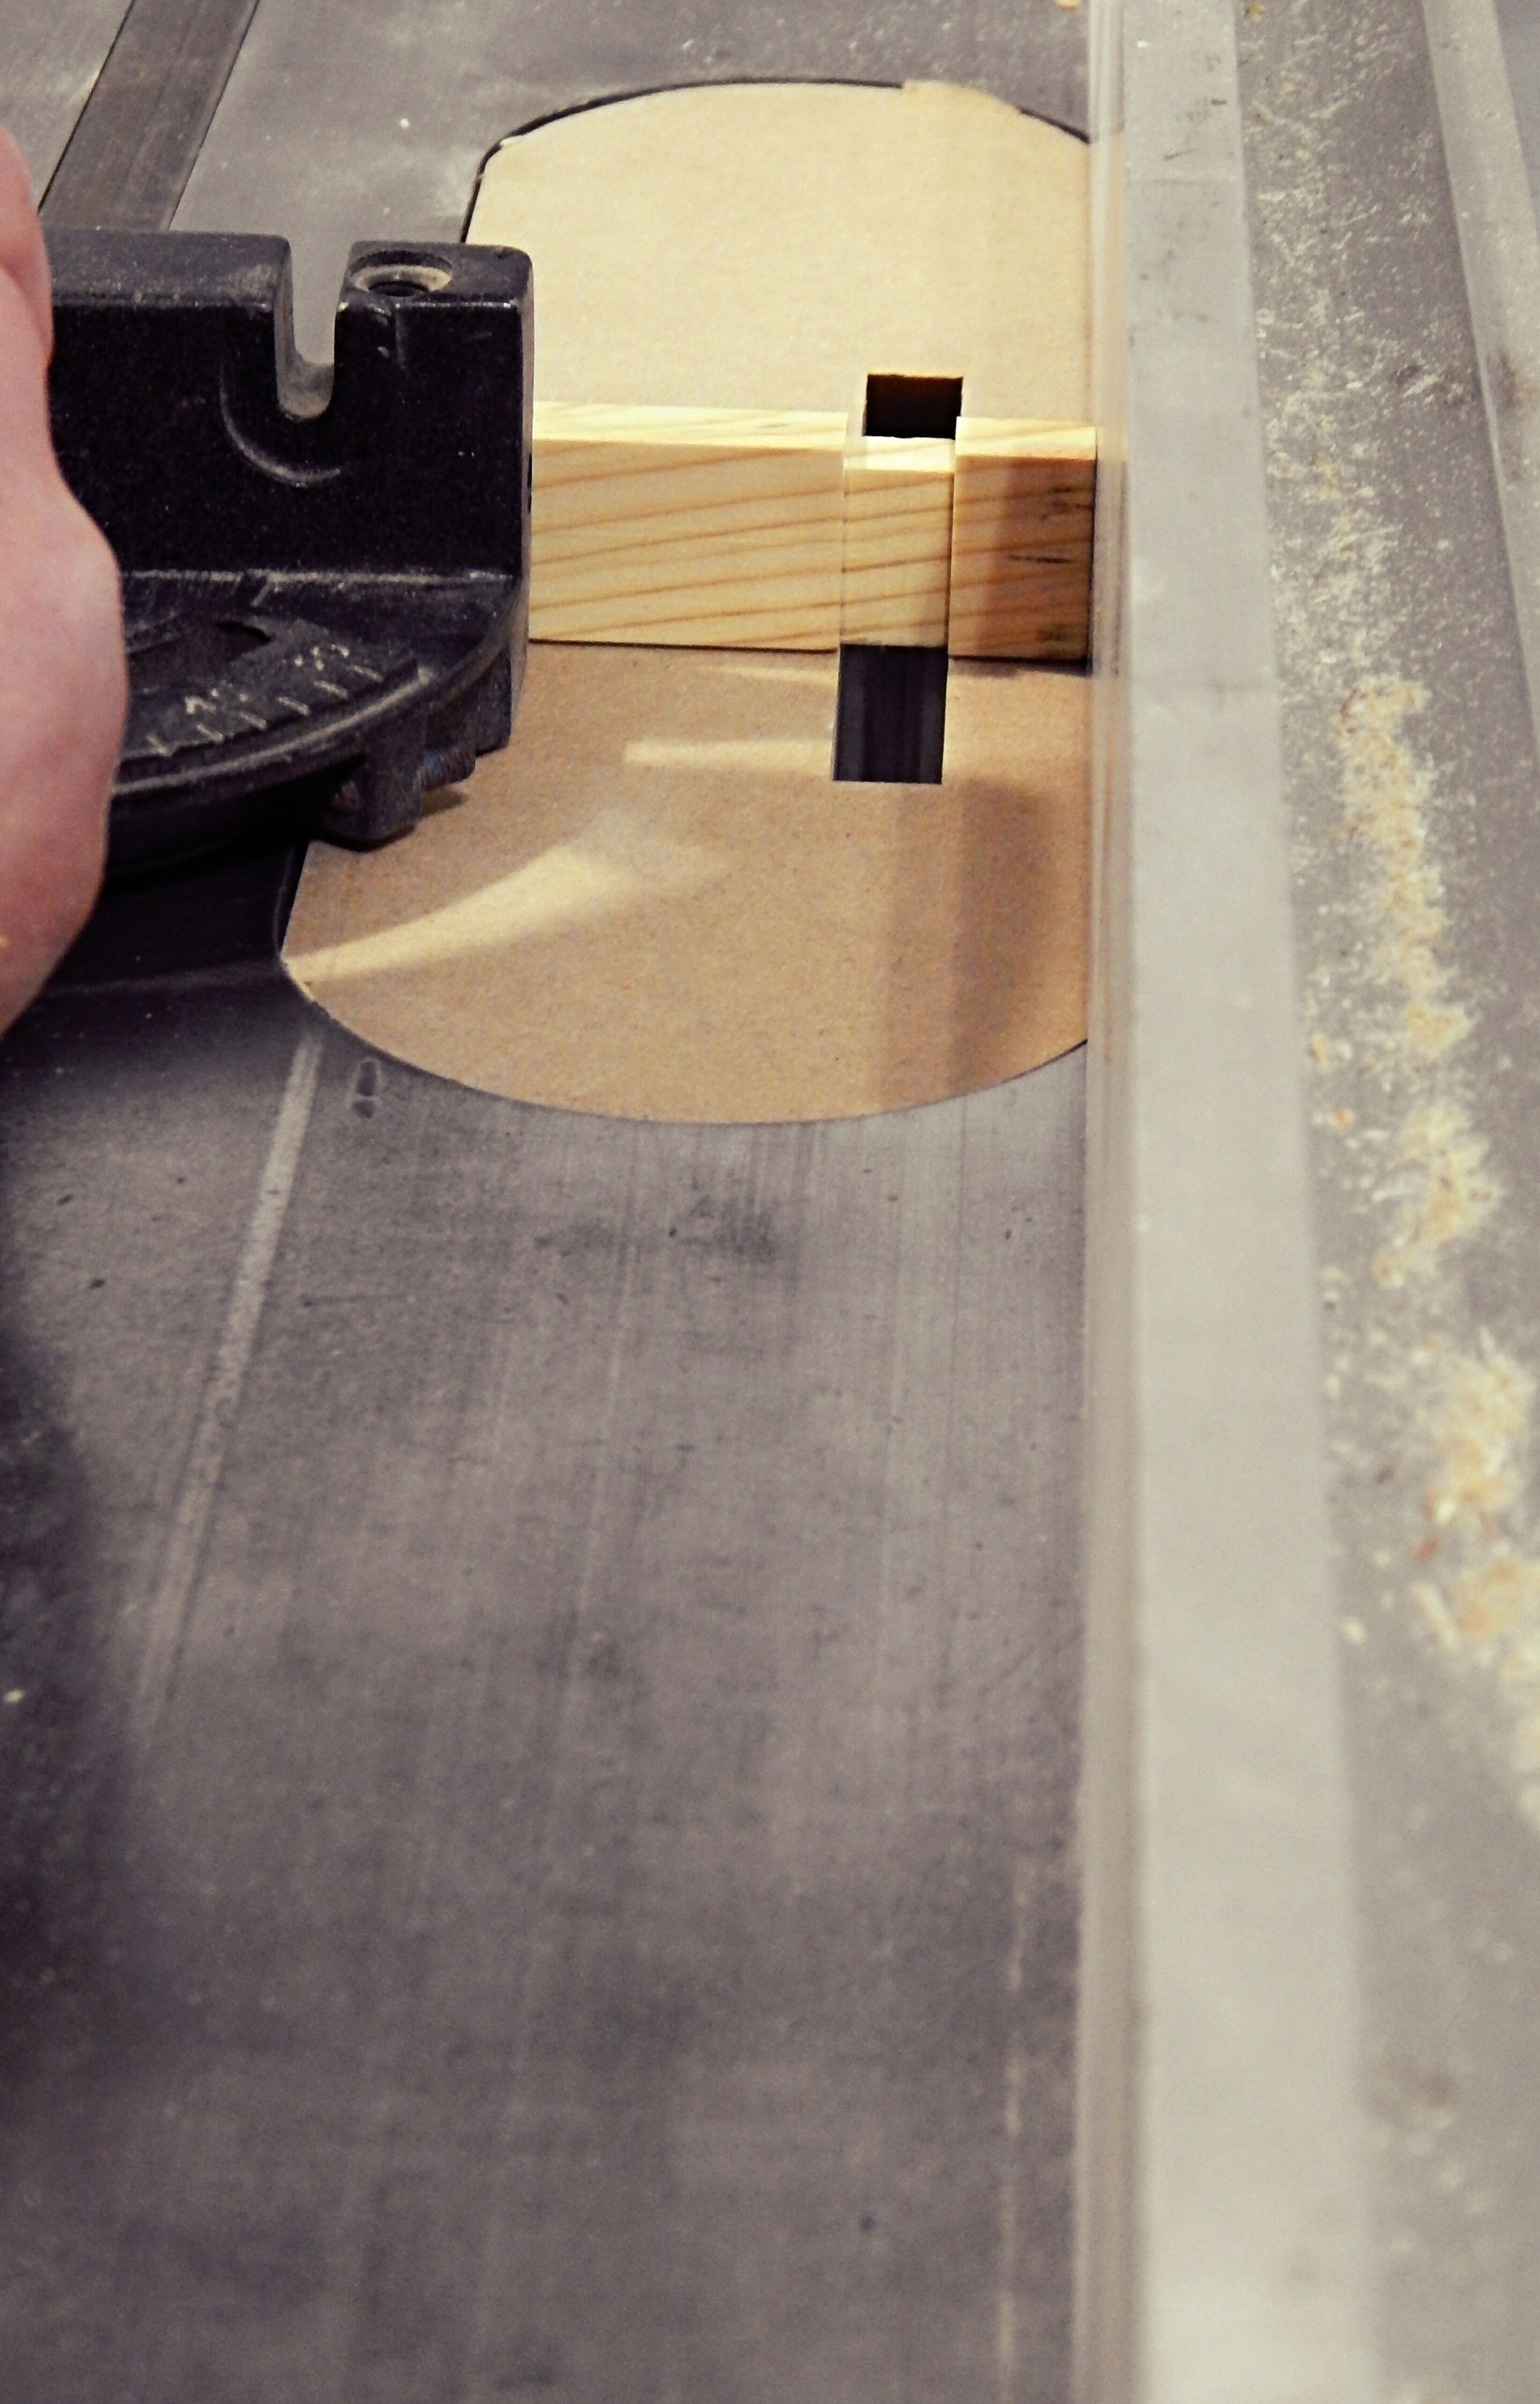
We will now be cutting the notches into each end of your "Bottom" 17 3/4" length board. Setting the Dado Blade to 1/8" up and using a sacrificial fence, set the spacing between the Dado Blade and the fence to zero. We will then make two cuts on each 3/4" side on both ends, making a 1/2' x 1/2" square on the end (Refer to drawings for visual).
The two pieces you have just cut should fit together making the bottom and side joint. If it doesn't fit perfectly you can use a razor blade to cut off any excess material.
Step Seven
We are now going to work on our 19" length "Top" piece. With the Dado Blade still at 1/8" depth we measure 5/8" off the fence and cut the same three sides on both ends.
Step Eight
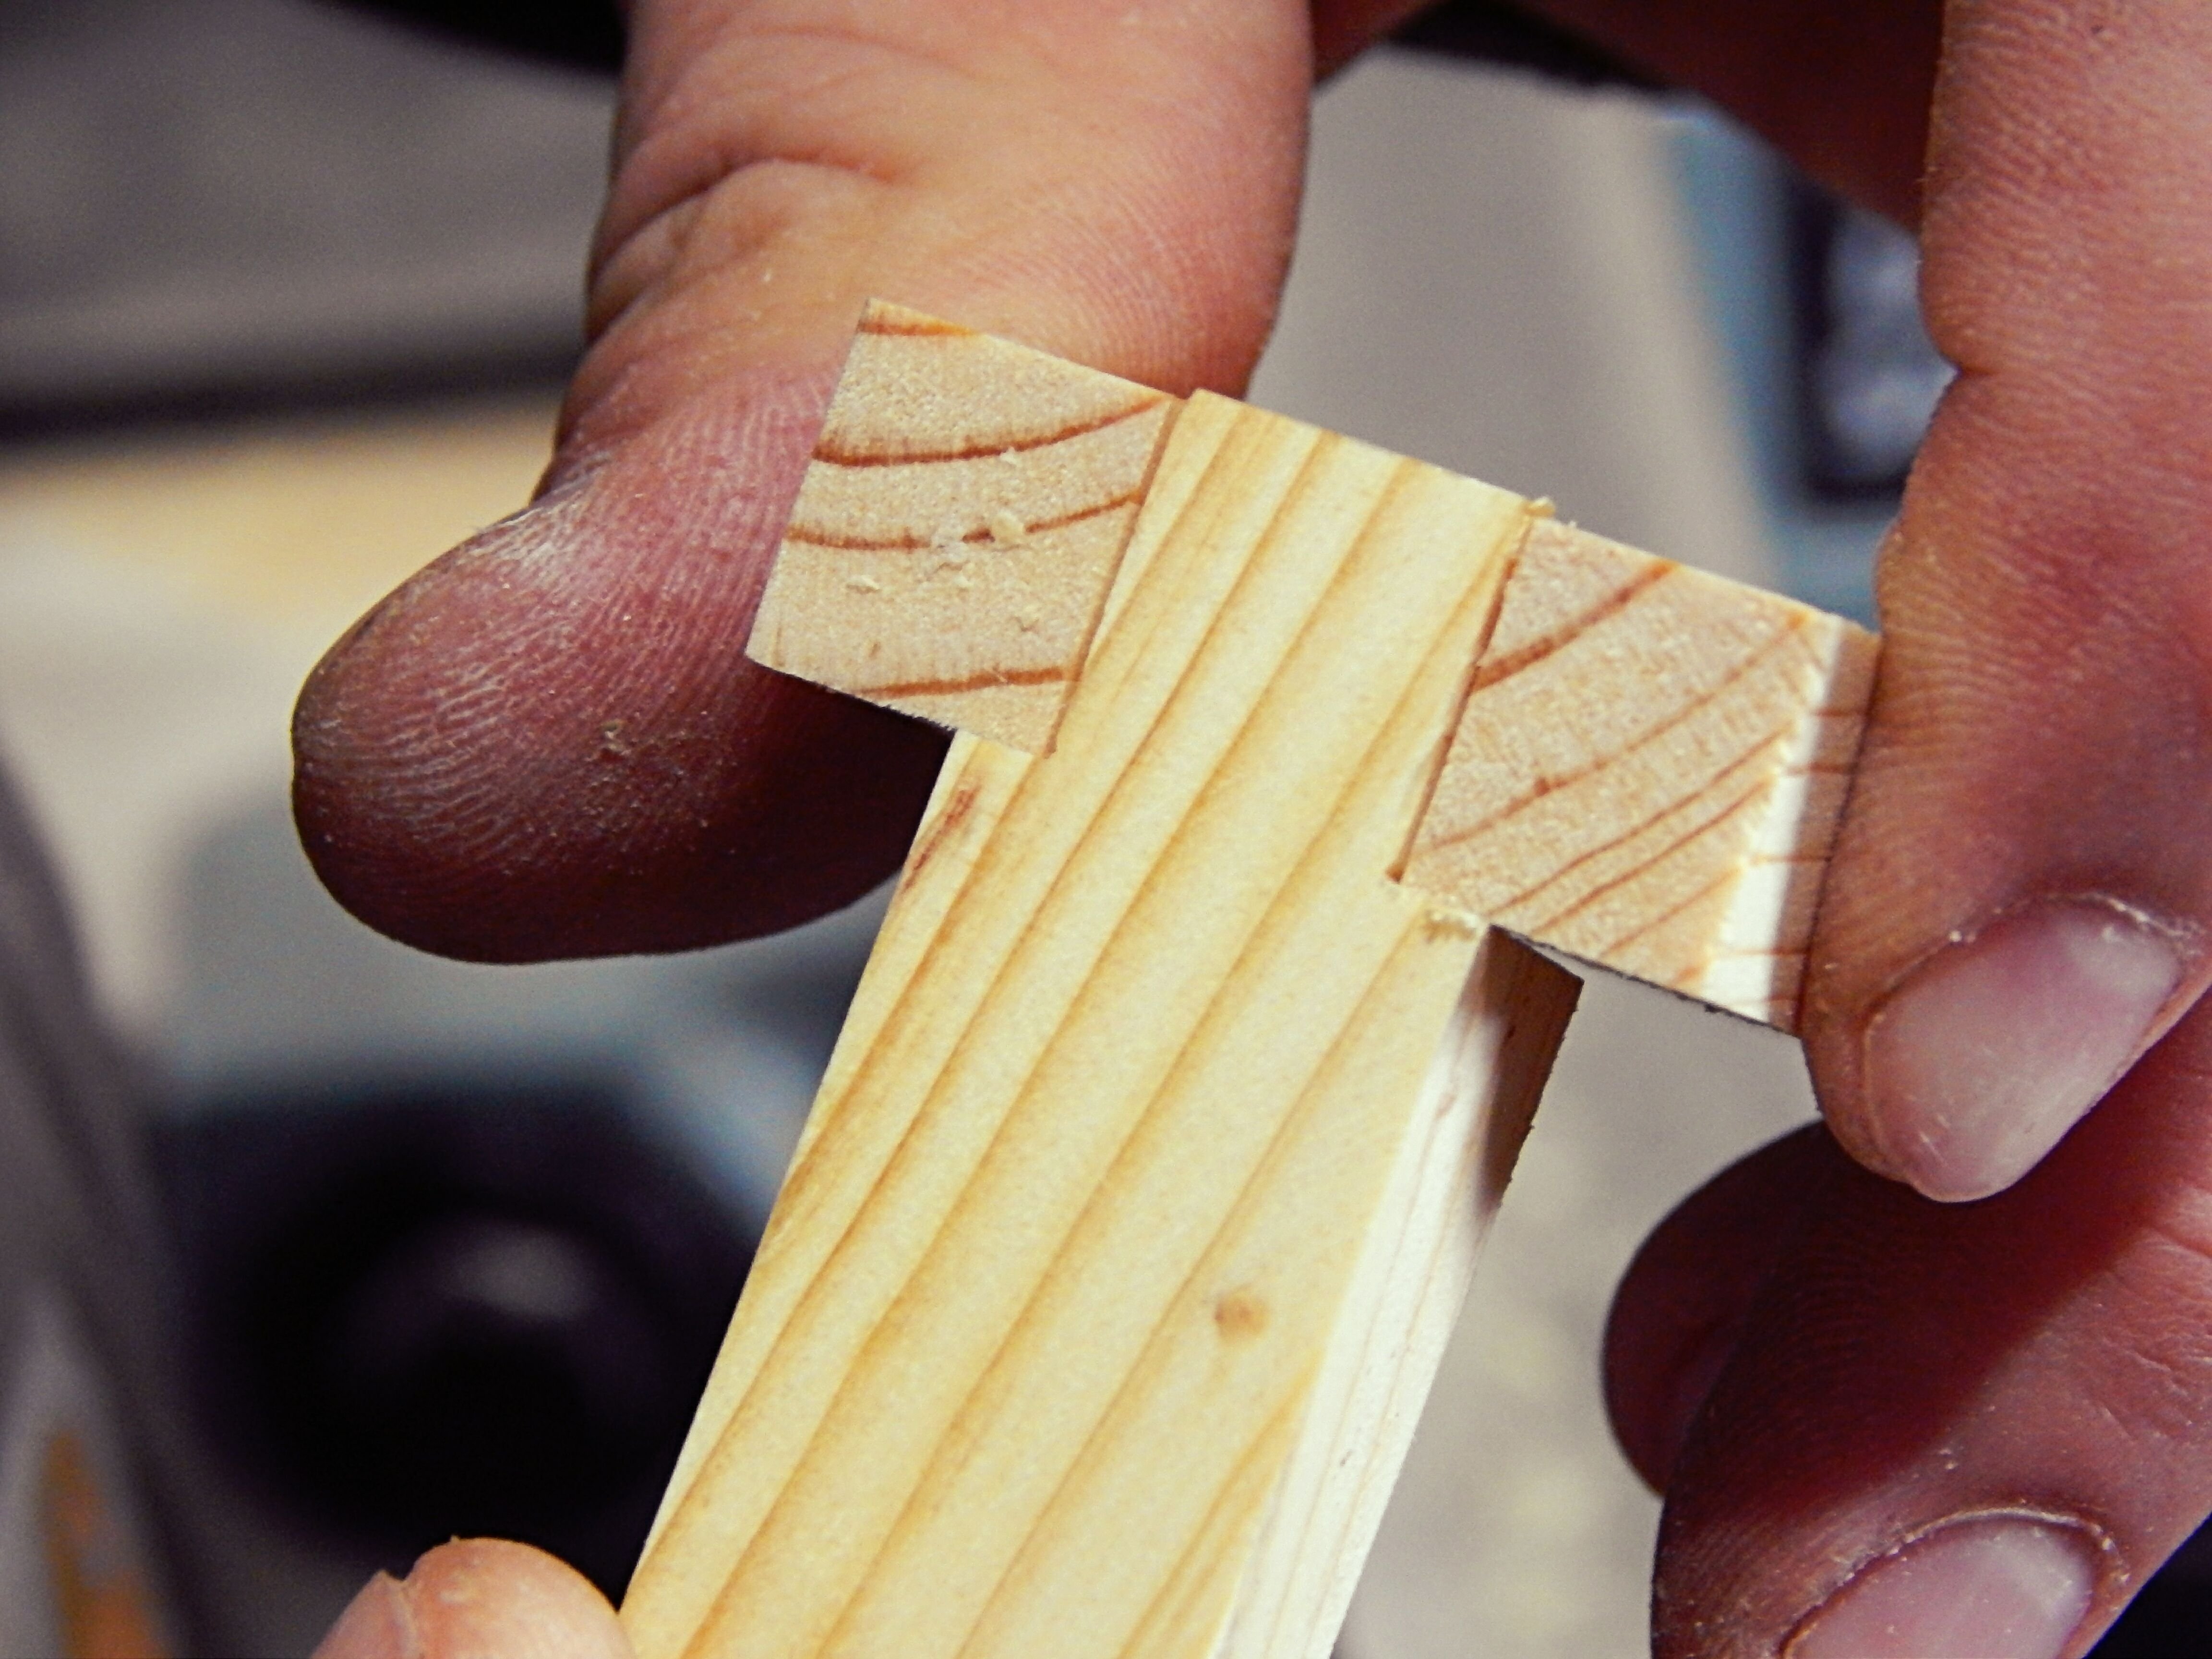
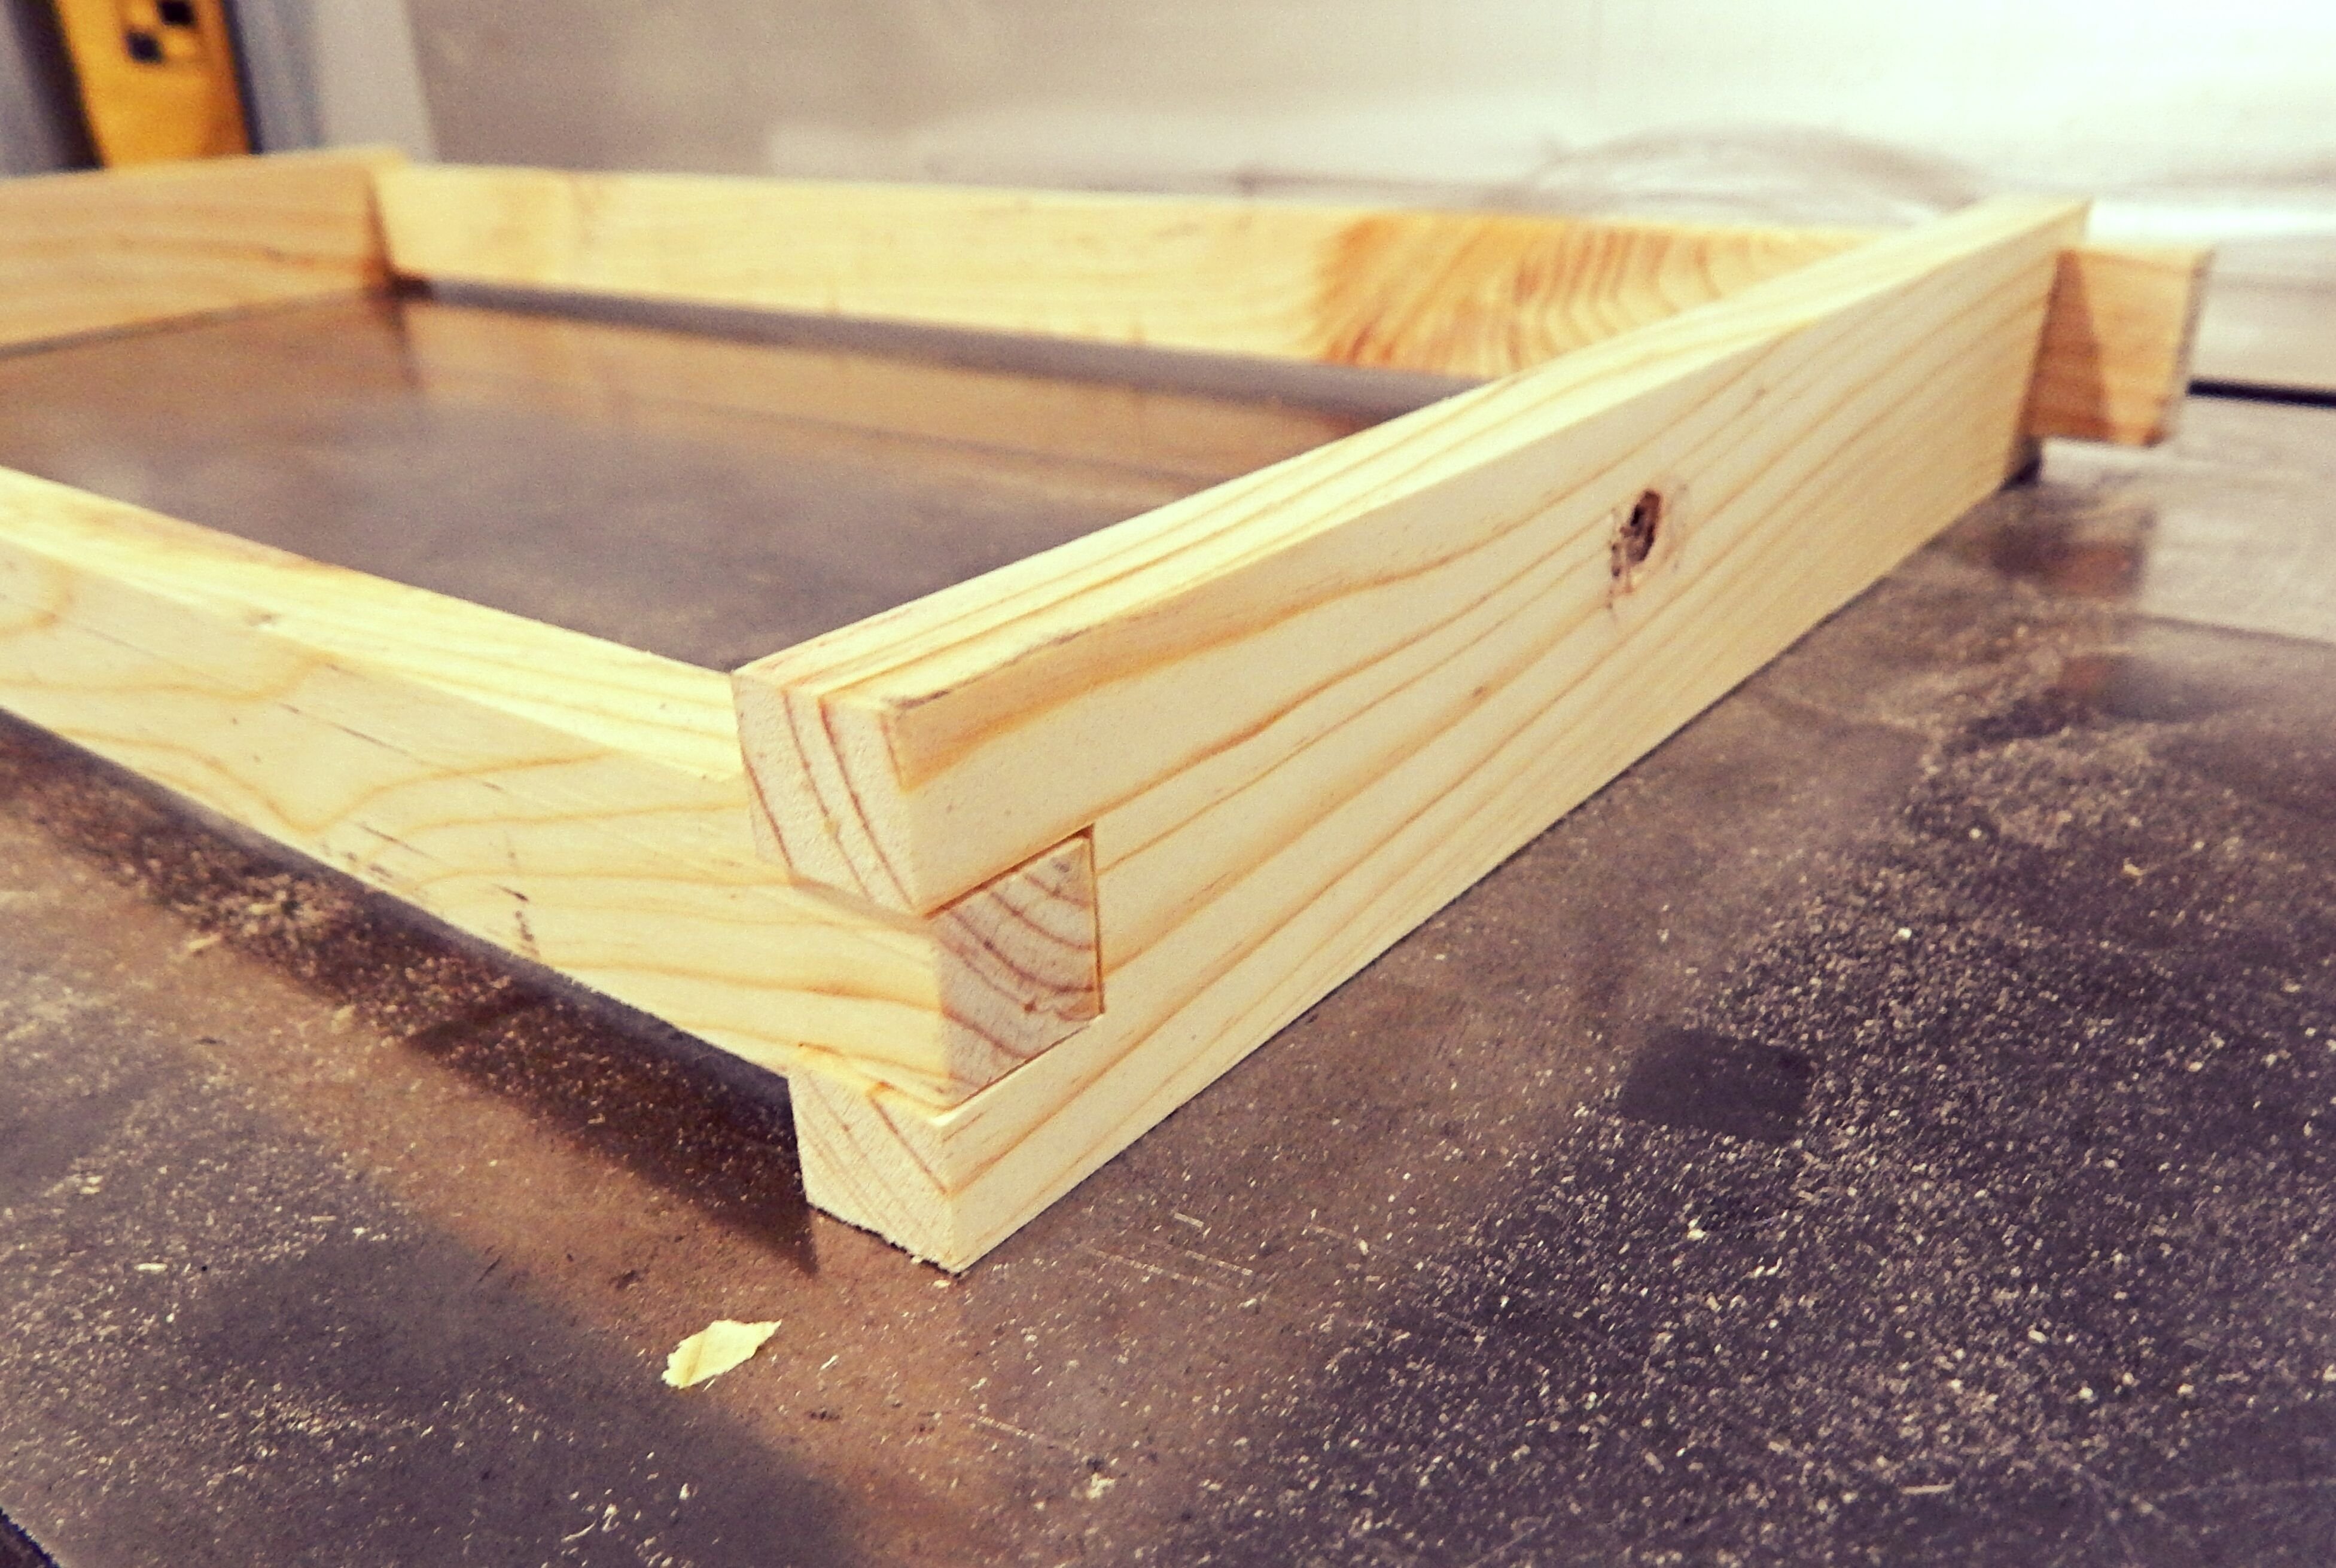
We are now going to do the additional cuts on the side pieces from above. First, need to change out our Dado Blade to the 3/4" size blade. Measuring 3/8" up and 5/16" off the fence we will make one cut on each of our 9 1/8" "Side" pieces.

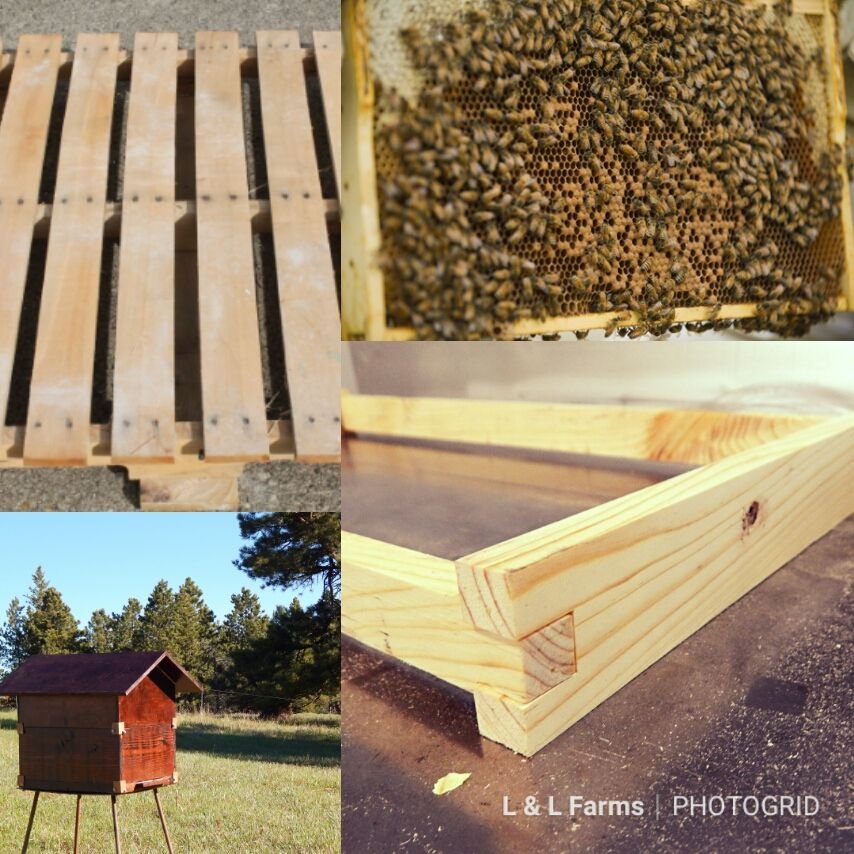
You now have your four complete pieces of the Hive Frame.
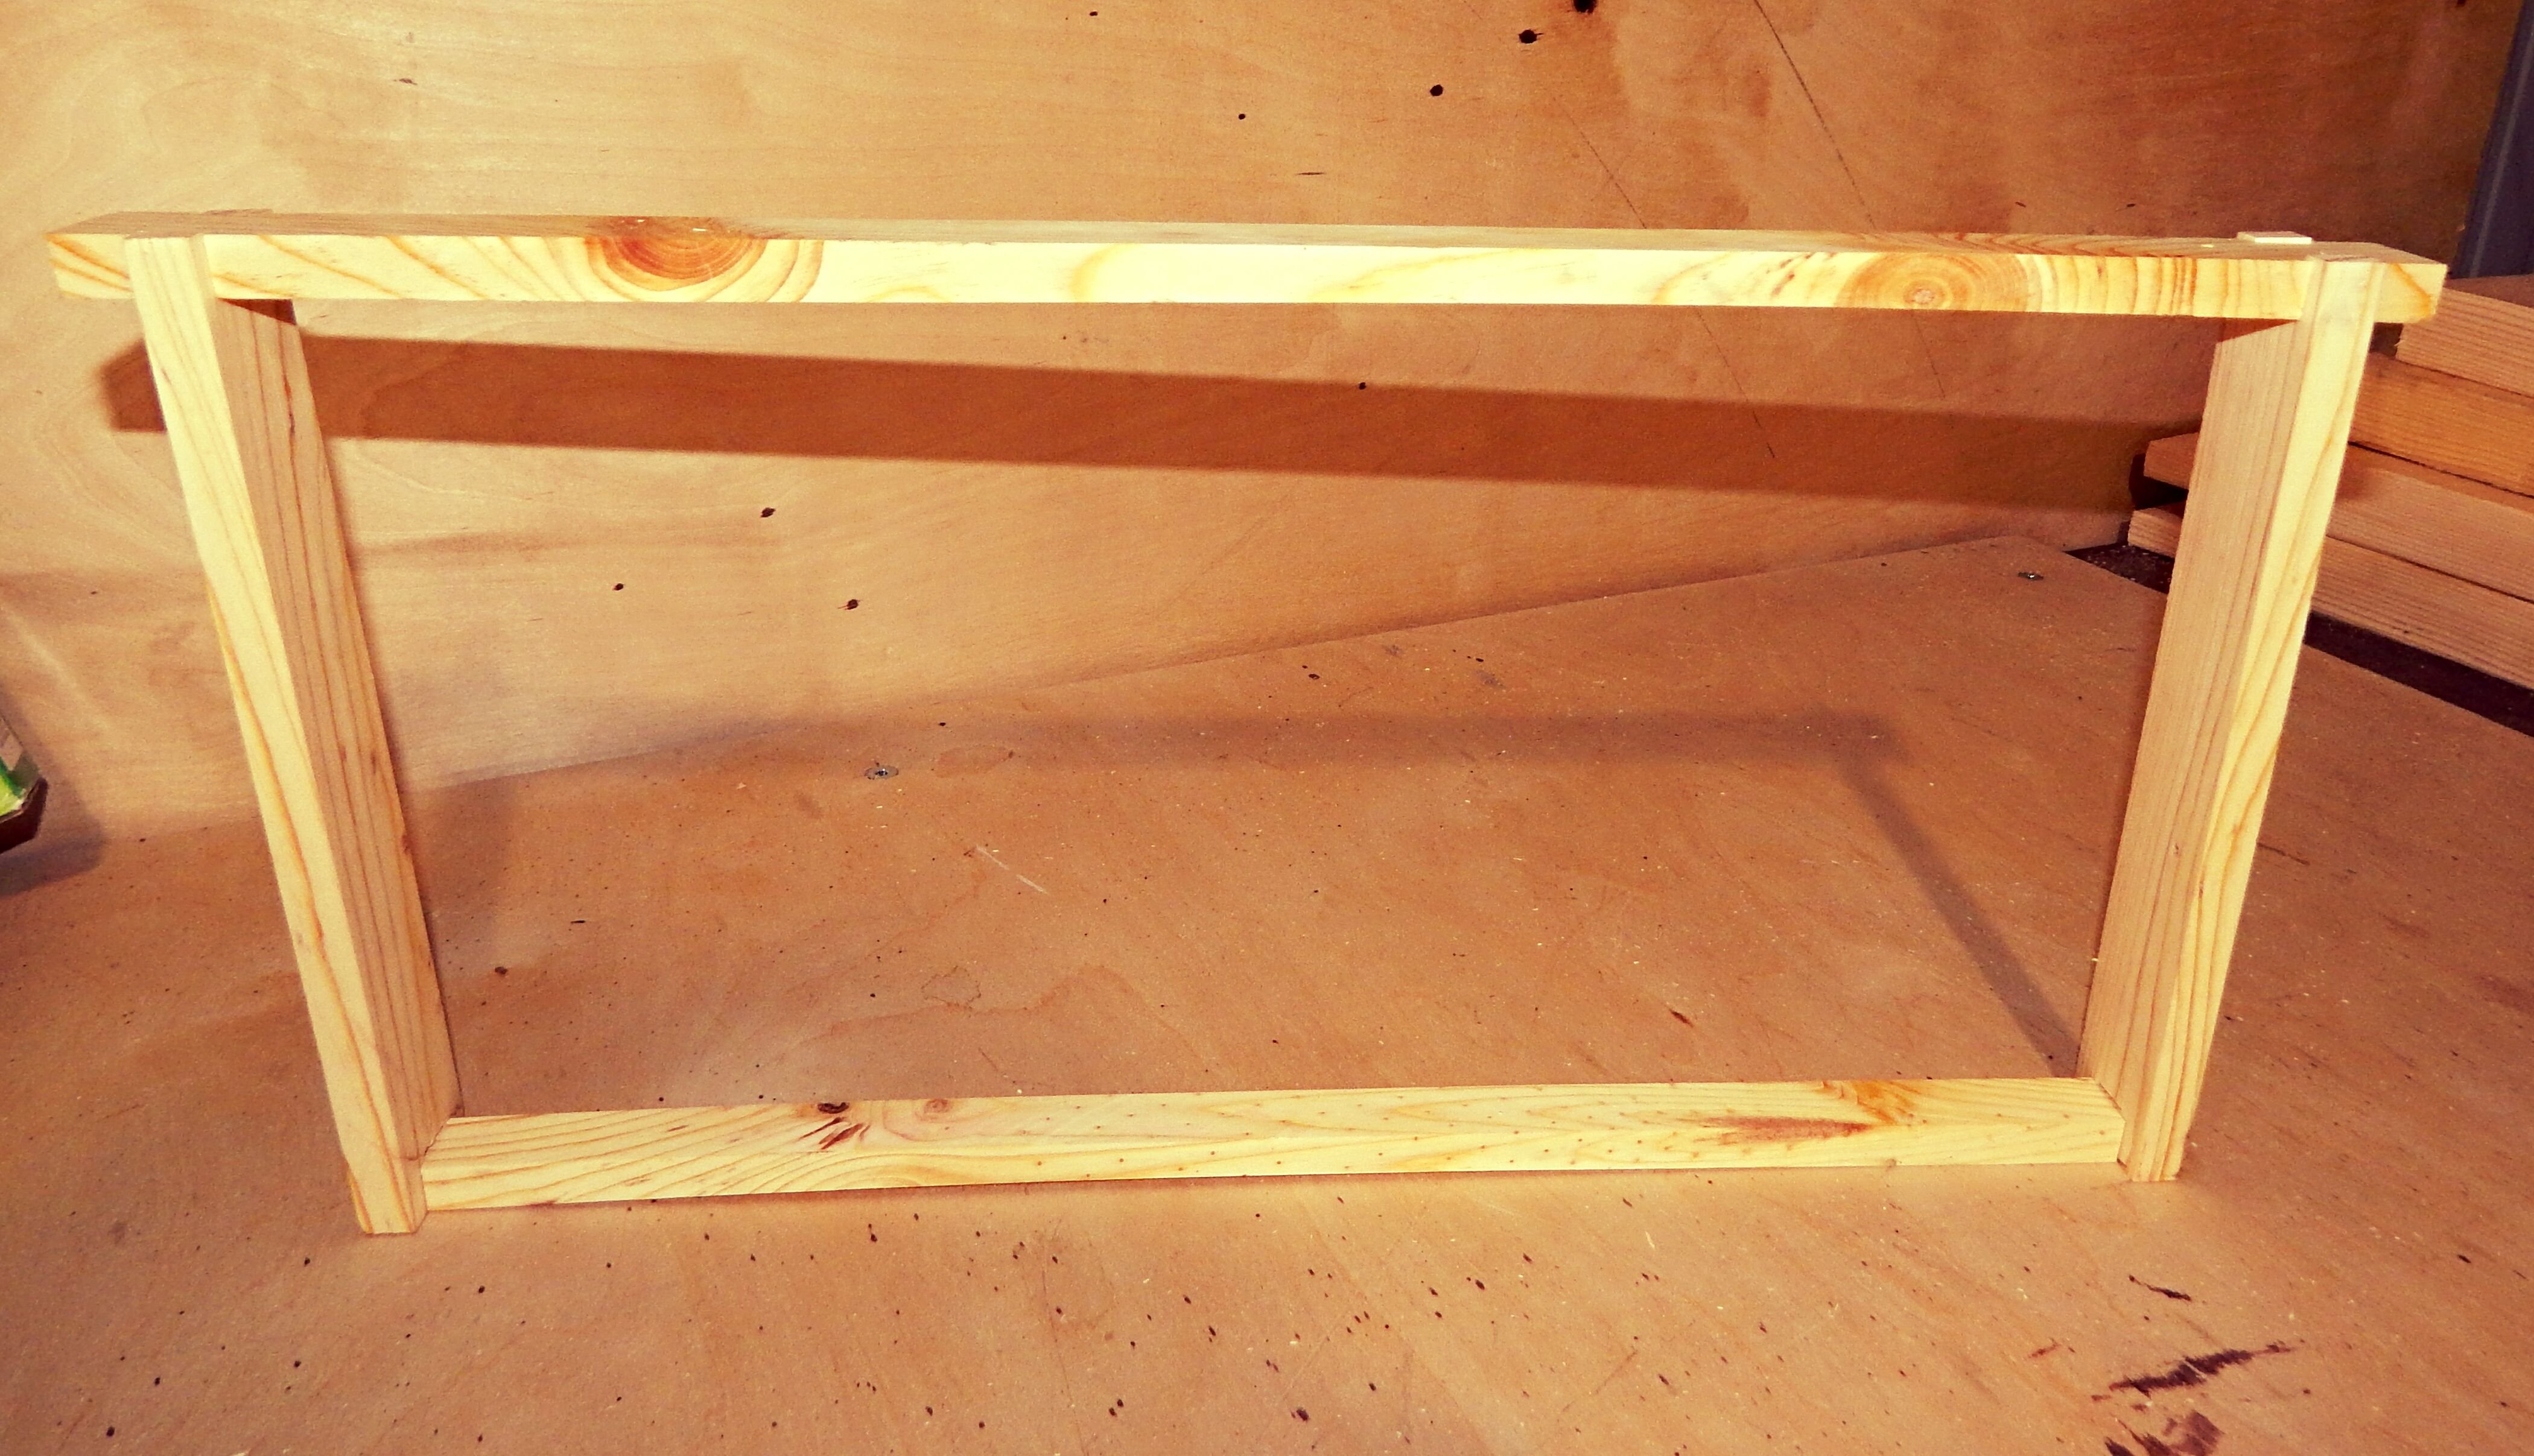
Glue each joint and use claps to secure while drying overnight. Using claps will make your frames 10x stronger than just glue alone, and we highly recommend using them.
You now have a finished Hive Frame made from scrap material... not bad huh?
Remember to save all of your hardwood scraps to make this cutting board
We hope you found this post helpful, feel free to contact us with any questions you may have along the way. We hope you will stay tuned to the rest of our Beehive building series.
Thank you for reading,
Happy Homesteading!