Welcome back to the Remarkable Diary! I'm very glad you have returned and welcome all of you who have just found this diary. You can of course read previous parts using the links at the end of this post.
This is the most exciting part of the entire story.. the start! Thinking back now, it was much more exciting starting than finishing! I think this is because there was no actual finish point. Even today I still have one or two things that still didn't get done! So, there I was, finally ready to begin building my dream home at last! I really had no clue where to start. My mind was absolutely full of an endless list of questions, and there was no clear answer to many of them. There are always many options when building, and a big part of Biotecture is observing your location, land, resources, climate, and so on, and responding to that. Whilst I did have three books that taught exactly how to build an Earthship from scratch, they were by no means a bible. I was doing this in a totally different location, and was unable to get many of the materials that were used in the traditional Biotecture approach. I wanted to make something very beautiful, that looked different to the normal Earthships you see around the world. Also, a big part of my mission was to make something that was not only eco friendly, but also without compromising comfort or any of the things that most people need to be happy in their home.
The Earthship Biotecture books were a very valuable resource, even though I couldn't follow them to the letter. What they provided was the theory and knowledge that you need to know to understand what an Earthship really is, and why it works. If you can understand the reasons why they are able to maintain a very comfortable temperature in almost any climate, then you can start to adapt the design to suit your needs. The location that I chose is actually a very easy climate to work with. The temperatures never fall below 8 degrees Celsius, and its never too hot or humid. We get plenty of sun, and rain and monsoons. We have solid ground on a mountain that will never flood due to our altitude. What this meant for me, was that I was MUCH more free to change the design and adapt everything to my desires, then if you are building in a typical European climate for example. When you build in a climate that gets very cold or very hot, you need to really pay attention to the things like orientation, burial, air cooling pipes, size of the house and many more things.
There is a model that has been developed by Michael Reynolds that is called the global model. This is something that is a very good starter design and plan that is very efficient and works well, with some adaptations, in almost any climate. That includes places where temperatures cam dip to -10 Celsius! Yes! There are people living in these sub zero temperatures without needs a fireplace to survive it!
Click Here For More Information on the Global Model Earthship
Since my climate is so mild, I was very free to design something that would hopefully perform well. I let my imagination run wild. I decided that I wanted to make my house the shape of a snail shell, based on the shape of the Fibonacci spiral! These golden mean proportions are quite special to me, and I figured that if my entire house is a spiral that this might bring in some good vibes. I'm not very good at drawing, but I know what I want when i see it! So, off to Google I went and did a search for spiral house. I found quite a few people who had done something similar (not an Earthship but a spiral house). There was one that REALLY caught my eye. The plan for this is below. The most special thing about this is that it has an open center where you can have a private little garden contained within the center of the house, and open to the sky. I LOVED this idea, and realized that I would be able to see the garden from anywhere in the house if I used lots of glass windows.
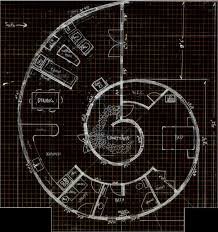
Very quickly I was in love with this idea. That was it, I decided I was going to make this! Wow.. Now what!?? I'm not very good at 3D designing on a computer, I am a more of hands on kind of guy. What I really wanted was a small model that I could somehow make and then get to look around it and really examine it. Then once I had this basic design, I could try to go about figuring out how I was going to make it work.
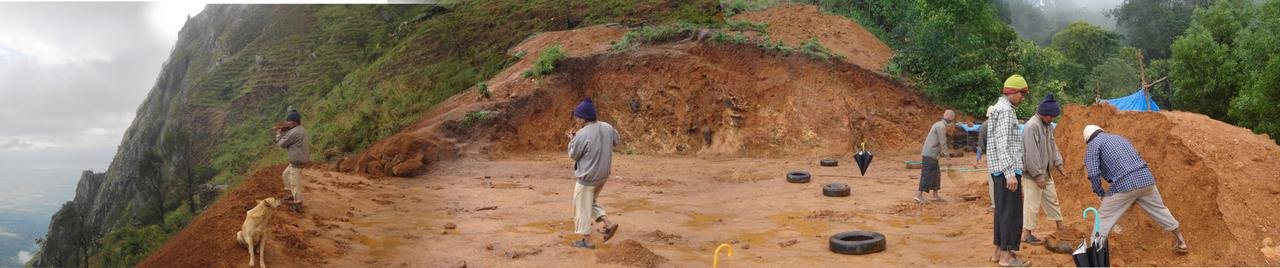
At this same time my plot was about half way to being leveled, by hand. I had a team of 6 Nepali workers who basically spent every day all day digging and moving dirt. My plot was on a steep incline and I needed to level it before we could put a single level structure on it. This was a LOT of work! We had shovels and buckets and no machines or power tools for this part of the work. I prayed that we didn't hit stone too early on as that might totally ruin my plans! What I wanted was dirt, and lots of it! It was pure grunt work, every day.. for... get this.. 8 months! Yes it took that long to dig!
As we were leveling we extended the plot quite a few feet in all directions and retained it all using tyres. I had managed to get enough tyres from my local town to do this, and it is one of the best and easiest way to securely retain a mountain of dirt pretty much indefinatley This was my first time working with tyres and I used a few local guys who looked pretty beefy! Making retaining walls is MUCH easier than the walls of the actual house. You don't have to fill them nearly as much, nor do you have to pay much attention to the exact leveling. You pretty much just make a wall that leans slightly into the dirt and then plaster over it for a nice natural finish. It went well, and we managed to retain a huge 60 foot length of land in just a couple of weeks with a few guys and almost no stone or cement.
All praise To the Nepali, who work come rain or sun
My passion for Earthship Biotecture and sustainable living goes much further than just wanting this for myself. I consider this whole idea to be a great gift to the world. So much so, that right at the start I decided that I would make my build a workshop for volunteers and anyone who wanted to learn this approach. I didn't have many connections back then and hardly used my Facebook account that had very few people on it. What I decided to do was go to a very special beach called OM Beach in a place called Gokarna near Goa. Gokarna has several beaches that are very popular with international travelers and Indians. The type of crowd who go there are the off beat type people who would no doubt find this whole concept very interesting. I went by taxi, took my dog for a holiday and we set off to the beach! It was a 20 hour drive, and let's just say that my dog doesn't travel well! I'll spare you the details... We arrived at 6am for sunrise, and what a beautiful sunrise it was. This has to be most beautiful beach I have ever seen. There were many small guest houses right on the beach and we found one that had a good restaurant and view.
Om Beach , Gokarna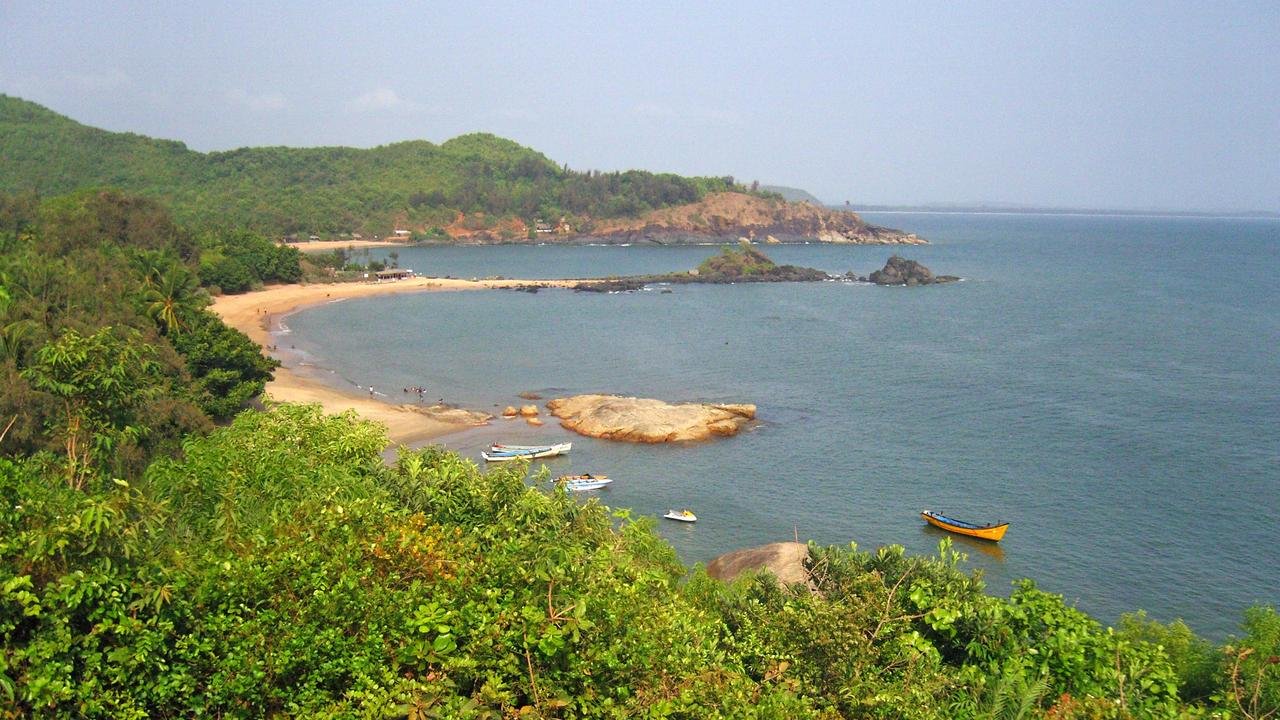
Now, finally to make this model! I set to work pretty quickly! I had the brainwave idea of using polo mints to mimic the car tyres and decided to make the whole model out of them. I went to the village and bought up probably every polo mint in town! I made a big print out of the spiral line and got to work, sticking the polo mints together with wax. Oh I wish I had a picture to show you of how it looked. Quite ridiculous actually, but I think that was mainly because it was made out of polo mints.. AND the flies were eating it up fast! It looked very cool indeed, and my final questions were related to how I was going to fit a roof onto a spiral. Probably I'd just make a big roof that covered the whole thing so the roof could be quite simple.
The exact spot where I made my Model Earthship from Polo Mints
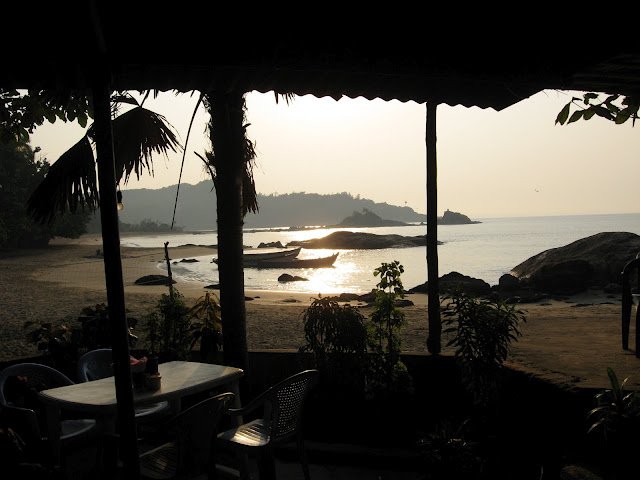
I sat looking at this thing for hours, overlooking the sea, beach and palm trees. This was a magical moment really. As I stared at it I thought long and hard about all the details. One of my main questions was whether I would seal the entire base of the building with a rubber membrane called EPDM. This stuff is totally waterproof and you can line the house in it to prevent any chance of dampness or moisture coming through. It is something that is pretty standard in Europe, and is also quite costly. I had made a few phone calls and found out it would cost around 3,000USD or more to buy it. This was really too much for me! I didn't actually have any budget, or much at all in the way of savings for this! I think in total I had around 8,000 pounds in the bank. What I did have was a job that paid me a few thousand pounds a month. That was enough in India to do what I was doing, provided I didn't spend too much at once. So this 3,000USD seemed like quite a lot to spend on a lining and I wasn't so sure I really needed it. Since i wasn't burying my Earhthship it wouldn't be nearly as prone to dampness. The traditional method of preventing dampness on the ground is to raise the floor level using stones to prevent wicking. I liked this idea, and decided to ditch the EPDM and save lots of money. That decision was a REALLY hard one to make! I didn't really know if I was right and it would be OK, but i had to take that risk. What I decided to do in the end was to wrap the base of the house using some kind of cheap plastic material like a damp proof course in a traditional brick house. A happy compromise!
It is quite hard to make decisions when you are not really sure of what you are doing! This takes a kind of courage and self belief. I didn't really have much in the way of experience, and with no one to ask I was forced to think on my feet. I had no contact with Mike since some time, he wasn't answering my emails.. and I didn't really know anyone else to ask all these questions to. Despite it being hard on the mind, it is also the best way to learn, and understand how to build.
I was really charged up with incredible excitement and disbelief. I couldn't really believe I was doing this, and it all felt a bit like a dream. My next mission was to spread the word and get some volunteers to come and help! I made a poster on my computer and went to town to print it out. It was pretty cheap to photocopy them and in the end i made 100 copies for 100Rs (1 USD). This turned out to be quite an effective use of paper! I took these copies and basically went on a three day recruitment mission. I went to every single restaurant and guest-house on three beaches and selotaped posters in them all. I think there were around 50 in total! The owners were all very nice and friendly and all of them let me stick a poster up. I don't think any of them really understood what I was doing but they could see my great excitement and passion and I think that went a long way.
As I stuck them up many people came to look, and I engaged just about everyone who even looked at me. "Have you heard of Earthships?" I would ask. "They are totally off grid sustainable buildings, amazing things! I'm holding a workshop soon if you want to learn how to do it" I was on my rant, and with such passion and excitement that I think I was even surprised how many people seemed totally enthused and ready to come! After three days I was ALL talked out! I think that I had even reached my own limit on talking about how amazing Earthships are, and finally called it a day after I had talked to just about everyone on the beaches!
I returned to Karuna Farm about 10 days later, and was ready to finally drill down into some of the details! I had too many questions about technical things and decided to email Michael Reynolds for a last ditch effort to get some help. Finally after a few days he responded! What he told me was that he didn't have any experience with snail shell houses.. No surprise there! He said he would be happy to advise me, but only if I changed the design to something that he had worked with before. He suggested something that was a round house rather than a spiral. If I was to build a round house, then he said he would help me!
Now, here is what may be my biggest mistake in the whole project. I was so keen to get his help that I just said yes! I literally ditched my entire spiral house plan and instead looked at an image of what he was proposing. This was a design from Africa that had a large part of the house as an open covered veranda. Whilst this may be OK in Africa, it was totally unsuitable here in the mountains. I could see that I would need to make a LOT of changes to his idea, but with his help I was happy to proceed.
Guess what happened!? The Haiti earthquake happened. This was a major disaster as many of you may remember. Mike rushed off to help, and didn't respond to a single email I sent him. I was firing all those questions that I had at him, hoping for the magical answers to come. Alas, they never came! Not even the most basic questions got answered, and so I was left to my own devices again to figure it all out.
Surprisingly I continued with this new design! I had let go of my spiral paradise, and was also concerned that there wouldn't be enough floor space due to the shape and amount of land I had. So I was happy to entertain a much simpler idea of one big round house. I totally let go of getting his help and started to think hard. I learned how to use a very simple 3D program called Google Sketchup. It is really easy to use and lets you do pretty much anything you like. I spent a few days on it and managed to get a rough idea of what my Earthship would be like from the outside. It took much more thinking than you might imagine since I was designing with function in mind as well as aesthetics. Here is my image of the grand vision! It wasn't supposed to be 100% accurate but it did represent more or less what I wanted to achieve.
The Plan! I have a plan!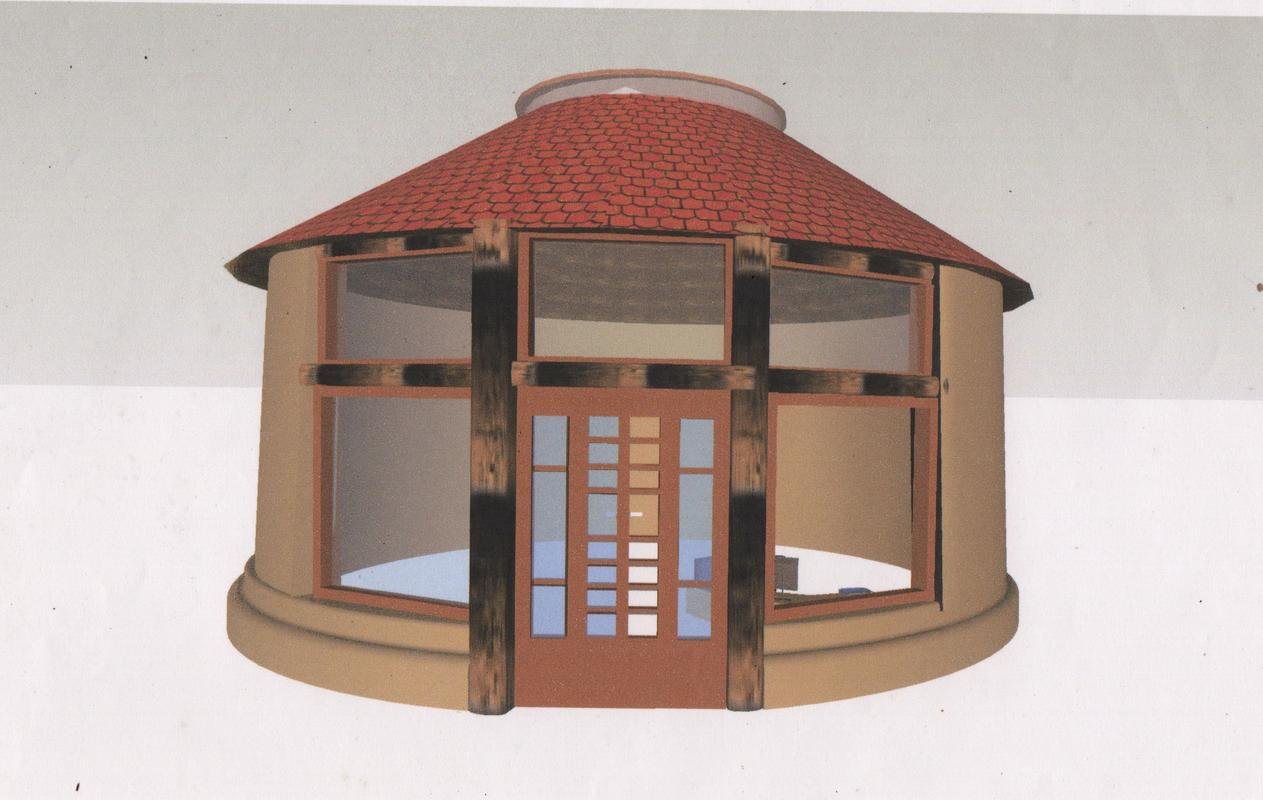
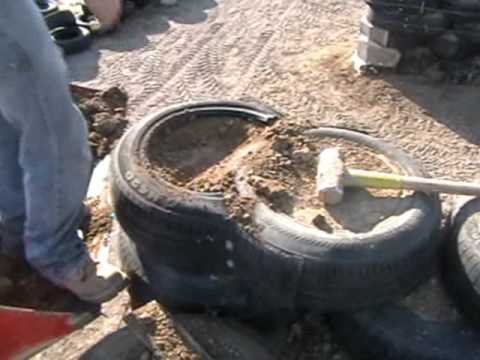
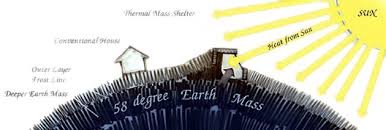
I would like to explain a little bit about what considerations I had to take on to make this design. As I have mentioned before, this is a design that is both functional as well as structural. The main thing about Earthships is performance! When you start to modify the design you have to understand how it effects the performance. To do that you need to understand the basics of how they work. The most important thing to understand is 'Thermal Mass'. This is the gold right here. The main load bearing walls of an Earthship are constructed from earth rammed car tyres. Each tyre can hold around 50Kg of dirt when fully compacted. This is very heavy! An entire house made of them will have more weight then just about any other kind of building. This mass of dirt is able to hold and store a lot of heat, so much so that they act as batteries of heat that can release it back into the house when the temperature goes down inside. This is also a part of the magic. The temperature regulates it self. The only thing you need to do is open or close windows or sky lights to allow air flow and ventilation.
How To Pound a Tyre
The heat comes directly from the rays of the sun hitting the walls of an Earthship, and so an Earthship needs to have a lot of glass and windows for sun to enter.. especially in colder climates. It is this need for solar gain that determines the depth of an Earthship. In a very cold climate you want the sun to hit the very back of the house walls so that all areas are heated up. In a very hot climate you can make it deeper and allow for some shading on hot sunny days. Since I had a round house, it was not possible to get sun to the back of it from the front windows. Therefore I decided to make a huge 15ft skylight that opens to allow better ventilation. I was pretty sure that this would bring in enough light to keep the whole house bright and warm.
The front of the house is mostly glass and windows. I decided to orient the entire house to the East, with the front door due east. This was for a few reasons. Normally when you want a lot of solar gain you aim the front side of the house to the south so that you can pick up the morning and afternoon sun. One thing about Karuna Farm is that during the colder months, it's nearly always sunny in the morning and then the clouds come by lunchtime. Also, there is a thing called Vastu in India that can be likened to Fueng Shui. Vastu is very specific about every detail of a house, including orientations and positioning of rooms. An east facing front door door is great for Vastu since we let the morning sun right into the house.
The roof was going to be hard! The roof of a house is usually the most expensive and difficult part of a house, and is also the most important in my opinion. This roof was to be self supporting, with no pillars holding it up. It would have this huge skylight that would somehow open. I decided I was going to make it using 16 large beams of wood. That means there would be sixteen sides of the roof, and also 16 sides to the skylight. The skylight would be made of wood and would be where all the beams met and attached on to. Since it is round, they should all counter balance each other and lock the ring into place. That was my theory anyways! Clearly I was going to need a good carpenter to help me with this.. and I was eventually very lucky to get one who randomly turned up from the UK with a sac of tools.. That story to come soon!
I wasn't sure if I would insulate the building, as I hoped it would not be necessary. The interesting thing about insulating an Earthship is that you do it from the outside walls, not the inside walls. This is because you want the sun to hit the inside walls to heat them up. The reason you insulate the outside walls is to prevent the heat from escaping to the outside, and so its all kept for internal radiation. I decided that it probably wasn't needed, and If it did get too cold I could always insulate it afterwards. That would save a lot of time and money and challenges!
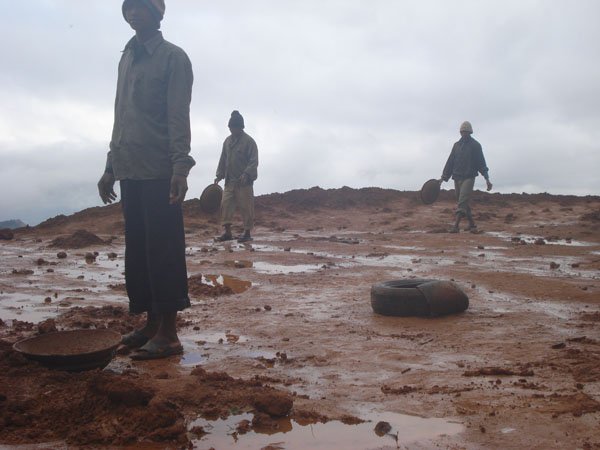
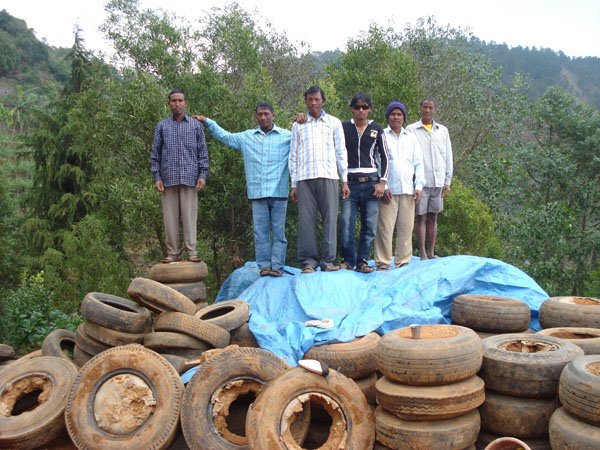
I managed to get the tyres from a nearby city. I had visited the city of Coimbatore and struck a deal with one of the local tyre retreaders. Their job is to fix old tyres and give them a new life.. so I was pretty sure they would have access to lots of them! It didn't take long before I had the ear of a helpful Indian man. I think he was fascinated that this European man was trying to buy 1,800 old tyres and was willing to pay decent money for them. For some reason they seemed to totally get it when I explained that I was going to make a house from them.. Everyone in India seemed to appreciate this idea, and I never got any looks like " Are you crazy!?" So we did the deal and I spent around 300USD on tyres and another USD150 on a truck to bring them up the mountain.
Time was tight now as I had people coming soon to help and volunteer and everything was ready except the tyres. We couldn't really do much until they arrived, so I crossed my fingers and waited. I had to give 100% advance payment and so I was pretty nervous if this was really happening, or else I had just made some guy's year by giving him so much money with no guarantee it would happen. We never signed anything! This is India! We live and die by our Karma! It is also fair to say that Indians are SO wonderful about trusting each other and not being to paranoid about things. Sure, there are plenty of scammers around, but person to person they make a judgment and go on that feeling. So finally after about 2 long weeks of waiting the truck came!!! I was SO nervous because I had asked for quite specific sizes of tyres, and it was quite a challenge to explain it to him. I was really worried that he would just send me a load of old junk that were all too small or just completely worn out.
Boy was I wrong!
Moving the tyres to the site was one of the easier things to shift. Two men can carry around 5-8 tyres on one stick, and there is never any worry or issue of breakage. Bit by bit the tyres arrived on my newly leveled site and I started checking them. Yes! They looked good! They looked VEry good.. perfect in fact! Phewph!!! We were ready to start!
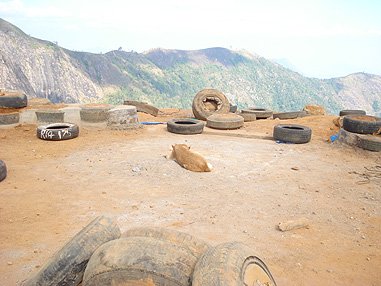
The Leveled Site With Random Tyres and My Dog J
My Nepali Digging Hero's!
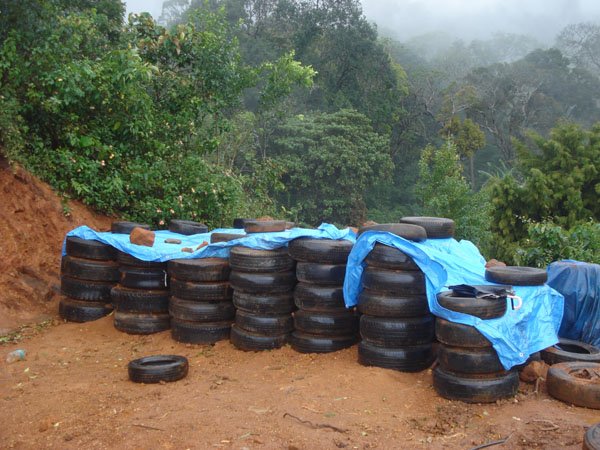
My Babies All Sorted By Size
Huge Fire Just a Few Weeks Before Volunteers Arrived
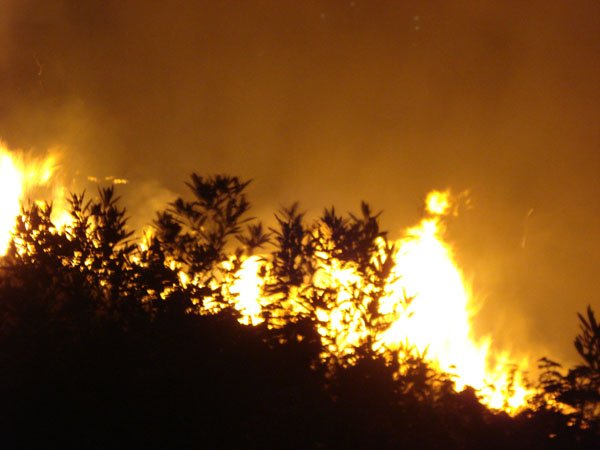
No good story is complete with out a bit of drama! Here at Karuna we have a few kinds of drama.. The most INTENSE is when we have fires. There is no one to help us, in fact most neighbors and guests run away. It is the Nepali and us who live here who have to fight it. When the fire gets this close to you, the sound is very loud! Sometimes there is so much smoke that you can nearly not breath! We just pray for the wind to blow the right way and wait it out. Thankfully no one ever got hurt here during a fire. We have them most years and I always crap myself when they come! What is always amazing is how quickly the land recovers. Usually its all blackened for a month and then suddenly it all looks green again!
Within a few weeks of returning from Om Beach, I started to get emails from people. Many people were responding to my posters! Most people wanted to know if they could still come, and where it was etc. Within another few weeks people started to arrive, first just one or two, then 5, then 10.. and on it went. We were finished leveling finally and in theory ready to go!
So now we are really ready to start this build! The plot was leveled, the volunteers were on their way, and the tyres were ready!
SO please stay tuned to see how it all began!
I really hope you have enjoyed part 5 of my story! Next time we start preparing the foundation of the entire house with tyres! That and some fun with the newly arrived volunteers!
READ PARTS 1-4 HERE:
Part 1
Part 1: The creation of my life's dream, a totally off-grid self sufficient home - Earthship Karuna
Part 2
Part 2: The dream was born.
Part 3
Part 3: HOW TO ACCOMPLISH ANYTHING IN LIFE!
Part 4
Part 4: Finding My Spot in India at Last! The Journey Ends and Starts!
Don't Want to Miss the Next Remarkable Diary Post?

Click here to subscribe to email notifications and nothing else

Check out what's trending on the ecoTrain, with 16 ecoTrain passengers!