I made Sunburnt Piggy Paus for this week’s ‘Beautiful Bread’ SCC challenge’.
THEN. . .!
I found out that @ikaputri had done something similar in a previous SCC round about a month back. I must admit, I felt a little bummed to discover that. While @woman-onthe-wing was kind enough to vocally recognise the differences, this discovery was kinda a catalyst for my second entry.
Gotta use up that fresh yeast anyway, right? =)
So what is @foodie.warrior baking next?!
Hokkaido Milk Bread!!
I’ve always wanted to eat Hokkaido Milk Bread!
In my 26 years and 364 days, I’ve eaten loads of airy, soft Japanese bread and buns! However, I’ve not tried the famed pillowy Japanese ‘Hokkaido Milk Bread’ — not yet!
While getting on a plane and zooming off to Hokkaido to taste its illustrious Milk Bread in all its authenticity sounds crazy attractive, I’ll have to make do with trying to recreate a version of it at home.
If I do it correctly, my family should have a heavenly loaf of soft, fluffy, pillowy goodness. On top of that, the whole house will be filled with the most delightful aroma of freshly-baked buttery (though there’s no butter inside!) milk bread.
DISH NAME
Hokkaido Milk Bread
Ingredients for a fuss-free Hokkaido Milk Bread
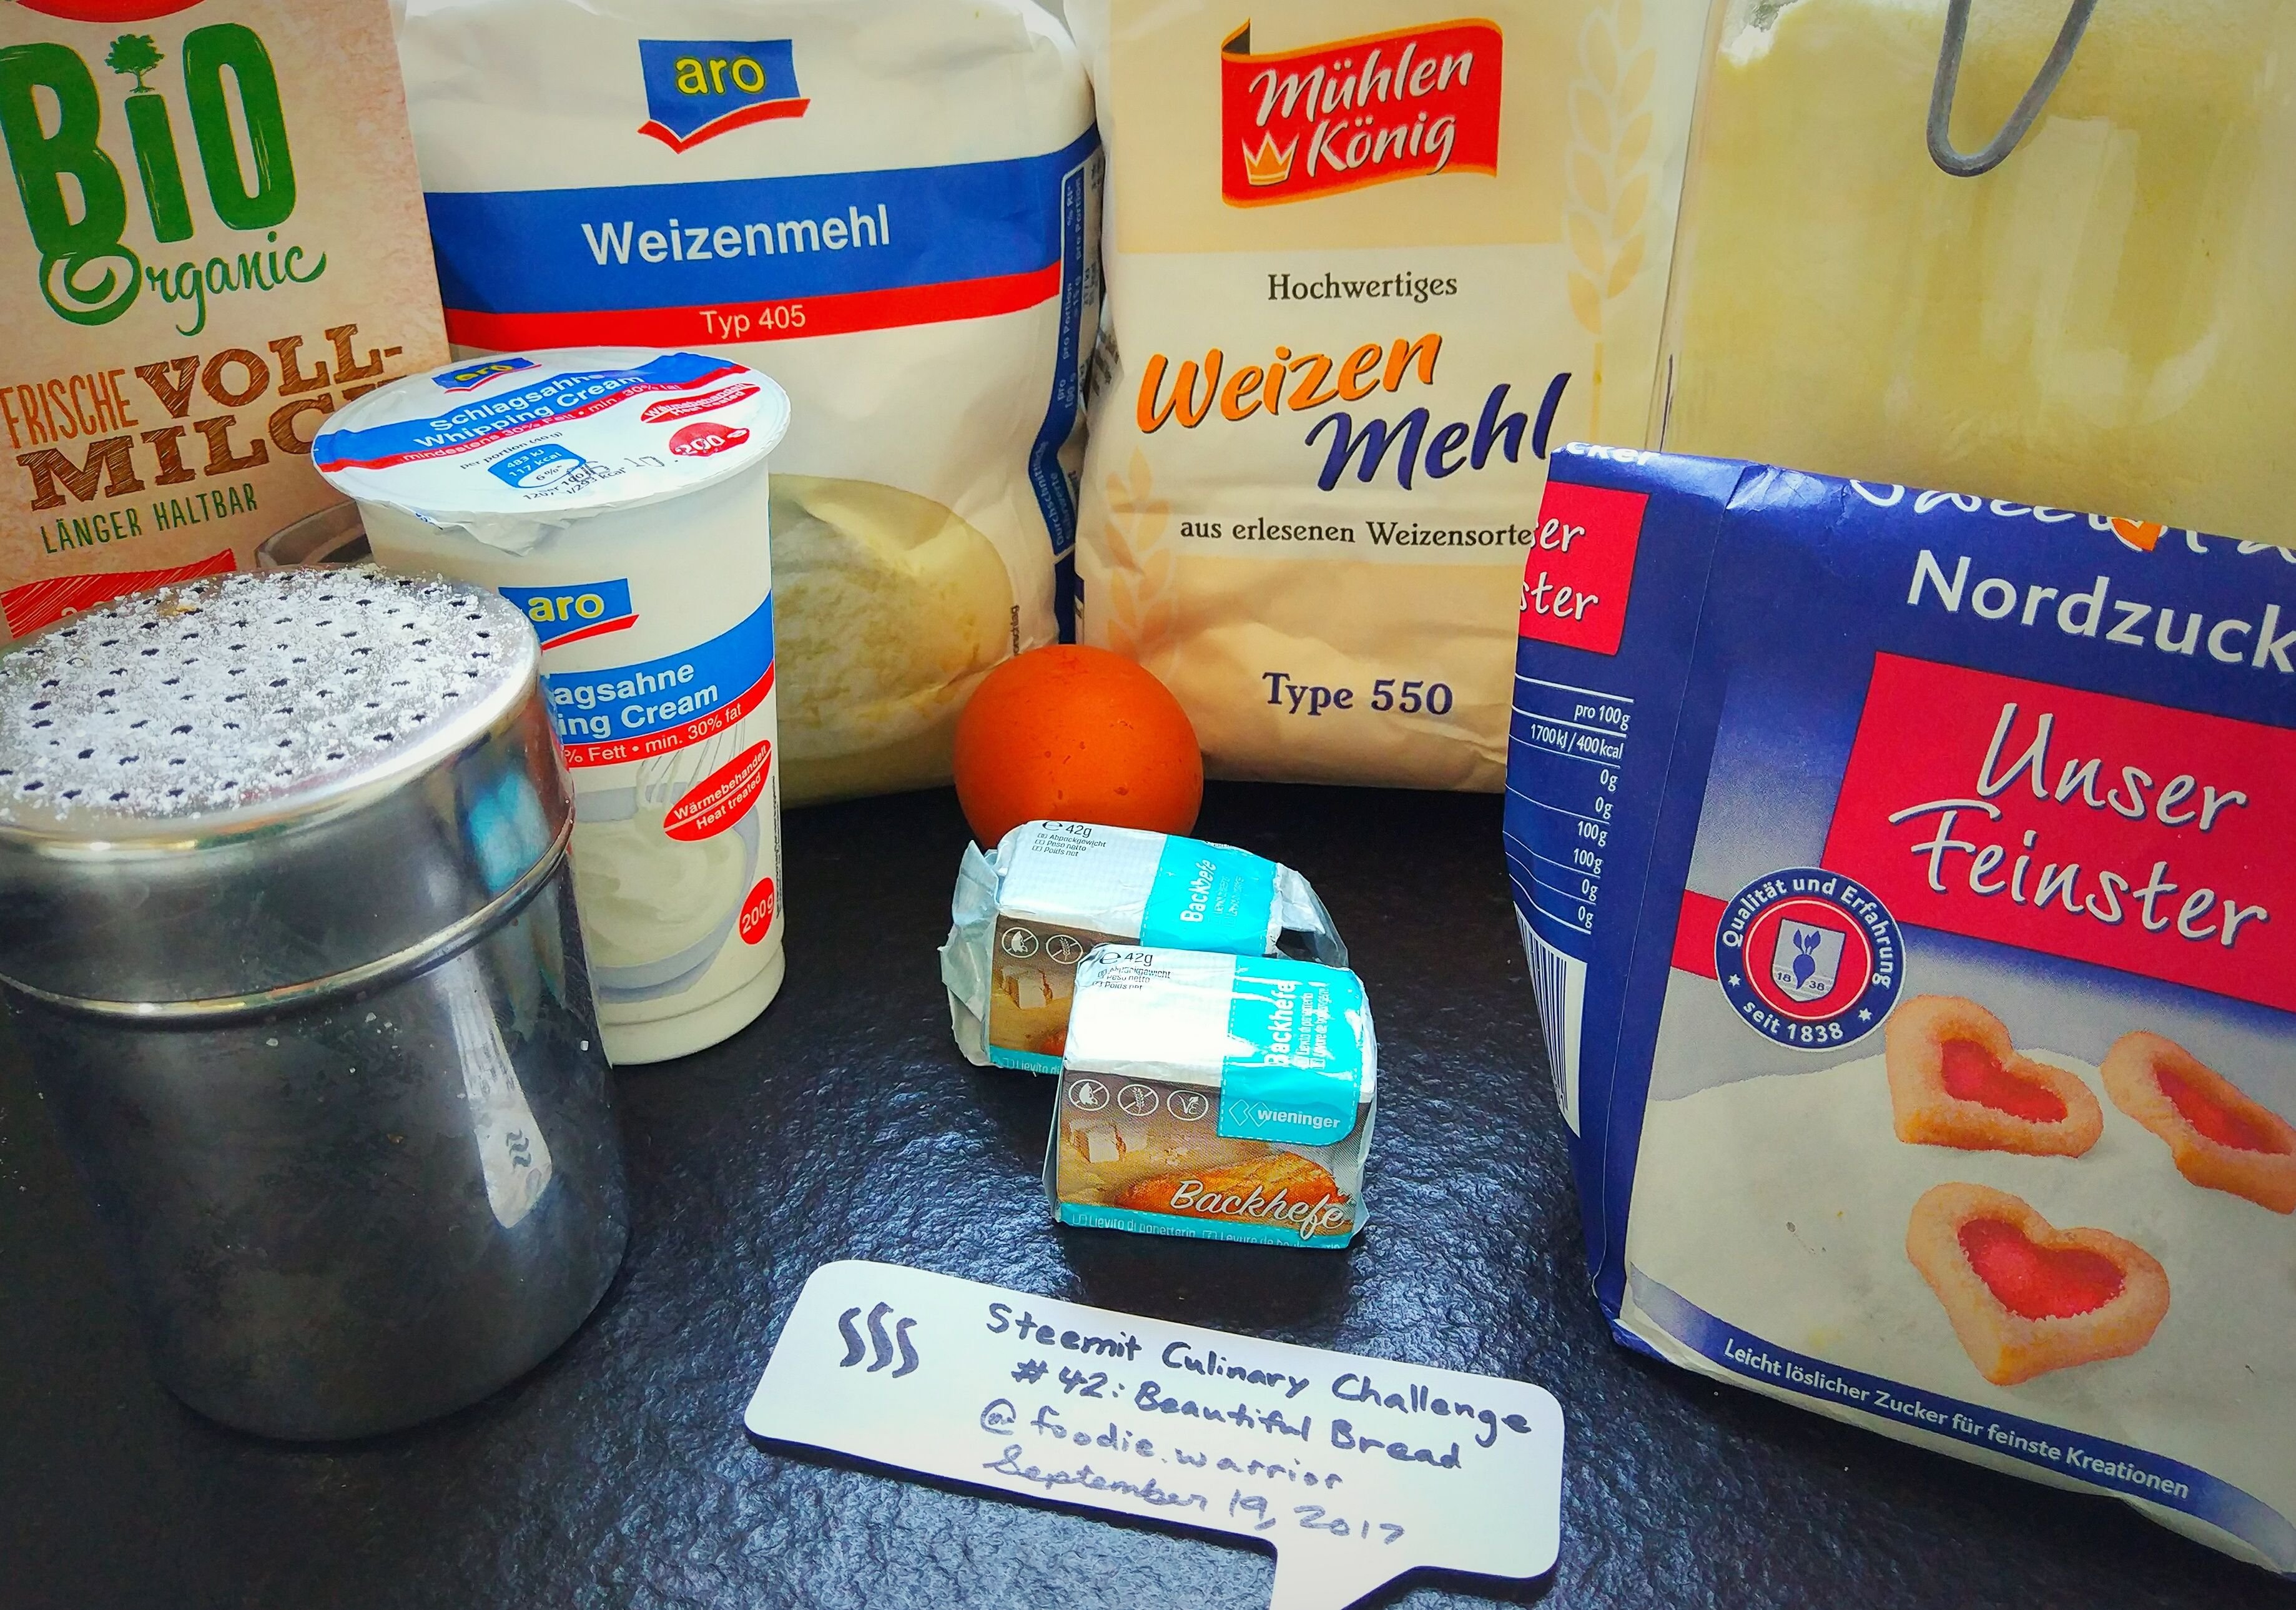
480g Type 550 flour (German equivalent of bread flour)
120g Type 405 flour (German equivalent of plain flour)
80g white sugar
30g dry milk powder
8g sea salt
30g fresh instant yeast
250g full cream milk
150g heavy cream
1 medium chicken egg, beaten
Extra flour, for counter-top
Extra heavy cream, for brushing on top off the finished loaf
How to make the Hokkaido Milk Bread
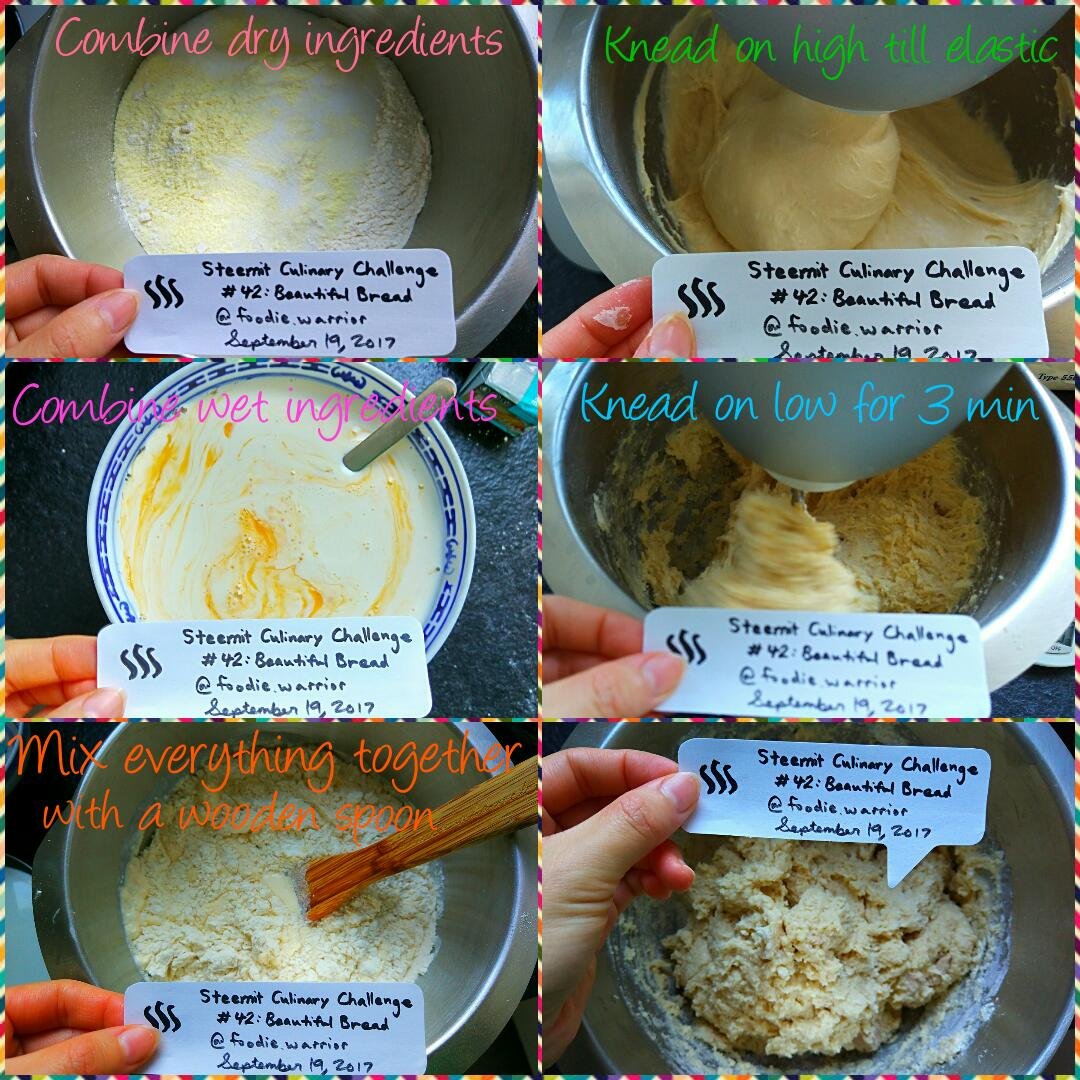
In your big mixing bowl (I used the one that comes with my stand mixer), whisk together all dry dry ingredients. Drop in the yeast.
In a separate bowl, combine all wet ingredients, then add to dry ingredients. Use a wooden spoon to mix the dough till it forms a sticky mass.
Using a dough hook attachment, mix the sticky mass of dough on low speed (3 min), then increase speed to high and knead till dough is elastic (it will still be sticky).
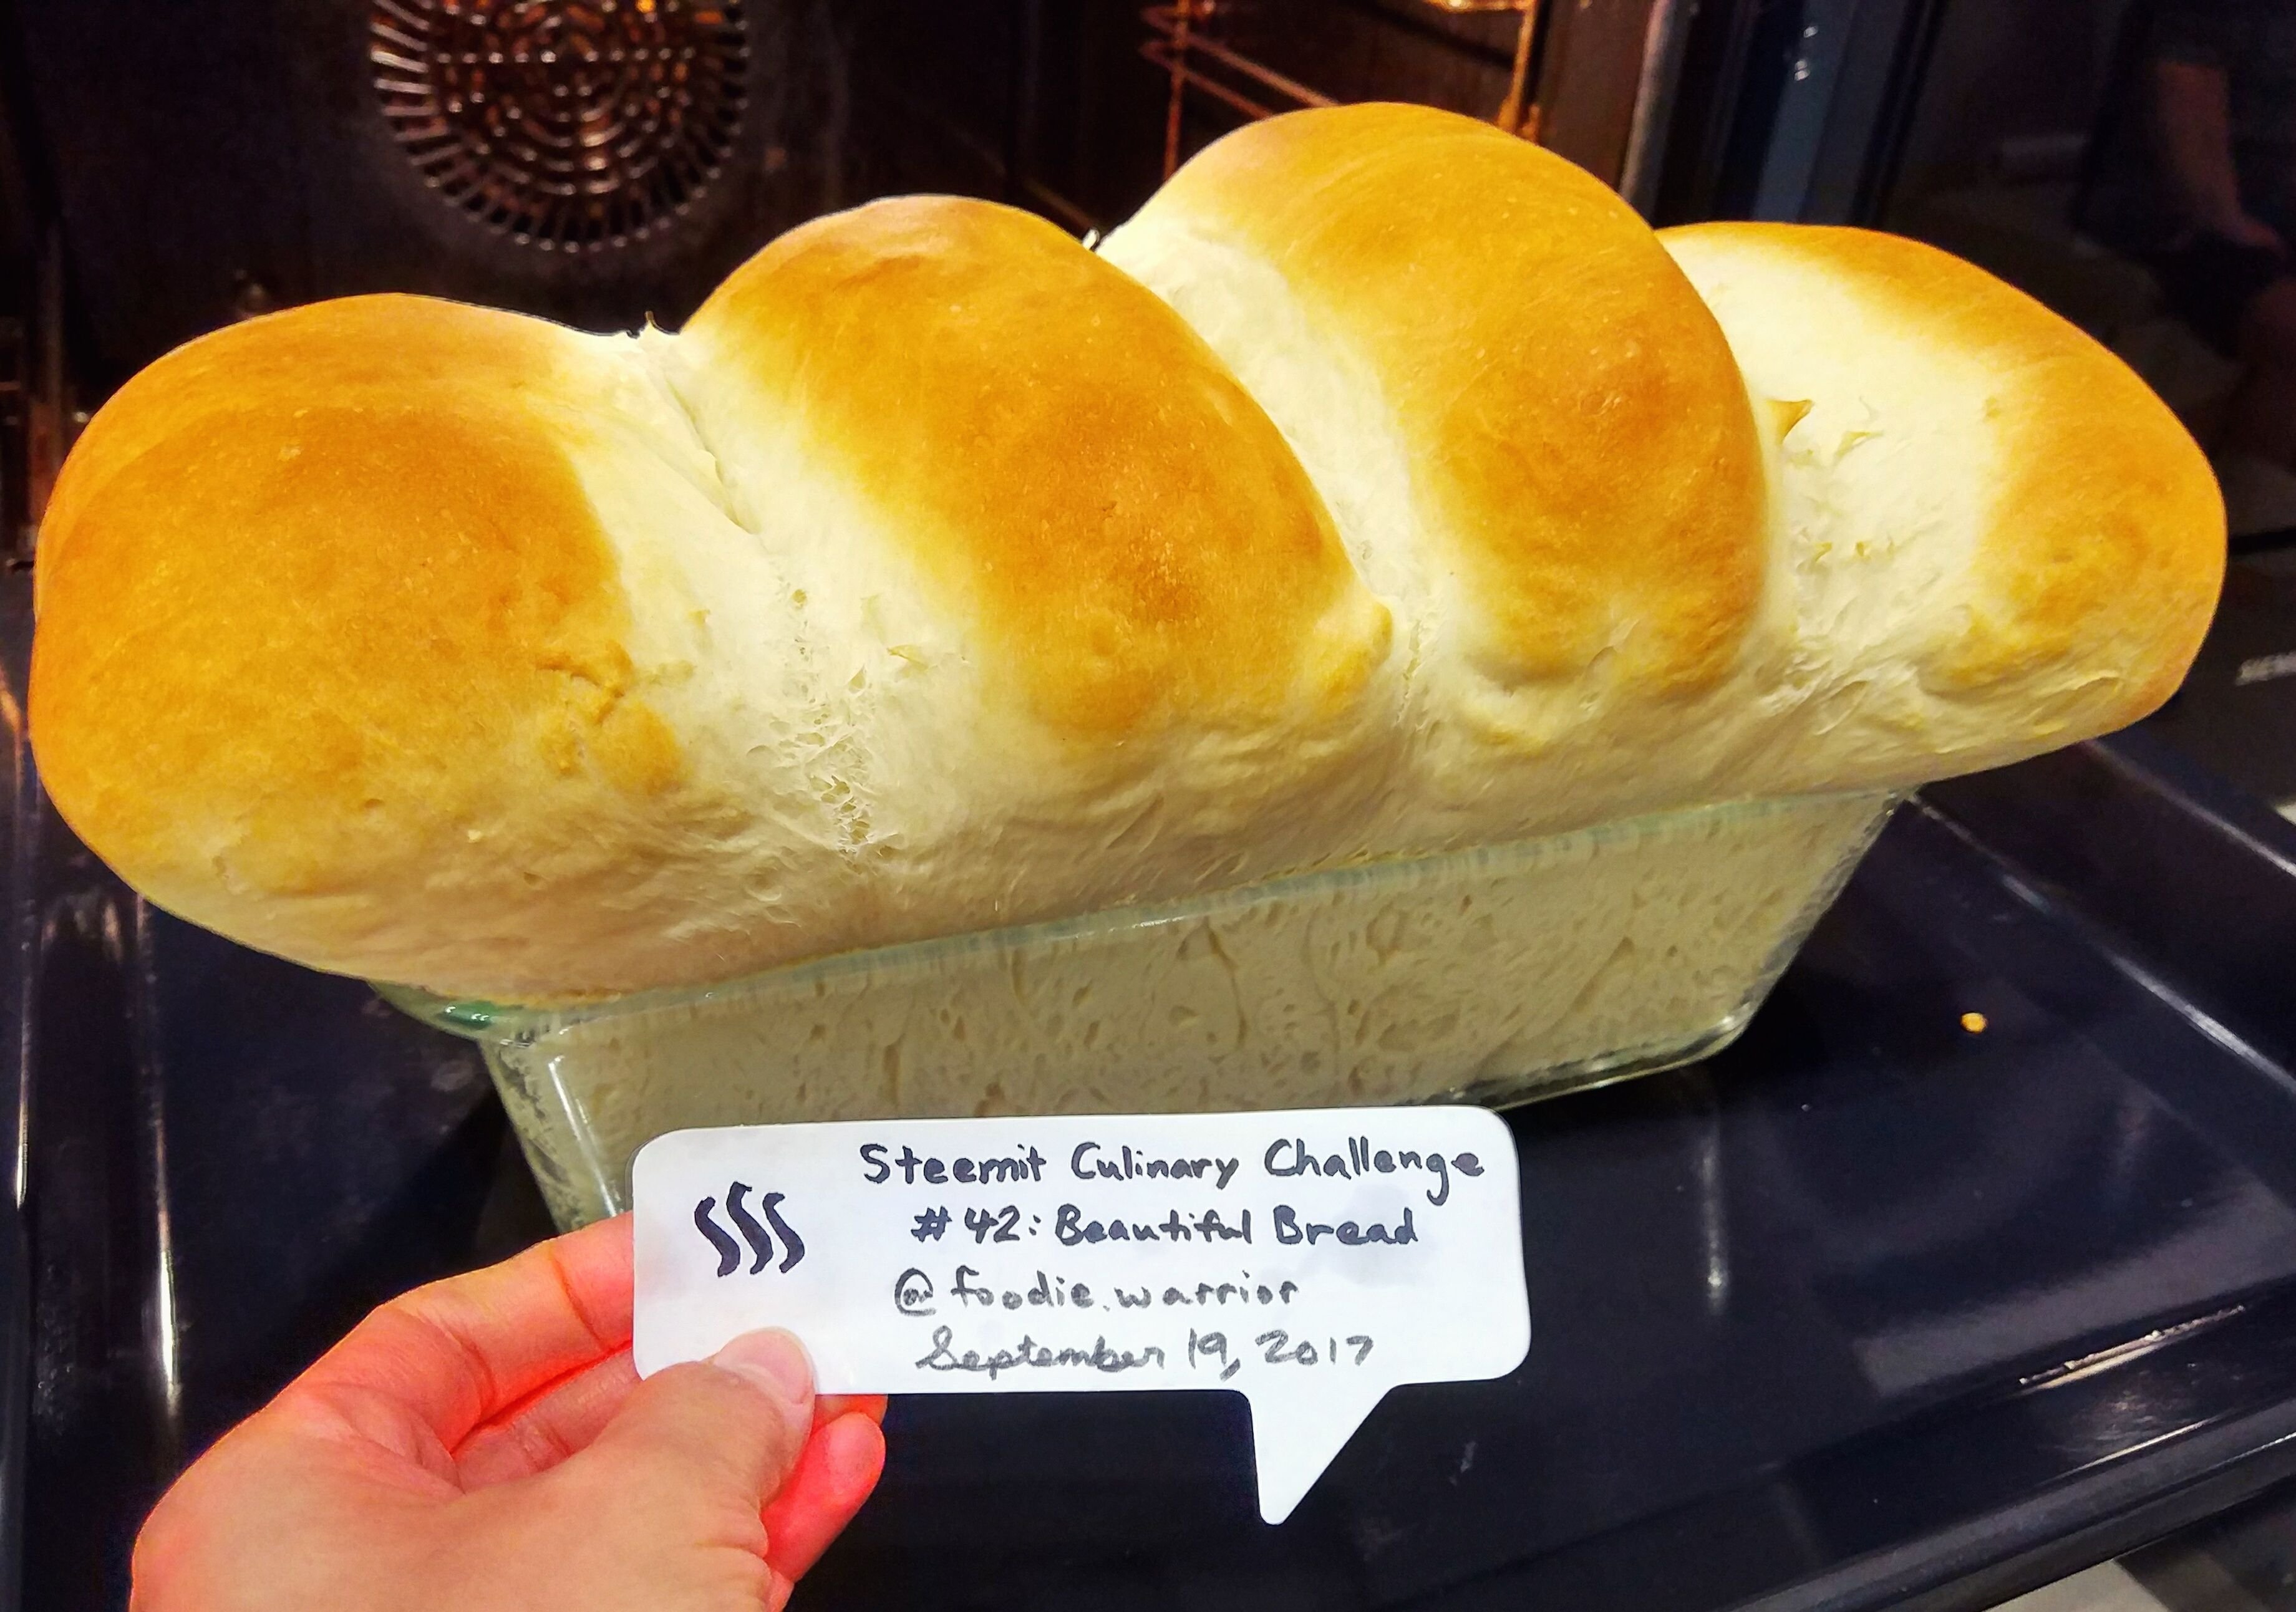
Lightly oil a bowl and dump the dough in. Turn the dough around so that both sides are covered in oil. Cover the bowl with a damp tea towel and let it proof in a pre-heated 35°C oven for 1.5 hours.
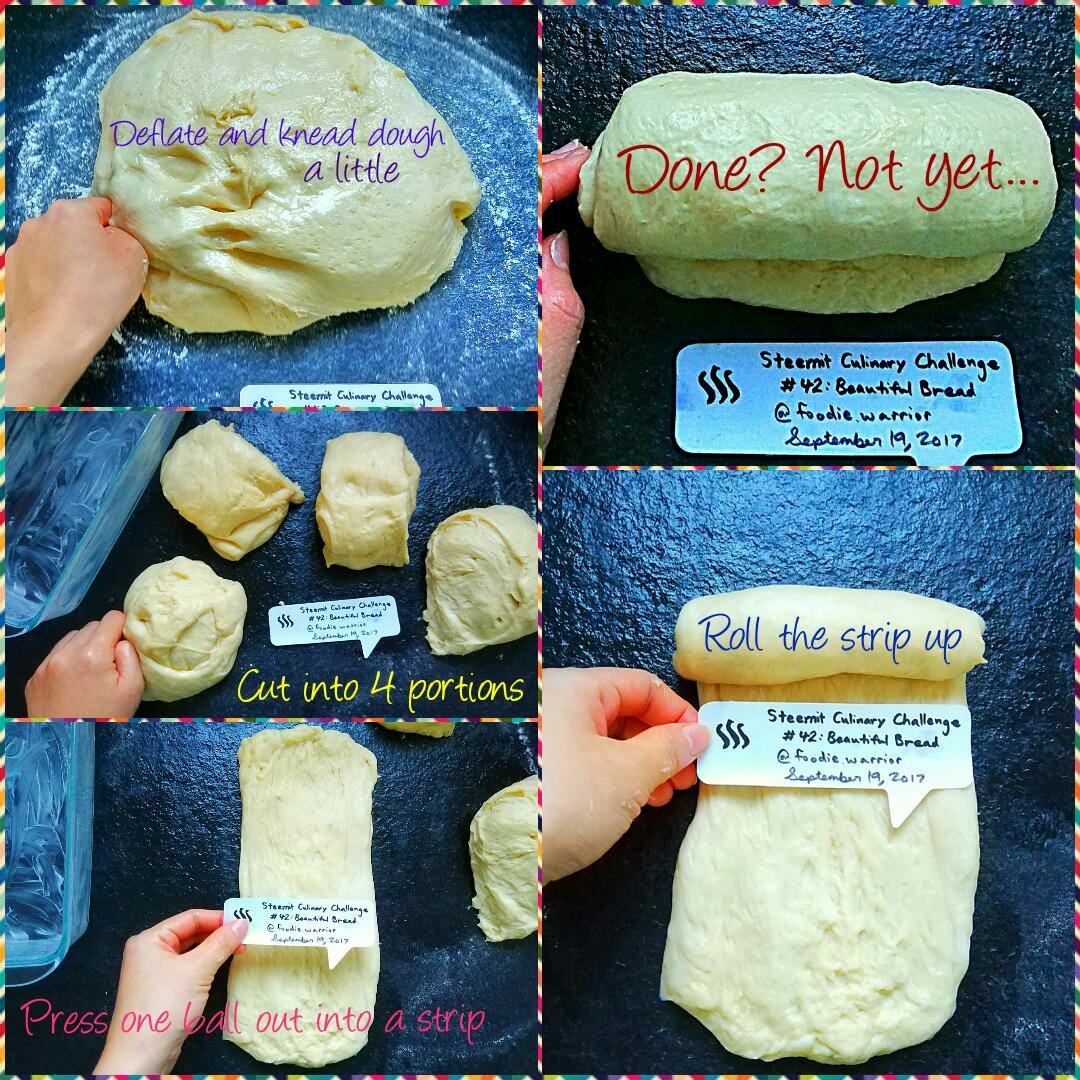
After first proof, place the dough onto a lightly-floured surface. Flatten the dough to release trapped air bubbles, and shape into a log. Divide the dough into 4 portions.
Using your palm, flatten each dough ball into a long strip and roll it up.
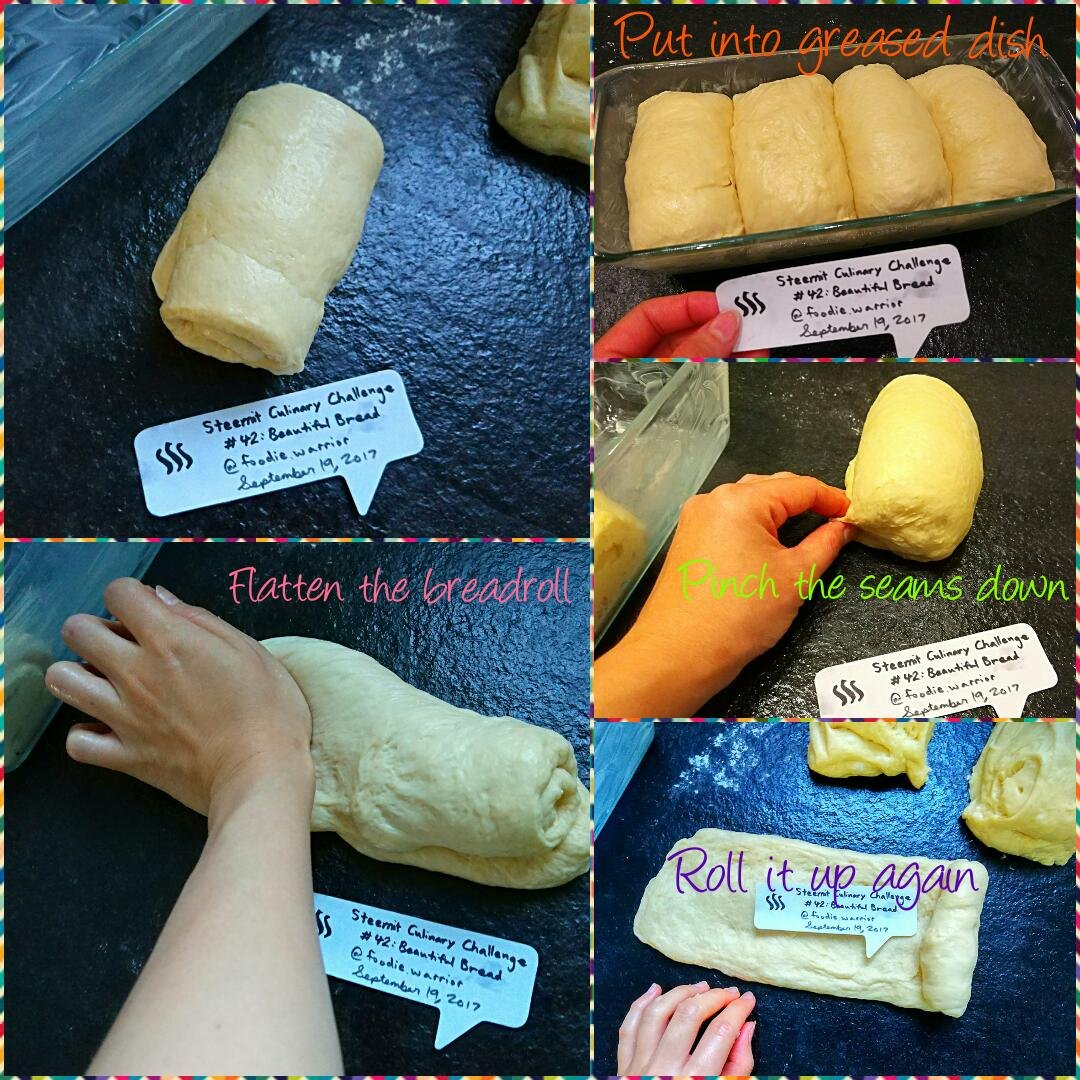
Flatten the roll again into another long strip and roll it up again, starting from the other side.
Pinch close the seams and place the twice-rolled portion into a buttered loaf pan (I don’t have one, so I used a glass dish). Repeat till all four are side-by-side in the pan.
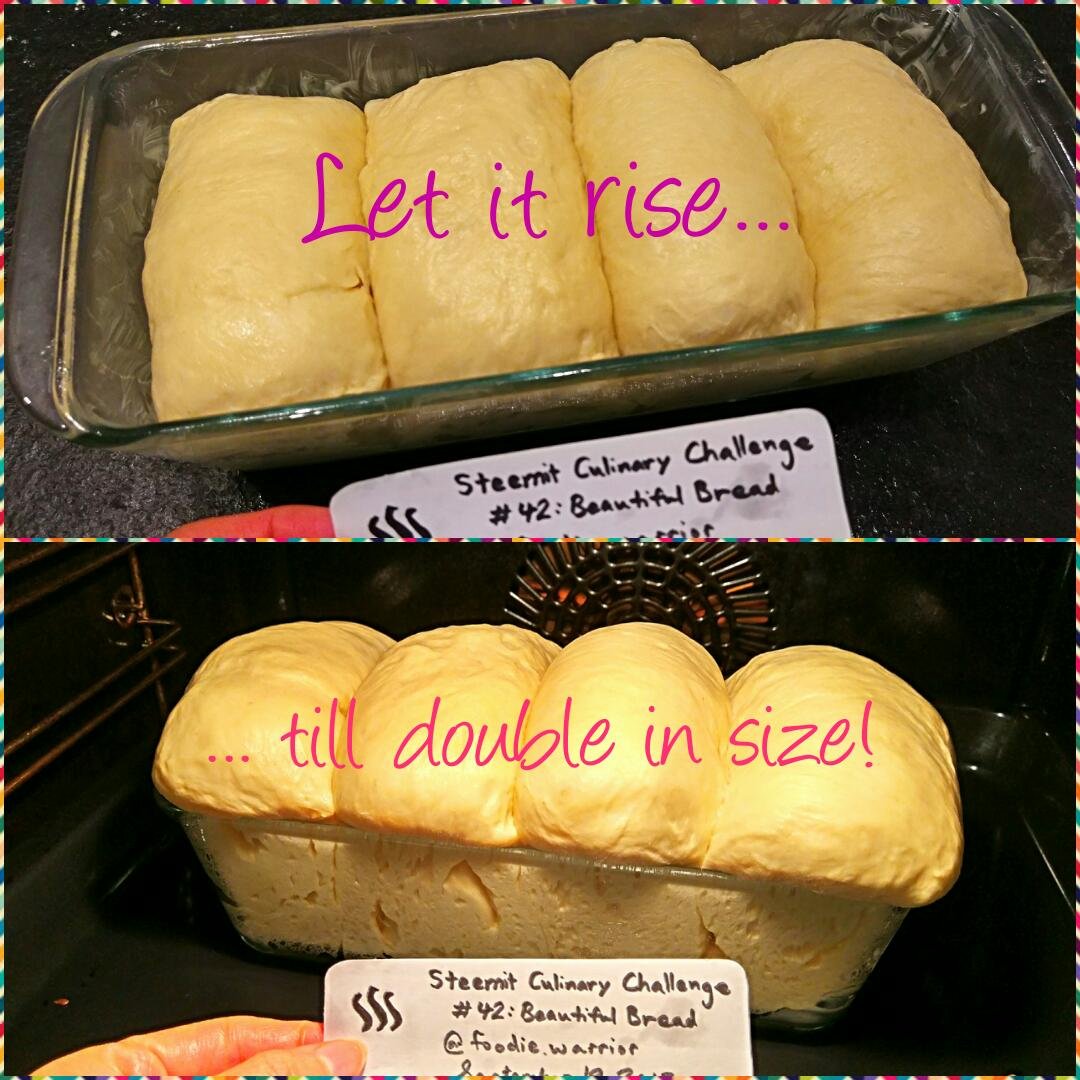
Return the pan to the 35°C oven to proof again till rolls are doubled in size. Toss a damp towel into the oven beside the pan to provide humidity.
Bake at 175°C for 15 min. Check. If the rolls are browning too much on top, place a sheet of aluminium foil over the pan and carry on baking for another 15 min.
Brush the tops of the loaf with a little heavy cream for a glistening finish.
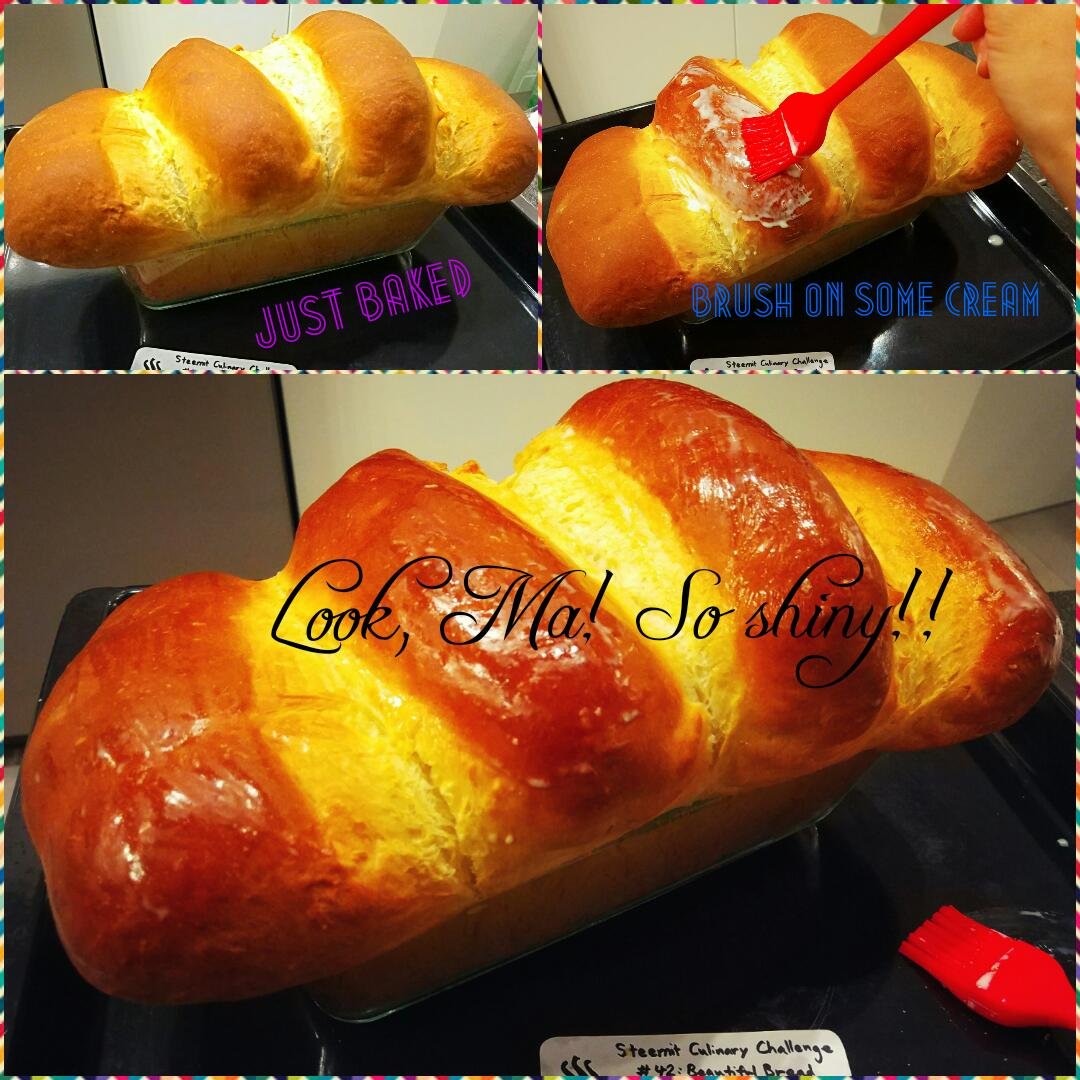
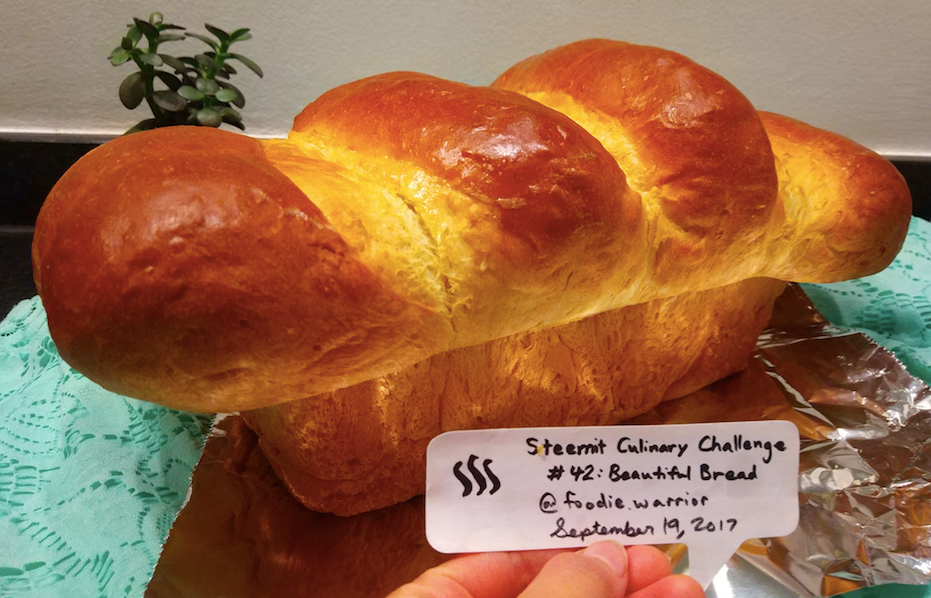
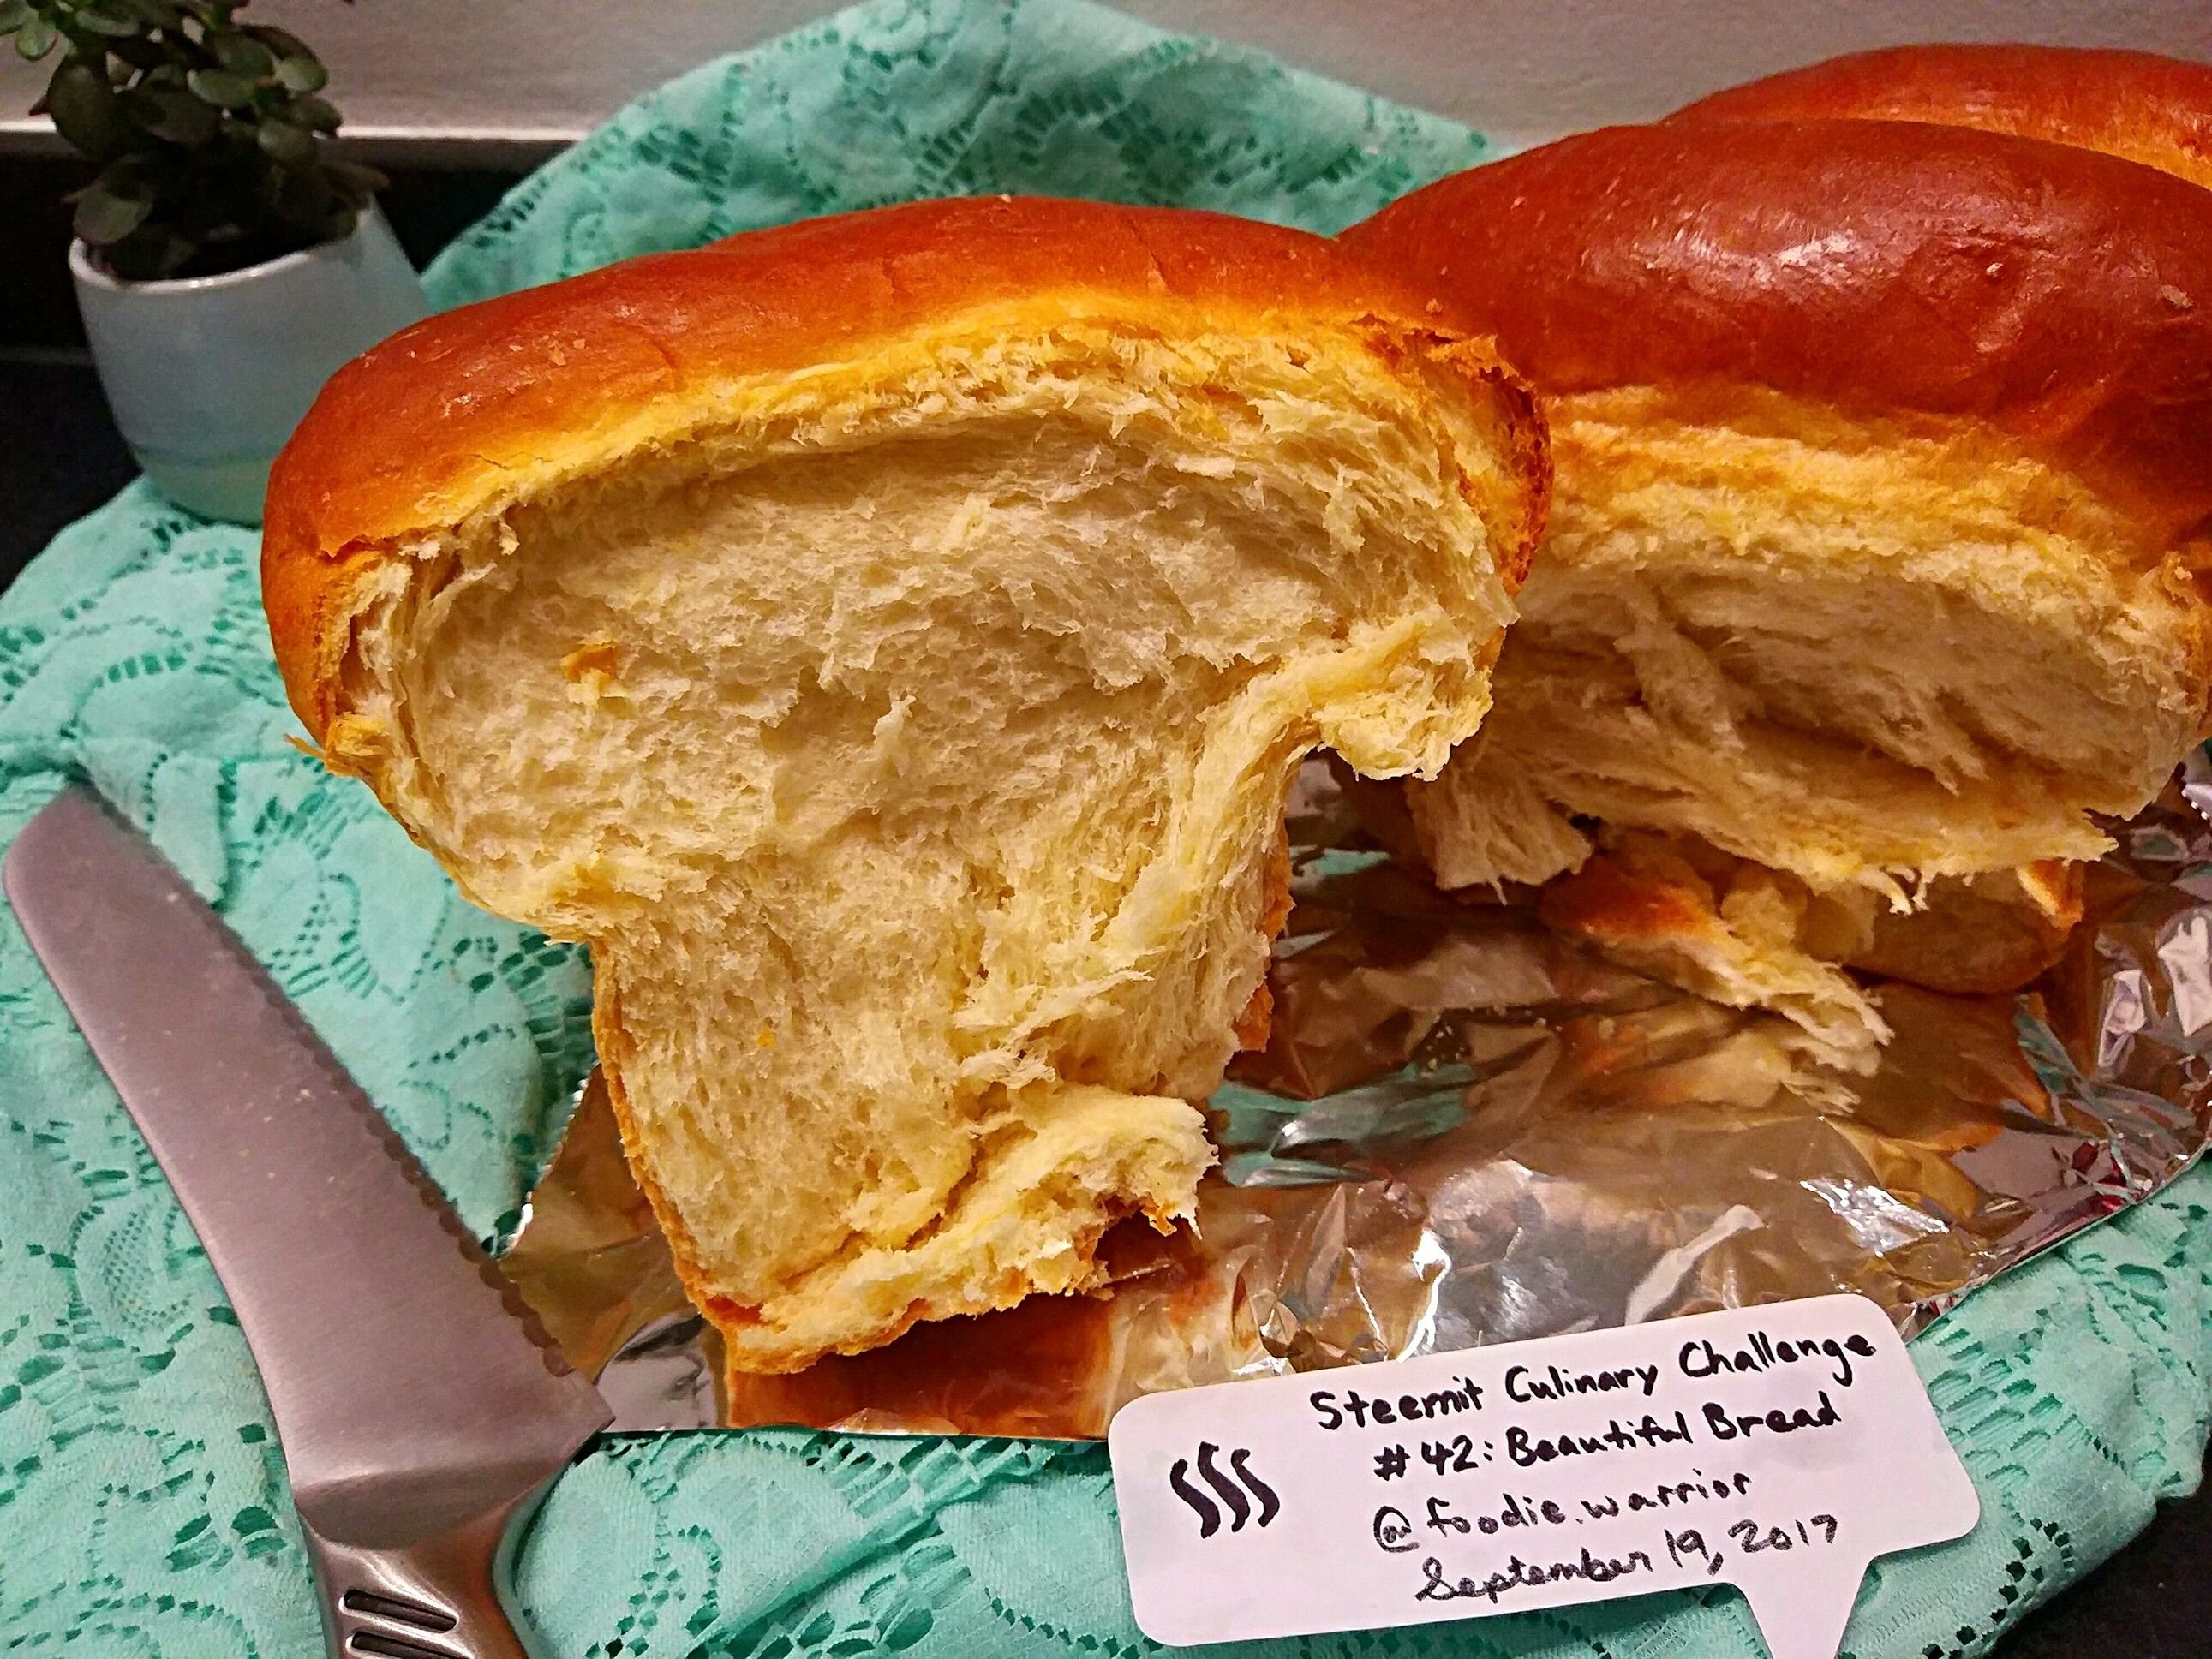
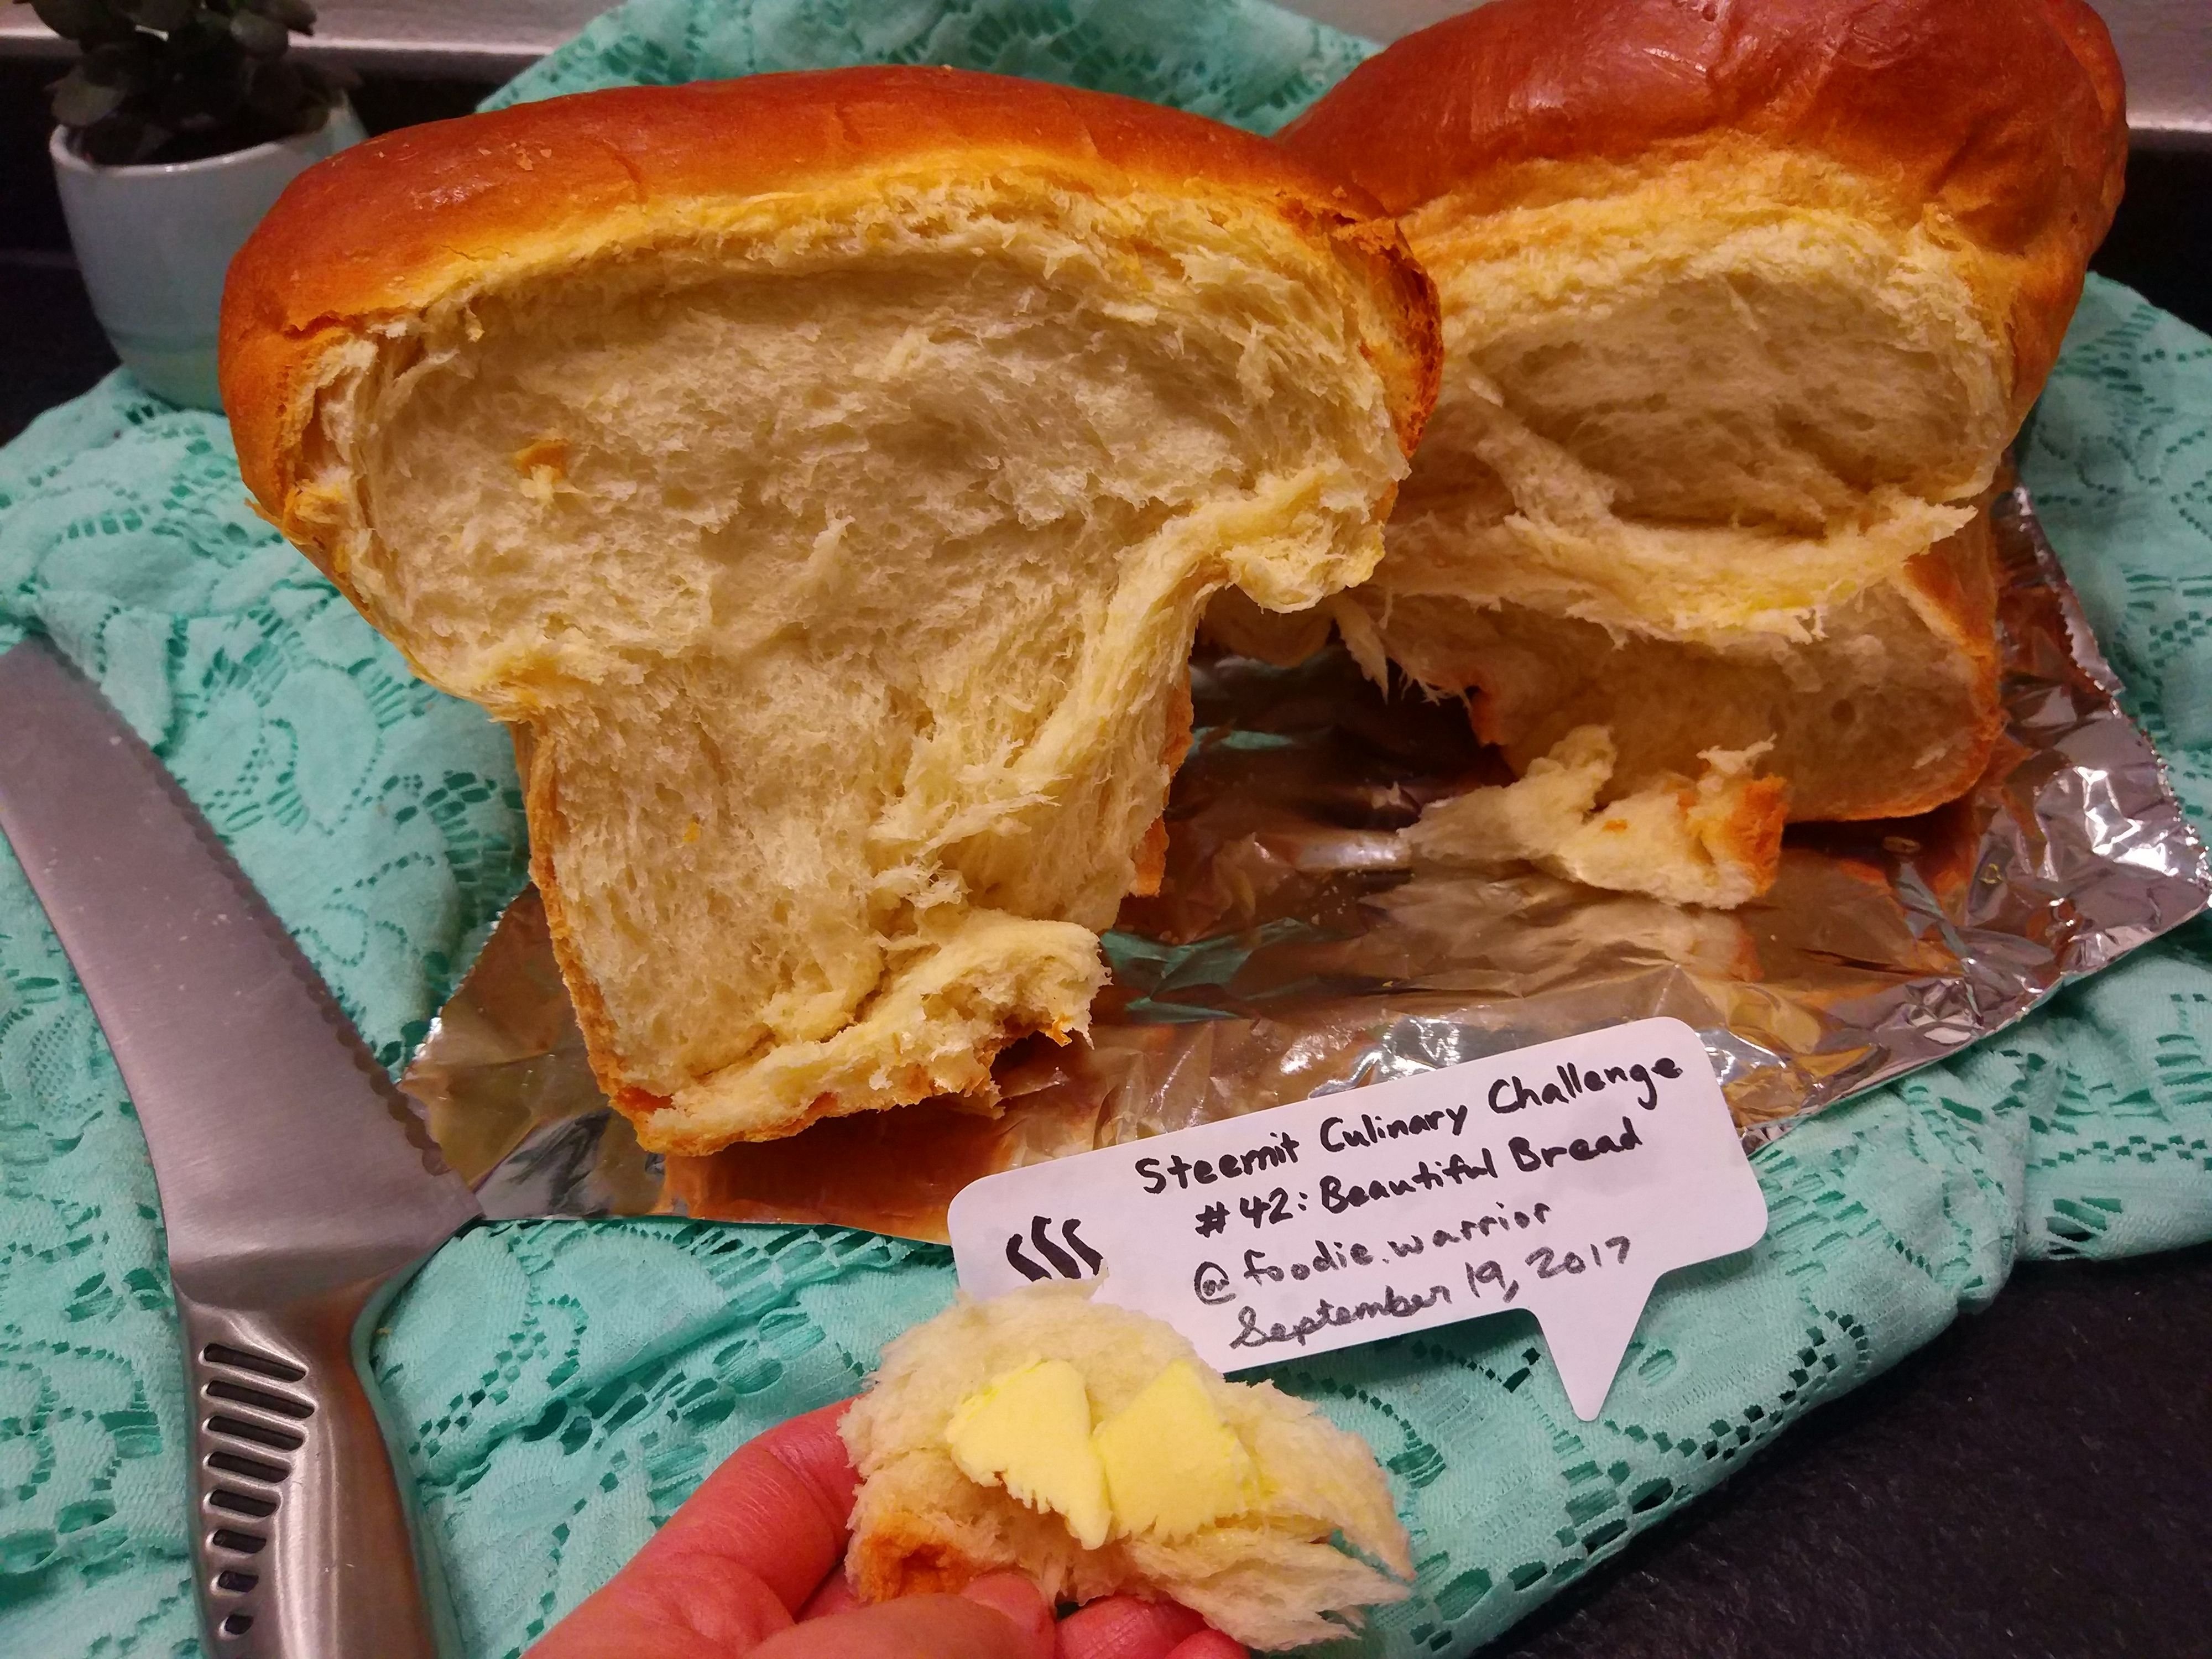
Before slicing the loaf, let it cool completely to room temperature. Otherwise all the fluffy structures might collapse/be ruined and you won’t be able to note the lovely crumb structure in your slices.
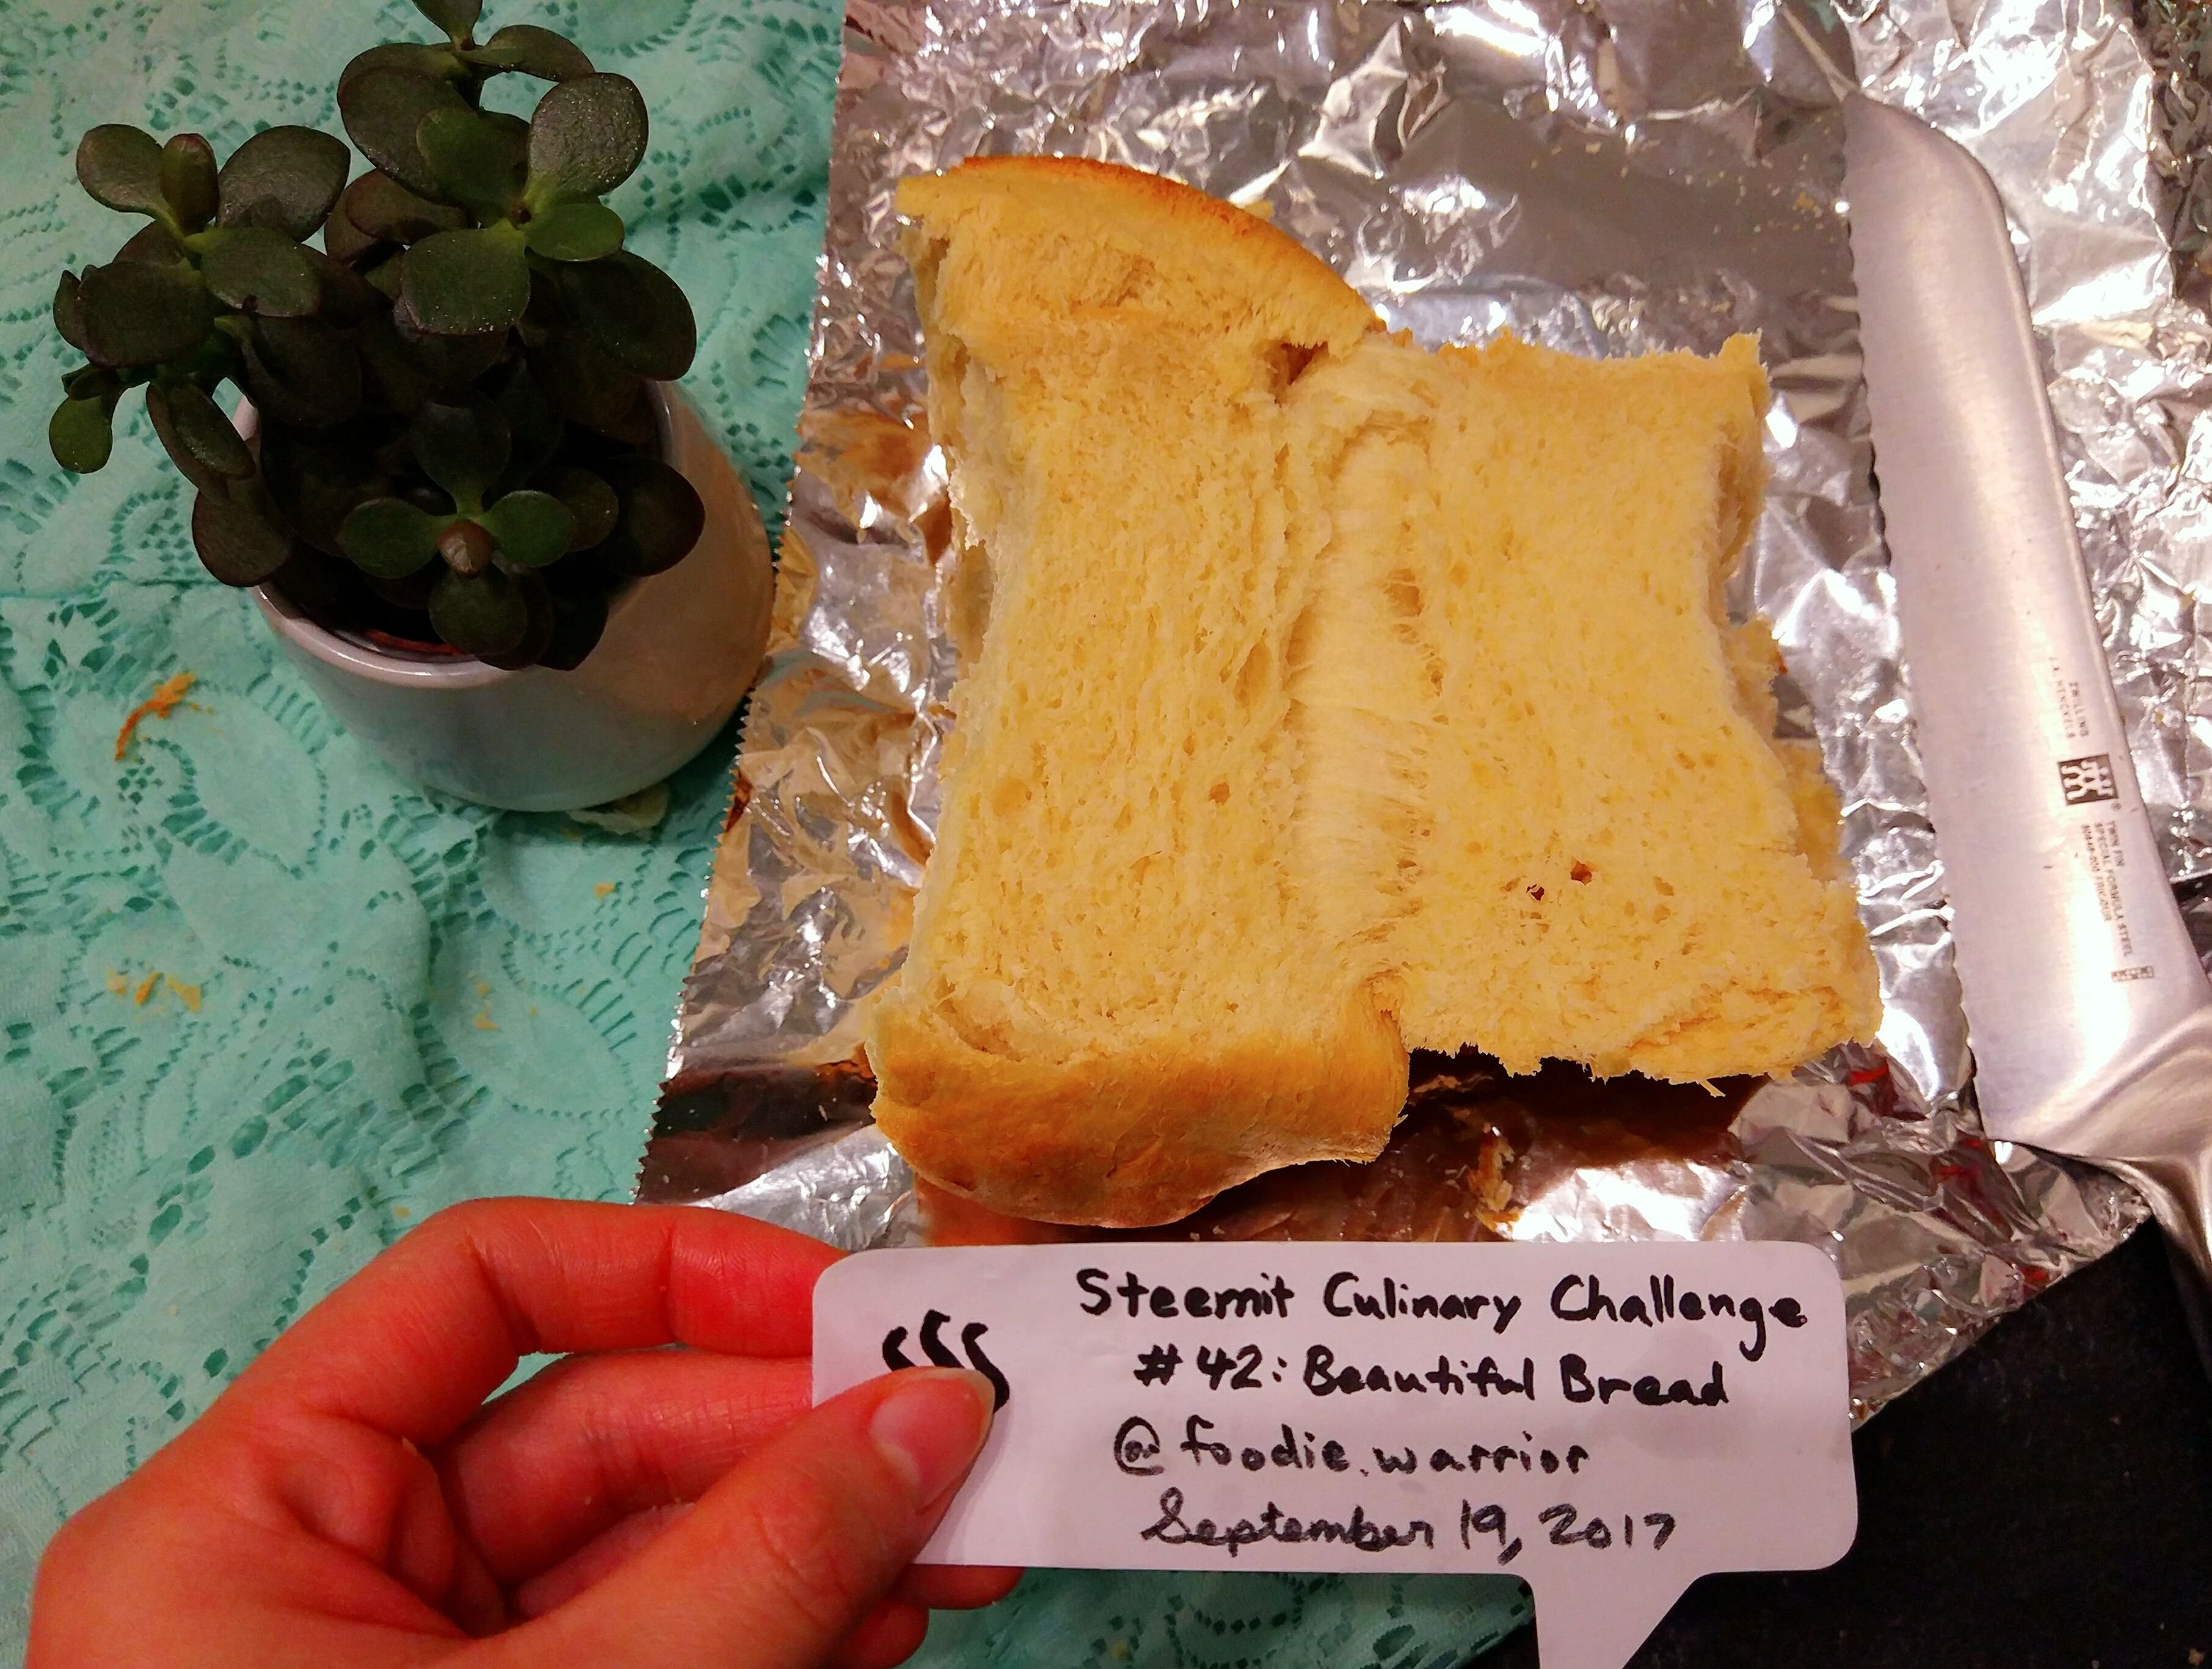
Alright! I couldn't wait! So I half cut with a bread knife and half pulled it apart with my hands.
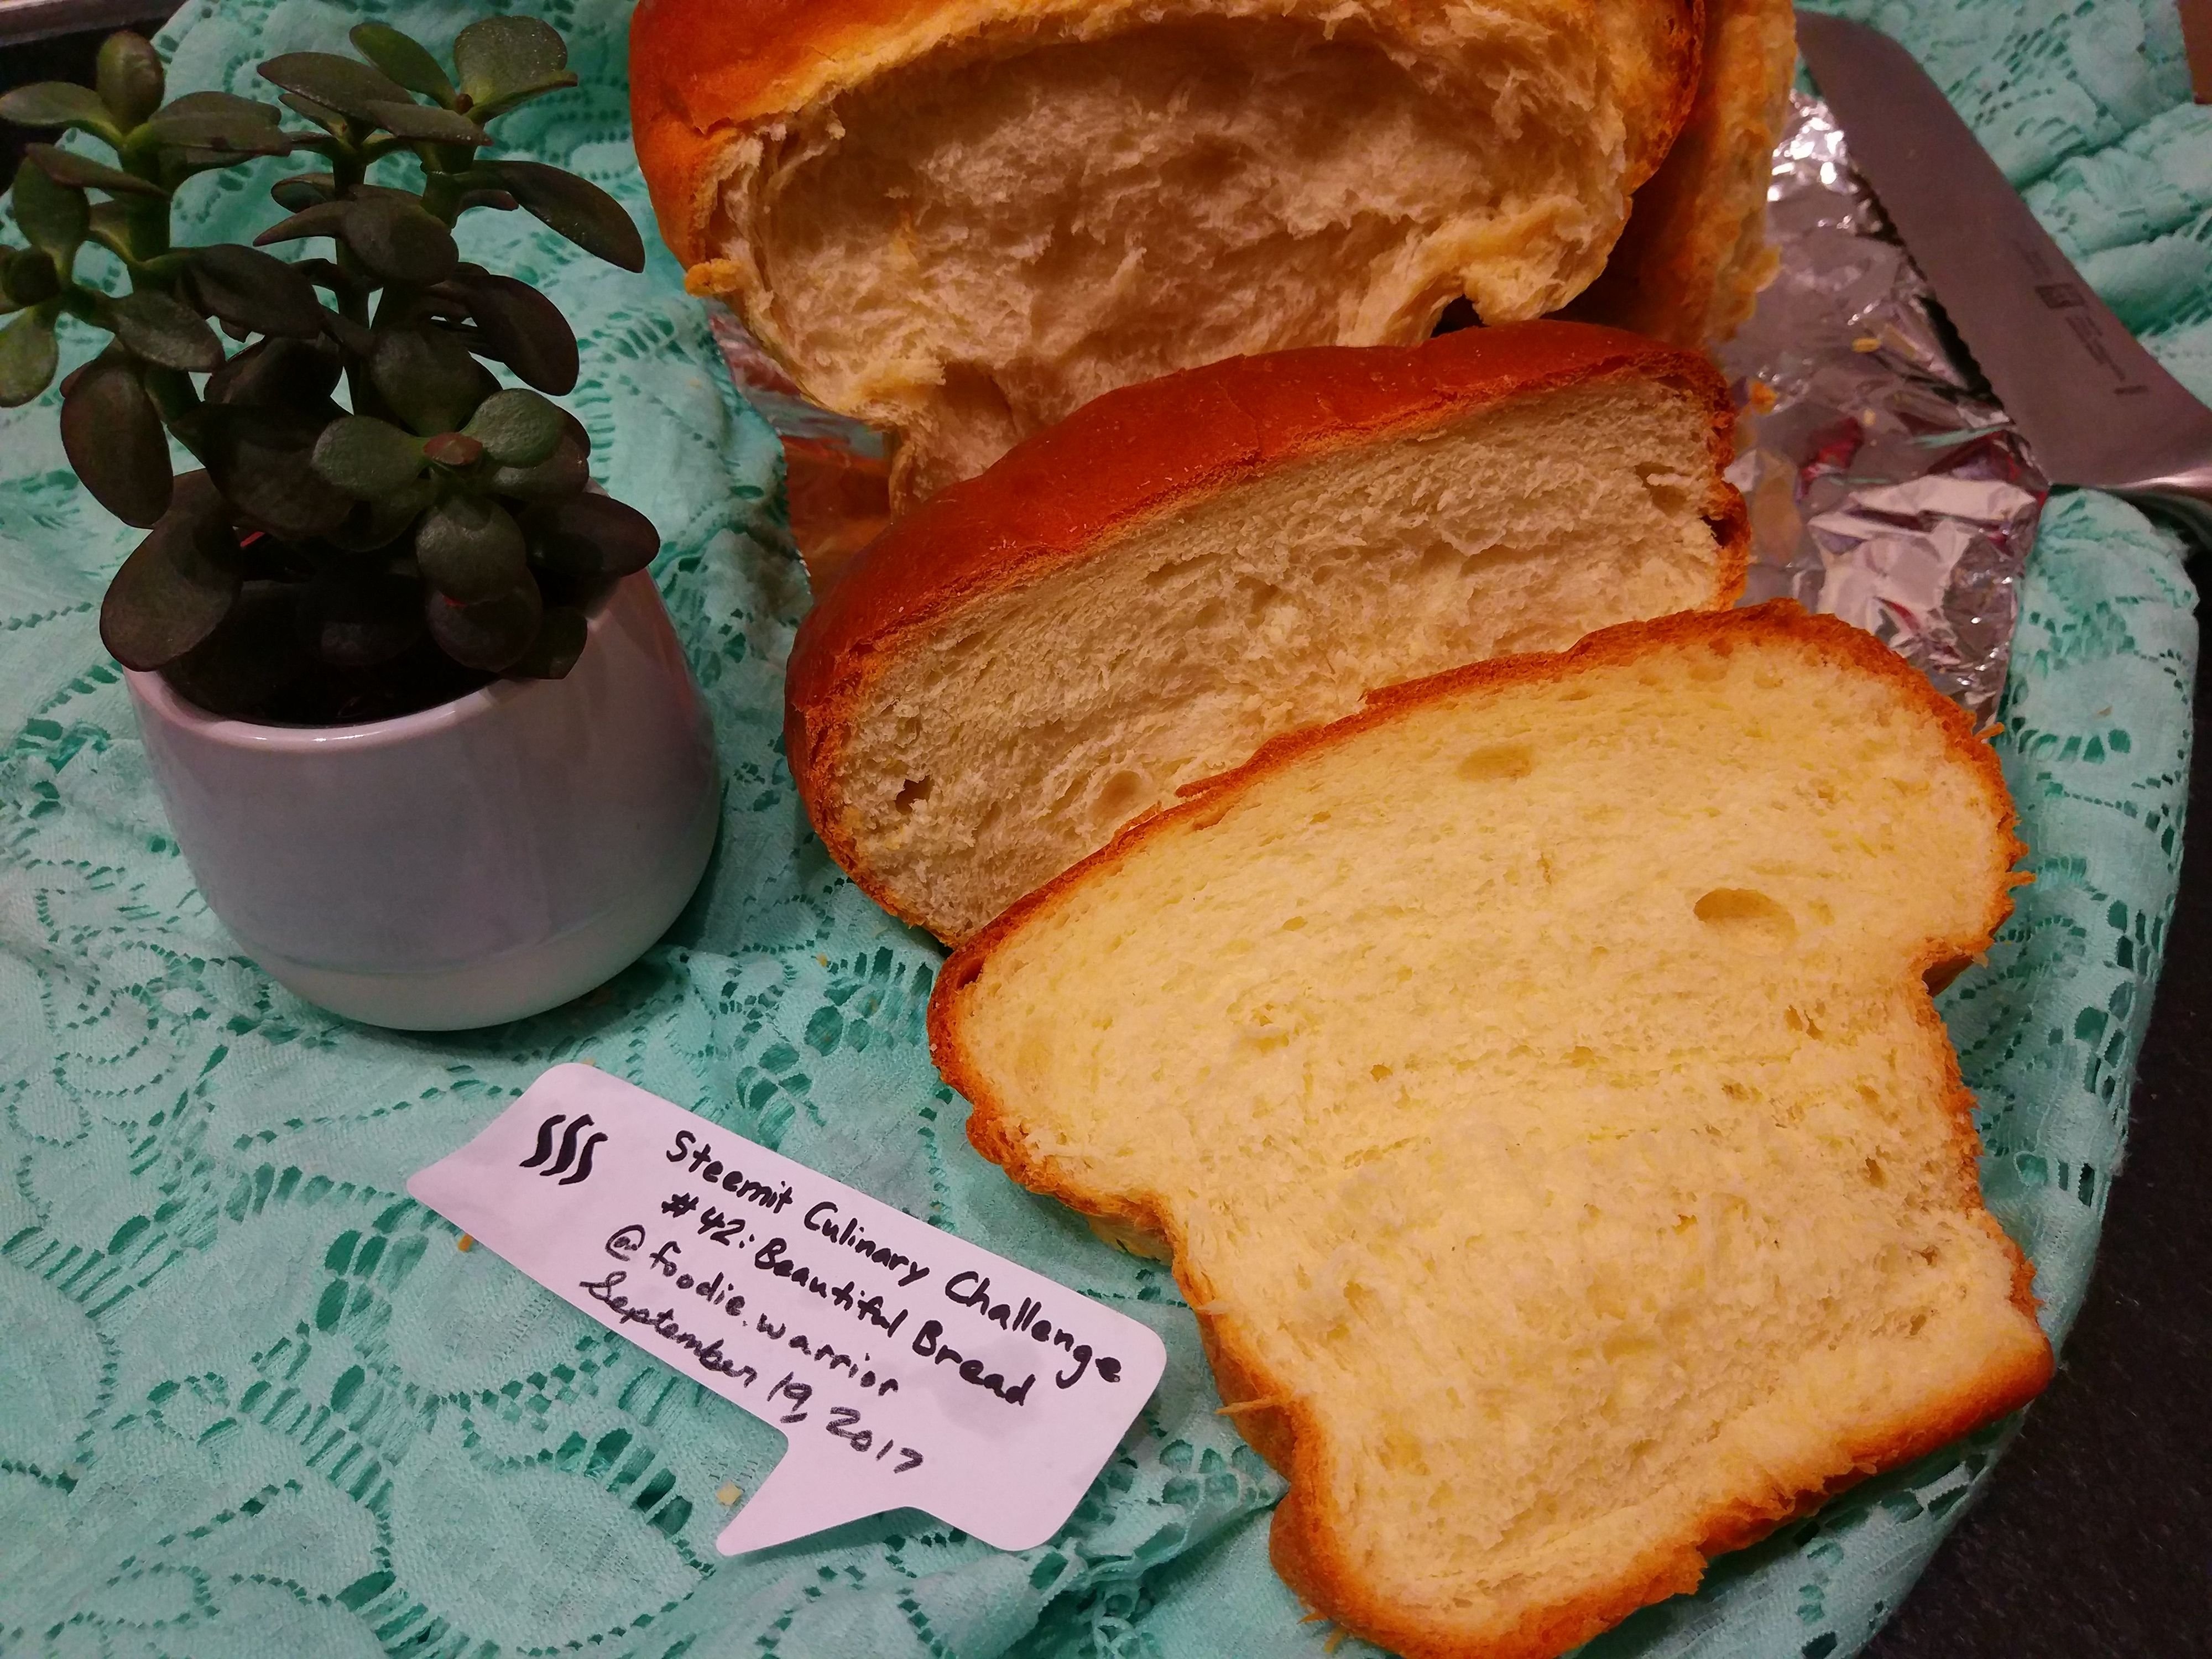
UPDATE: Here's a slice that I made after the bread cooled down. Enjoy that crumb! =P
Close up:
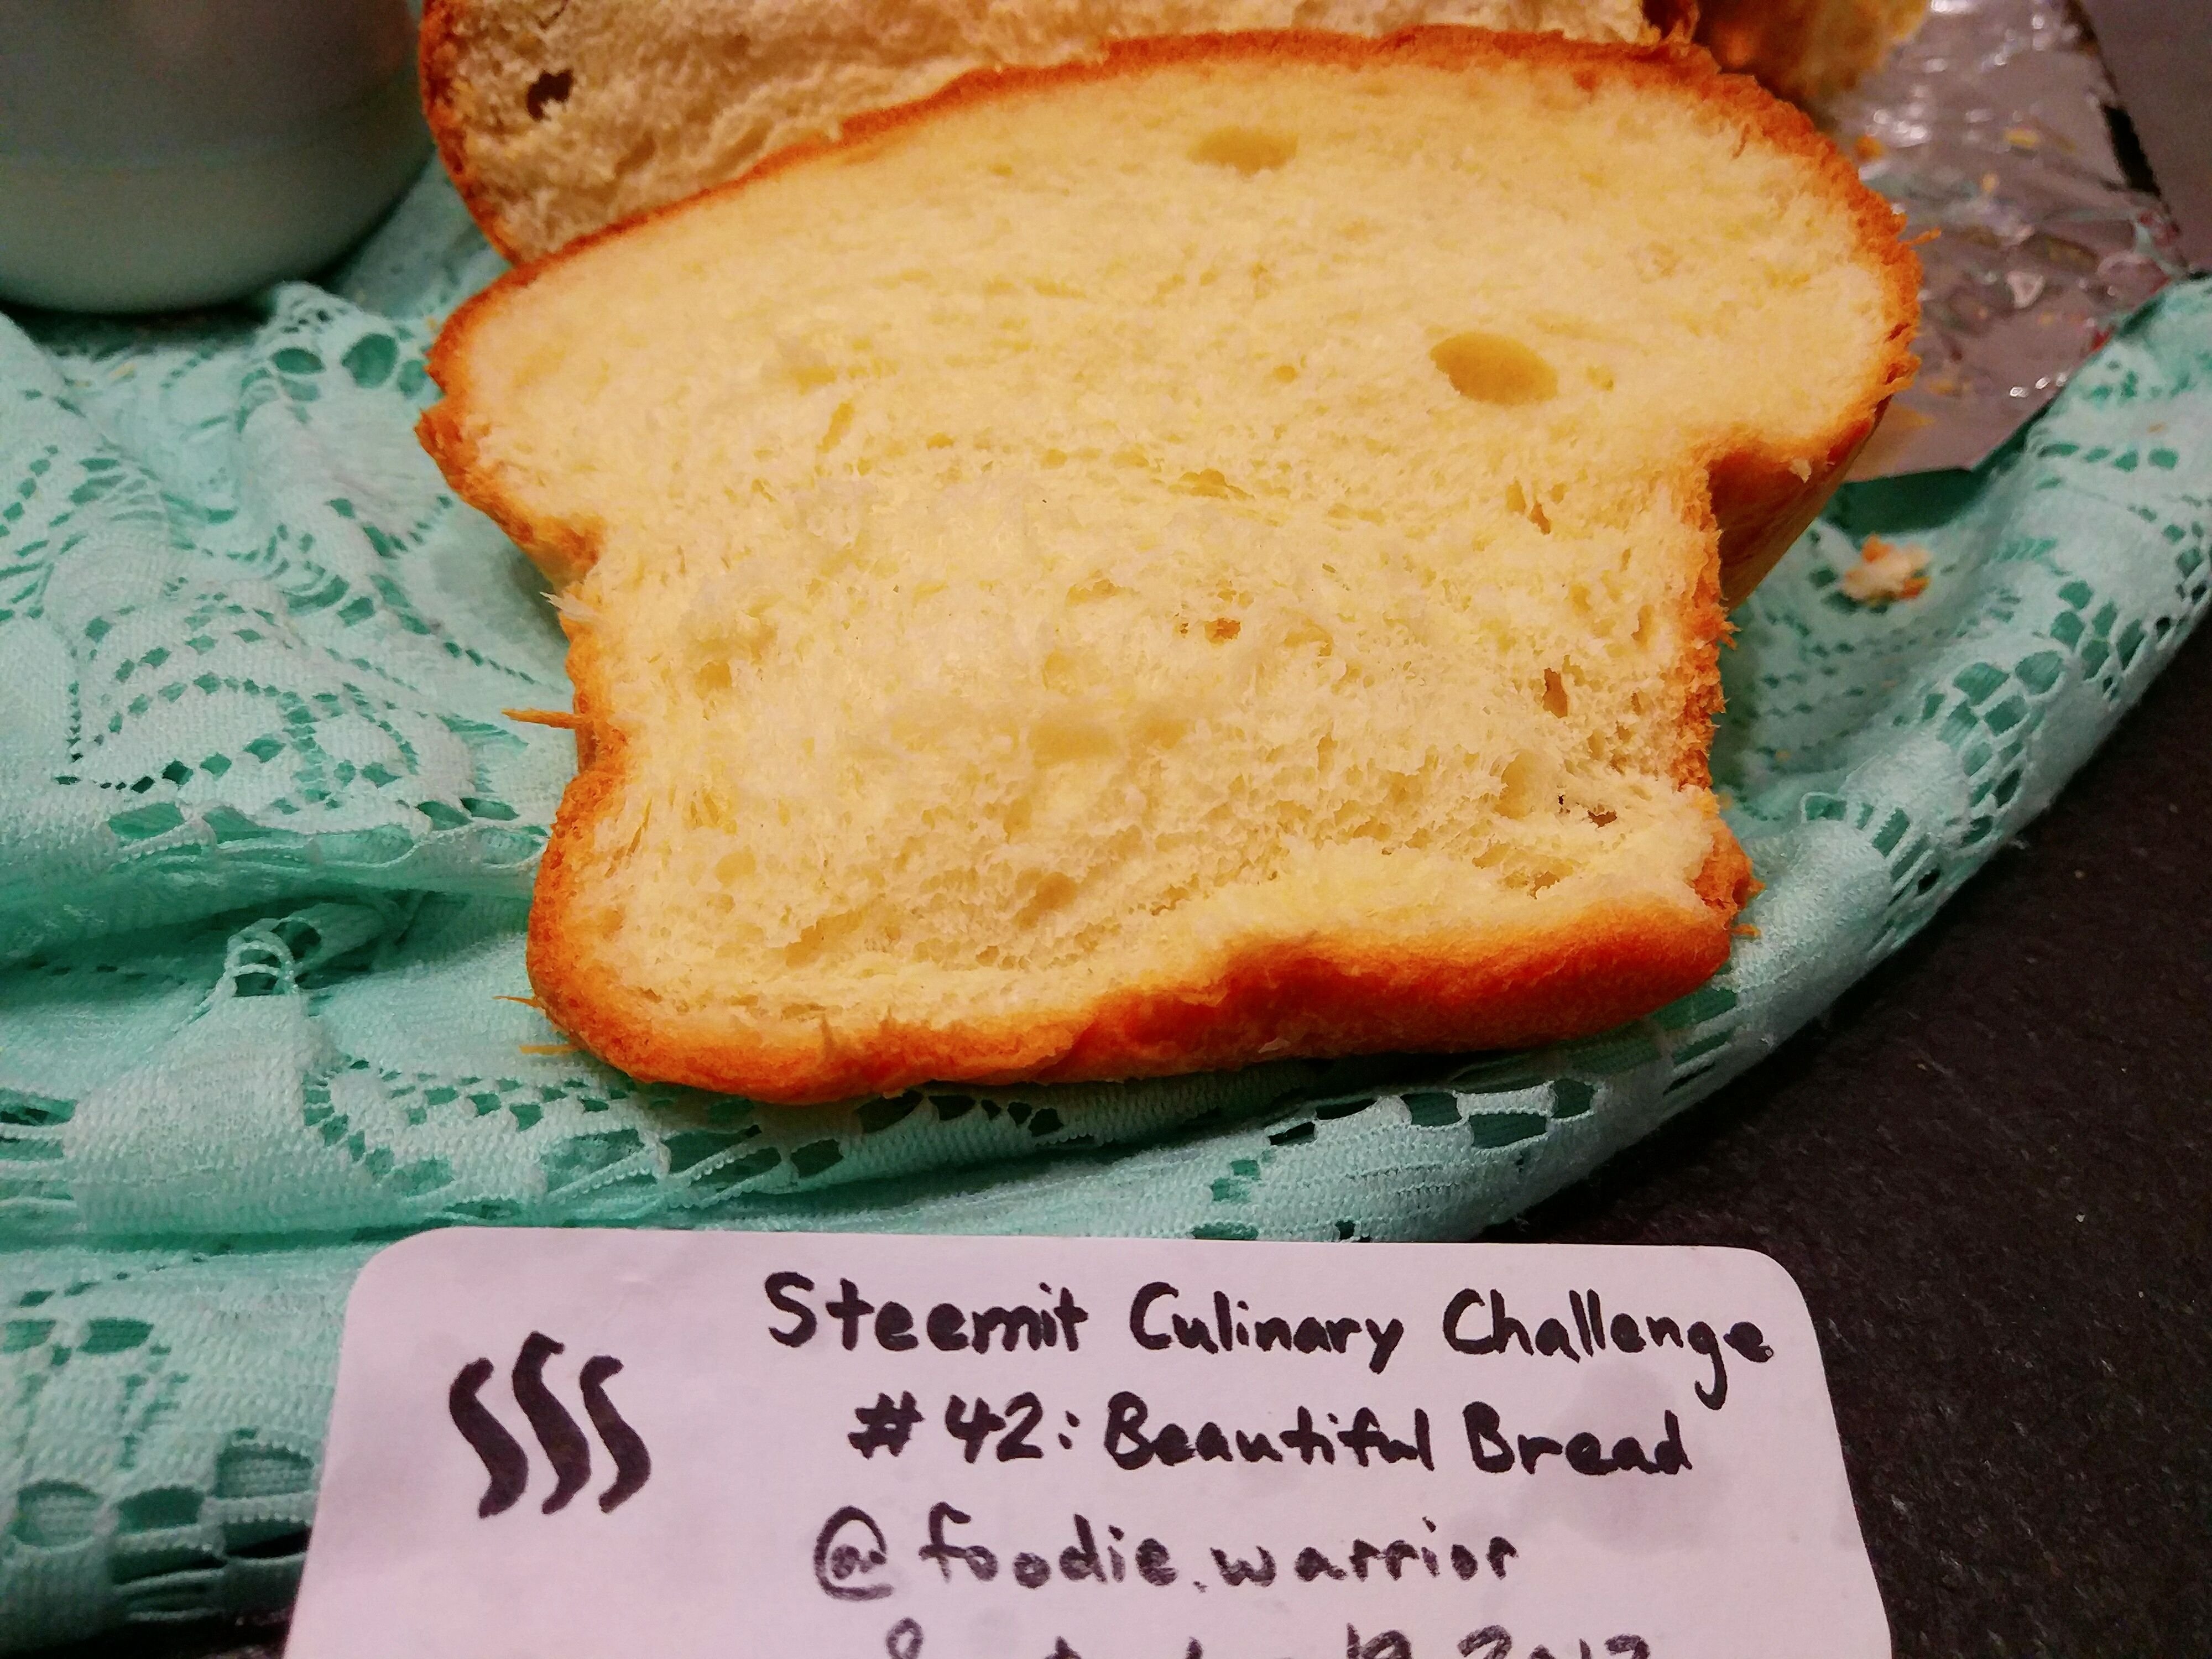
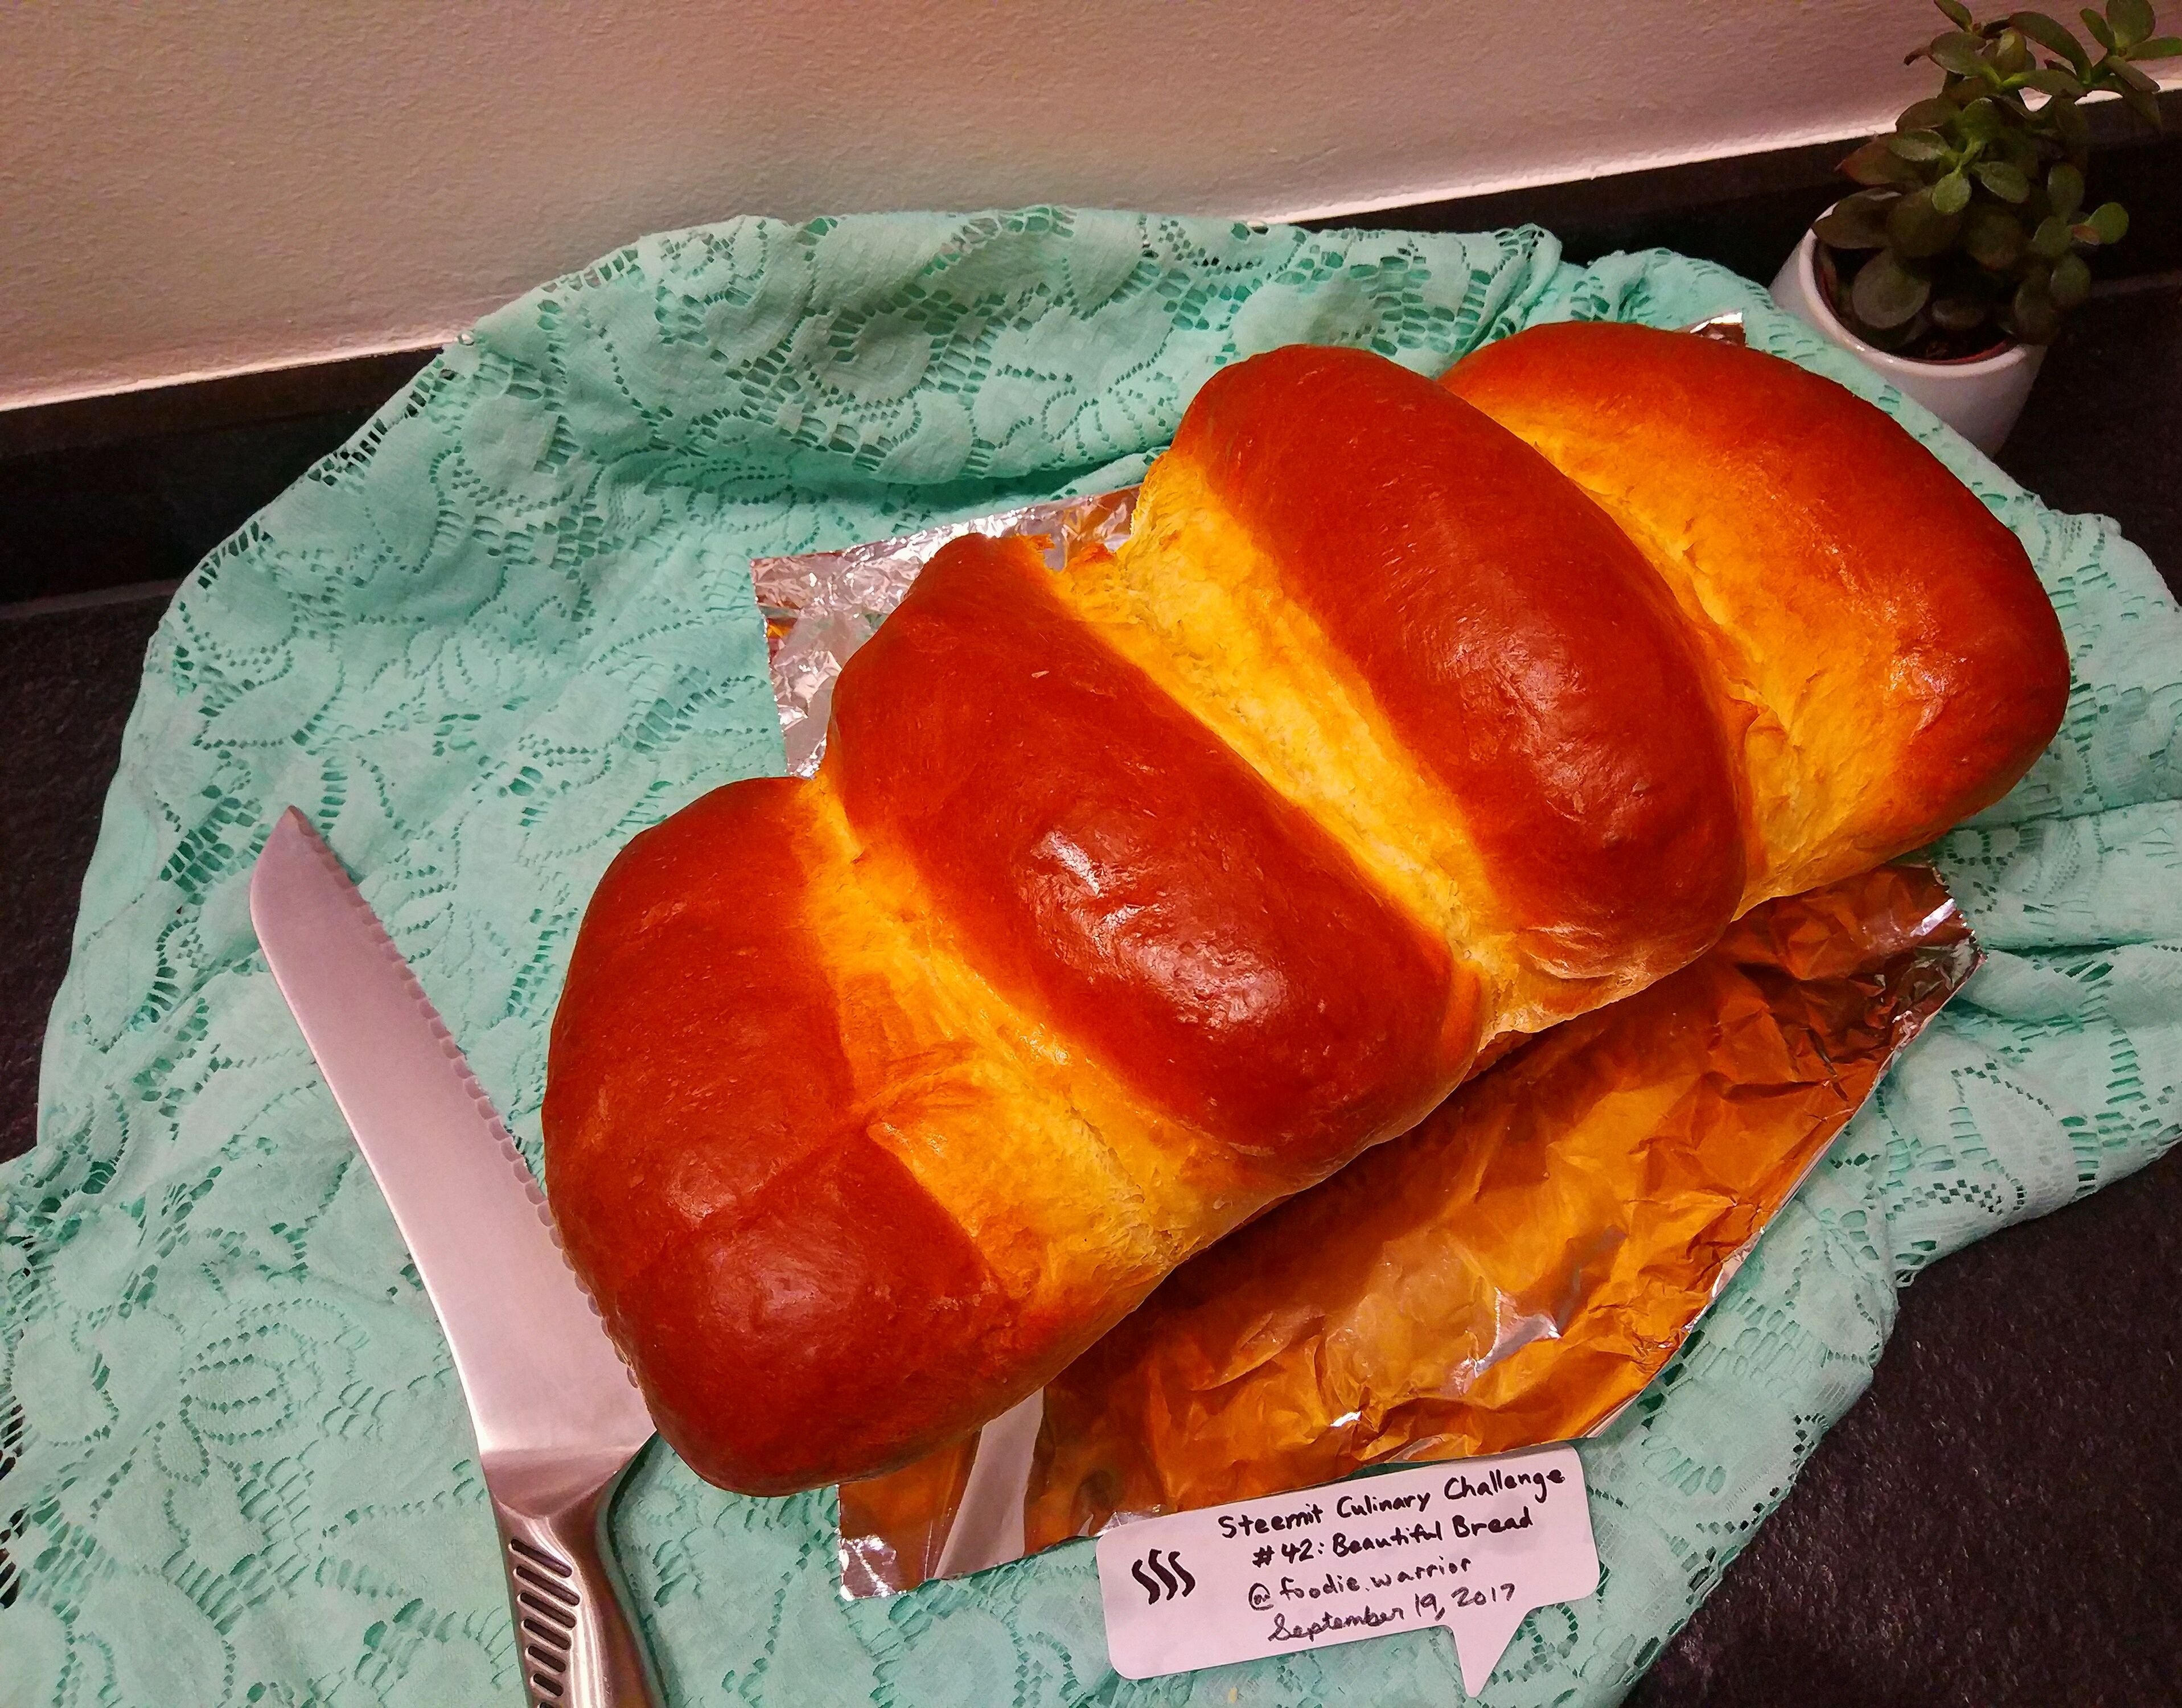
I cut a horizontal cross-section for more detail. This is fun! =D
Such soft, fluffy happiness! With a dollop of salted butter, it's a wonder! =DD
The weekly Steemit Culinary Challenge is the brainchild of @woman-onthe-wing. Current sponsors @gringalicious and @sirwinchester and recent sponsor @englishtchrivy, as well as all the contestants and upvoters/resteemers/word-spreaders past and present have helped to boost this contest into one of the most popular cooking contests on Steemit.
P.S. @progressivechef’s super well-organised and fun Steemit Iron Chef Contest is another..while still a young initiative, it is gaining steady and rapid ground.