Welcome back to the second part of securing your Linux Server.
I won't talk about becoming a witness, or what a witness is, until I actually get to that part of the setup myself. This is about securing a server first. Sorry for mentioning the journey to becoming a witness too early, in the first post. So, I'm not becoming a witness yet. I'll mention it again when I actually get there ;)
As mentioned in Part 1, this part will deal with SSH keys to make your server even more secure.
Let's get it on!
Public and Private Keys for SSH
Again being on Windows, grab the PuttyGen.exe software. Click on that link and it will download. Open the program, nothing is installed.
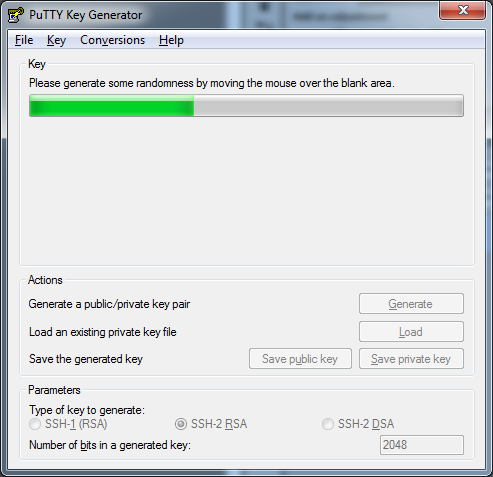
Click on Generate, and move your mouse around the blank area under the status/progress bar. You will see the bar fill up as you move your mouse around. Keep going until the key is generated.
After that, you will get your keys. Copy the "Public key for pasting" into a file, call it pub_key.txt. Next, put in a "Key passphrase" if you want some extra security, but if you're the only one connecting to your server then it's not that big of a deal. Then click "Save public key", call it "pub_key". Then click "Save private key", and save it as "private.ppk".
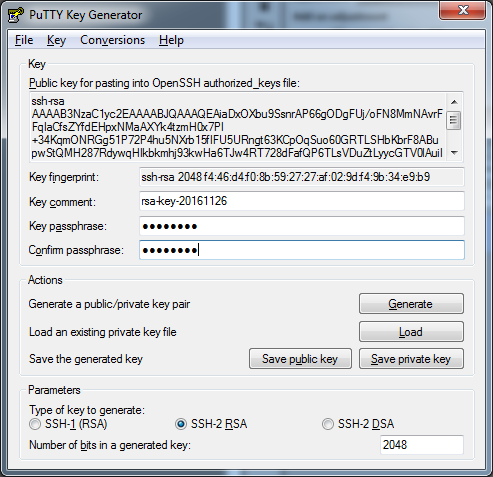
So if you saved them like I named them, you will have three files:
pubkey.txt
pub_key
private.ppk
Install public key on server
Now that the keys have been generated on your local computer, it's time to upload the public key to the server so you can connect with it.
Open putty, load the profile, and Open the connection. Put your user password, and login. Remember, we're no longer logging in as root.
Do the follow commands
mkdir ~/.ssh
Make a hidden user directorychmod 700 ~/.ssh
Modify the folder accesscd ~/.ssh
Go into the foldernano authorized_keys
Create a file for the key, it has to be this nameOpen "public_key.txt" from before and copy it's contents. Then paste those contents into putty that has the file "authorized_keys" open. Save and close the file: ctrl+o or just ctrl+x and save the file before exiting.
chmod 600 authorized_keys
Set file access on thr public key so no other users can access it, except for root

Disable password logins
Open the sshd_config file:
sudo nano /etc/ssh/sshd_config
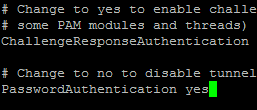
Scroll down with the arrow key, or hit Page Down twice, to find PasswordAuthentication yes
Change the "yes" to "no":
PasswordAuthentication no
Then restart the service:
sudo service ssh restart
Test SSH login with a key, instead of password
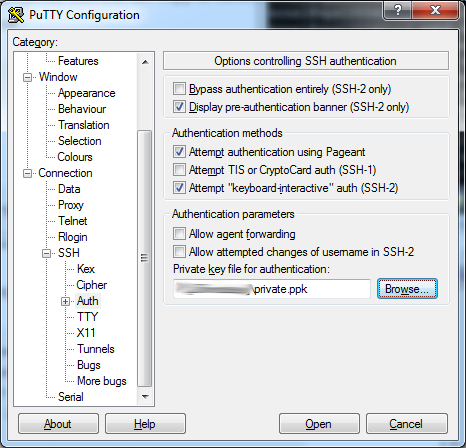
Open putty, and load your profile. Go to the left panel section, and go to the "Auth" section shown here:
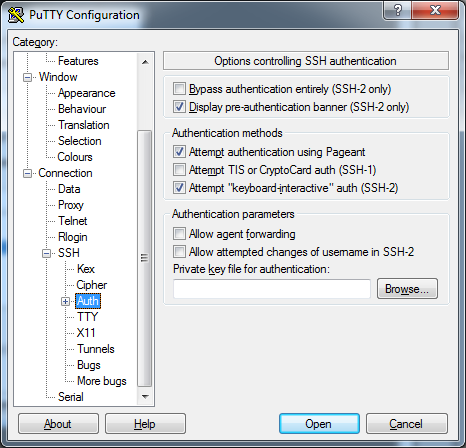
Next, click "Browse" to find the "private.ppk" file we saved earlier.
The last thing to do is "Save" your profile in putty so that you don't need to do this again. Go to the top to "Session" and you can save again.
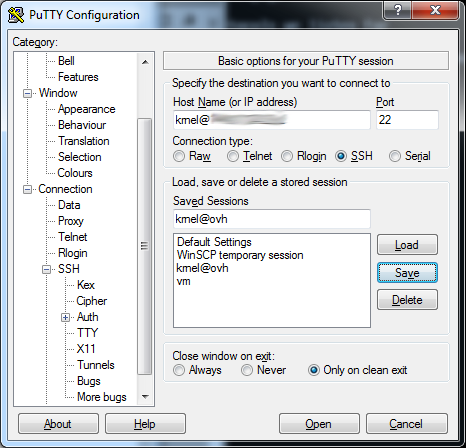
And then just click "Open" to connect with your new SSH key.
If you are prompted to accept a key, click "Yes".
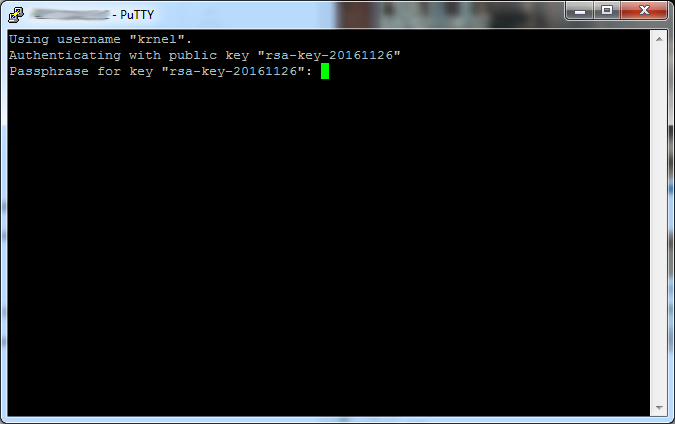
If you set a passphrase for your key earlier, then this when time you need to use it. If you didn't put a passphrase, then you login without using a password, and it's still more secure being it uses private-public keys.
Remove IPv6 listening
Since no one really uses IPv6 yet, disable this and make one less thing your system is checking for.
AddressFamily inet needs to be added.
You can add this manually to the end of the sshd_config file @ nano /etc/ssh/sshd_config.
Or just run:
echo 'AddressFamily inet' | sudo tee -a /etc/ssh/sshd_config
If you ever need IPv6 SSH back, remove that line.
Finish with a restart of SSH:
sudo service ssh restart
Done!
Thank you for your time and attention! I appreciate the knowledge reaching more people. Take care. Peace.

 Payout Selected
If you appreciate and value the content, please consider:
Upvoting  , Sharing
  and Reblogging
  below.
@krnel
2016-11-28, 6:10am

