
This week was spent mostly on building out the front end for my Thinkful Node.js project. This is definitely the most complicated project I’ve ever built, so progress has been slow, but it’s starting to really take shape. 😀
Local Storage
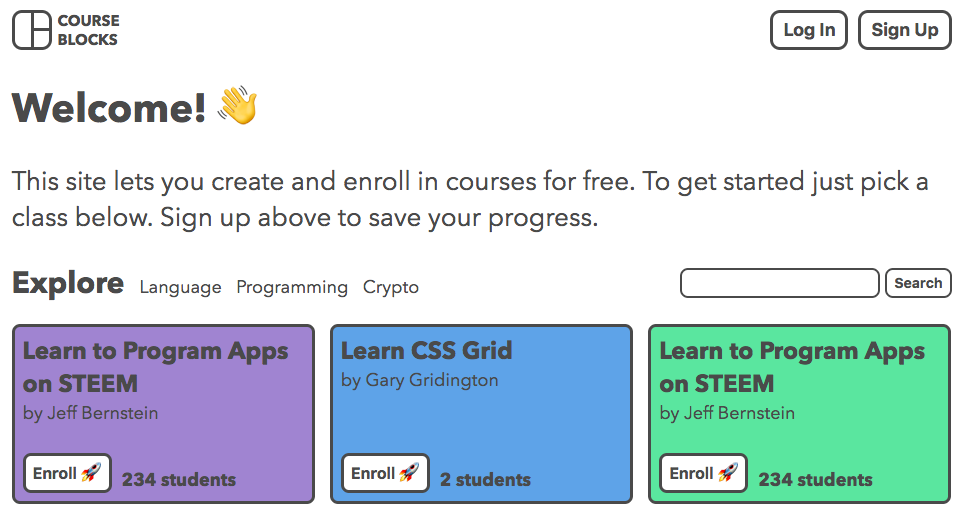
If a new user visits my site, they’ll be greeted with a different home page than someone who is logged in. Here’s the welcome message for a new user:
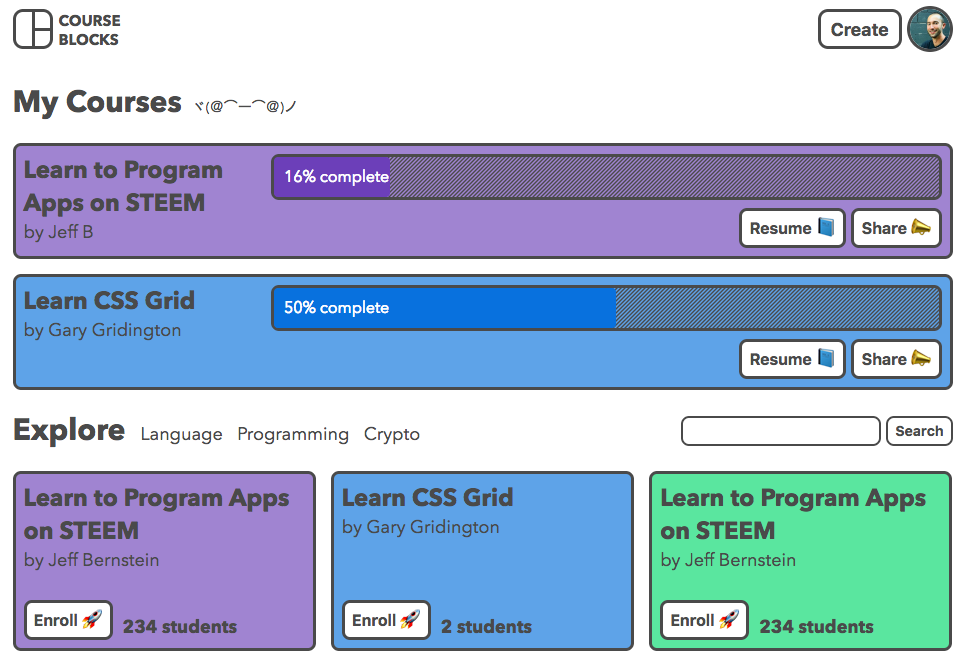
And a logged in user sees the courses they’re enrolled in, their Gravatar image, and a create button:
To test out this functionality, I’m using a mock JSON web token (more about that later) stored in local storage, which is a collection of data that’s saved across browser sessions. I’m not sure if this is the exact mechanism that most websites use, but from what I understand, I’ll save a token in the user’s browser when they log in, which makes it so they don’t have to log in every time they visit my site.
It’s actually much easier to manipulate local storage data than I would have expected. Here’s an example from the MDN web docs:
localStorage.setItem('myCat', 'Tom');

var cat = localStorage.getItem("myCat");

localStorage.removeItem("myCat");
You can see the items stored in local storage in the Application section of Chrome dev tools:
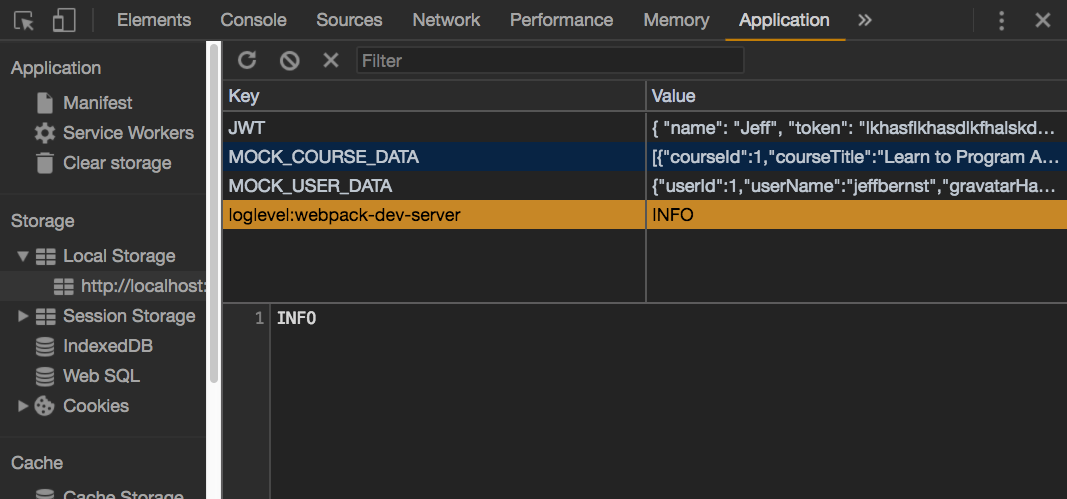
I also have some mock course and user data to help me simulate what it will be like when my database is up and running.
JSON Web Tokens
JSON web tokens (JWT) are strings used to identify a user and grant them access to something behind a password wall. I’m going to walk through my basic understanding of how this all works. Please let me know if I get any of this wrong! (Here’s a good medium post on the subject.)
Here’s an example of what a JWT looks like:
eyJhbGciOiJIUzI1NiIsInR5cCI6IkpXVCJ9.eyJzdWIiOiIxMjM0NTY3ODkwIiwibmFtZSI6IkpvaG4gRG9lIiwiYWRtaW4iOnRydWV9.TJVA95OrM7E2cBab30RMHrHDcEfxjoYZgeFONFh7HgQ
It’s three collections of numbers and letters with dots in between them in this format:
header.payload.signature
To decode the JWT, you can paste it into this tool, which shows the following:
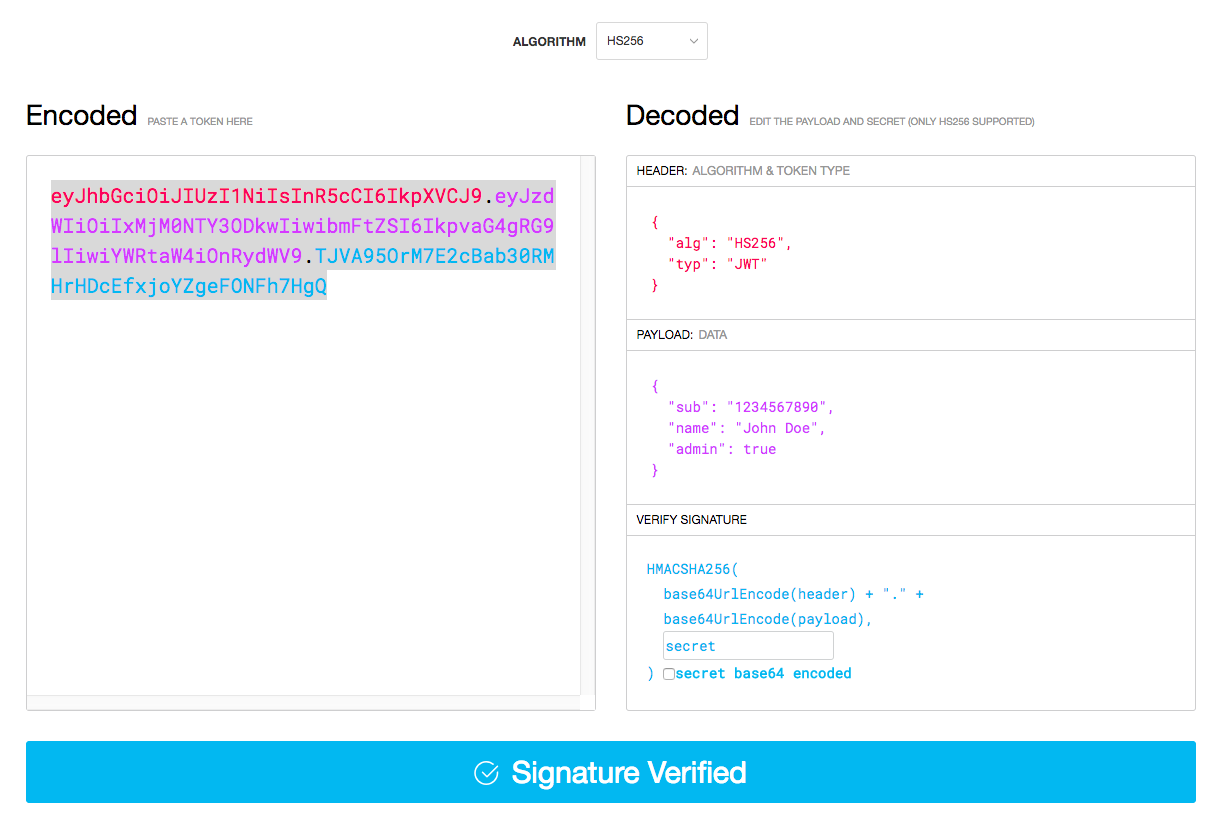
The JWT is color-coded in the box to show which part of the string corresponds to which data. The string header contains that it’s a JWT encoded with the HS256 algorithm, the data (payload) gets stored in the middle string shown in purple, and the blue section is the signature, which is used to verify that the JWT is valid. The word “secret” in the box at the bottom is the secret key.
So for something like user registration, the user will fill out a form on my site with their username and password. I hash the password (convert the string to an unguessable set of characters) and store it on my database with the rest of the user info.
Once the user is in my system, they can submit their information on the log in form, and in response they’ll get a JWT stashed in the browser. Now when they try to access something that requires authentication, the JWT can be used to show they have access.
This stuff is a bit complicated, but if I understand correctly, the header and payload are encoded using something called base64URL and attached with a dot in between them. Then both of these are hashed with the secret key using the algorithm specified in the header (HS256) and attached to the encoded header and payload with another dot. When this whole JSON web token is sent to the server for authentication, it uses the secret key in its possession to confirm that the signature matches the data. Pretty cool!
Wallaby.js
I’ll probably talk more about this tool in later posts, but I just wanted to introduce it here because I’m setting it up now as I get ready to set up my server. Wallaby.js works with your tests to show errors live in your editor:
They also have a free tool called Quokka.js that I want to play around with some more. Here’s what it looks like in action:
I’ve still got a lot of reviewing to do as I implement my unit/integration tests on my project, but I think Wallaby will make it easier to write my back-end code properly.
Almost Done!
I’m getting much closer to being done with my project! Wrestling with the front code is starting to get a little monotonous, so I’m excited to take a crack at setting up my server/database.
Thanks for reading! If you have any suggestions or explanations for any of these things that I’m learning, I’d love to hear about them in the comments! 🙂
