Hi there friends! :)
Here we go with another black and white postcard from Shiny Forest :)
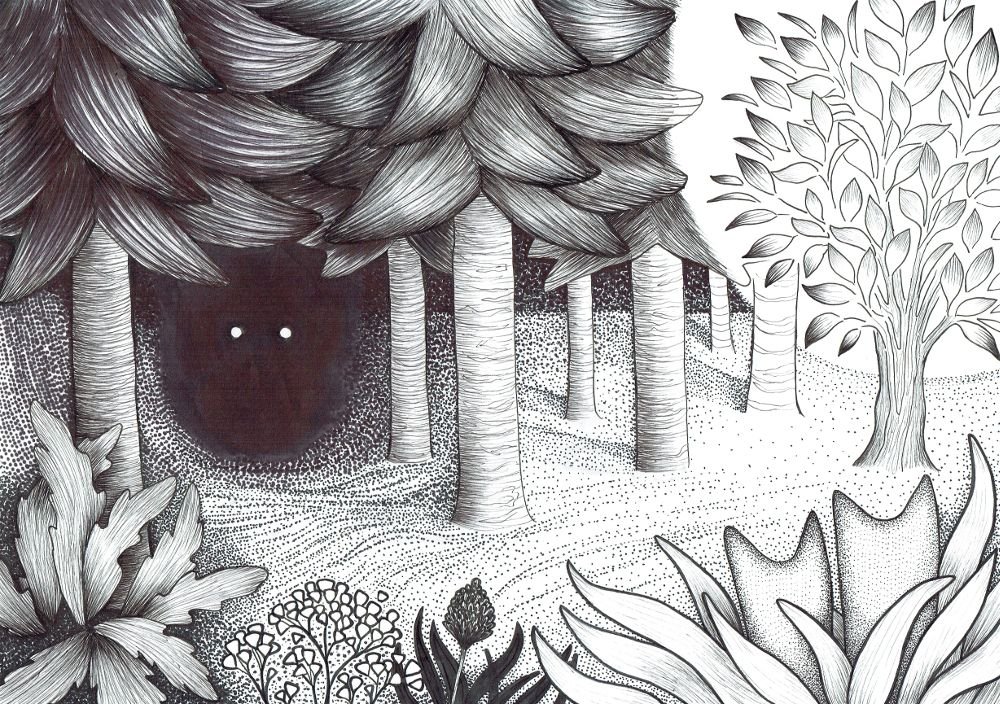
This one was supposed to be pretty scary. In my mind this scene was terrifying. But I've heard an opinion that yes, indeed, this scene could be scary, if we were talking about an illustration for a children's book ;) Well, the sweetness wins with the creepiness, I guess.
Besides its highlights, Shiny Forest has also its shadows. This particular one is quite seriously dangerous, it distorts the space and stares at you in silence. Hah. I'm not sure what the forest ghosts think of its presence. They stare back at it in silence, which says it all, I guess.
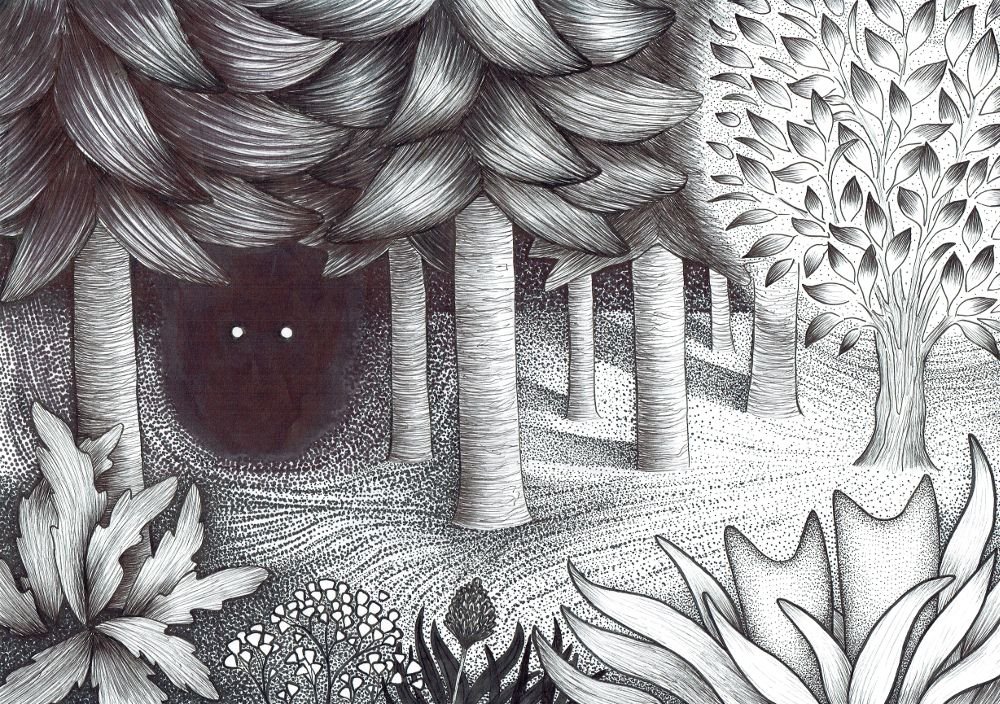
Pen and ink on paper, 29,7 x 42 cm
Now, without any further ado, I'd like to walk you through the steps of my artwork :)
PROGRESS STEP BY STEP
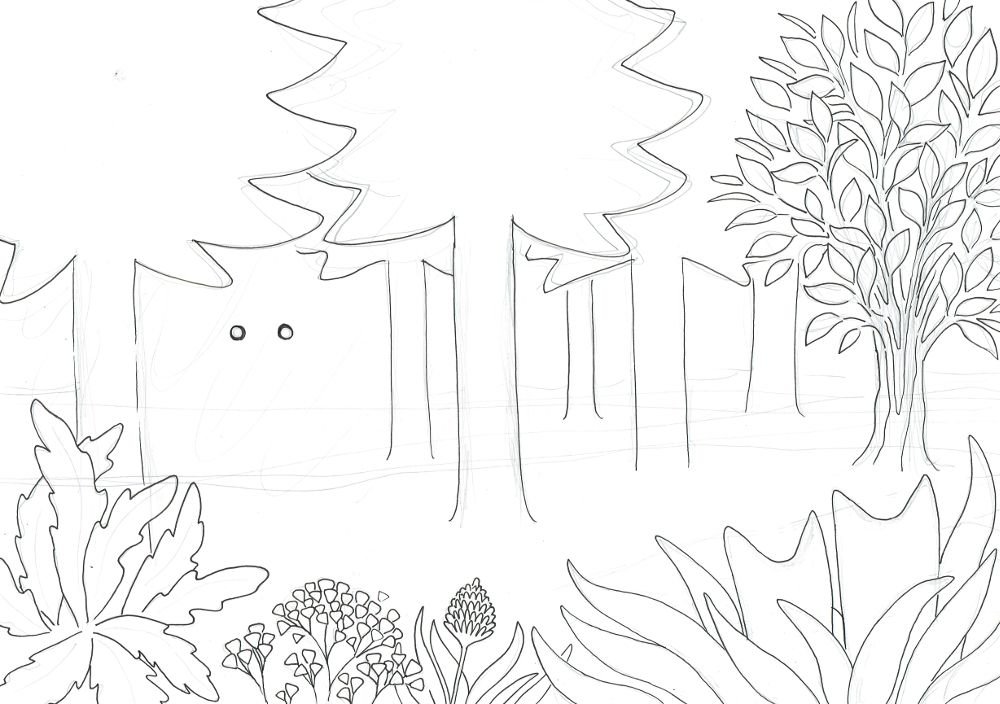
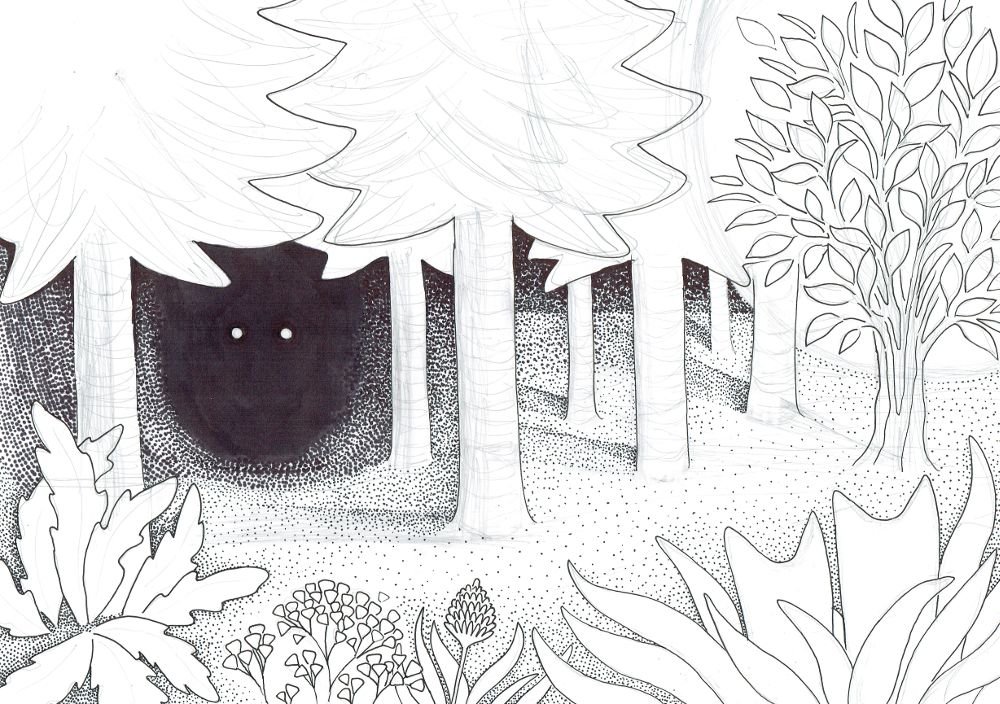
As always, my friends, I started with an informal pencil sketch. I'll tell you in secret that the first thing I do after the vision comes to my mind is trying it out in my sketchbook. The initial concept is redrawn and modified hundreds of times until I deem it finally ready, and only then I move onto the A3 paper :)

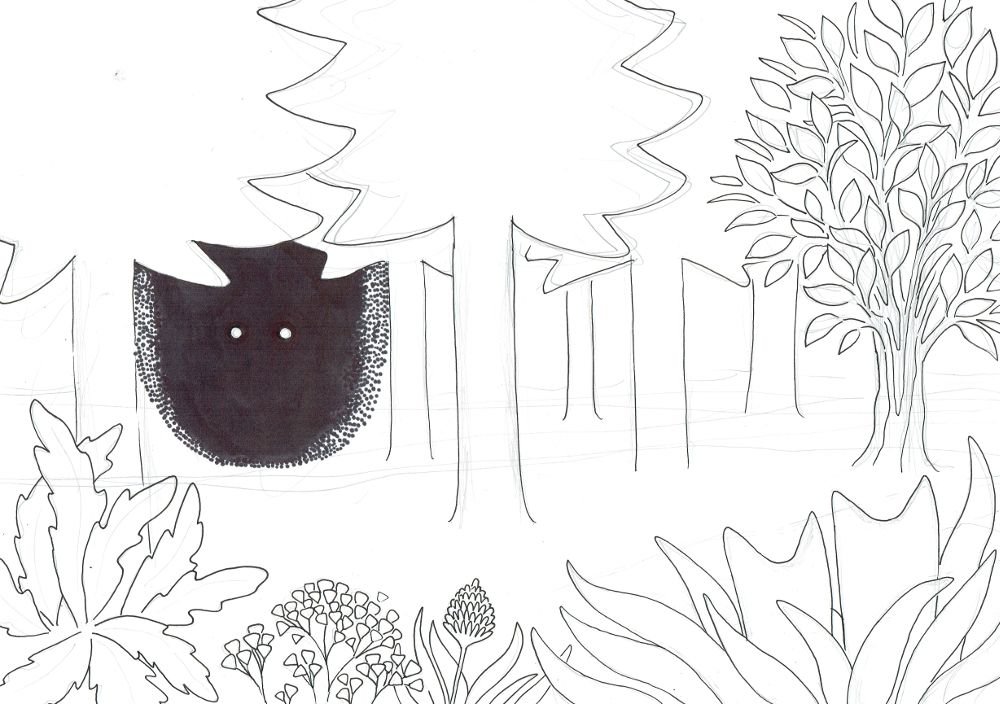
Next thing was the complete redraw of the outlines with pen. My pen slipped when I was outlining the eyes of the creature, giving them a crazy look. I wasn't happy with that at all because it took all the menacing impression away. That's why I started with shading the monster and filling it with black.
I gave the shadow rounded edges.
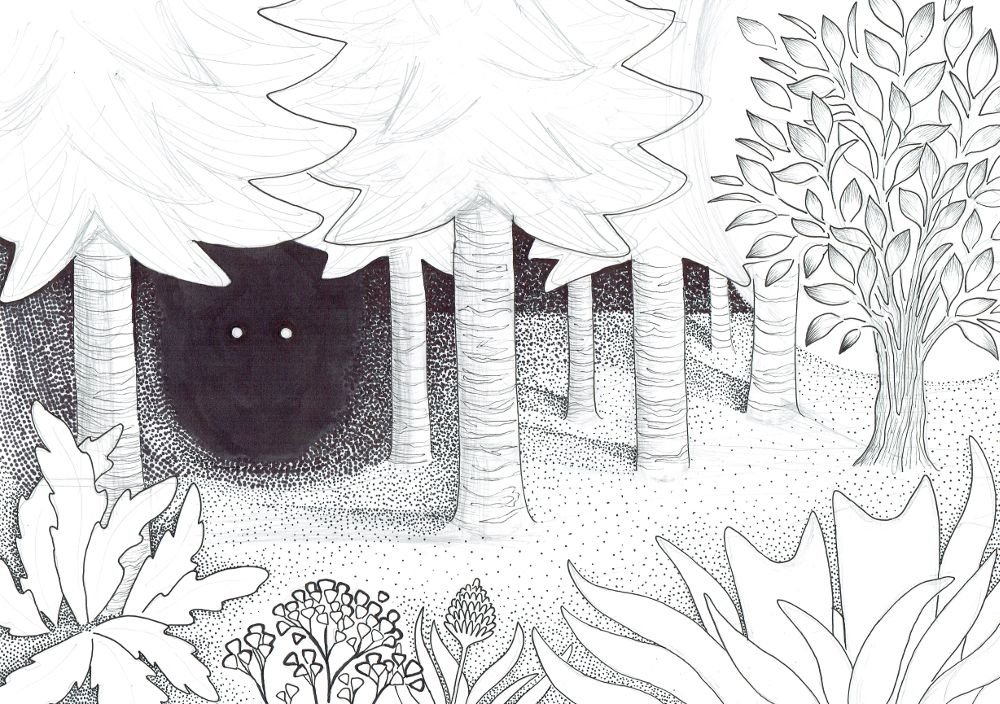
Then the shadow has spread between the trees.
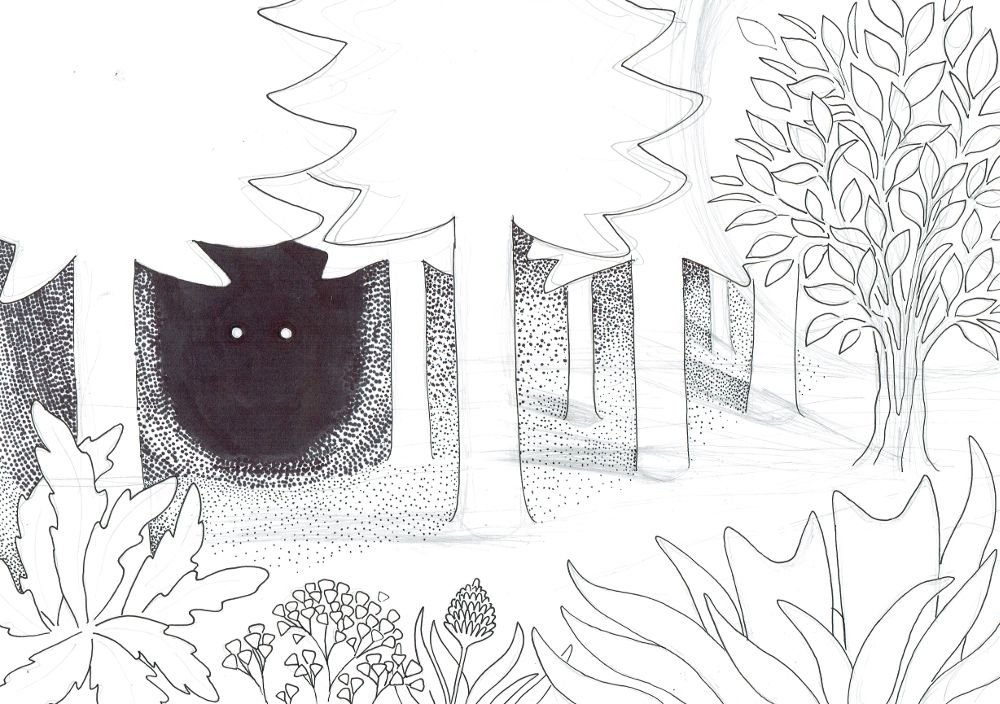
The shadows grew and intensified, but I thought it would be good to give the scene a little bit more depth, hence the horizontal line in the back.
Then it was time to move onto the plants and trees. I wanted the trunks to have a little bit of popplar-like texture. I also created some auxiliary lines in the pines for reference.
I thought it would be nice (and scary) to create a distortion with dots around the shadow and on the ground. I like black holes and also get creeps thinking about them, maybe that's the reason why the shadow resembles one.
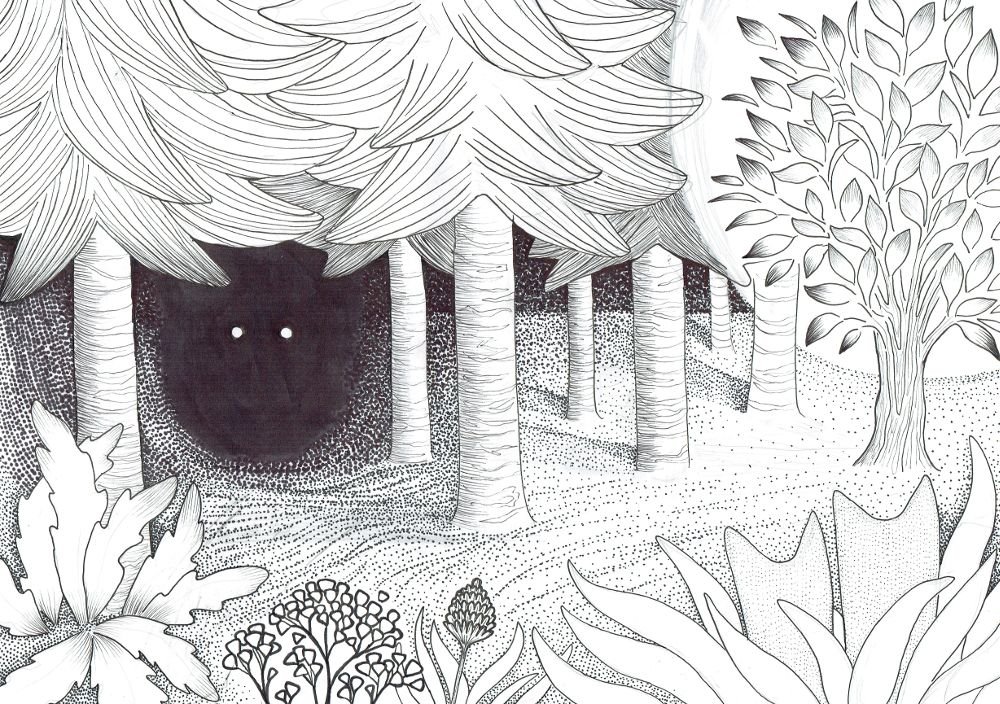
It took me a long time to finish the stippling and give texture to the scene.
I knew I wanted it to be darker on the left side, away from the shining tree.
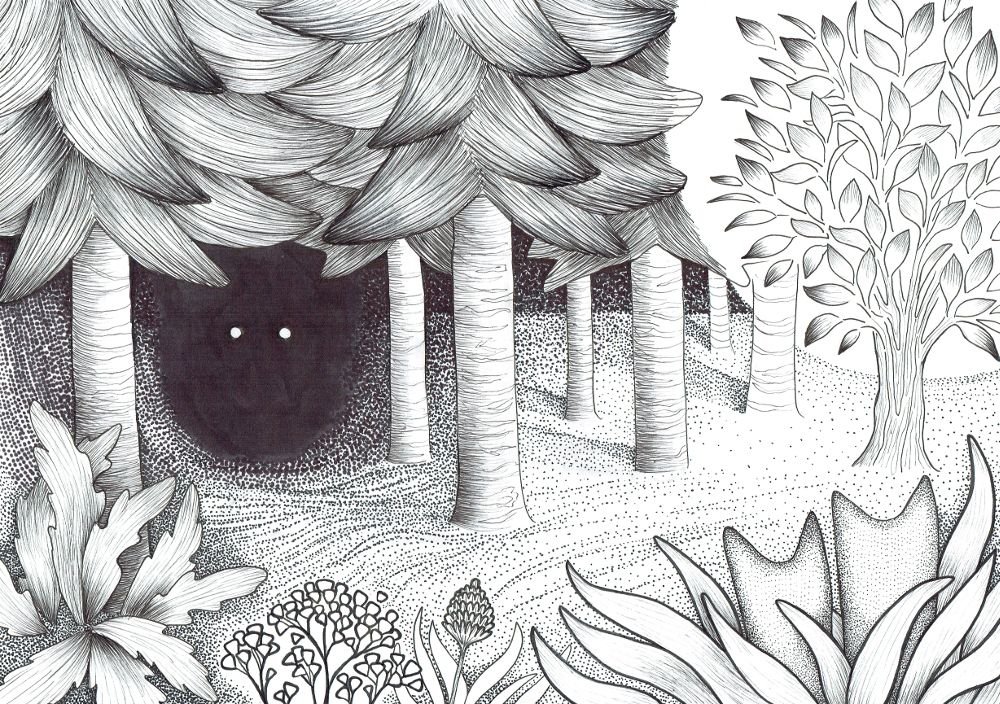
Many layers of dots and lines later all was going very well, but I wasn't very pleased with how the tree turned out.
But before I sorted it out, I spend some time working on the ground, giving it more texture and structure.
Then I started with the tree, by reducing the white surface with shading and dots and trying to fix its shape into a nice round circle.
And finally, after even more dots and lines, I was finished ;) And I'm very glad about that, because I have many more new scenes in my mind, waiting in line to be drawn! ;)
Here I captured the whole progress in GIF for you:

All those progress GIFs make me really thirsty for some animation, it would be lovely to create one in the future. I know I'd have to start with something simple. We'll see :)
I hope you've enjoyed my post, thank you so much for stepping by! Please let me know what you think ;)
All the best,
Klaudia