This Part #2 of a multi-part series of Blended Learning Theory and Practice. This article covers one of the essential components of BL: the Learning Management System.

PHOTO CREDIT: MINDFLASH.COM
What is Learning Management System (LMS)?
An LMS allows educators to deliver contents to the students online (by internet) or locally through the use of a local server located in a domestically designated area such as in a school campus or office via an intranet or local area network (LAN).
Its functions include the ability to create content, delivery of contents in time or scheduled, tracking student performance, administration and documentation, reporting of vital information and statistics for evaluation among other things.
I believe one of the most important feature of LMS is to be able to “interface” with other similar systems or provide an API to enhance and develop its functionality. Most of open source LMS like Moodle and Chamilo are extensible and may be customized to the users’ needs.
Edmodo, currently at the #1 spot in Capterra website, is an LMS who has been around for a long time. It’s a robust application with millions of users. With its social media functionality, members are able to share resources and collaborate to accomplish tasks and projects.
Although Moodle is one of the top popular LMS, #2 spot in Capterra, its interface is one I am not comfortable working with. But its minimalistic interface really simplifies the workflow, and I think that is a very commendable feature.
However, I found Schoology, #9 spot in Capterra, a much better option with its UX design and its familiar interface resembling Facebook and similar social media sites. In fact, Schoology is social media and a LMS at the same time, which is cool.
I am not paid by Schoology and I am in no way affiliated with them, except for being its member. You may direct your questions or contact them if you need more information about this wonderful app. You can always try other LMS to find what works best for you. There is no perfect LMS, but there is always one that we are most comfortable with that will provide most of the things we need.
So let me get on with Schoology.
Schoology
There is one LMS out there that strikes me as one of the best there is: Schoology. I have been using Schoology since 2012 and have seen tremendous developments by leaps and bounds in its offerings and robust features. Back then, I was able to register as a user and had been an Administrator of my previous’ school account in Schoology.
Schoology mobile apps are also available in iOS and Android platforms.
How to Use Schoology?
Anybody can register in Schoology starting with a Free Basic Account. You need an email address and if need to be verified, you need a mobile number. Verified accounts have more privileges than a non-verified one.
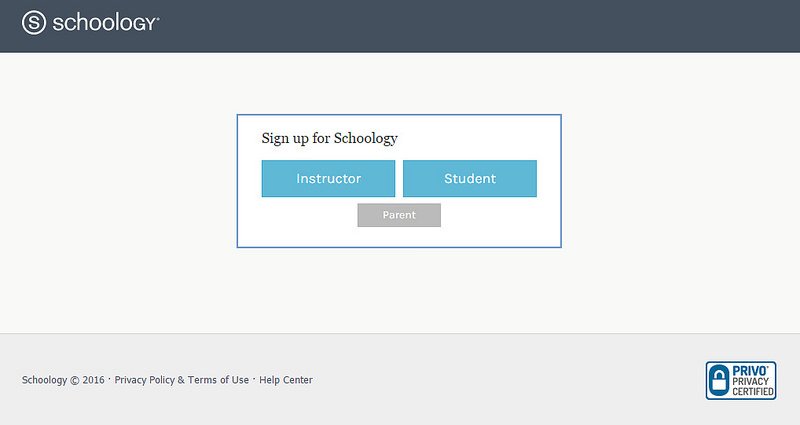
You can sign up as Instructor, Student, or Parent. You will see a series of screenshots on how to sign up as Instructor and Student. I will not cover the Parent sign-up unless someone requests it.
Instructor Sign-up
1.Choose your account type:
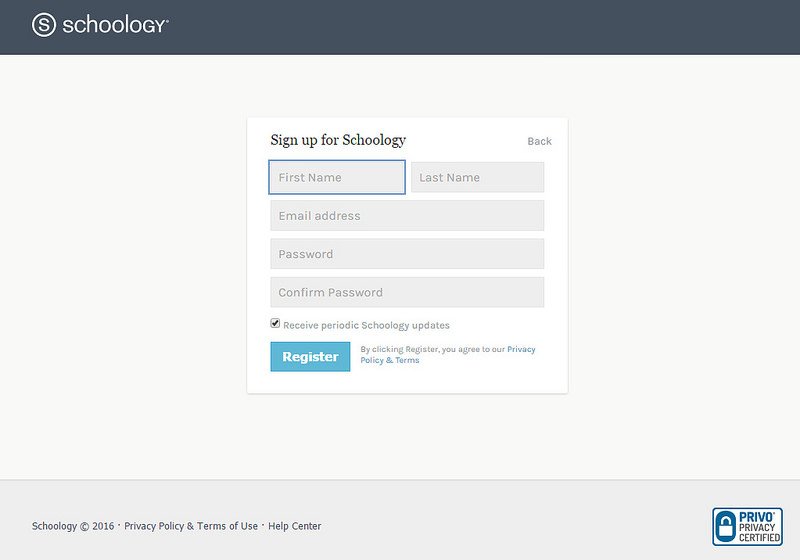
2.Enter user details:
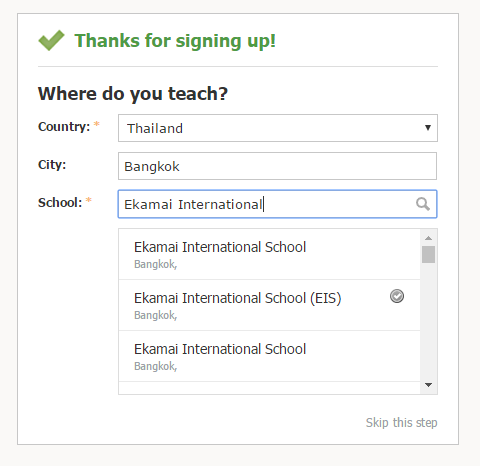
3.Where Do You Teach?
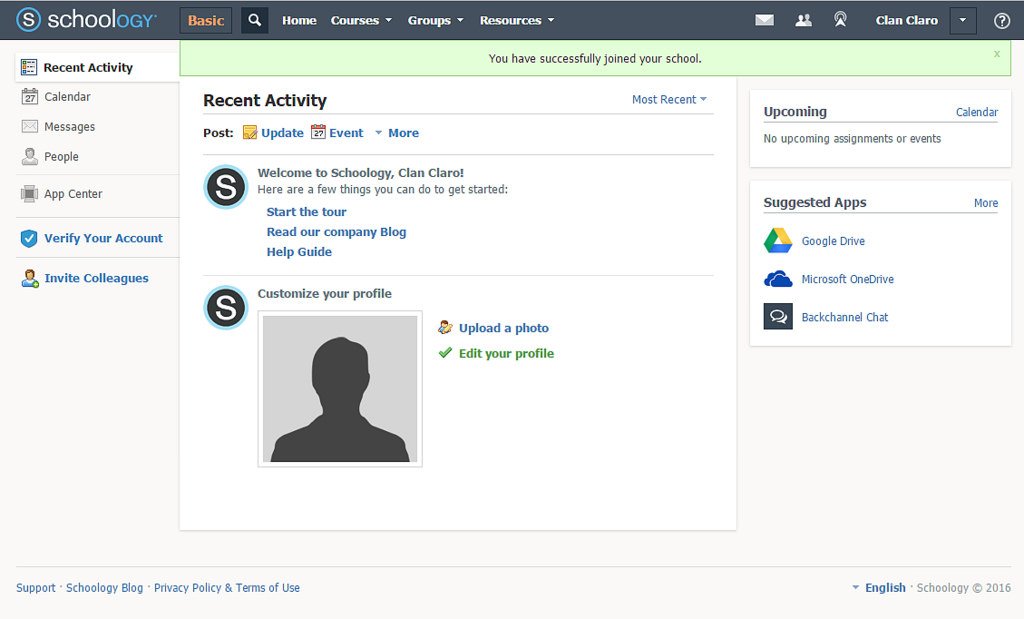
4.User (Instructor) Home Page
Creating a Course
Now, the first thing an instructor does is to create a course for students to join in.
1.Creating a course.
"
2.Entering Course details

3.Entering Course Subject Area
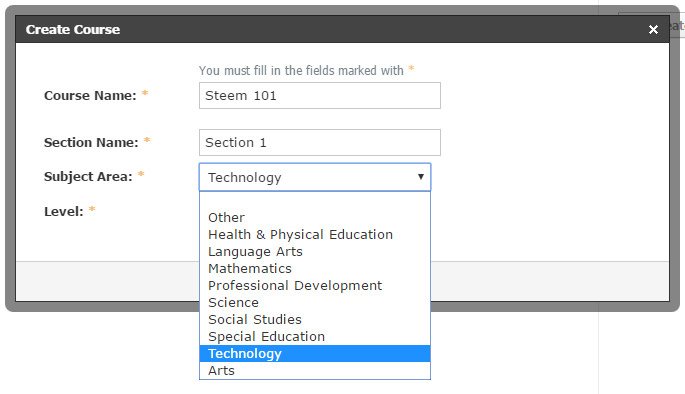
4.Entering Course Level
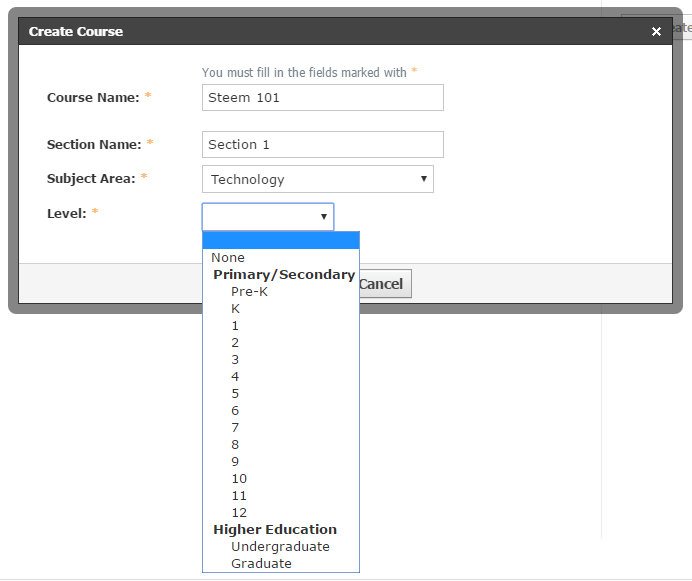
5.Entering Course Level Range

If you’re like me, you would choose Pre-K to Grade 5 as the range of levels for this particular course.
Course Home Page
The following screenshots show the different facets of a course in Schoology.
1.Course Home Page
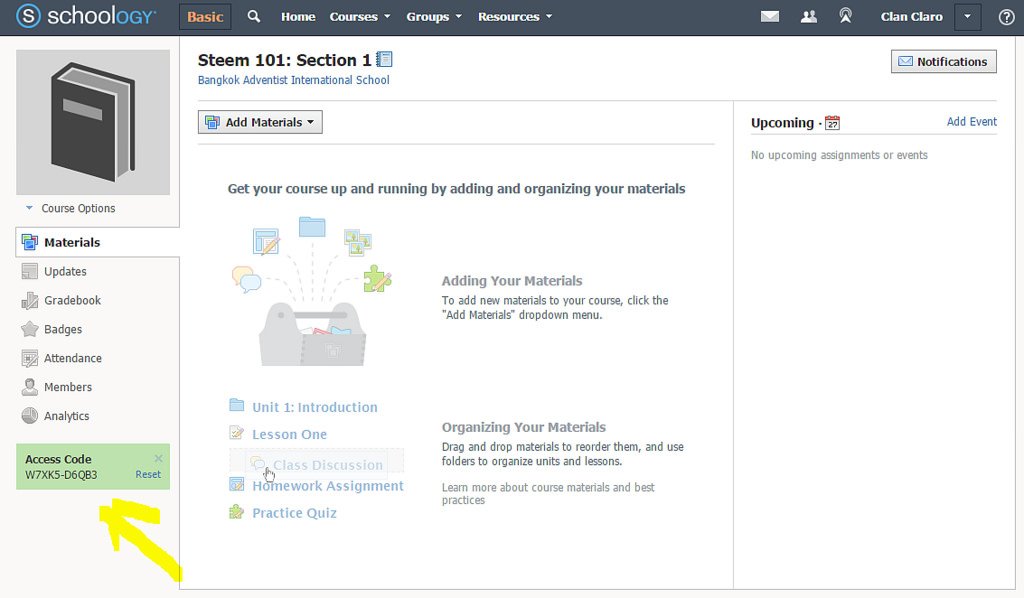
The screenshot shows the barebones of a newly created course in Schoology. Currently it shows the “Materials” section of a course. This section contains the assignments, quizzes, etc. for the course. Students see these materials when the instructors create and publish them for students to perform the required tasks.
At the lower left corner of the image as pointed by the yellow arrow, this is the Access Code students use to enroll into the course. This will be shown later in other screenshots.
2.Course Update Section
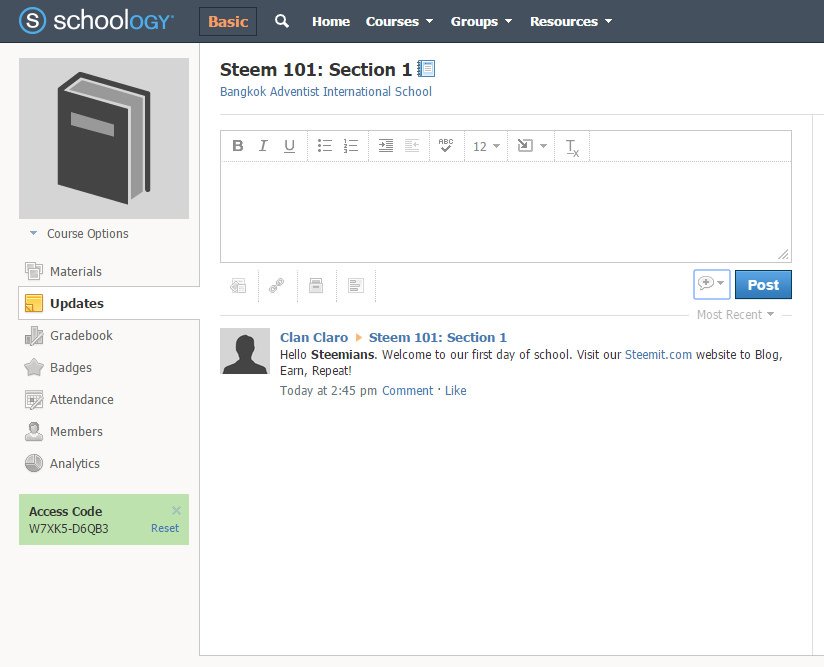
The instructor use this section to post any messages, status, or updates in relation to the course. At one time, I had to use this update status to let my students know I was admitted for appendectomy.
3.Course Gradebook Section
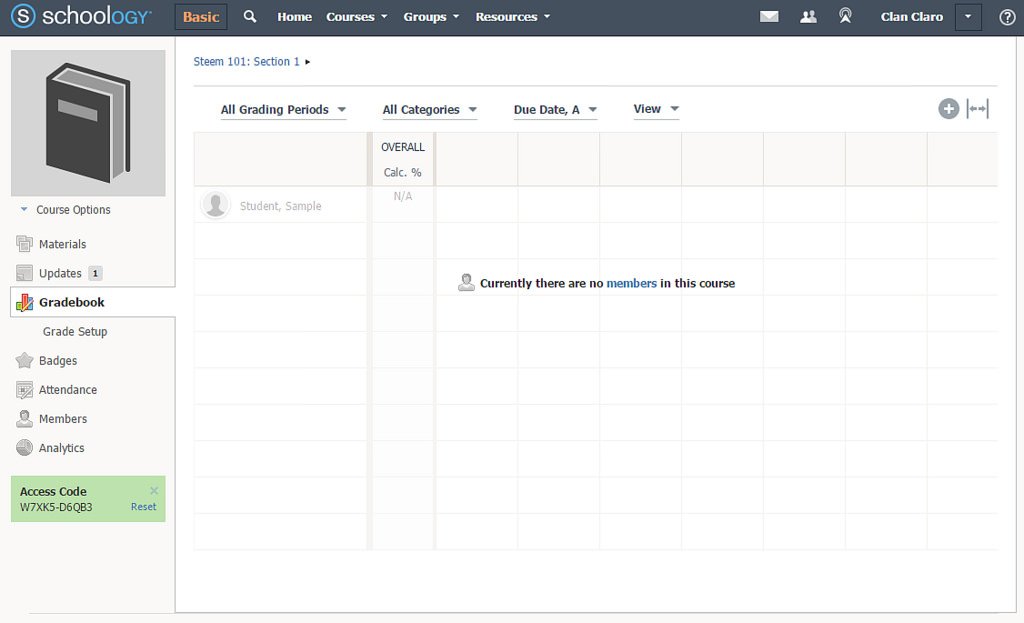
This section lists all students enrolled in the course. You may display specific grading periods or all of them.
4.Course Gradebook Setup Section
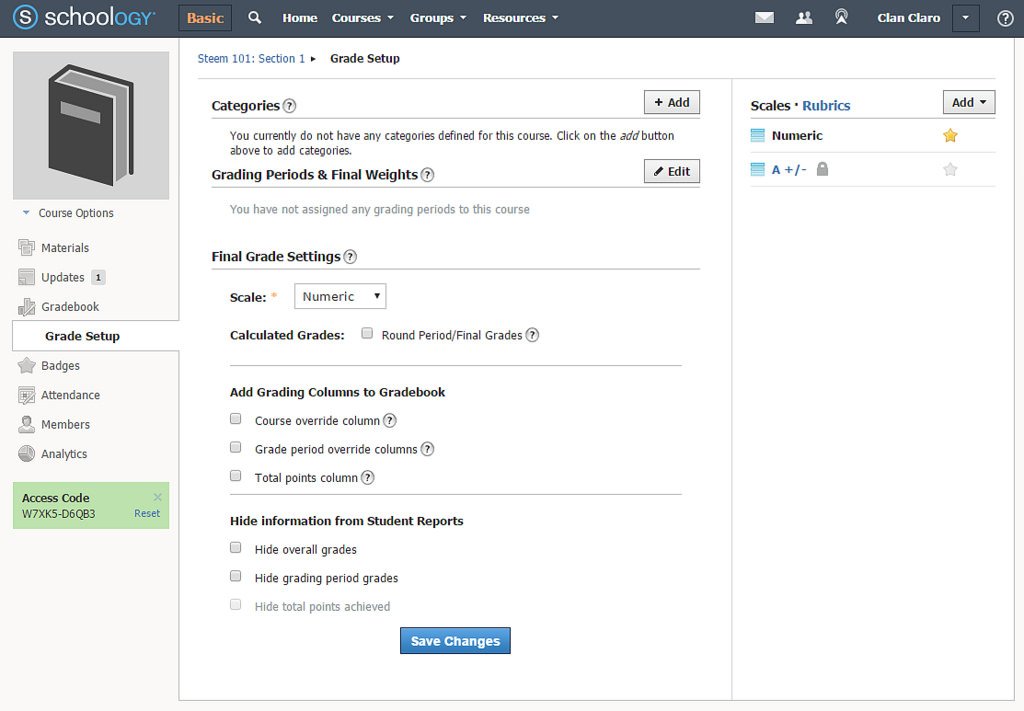
The setup section allows you to set up categories, weights, and other items related to grades. One option is the Round Period/Final Grades which allows the instructor to automatically round off grades of the students.
5.Course Badges Section
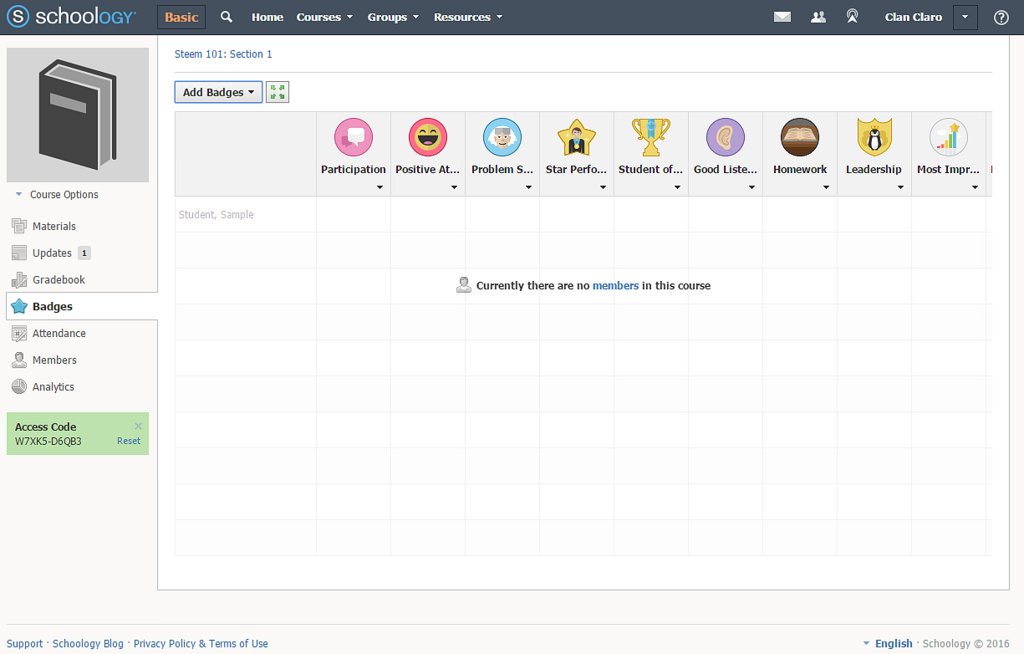
These ones my students are proud to have. It sets them apart from others who don’t have badges. It also boosts their morale and works as a motivation for them. You may add more badges from other sources as well.
6.Course Attendance Section
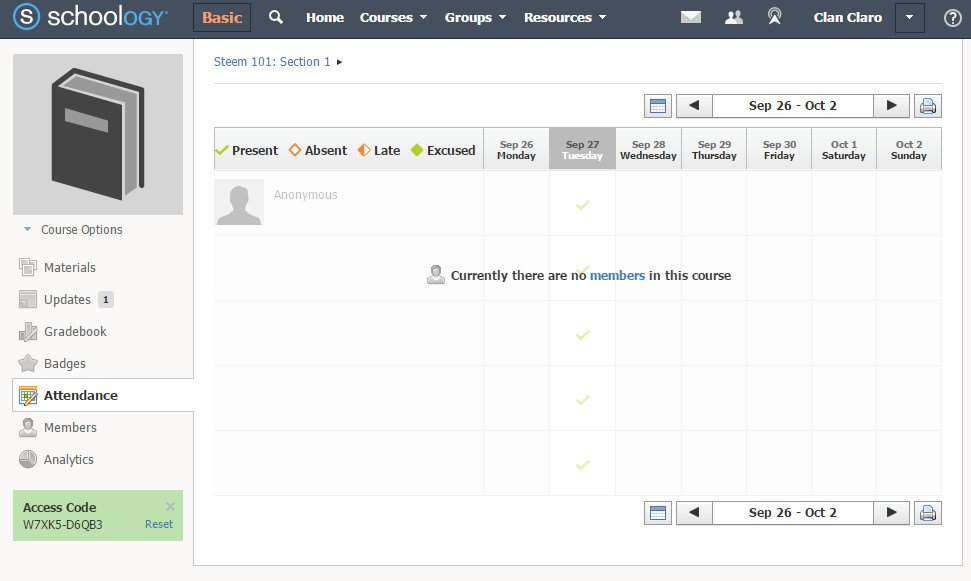
Keep track of your students’ attendance with this module. You can mark them present, late, absent, or excused. This attendance record is also visible on Student Attendance View so there is no excuse for them not to know their attendance status. This is important when attendance is a vital part of your grading system.
7.Course Members Section

Instructors see who are currently enrolled in the course and check whether they should be enrolled or not.
8.Course Analytics
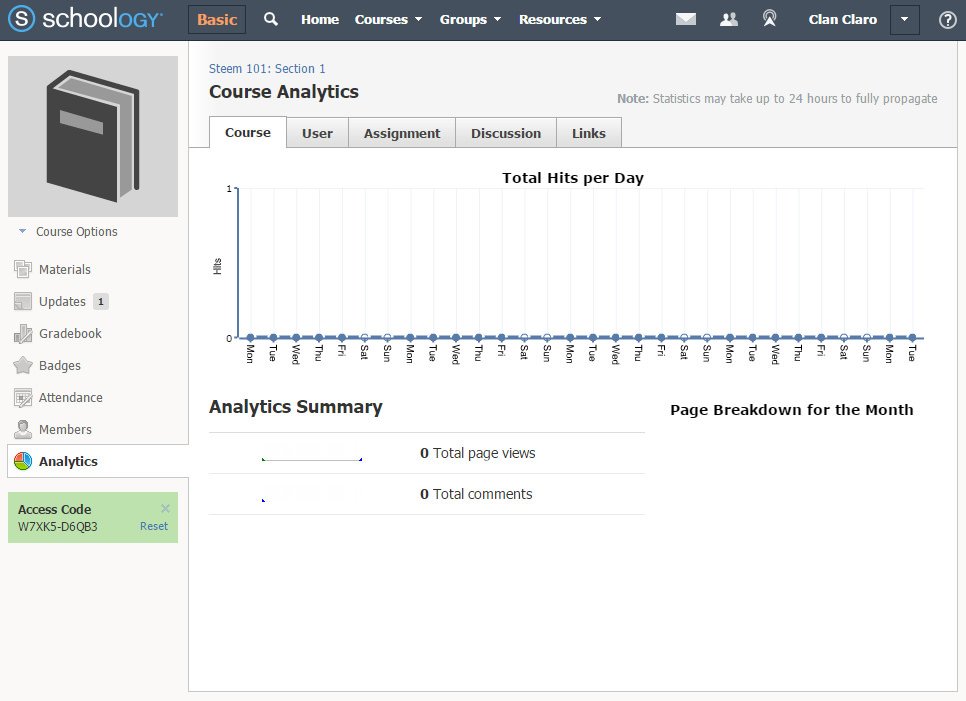
It pays to know what’s happening with the course statistically. This will allow instructors to make adjustments if there is a need to do so.
Adding Materials to the Course
Materials refer to many things in a Schoology course. It may be an Assignment, Test/Quiz, File/Link, External Tools, Page, Discussion board, or Media Album.
I have added an Assignment to the course and will show you the screenshots for it. Assignments are tasks you want your students to do in and out of the classroom. Assignments is the generic name for Classwork, Homework, or any kind of work you want students to do. This is where you can include lesson plans, instructions, resources, links, and even add some images or videos into the Assignment.
1.Adding Assignment
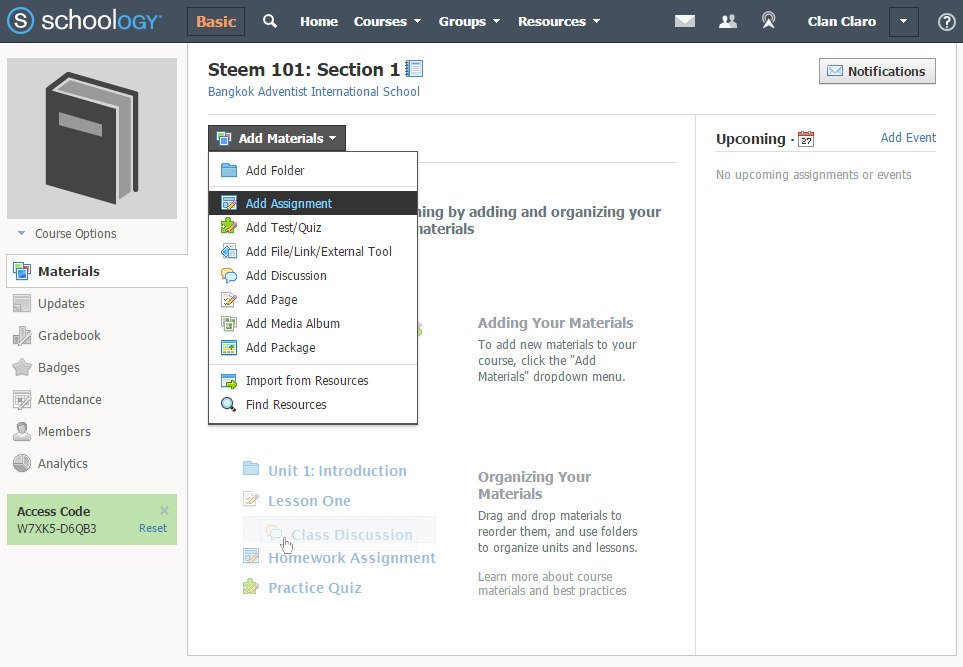
2.Entering Assignment Details
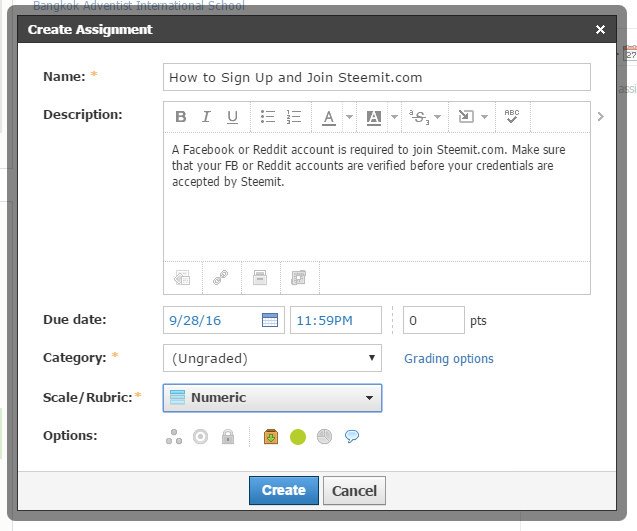
These are the basic information you enter in an Assignment. Most of the items are self-explanatory. But I want to emphasize the Scale/Rubric which you may have set up in the Grade Book Section of the course. Rubrics may be done “on-the-fly” as you create the course. Rubrics is one important topic I want to tackle when we go deeper with Schoology.
There are a lot of options you can include in your course. For now, we skip them for simplicity of presentation.
3.Course Home Page with Assignment
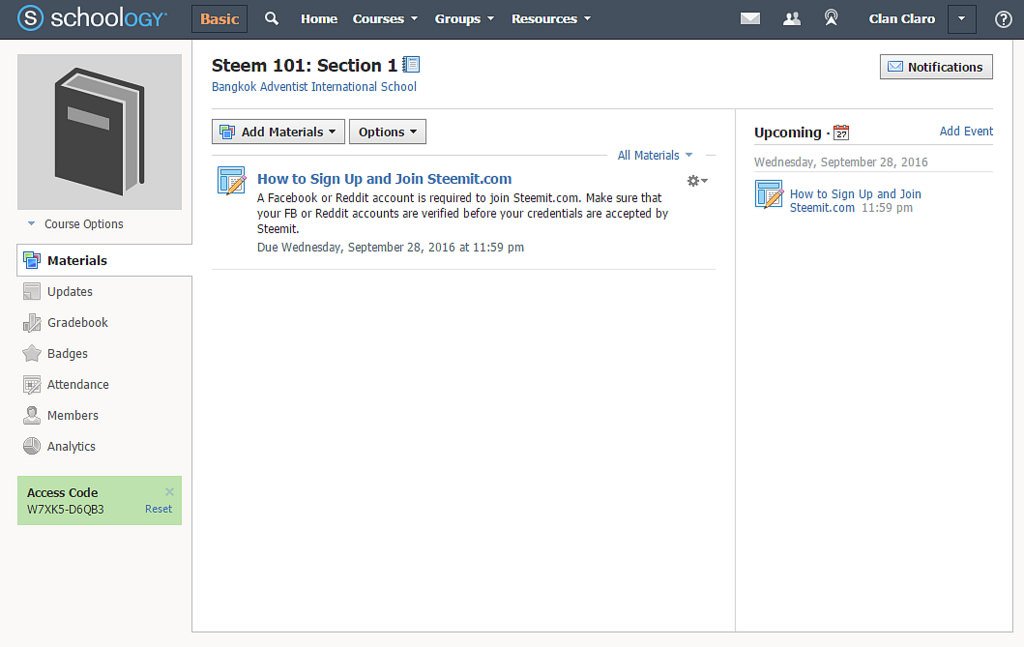
All Assignments and Materials added to the course are visible in the middle column of the page. You will also notice that the Assignment is displayed on the right side column as “Upcoming” event because of the date assigned to it.
4.Assignment Details - Instructor’s View
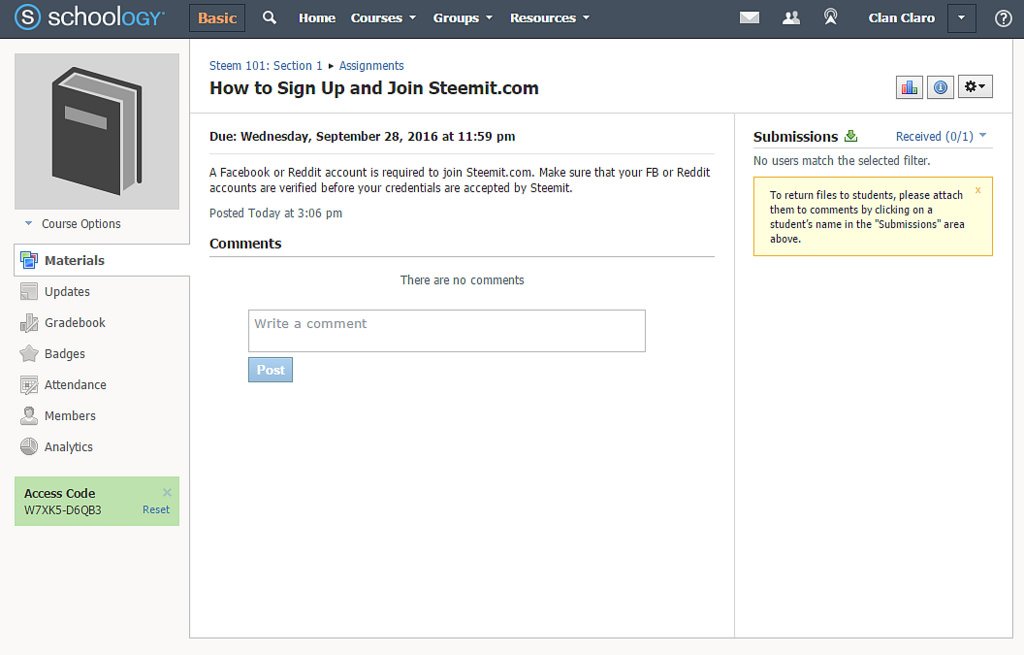
The instructor’s view of the Assignment details shows a “Submission Section” on the right side column. This is where all students’ submission appear. It will also show whether the submission was given on time or late.
Submissions are files, images, or other documents you want students to submit as output of the Assignment. As you click on the submissions, the Grading module appears and you may assign grade right then and there.
Student SignUp
Student signup cannot be more straightforward than this. Email address is optional. One required information is the Access Code of the course the student intends to enroll in.
1.SignUp Screen
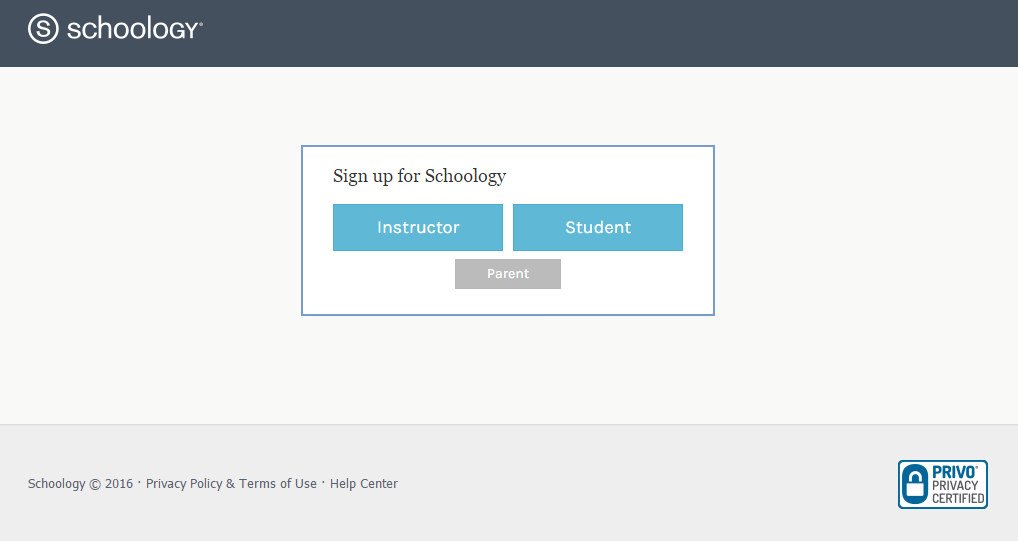
Student chooses the “Student” button.
2.SignUp Details
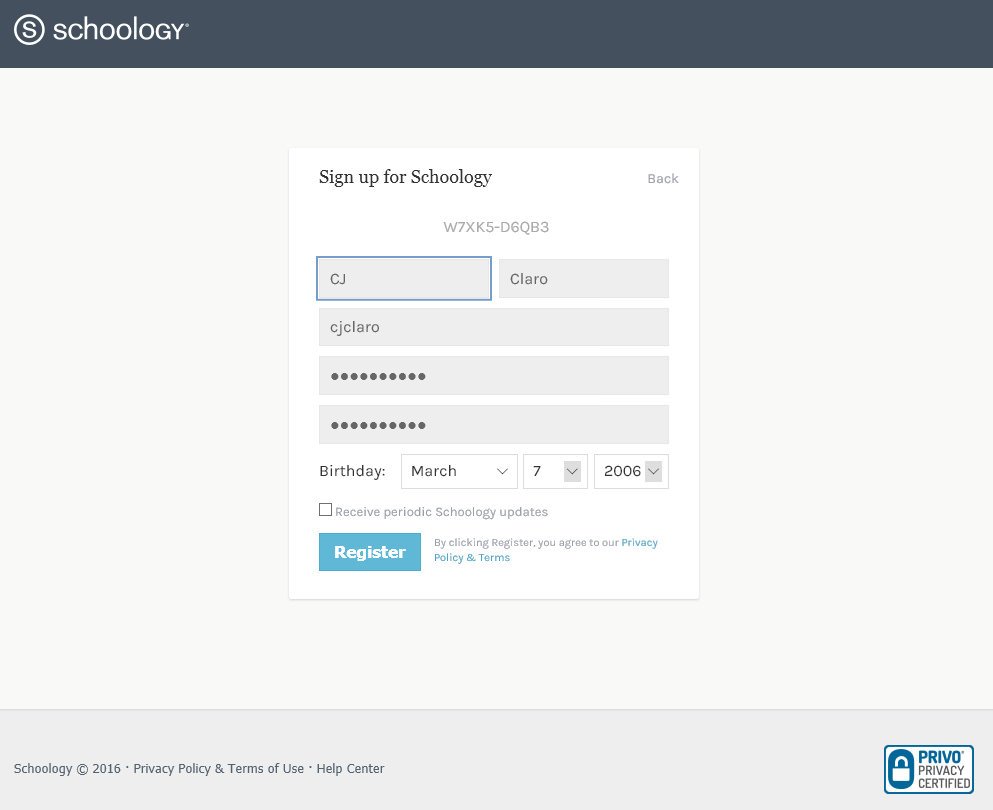
Students provide their desired usernames. I require my students to use their first name or last name or combination of both to avoid issues with bad usernames in the future.
Student Home Page
1.Course Home Page - Student View
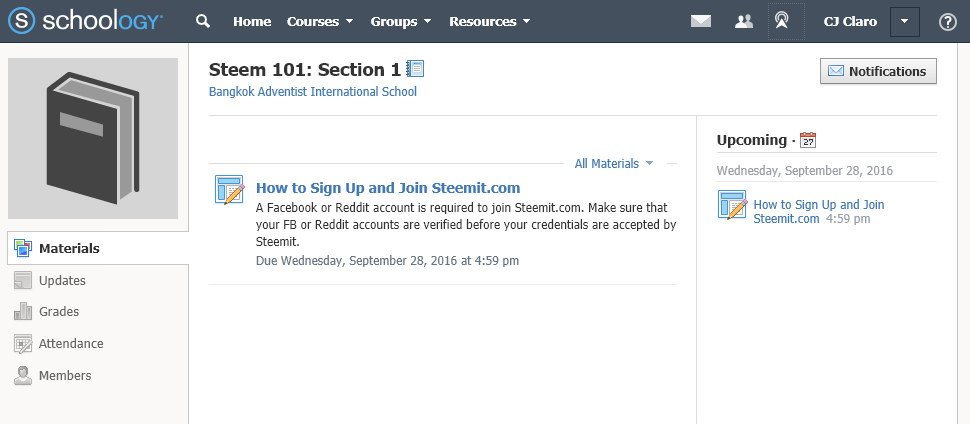
This view is quite similar with the instructor’s view. All Assignments and Materials added to the course are visible in the middle column of the page. You will also notice that the Assignment is displayed on the right side column as “Upcoming” event because of the date assigned to it.
2.Course Updates (Stream) - Student View
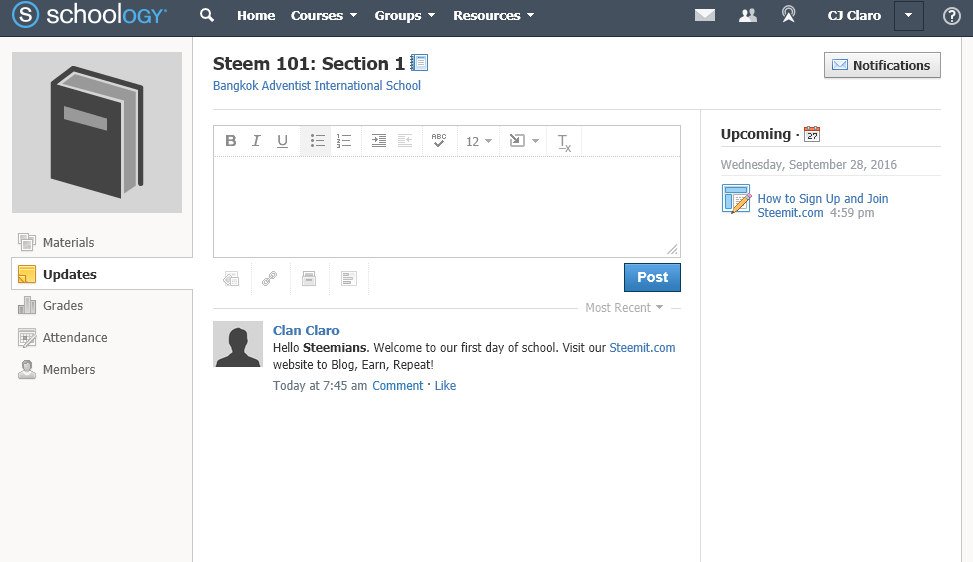
This is the “stream” of the course where students can comment, reply to comments, and like the comments. Sounds familiar? Yes, Steemit has that feature too! On the right side is the Upcoming event calendar. The calendar is almost seen anywhere at anytime in Student View.
3.Course Assignment Details - Student View
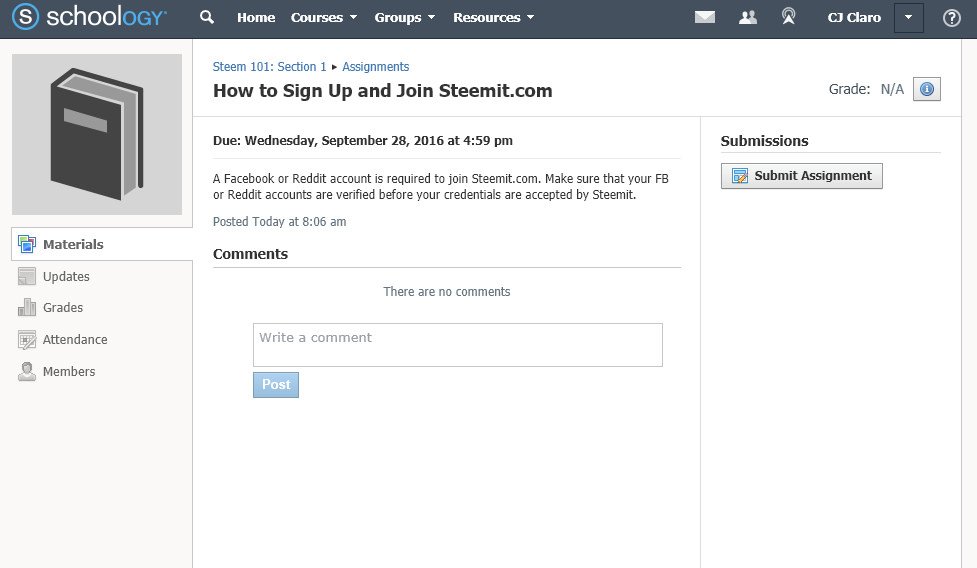
Similar to the instructor’s view, the one notable difference is at the right column side where a Submit Assignment button is found. Students click this button when they submit the required file or files for the assignment.
Students can also comment on the assignment or ask questions for clarification or simply communicate with other students in the course.
4. Course Grade - Student View
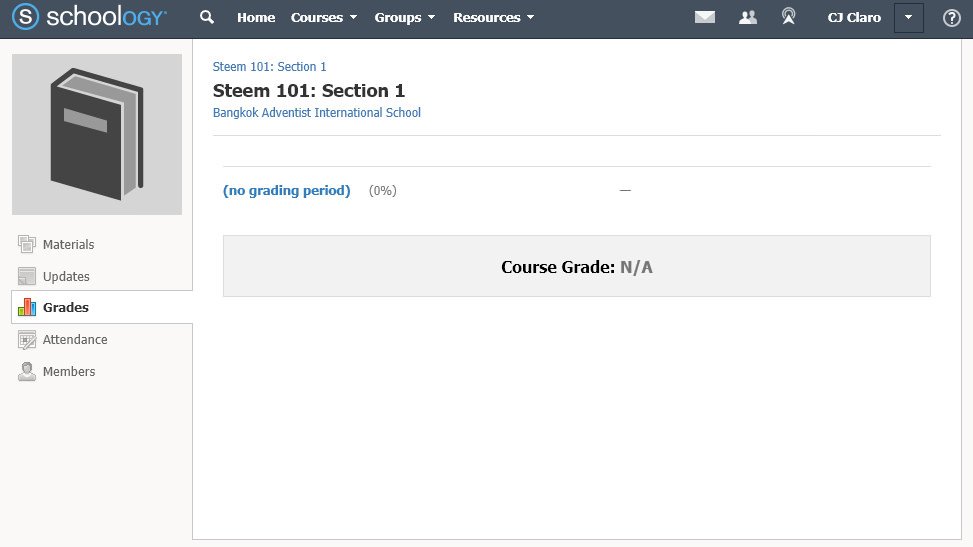
Here the student will be able to his grades in details. For now, this is empty because there has been no activity in the course yet or the student has not done any assignment.
5.Course Attendance - Student View
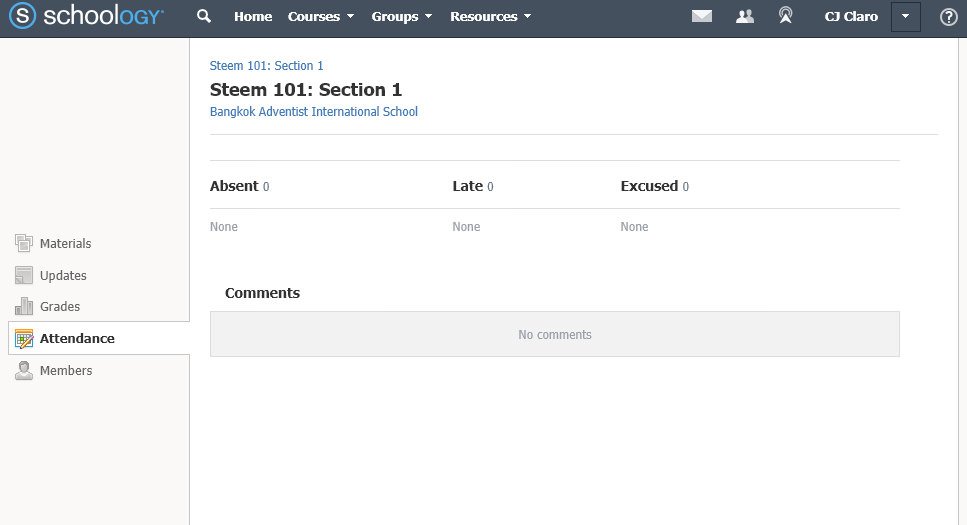
The attendance view is the personalized details of student attendance. It shows how many times a student was late, absent, or excused. It also shows any comments made by the teacher about the student’s attendance.
6.Course Members - Student View
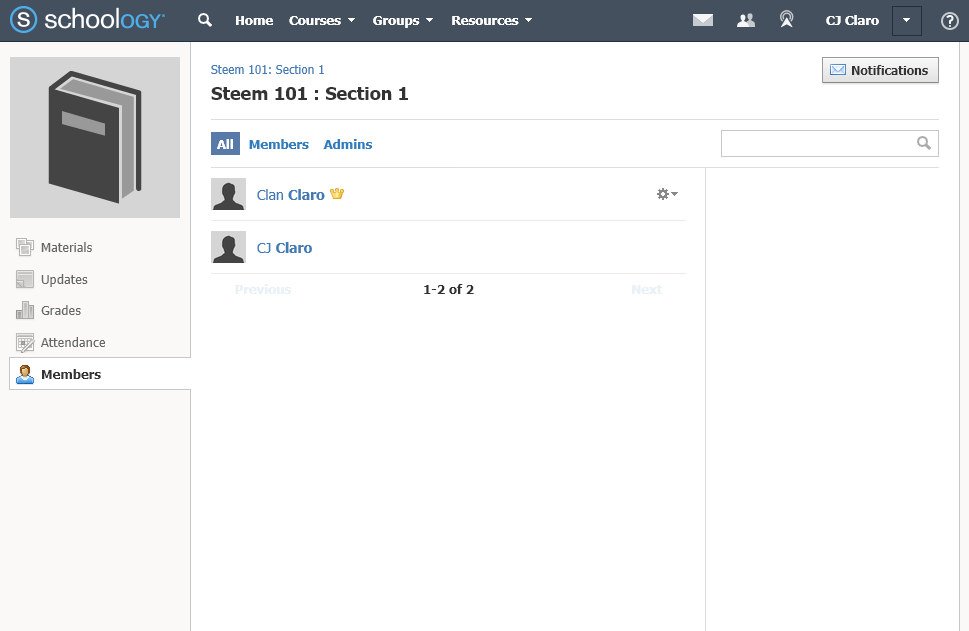
Showing list of members currently enrolled in the course. The list is also “searchable” and may be filtered by three options: All, Members, Admin. Also, members may send messages to other members through this list.
What you have seen is only the basic of Schoology. Digging deeper into its features and capabilities will require some amount of time on your part to get the full benefits of this LMS. I strongly suggest you sign up, create courses, and test what it can offer you as a teacher or trainer.
Next Stop: The Plan - What Teachers Should Prepare for to implement a successful Blended Learning environment.
