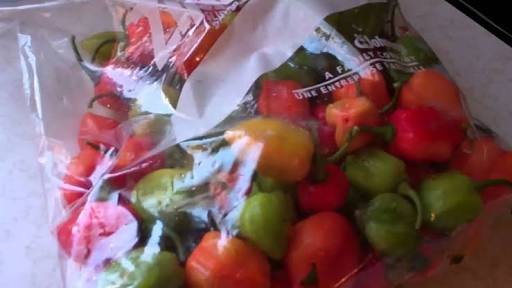
Hello fellow steemians and parishioners of the steemchurch! Today, ushers in the first of many agricultural posts initiated by @farms in this post here. Feel free to visit the link and learn about the initiative, it's guidelines and make your own debut. I personally believe so much in agriculture and I'm really excited to be sharing agriculture-related posts. Today I'm going to be talking about a hot spicy plant, pepper.
Types of pepper
Pepper comes in different types and sizes which include:
- Bell pepper
- Jalapeno
- Sweet and chili peppers
- Carolina reaper
- Piri Piri
....and others too numerous to mention and so for the purpose of this post, I'm going to be talking on the first pepper type listed; the Bell pepper.

img src
Just like most other peppers, bell pepper is a great plus to and dish and what's more? you can grow your very own! especially if your family consumes a lot of it. But if you'd like to go into it commercially, then you'll also find that it has a lot of agricultural and economical benefits. It truly is a spicy wonder! It would surprise you to note that pepper is the most traded spice in the world alongside salt.
Let's get to it then;
How to start growing bell peppers
Some people buy the plant that has grown to a certain point and just transplant, it's kinda easier that way because you won't have to prepare the seeds but once again, for the sake of this post, we are going to start from the very beginning.
Depending on your climate, you may choose to start growing your pepper indoors because peppers at this initial stage grow well under warm conditions. If it is cold or frosty where you are, then you should consider growing your pepper indoors for atleast two months before transplanting outside and if you are in a warm climate with a long planting season for example, then you may choose to wait and grow them outside but this may affect the time in which the plant produces fruit.
STEP 1 - Planting the seeds
The pepper seed should be planted in thin layers of sand and then watered daily. After about two to three weeks, the seedlings will appear from the ground. In order for the seeds to germinate, they must be at about 70° F. The seeds won't germinate if they are not kept warm enough and that is one of the reasons for the advice to plant indoors.
STEP 2 - Germination and transplanting
Once the seedlings sprout from the ground, for those growing indoors, take care to provide enough light for the plant else it will have bad growth at an early stage causing weak transplants. You should begin to harden off the plant at about 10 days before transplanting, then you should introduce fertilizers into the soil a week before you transplant. This prepares your plant for outdoor conditions.
The plants do well with sulfur, so at the point of transplanting, introduce a little bit of it into the soil. Make sure to wait till the plants are about 20 inches tall before you transplant. Also take care in making sure that the outdoor temperature is generally at 65° F because it will be difficult for the plants to survive the transplant process at a lower temperature.
Now your pepper seeds have become plant, let's look at some techniques on how to care for them till they reach maturity.
CARE TECHNIQUES
These plants require a well drained soil as adequate moisture needs to be maintained for proper growth. Best to make use of mulch.
. If you stay in a warm climate, it is essential that you water every day because peppers are very heat sensitive and for the colder climates, make use of black plastic as it enables the plant to grow faster.
Ensure to fertilize after the first set of fruits show up.
You should wait for the pepper to ripen fully before plucking them off, bell peppers usually start off green and then after 2-3 weeks, they ripen to the desired colour. bell peppers could be either green, red or yellow in colour, so note the type planted.
Insulate the seedlings against temperature drops by making use of jars or used plastic containers to cover them, of course leaving the top cover open for air and sunlight to get in.
Erect structures of sticks and cages to prevent bending of the plant.
PEST AND DISEASES
Some of the pests and diseases that affect the plant include: Cucumber mosaic virus, blossom end rot, aphids and flea beetles. It is important to note that some environmental conditions can prevent the plant from bearing fruit and as such it is good to apply Epsom salt to the plant, either in the soil or mixed with water and sprinkled on the plant. The method of application is up to you.
Take care when using a nitrogen fertilizers because excess nitrogen leads to the production of fruitless plants (lush).
How to harvest and store the pepper
You should harvest your pepper as soon as it attains the desired size, although the longer bell peppers stay in the plant, the sweeter they become as well as more nutritious. Use a sharp object such as a knife to cut them off the plant as this poses less risk.
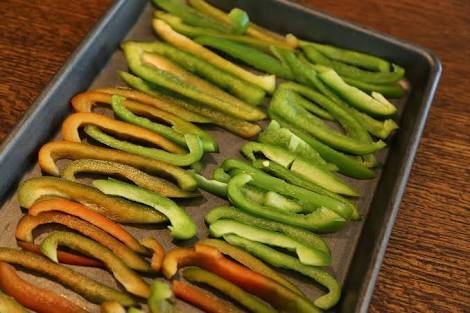
Bell peppers can be kept in bags (plastic) or storage containers for over a week without damage, they could also be dried as well by cutting them into thin strips and placing them in an oven.
Pepper seeds can be kept and preserved for as many as two years without use. You should gather them up and keep them in a cool dry place as moisture can cause them to sprout prematurely.
I hope this post enables you to start your own pepper farm today. Feel free to leave your questions and comments about the pepper plant as i'd very much love to answer any that you might have.
Thanks for viewing...


.jpeg)
.jpeg)