I have never been a huge peanut butter lover until I started to make my own. It might had something to do with that claggy-mouth texture that made me hate this common food staple. However the Pad Thai lover I turned into - that's what living in SE-Asia does with you - recently sent me on a mission to make my own.
Making peanut butter is actually so easy that, if you are anything like me, you ask yourself why people actually go for the overly processed store-bought stuff. It even turned me, a peanut butter hater, into a true addict. Now I often add it to breakfast bowls, smoothies, dressings, sauces, snacks, and stir-fries.
1. Roast peanuts (optional)
This is entirely optional, but highly recommend if you are not on a raw food diet. It will improve the taste of your peanut butter. The heat will also make them easier to process and release their oils to turn the peanuts into peanut butter.
There are 2 options here. Toast them in a dry pan over medium-high heat for a few minutes. Make sure to keep tossing them around so they do not burn. You could also use the oven. Add nuts peanuts in a single layer on a baking sheet. Toast them for 10-15 minutes on 150°C/300°F. Stir/toss regularly to avoid burned nuts.
3. Simple homemade peanut butter
This recipe actually works for all seeds and nuts, or why not try and make a mix. You can either use raw nuts or roasted/toasted.
Ingredients
- 2-3 cups peanuts
- 1-2 tablespoons extra virgin coconut oil, peanut oil, sesame oil, etc. (optional)
- Pinch of salt
How to
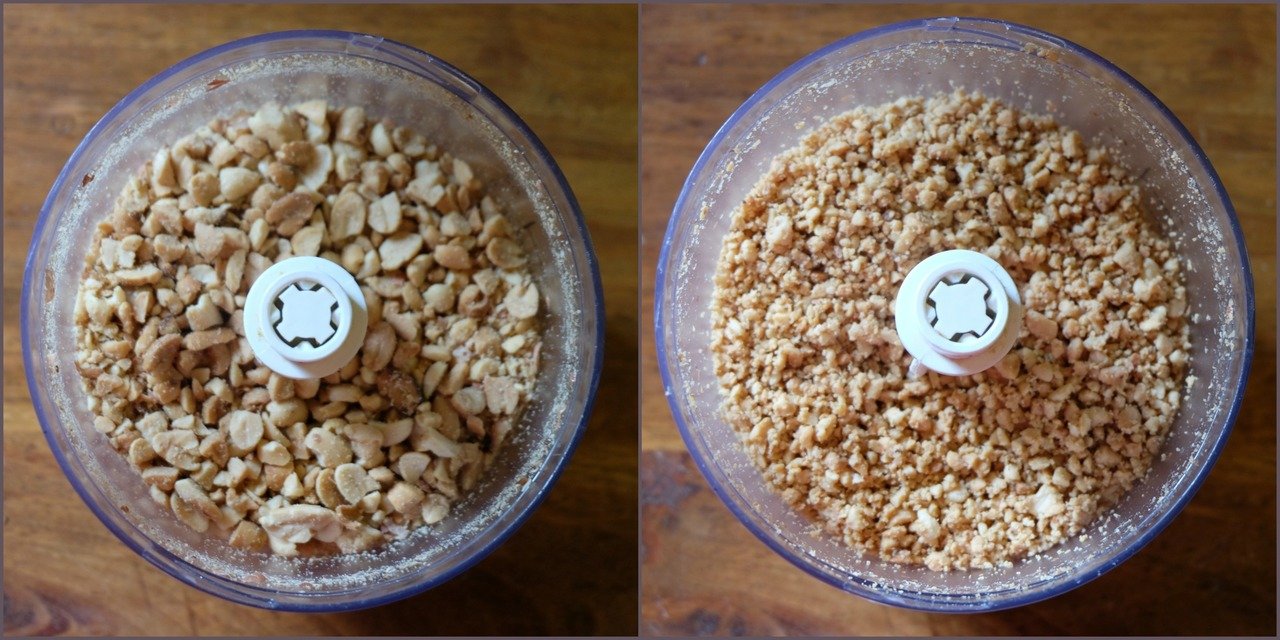
- Add the nuts to your food processor or blender when they are still hot. If using a small food processor, use half of the nuts. When the jar is too full the nuts don’t have enough space to move around and they will release their oils much slower.
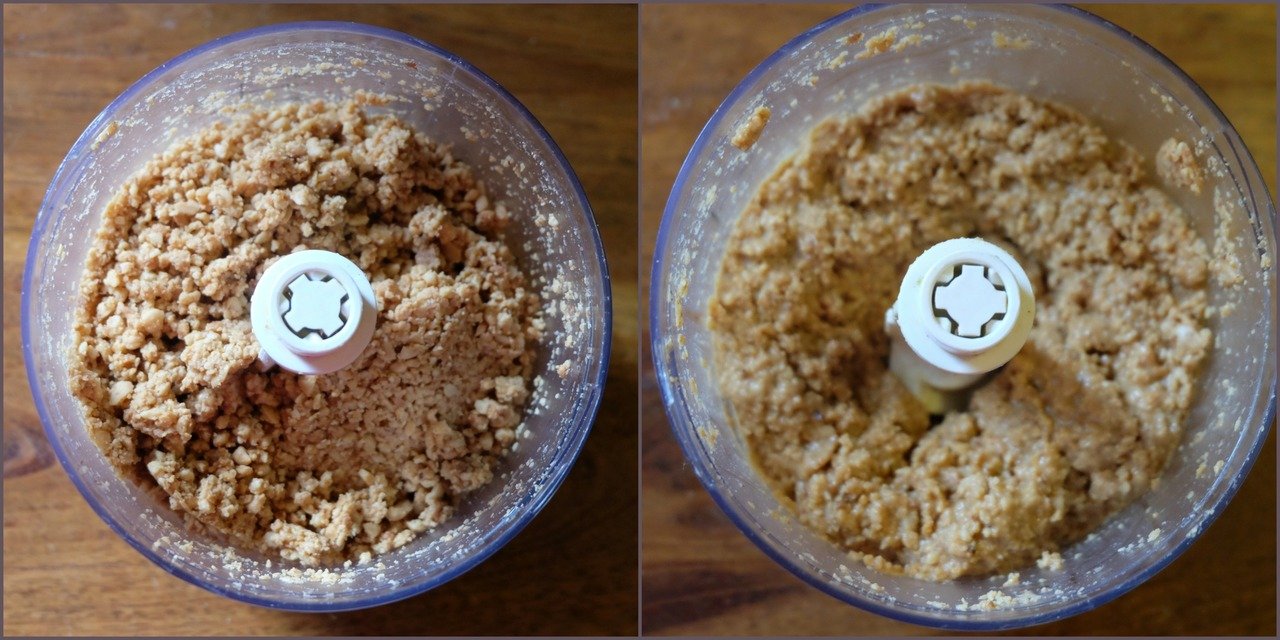
- Start by pulsing the nuts/seeds to break them down. Then run at high speed, often stop to scrape down the sides. At first, it will still be quite chunky; then it turns into a fine powder, and then magically the oils come out and they convert it into a creamy peanut butter. If at any time you feel your blender or food processor is getting really hot or smells burned, allow to cool down before resuming the blending process.
- When the nuts are turned to powder, you could add some oil, but this is entirely optional. It will ease the blending process and make it a bit creamier.
- The butter is done when the mixture turns into a thick creamy paste which blends smoothly. If not add a little oil. Do not add water or nut milk, or your nut butter will spoil so much faster.
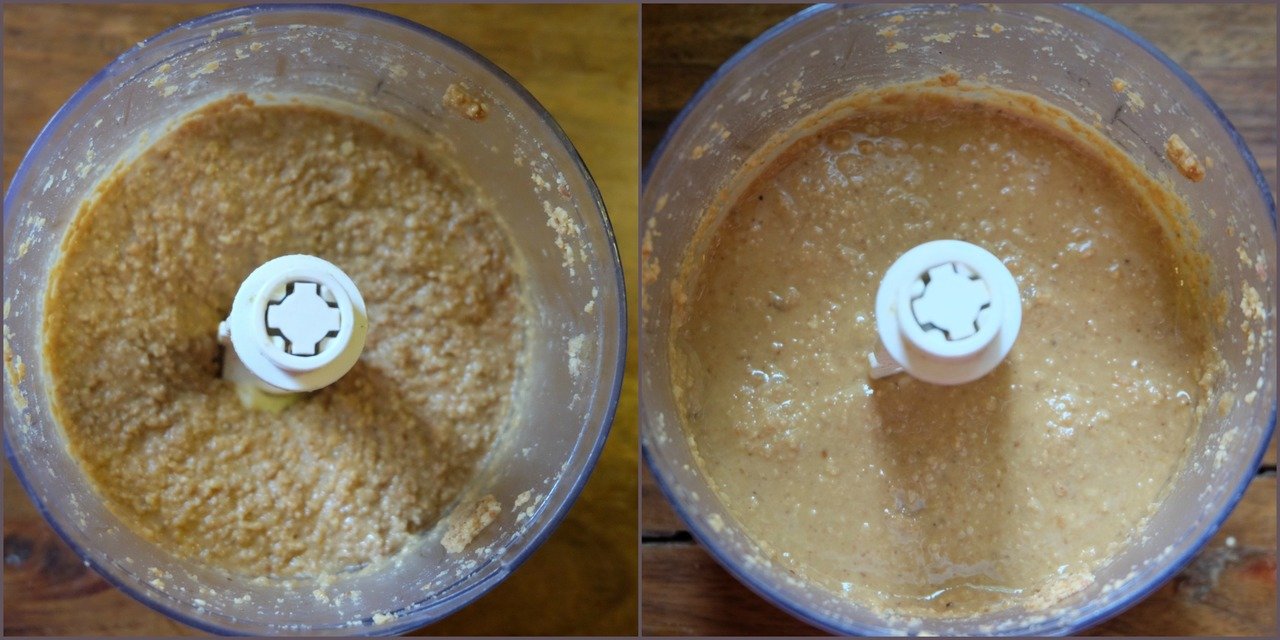
- Add a pinch of salt or another flavoring like raw cacao powder, vanilla extract, raw honey, maple syrup, etc. por into an airtight container. Store in the fridge for up to 3-4 weeks. Might even keep longer. If you need a runny peanut butter, allow to sit outside the fridge for a few minutes before use.
Recipe note
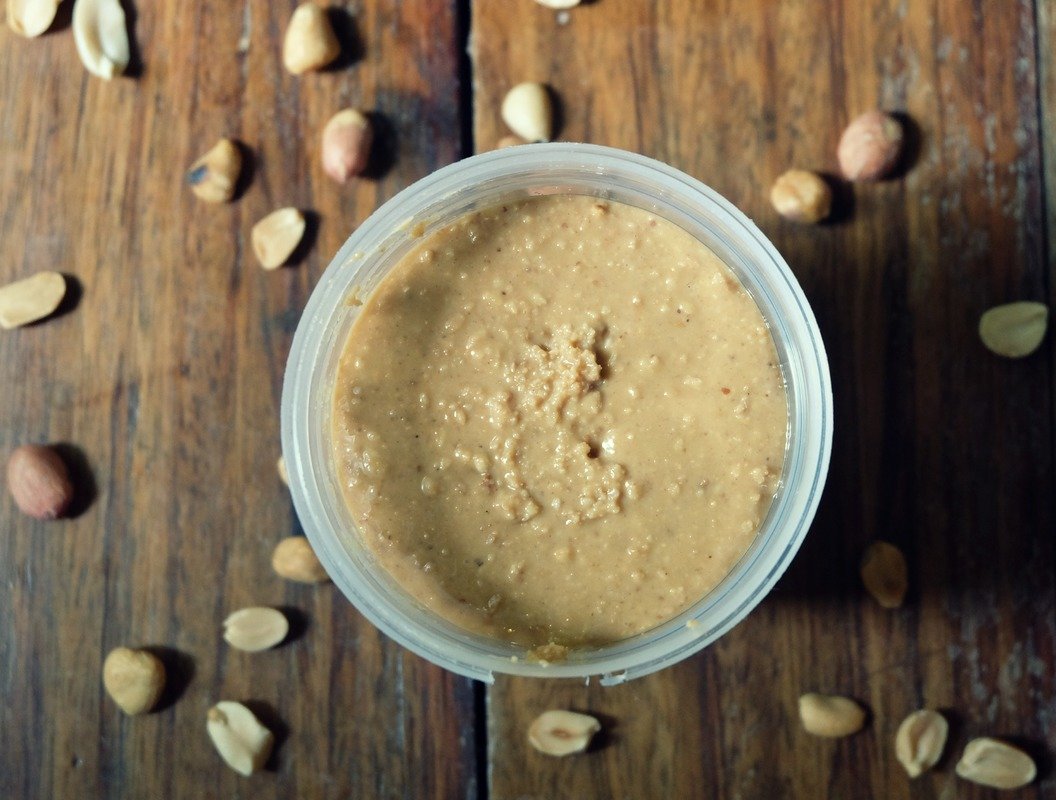
I like my peanut butter a little crunchy, so I added 1-2 tablespoons finely crushed, roasted peanuts, hence the chunky bits you see in the pic.
And that’s how simple making your own peanut butter is. No rocket science. The only thing you’ll need is patience. Depending on whether or not you use oil, the whole blending process may take as long as 15 to 20 minutes.
Until next time!