👇PL👇
English
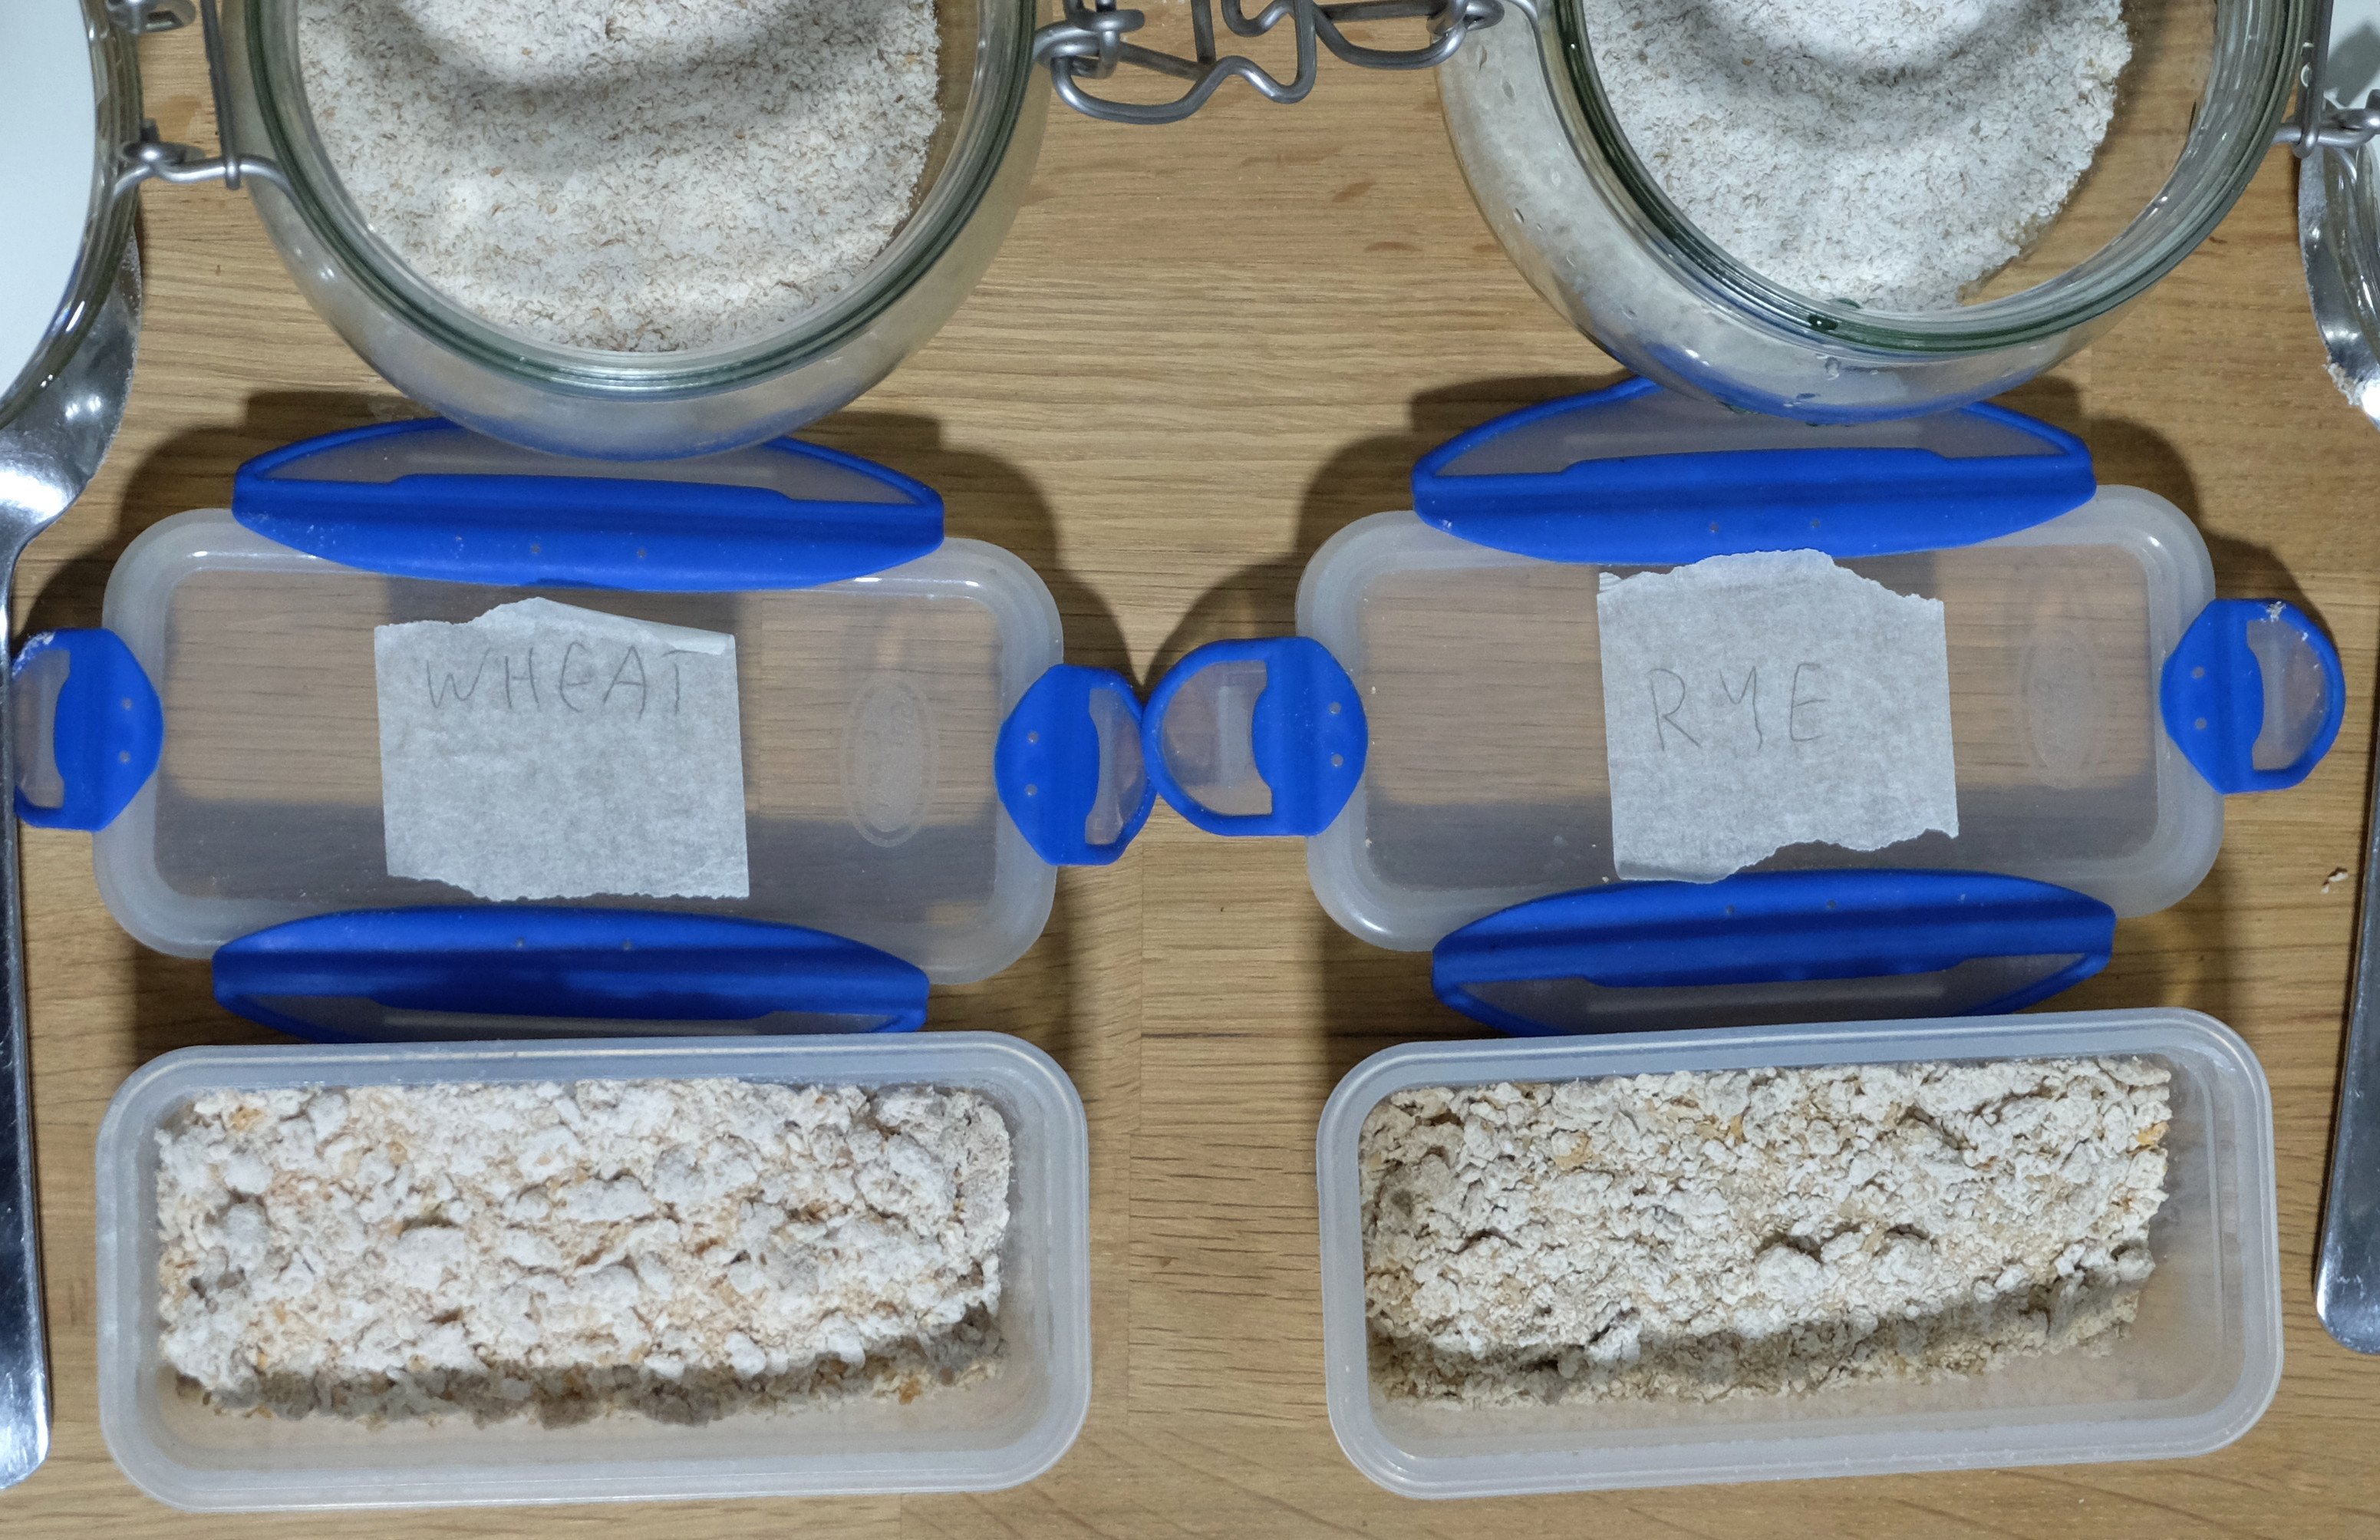
Second try to revive the sourdough. This time I have taken on the sourdough crumble. I've prepared it with both rye and wheat sourdough, so just to make it clear, each sourdough was fed with its kind of flour.
Crumble Preparation
Place a heap of flour used to feed the sourdough on a plate, then put a spoon or two of sourdough on it and work it just like you would work butter and sugar into the flour to make crumble. Then take the thick elements and put into a container and into the fridge.
The idea comes from Ava Celik on Instagram (click for her video).
Reviving
I wasn't sure how to approach it, so I decided to do it like this in the evening:
- 60 g flour
- 60 g water
- 40 g crumble
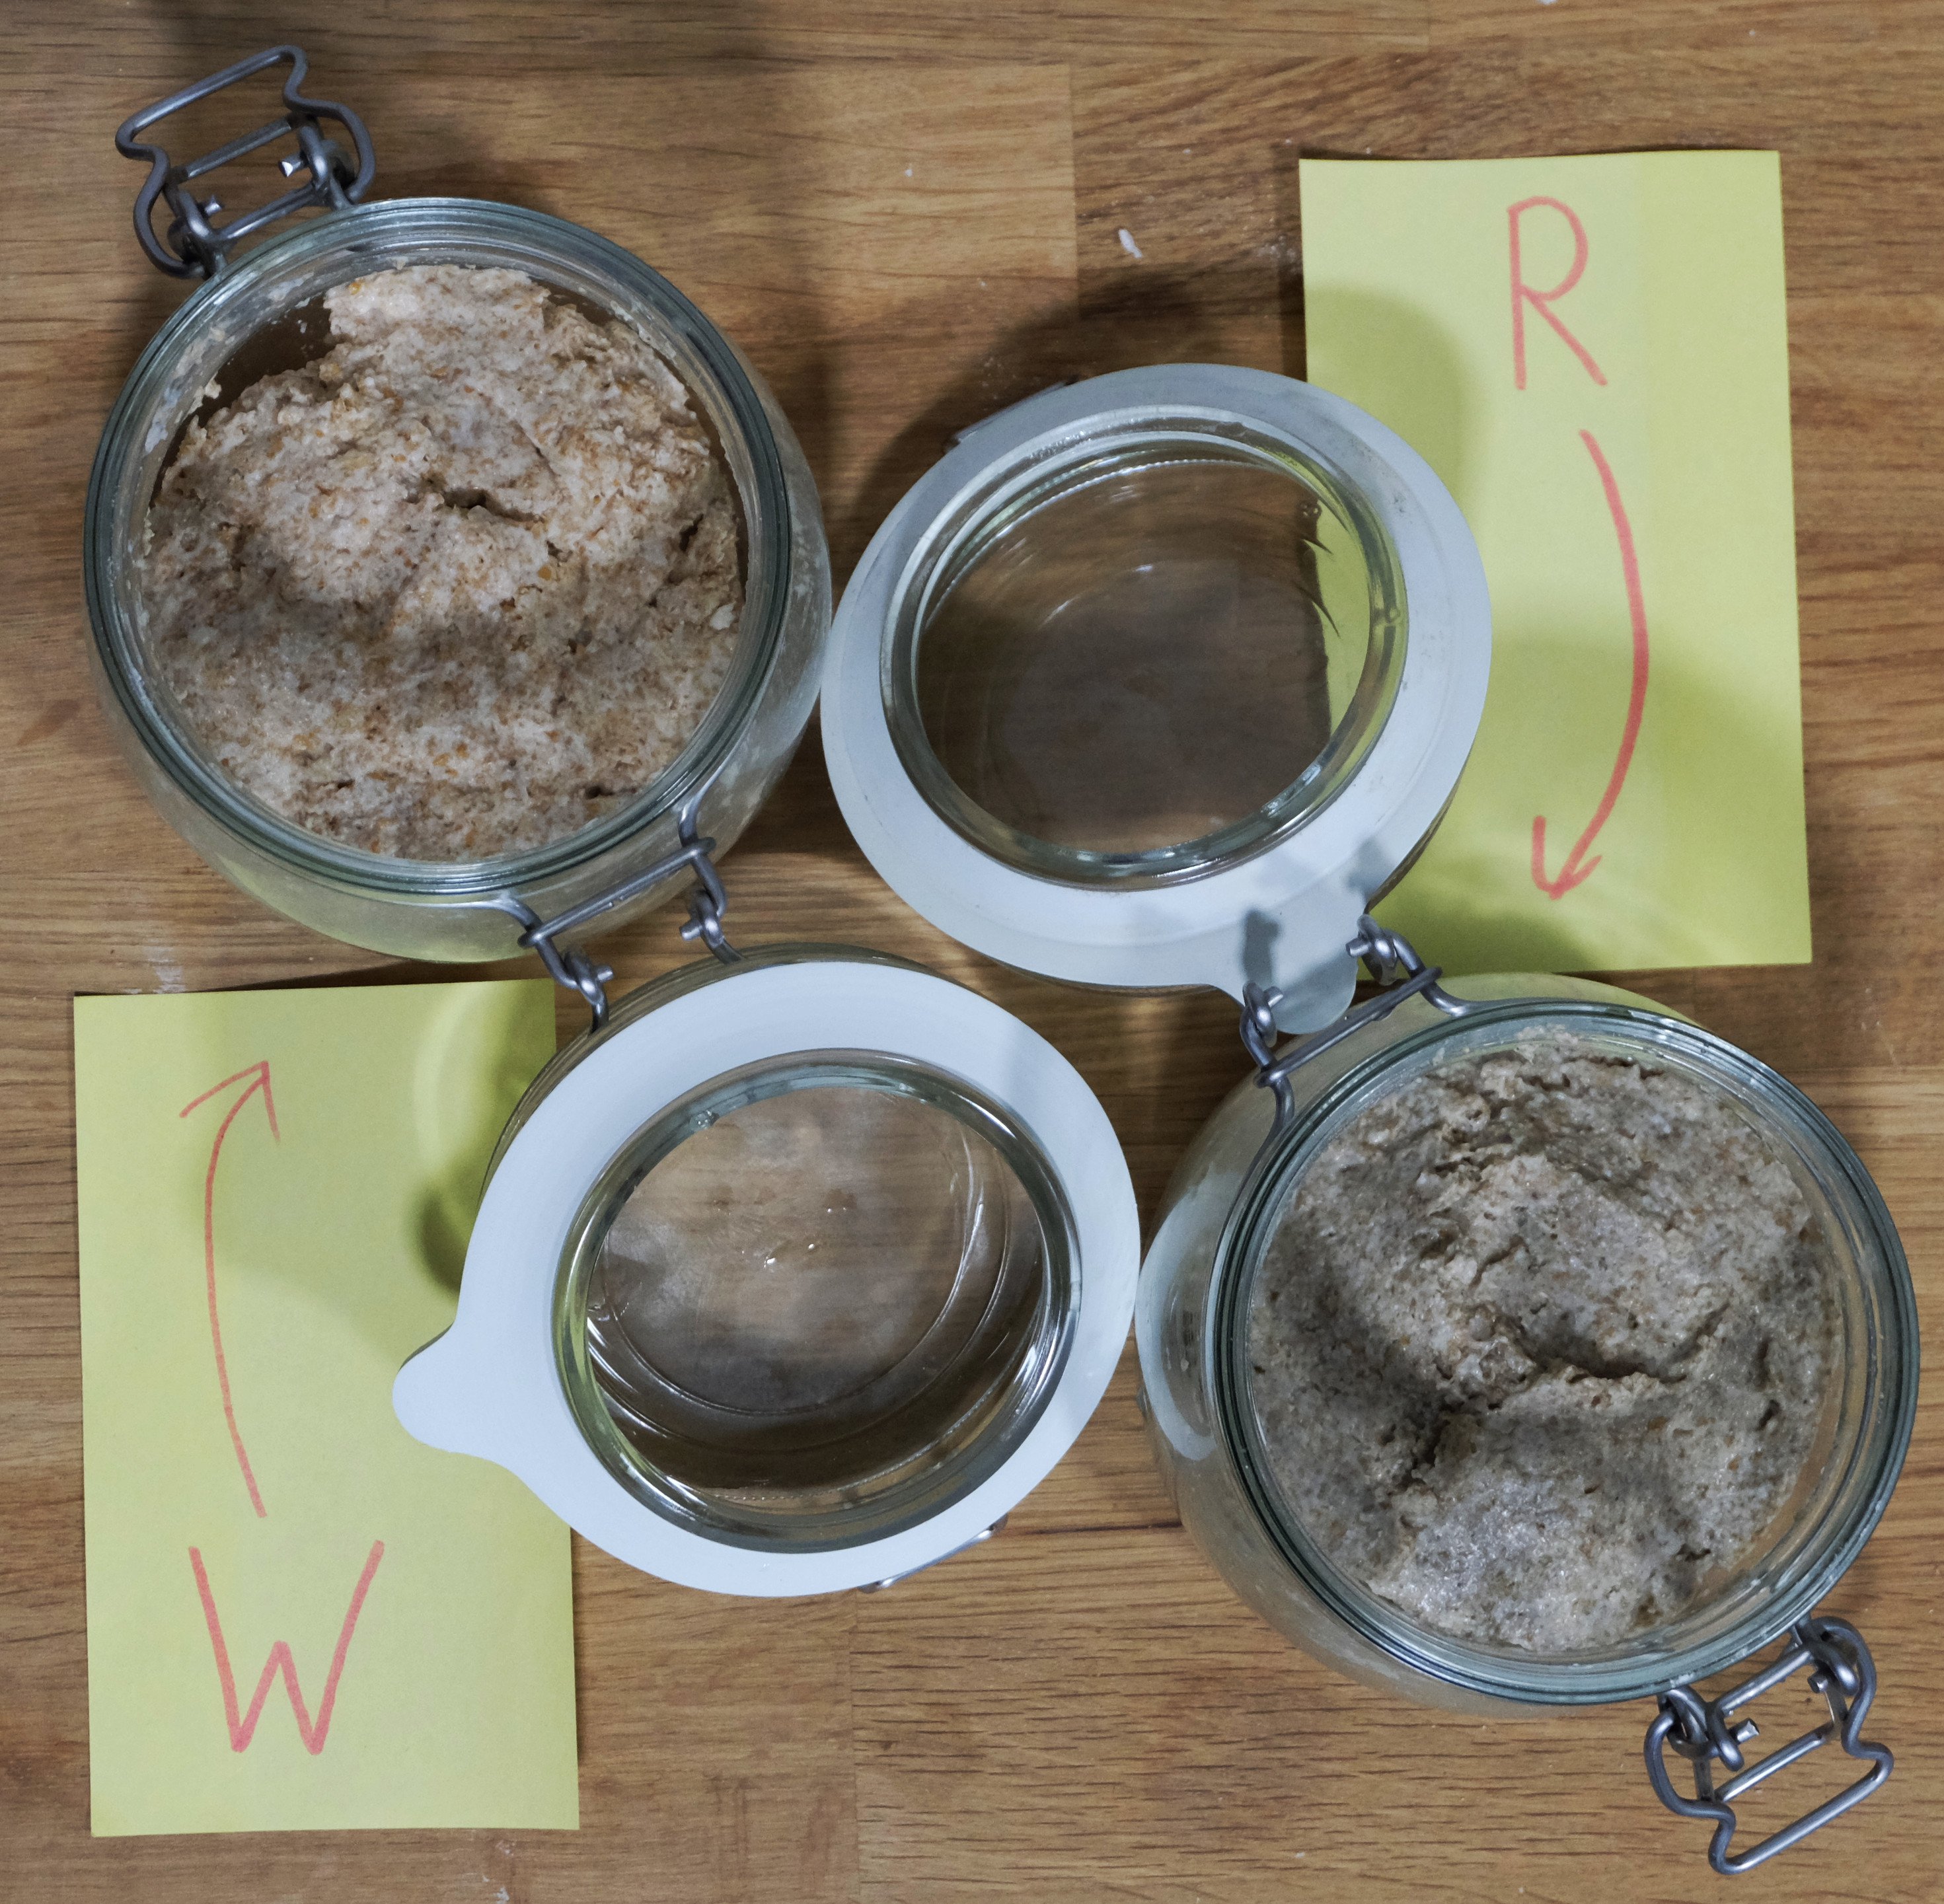
In the morning there were some tiny bubbles, but not much action. It felt that it all was quite dense, so I decided to add 40 g water extra. In the evening there clearly was some action, but not too impressive. I decided to add 20 g more crumbles.
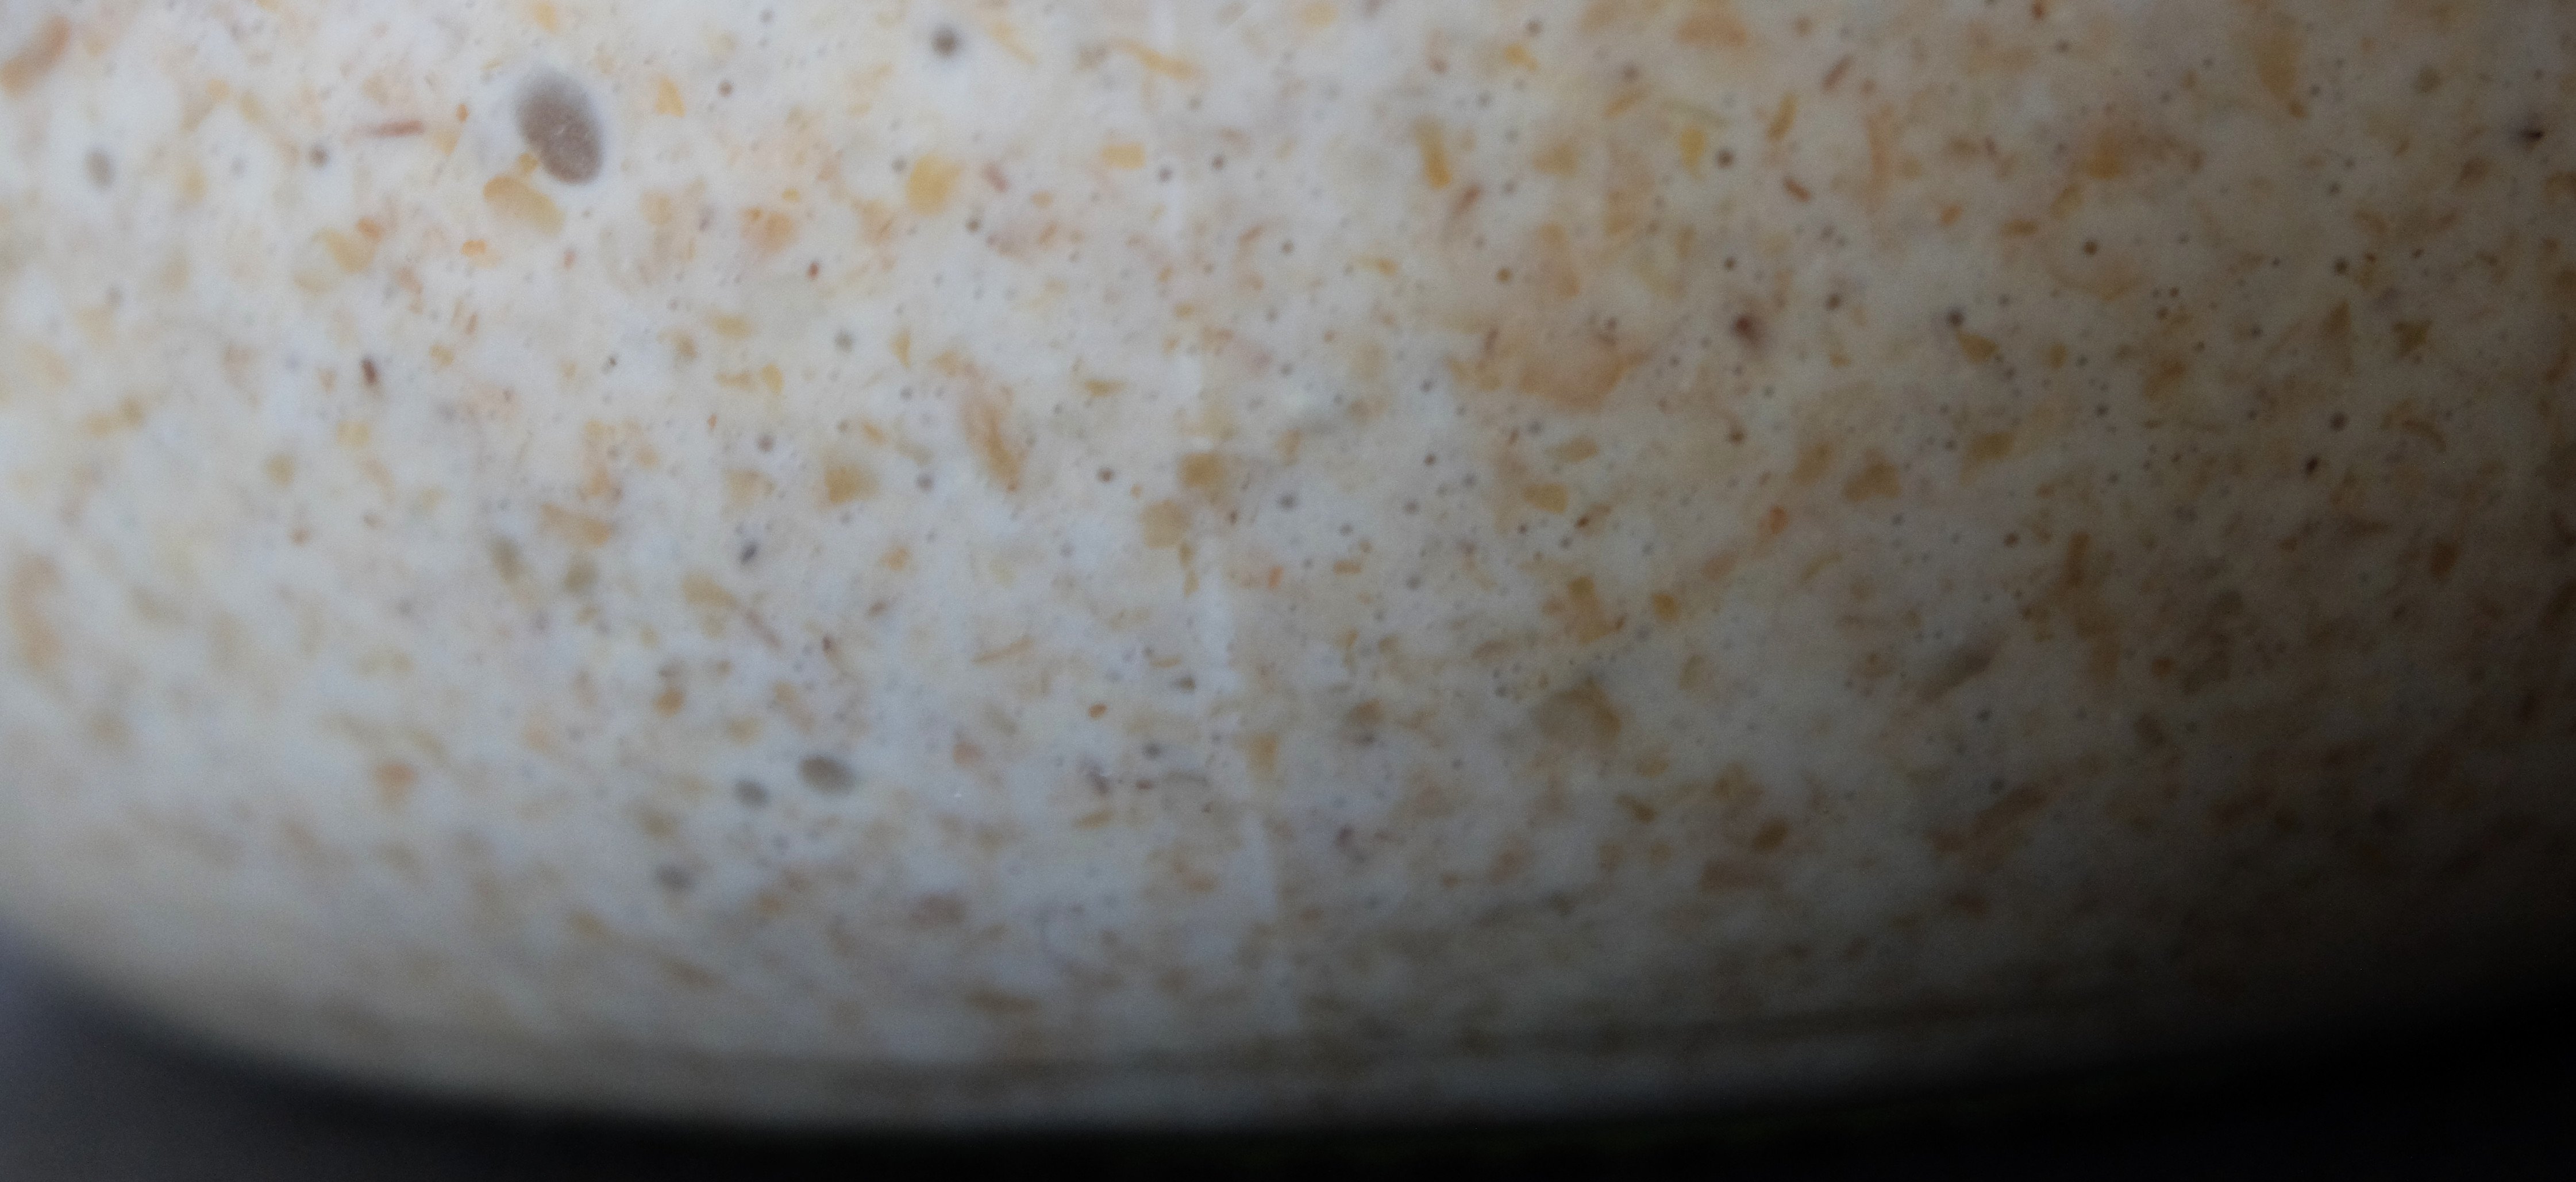
The next day both starters were rather active and bubbly, but still did not feel very strong.
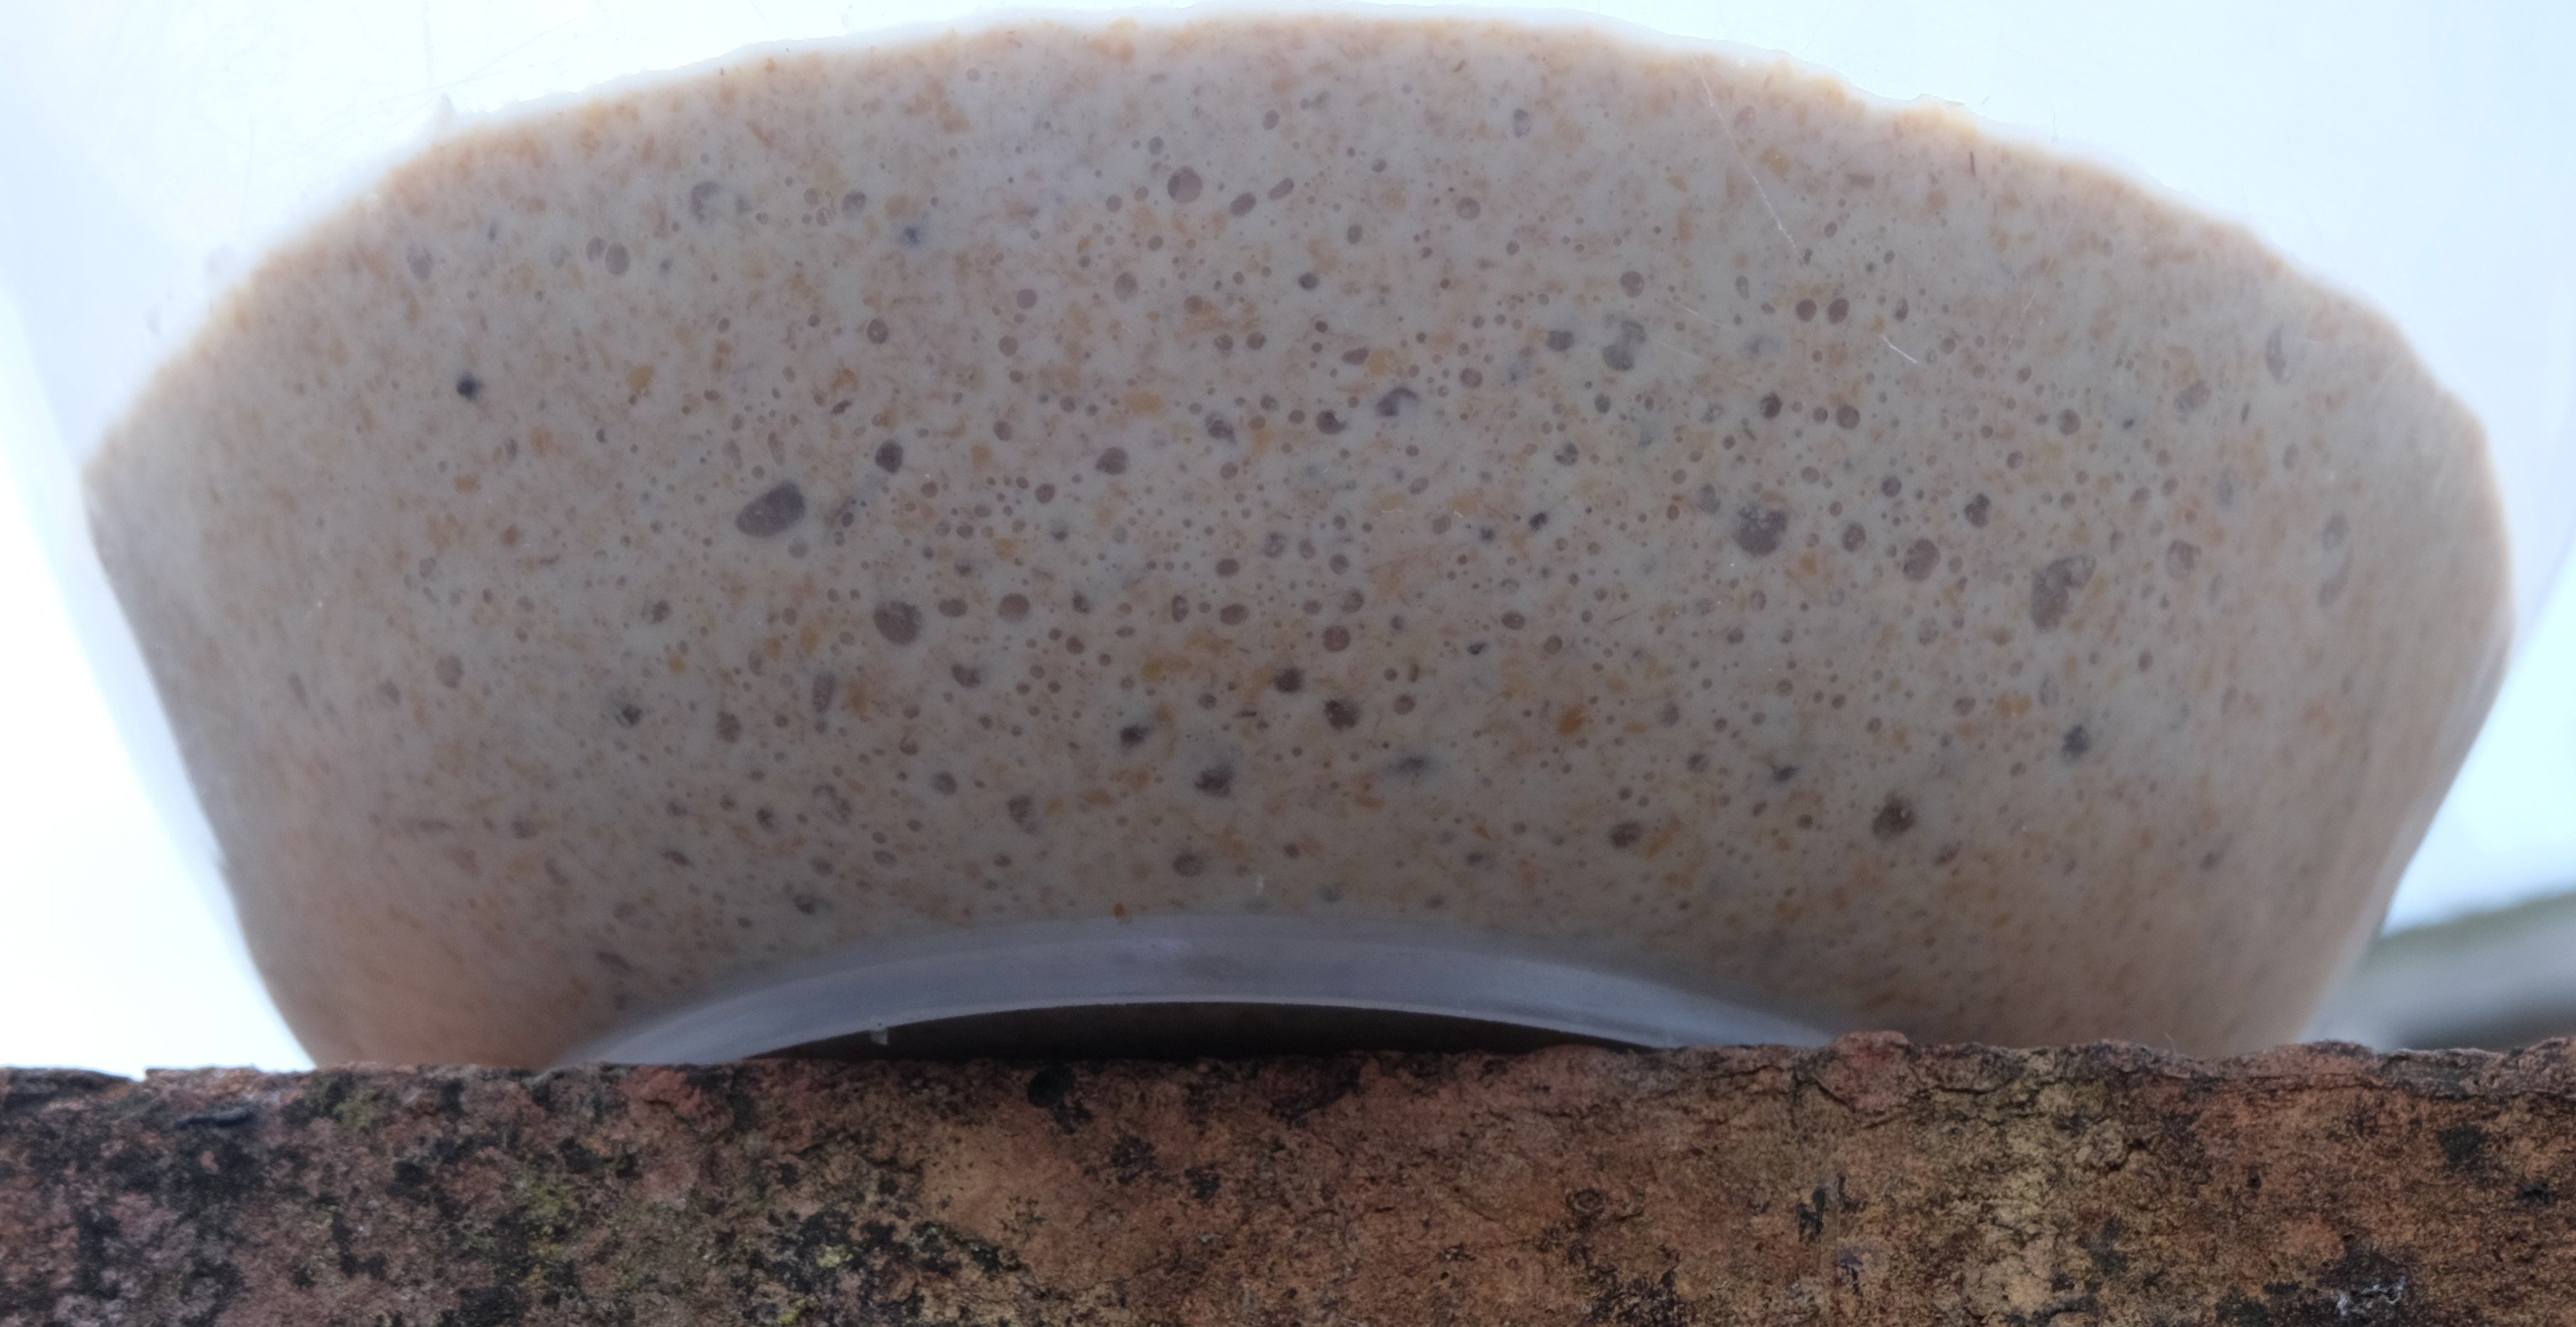
Wheat:
Rye:
I was trying to understand what was happening all the time and these are my conclusions:
- I pretty much dried the starter in the extra flour. While I added 40 g crumbles, in reality it could have been 10 g sourdough and 30 g flour. This means that in my initial reviving mixture there was 10 g sourdough, 90 g wholemeal flour and 60 g water - quite dry and not enough starter to work with
- adding water and more crumbles improved it, but the rye sourdough was very weak, almost as if I started a new one instead of reviving the crumbled one
So the final amounts I used to revive the crumbles were:
- 60 g crumble
- 60 g flour
- 100 g water
At this time I decided to make bread and make a test on the crumbles that remained.
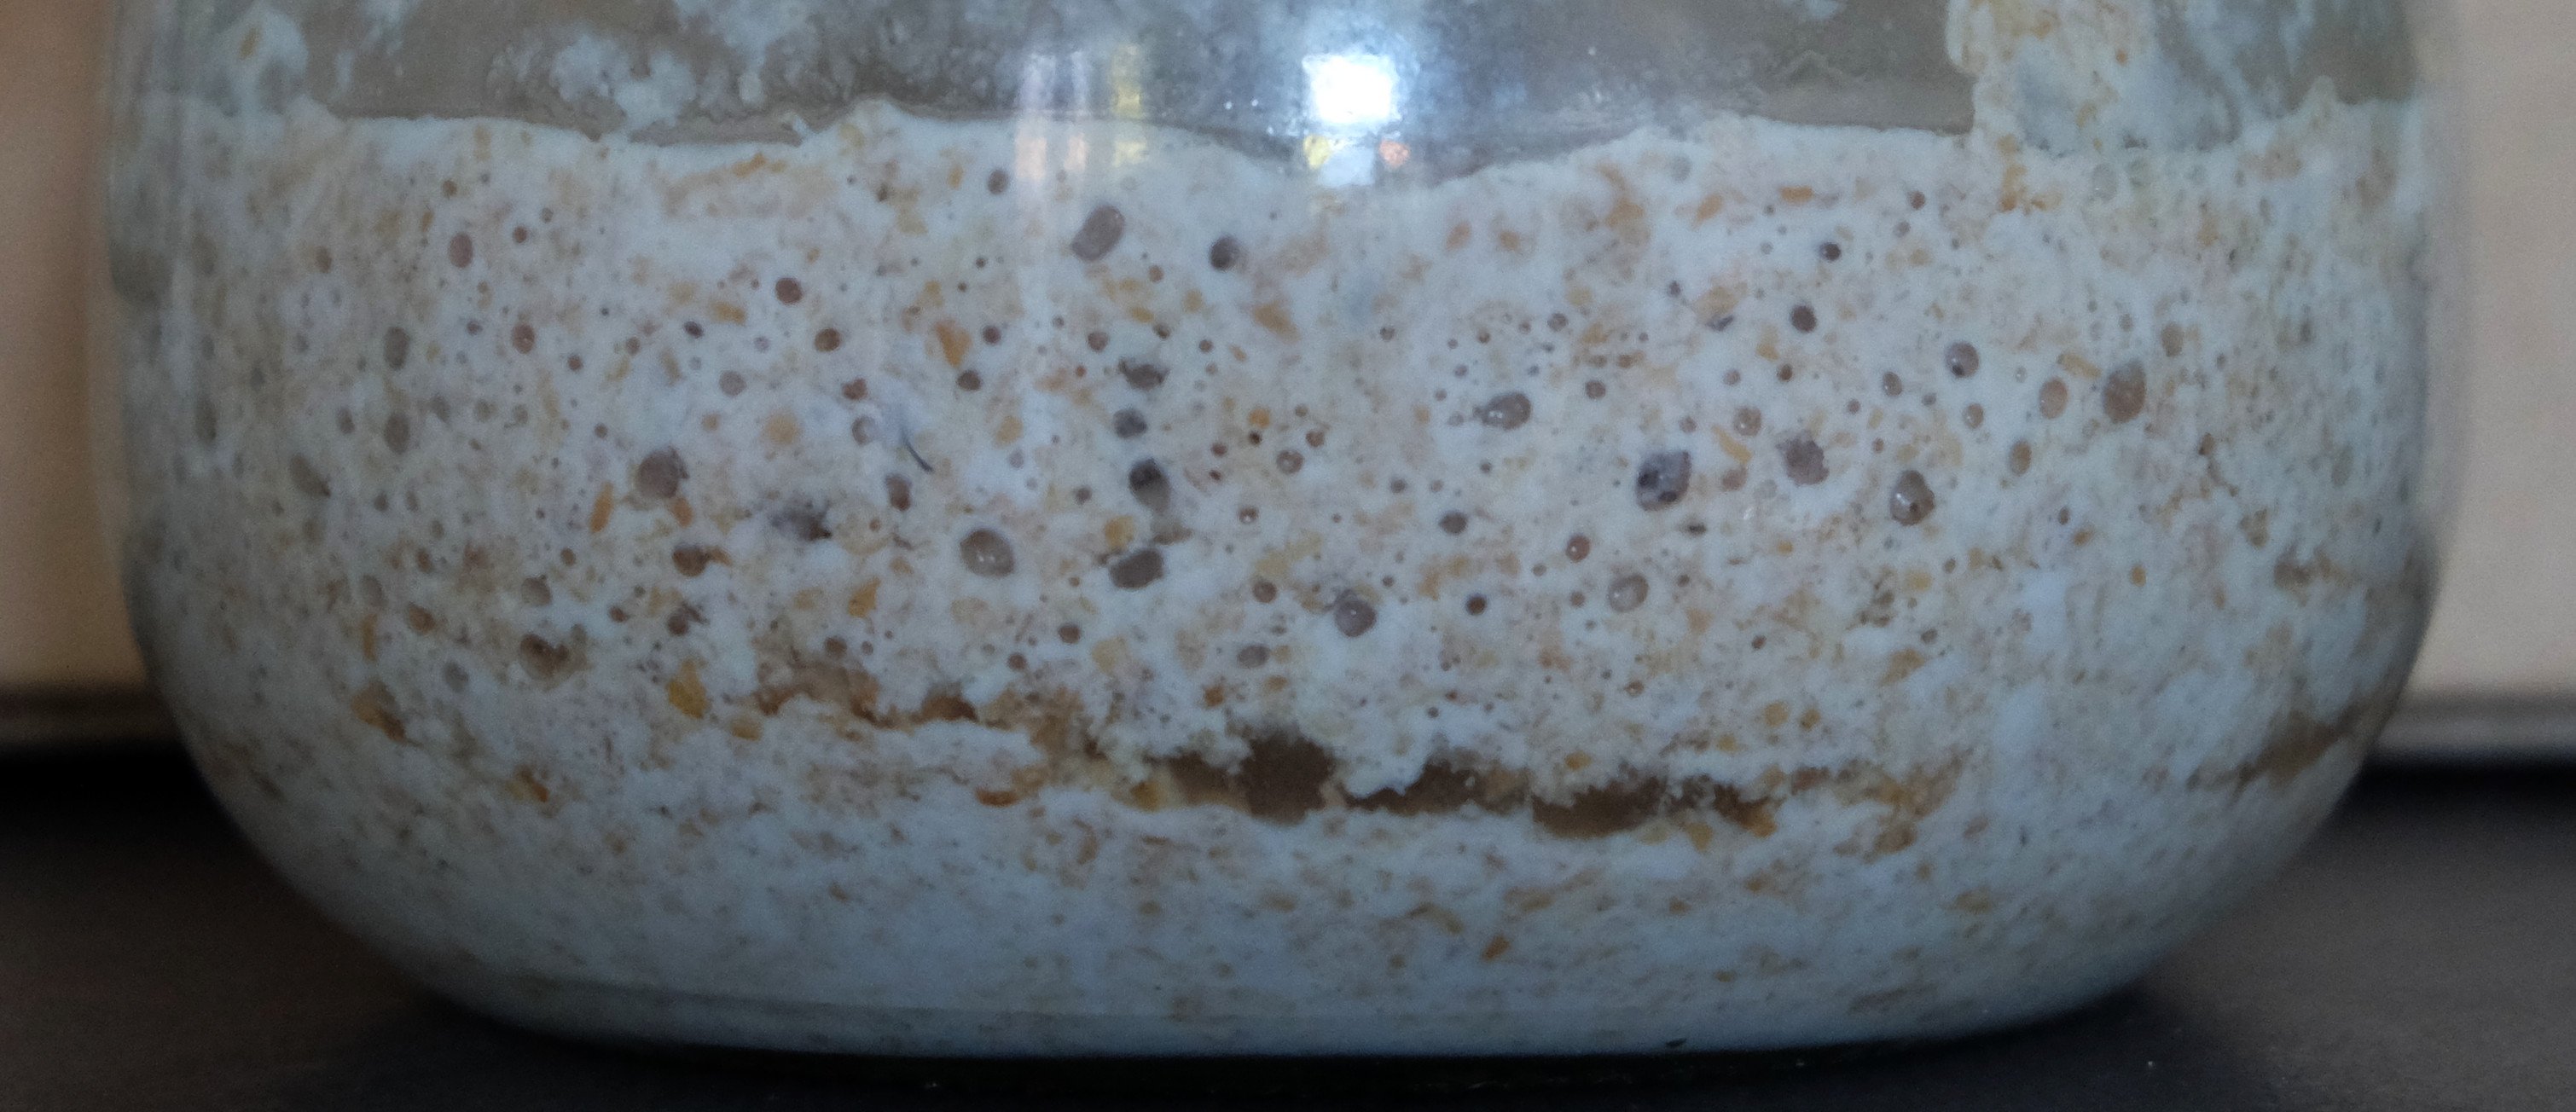
The test
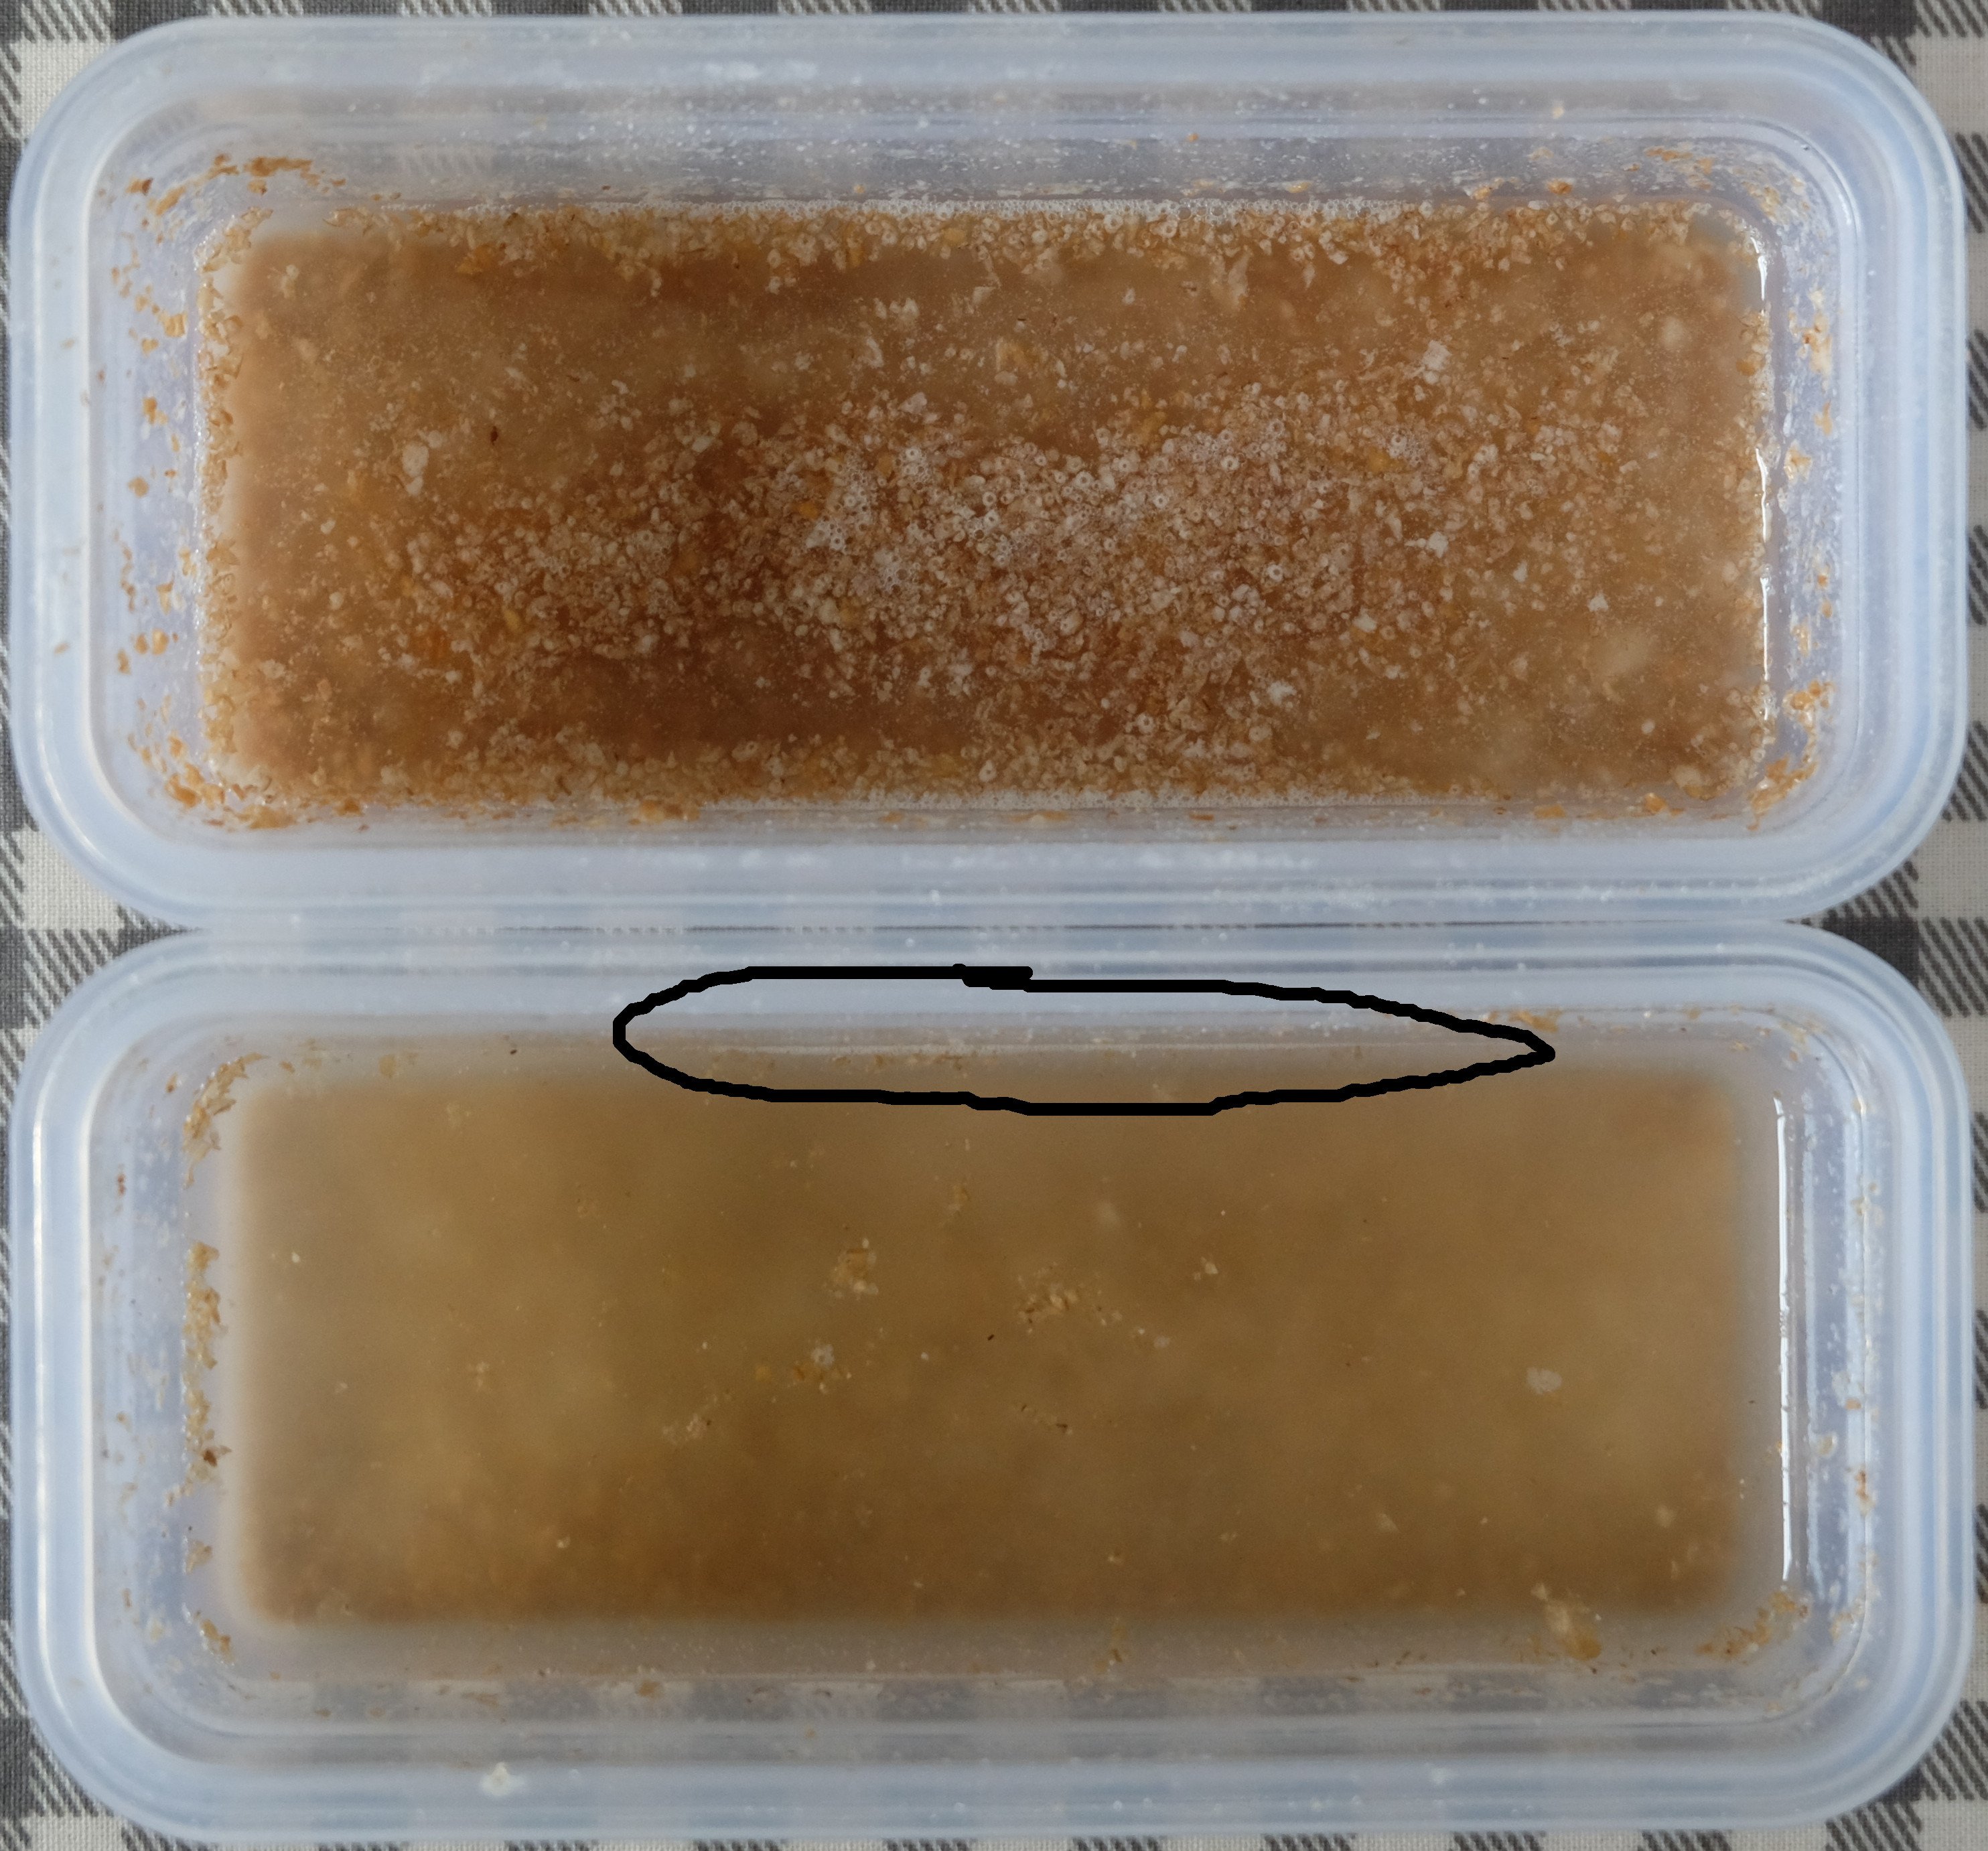
The general idea was to find out if there is any potential in the crumbles on their own. Maybe I should have just hydrated it and left for reviving?
Method: Add a lot of water to the crumbles and mix in the evening, check activity in the morning.
Result: Wheat crumbles produced a lot of bubbles, rye bubbles produced just a bit (marked below), but there clearly was some activity in it. Maybe I should have used more sourdough to make the crumble then? I don't know.
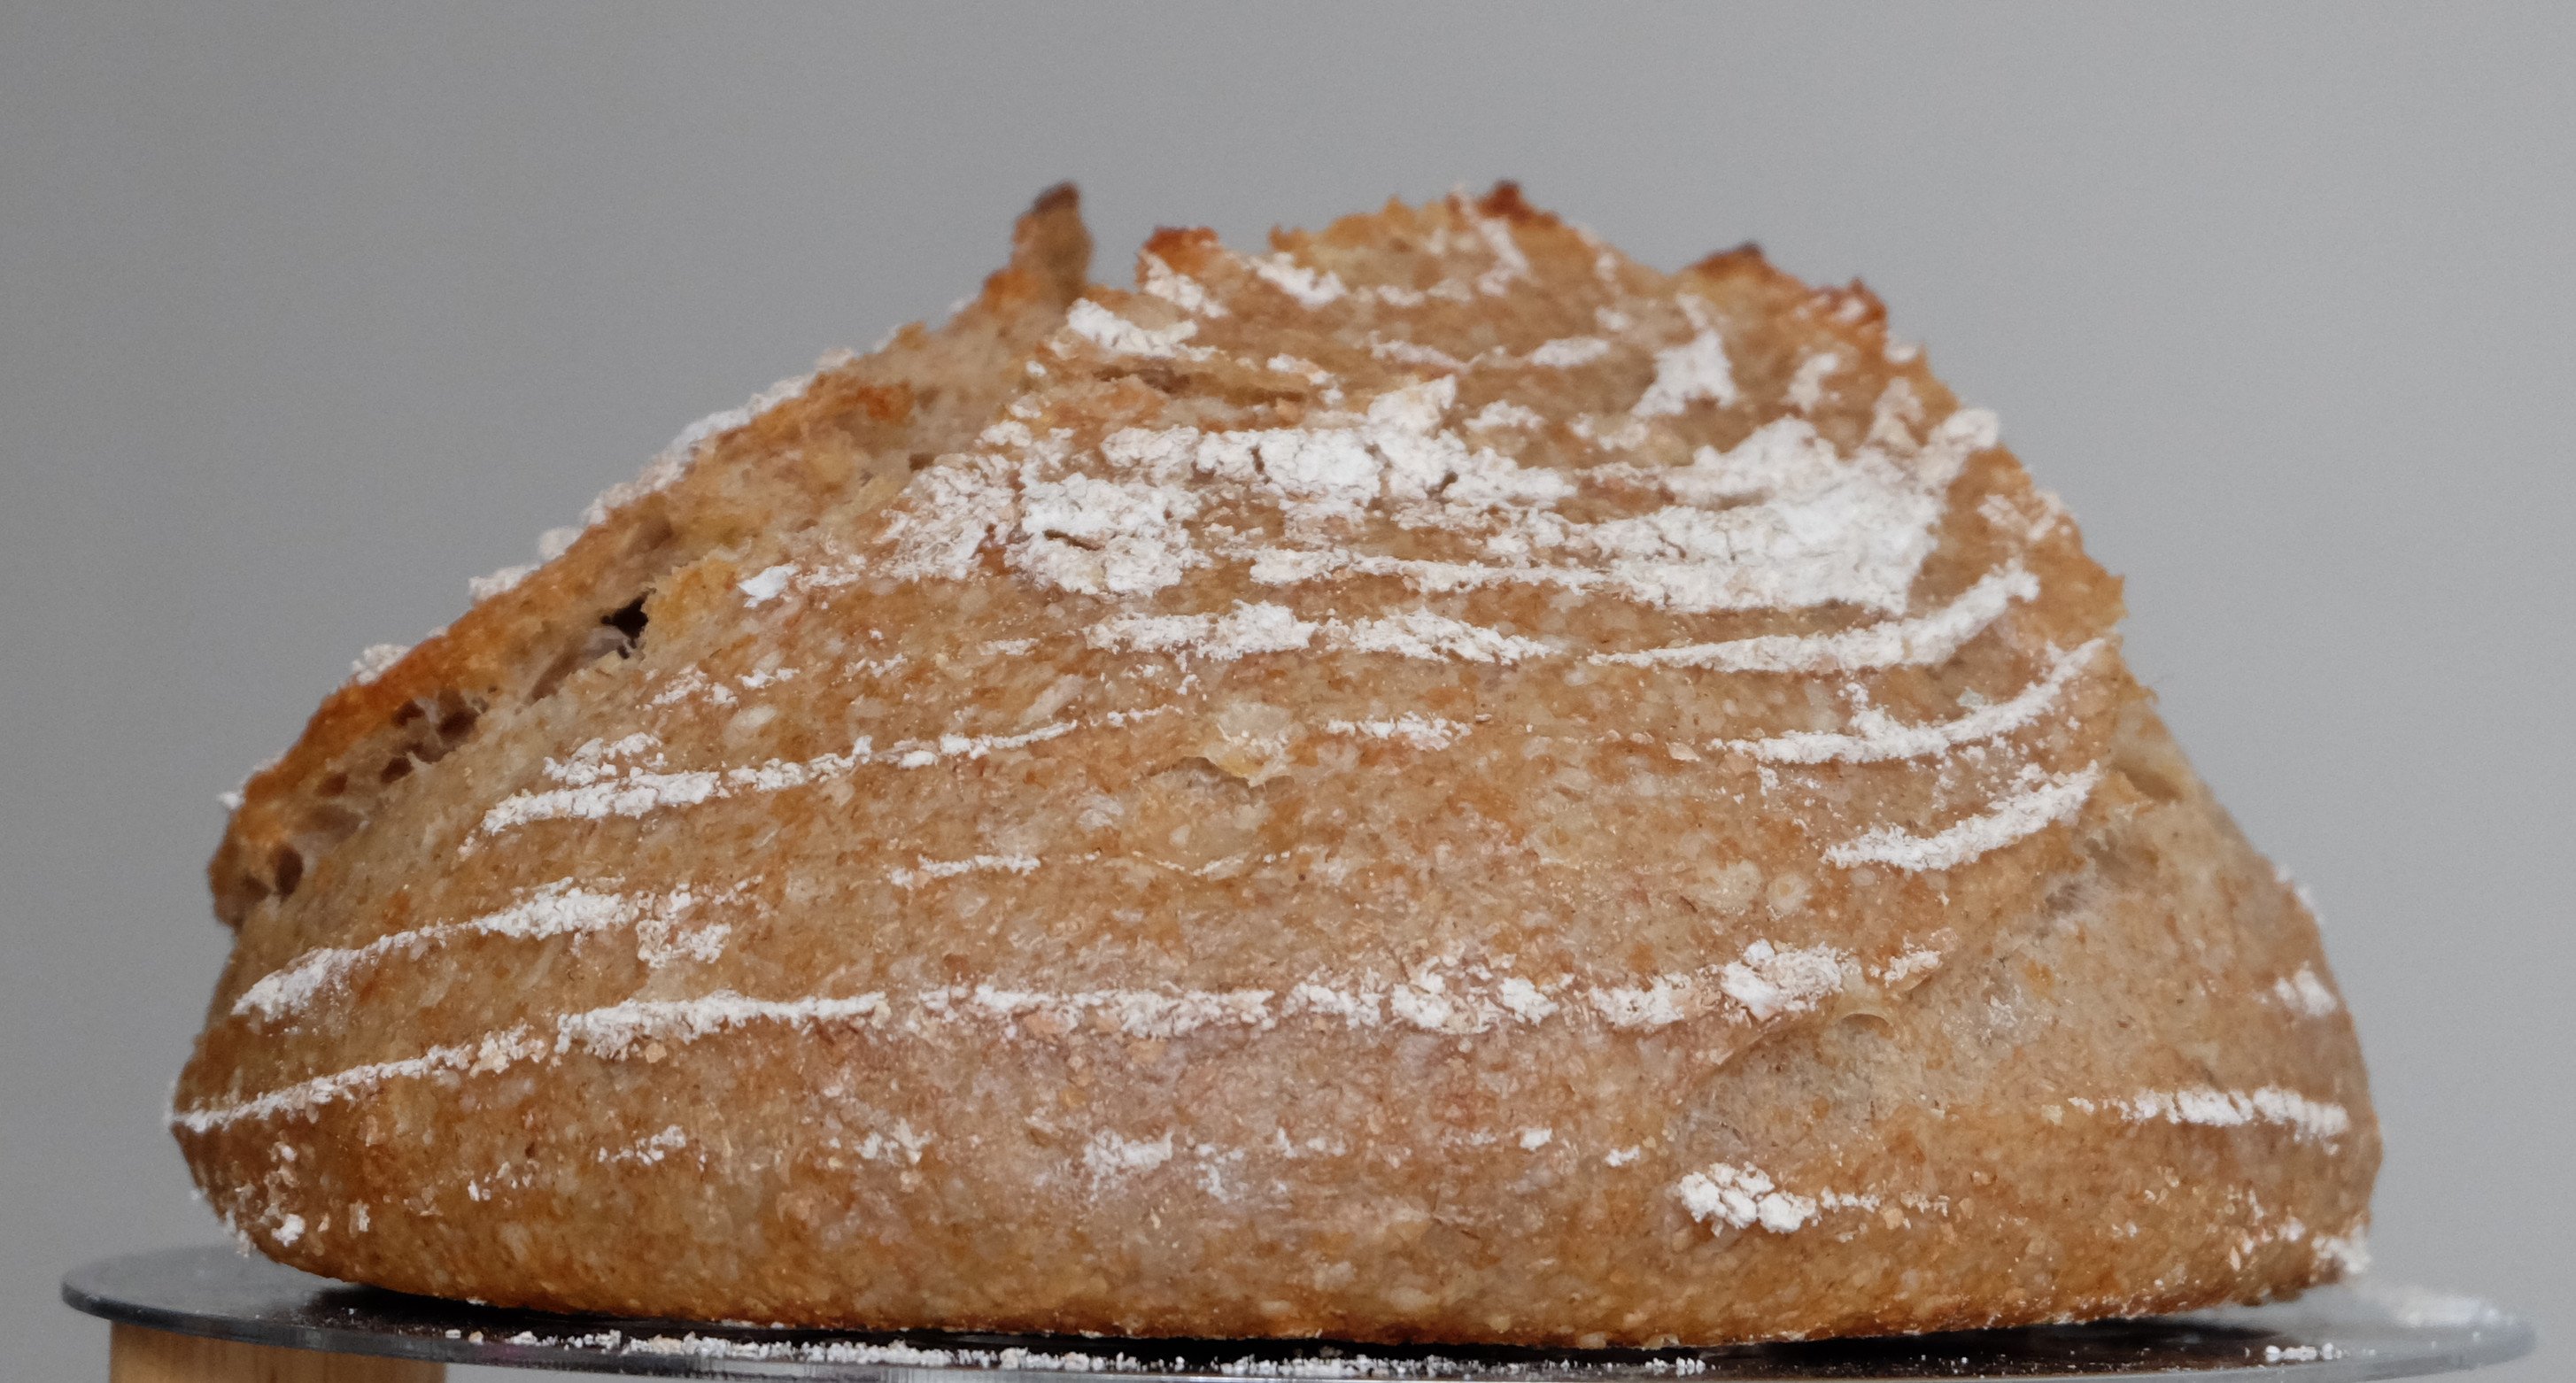
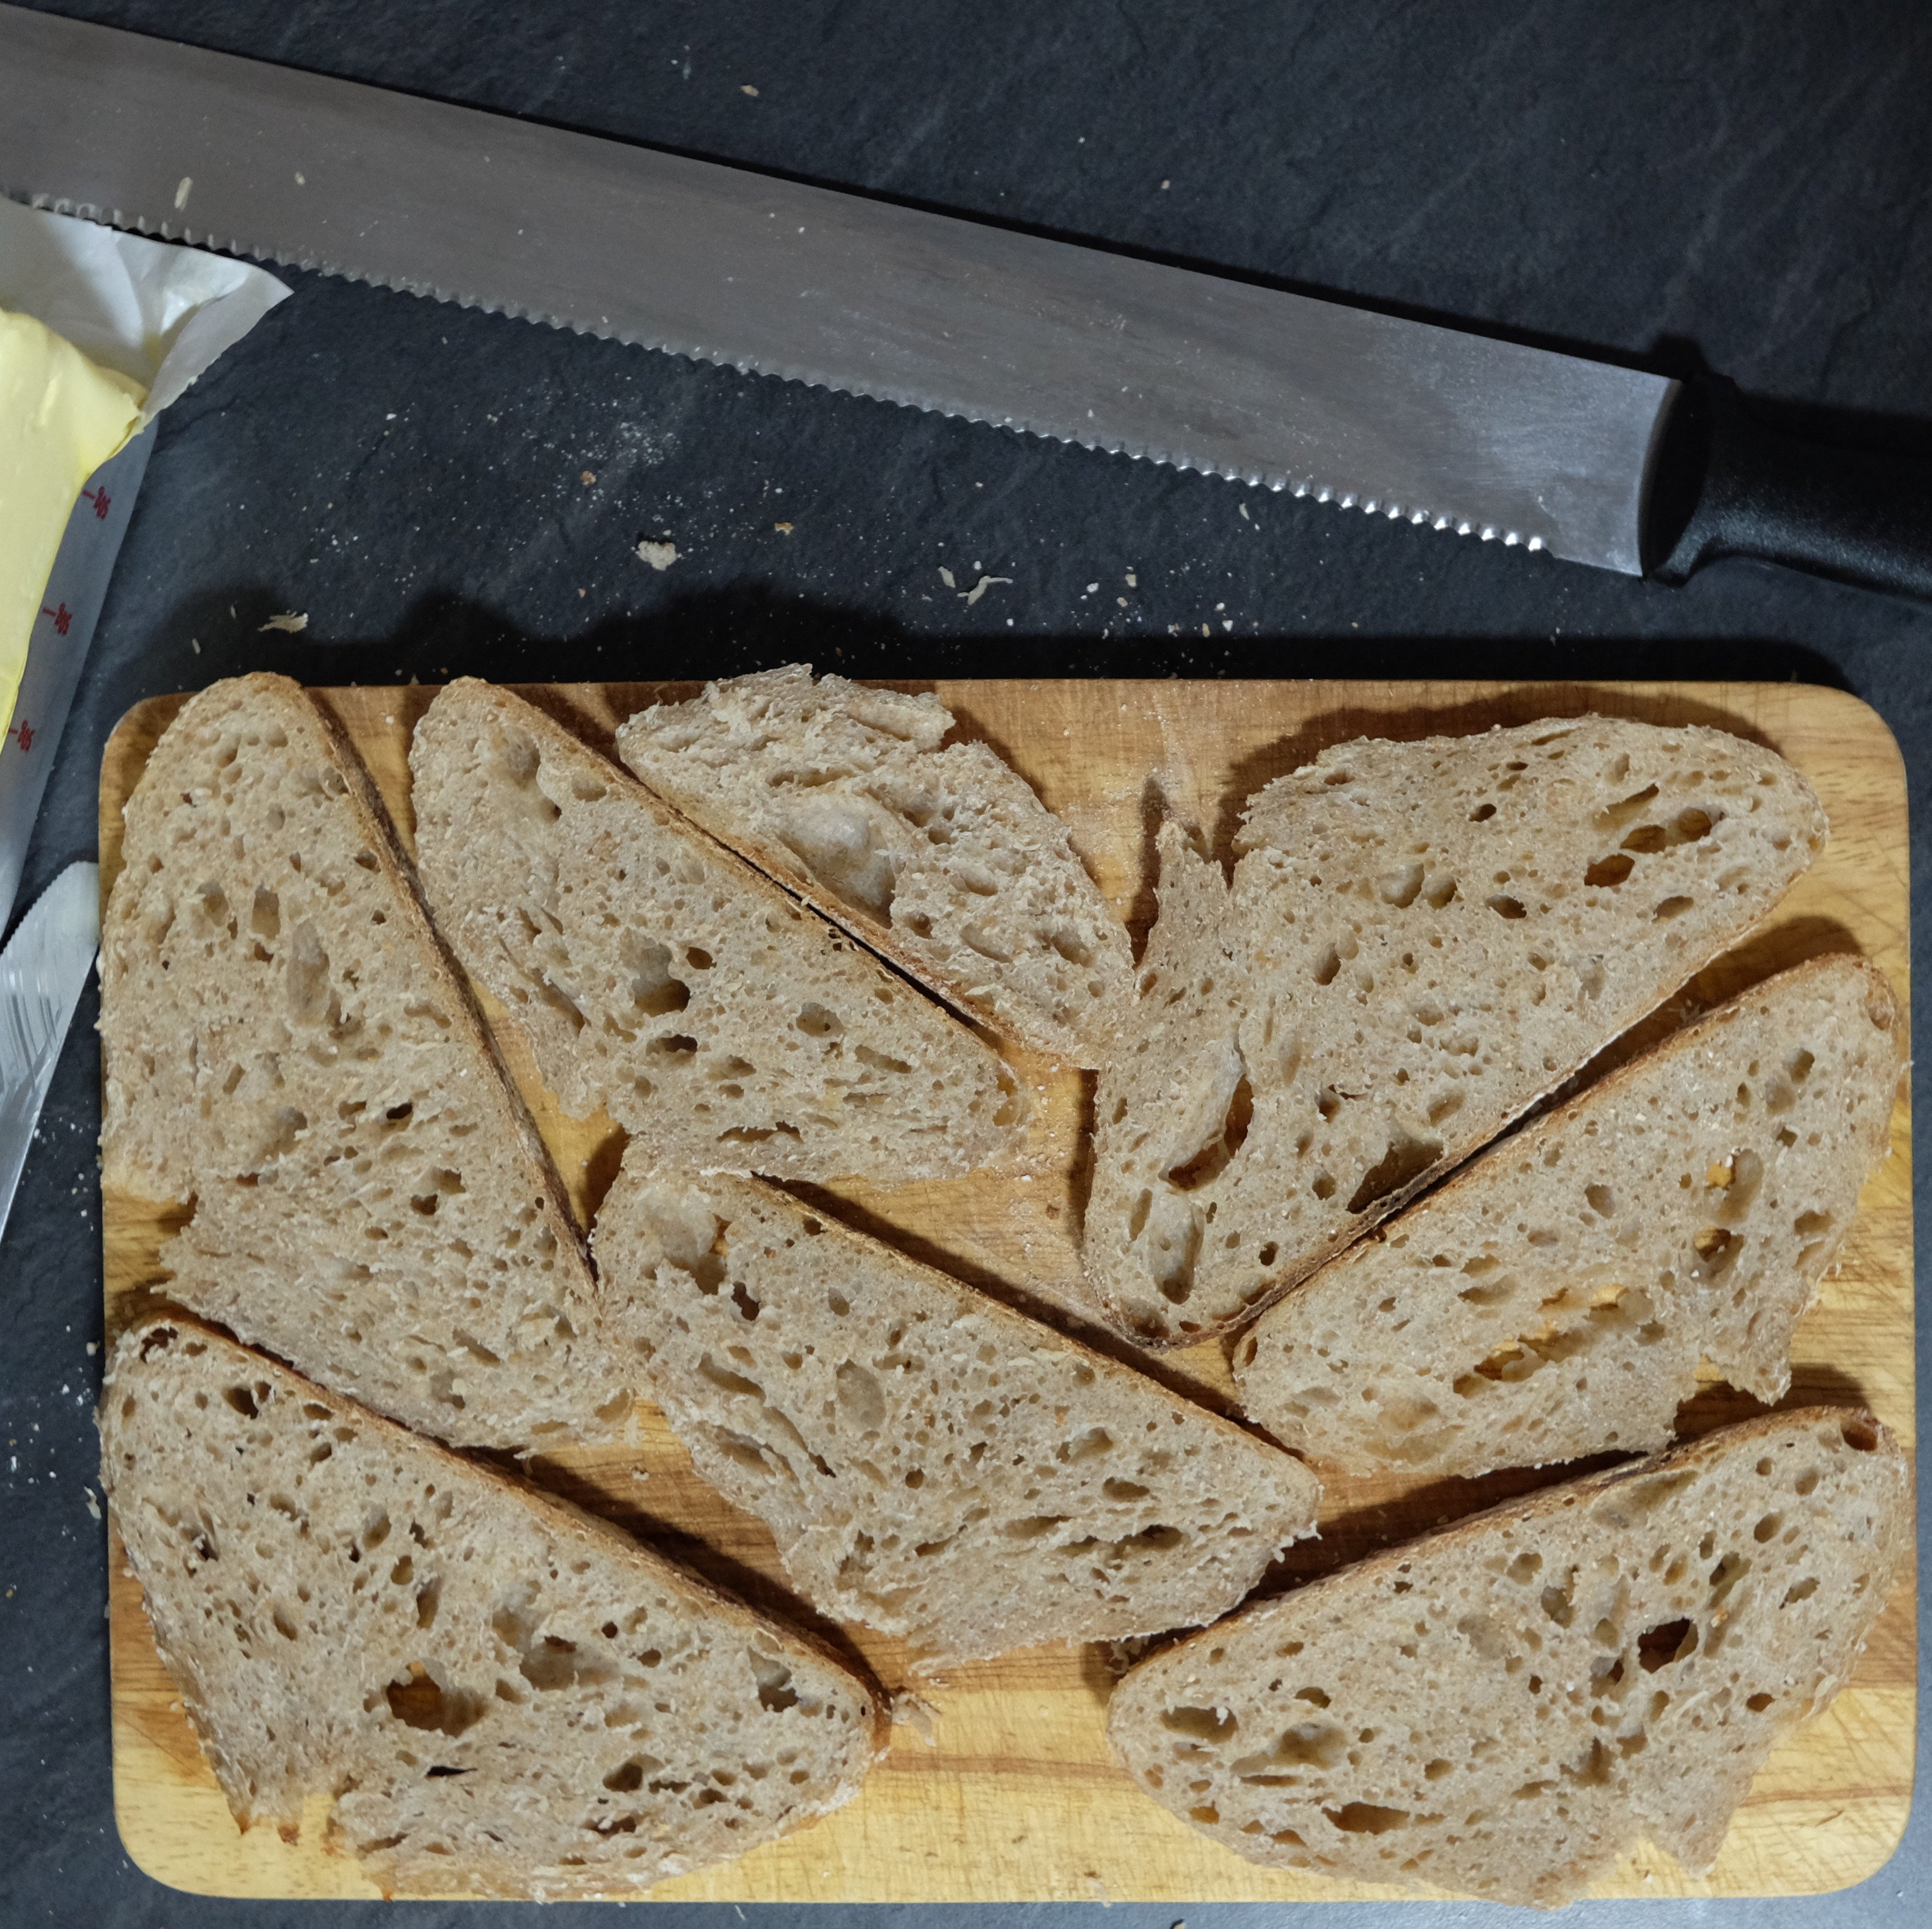
The bread
I used a recipe from Justin Gellatly's "Bread, Cake, Doughnut, Pudding" (ISBN 978-0-241-14607-7). He recently published a new book together with his colleagues at the Bread Ahead Bakery and School at Borough Market They are a lovely bunch, I really enjoyed spending time with them during their open days and having my bread reviewed by them.

This one is a wheat-rye sourdough with long final proof.
I had to choose which sourdough to use and I decided to make two levains and see which one behaves better. This would also ensure that the not-so-strong cultures get a nice feast and get hungry and active just before the baking. The original recipe had no levain in it.
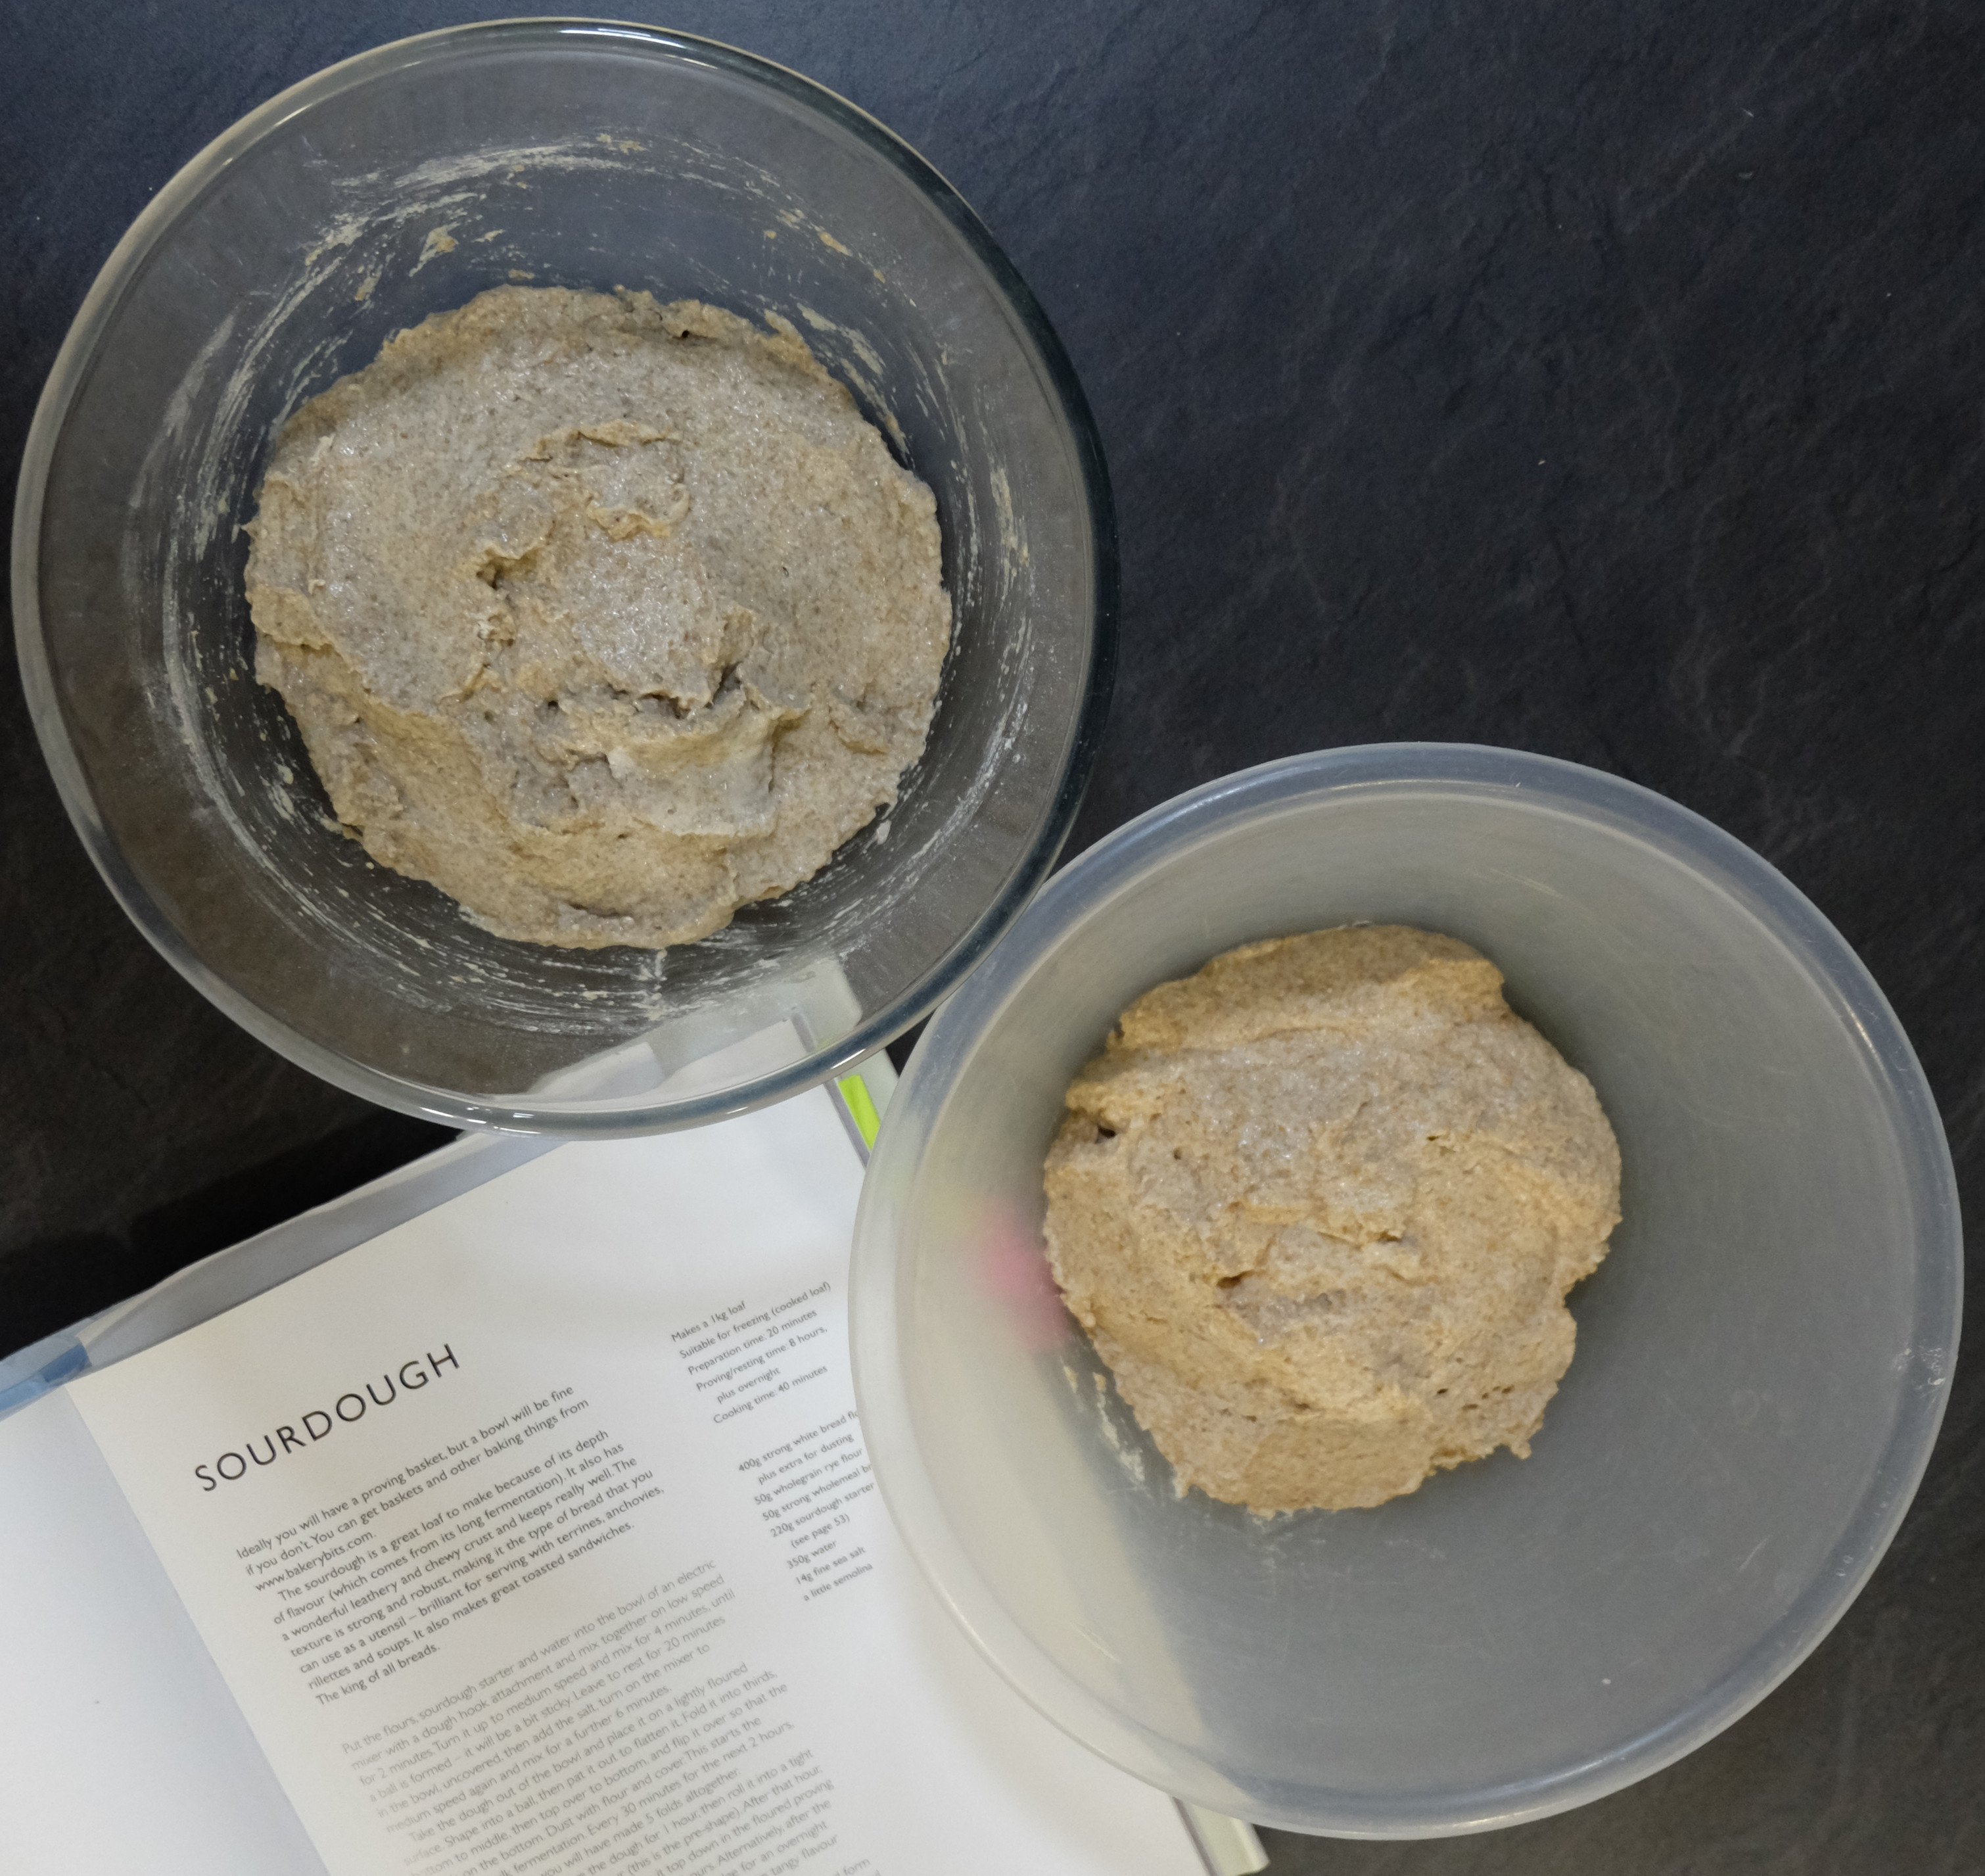
In the morning it turned out that both levains were nice, but the wheat one was better, so I used mostly that and added a spoon or two of the rye one.
Rye:
Wheat:
Planning
Make a levain in the evening (optional 12 hours extra to make the starter more active), mix the dough, 20 minutes autolyse, finish mixing, bulk proof with stretch and folds every 30 minutes for two hours, one hour to end the bulk proof, divide and preshape, one hour, final shape, into the bannetons and 6-8 hours in the fridge, then bake for 40 minutes. The making itself takes 12-14 hours plus the levain preparation.
I do recommend using a mixer for the dough as making it by hand may turn out quite tiring and time consuming.
If you don't have a banneton, you can use a collander with a dusted tea towel. Just make sure you dust it with rye flour or something gluten free, as wheat will get incorporated into the dough.
Make sure you prepare a bit of a worktop for the proofing. I normally proof in a bowl, but this was a pleasant experience and I recommend you try it for once. You will occupy it for four to five hours.
Ingredients
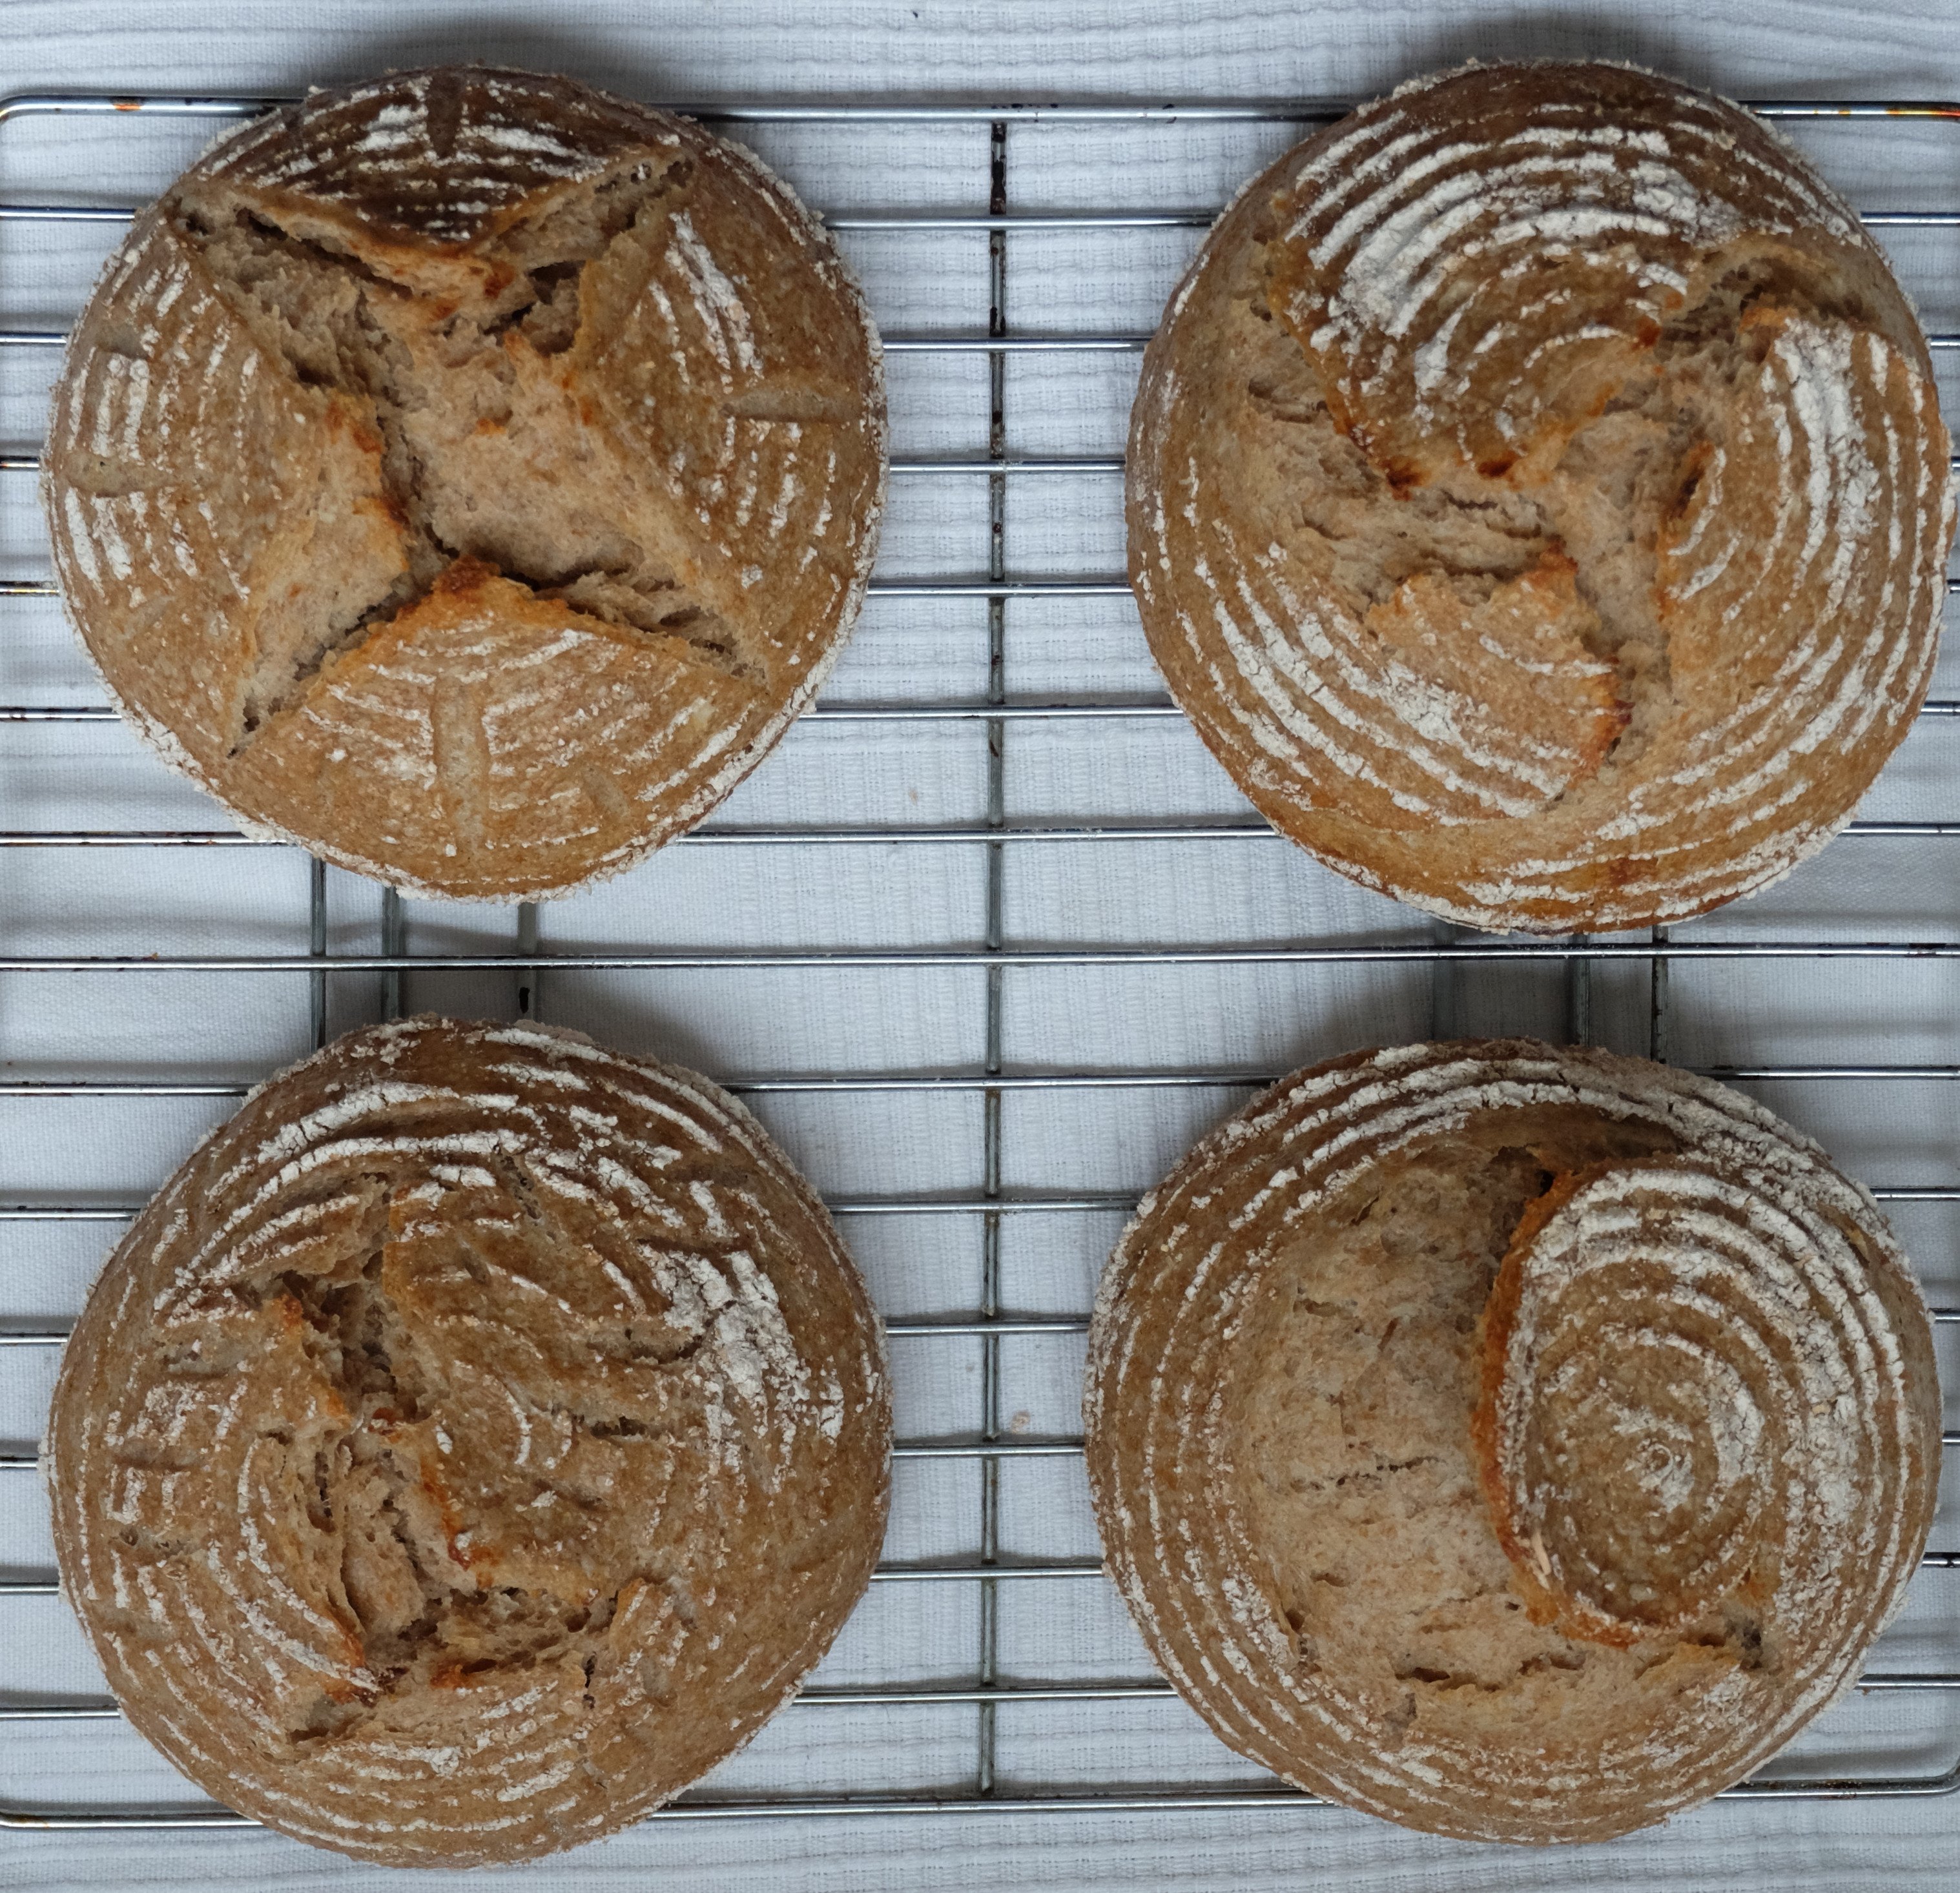
This will make a single large loaf. I doubled the amounts and made four small ones. One went to my work, three were eaten over the course of 4-5 days.
Levain
- 90 g wholemeal flour
- 90 g water
- 40 g sourdough
Final dough
- 220 g levain
- 400 g strong white wheat flour
- 50 g wholemeal wheat flour
- 50 g wholemeal rye flour
- 350 g water
- 14 g salt
Preparation
Levain
- Mix the levain ingredients in a bowl
- Leave for 12 hours covered with cling film
The dough
- Mix everything EXCEPT SALT. First 3 minutes on lower speed, then 5 minutes on higher speed. If you use hands to mix and knead, it will take some 15 minutes
- Leave it for autolyse for 20 minutes
- Sprinkle salt on top and mix on higher speed for 6 minutes. Hands: 15-20 minutes. It will be sticky, but don't add flour. Adding flour is generally a bad idea as you will break the ratio between the flour and salt. Salt is generally around 2-2.5% of the flour weight and this should not be changed. If you want a stiff dough, add 90% of water at first and then make corrections
- Take the dough out of the mixer bowl onto a lightly floured surface (remember to take care so that is is lightly dusted at all times) and perform a stretch and fold. Stretch and fold is a technique in which you grab some dough from the side, stretch it even further aside and then fold on top of the dough. Then you take some from the opposite side and repeat. Then from the two remaining sides. You can repeat it more than once, but be aware that if you work it too much, the dough will tear
- Dust the dough lightly with flour and cover with a tea towel. Leave the dough for 30 minutes, then stretch and fold. This step should be performed four times. As a result, over two hours you will have performed five stretch and folds (one in the step above and four here). At first the dough will be sticky and difficult to manage, then you will gradually see how strong it becomes, resisting the stretches. After each rest it will become workable again
- Leave the dough to rest for one more hour under a tea towel. This is the last part of the bulk proof
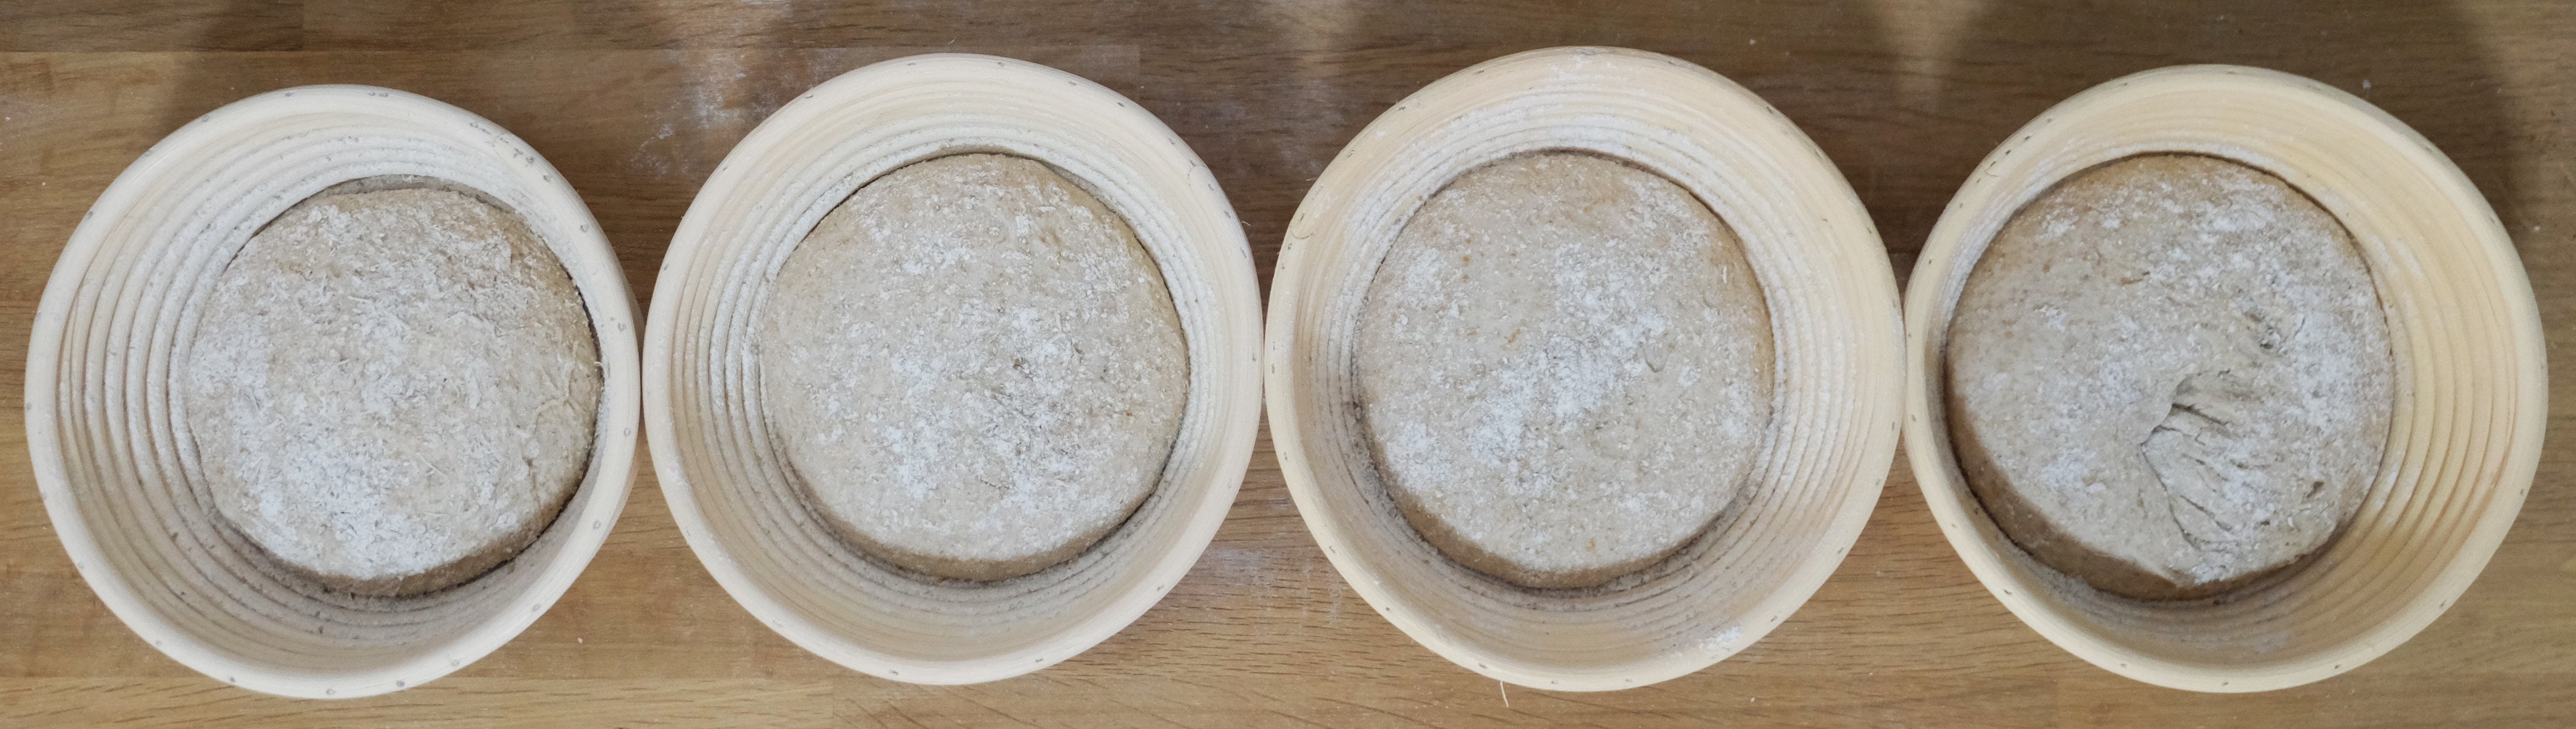
- If you want smaller loaves, divide the dough now
- Preshape the loaves: take each piece of dough, flatten it out, then gradually fold bits around the edges and press them against the centre. Then flip it, grab it with palms of your dusted hands with little fingers touching the worktop and make circular movement lightly pressing the dough against the worktop. You should feel some friction and notice that the surface of the dough is stretching and creating tension
- Dust with flour, cover with tea towel, leave for an hour
- Some people will almost repeat the whole shaping now. I would if the dough would lose its shape again, but it didn't, so I only repeated the circular movement to get more tension on the surface and popped the loaves into the bannetons. Then into a plastic bag and into the fridge for 6-8 hours
- Preheat your oven to 220 C up and down without a fan. Know your oven
- Put the loaves on a baking tray, make a cross on top or whatever cut you prefer and pop it into the oven. Add steam, but release it after 15-20 minutes
- After 30 minutes from the start of baking take the loaves off the baking tray and onto the baking rack for another 10 minutes to get a nice crust
- The loaf is ready when you knock on the bottom and it sounds hollow
- Take it out of the oven and leave on a cooling rack
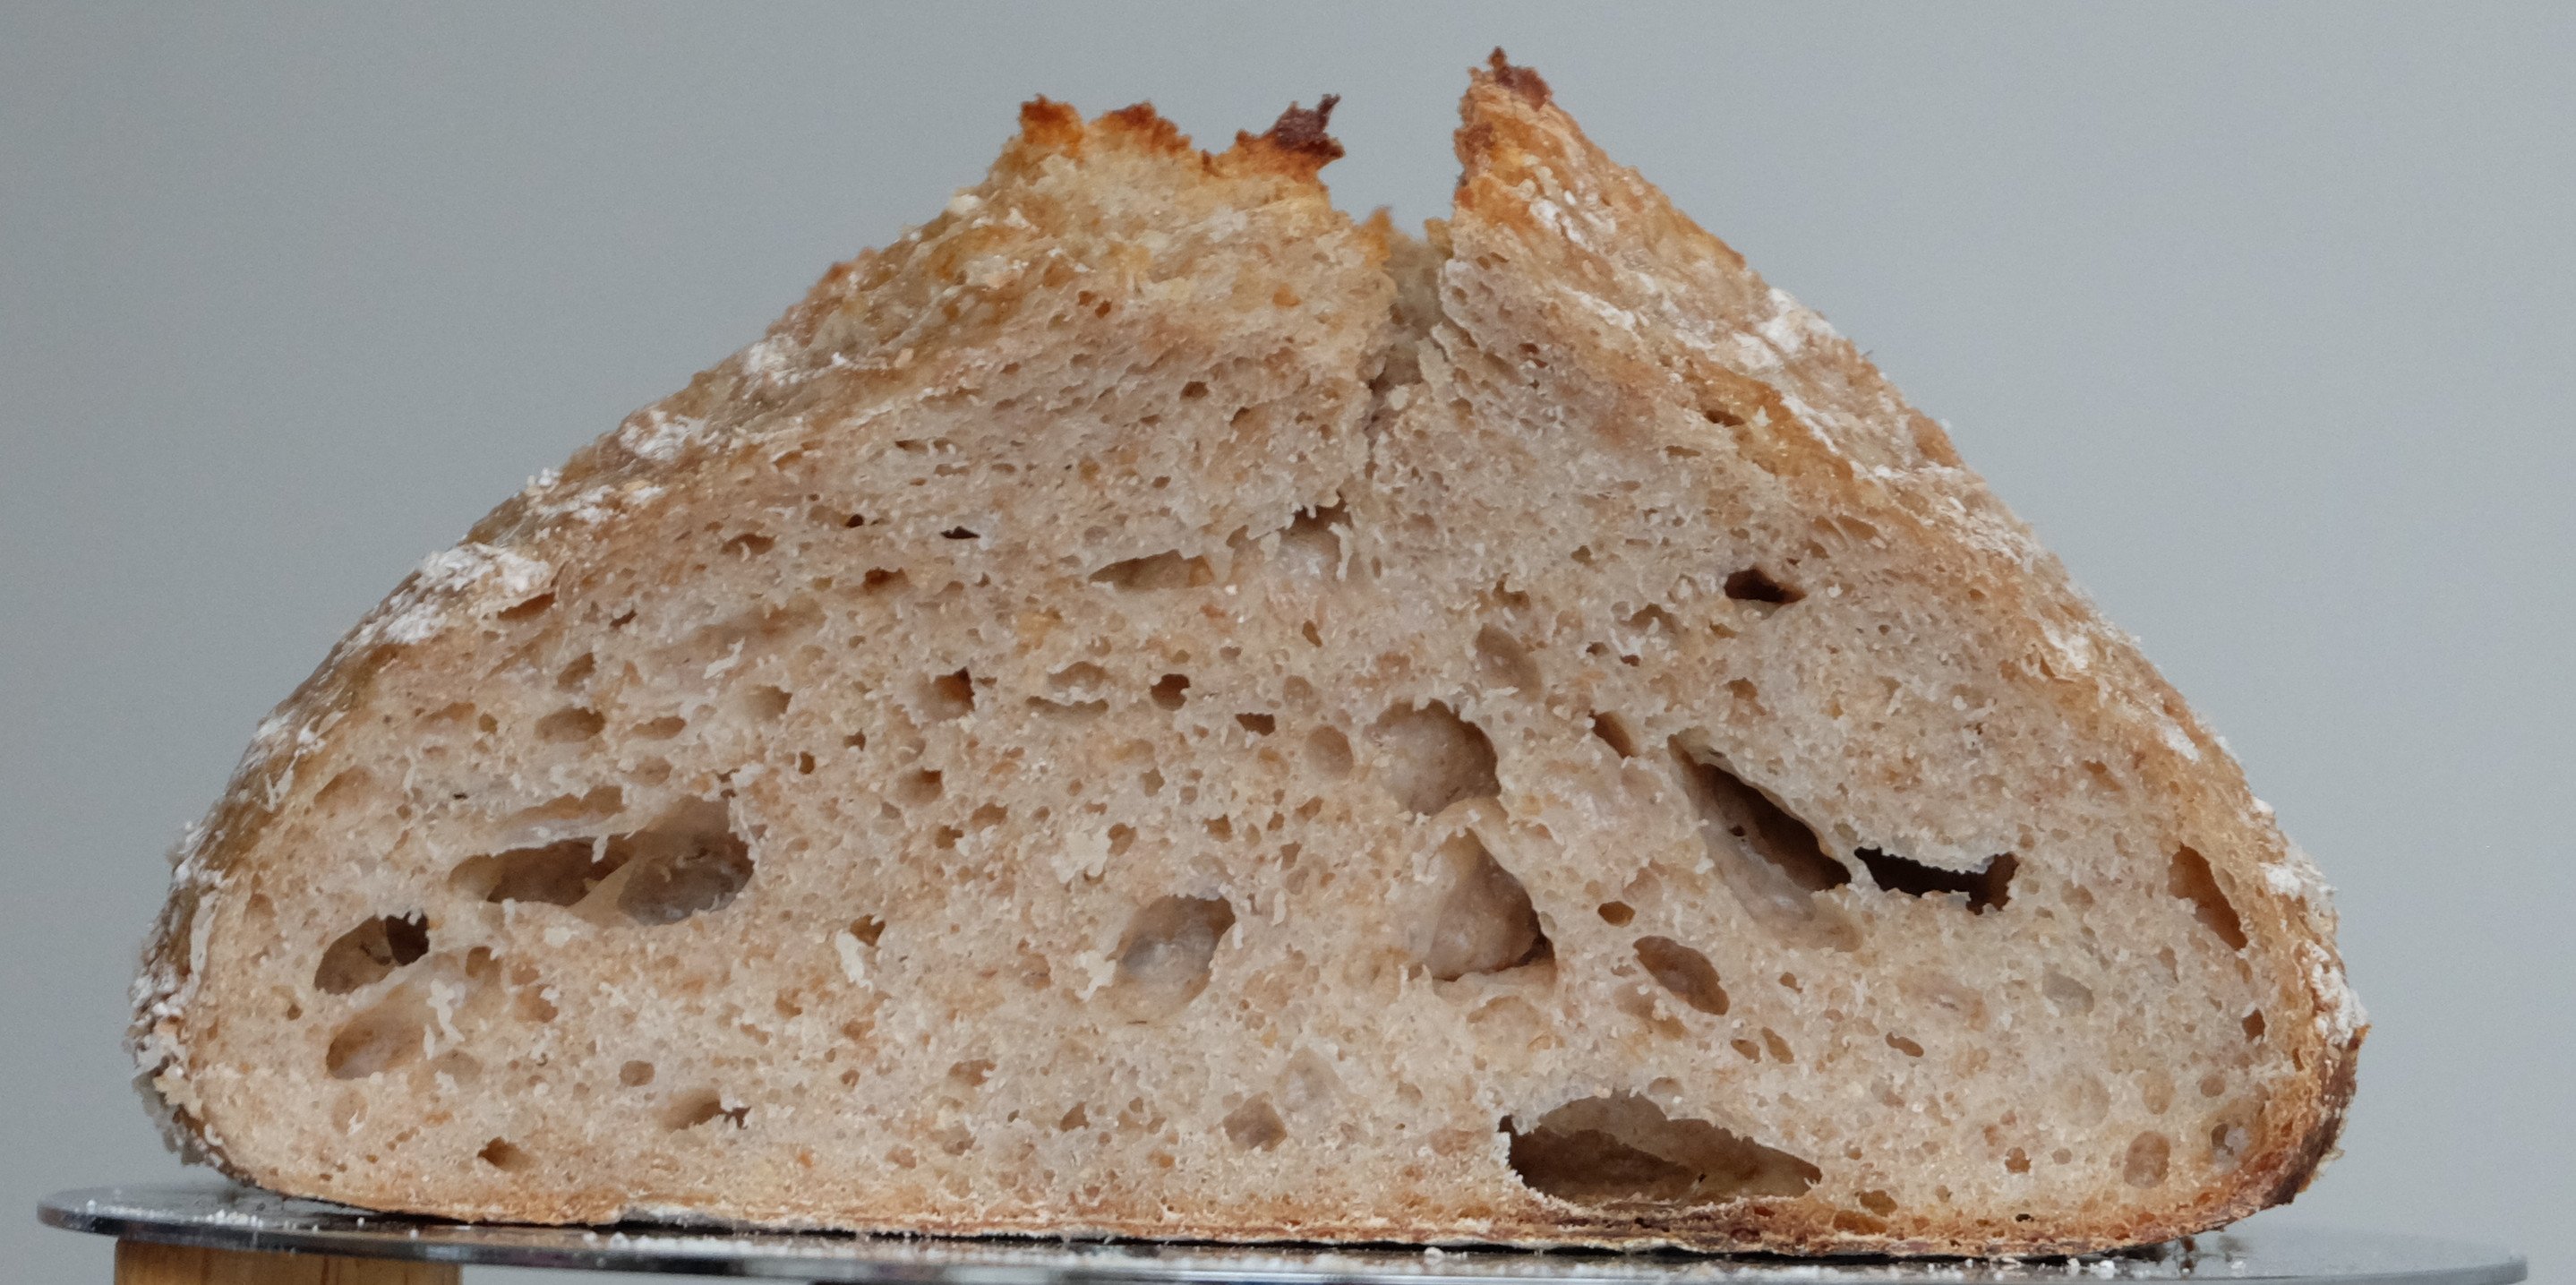
This recipe has a big potential. While time consuming, it's very enjoyable, it gives you a lot of chances to interact with the dough, learn how active it gets and get more control over what you get in the end.
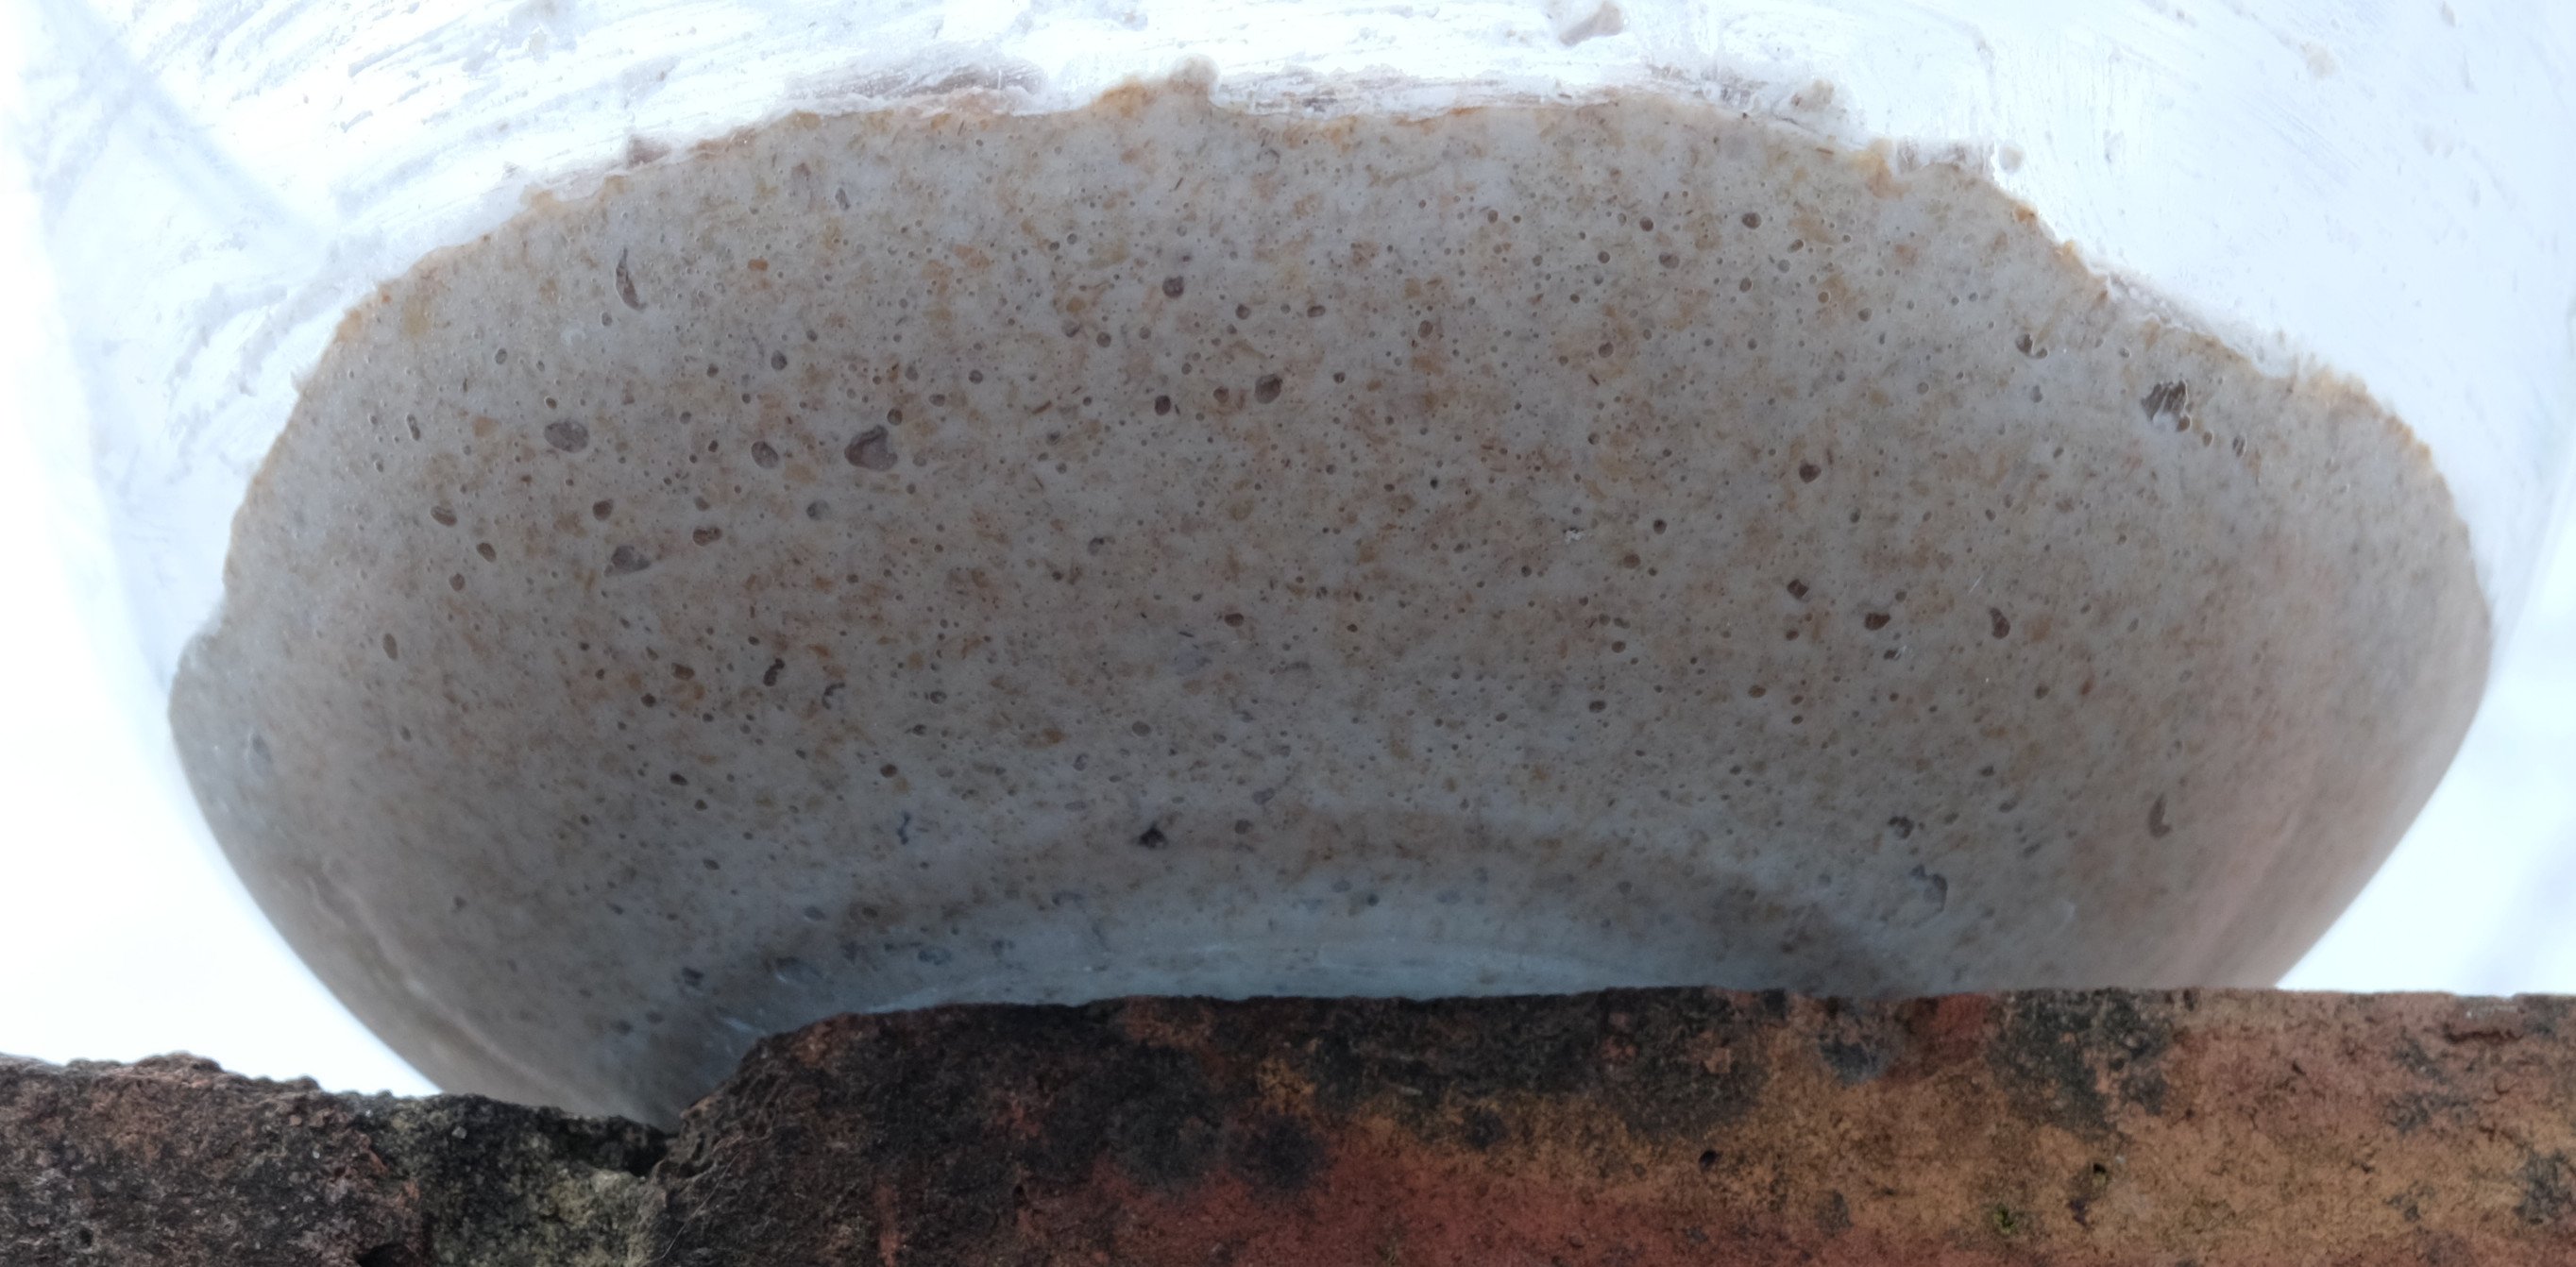
It did not come out perfect in my case. The dough did not rise by much when proofing and got more active in the oven. I may leave the loaves in bannetons in a warm place for an hour or two next time. Or maybe it's just the sourdough being too weak? There is a lot of space to observe it, I will decide when I bake it, and I surely will.
Final conclusions
The crumble method does work to store you sourdough, but there is a but: I was supposed to store it in the fridge, it was problematic to revive as well. I don't know how long it can last, but if I need a fridge for it, I can just as well store the actual sourdough as I did. Still, has a potential as a backup method.
I have most hopes with the flakes that we made. I hope they were done well (meaning I did not bake them but just dried them). If it works, this may be a good way to share sourdough with others.
Please upvote if you like my post and follow to see more in the world of baking and programming.
Po polsku
Drugie podejście do ożywienia zakwasu. Tym razem wypróbowałem kruszonkę zakwasową. Przygotowałem ją zarówno z żyta jak i pszenicy, więc dla przejrzystości - każdy zakwas był karmiony swoją mąką (nie podawałem poniżej rodzajów).
Przygotowanie kruszonki
Nasyp kupkę mąki, używanej do karmienia zakwasu, na talerzu, następnie umieść na niej łyżkę-dwie zakwasu i wyrabiaj tak jak wyrabia się kruszonkę z mąką i masłem. Następnie zbierz uzyskane grudki i umieść w pojemniku w lodówce.
Pomysł zaprezentowała Ava Celik na Instagramie (click for her video).
Ożywianie
Nie byłem pewien, jak do tego podejść, więc postanowiłem wieczorem zmieszać:
- 60 g mąki
- 60 g wody
- 40 g kruszonki
Rano było trochę malutkich bąbelków, ale nie za wiele aktywności. Wydawało mi się, że mieszanka jest trochę gęsta, więc dodałem dodatkowe 40 g wody. Wieczorem działo się już więcej, ale wciąż maławo. Dodałem jeszcze 20 g kruszonki.
Następnego dnia oba zakwasy były raczej aktywne i bąblujące, ale wciąż niezbyt mocne.
Pszenica:
Żyto:
Próbowałem zrozumieć, co się tutaj stało i doszedłem do następujących wniosków:
- właściwie zasuszyłem zakwas dodatkową mąką przy robieniu. Gdy do ożywiania użyłem 40 g kruszonki, w rzeczywistości to mogło być 10 g zakwasu i 30 g mąki. To by dało 10 g zakwasu, 90 g mąki i 60 g wody - dość sucho i za mało zakwasu do aktywowania
- po dodaniu wody i większej ilości kruszonki sytuacja się poprawiła, ale zakwas żytni był bardzo słaby, jak gdybym zaczął nowy, a nie ożywił stary
Ostatecznie użyłem takich ilości do ożywienia:
- 60 g kruszonki
- 60 g mąki
- 100 g wody
W tym momencie postanowiłem upiec chleb i zrobić eksperyment na pozostałej kruszonce
Test
Ogólny pomysł polegał na sprawdzeniu, czy w samej kruszonce drzemie moc. Może powinienem byłem ją jedynie nawodnić i zostawić do ożywienia?
Metoda: Dodać dużo wody do kruszonki wieczorem, sprawdzić aktywność rano.
Resultat: Pszenna kruszonka zrobiła sporo bąbelków, żytnia ociupinkę (oznaczone poniżej), ale zdecydowanie coś się działo. Może zatem powinienem zrobić kruszonkę z większej ilości zakwasu? Nie wiem.
Chleb
Wybrałem przepis z "Bread, Cake, Doughnut, Pudding" autorstwa Justina Gellatlyego (ISBN 978-0-241-14607-7). Ostatnio opublikował nową książkę wespół ze współpracownikami z Bread Ahead Bakery and School na Borough Market. Lubię ich, bardzo miło spędziłem z nimi czas podczas otwartych dni, miło było posłuchać ich opinii o moim chlebie.
To jest chleb pszenno-żytni z długim końcowym wyrastaniem.
Musiałem wybrać, z którego zakwasu skorzystam, więc postanowiłem zrobić dwa zaczyny i wybrać aktywniejszy. Zaczyn też zadba, aby niezbyt mocna kultura zaktywizowała się i zdążyła zgłodnieć przed wykorzystaniem. W oryginalnym przepisie nie było tego etapu.
Rano okazało się, że oba zaczyny były aktywne, ale pszenny bardziej, więc skorzystałem głównie z niego, tylko dodałem odrobinkę żytniego.
Żyto:
Pszenica:
Planowanie
Zrób zaczyn wieczorem (opcjonalnie, 12 godzin czekania), wymieszaj ciasto, 20 minut autolizy, domieszaj, pierwsze wyrastanie przez dwie godziny ze składaniem ciasta co 30 minut, jeszcze jedna godzina na zakończenie pierwszego wyrastania, dzielenie i wstępne formowanie, godzina wyrastania, końcowe formowanie, do koszyków i 6-8 godzin w lodówce, pieczenie przez 40 minut. Samo robienie chleba zajmuje czas na przestrzeni 12-14 godzin, plus zaczyn.
Polecam skorzystać z miksera, robótki ręczne będą bardziej męczące i czasochłonne.
Jeśli nie masz kosza, możesz użyć durszlaka i oprószonej ściereczki kuchennej. Tylko upewnij się, że oprószysz mąką żytnią lub czymś bezglutenowym, pszenica włączy się w ciasto.
Przygotuj sobie kawałek blatu na wyrastanie. Ja normalnie wyrastam w misce, ale to było przyjemne doświadczenie i polecam spróbować choć raz. Zajmiesz ten kawałek na cztery do pięciu godzin.
Składniki
Wystarczy na jeden duży bochenek. Ja podwoiłem sobie ilości i zrobiłem cztery mniejsze bochenki. Jeden zabrałem do pracy, trzy zostały zjedzone w ciągu 4-5 dni.
Zaczyn
- 90 g mąki pełnoziarnistej
- 90 g wody
- 40 g zakwasu
Końcowe ciasto
- 220 g zaczynu
- 400 g mąki pszennej chlebowej
- 50 g mąki pszennej pełnoziarnistej
- 50 g mąki żytniej pełnoziarnistej
- 350 g wody
- 14 g soli
Przygotowanie
Zaczyn
- Wymieszaj składniki na zaczyn w misce
- Pozostaw w ciepłym miejscu na 12 godzin pod folią spożywczą
Ciasto
- Wymieszaj wszystko POZA SOLĄ. Przez pierwsze trzy minuty na niższej prędkości, następnie 5 minut na szybszej. Jeśli mieszasz dłońmi, zajmie Ci to jakieś 15 minut
- Pozostaw do autolizy na 20 minut
- Posyp solą powierzchnię ciasta i mieszaj na szybszej prędkości przez 6 minut. Dłońmi: 15-20 minut. Będzie klejące, ale nie dodawaj mąki. Dodawanie mąki to generalnie zły pomysł, ponieważ zepsujesz proporcje między solą a mąką. Zazwyczaj soli daje się 2-2,5% wagi całej mąki i nie powinno to ulegać zmianie. Jeśli chcesz sztywniejsze ciasto, użyj 90% wody i potem koryguj do pożądanej konsystencji
- Wyjmij ciasto z miski miksera i połóż na lekko oprószony blacie (pamiętaj dbać, żeby blat był cały czas lekko oprószony) i wykonaj rozciąganie i składanie. Rozciąganie i składanie to technika, w której łapiesz ciasto z boku, rozciągasz jeszcze bardziej na bok i zakładasz na górę ciasta. Następnie powtarzasz z przeciwnej strony. Następnie z dwóch pozostałych stron. Możesz powtarzać ten proces więcej niż raz, ale miej świadomość, że jeśli przesadzisz, ciasto się podrze
- Posyp ciasto nieco mąką i przykryj ścierką kuchenną. Pozostaw na 30 minut, po czym znów rozciągaj i składaj. Ten krok powinien być wykonany cztery razy. W efekcie po dwóch godzinach będziesz mieć za sobą pięć składań (jedno z poprzedniego kroku i cztery tu). Początkowo ciasto będzie klejące i trudne w obsłudze, potem będziesz widzieć jak się wzmacnia i zaczyna się opierać obróbce. Po odpoczynku będzie ponownie dawało się obrabiać
- Pozostaw ciasto na godzinę pod ściereczką. To końcowa część pierwszego wyrastania
- Jeśli chcesz mieć mniejsze bochenki, podziel teraz ciasto
- Wykonaj wstępne formowanie bochenków: weź kęs ciasta, rozpłaszcz go, następnie zawijaj brzegi do środka. Następnie odwróć je i złap wewnętrzną stroną oprószonej dłoni, tak żeby małe palce i krawędź dłoni dotykały blatu, i wykonaj kolisty ruch, lekko dociskając ciasto do blatu. Powinno się dać wyczuć lekkie tarcie, a powierzchnia ciasta powinna się napiąć
- Oprósz mąką, przykryj ściereczką, pozostaw na godzinę
- Niektórzy ludzie niemal zaczynają formowanie końcowe od zera. Ja też bym tak robił, gdyby ciasto się rozlało, ale tak się nie stało, toteż jedynie wykonałem ponownie kolisty ruch, napinający powierzchnię ciasta i włożyłem bochenki do koszyków. Następnie włożyłem koszyki do plastikowych toreb i umieściłem w lodówce na 6-8 godzin
- Nagrzej piekarnik do 220C na górę i dół, bez wentylatora. Znaj swój piekarnik
- Umieść bochenki na tacce do pieczenia, natnij je jakim wzorem chcesz, na przykład krzyżykiem, i wrzuć do piekarnika. Dodaj parę, ale wypuść ją po 15-20 minutach
- Po 30 minutach od rozpoczęcia pieczenia zdejmij bochenki z tacki i połóż na kratkowej półce w piekarniku na kolejnych 10 minut, aby uzyskać ładną skórkę
- Chleb jest gotowy, gdy po stuknięciu w spód wyda głuchy odgłos
- Wyjmij z piekarnika i umieść na kratce do ostygnięcia
Ten przepis ma spory potencjał. Mimo że czasochłonny, jest bardzo przyjemny w realizacji. Daje sporo okazji do pracy z ciastem, obserwacji, nauki jego aktywności i w rezultacie uzyskania większej kontroli nad końcowym rezultatem.
Nie wyszedł idealnie. Ciasto nie wyrosło zbytnio przy wyrastaniu i bardziej je rozsadziło w piekarniku. Może następnym razem nie włożę bochenków od razu do lodówki. A może to była kwestia słabego zakwasu? Jest pole do obserwacji, zadecyduję gdy będę jeszcze raz piekł.
Końcowe wnioski
Metoda kruszonkowa działa, ale jest "ale": musiałem trzymać kruszonkę w lodówce i miałem trudności z ożywieniem. Nie wiem, jak długo może wytrzymać, ale skoro musiałem korzystać z lodówki, mogłem równie dobrze przechować zwykły zakwas. Mimo wszystko na sytuacje awaryjne może się sprawdzić.
Największe nadzieje mam pod adresem płatków zakwasowych, które wykonaliśmy. Mam nadzieję, że zostały zrobione prawidłowo (w sensie że nie upiekłem zakwasu a jedynie go wysuszyłem). Jeśli uda się, to może być niezły sposób na dzielenie się zakwasem z innymi.
Proszę zagłosuj, jeśli podoba Ci się mój wpis i obserwuj mnie, aby usłyszeć więcej o świecie pieczenia i programowania.