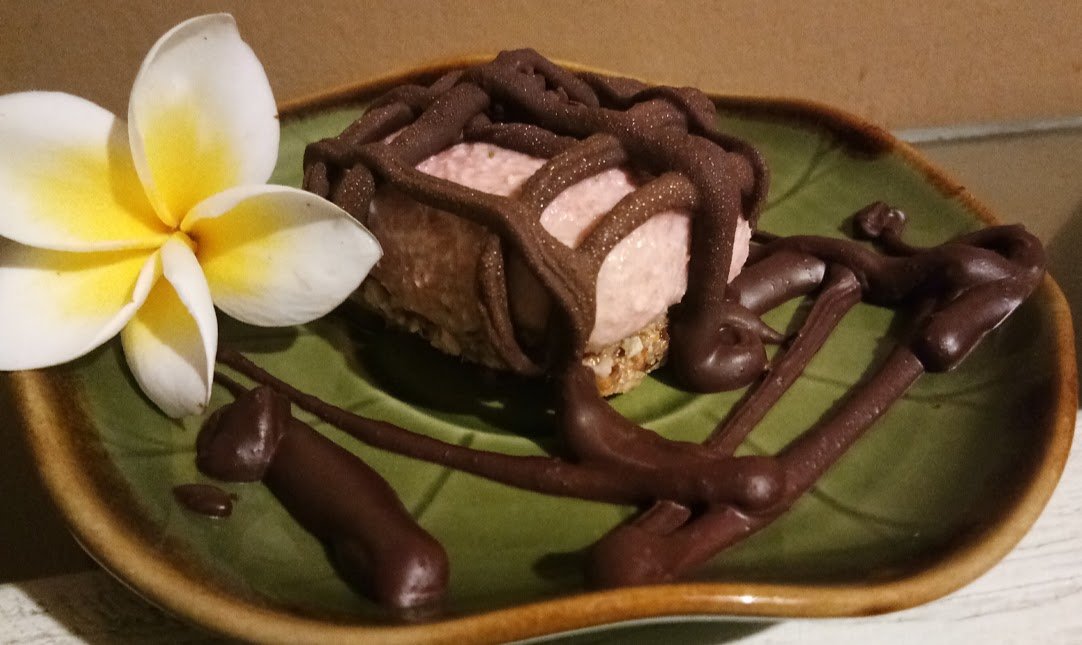
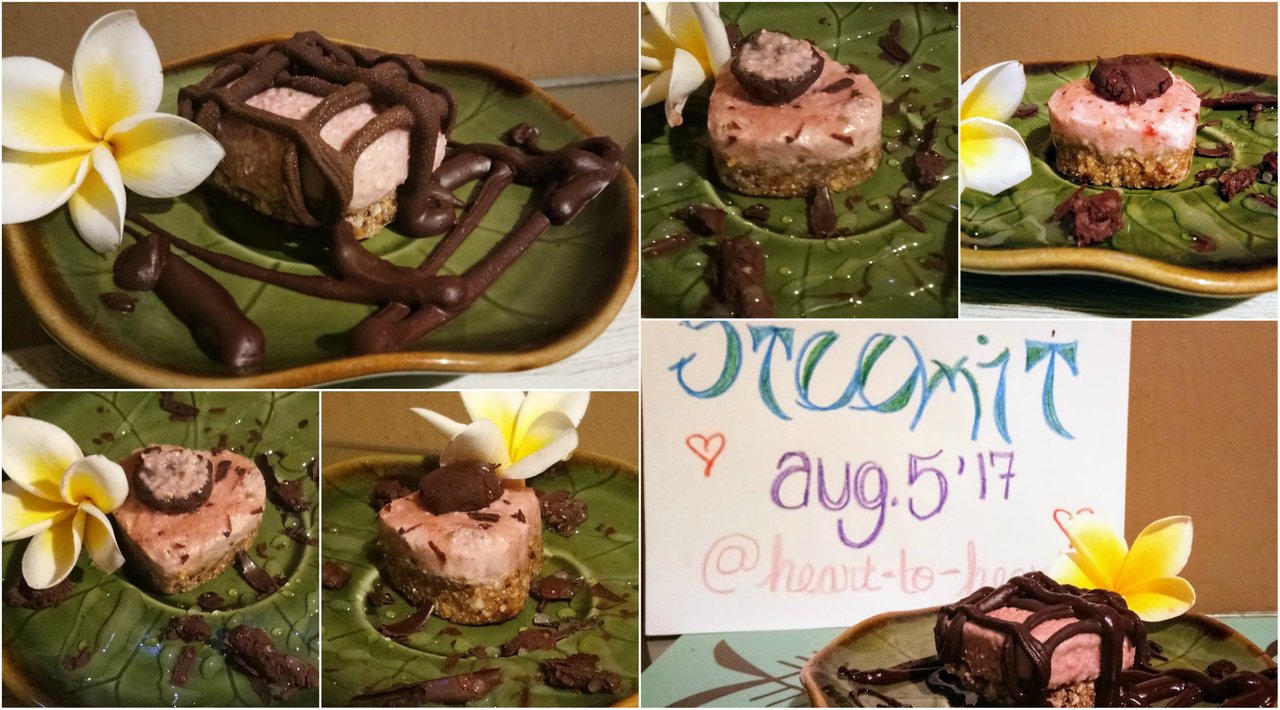
Who is ready for some chocolate covered strawberry cheesecake?
The answer is ME! (And you too since you're here!) Guess what else? They're vegan, gluten-free, sugar-free, fresh-fruit-infused healthy treats your kids will actually want to eat! Prepare to enjoy a guiltless pleasure my Steemian friends! Beware: they won't last long! Better double up the batch 💜
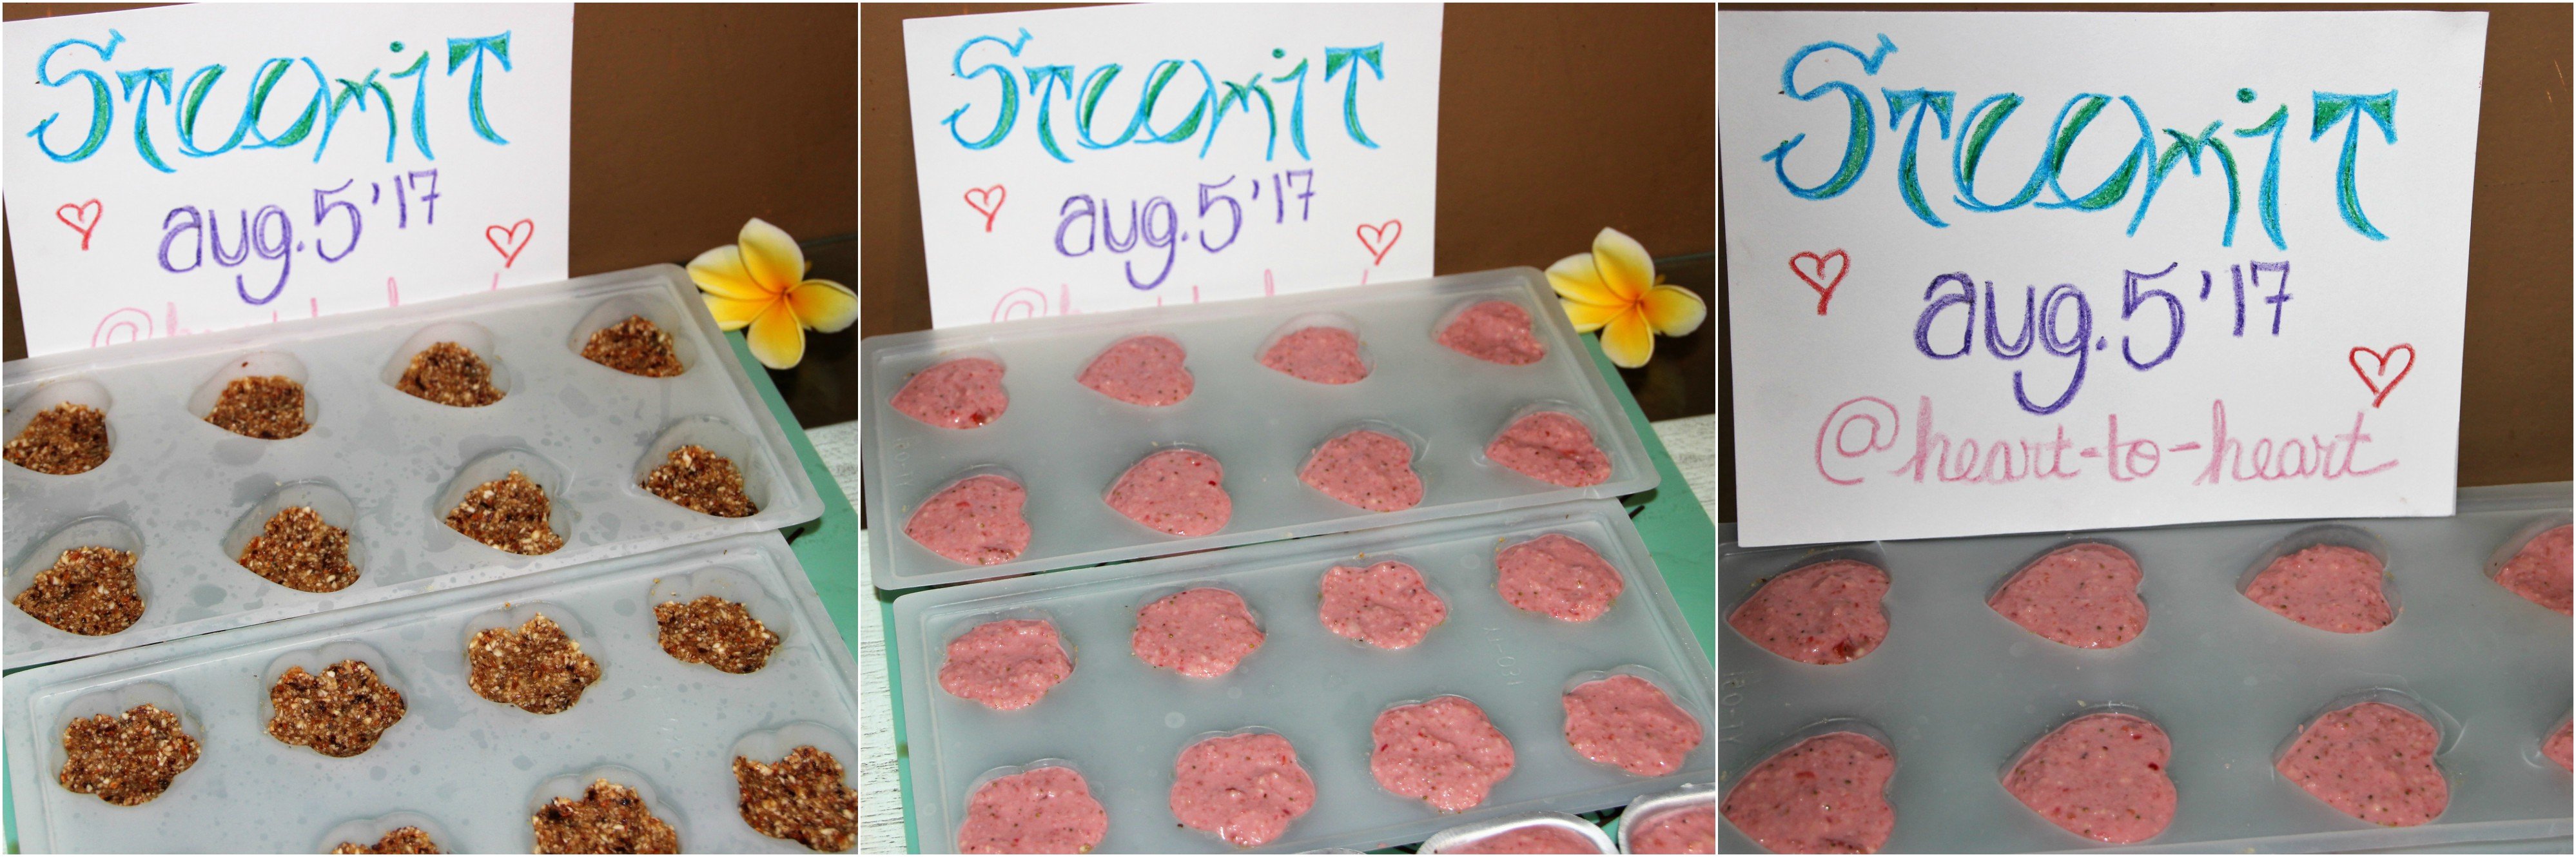
(My biggest challenge this time was getting that verification piece of paper in the shots but these mini cakes were made today from the fresh strawberries at the market, yum!) 😉
.JPG)
What You Need:
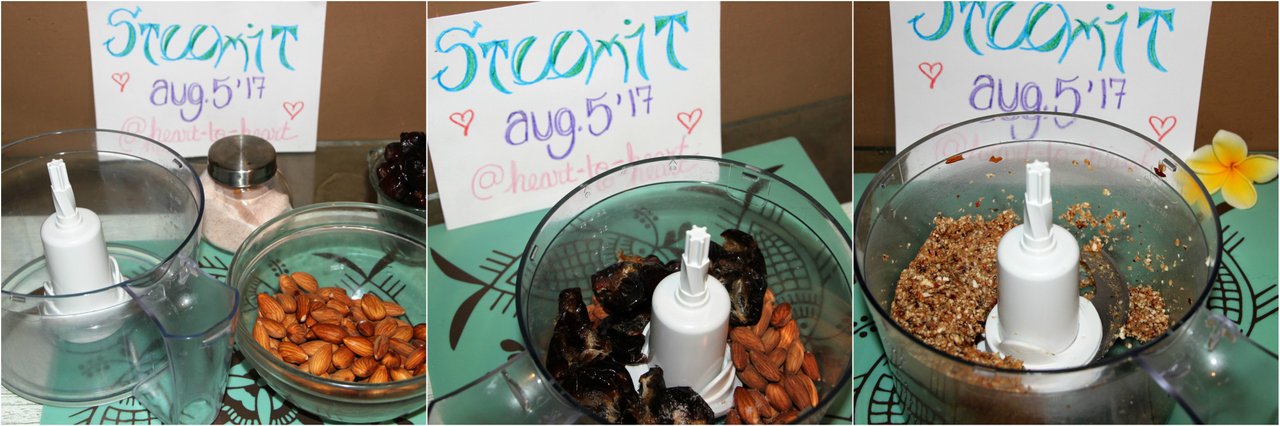
All about that base
- 1 cup soaked almonds (not necessary to soak but soaking nuts has a lot of health benefits and helps them chop smoother)
- 3/4 cup pitted dates
- A pinch of sea salt (I use pink Himalayan)
Gotta get my fill
1 container of organic strawberries
1 cup raw walnuts/cashew mix (soaked in water overnight)
1 teaspoon vanilla extract
2 tablespoon coconut oil
1/2 a lemon (just the juice)
1/3 cup maple syrup/honey/agave/coconut nectar (your preference of sweetener)
2 tablespoons water
Can't stop til I'm on top!
1 piece of raw chocolate (like shown here, to be melted)
or
1 cup of unsweetened chocolate chips
2 tablespoons coconut oil
2 tablespoons sweetener (maple/honey/agave/coconut)
What to do!
Part 1: All about that base:
- Take your base ingredients and throw them in a food processor. Press play- go! Now you can let that baby whip up your base without even working up a sweat!
- Meanwhile, you can dance up a storm, sing your heart out or upvote a couple of your friends until the mixture sticks together. You'll know when it's ready based on the noises of your friendly appliance!
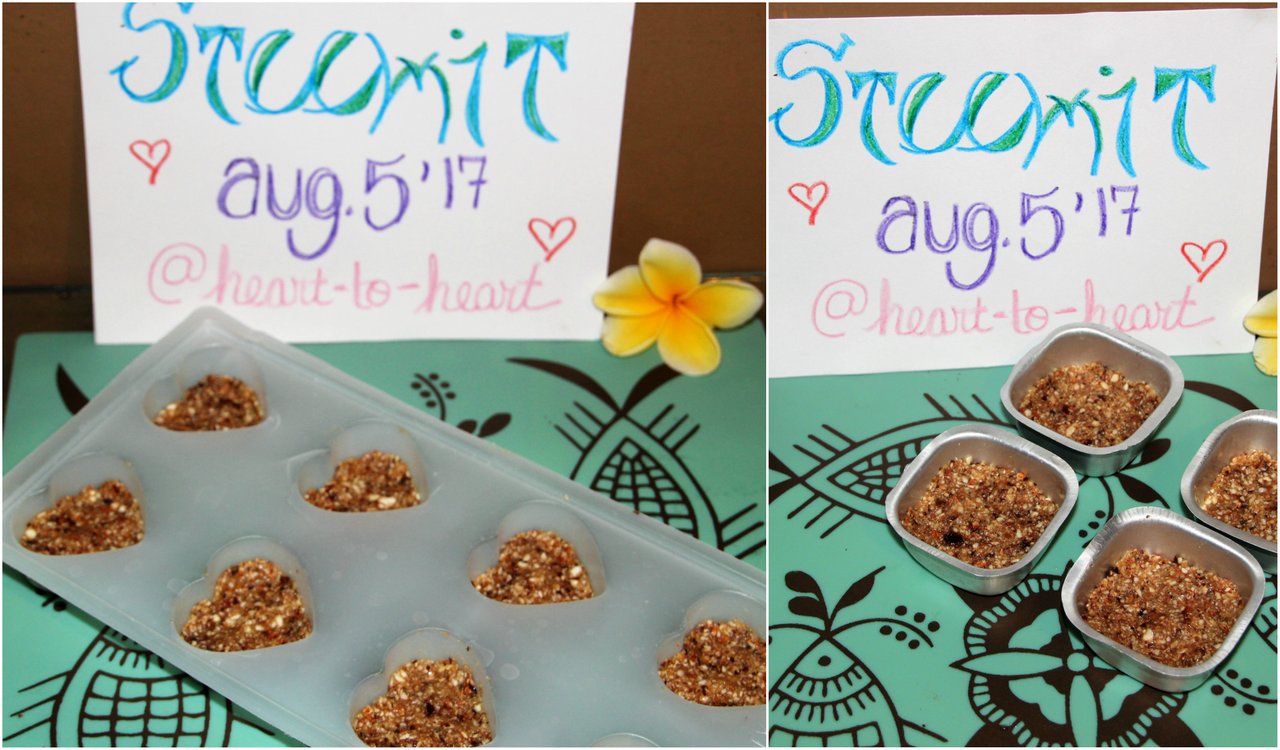
- Once you've got a smooth mixture, fill into cupcake containers half way leaving room for your cheesecake on top! (oiled beforehand to avoid any sticky situations!)
- Now freeze! Get those treats into the freezer to settle while you move onto the next phase!
Part 2: Gotta get my fill:
- Take all of the filling ingredients and add them into the food processor.
- Press the button that makes it go!

- Once it looks like a dream come true, a little bit of pink paradise, you can add it on top of the crust and put it back into the freezer.
- Patience is a virtue. Give it a couple of hours to settle and freeze properly for best effects.
- (If you're impatient like me or the kids are begging you for some, you don't have to wait but it does make them prettier and stay together better!)
Part 3: Can't stop til I'm on top!
- Really, if you don't like chocolate all that much, you could just skip this step 😉
- However, if you're like the child in me- and LOVE everything about chocolate, let's go ahead and add it on.
- I used a brick of raw cacao that comes with the cacao butter still within it so it melts into a thick, pasty cream
- If you're using chocolate chips they work the same way- let's get them hot and bothered!
- Add all ingredients to heat until smooth, liquid chocolate appears!
Go on now, and shake that chocolate all over the place!
Now you have a delicious, easy to make treat for the kiddies that is also good for them (but they'll never know it!)
I hope you all like this recipe, I know it's just become one of my new favourites! I love strawberries and am excited to let you know that I bought 2 containers, so that means another strawberry treat is on it's way tomorrow, you know, so they don't go bad 😉
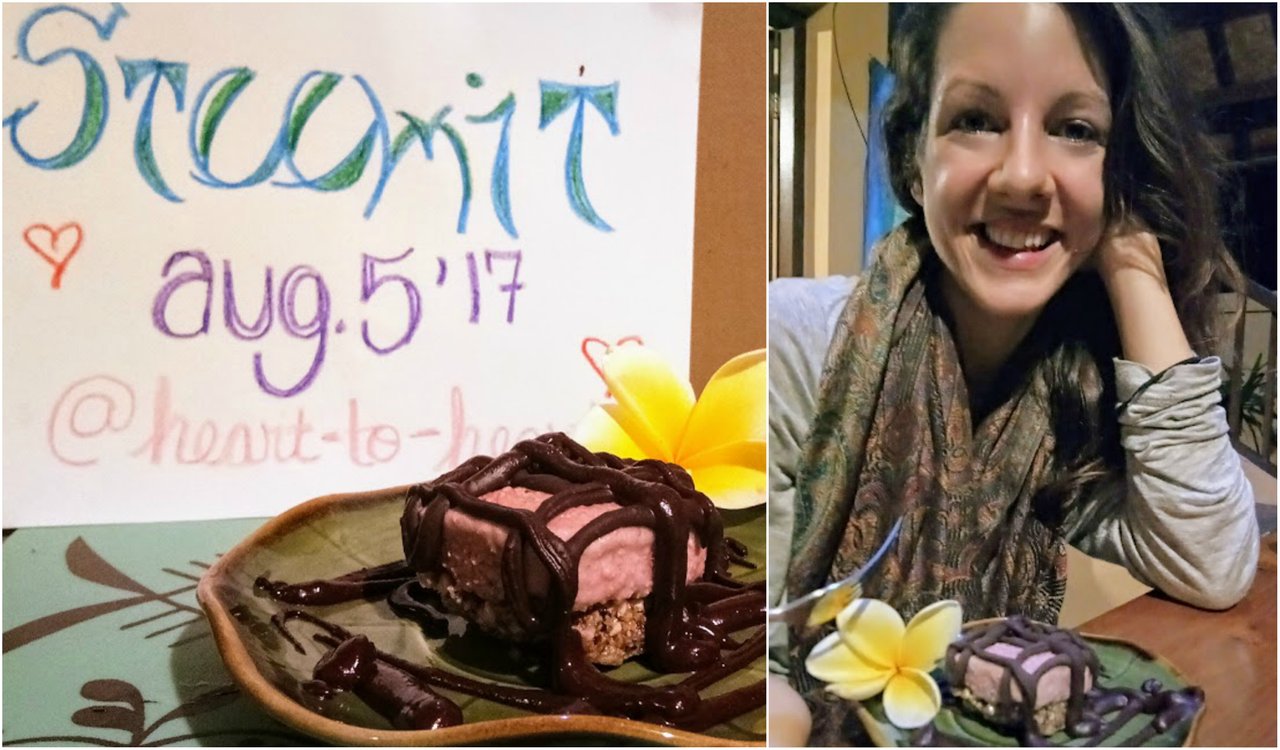
Happy creating my fellow food-enthusiast friends! 💜
Sending you love, through food!
XO,