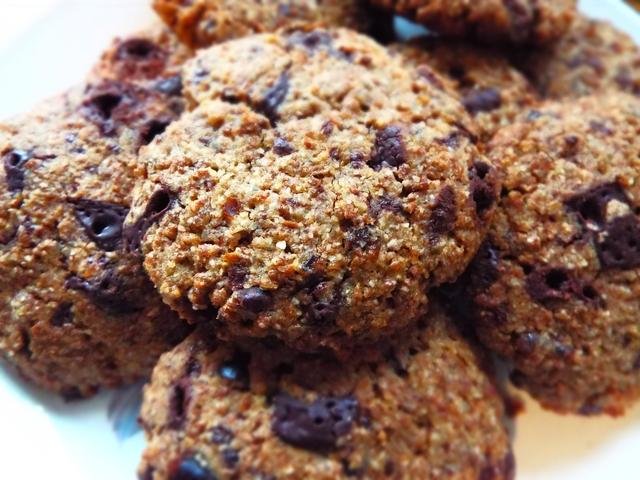
After a little experimentation I have created some lactation cookies that are free from processed/refined sugar, and yet taste sweet and yummy! Most of the lactation cookies available to buy in stores/online contain quite a high processed sugar content (to mask to flavour of some of the lactation-boosting ingredients), as do many homemade cookie recipes, which isn't a great option for pregnant or breast-feeding mothers who wish to avoid a sugary diet.
Not only does fructose in the mother's diet get passed onto the baby through the breast milk, but sugary foods can fill Mama up with empty calories and lessen her appetite for real foods that contain essential nutrition. Although snacks can be tempting when breastfeeding, as feeding is very tiring, it's really important for Mama to get a well-balanced highly-nutritious diet, both for her own energy and wellbeing, and not to mention for lactation.
The most essential 'ingredient' for a breastfeeding Mama is water, water, water. If Mama is dehydrated she is more likely to experience lactation issues. Fresh vegetables, fruits and plant proteins are very important as well. There are also some specific ingredients that many women recommend for increased lactation, including oatmeal, nuts (cashews, almonds, and macadamia in particular), seeds (fenugreek, fennel, sesame, cumin, and flaxseed in particular), brewer's yeast, ginger, garlic, unripe papaya, spinach and beet leaves, carrots, chickpeas, healthy oils (such as coconut, avocado, olive).
If any of you make these, please report back and let me know whether you enjoy them, and whether you feel they do indeed boost your milk supply! I have known many mothers who swear by lactation cookies, but obviously I'm not lactating myself right now so I can't comment :-)
Ingredients (organic recommended):
100g butter/coconut oil (or a mixture of the two)
5 tblsp maple syrup/raw honey
2 large free-range eggs (or 'flax eggs' for vegan option)
4 tblsp water
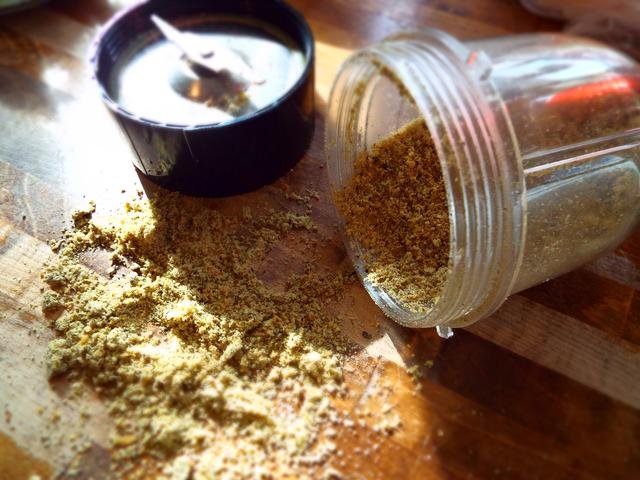
2 tblsp brewer's yeast (other kinds of yeast are not a substitute for brewer's yeast)
1/2 tsp Himalayan salt
2 tsp cinnamon
75g almond butter (100% almond content)
2 tbslp ground flaxseed/golden linseed
100g wholewheat flour
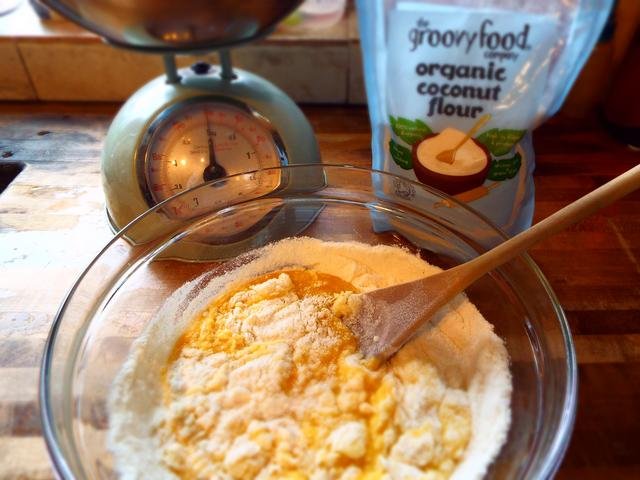
50g coconut flour
100g whole oats (not 'quick oats')
100g dark-choc chips (optional)
Directions:
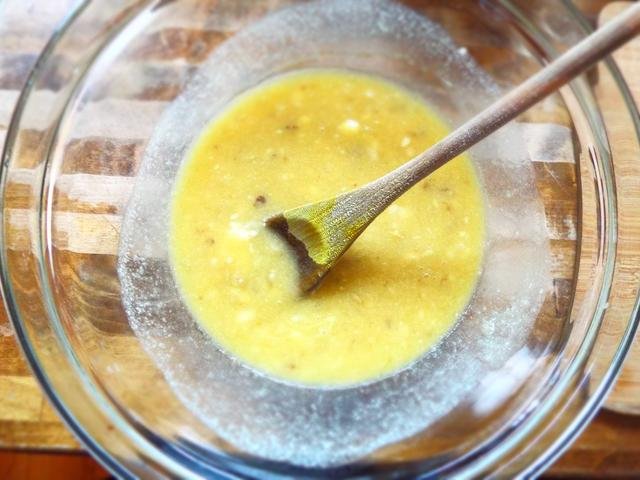
Melt the butter and/or coconut oil and mix with the maple syrup/raw honey in a large bowl. Stir in the eggs, water, brewer's yeast, almond butter, salt and cinnamon.
If you aren't able to purchase ground flaxseed (or 'flaxmeal'), you can prepare your own by simply grinding it up in a coffee grinder, or grinder attachment for a blender, like this one I use. Ground flaxseed is nutritionally superior to whole flaxseed, because the ground seed is fibre rich and much more digestible than the whole seed (which can pass through the body without being digested).
Stir in the ground flaxseed, wholewheat flour and coconut flour. Coconut flour adds a certain sweetness to baked goods, which makes it a good option when trying to mask the flavour of other ingredients (namely the brewer's yeast in this recipe).
Stir in the oats (as high-quality as you're able to buy) and mix really well.

Chocolate chips are optional, and should only be added if (a) you're unlikely to eat the cookies without them, (b) you're able to buy a high-quality high-cocoa percentage organic variety with little or no sugar content or (c) if you have some homemade sugar-free chocolate to use instead of store-bought.
Homemade chocolate is much easier to make than you may think... in this case I made my own from 100g organic food-grade raw cocoa-butter, 100g organic cacao powder, and 50g raw organic honey. That's why it looks a little bubbly if you look closely! The texture reminds me of those 'Aero' chocolate bars.

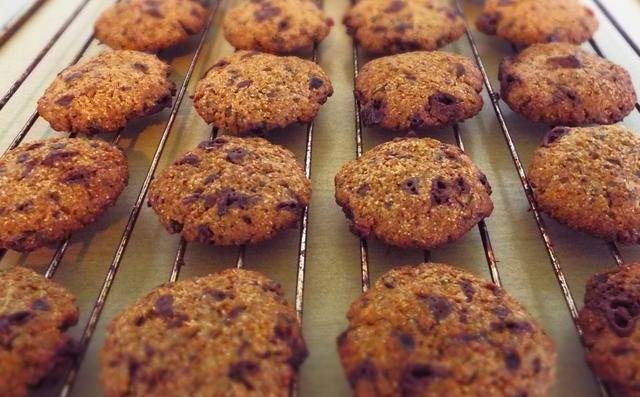
Roll the mixture into balls, flatten between your palms and place onto baking trays (I use silicone to avoid sticking). Bake in pre-heated oven at 170 degrees Celsius for about 15 minutes. Allow to cool a little on the tray before transferring onto a cooling rack or container.
Enjoy, and let the milk flow Mamas!!!
For all kinds of health information, tips, recipes (vegan/vegetarian), crafts, photography, and more, please follow me!
To find out what my "Make It Healthy Project" is all about, and how you can be involved in growing this project, please click here.
![]()
![]()

("5 Cs" shared with kind permission from @kiwideb)