Continuing my series on the gaming PC which I started here @c0ff33a/building-a-gaming-pc-part-1-i-love-it-when-a-plan-comes-together and continued here @c0ff33a/building-a-gaming-pc-part-2-the-components-for-the-pc this time we are going to put all the pc components together - and hope the system boots!
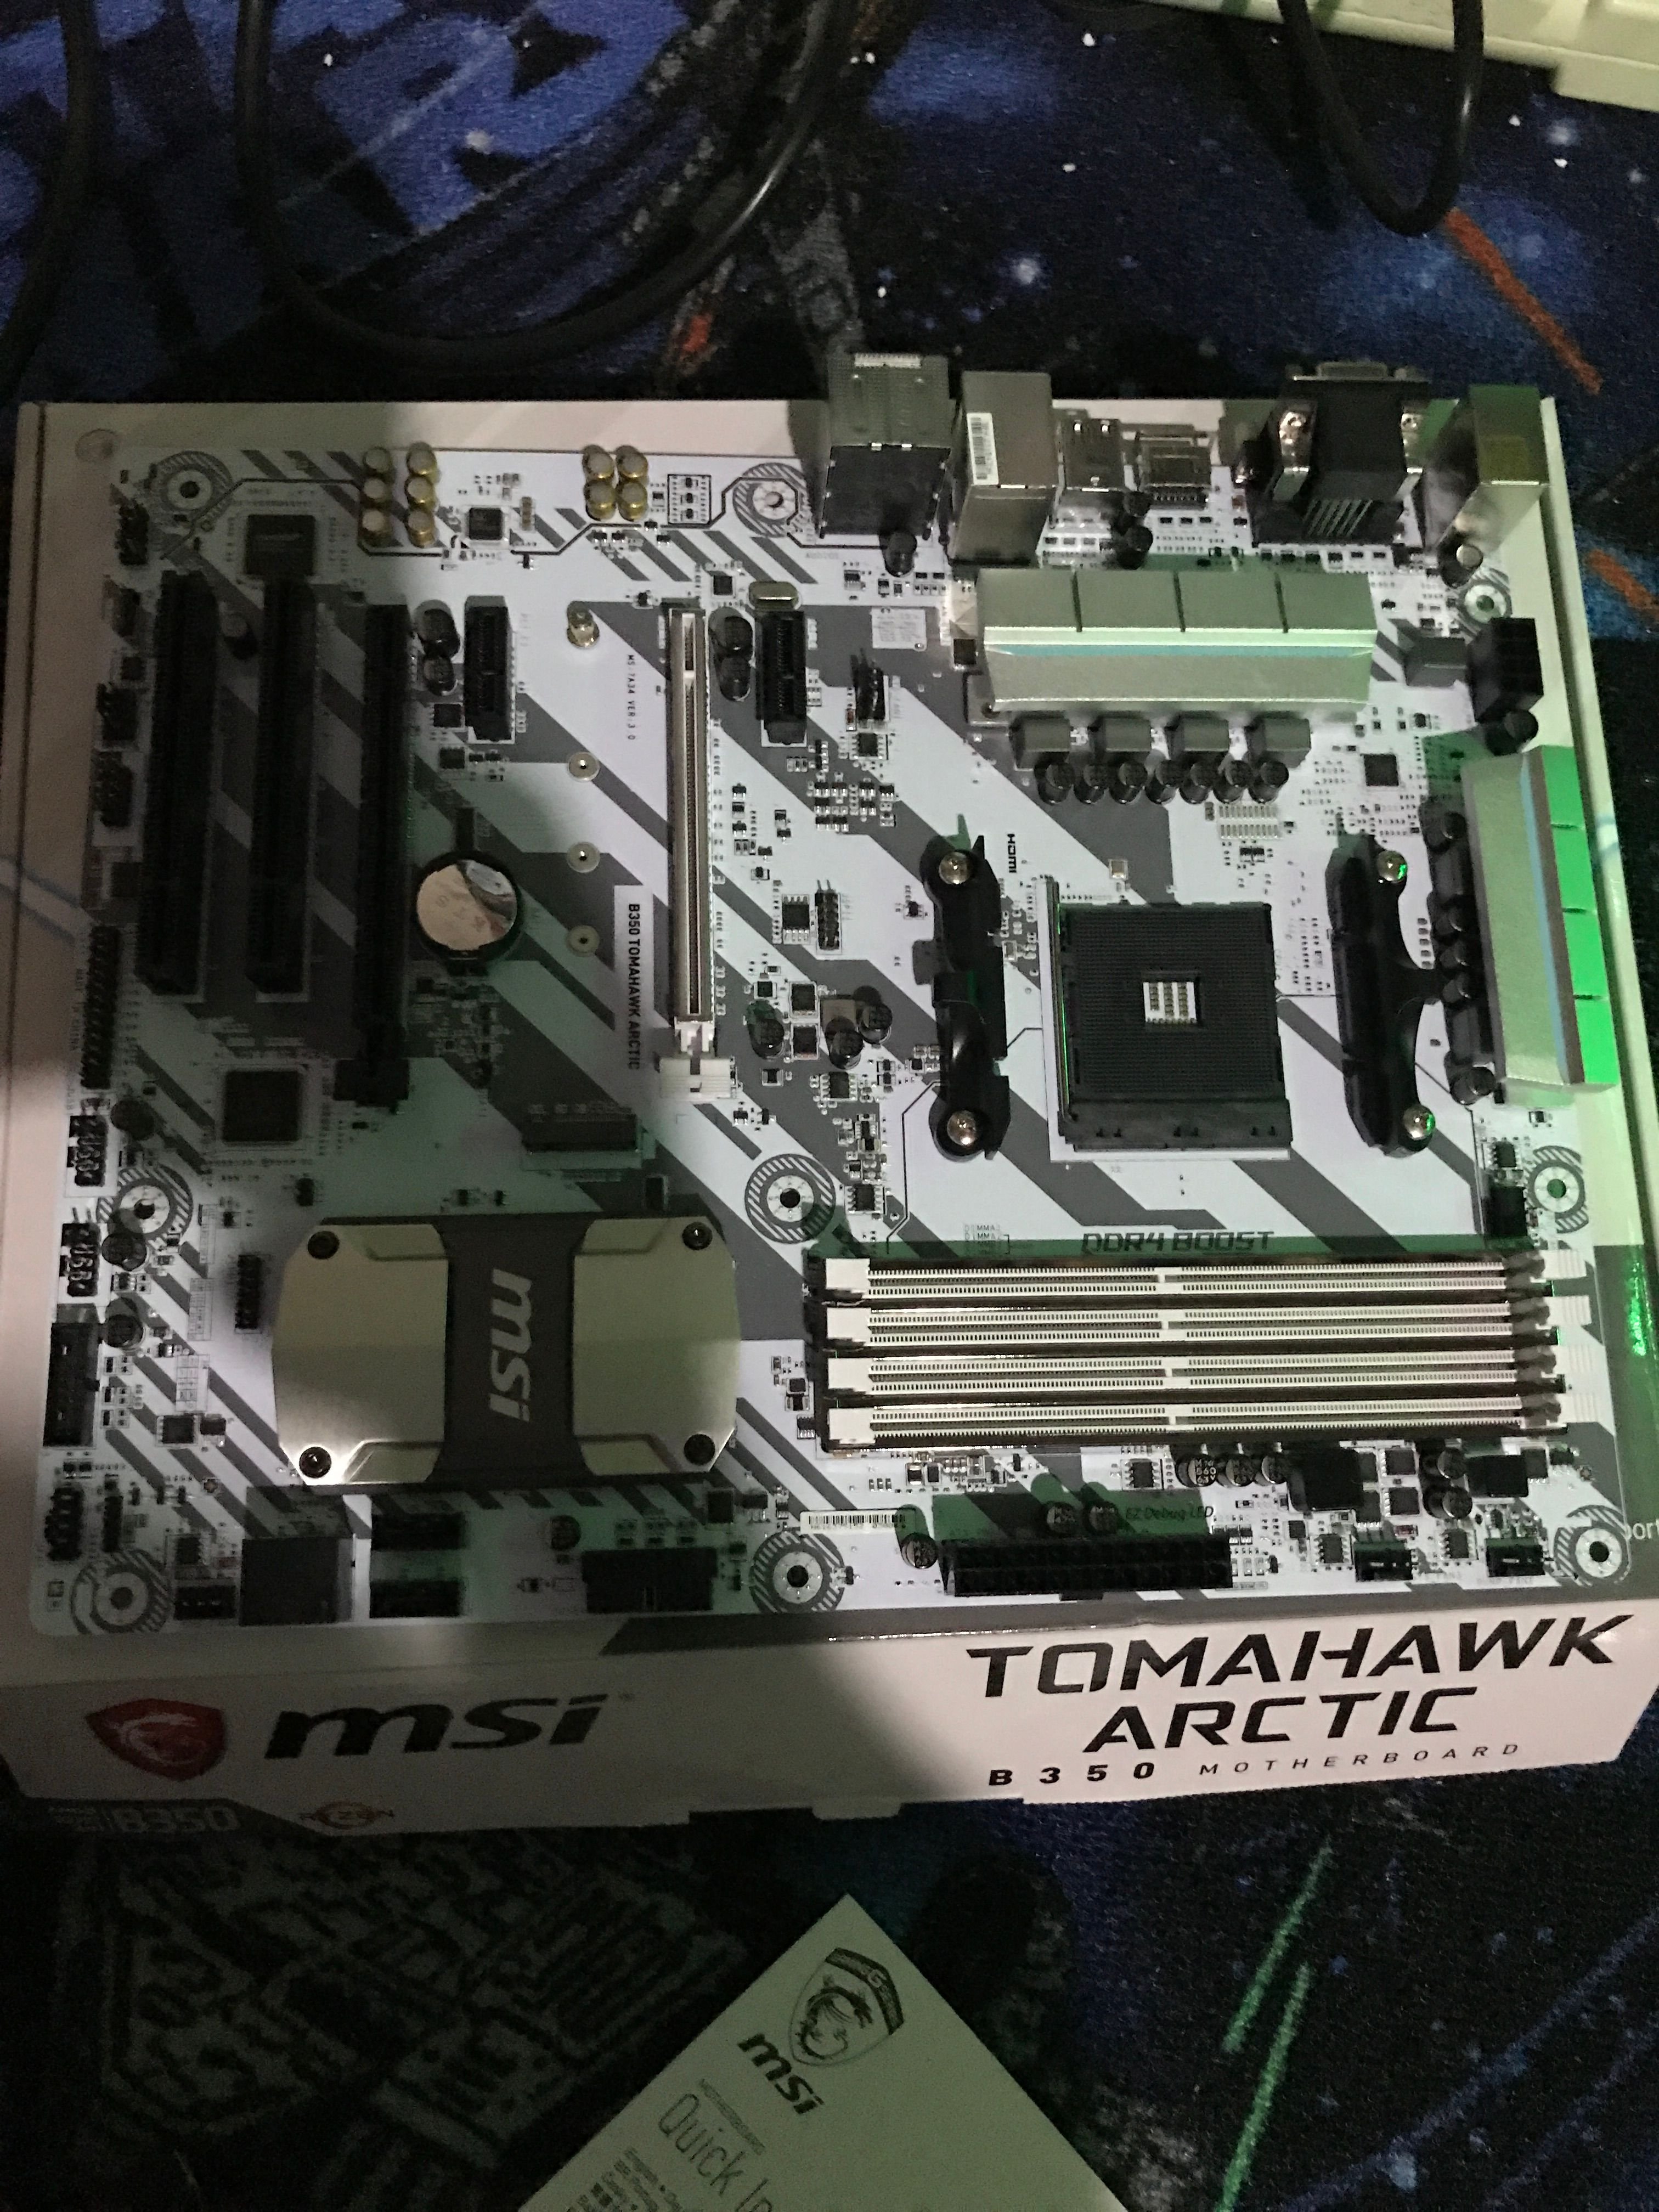
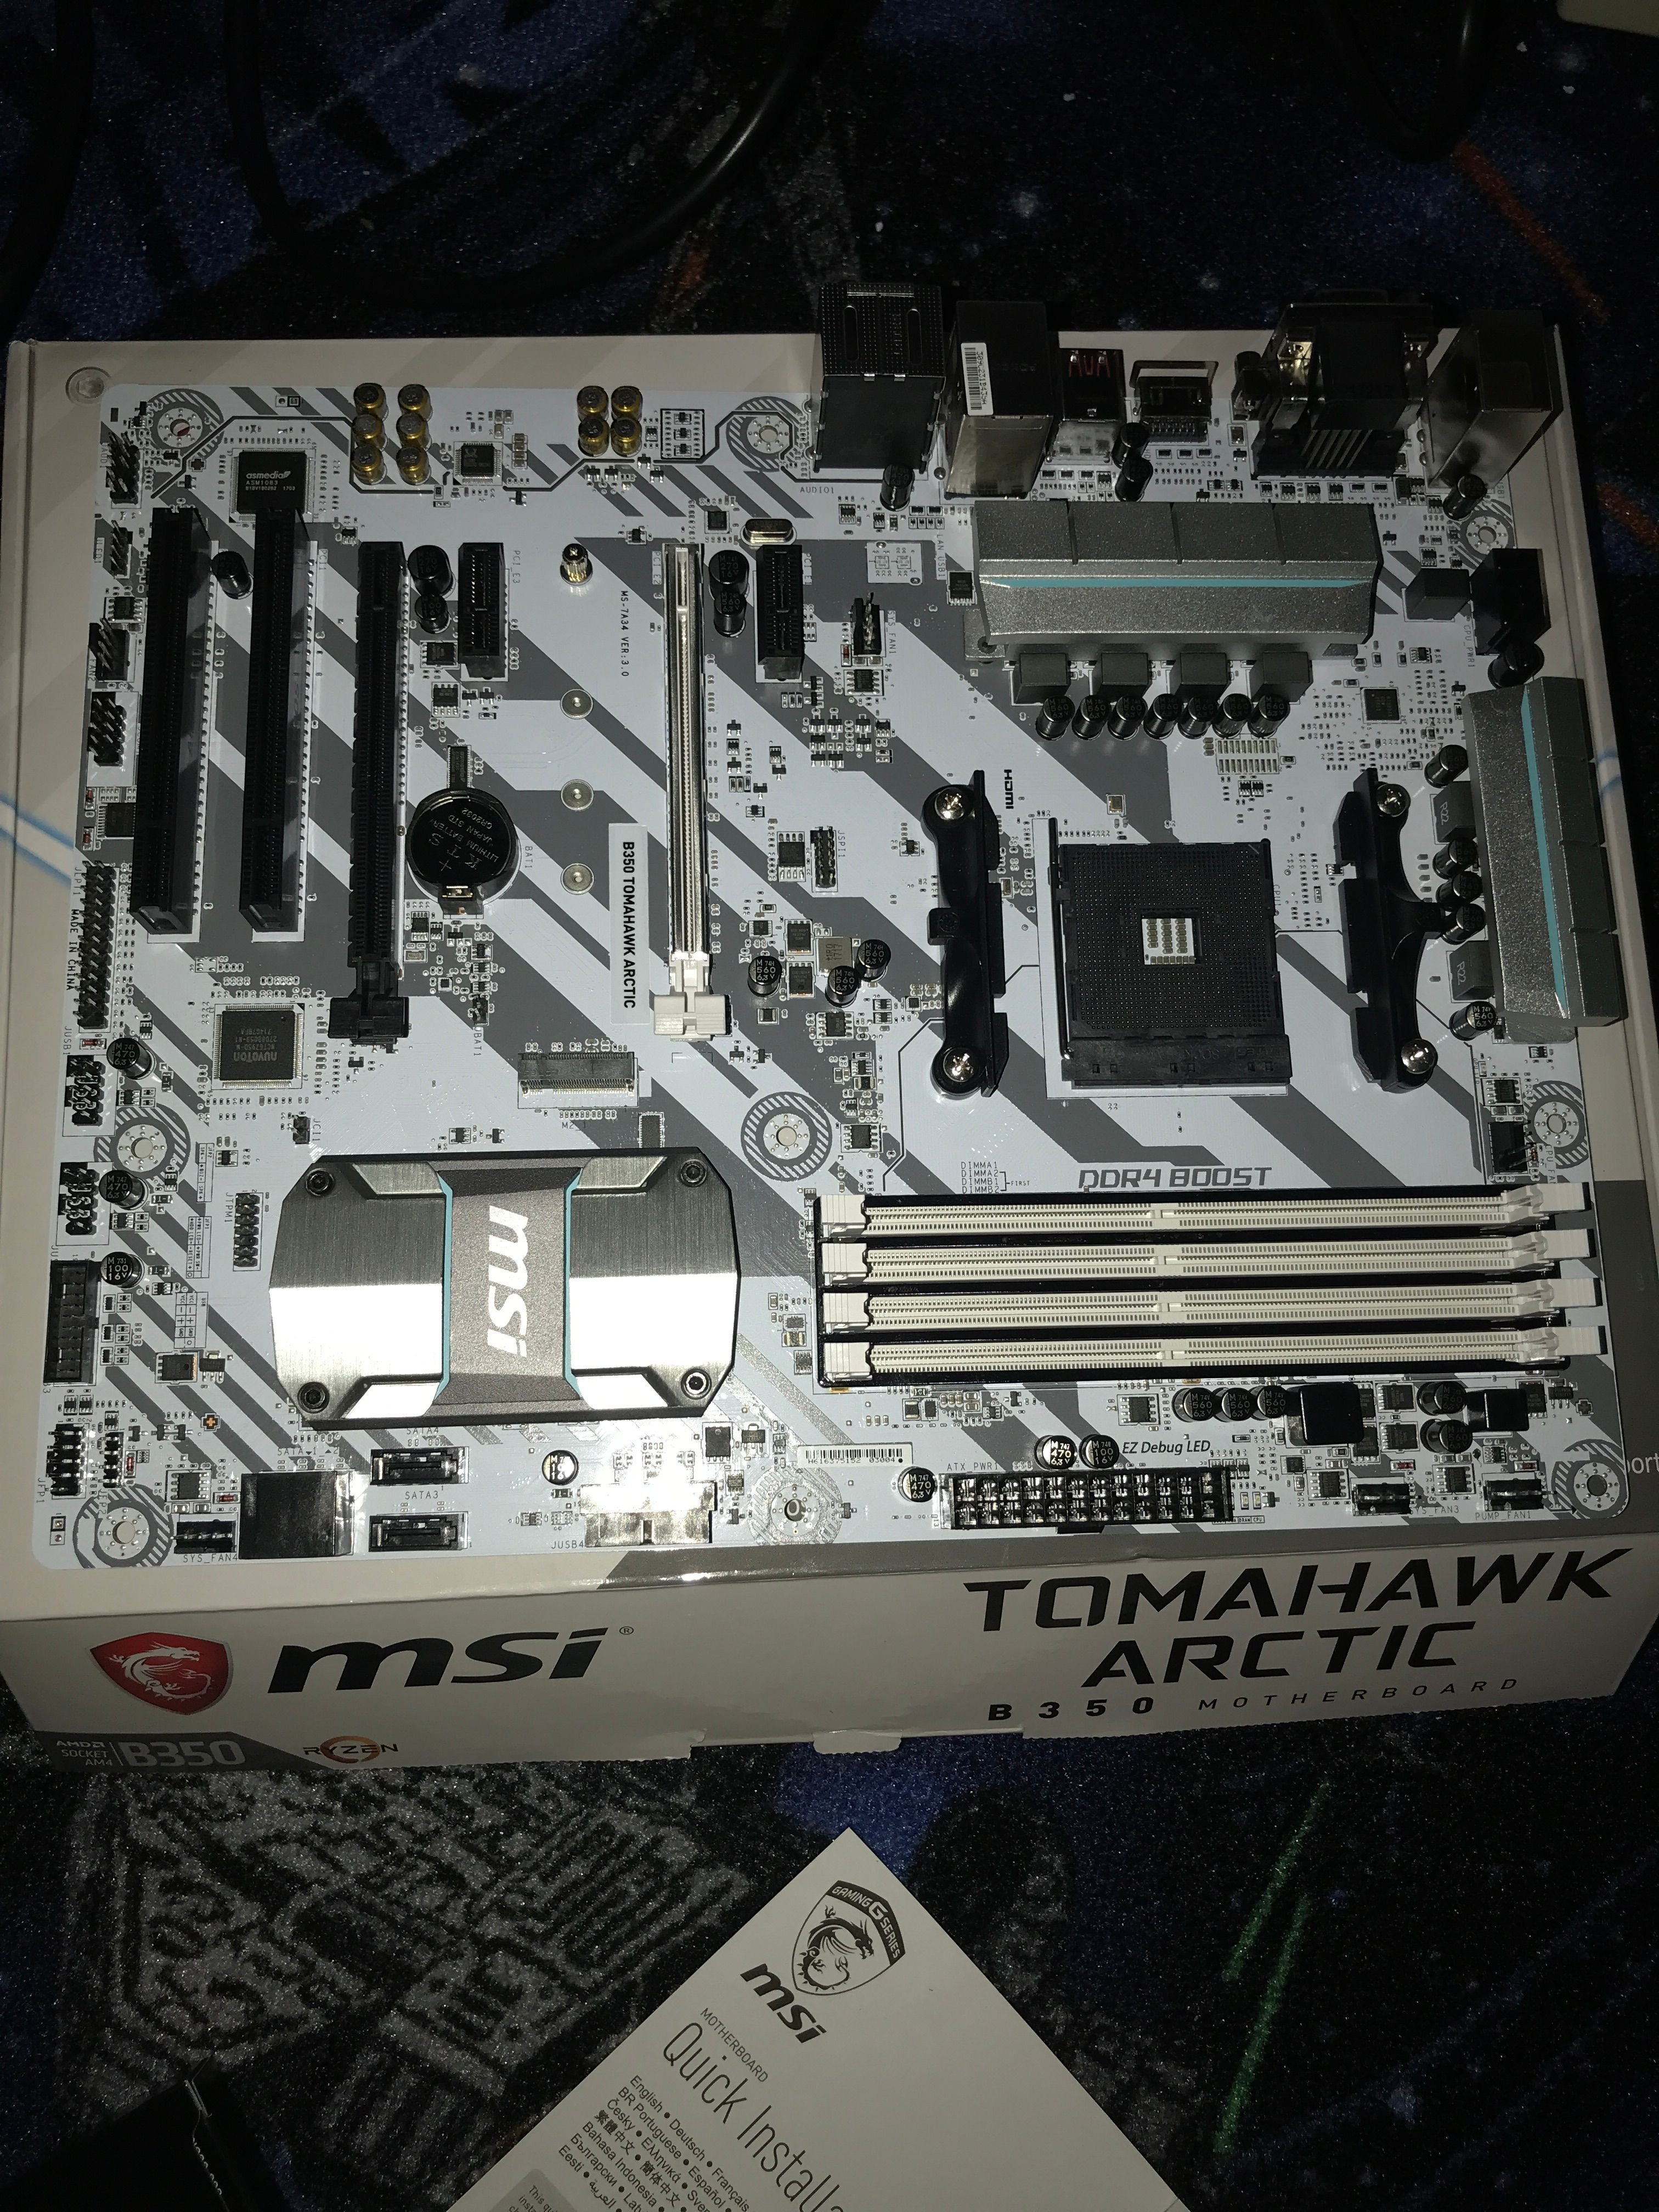
Starting with the part that combines all the other pieces together - the Motherboard. First Job on here will be to fit the CPU chip into the black rectangle middle right - and then mount the CPU cooling fan on top of it.
The CPU is quite simple, you just lift the clamp lever visible on the left side of the holder, position the CPU carefully inside the holder and then carefully engage the clamp. The only thing you have to be very careful about is getting the position correct - the CPU has a little notch on one corner - and then the mount on the motherboard will also have a notch - these positions must be matched up to ensure the CPU is correctly orientated.
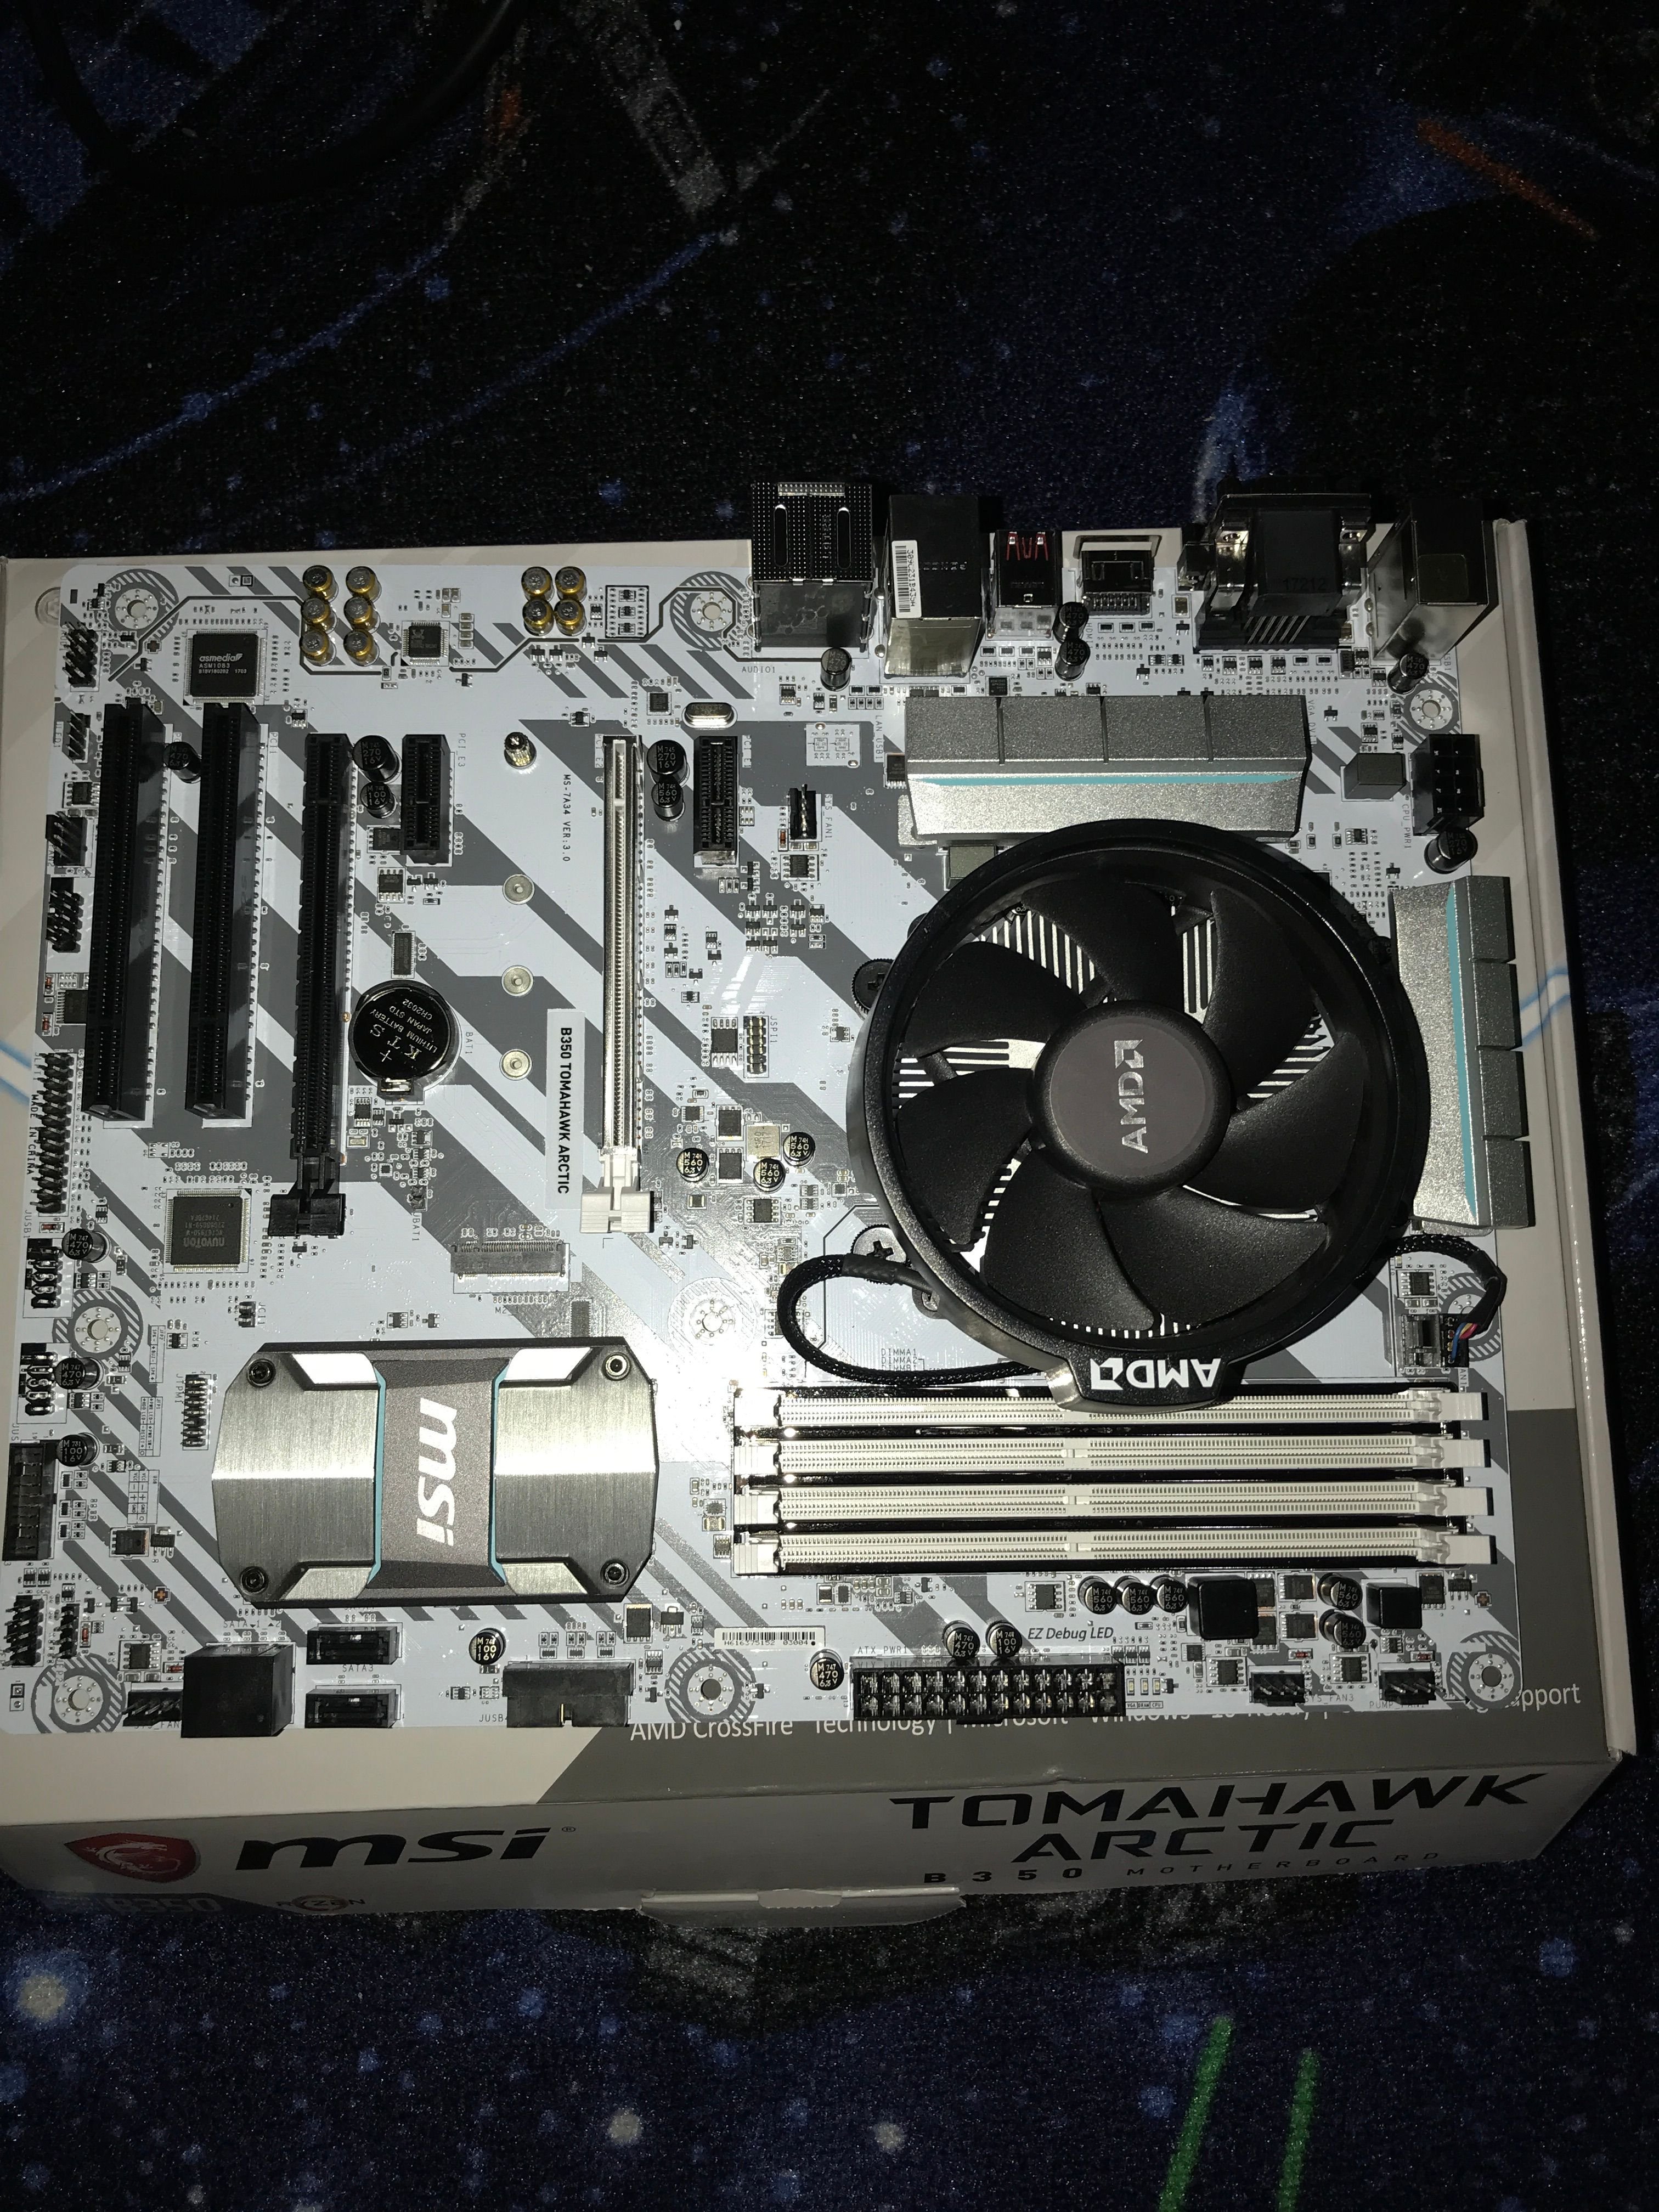
With the CPU in place next job is install in the CPU cooling fan, I watched a guide for this - because the fan is a recantangle it can only mount in certain directions - the guide said to put the AMD notch towards the ram slots - but afterward I noticed it blocks notch 1. The motherboard had some quick mount clips for fans that would support it - mine did not so I had to unscrew these and then screw in the fan mounted sprung screws. This a quite a scary job, to get the screws to push into the holes and thread you need to exert pressure on the delicate motherboard - too much and you might break it - too little and they will never screw in. Even once you have the screws in - how many turns to use to get a good clamp is delicate - too many and again you could damaged the motherboard - too little and the cooling block will not be tight enough to give cooling to the CPU. I went as tight as I dared - and hoped it would be enough - testing would show if the CPU got too hot or not. When watching the guide it mentioned CPU Thermal Paste which I did not have with me - fortunately the processor cooling block had it's own stock paste applied - although serious overclockers would replace this with a high performance compound like Artic Silver.
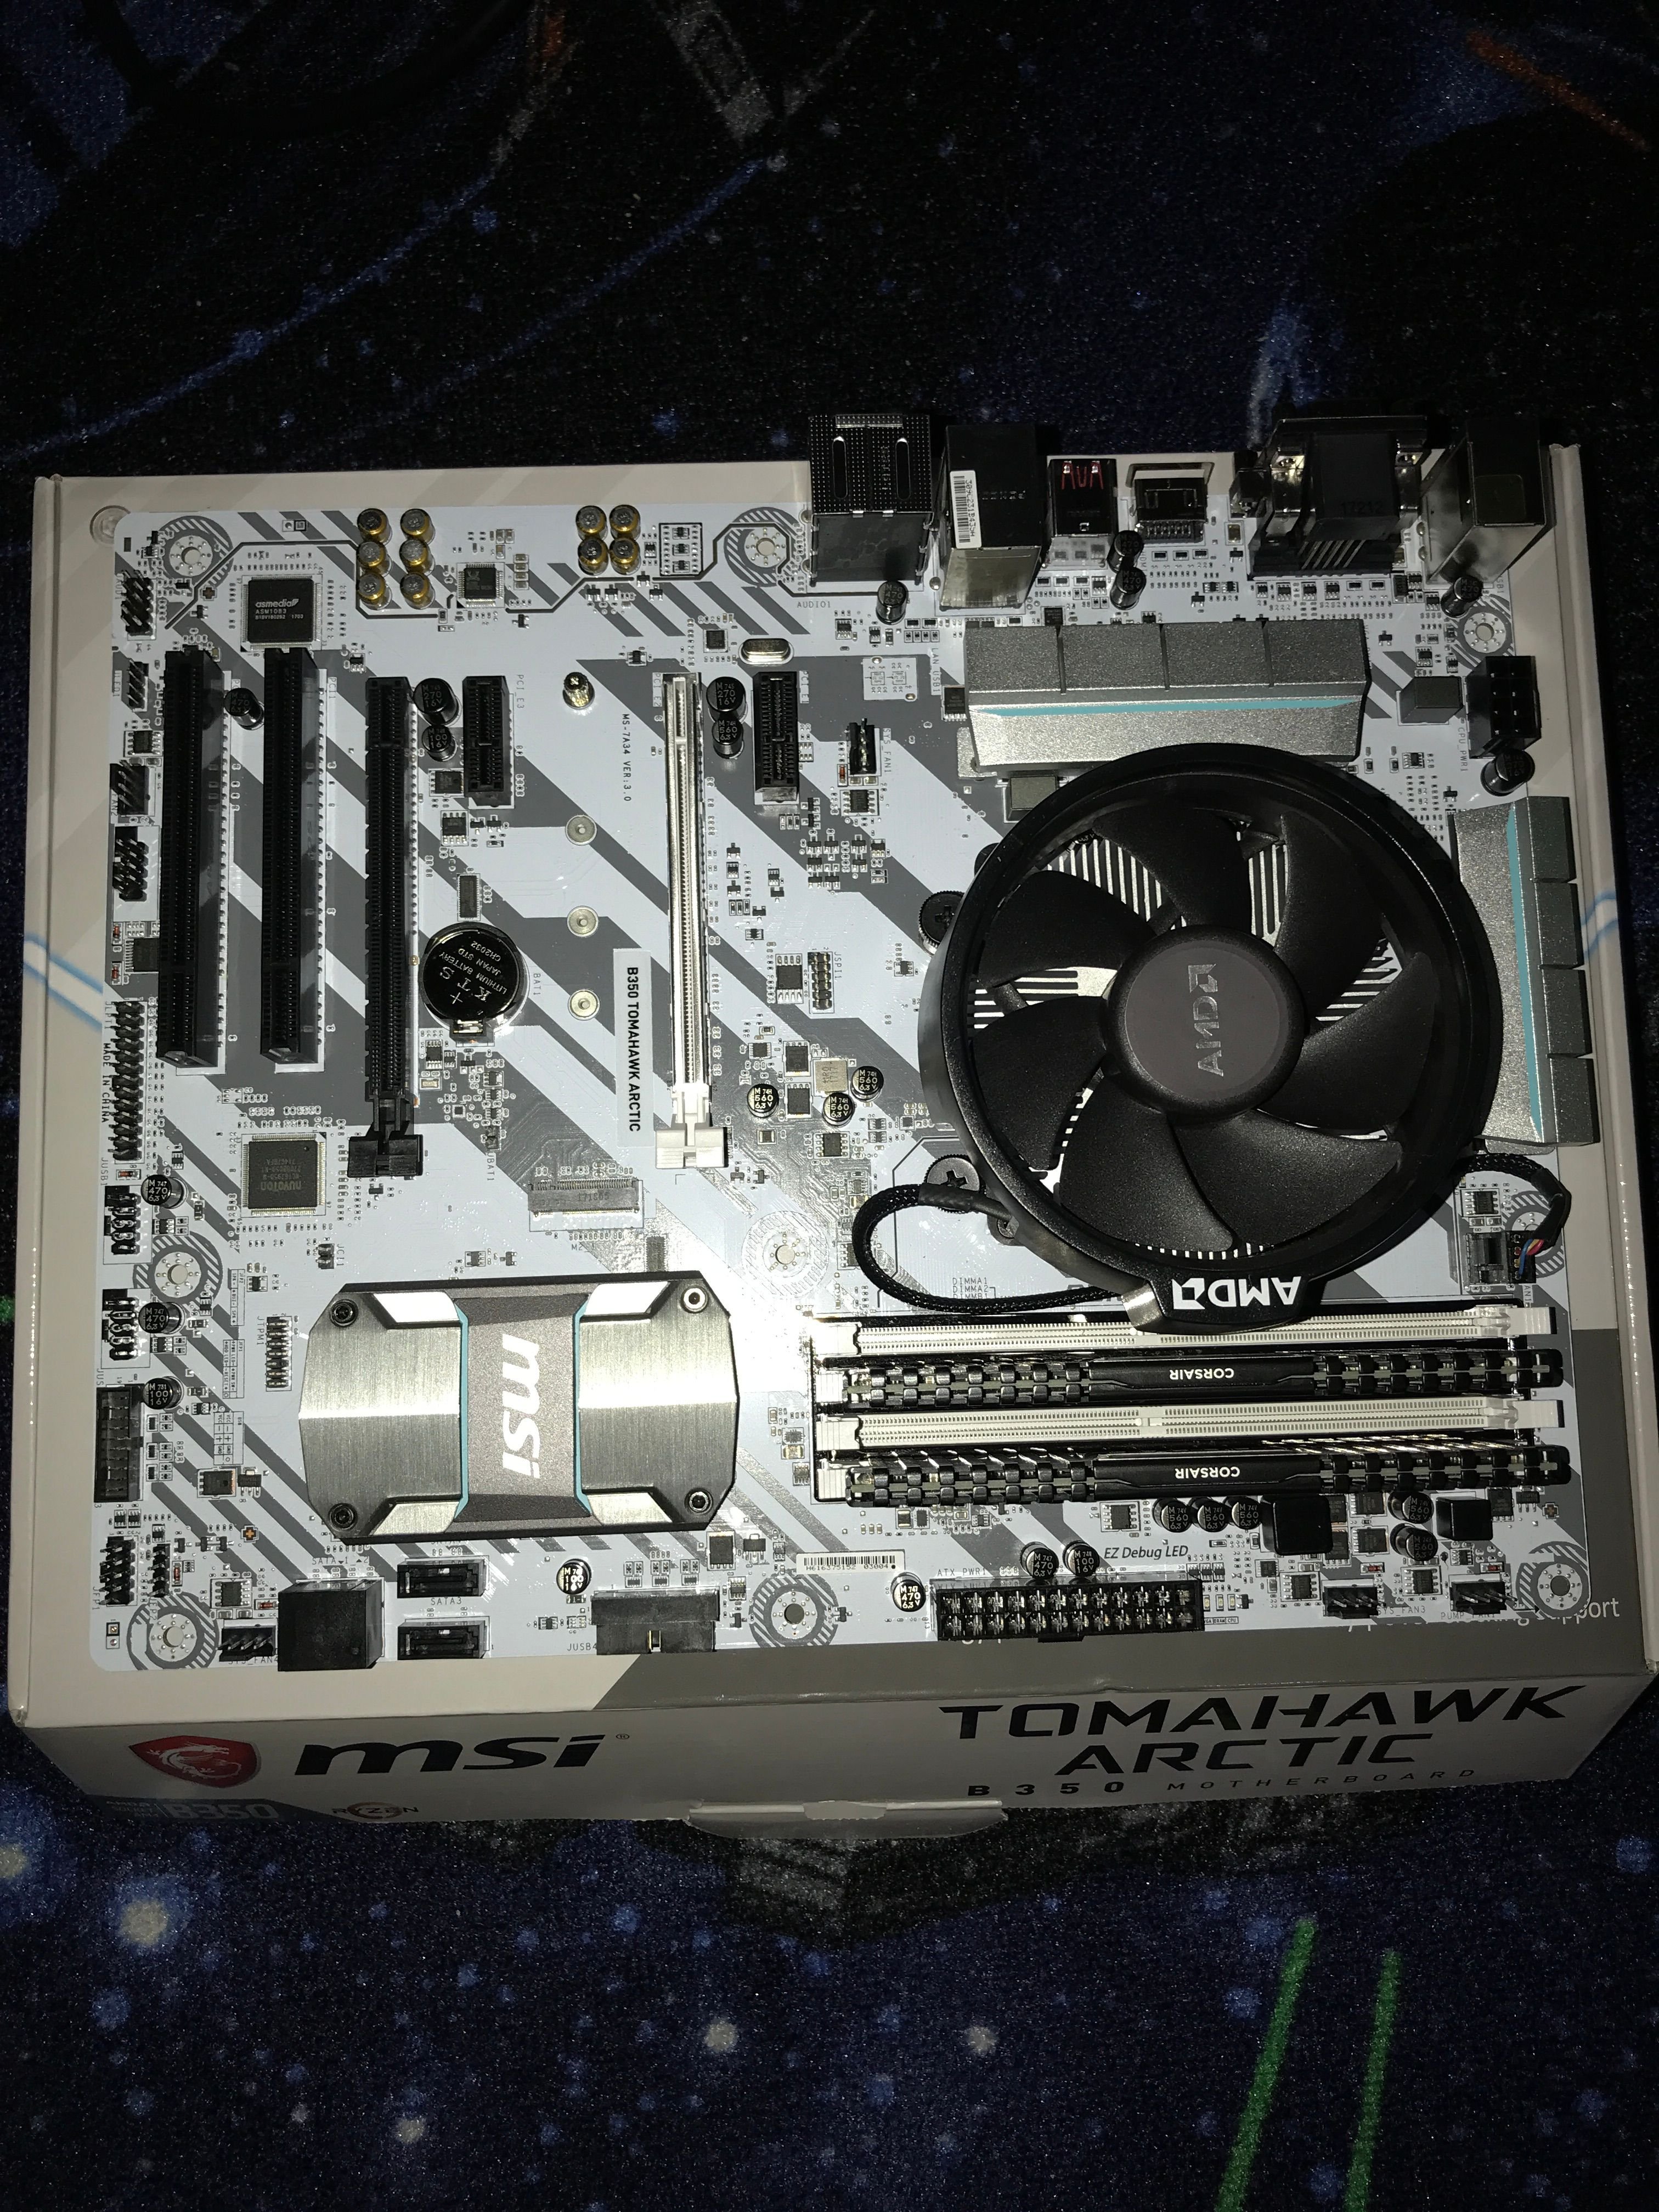
Next the Ram. Most motherboards have a special position requirement for the Ram sticks depending on the number of slots you are going to use. 1 Stick and the Ram goes in slot 1. 2 Sticks and they go in 2 and 4 - not very logical but fortunate for me as I covered slot 1 with CPU fan!
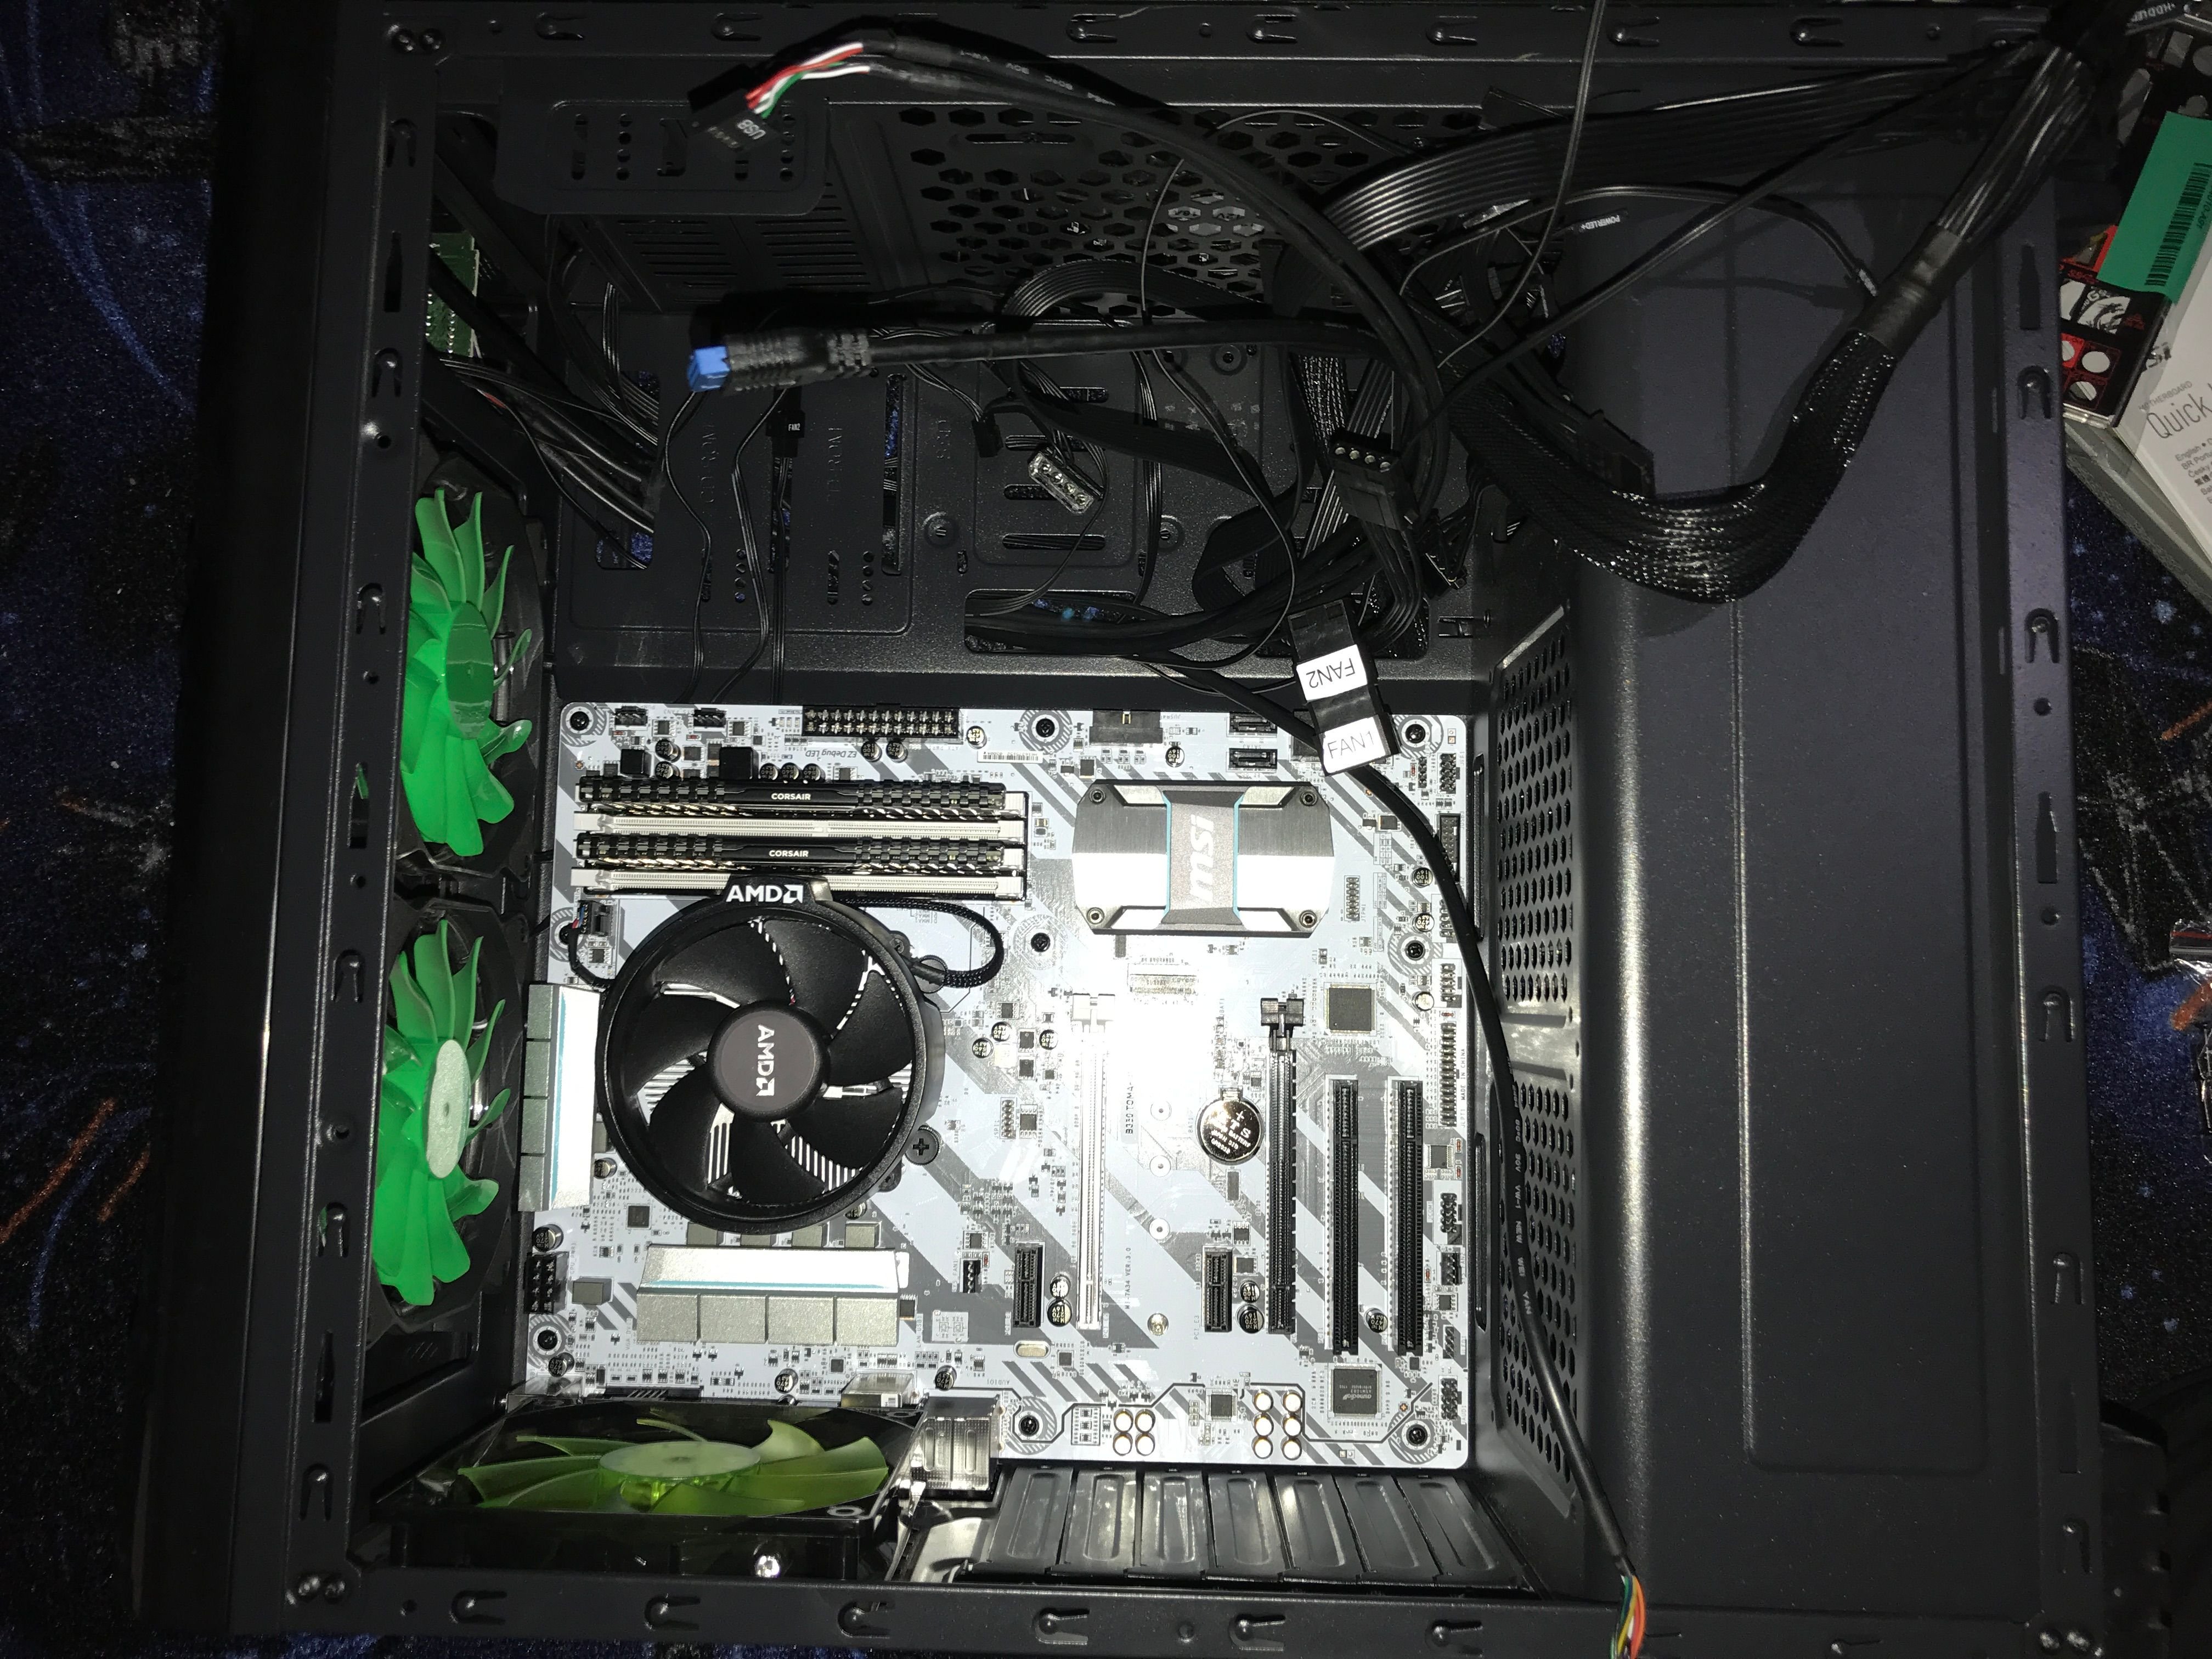
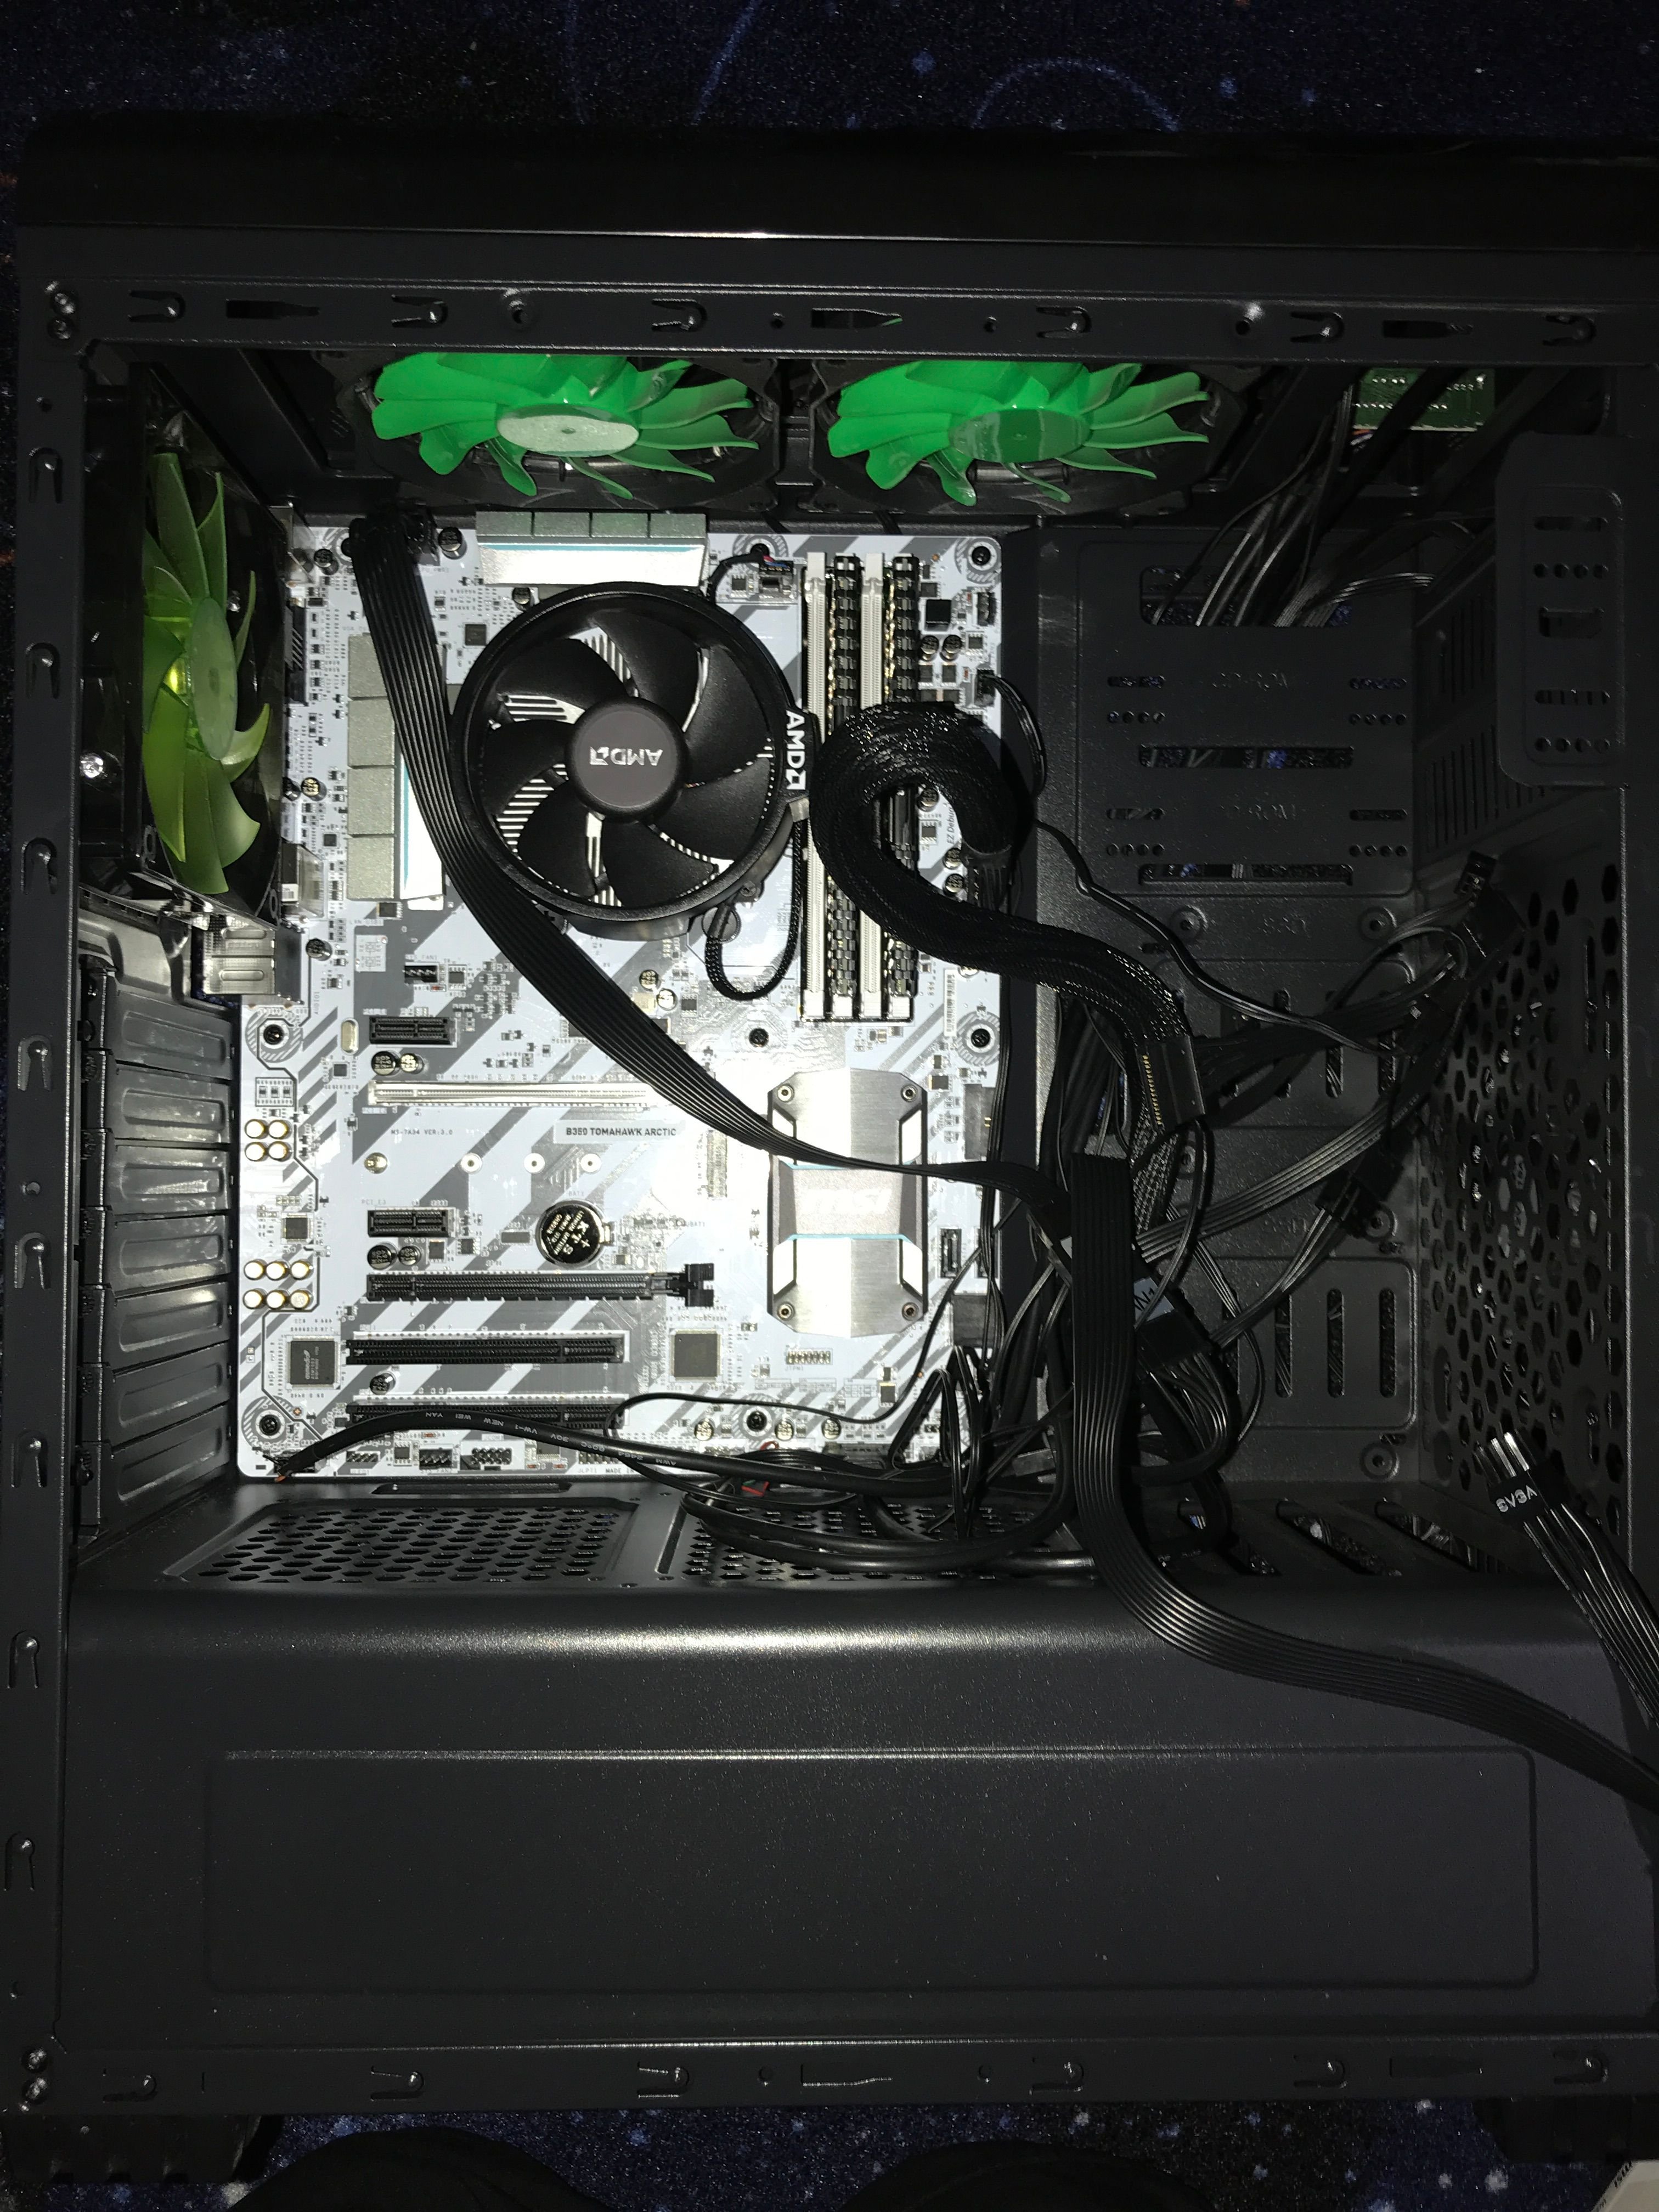
Fitting the motherboard into the tower proved tricky because of the pre-installed fans - would have been easier if I removed them first but I managed with some delicate wiggling. Prior to fitting the motherboard in, I pulled all the required cables through one of the bottom slots they pass through in the case. This proved to be a big mistake. Shout out to @techmojo for pointing out my terrible cable management. This one decision really caused it - and once I had realised my error I was way to far down plugging everything in to change it. In the future I will be reorganising the cables so they are far more tidy.
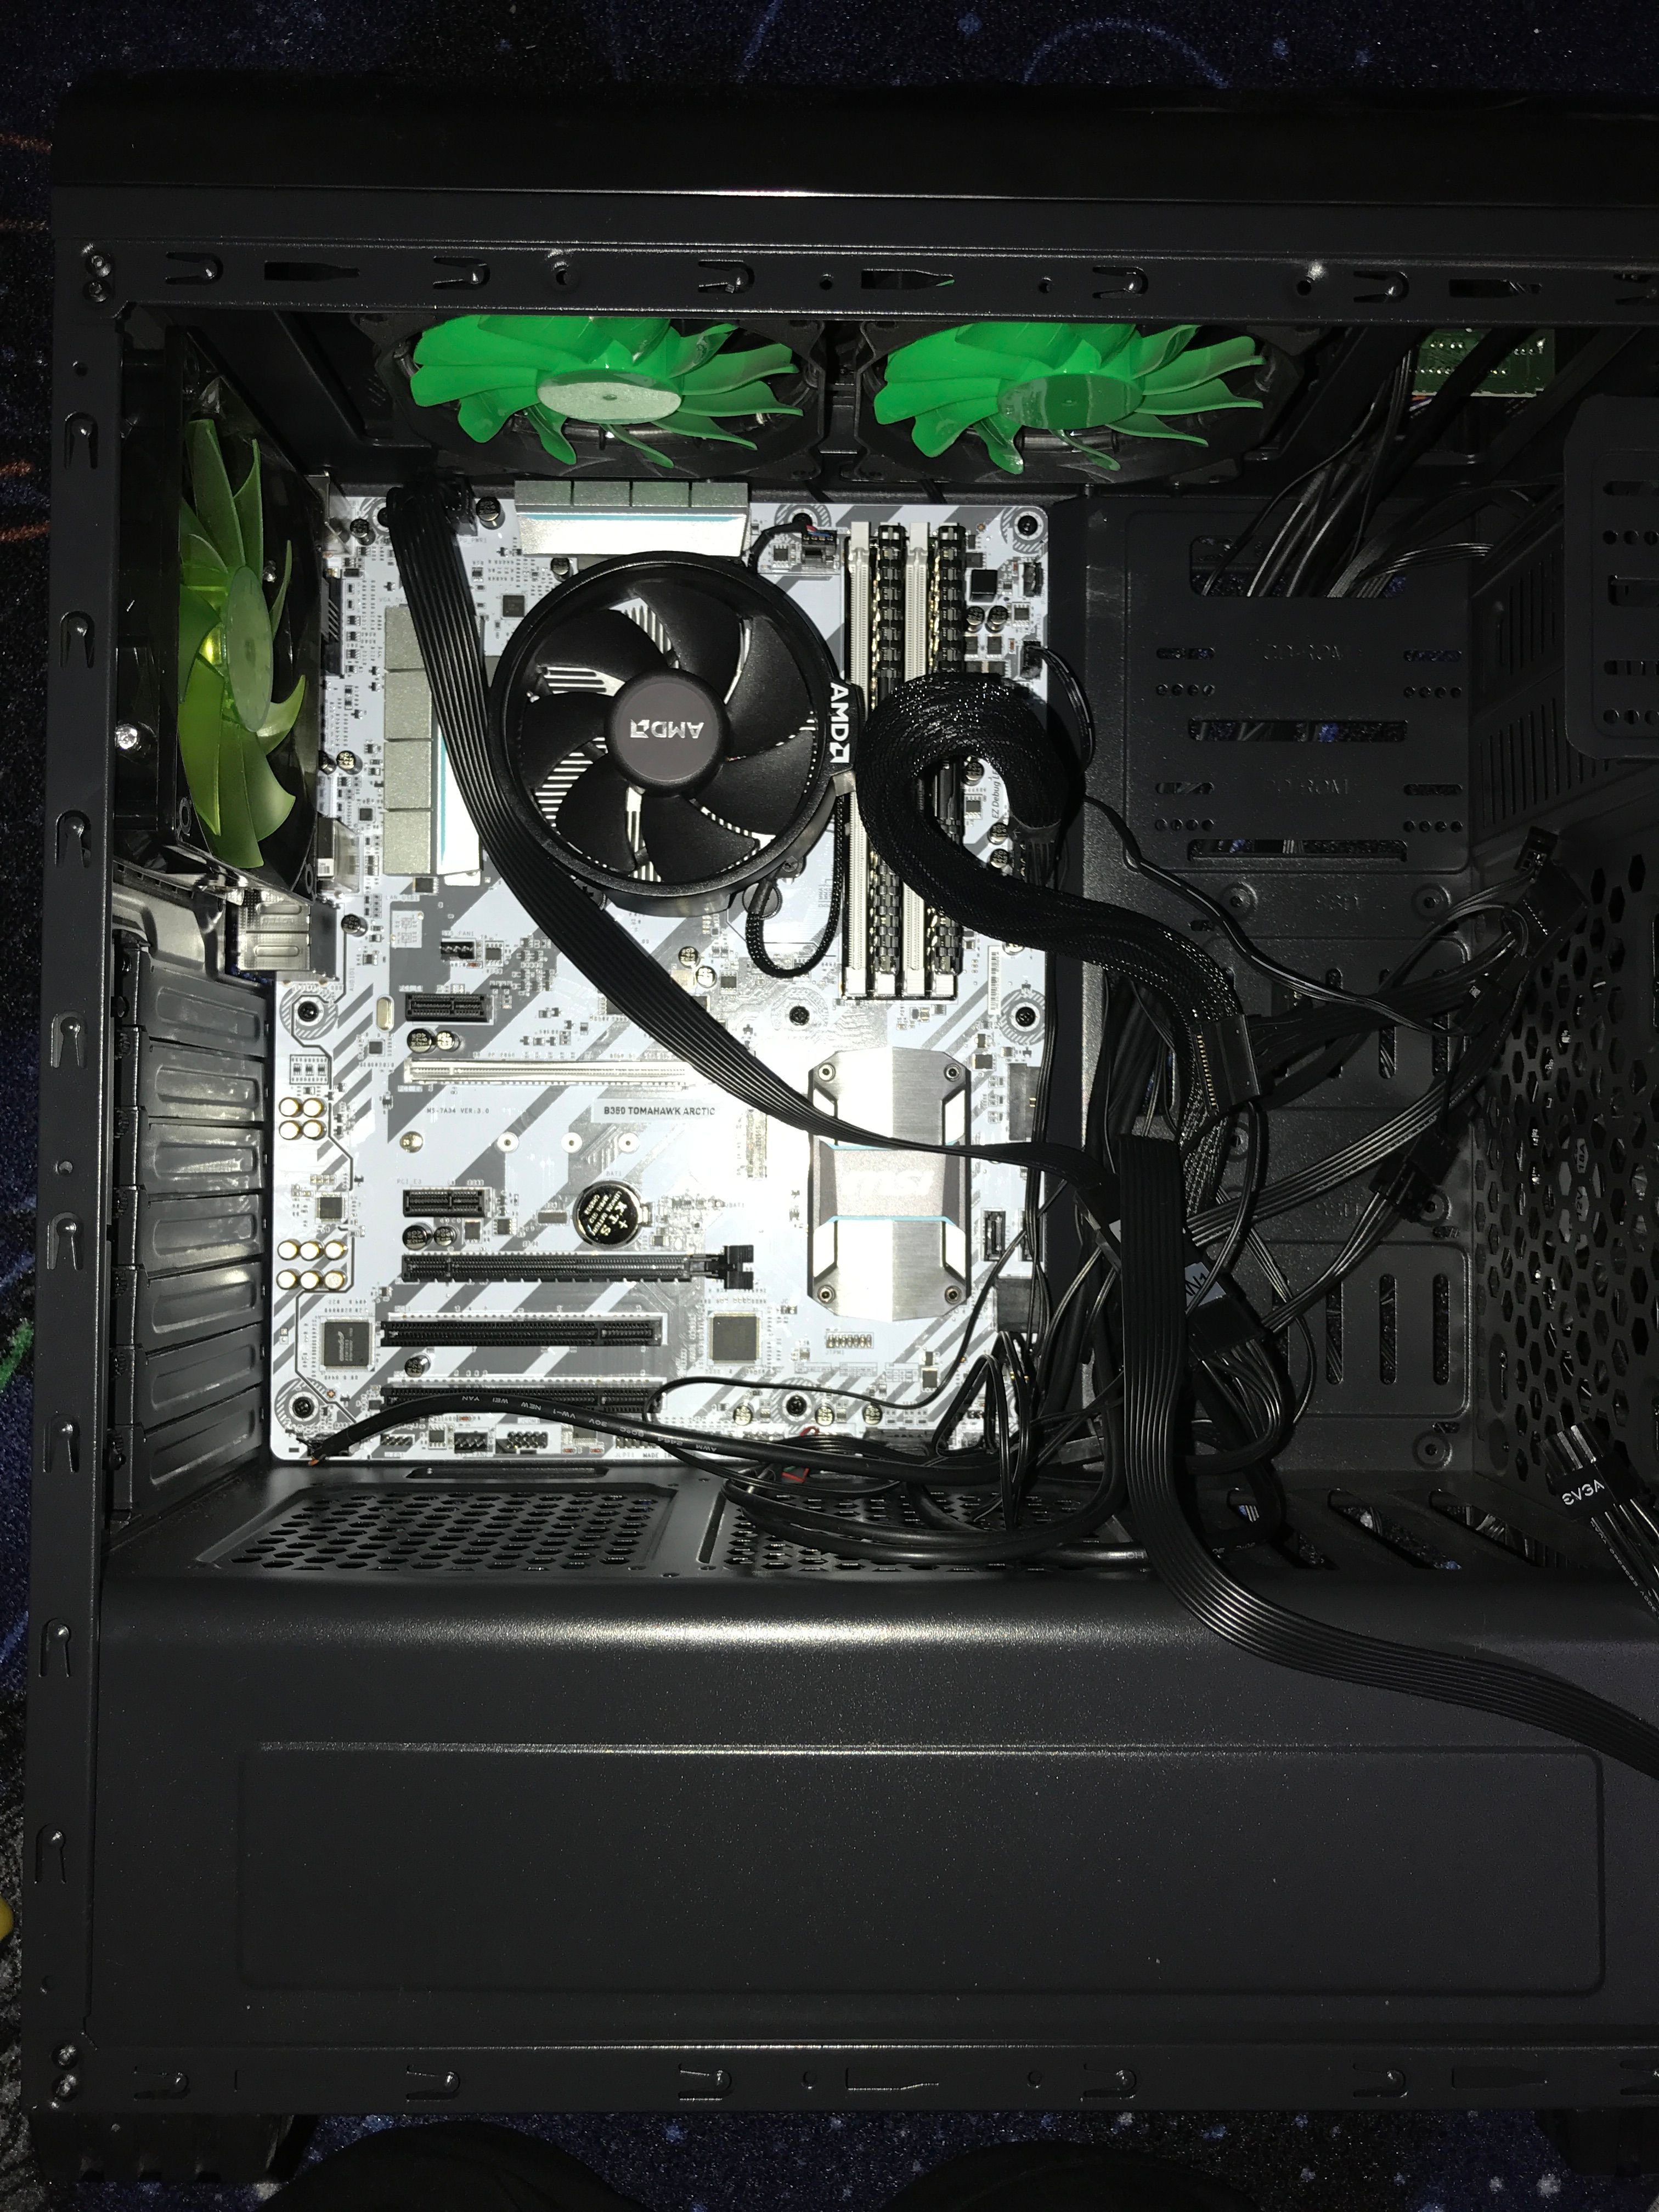
Starting to hook up the power supplies, CPU top left, mainboard power middle right, and then the various case io ports and button connections on the bottom. These connections are very tricky - lots of tiny connectors which need to be fitted to the correct pins - and in a hard to access place as this tower case has the base set aside or the power supply.
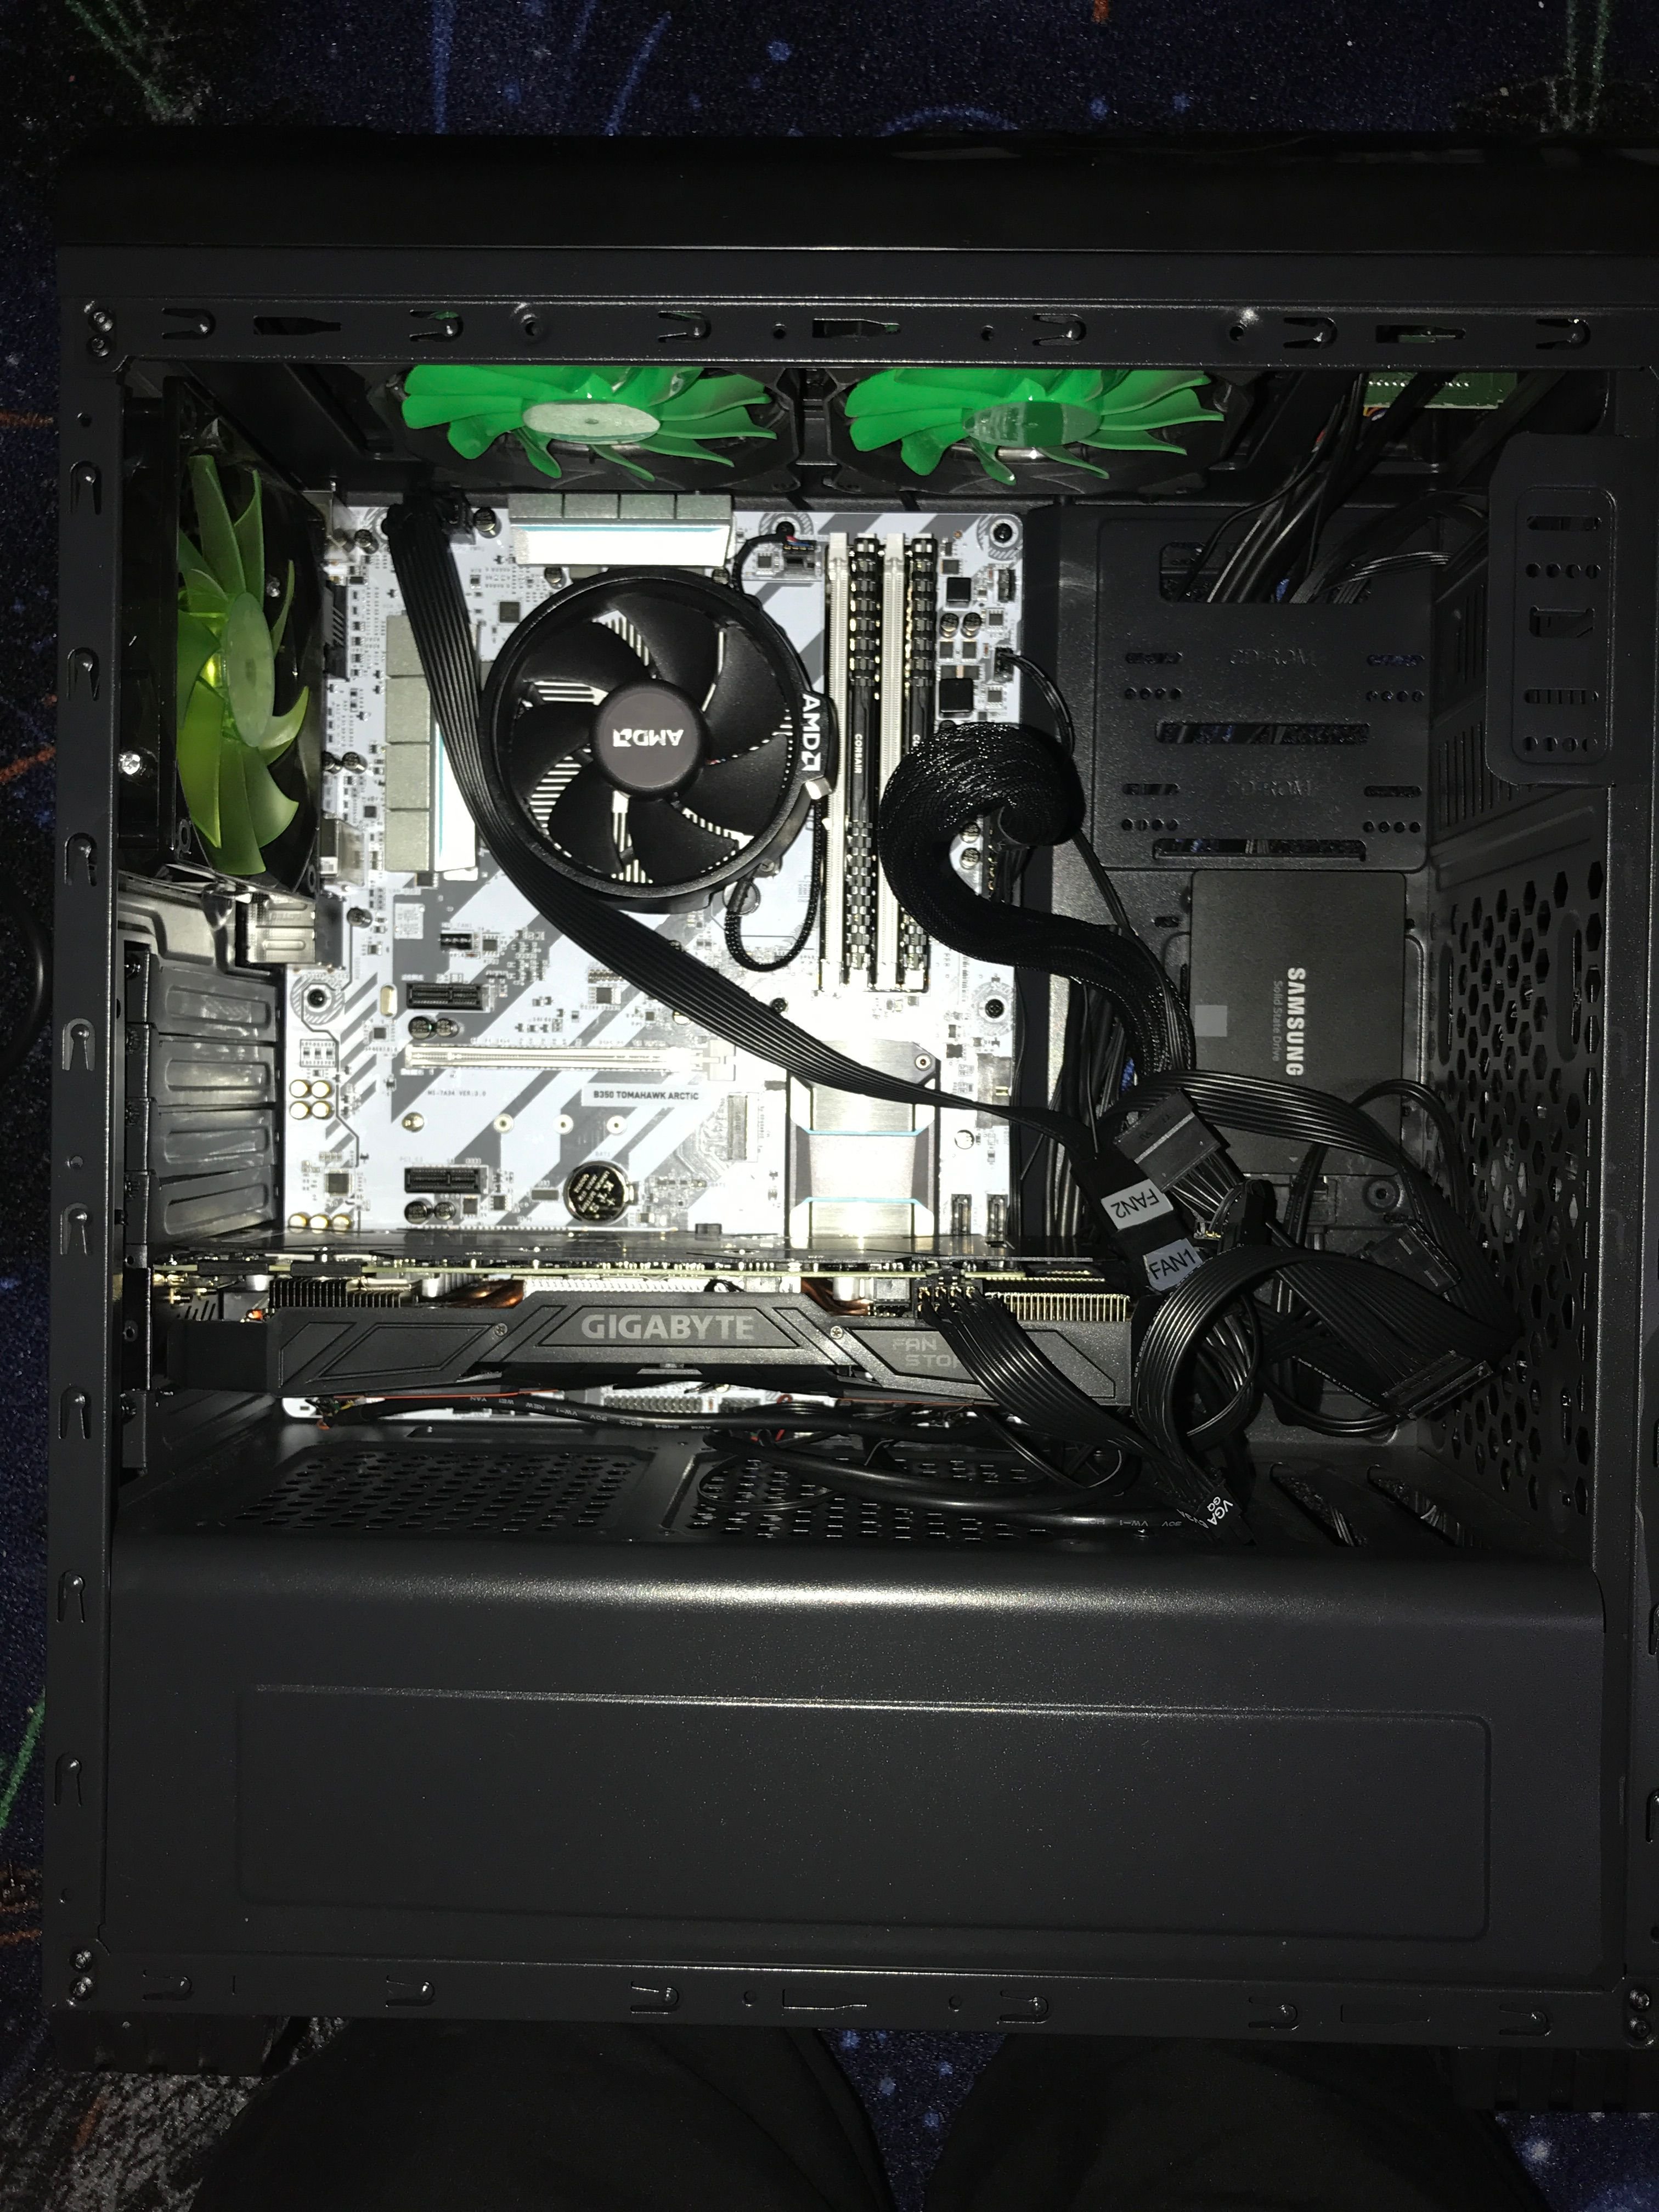
Finally the Samsung SSD is fitted - this was tricky because all those cables I pulled through the bottom slot on the case back wall - they pass right in from the SATA connections - what a genius. And then the massive GTX 1070 graphics card is so long those same cables also got in it's way! After much wiggling and pushing it all fitted in - time to connect up the power and see if it will run.
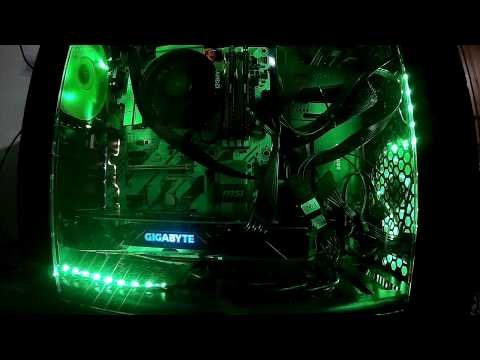
A quick video of the green machine in all it's splendour. To my surprise it booted up first time to the bios screen - somehow I had managed to connect everything needed - and more importantly to the correct sockets and pins! Installing Windows 10 from a usb installer I created was surprisingly quick and straight forward - it then booted straight to desktop and required very few updates to be all up and running. The graphics card needed a few installs of it's bespoke software to get it up and running on full power - but that and the bench marks and testing is for another post.
If you enjoyed my post don’t forget to leave an Upvote, feel free to comment on what you liked or where I can do better even. Follow @c0ff33a for regular and varied posts, photography, my weekly VLOG, posts on coffee roasting and brewing - just follow and see.
JoinSteamfollower and get upvotes in return for upvotes
https://steemfollower.com/?r=158
It’s free, simple, easy to find new content to upvote and get your own content seen by more users and possibly upvoted.
My Dash Wallet
dash:Xqjemfc9gEmrnXQ7KPdADmNpdpncMHB47C
My Bitcoin Wallet
bitcoin:1G7psTXjKV3URkF7sLprgQrcv9Ar9HoPap
Feel free to help me fill them if you have any spare crypto currency you would like to share ;-)
For more upvotes and content sharing join the GuideSteemit team @guidesteemit/guidesteemit-voting-bot-for-1-month-join-our-channel-you-will-get-more-information
Follow me on Twitter (https://twitter.com/c0ff33a)
All photos are my own, taken with my iPhone. All my steemit posted pictures can be freely used by other Steemit users in their own blog posts - all I ask is that you follow me and credit @c0ff33a linking to my post you took it from.
!steemitworldmap 53.766547 lat -1.801500 long Bradford, West Yorkshire, United Kingdom. d3scr