Among the the most intimidating perennial vegetables for the home garden must be the humble asparagus.
I'm certain lots of people have been dissuaded from growing this wonderful plant just by reading an article or a guide (or a schematic, for crying out loud!) about planting and taking proper care for the asparagus.
Well, I don't really care about proper anything! And I'm here to tell you starting and maintaining your asparagus patch is super easy and for a relatively small effort, you'll be rewarded with an even-renewing perennial crop. The only thing required is willingness to not care much about quick and massive yields.
What not to do
Do not over prepare. Do not buy asparagus crowns (that's another name for the clump of roots the plant develops). Do not dig trenches that rival a castle moat. Do not purchase truckloads of compost and manure. Do not spend obscene amounts of time and labor mounding soil. Do not fret about watering.
What I did and it worked wonderfully
A step-by-step guide for the laid-back gardener.
Some time in late summer/early autumn set aside a space of your garden that will become the asparagus patch. If it has not been worked before, do a light dig with a broadfork or a digging fork to loosen the soil. Don't overdo it. If it seems like hard work, you're overdoing it. Sheet mulch it deeply, or at least pile as much straw as you can on top of it. Whole bales work too (it's what I did).
Purchase asparagus seeds. 100 or more, depending on the space you can afford to set aside for an asparagus bed. You won't be planting all of those at once. Choose a heirloom, open pollinated variety, not a hybrid. I went with Connover's Colossal, a green variety.
In spring, after the last frost, fill some seed trays with large compartments with compost or plain soil, mixed with vermicompost (worm castings). You can also use commercial peat-based mixes, however I'd rather use plain soil than bring in unnecessary inputs.
Put a single seed in each compartment of the tray. Water well and do not allow to dry out completely. Keep the trays outside, no need for coverings, lamps, extra plastic, etc. You can also use large soil blocks, but make sure those are extra sturdy, as growing roots of the asparagus can and will make them fall apart.
In late autumn the same year, remove the mulch you laid down in step 1, do another light dig and plant your asparagus babies as deep as you can. 20 cm (8 inches) is plenty. If you're feeling generous and have some home-made compost at hand, sprinkle some on top of the bed. Mulch it deep.
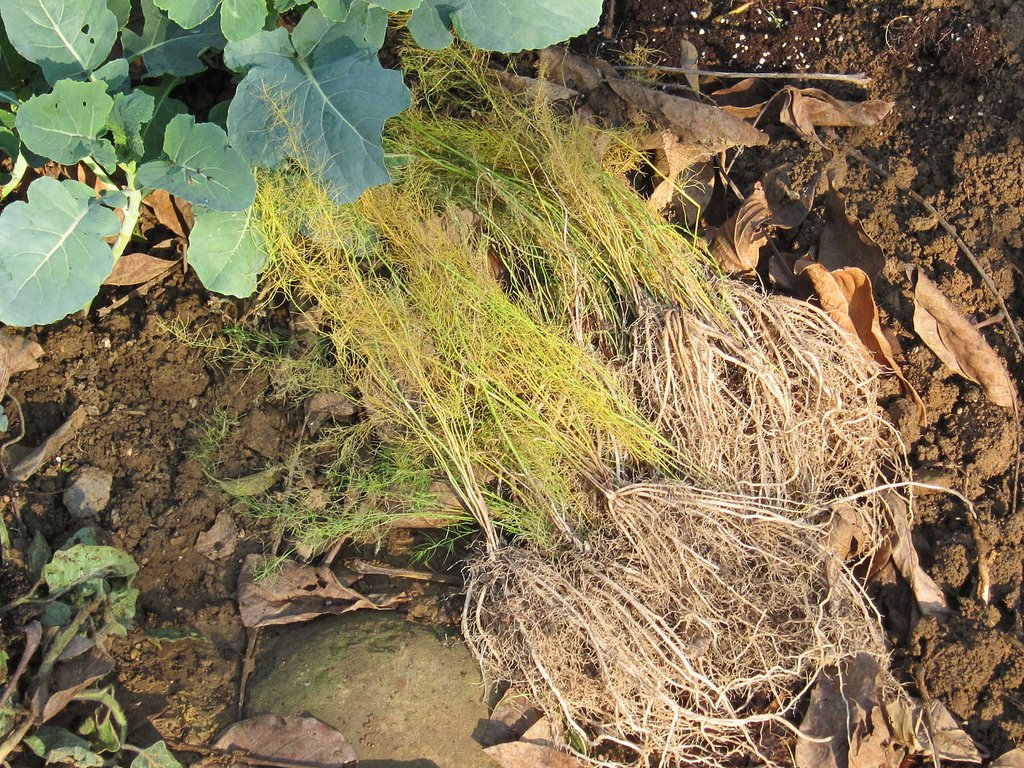
Our first baby asparagus waiting to be planted out. In this occasion I rinsed out the roots, because I wanted to see them fully extended and to compare growth in different containers. I don't do it anymore and you don't have to, unless you're as curious as me :)In early spring, enjoy your first (toothpick thin but still super delicious) asparagus harvest! The first year pick only one "spear" out of each plant, provided it sprouted 2 or more. So if some crowns make a single stalk, let it be. The second year you can pick 2, following the same rule and so on. Do not forget to go back to step 2 and plant another batch of your seeds!

Those are actually second year stalks coming through woodchip mulch, but the excitement is the same each and every year!
Eating (baby) asparagus
OK, this may sound strange, but the best way to eat asparagus is raw, freshly cut (or snapped, as it often the case). And I don't mean like a salad or something fancy, but just snap it and eat it.
You may have noticed the Latin name of the asparagus is Asparagus officinalis. Officinalis means medicinal. Since ancient times that plant has been used for medicinal purposes. Find more on that at Organic Facts. Only in the last few decades it has become a luxury food.
Asparagus is most useful to our bodies when eaten raw. And it tastes great! What's more, kids chomp it down like crackers! While the limp, slimy, cooked variety is usually regarded with mild disgust, quickly evolving into aggressive panic, if the parent is being too persistent about eating the greens...
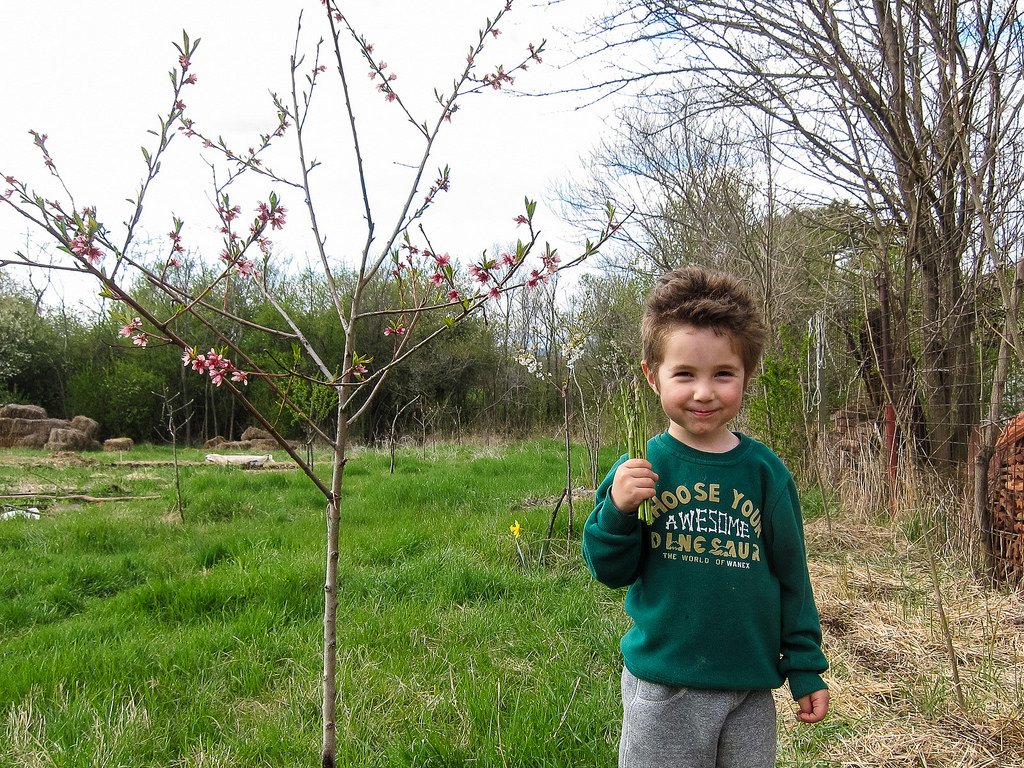
Our son proudly showing his first asparagus harvest, next to a blooming baby peach tree. That should give you an idea about timing. Oh and this bunch of stalks was eaten on the spot by him and his year-and-a-half old sister. In like 5 minutes. I literally had to slap-fight those two for a nibble!
What's more, in the first 3-5 years, you won't be getting those thick asparagus spears you can find the grocery store (and gasp while checking the price). So the thinner stalks are hard to cook the traditional way and much more suitable for a quick snack in the garden.
Maintenance
You might see a pattern emerging in my posts... But if something can survive with minimal or no maintenance, I'm not the one to fret over it, I just let it be. So asparagus does receives a watering once every month of the summer and the water is usually delivered via spray hose by our son. Him being 4 years old this summer, you probably guessed correctly that 50% of the water actually goes toward watering him and not the plants.
Apart from the watering, I chop and drop the dry stalks each late autumn and add another layer of straw. In spring, I may, or may not, add a bucket of compost to the bed. And that's about it.
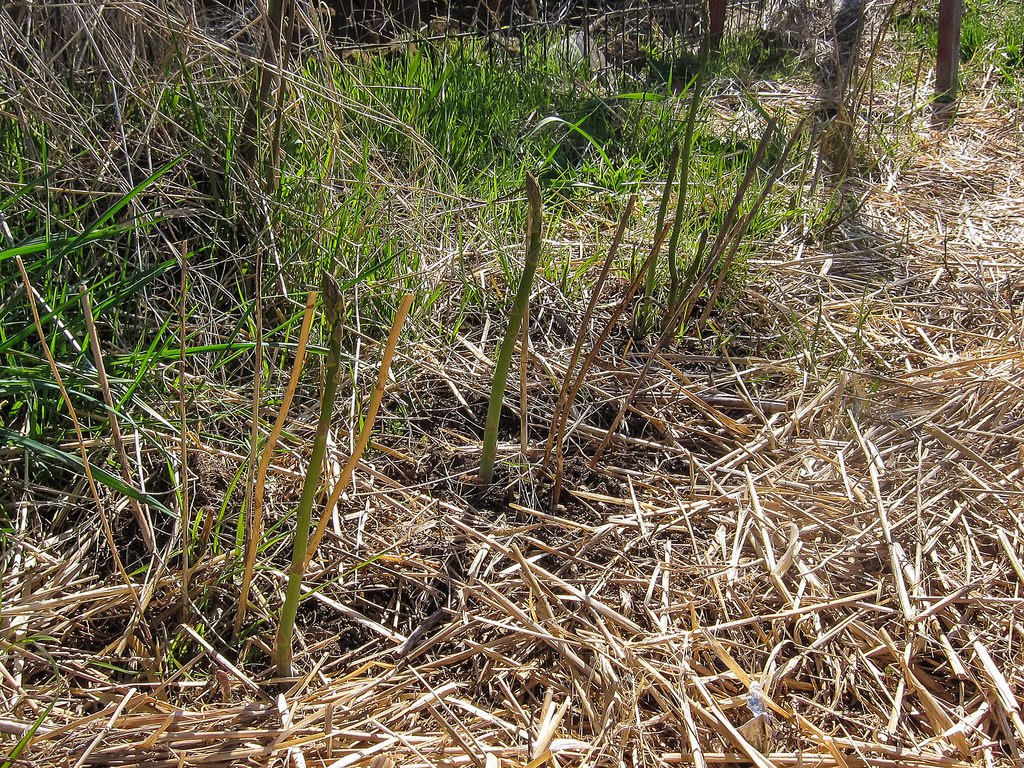
Those are 3 year old plants coming out in spring. Take note of the last years' stems - I left them for reference, you can cut them to the ground. The dry stems are visibly thinner than the new growth. This means the root crown has fed well during last season, it has grown and is now producing bigger stems!
Of course, there's the annual planting of new baby plants that you grew in the summer from seed. The aim of that is to have an asparagus patch of diverse age and avoid "a collapse" down the road, where most of the plants start dying out at nearly the same time.
Also, there are always some losses with this minimal maintenance. Some of the babies dry out in hotter summers. Other are lost to severe winter frosts. And others are just grazed by neighbors' lambs, but that's another story. So you'll probably need to start a tray of seedlings each year, just to be sure. Plus, baby asparagus is a great gift for anybody that loves plants! You can even gift them potted and it's an edible houseplant!
Seed saving!
I deliberately saved the best part for last! Asparagus will bloom tiny flowers, who will turn into tiny spherical fruit that in turn will become startling bright red as the foliage dries out. Flowering usually starts after year 3, but it can happen sooner, so be on the lookout when cutting the dry stems!
Those tiny red globules hold the secret of your ever-renewing asparagus patch!
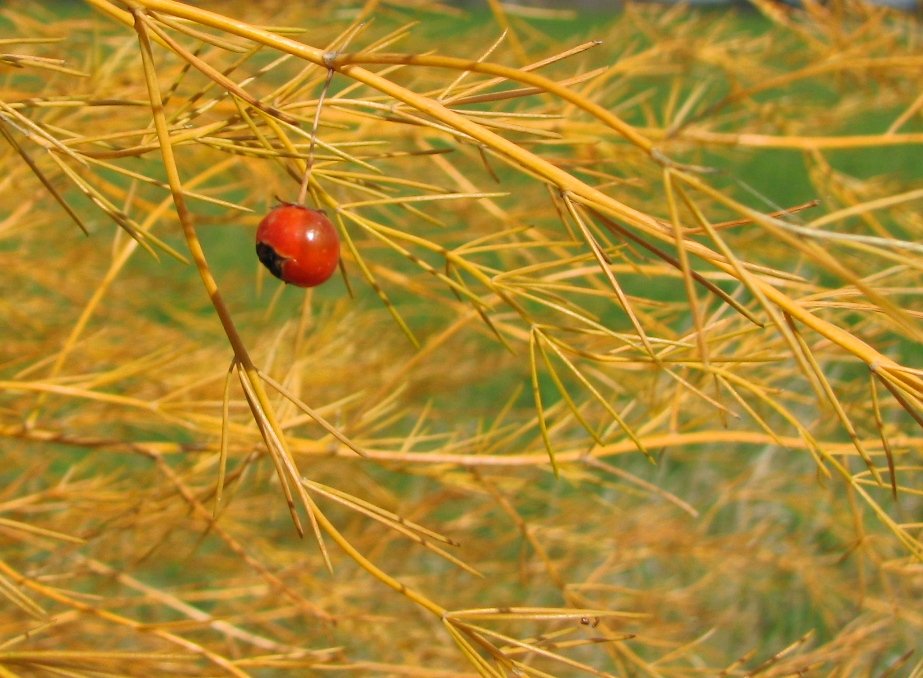
(Sadly, I don't have a photo of my own, so I'm using one from Gerald Wykes.)
Collect them and keep them for a few days in a glass of water, until the red pulp turns gooey and soft. Rinse them out in a sieve, gently pressing them with your fingers. That will make the seeds inside come out clean.
Dry the seeds on a towel and store them until next spring. Then take out the seed tray and... it's the ciiiiiiiircle of liiiiiiife!