Urban Farming and especially Hydroponics been my passion for over 8 years now.

After my first encounter with this technology I have been immediately hooked on the ability to grow such a wide variety of plants in a completely controlled environment, without the need for soil or over fertilization.
But the thing that amazed me the most is the versatility of this technology, the ability to grow food in places where it was not possible before.
To be able to grow proper nutritious food, several things must be present in the growing environment, I will not go into this in this particular post, but the point is that to grow food we either need a very fertile natural soil that been fertilized with organic mater or we need a low-mid grade soil that must be supplemented with fertilizer in order to provide the proper nutrition required for healthy plant growth.
This over fertilization causing a heavy load on our environment, due to pollution of aquifers and surrounding vegetative life, the growing population that requires more food causing a growing need for that soil to grow that food and that speeds up the process of pollution.
On top of this we can add the massive distances our food travels just to arrive to our plates and the huge amount of water we use to effectively water those crops and we end up with a very polluting, non-efficient industry.
Hydroponics can help to solve this problem, by allowing us to grow food in any place we want, be it rooftops, balconies, abandoned buildings in midst of cities, in space...
So although web freelancing at the time, about 7 years ago I have opened my first business that was building custom hydroponic systems at peoples homes.
At that time, hydroponics was a very niche market, nobody knew what it was and how is it possible to grow plants on water.
But today there is a growing interest, people and businesses are turning to a more sustainable way of life and changing the food they eat and therefore the ways they grow that food has a big part in this change.
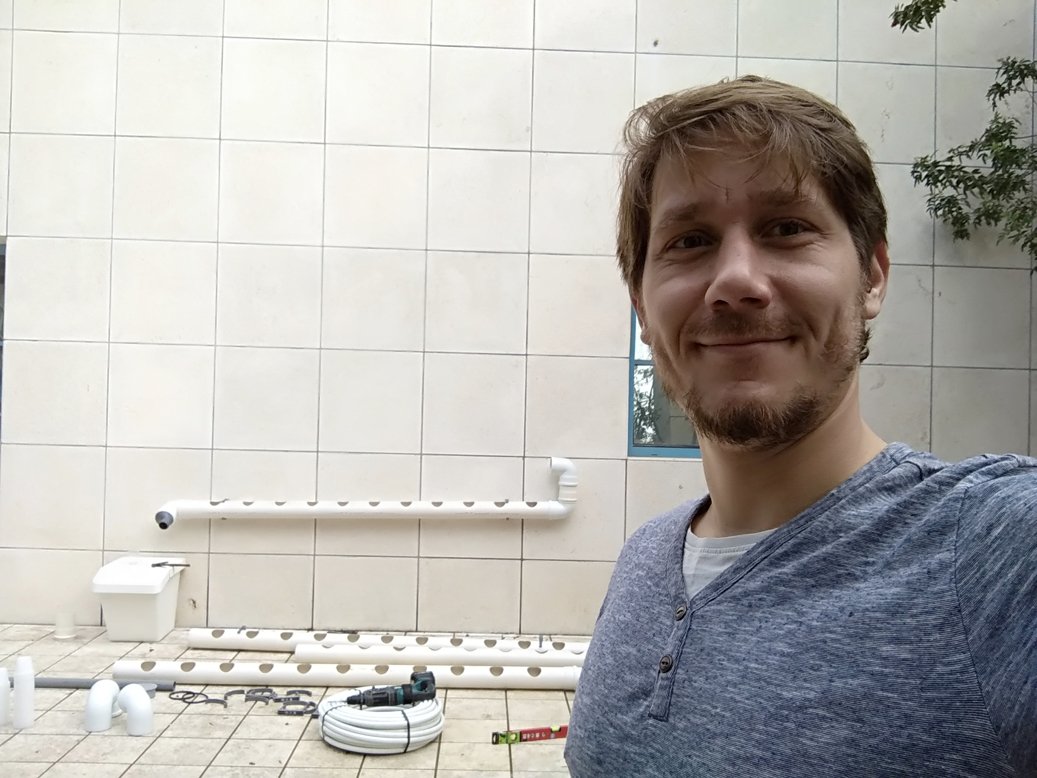
So today I want to share with you a simple system that we recently installed in one of the schools in Israel, you can easily build it at home with a minimal budget.
We have installed hundreds of those systems all over Israel and can say for sure that they work like magic.
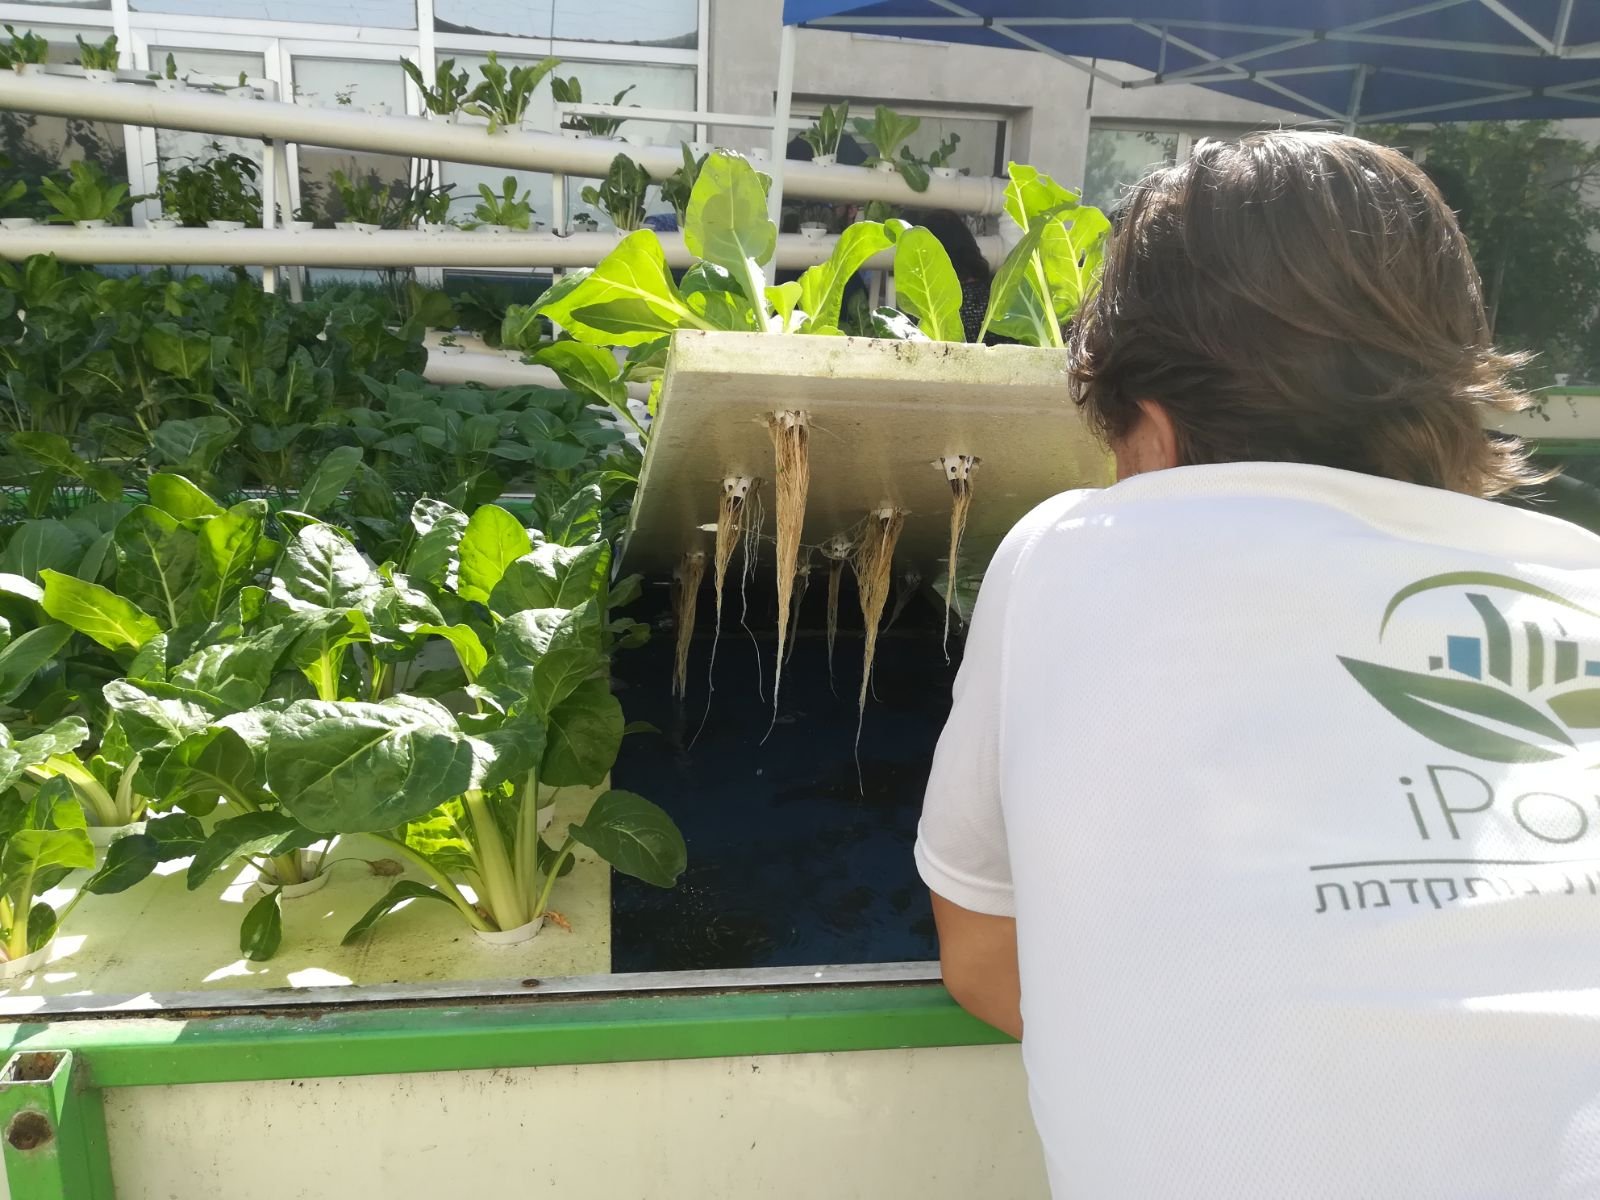
The specific technique I want to share with you today is called NFT - Nutrient Film Technique - its basically letting the nutrition mixed water to flow on a tiny "slope" through a pipe or a channel of a sorts.
So what do we need before we start building this hydroponic system?
So basic stuff:
A Wall - If you want to grow plants for food (vegetables), preferably a wall with full sun exposure or at least partial (for herbs and green vegetables).
Power outlet (or an extension cable) - Make sure to cover any outlets from the rain.
Water source
Parts for the system
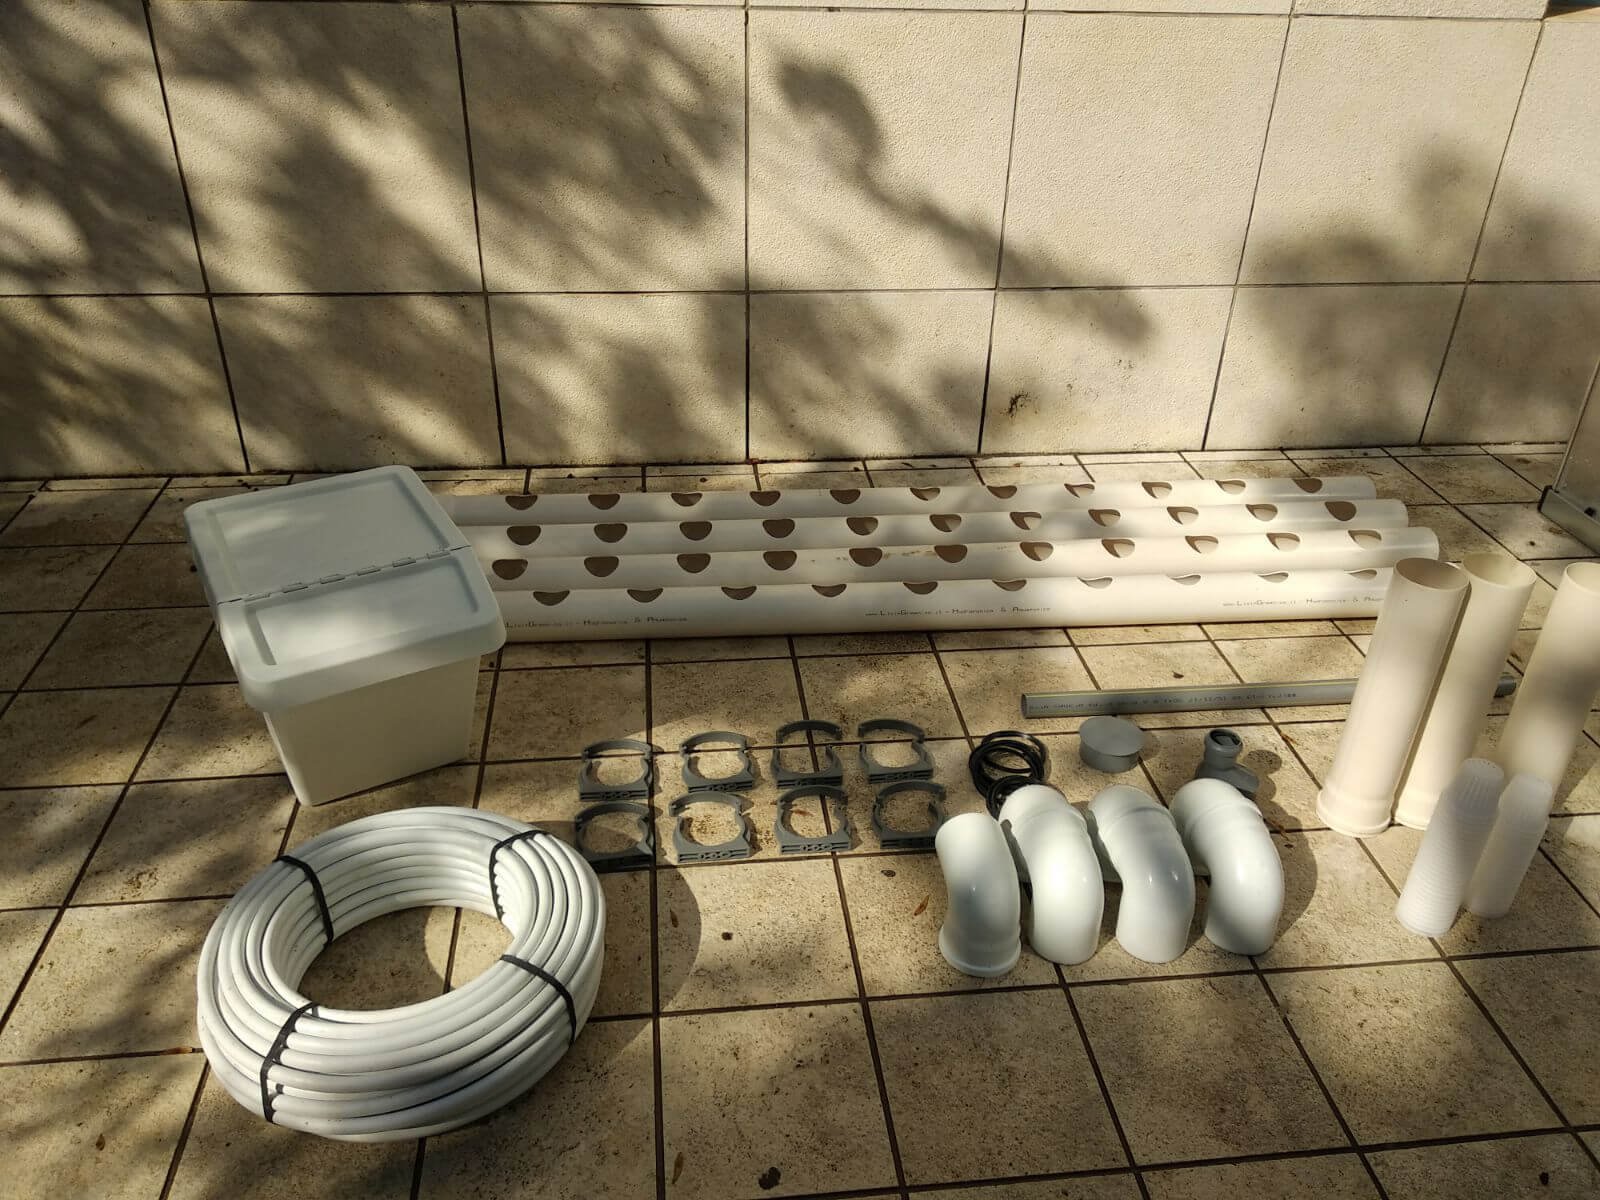
- Water reservoir - preferably 50 liters or more.
A white color will help with the heat absorption and will keep your water nice and cool.
Try to find a reservoir as water and light proof as possible in order to prevent the entry of pests and sunlight.
Drill a whole in the lid of the reservoir with the diameter of the drainage pipe and another smaller opening for the hose that is connected to the water pump and drives the water to the top of the system.
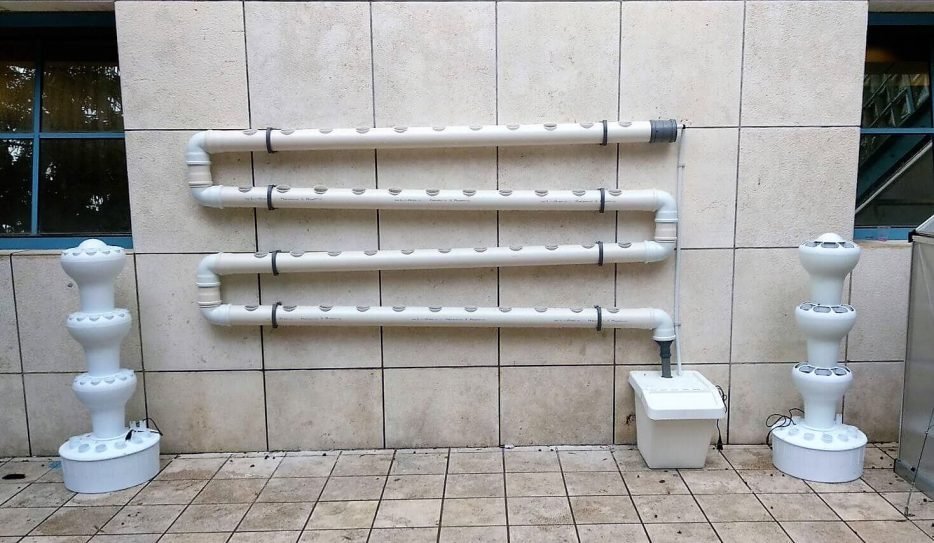
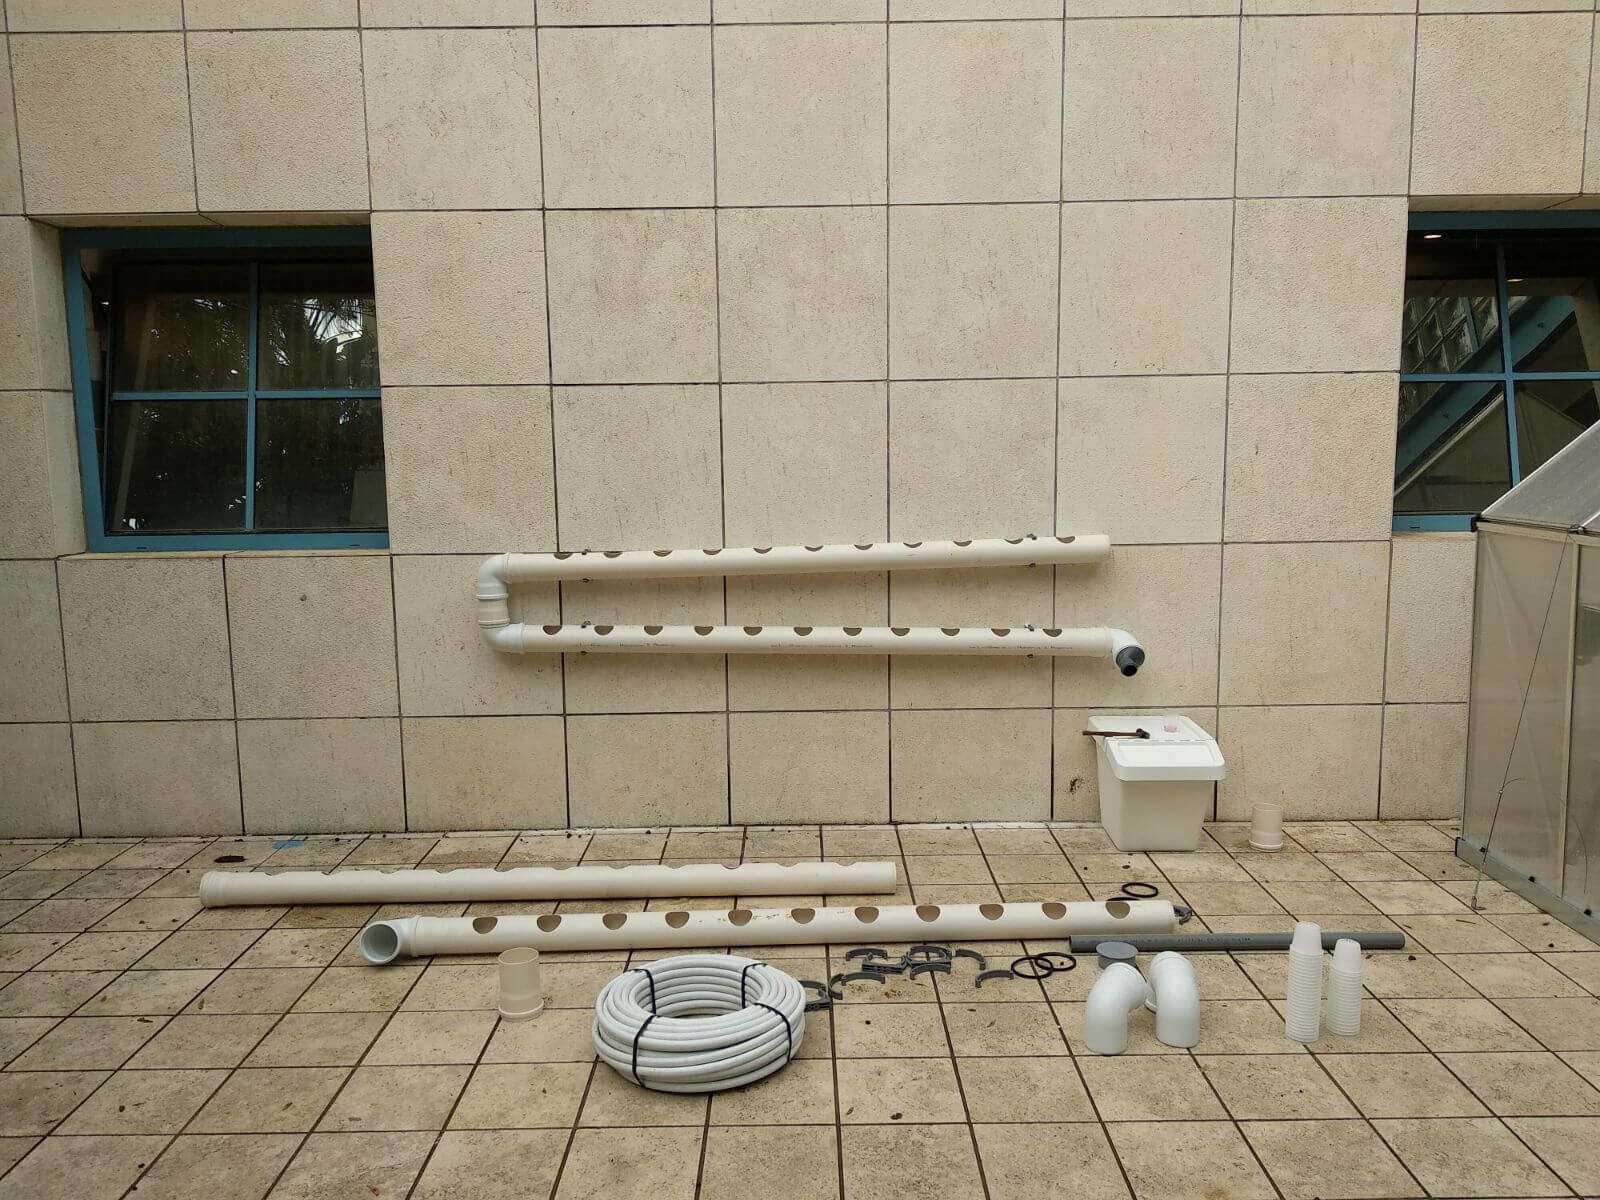
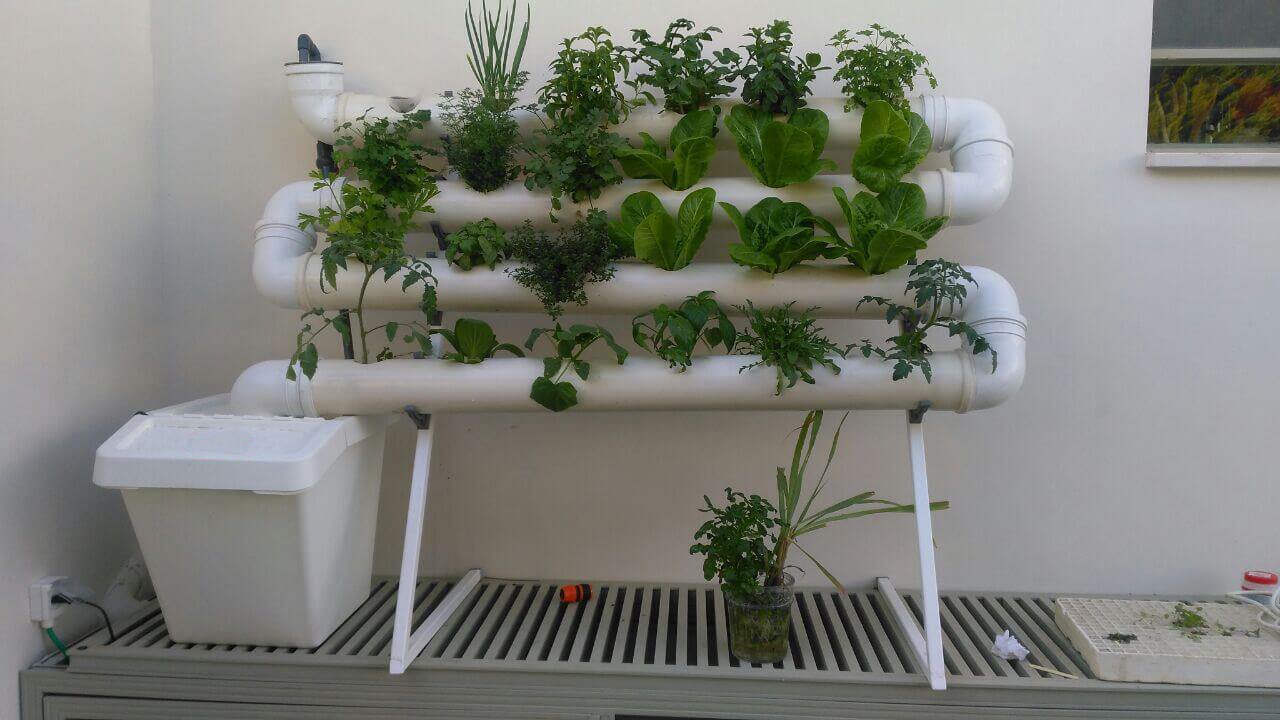
4 UPVS pipes 110 mm (mine are 2.4 meters long with 11 planting holes) - these are the growing channels where the hydroponic plants will grow.
Net Cups ( I got 44, 75 mm wide) - the cups are used to house the plants inside the system, it is important to make sure they come with enough holes for the roots to come out and touch the water flow in the channels.
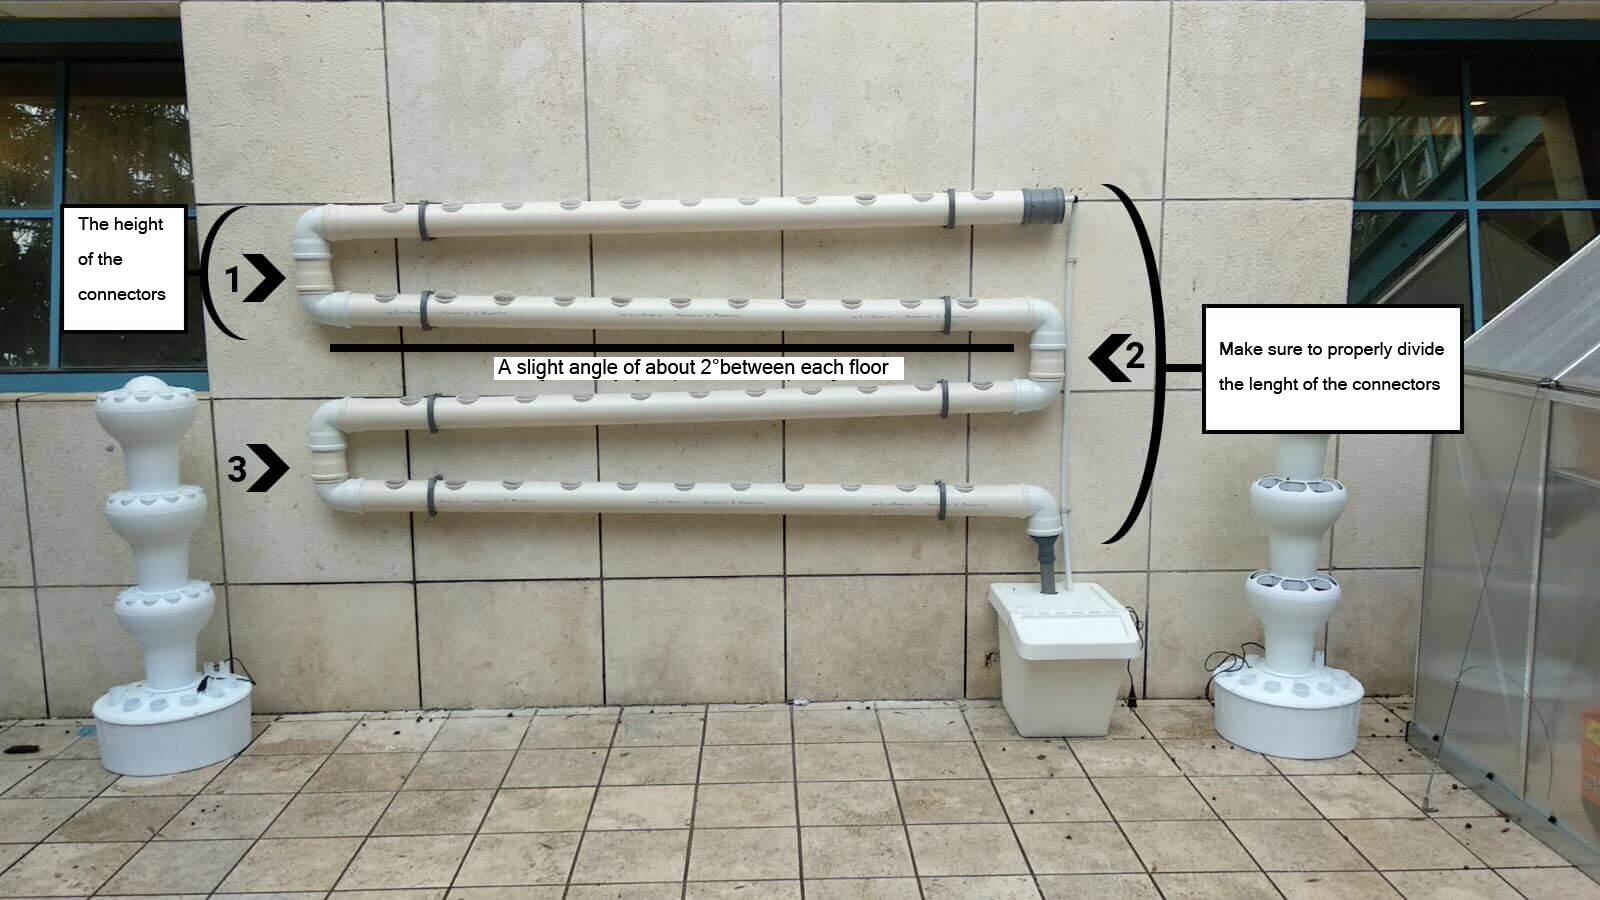
Seven 110 mm ,90 degrees, UPVC connectors - those will allow you to connect the pipes one under the other.
3 110 mm UPVC extenders ( length 15-50 cm depends on the height you want between each floor of the system) - the role of the extenders is to configure the height between each floor, they are put between the pipes and the 90 degree angles.
110mm PVC Cap - It is used for the upper pipe. This is very you plug your water hose that delivers the water through the pump.
Drill a whole with the diameter of the hose that is connected to your pump, preferably at the top part of the cap.
A water pump that can push the water to the a sufficietn height - the pump sits in the reservoir and pushes the water continuously to the top of the system.
20 mm pipe or hose to deliver the water from the pump to the upper channel at the appropriate length.
Suitable connector between the 20mm pipe and the pump's water outlet (usually comes with the aquarium pumps)
Eight 110mm brackets - the are various kinds depending on where you are, but any home supply store should have suitable ones to secure the pipes on the wall.
Fifteen 110 mm lubricated seals (rubber bands) to prevent spills between the connectors.
UPVC pipe reducer from 110mm to 50mm (4" to 2") - not necessary, you can insert the bottom angle directly into the reservoir.
Step 1 - Some Calculations and Positioning
So after picking the perfect place for your new hydroponic system, position the water reservoir at the left or the right side of the system.
You need to take in account the convenience of access to the water source .
This will be the side where the drainage of the system will be located.
Calculate the distance between the topmost point where you want to place the upper pipe and the lowest point where you will place the bottom pipe, that will drain back to the reservoir.
Split that height into the number of pipes you planning to use (in this case 4) to calculate where you going to put your first pipe.
Step 2 - Start with the lowest pipe and the reservoir
For easy assembly start with the lowest pipe of the system that drains back to the reservoir and then assemble the rest of the pipes going up.
Make sure to put the rubber seals in all the connections in order to prevent any leaks when the system will be running.
Secured the pipes into the wall using metal or plastic brackets, make sure they are capable of caring the necessary weight.
Cut 2 holes in the reservoir lid: One with the diameter of the drainage pipe and the other with the diameter of the pipe that is connected to the pump (in this case a 20mm flexible pvc pipe).
Step 3: Plugging the pump and the Planting :)

Once you have placed the reservoir and set up the planting pipes, put the bottom drain pipe into the appropriate hole in the reservoir lid.
Place the water pump in the bottom reservoir and finally attach water pipe to the pump while passing it through the second hole on the lid.
Drill a hole in the PVC cap closing the topmost pipe (make sure that the opening is at the top of the cap).
Insert the other end of the water delivery pipe that is connected to the pump to the opening in the upper part of the cap.
Pull the pump electric cord out of the reservoir lid, and secure the deliver pipe to the wall.
That's it, you're done!
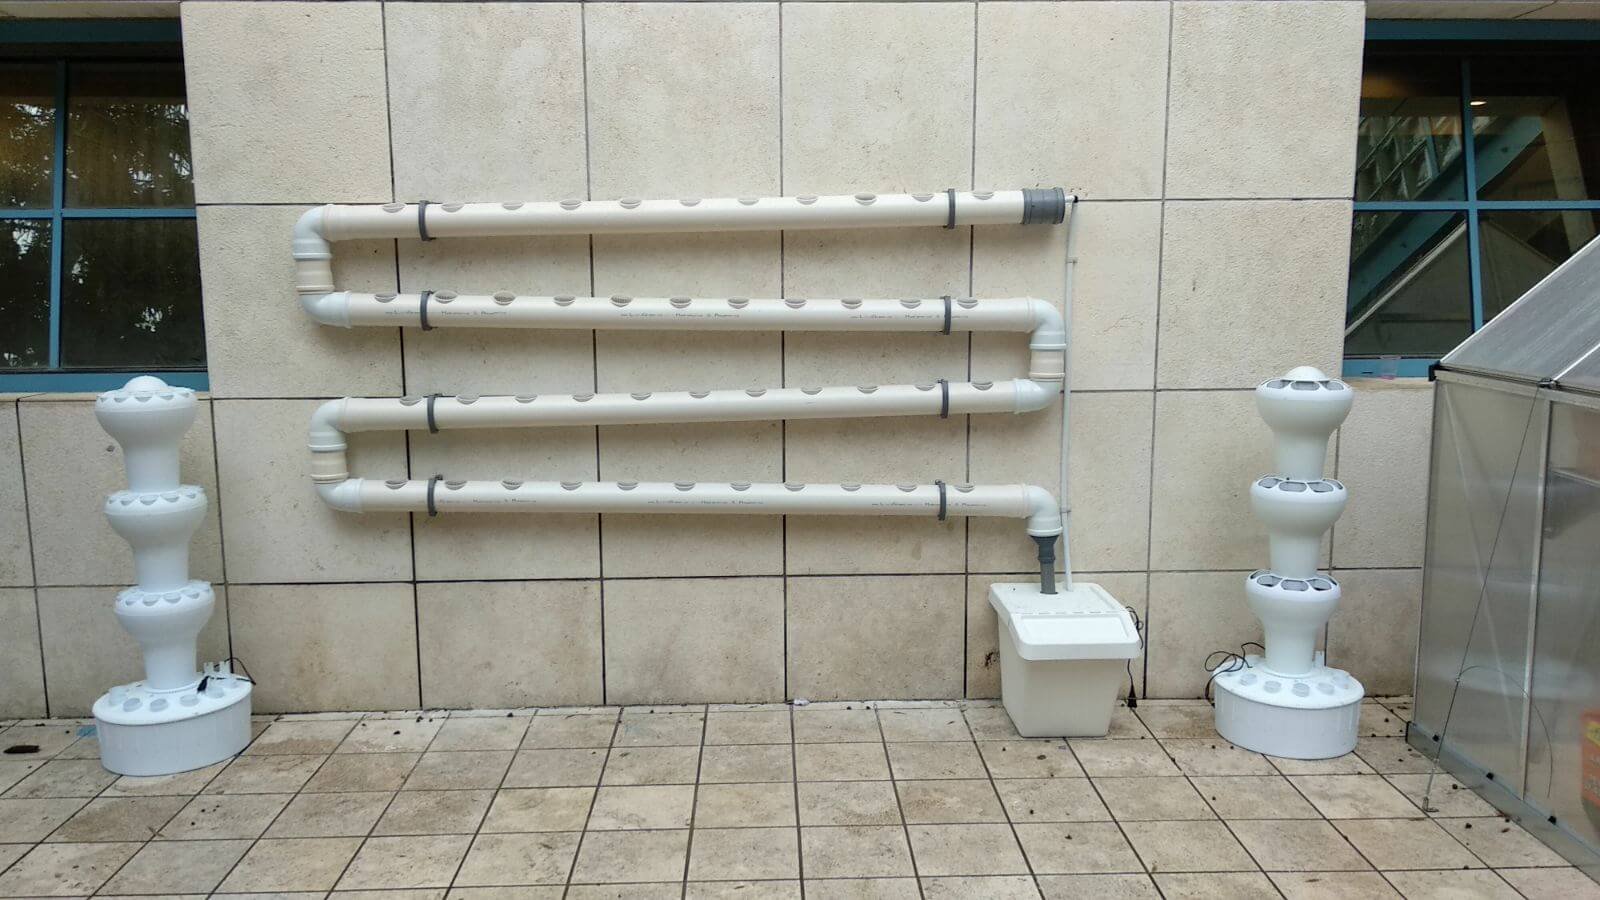
The system is ready for operation and planting.
Fill the reservoir with only one third of the water), connect the pump to the electricity supply and let the water run for about an hour before planting the plants, in order to properly wash the pipes.
After an hour, empty the reservoir and refill it again, this time to grow the plants.
Now comes the awesome part of planting your little seedlings.
As mentioned above, make sure that the roots of your seedlings are big enough to reach the bottom of the growing pipe and thus ensure sufficient supply of nutrients and healthy growth.
I suggest filling the net cups with some sort of inert growing medium that will blocks light and pests and will hold the plants securely in the system.
The substrate can be hydrotone (puffed clay balls), tuff, or even washed gravel.
There is no real importance to the substrate other than for the specified purposes, so there is no need for it to absorb water or provide any nutrition for the plants.
I also recommended to use young seedlings with as little soil as possible.
The small seedlings can usually be planted right away without the need to wash the roots from soil.
If you only have bigger seedlings, then it is recommended to properly wash the roots of any access soil in order to prevent the pump clogging.
Possible Upgrades
Regular maintenance of the system will require you to fill the water, balance the acidity and fertilize according to the needs of the plants on a regular basis.
In addition to that, you should be monitored for pests, dead leaves, root pruning (in case the plants get to large) are too developed and of course harvesting.
Later on you can consider adding some kind of automation to your system.
For example you can decide to add siphon to automatically feel your reservoir with water when it goes bellow a certain level, you can also choose to add some more sophisticated systems that will allow you to automatically dose your reservoir with the necessary amount of fertilizer and automatically adjust the PH (potential of hydrogen) accordingly.
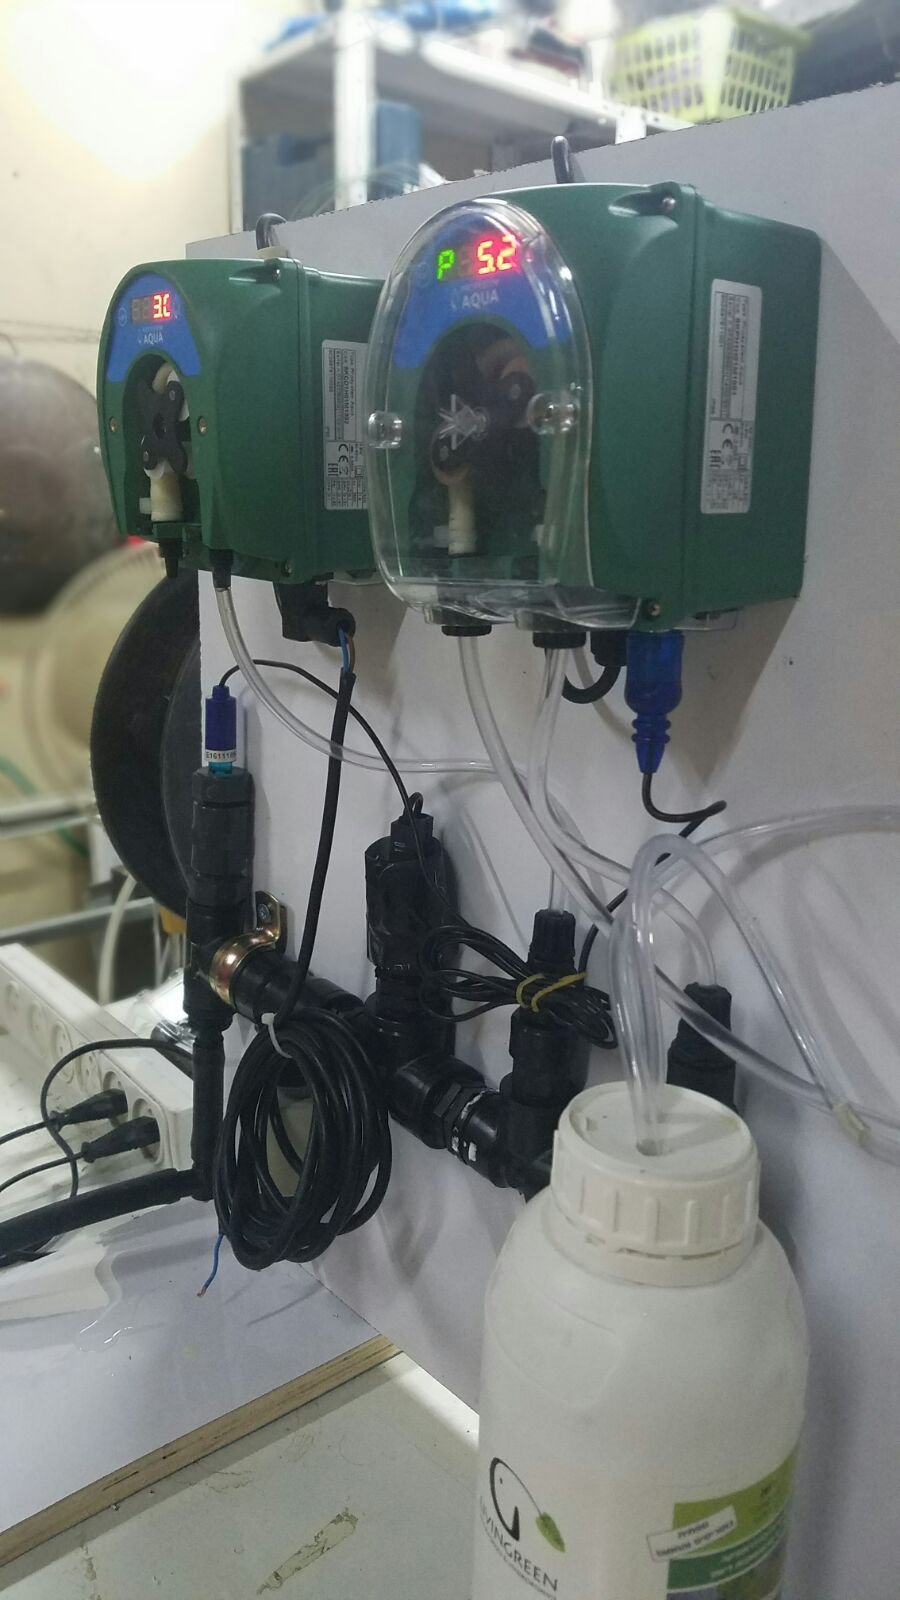
Those systems usually utilize some sort of low dosing pumps (usually peristaltic pumps) and sensors, to automatically detect the current levels in the water and slowly adjust it to proper settings.
Such automation will not only ease your life as a grower, but will also prevent errors resulting from human inconsistency that does not always succeed in providing the ultimate treatment for the system.
In the case of automation, maintenance on the system drops to pest tracking, removal of dry leaves and unwanted branches and of course - picking you food!

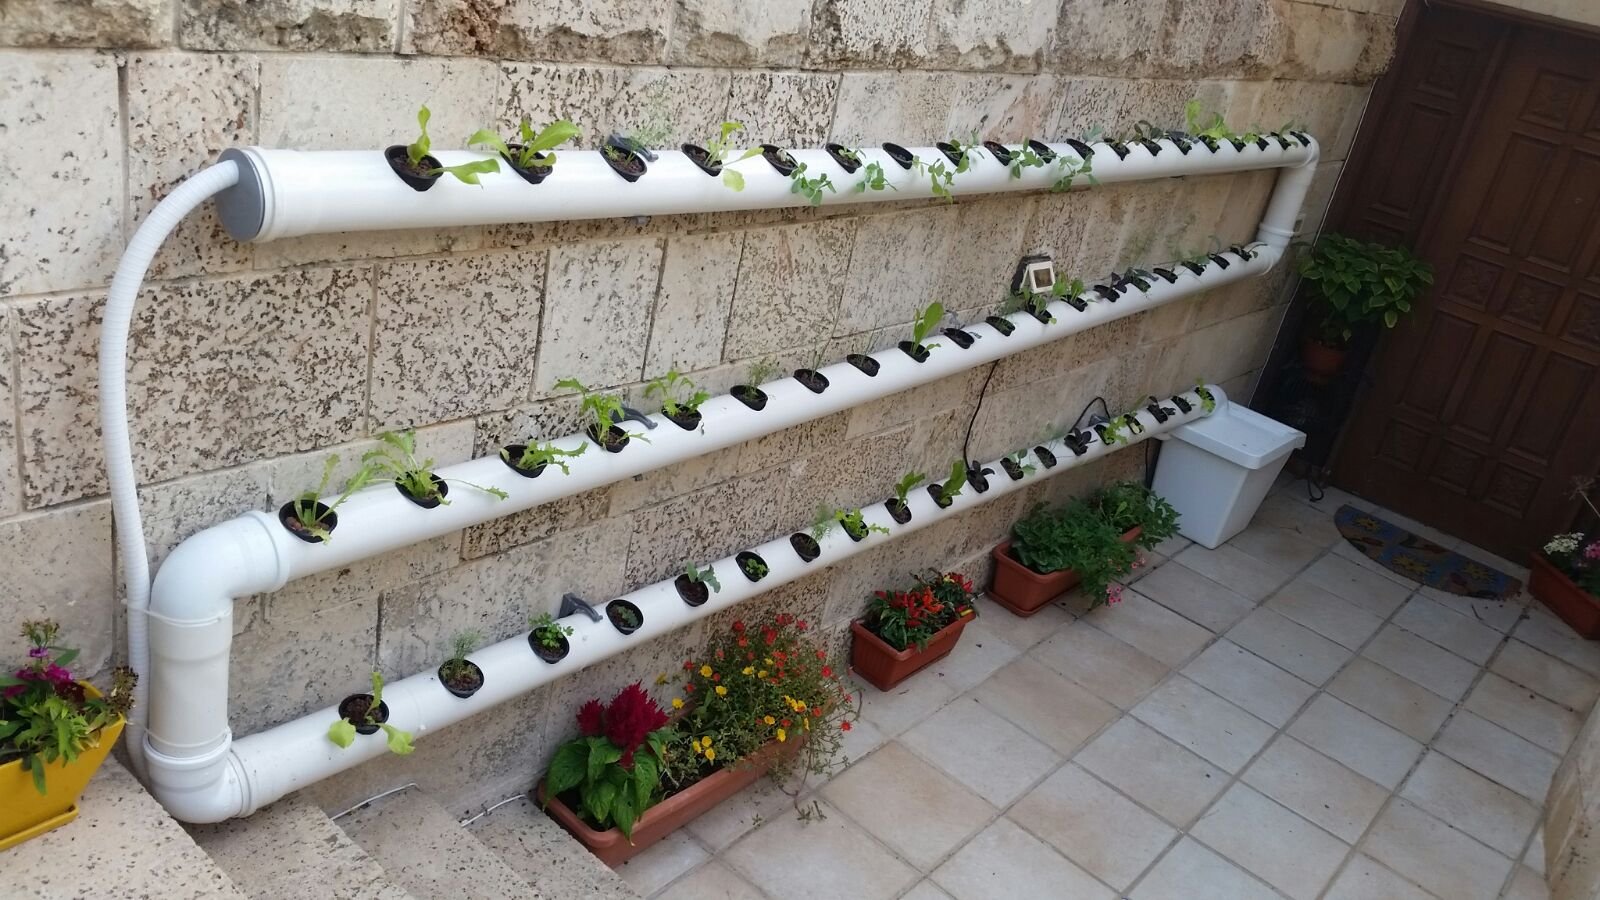
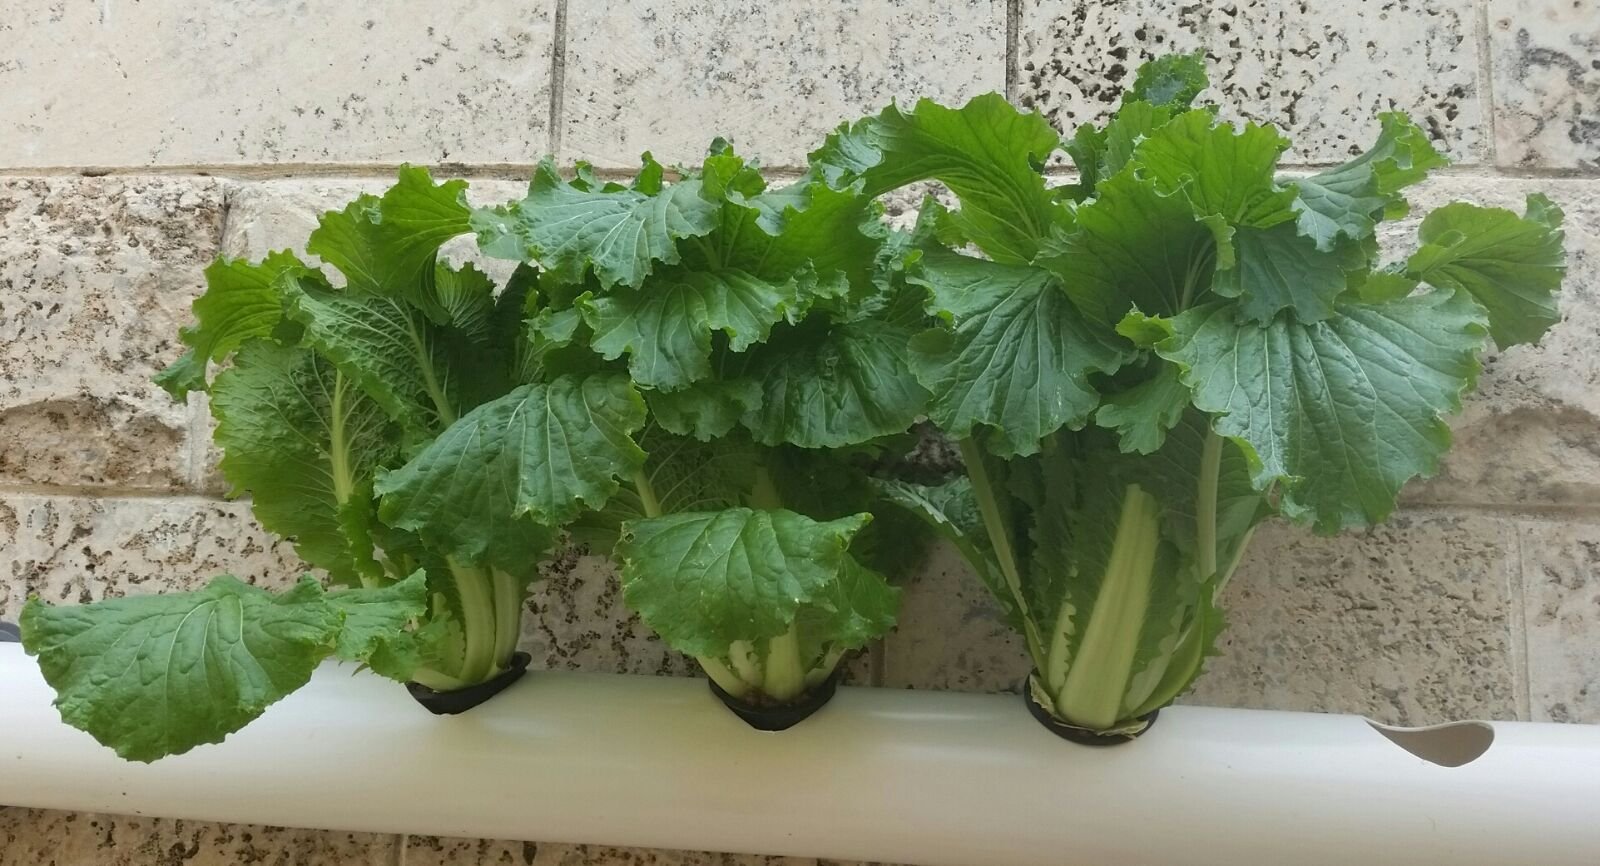
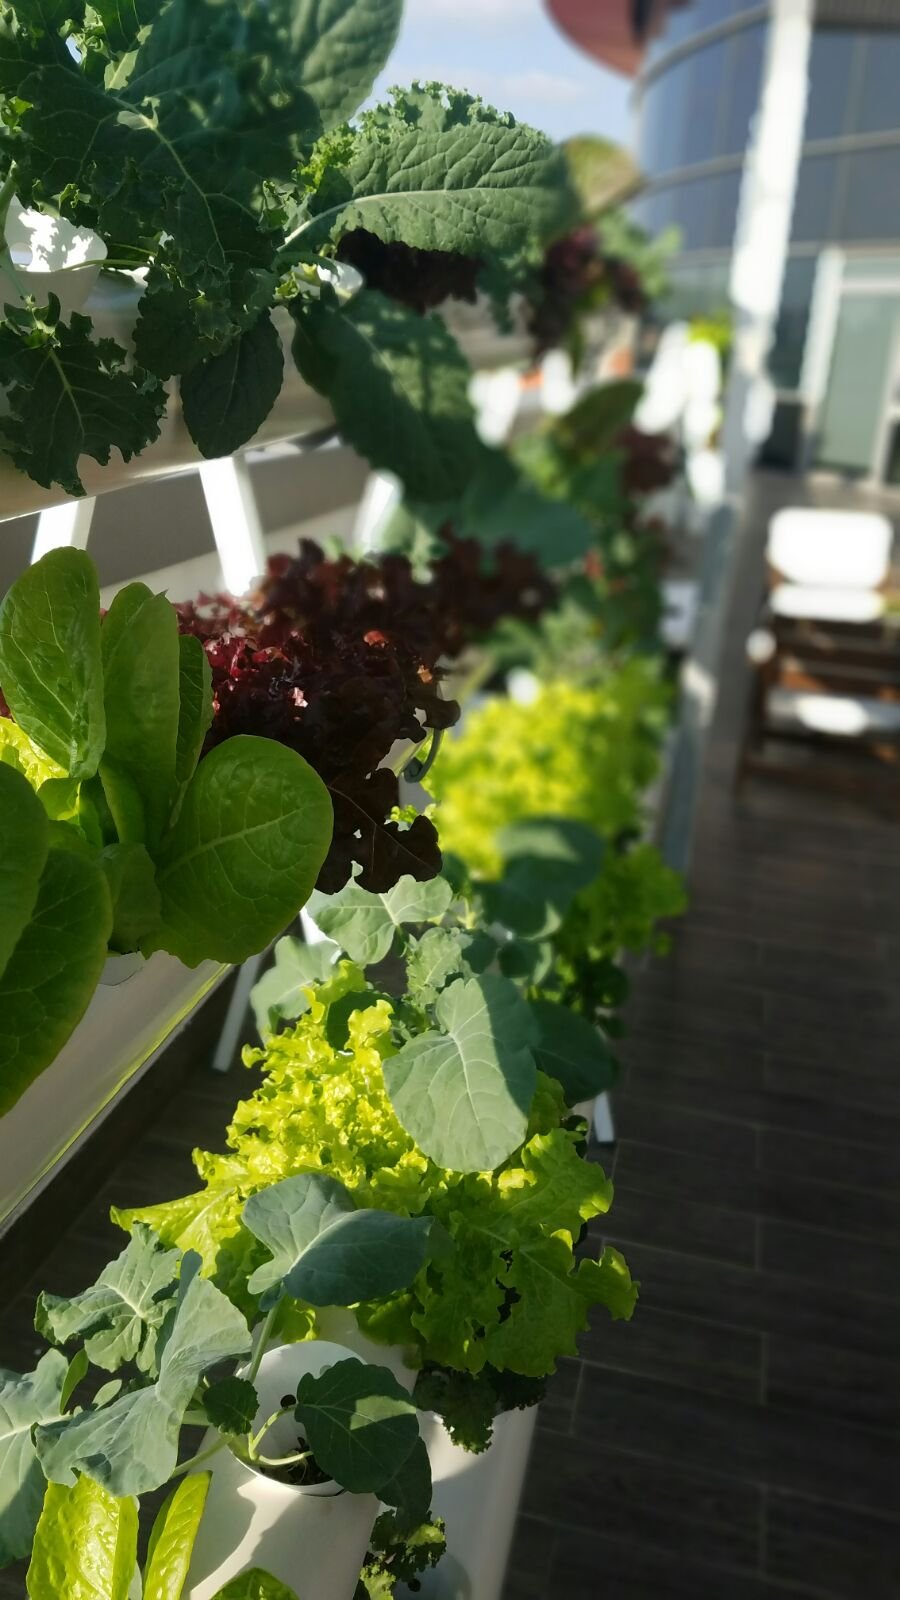
Unfortunately I still don't have updated photos from this specific hydroponic system, but this is how it going to look after a few weeks of growing:
I hope you enjoyed this little tutorial.
If you have any questions regarding the building of this system or have any general questions about hydroponics, growing automation, urban farming, solar power or just want to talk about anything related to hydroponics, urban farming or sustainability in general, make sure to drop your comment and share with me your thoughts.
It would also be great to see your own hydroponic setups at home, so share them in the comments if you may.
If you like my work then an upvote or perhaps a resteem will be much appreciated.
And if you would like to read more about my travels, about hydroponics, about life in general, make sure to follow and comment so we get to know each other! :)

If you would like to know me a bit more, make sure to read my #introduceyourself post.