Don't sit under the apple tree with anyone else but me.
A wonderful song with a truthful message. Seriously, if you're going to eat apples with anyone, eat them with me. I think apples are a wonderful fruit. Sweet, crisp, beautiful, and delicious. I even eat the nutritious peel!
In this post I'm going to briefly show how I planted a new apple tree. Last week, I shared posts on how to get started growing an apple tree, and how to graft and apple tree. Now I am going to talk about I plant my apple tree, to complete the series.
Preparing the Pot
First things first. We need a pot to plant the tree in. The biggest pot you can afford is best, because apple #trees need a lot of space for #roots.
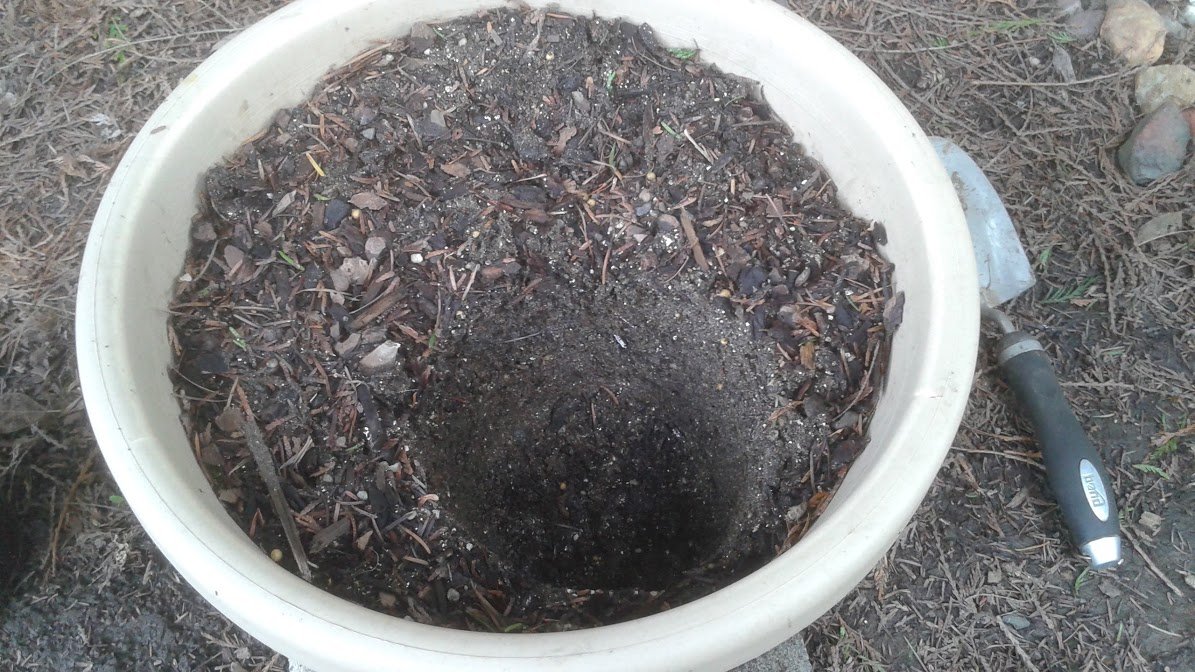
Notice the indentation in the #soil? That is because I had another #planter sitting inside this soil all last winter that formed this shape. Last spring, I had a grafted tree in here that did not survive, so it has been vacant all this time. This pot of soil has been sitting under a shady cedar tree all year. In that time, it has probably turned the soil slightly acidic, and gathered some good #nutrients and #bacteria from the rain. There were some cedar needles on top, and I picked them all off by hand. The Douglas Fir needles on top are okay, because they are breaking down into fine #compost, which is great.
You don't have to do it this way. You can start with a fresh soil mix, and dig a well that looks like this.
My soil is mixture of #sand, potting soil, and 1-inch untreated #wood #bark chips. There's also some handfuls of #perlite and #vermiculite to add some #aeration to the soil mixture. Also incorporated into the soil mix is #Ozmocote #fertilizer, according the amount recommend on the package. At the very bottom are large river #rocks and broken pottery pieces covering the large holes in the pot. This blend should allow plenty of water retention, and easy #drainage so it never floods or pools at the bottom. The top of the soil is covered with about an inch of the same wood chips, as a surface #mulch.
Inspecting the Roots
This is what a new grafted tree looks like. The #rootstock I purchased was given to me bare-root, meaning it has no soil yet. The only thing it has been feeding on is wet sawdust in a bag.
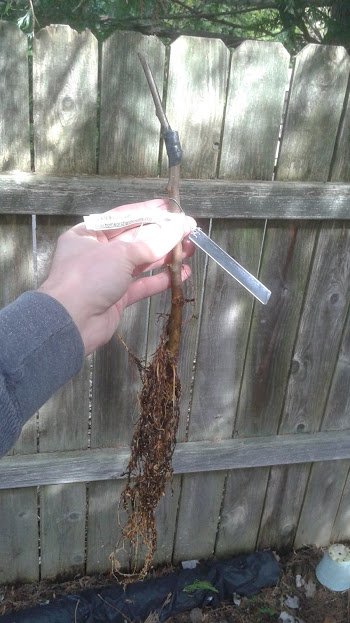
Make sure the tree has nice healthy looking roots. Anything that looks infected or diseased can be pruned or pinched off. Any roots that are hanging down much, much longer than all the others can be pruned down to a matching length. I don't want any roots much longer than the hole I am burying them in.
Hold the tree upright in the center of the well we made in the pot. Making sure the tree is centered and upright is very important so this tree can hold the weight of heavy #branches and #fruit in the future. I don't want this tree to grow side-heavy and tip over. Spread the roots out into a somewhat radial pattern, and start filling in the spaces with soil. Try to fill in all the air gaps over and under the roots, and all the spaces between, but don't be aggressively firm. Disturbing the roots with too much heavy pressure can cause friction to strip or tear the roots to shreds, making it harder for the tree to survive.
Finishing Up
After the roots are fully covered, add some fresh mulch on top. Wood makes an ideal mulch, as it prevents #sunlight from scorching the roots, and the #moisture it retains will help feed top roots and even release water #vapor into the air to feed the #leaves. I added another inch of fresh wood mulch on top of the soil. Should be plenty.
Put an aluminum tag on the tree to label the type of apple wood grafted to the tree. Make sure the wire is twisted loosely, so it does not cut into the soft bark. I might even add the year it was grafted to the tag.
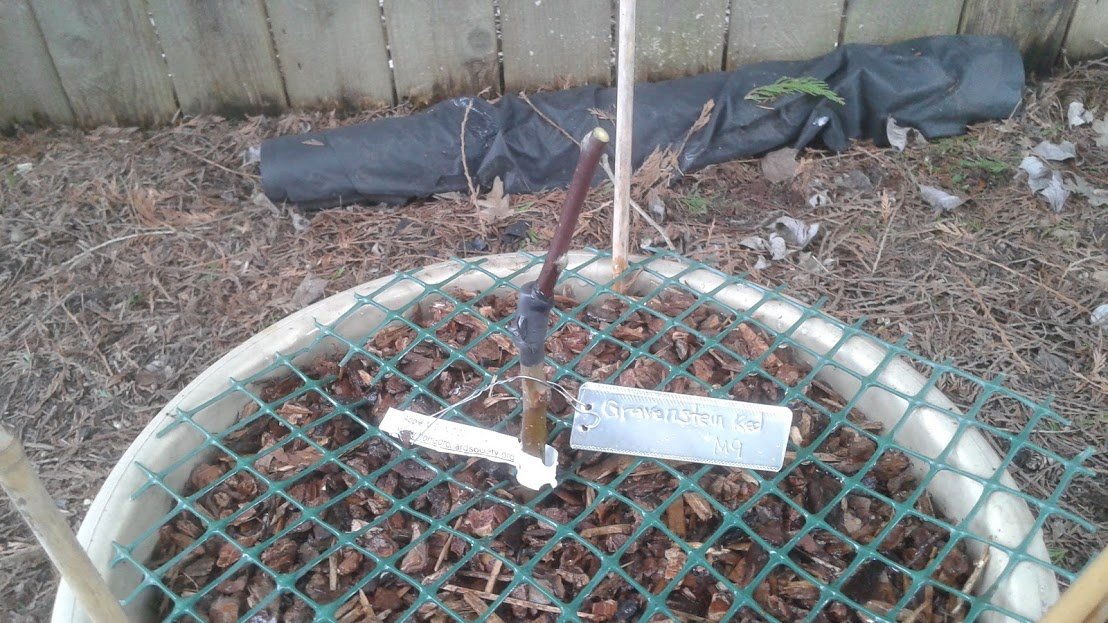
Over the top of the soil, I cut out a plastic #screen material to fit the shape of the pot, and a small weight is used to hold it down. This prevents wild animals from #digging into the soil and disturbing the roots of the tree.
Protection is also recommended around the #trunk of the tree if you want to be extra careful. The reason the apple tree I planted in this pot last year failed was because something had chewed through part of the bark, and as a result it dried out or became infected, and died. You can use a plastic tube wider than the trunk to block animals from biting into it. Alternatively, the screen material can also be fenced a few inches around the tree trunk, and this will protect the trunk and allow sunlight to pass through and benefit any #buds or leaves forming.
A newly grafted tree doesn't need full sun until after the leaves start forming. Pluck off any flowers that form the first year, as this will drain the tree of energy the roots need. It can't support #growth of fruit the first year.
Keep the pot on top of a flat concrete slap or paver so that the water can drain away, and so roots do no stretch into the soft earth below. Water the soil any time the concrete and mulch is dry. This might be daily on hot summer days. I also like to apply doses of organic fertilizers such as compost tea and fish emulsion about every three weeks to replenish the tree when it speeds up in growth.
Bonus Photo
.jpg)
Thank you for reviewing my post. You can follow these same planting instructions for most container grown fruit trees. All they need is a large #container, some inorganic soil to help the water to drain (too much organic matter tends to break down and mash the roots down, making it root-bound faster), and some protection until it grows in vigor. After that, you can enjoy maintaining the health of the tree until future years when it will bear delicious fruit to #harvest.
I hope you get to enjoy being out in the sunshine this week. Have a good one.