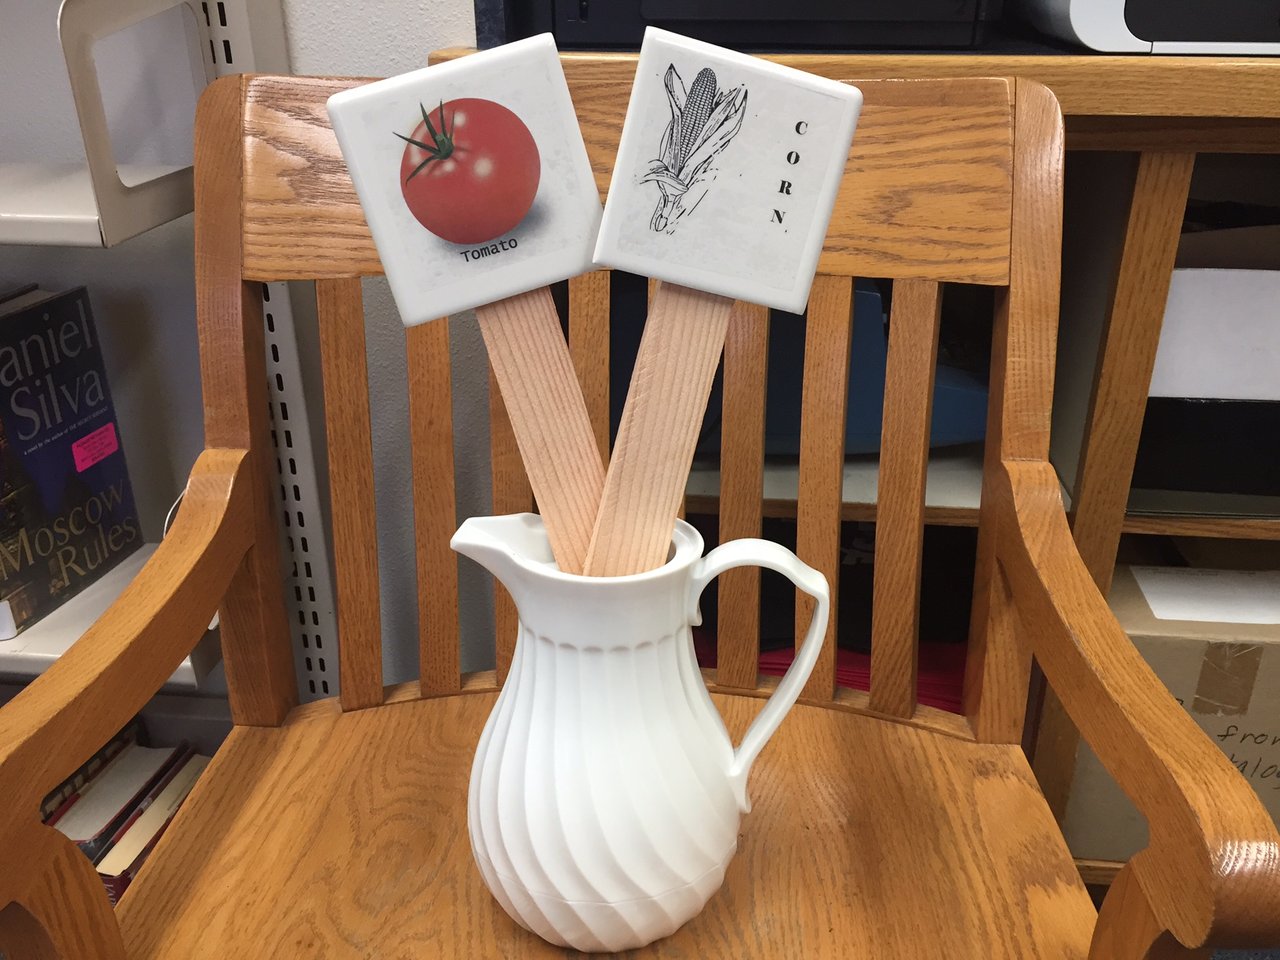
Reusable Row Markers
So, I am not the most crafty person in the world. Give me a patch of land and I will craft an edible landscape, but give me stickers and scrapbook paper and I promise you that I will look slightly befuddled with a touch of terrified thrown onto the facial fray.
With that said, of course I was tasked with coming up with a garden-themed adult craft at our library for this month's adult craft program. I had no idea what in the world I was going to do. There was, however, this huge stack of contact paper languishing on the In Processing shelf; leftover from covering soft cover books that came into our collection. I knew that I wanted to facilitate a craft that made use of all of that space-taking sticky paper, and then inspiration hit me! Row markers made out of picture transfers on tiles!
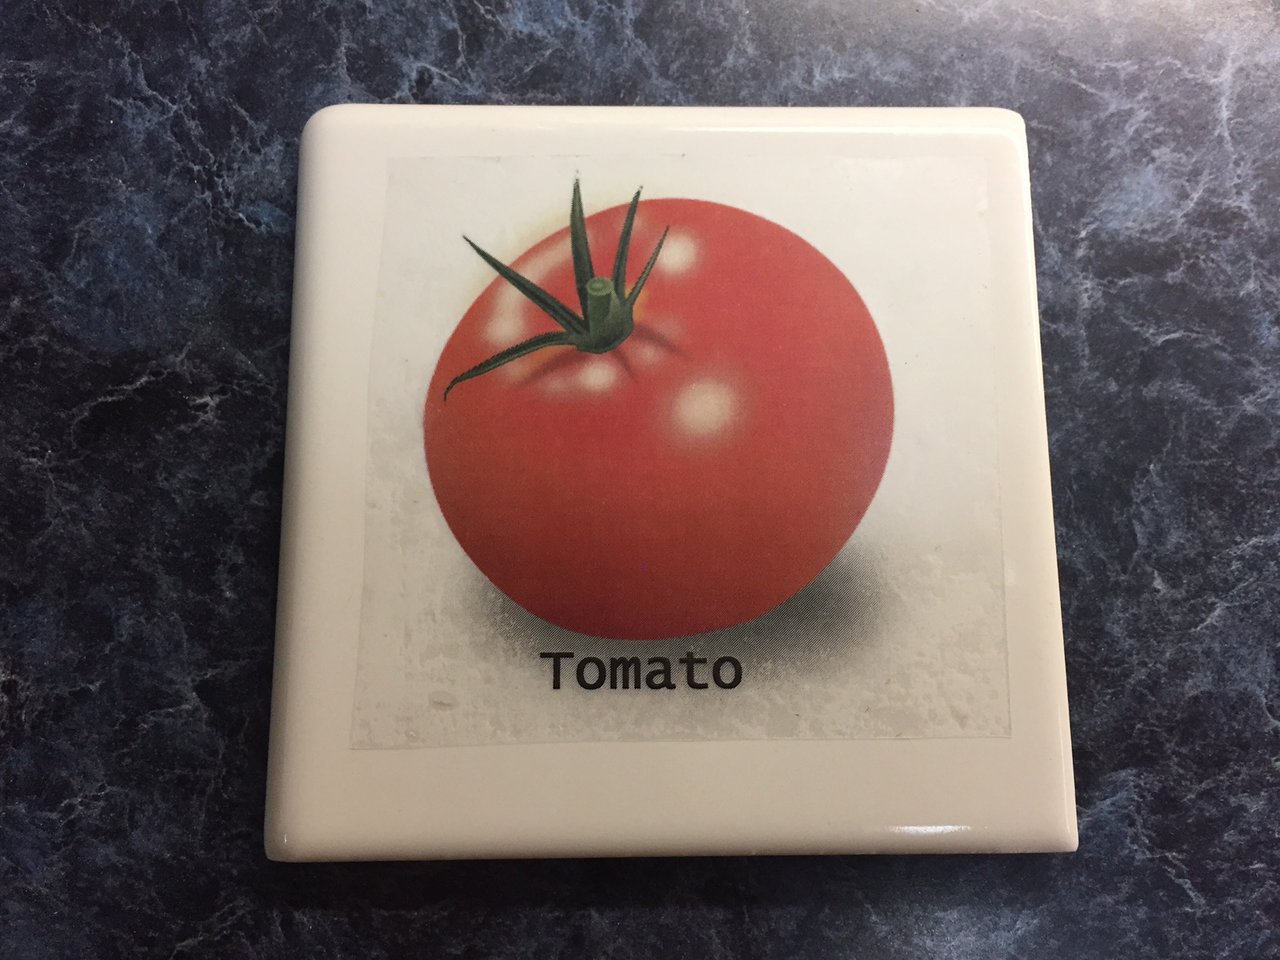
I had some 4X4 inch white porcelain tiles lying around my place, left over from some project, and as an experiment I grabbed a couple of tiles, a wooden stake from the scrap pile, some E6000 adhesive, and here is the resulting experiment:
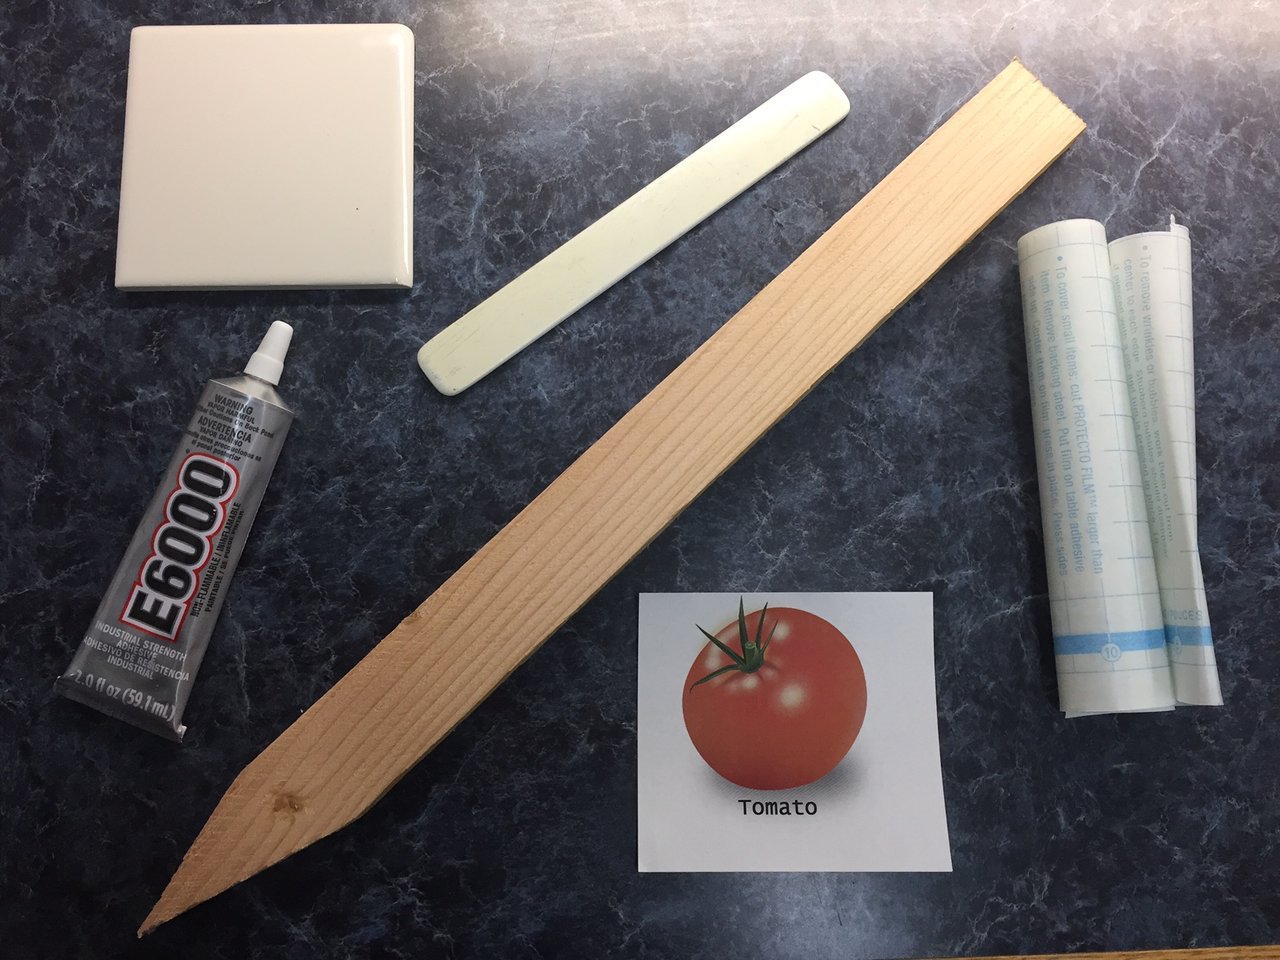
First: Find yourself some copyright free images if you don't have your own. Thanks Pixabay! Make sure that you print them on a laser printer, ink jet won't work with this process.
Second: Cut your contact paper to fit your tiles. I cut my squares of contact paper 3.75"X 3.75".
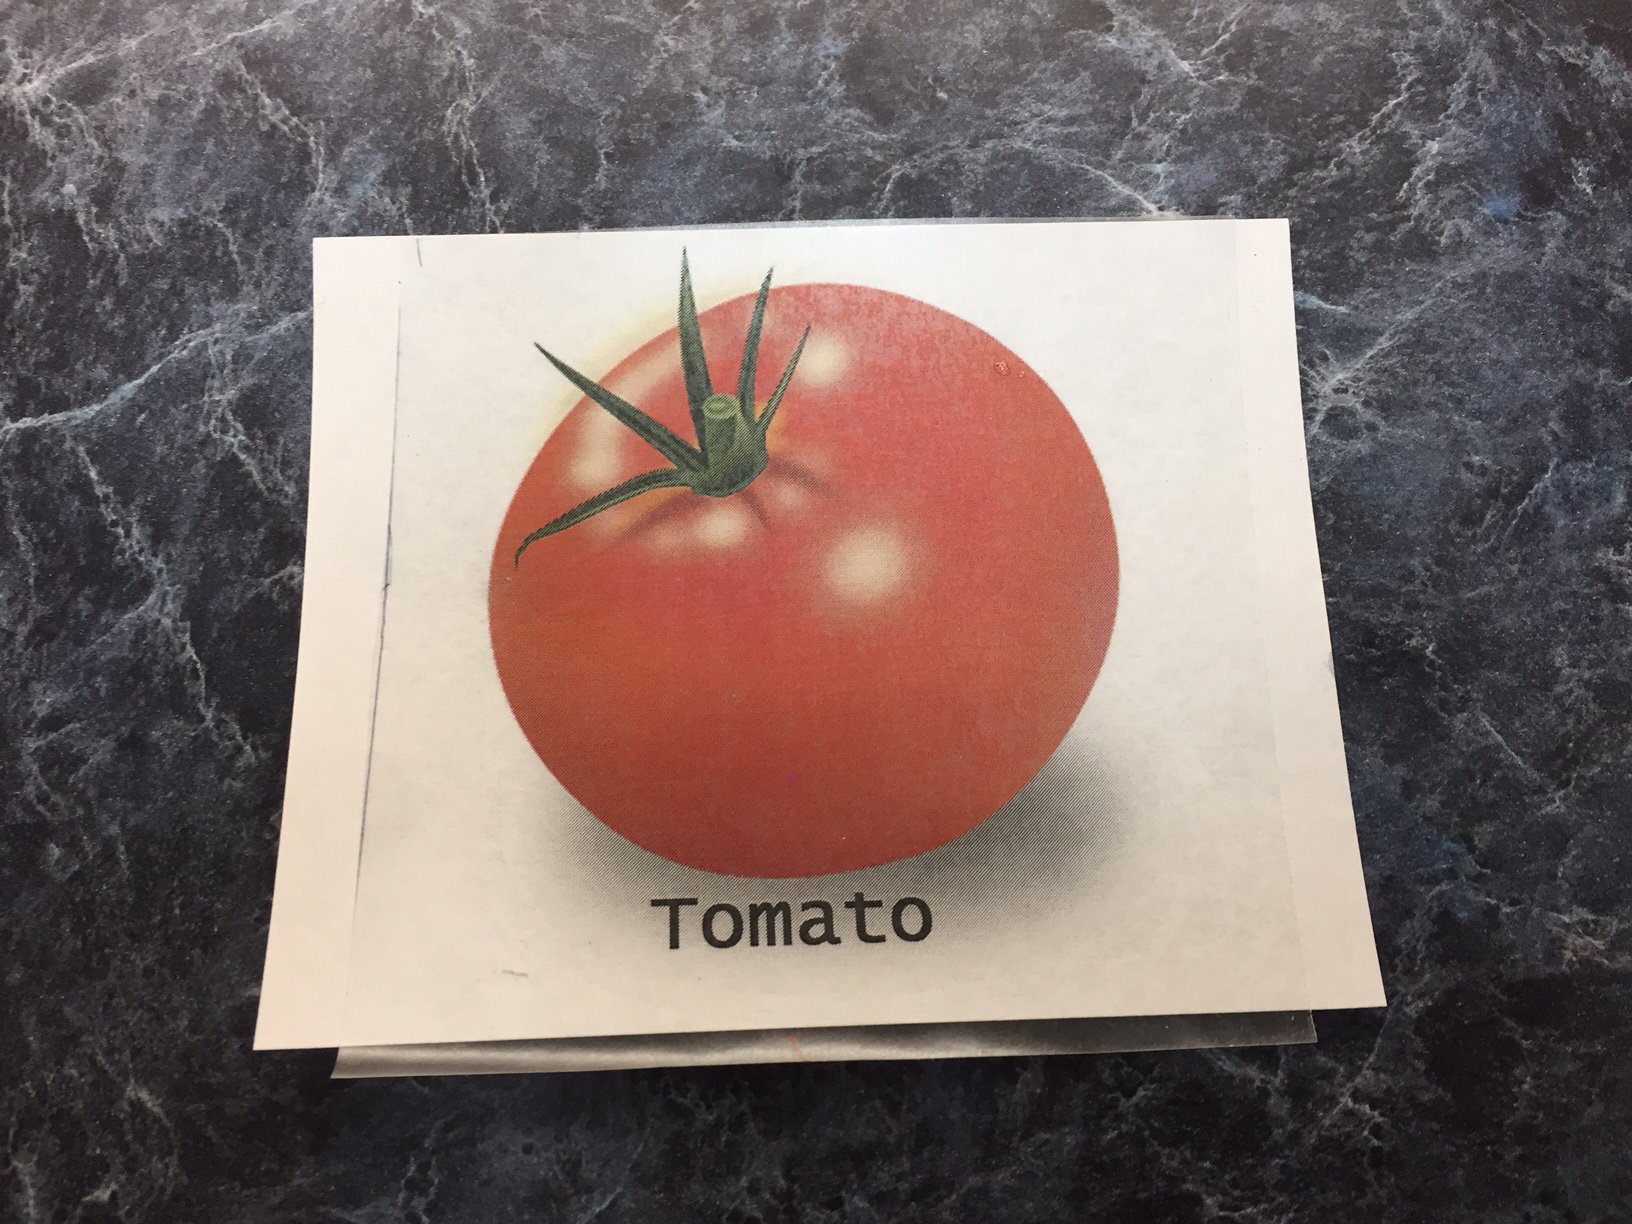
Third: Place your printed images picture side down on the contact paper.
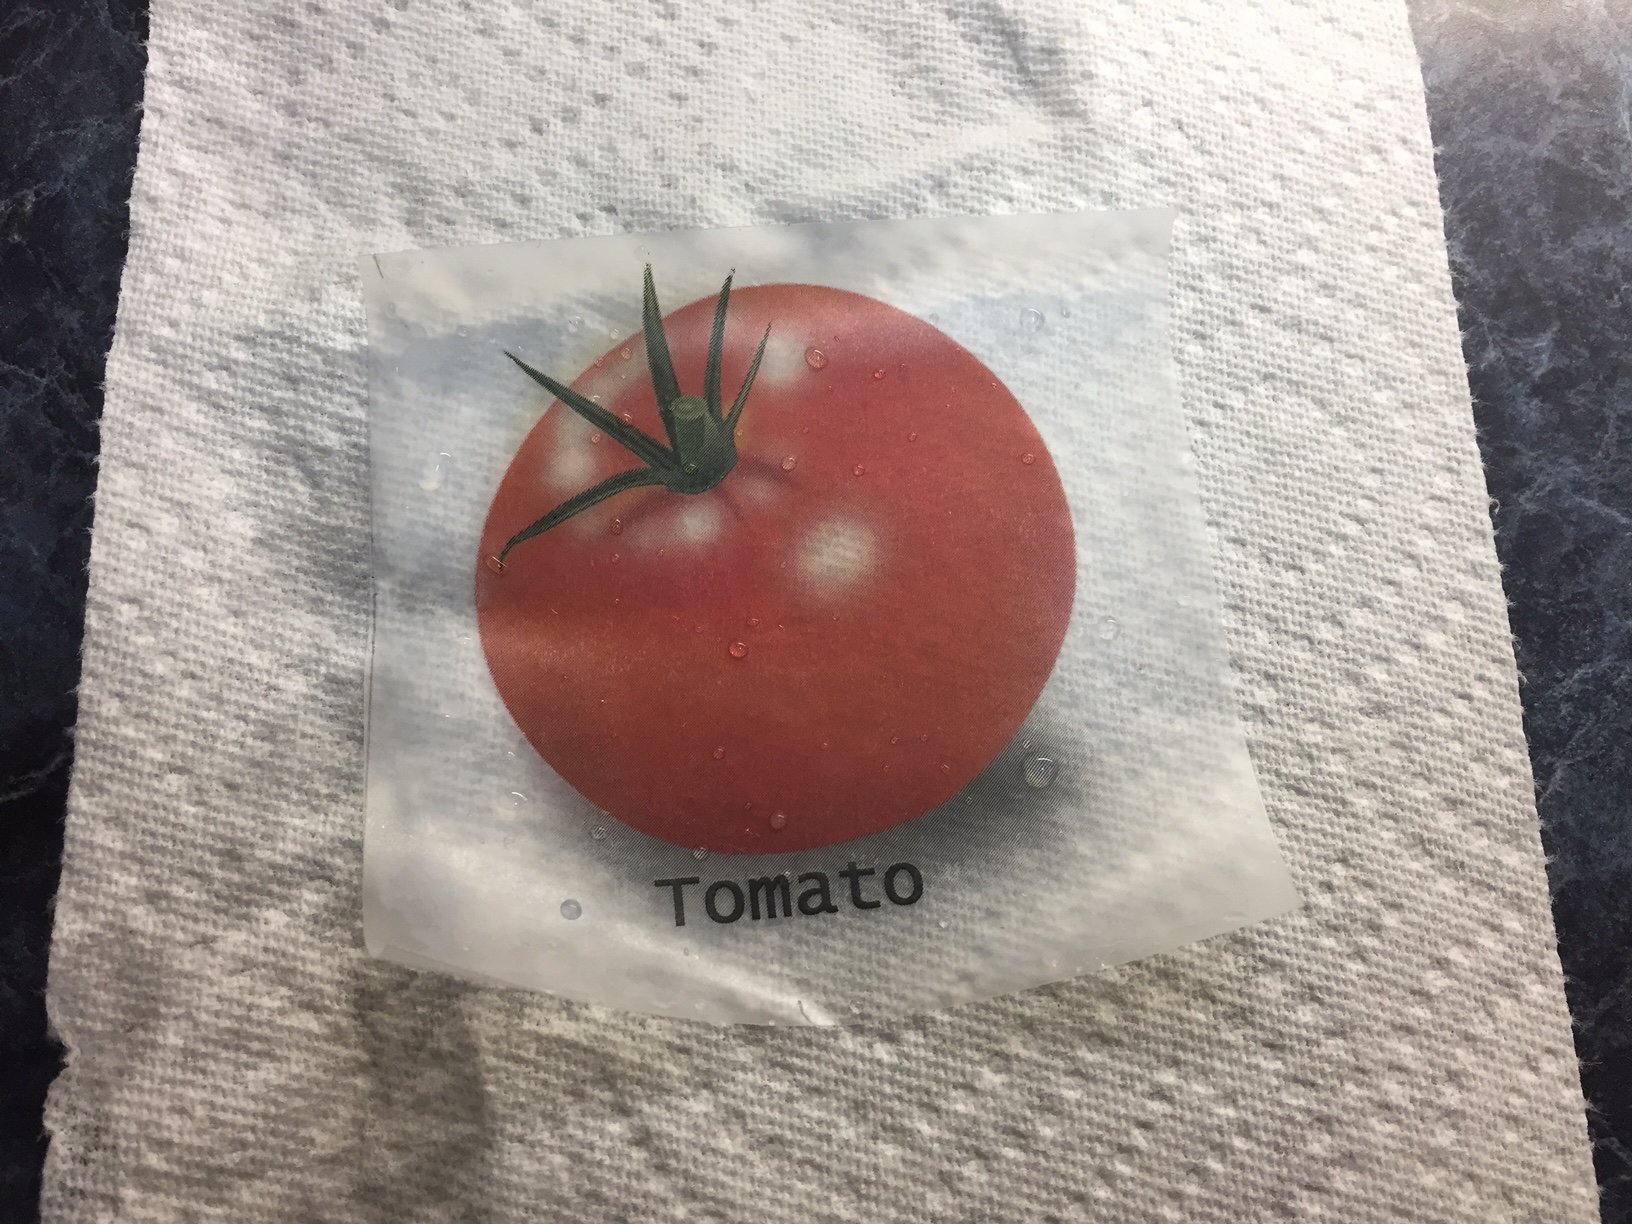
Fourth: Soak your your image in water for a few minutes, I like to let my transfer swim for about 5 minutes or so.

Fifth: This is the toughest part of the process. If you want your transfer to look nice, gently roll the paper off of the contact paper with the tips of your fingers. If you scratch too hard you'll take some of the image with you.
Sixth: Pat image dry with paper towels. At this point you might see little bits of white paper still clinging to your transfer. Re-wet it and make sure that you get all of the paper off of it. Then dry again.
Seventh: Attach your transfer to the tile, smooth it out with some sort of smoothing tool, whatever has a blunt edge will work.
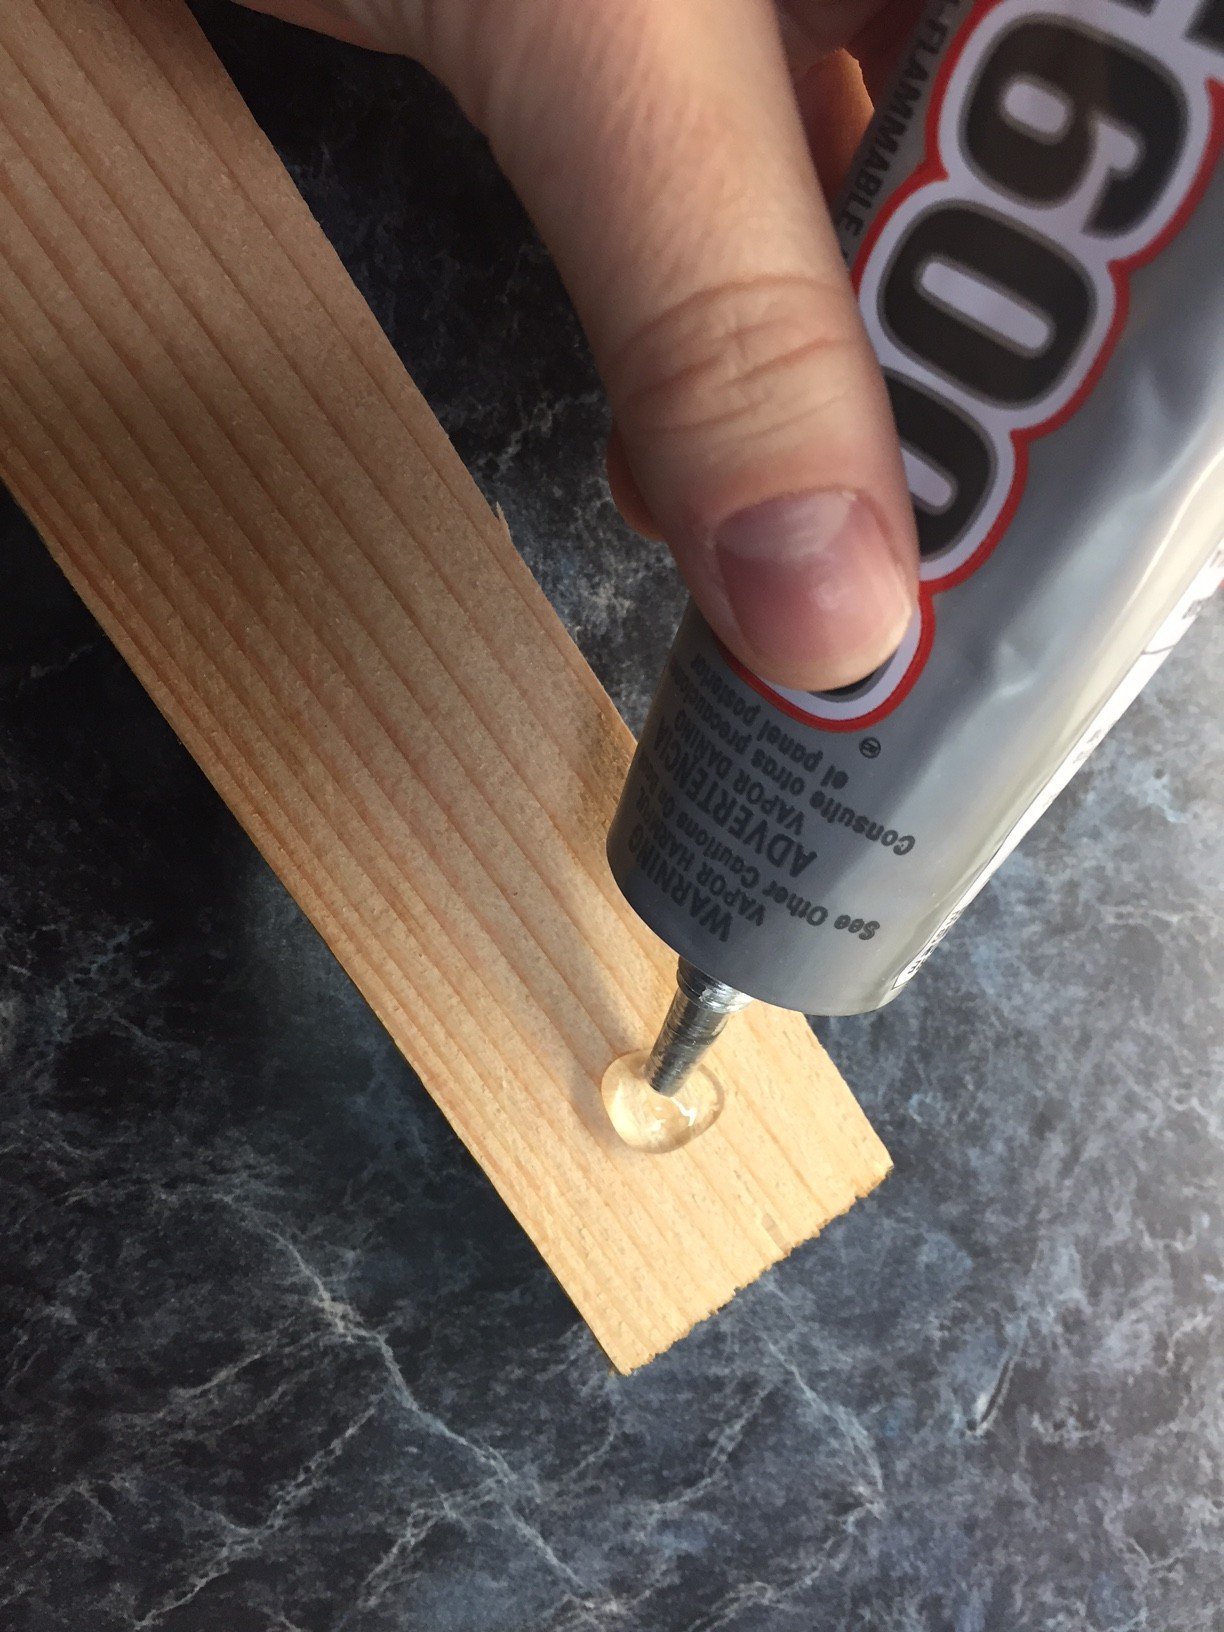
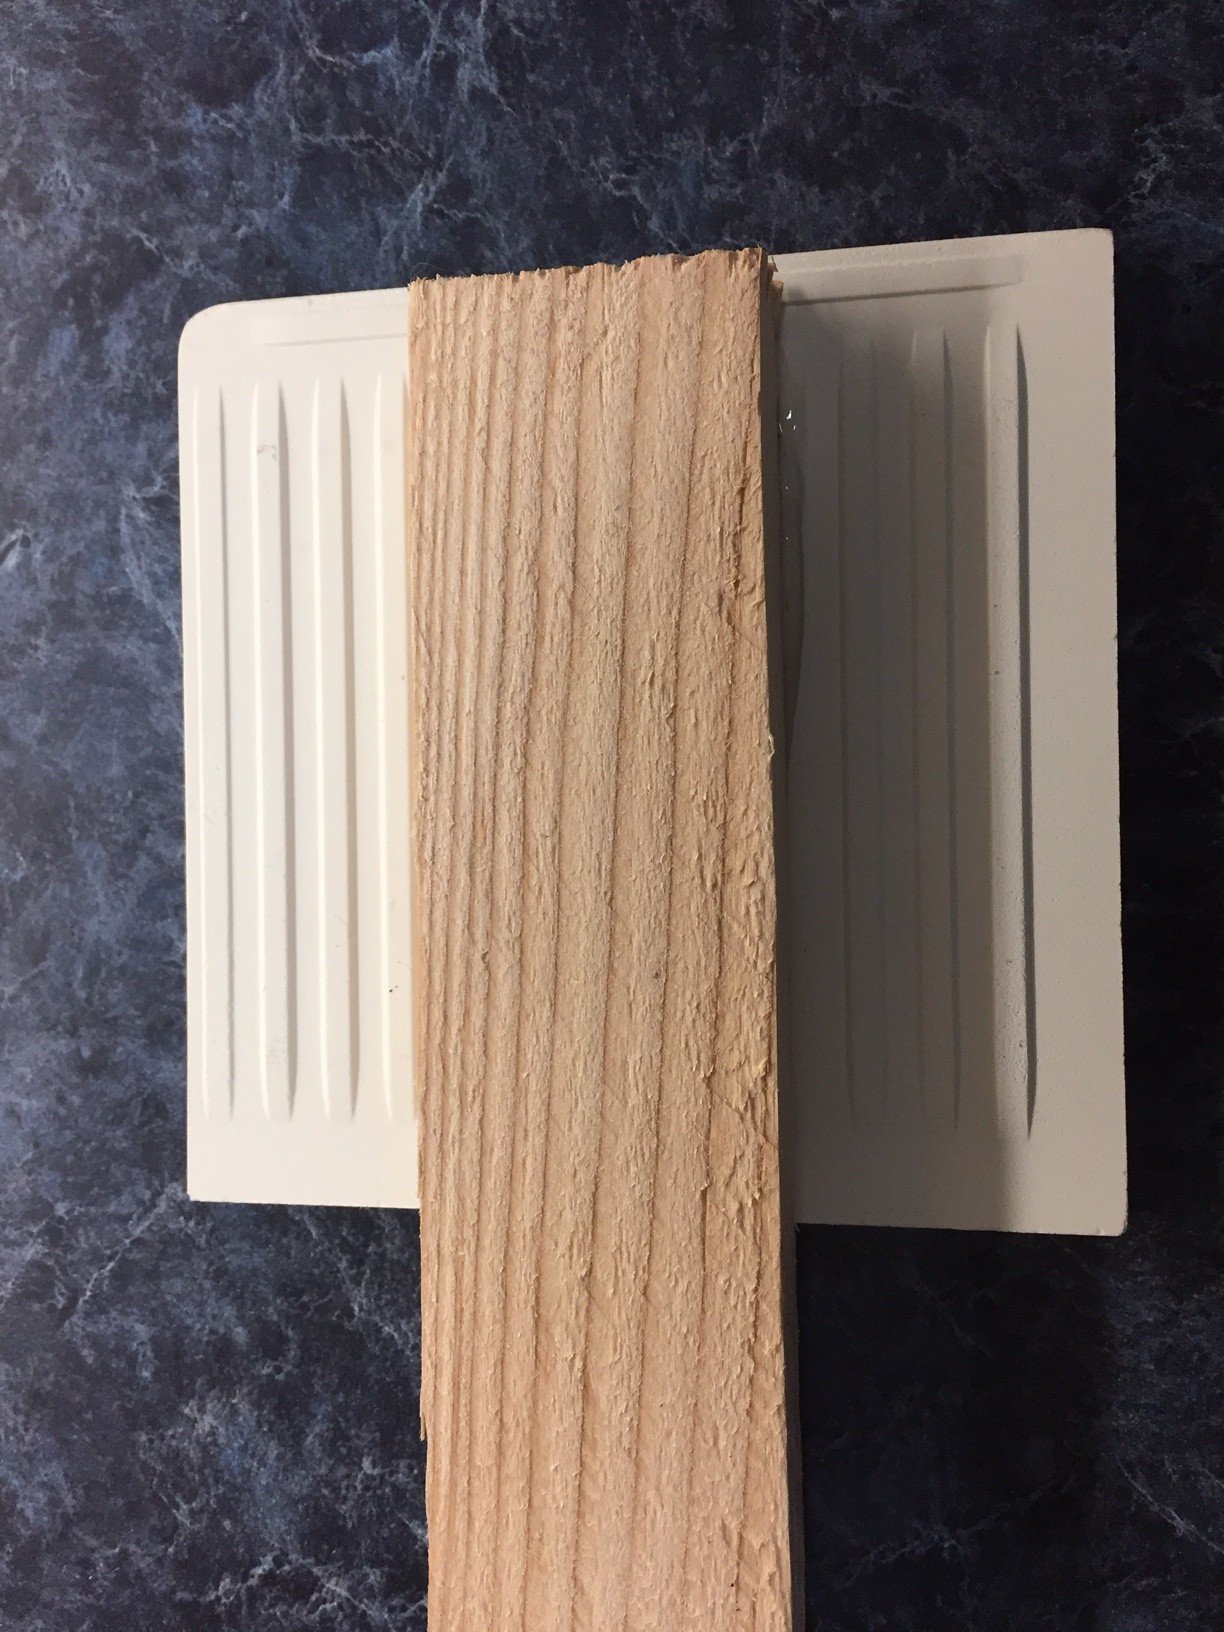
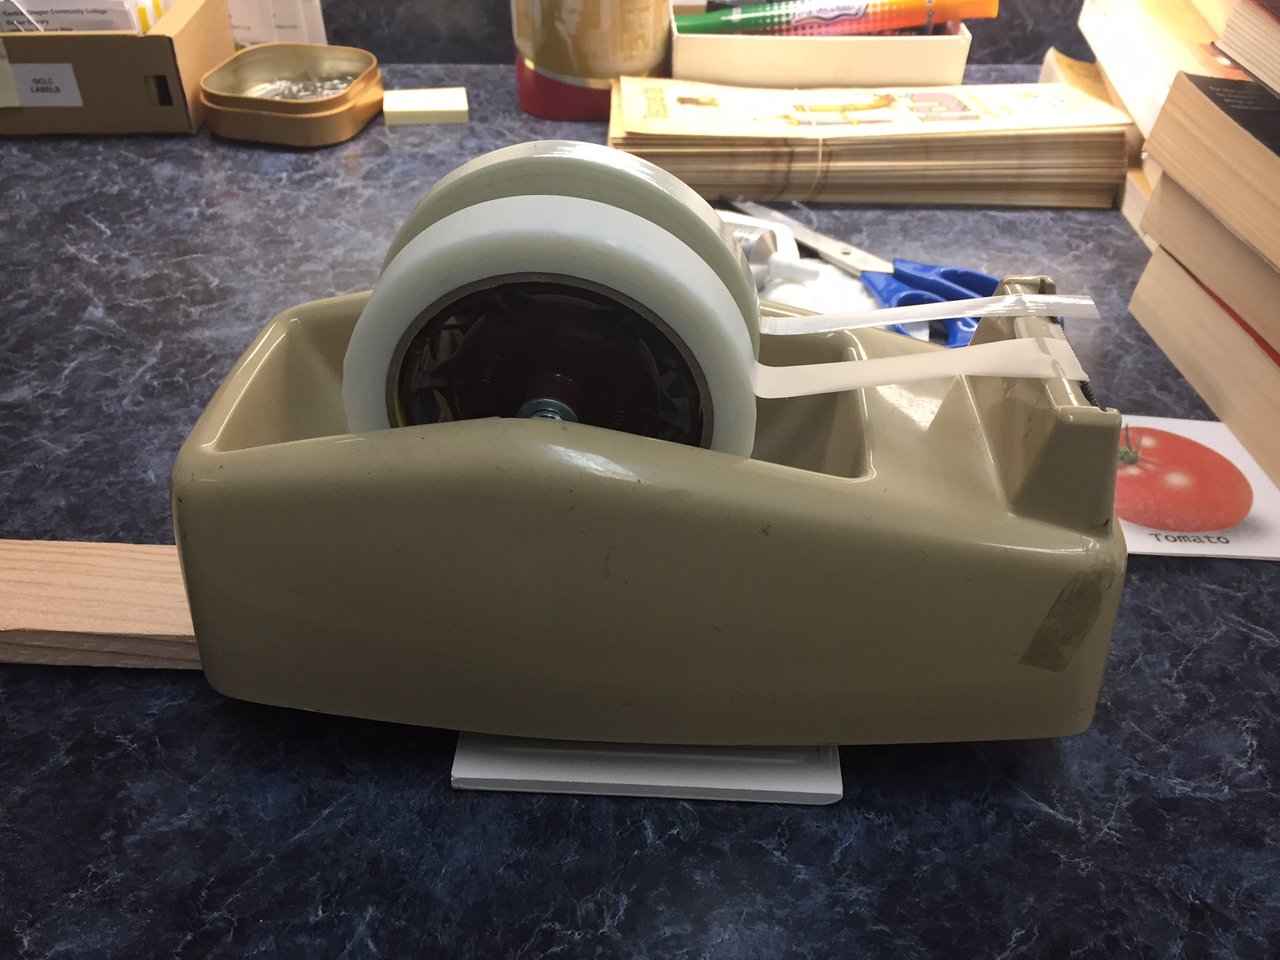
Eighth: Now it is time to attach the tile to the stake. I applied adhesive to the stake and then pressed the tile onto it, as centered as I could get it. I then placed the heaviest thing that I could find on it to help the tile and wood bond together. Our ancient tape dispenser is not light. A brick would work well too.
Ninth: All done! Enjoy your pretty row marker, and best of all, if you hate the image, make another transfer and change it out! Yay!
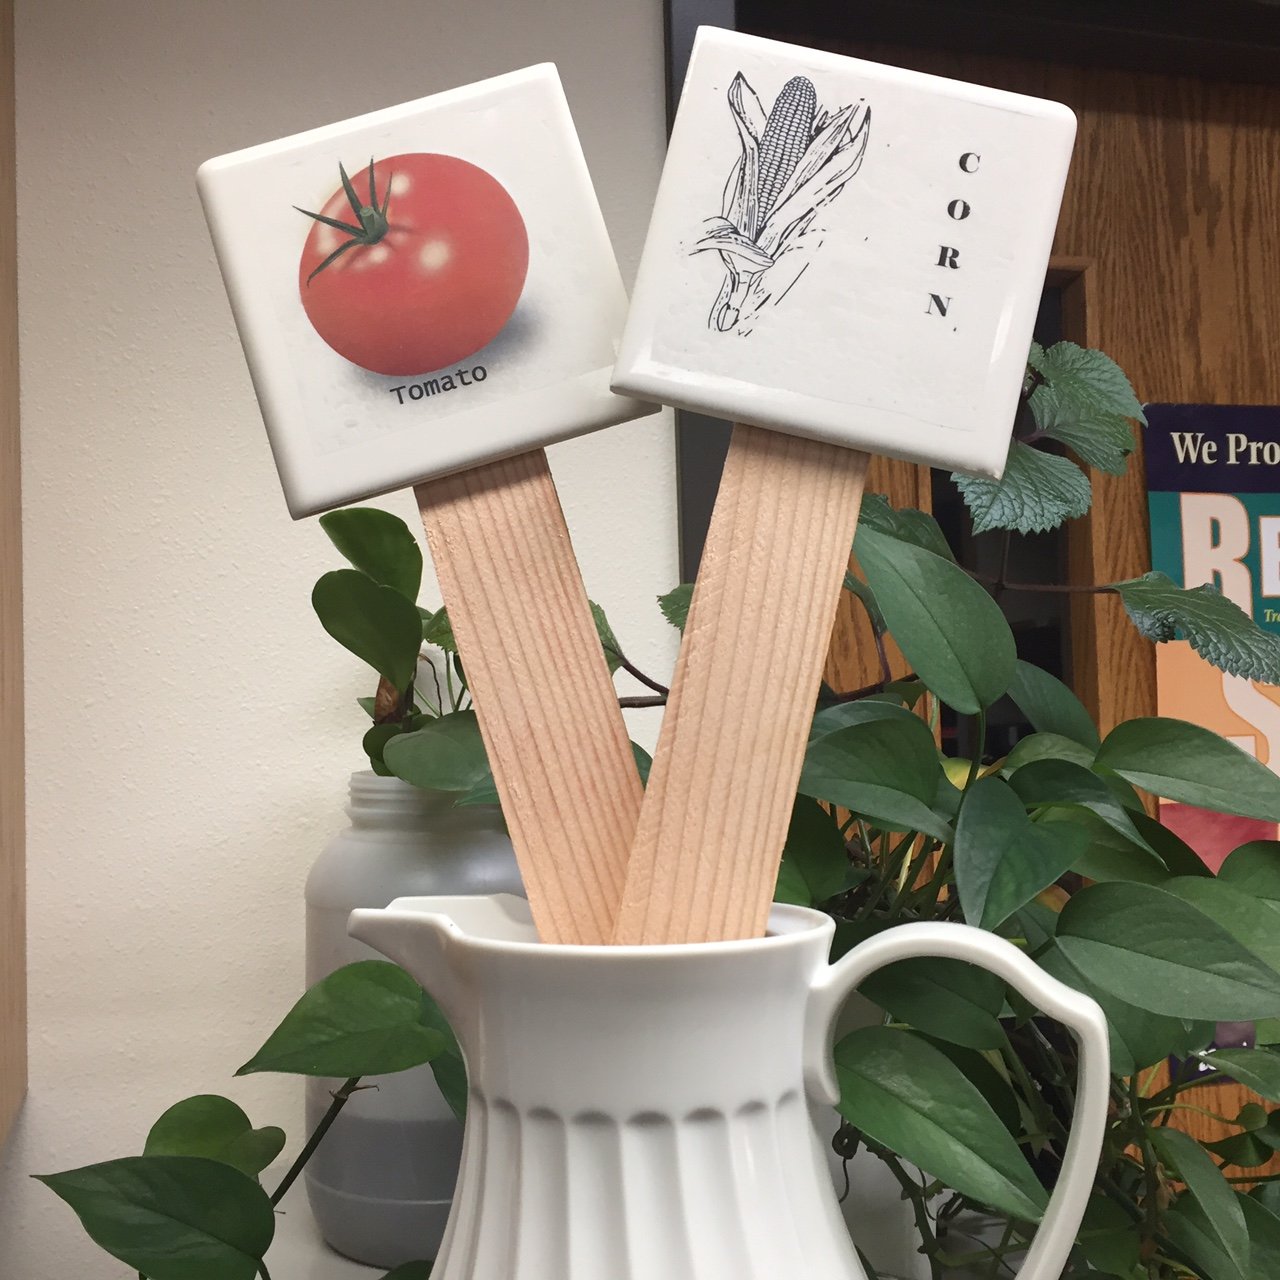
What I like about these row markers is that they are completely customizable. You need a row marker for beets? Print off a beet picture, slap it on some contact paper, soak, rub off the paper, and stick it on the tile. You can't get much more personalized or easy than that!
In all honesty, I never get around to row markers in my garden. I sketch out a general plan, follow it, and know where everything is. However, it is going to be fun to have a bit of quirky signage this year!
And as always, all of the images in this post were taken on my contact paper bedecked iPhone.