Background
I enjoy gardening. It is a great stress reliever and a good way to keep active without having to actually exercise or go to the gym. :P However, we don't have our own yard where we live right now so I have to content myself with growing potted plants on our balcony - hence the title of this series.
No soil needed (at least at first :D )
One of the few things I started growing on our little balcony is this avocado plant. I know you're probably thinking that avocado is definitely not a balcony plant.. LOL but you can certainly start growing it that way. The inspiration for this came when we visited my in-laws this past summer and I saw this jar filled with water sitting by their kitchen window, with an avocado seed halfway submerged with the top part is held up by 3 toothpicks. And it was growing leaves! Who knew you can grow seed that way - without soil? I certainly didn't.
Affordable and healthy
Since avocado is a tropical plant, we have them available here in the Philippines. You can buy the fruits in the local market usually during summer season. When we lived in Hawaii, most avocados had to be imported from Florida or California and because of that it was so expensive to buy! Depending on the season and the size of the fruit, the cost can be between $1 - $3 a piece! Over here in the Philippines, I could buy 6 medium/large-sized ones all for that price!! Yay! Also, my family loves to eat Mexican food and of course guacamole dip is always a must when we have nachos or tacos so we buy avocados often when they are in season. Avocados are also considered one of the super-fruits because of its numerous health benefits - it is an excellent fiber source, for one, and many others.
How to..
Two months ago, when we bought a batch of avocados, I just had to keep the seeds to try and see if I can grow them myself. So here's how I did it in case any of you would also like to try it on your own.
Step 1
Remove the seed (or pit) from the fruit. Be careful not to cut the seed when you slice the fruit in half.

Step 2
Soak the seed in water for a few minutes and gently clean it. I say "gently" because you wouldn't want to remove the brown skin that covers the seed, because that is what protects it.
Step 3
Get a small jar or cup and fill it with water. A glass jar or transparent cup works best, that way you can keep an eye on the water level and the roots when they form.
Step 4
Find the bottom of the seed. Avocado seeds are mostly egg-shaped - where one end is pointy. That pointy part is the bottom.
Step 5
Pierce the top part of the seed with 3 toothpicks and try to make sure the toothpicks are evenly spaced.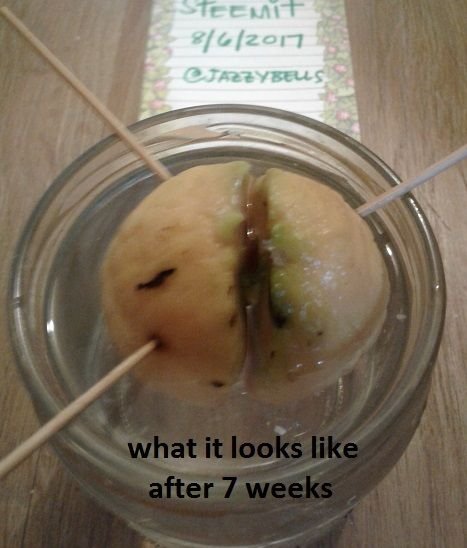
Step 6
Submerge the bottom half of the seed in the jar or cup of with water that you prepared. The toothpicks will hold the upper part of the seed above the water.
Step 7
Place the jar somewhere where it can get the proper amount of sunlight. Do not place it in direct sunlight otherwise the water will evaporate too fast leaving your seed dehydrated.
Step 8
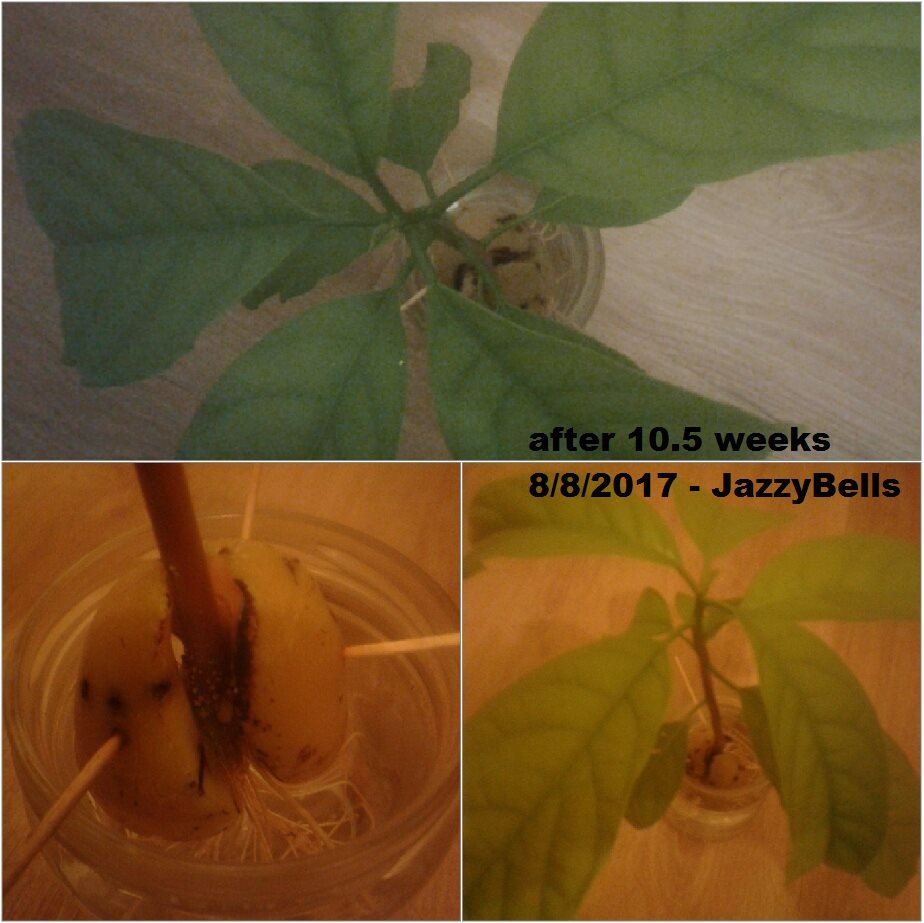
Make sure you check the jar occasionally to see if it needs water refilling or replace the water if it becomes too dirty. Wait 6-8 weeks before you can see roots emerging from the bottom of the seed and another 2-3 weeks after that to see the sprout at the top of the seed.
Step 9
When the plant gets tall enough, you are now ready to plant it in a large pot with soil. Make sure you keep the top part of the seed above the soil to give it room to grow.
Hope you enjoy this post :) Feel free to UPVOTE, RE-STEEM and COMMENT. Thank you for reading!

JazzyBells