Welcome to my first official hydroponics gardening post. This weekly series will show you my garden systems and how I go about growing the majority of our produce-type foods right at home, even with NO farmable land.
I have been growing food using hydroponics since 2013 when I made the decision to switch over from container soil gardening. This was the smartest decision I ever made with respect to gardening. I have increased our yield by 300-400% depending on the crop, which is a big deal when you have very little space to grow in. Each year I learn a little more, little things that help improve my gardens over time. Even with my wall garden, I didn't get it 100% right the first time around. Nine months after I built the system I ended up redesigning it to make it more efficient, which increased its yield. Over time I started using the term "Hydrogarden" to refer to my hydroponic garden systems, so that is the term you will most often see me use in my writings.

Various lettuce and herbs growing in our wall garden.
Growing Greens Indoors
This week I will show you my indoor lettuce wall garden. Down here in South Florida where we live has it's own unique challenges to growing outdoors. While it is possible to grow your greens outside here, the unpredictable weather, high humidity, and intense summer heat means you will have to devote more time and hands-on effort to maintaining them.
Lettuces and herbs love the sun, but in extreme heat they tend to bolt early (produce flowers and go to seed) drastically reducing the life of the plants and your edible yield. The high humidity also means more chances of disease and leaf fungus that can spread quickly through your garden.
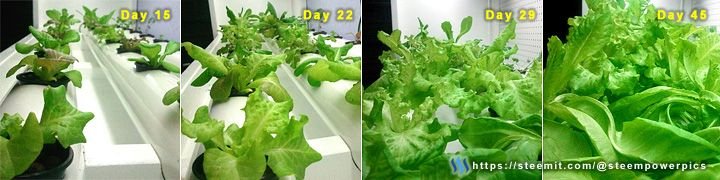
Lettuce starter plants in a 45 day growing test.
The silly part about it all, was the fact that at the time I was starting my seeds in a hydroponics system I set up in my garage. That system now uses custom designed, energy efficient blue/red LED grow lights I had manufactured for me by a company over in China (where else?) to replace the T5 tube lights I started with.
Once the plants got to a certain size I would move them to the outside garden or give them to family and friends to grow in their gardens. If I did not have a home for the starter plants I would let them continue to grow there until I did. In time I realized the lettuce in the garage would grow faster and larger if I let them, than the ones I moved outside.
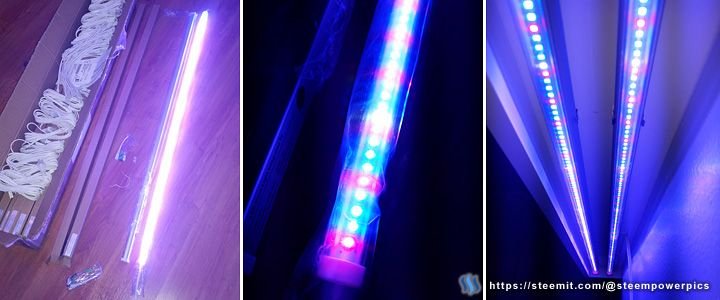
My Custom LED Grow Lights.
So, after battling the seasonal ups and downs for 2 years, I decided it was time to move my lettuce and herb production indoors and I got to work designing and building my 3-tier indoor wall hydrogarden.
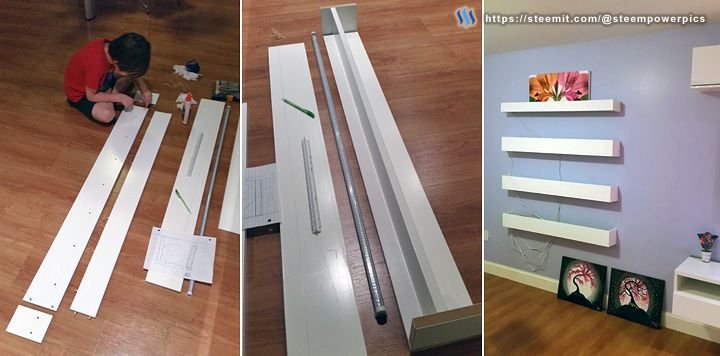
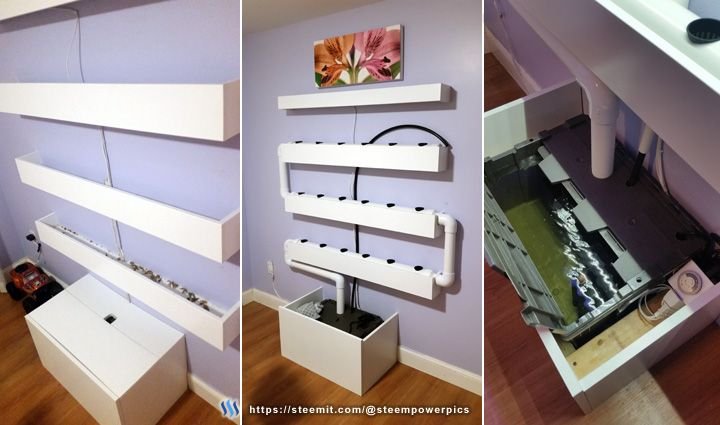
Building the wall unit support boxes, my son helped with the glue.
My original design was focused on creating something that matched the modern white "IKEA" style of the adjacent living room and kitchen. I wanted to build a system that minimized the fact that it was going to be a stack of pipes and hoses bolted to the wall, so my design incorporated a complicated system of 1/2" flow and return pipes and wires carefully hidden within each level, only showing as a central "stem" in the middle from top to bottom. It's important to note that this is a huge departure from they way I built my other hydrogarden systems, and would eventually be the reason I had to rebuild it nine months later.
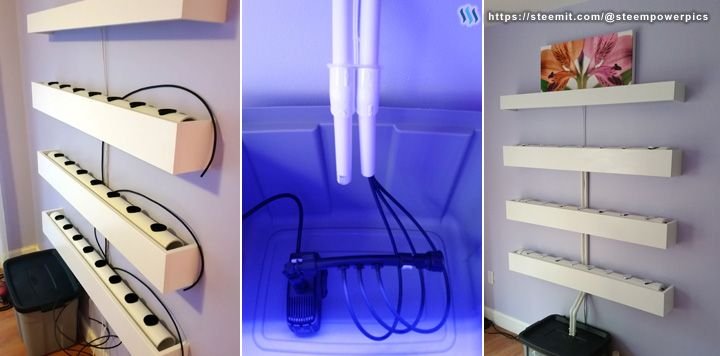
Final assembly on the system and reservoir tank connections.
After I completed the functional components of the system I let it run with just plain water for a week to make sure there were no leaks and no issues with pump pressure or circulation. Once I felt it was good to go, I built the lower box cabinet to hide the reservoir tank, cords, and timer for the lights, mixed in the nutrients, and added the plants.
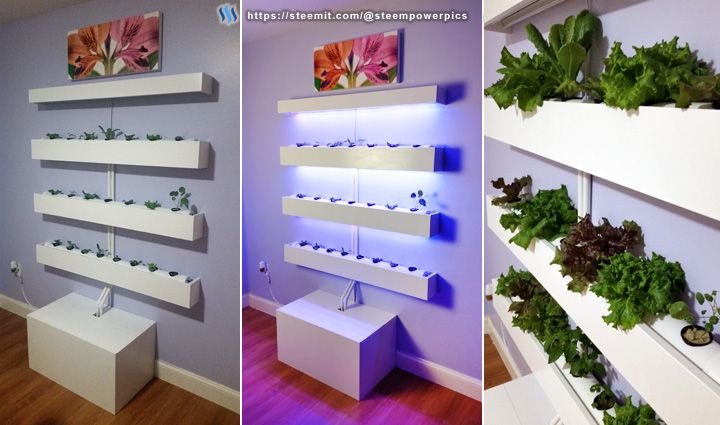
The completed wall unit with a clean low-profile design.
Our new wall garden was a success and cranking out the greens! We now had fresh, crisp, clean lettuce and herbs just a few steps from the kitchen. It did take some getting used to the night club type glow put off by the LEDs during the day, but the plants seem to love it.
Over the next few months I took notes on the growth cycle of the plants as I always do during the first few growing cycles. This helps me figure out a steady cycle for successive plantings, a method of keeping plants of different ages in your garden to ensure a continuous harvest.
A few months in I realized the plants were not performing as well as the tests I ran in the garage system. While they were doing much better than my outside lettuce, they were not growing as fast or as big as the plants from the garage, and they tended to bolt sooner as well. Upon doing a complete system check, something I do every six months, I noticed the 1/4" feed lines were not flowing as well as they should and an excess of plant/root debris was collecting in the main growing pipes.
I let it go a few more months before deciding that if I wanted this system to perform the way I wanted it to, I would have to rebuild it.
Converting the system to my standard free-flow design.
The original system was built to last and there was no way to modify it in place or even to get it out peacefully. Each level had to be pulled out to snap the connecting 1/2" return pipes to break them free.
I then cut "U" shaped channels in the opposing sides with a jig-saw to snugly fit the new 2" elbow return pipes that would allow the nutrient solution to flow freely through the system. I then ran a 1/2" flow tube directly from the pump to the upper level and tucked it into the starting end of the system with a 90 elbow fitting.
I replaced the reservoir tank with a slightly larger one that luckily fit inside the original cover box, and added a new 250/gph pump to increase the circulation flow. The only thing I needed to change was make a new back section of the box cover since the return pipes are bigger.
Just as I did the first time, I let the system run for a few days before adding in the nutrients and plants.
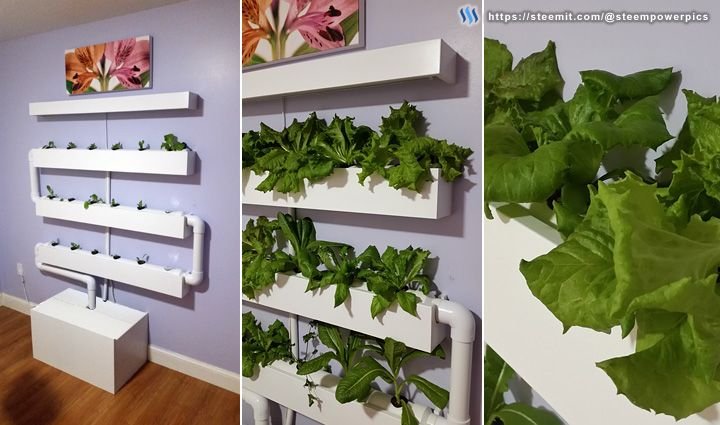
The new upgraded system.
It's been six months since the rebuild and our wall garden is producing more lettuce and herbs than we can eat ourselves. Even with a conservative plant rotation schedule, every week we bring some lettuce over to my wife's family to make sure nothing goes to waste.
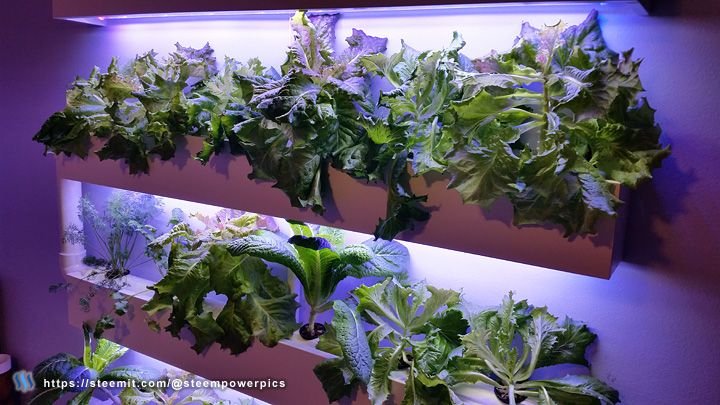
Mature lettuce plants growing under my custom blue/red LED lights.
I hope you enjoyed taking a look at my home hydroponic wall garden. If you have any questions or comments, just drop a reply below.
As always, please upvote this post and follow me if you like my work and want to see more.
If you think others will enjoy this
Please ReSteem it!
Thanks for reading!