Saludos amigos de la comunidad Mi blog Bengalí.
Esta es la primera vez que voy a realizar una publicación en esta comunidad, y lo que llamó mi atención fue el hecho de ver la palabra DIY.
En Steemit no he encontrado una comunidad donde se tome en serio la manualidad, el bricolaje, las reparaciones y todo lo referente al arte manual y creativo.
Greetings friends of the My Bengali Blog community.
This is the first time I'm going to make a post in this community, and what caught my attention was seeing the word DIY.
On Steemit I have not found a community where crafting, DIY, repairs and everything about handmade and creative art is taken seriously.

Mi pasión es la reparación en el área de la electrónica, en este campo no todo es exacto y precioso, a veces debemos improvisar para poder solucionar un problema y más aún cuando no contamos con las piezas exactas.
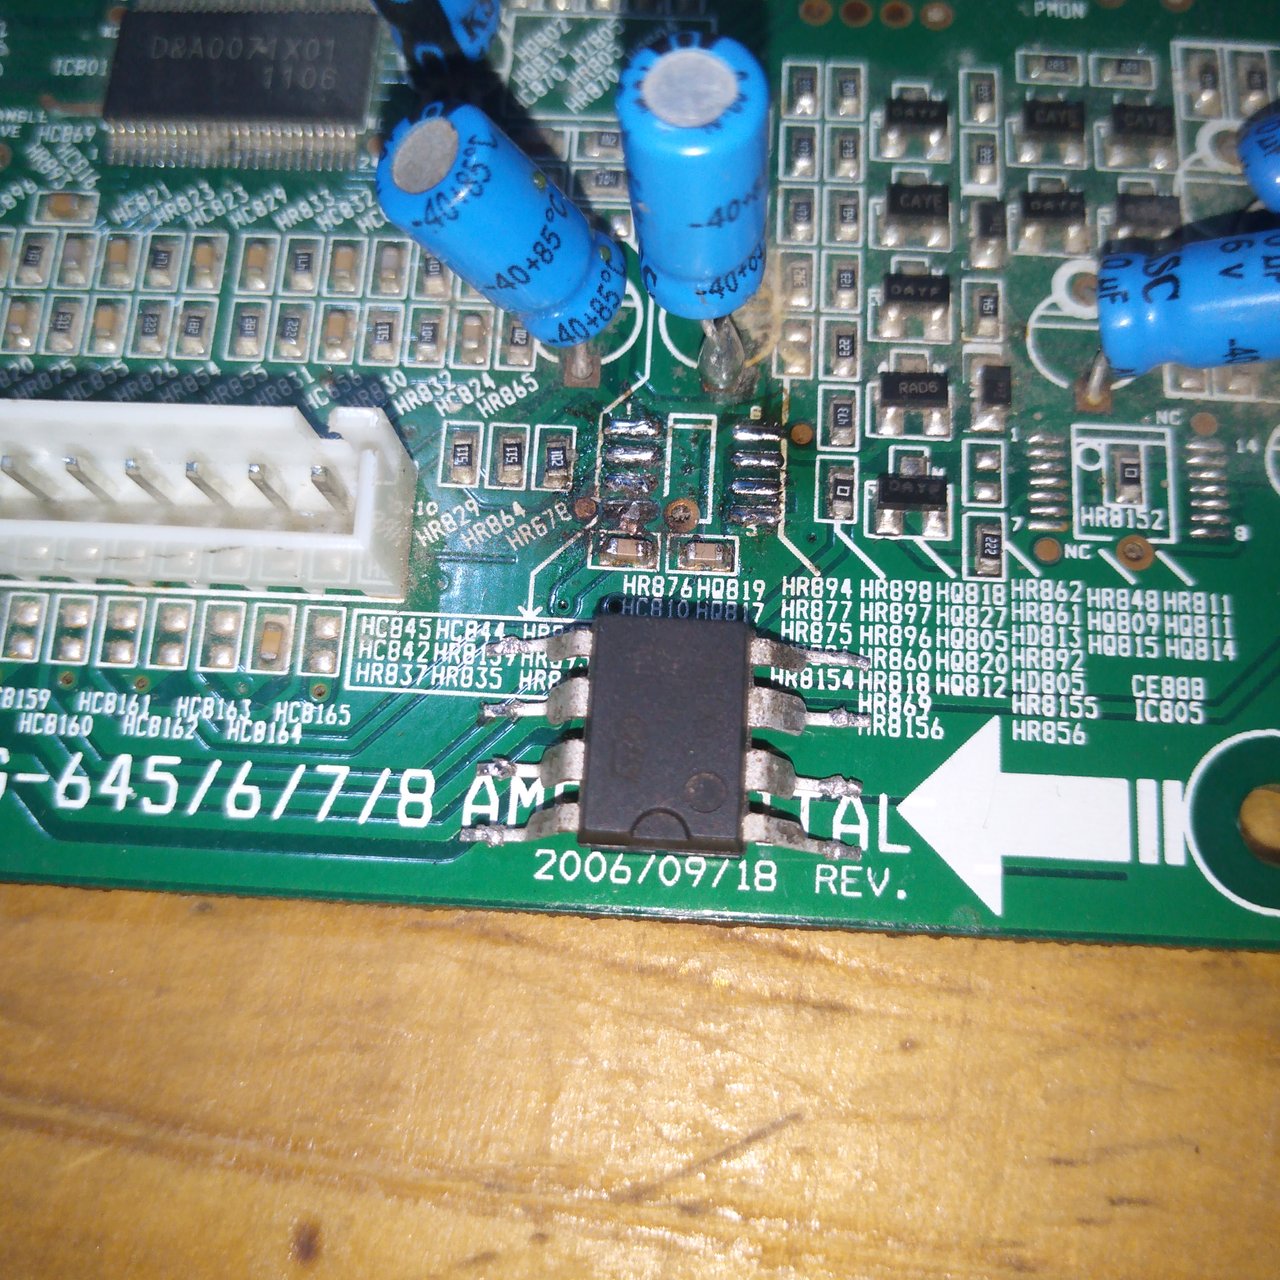
Para demostrar lo que les estoy hablando les mostraré como adapté un amplificador operacional 4558C de montaje hueco pasante en donde iba un amplificador 4558 pero de montaje superficial.
My passion is the repair in the electronics area, in this field not everything is exact and precious, sometimes we must improvise to solve a problem and even more when we do not have the exact parts.
To demonstrate what I am talking about I will show you how I adapted an operational amplifier 4558C of hollow pass-through mounting where a 4558 surface mount amplifier used to be.
Aquí es donde entra el ingenio para resolver el inconveniente.
La idea es lograr conectar de alguna forma este amplificador que es el doble de tamaño que el de montaje smd.
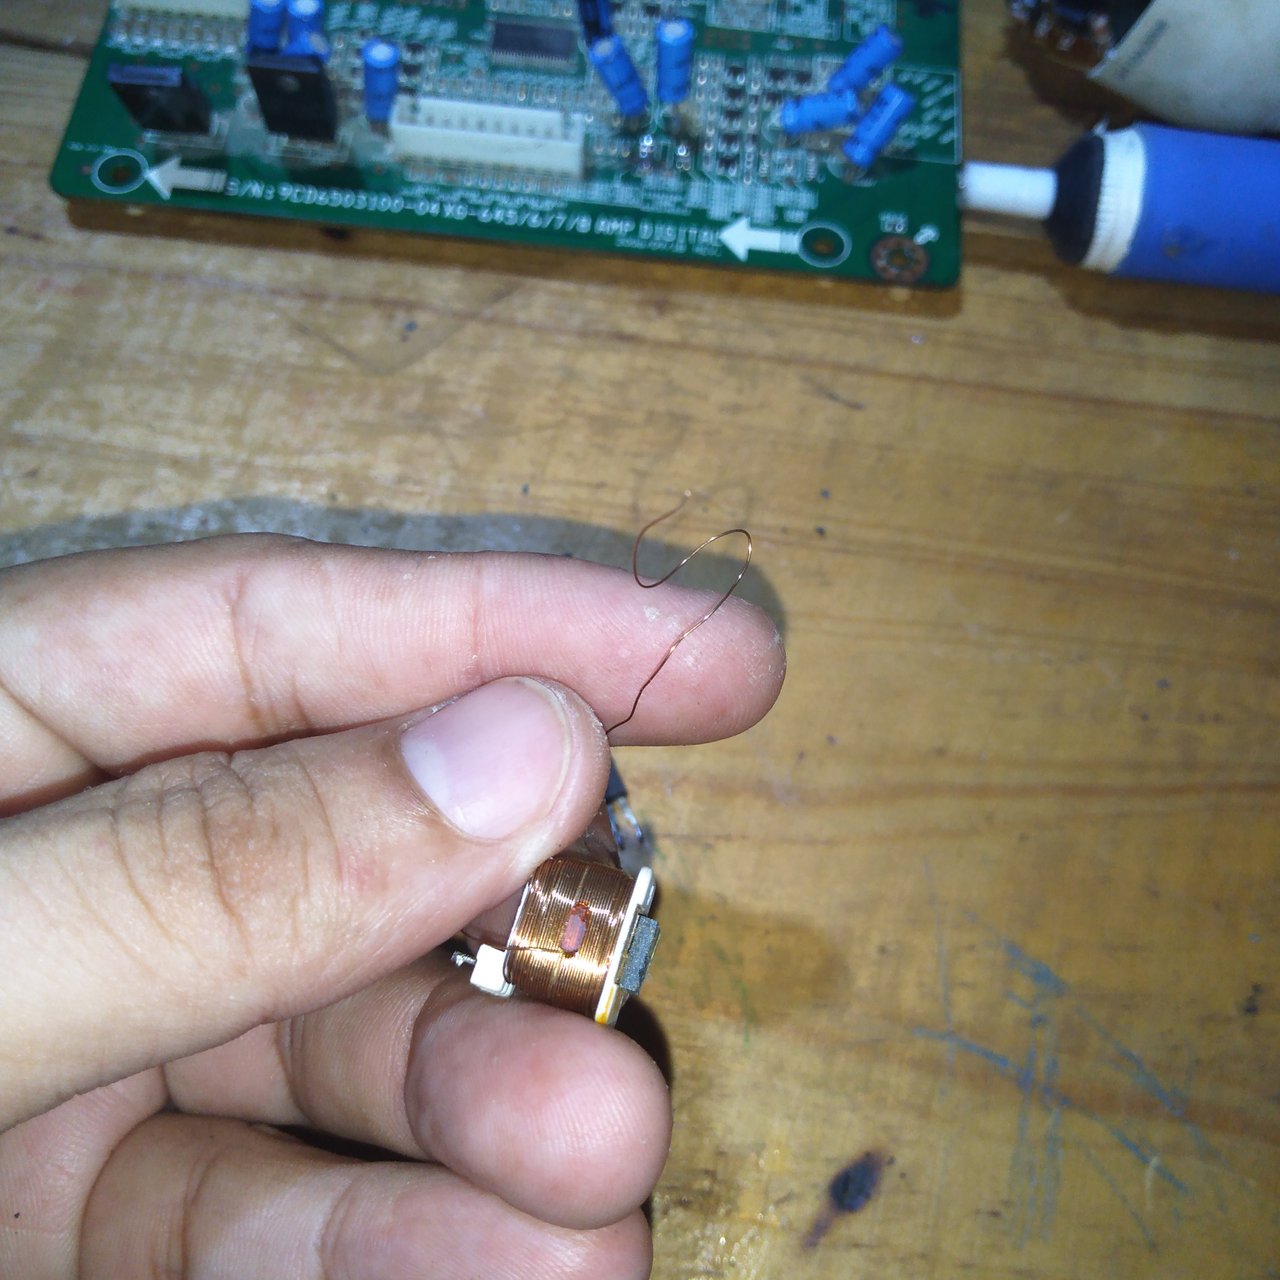
Para ello ubiqué un circuito de bombillo ahorrador, este tipo de bombillos cuenta con un transformador que tiene un alambre fino de cobre recubierto con barniz aislante.
This is where the ingenuity comes in to solve the problem.
The idea is to somehow connect this amplifier that is twice the size of the smd mounting.
For it I located a circuit of saving bulb, this type of bulbs has a transformer that has a thin copper wire coated with insulating varnish.

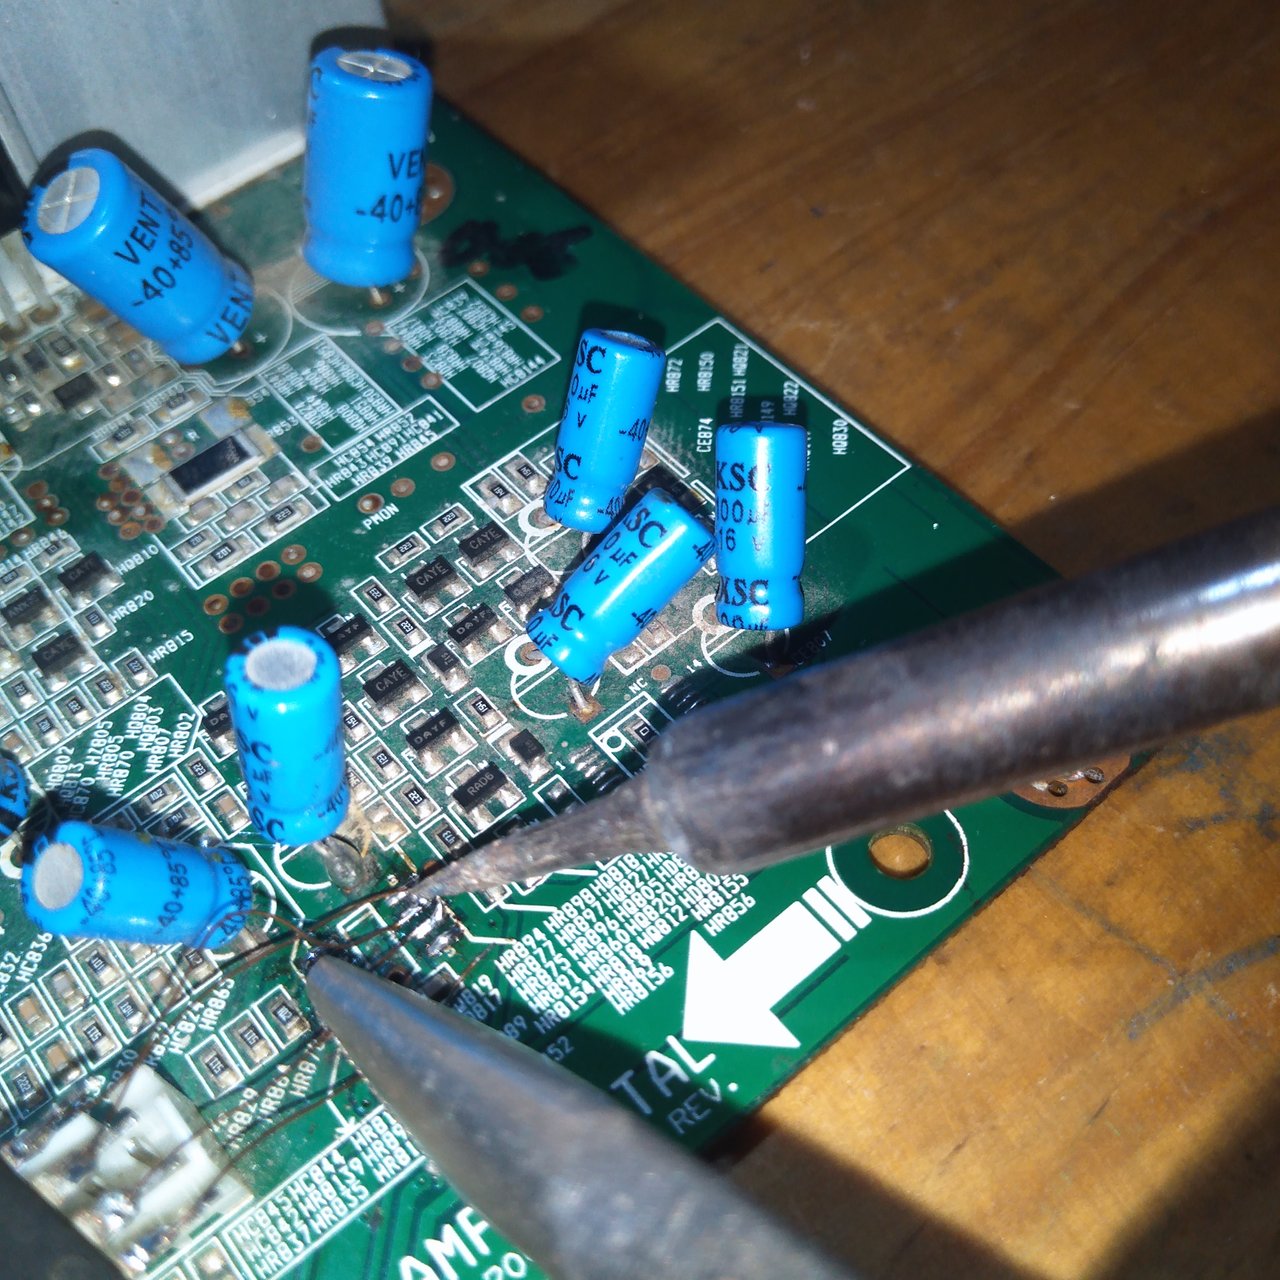
Con el cautín desmonté el transformador y luego rompí su cubierta para poder llegar al alambre de cobre que me interesa.
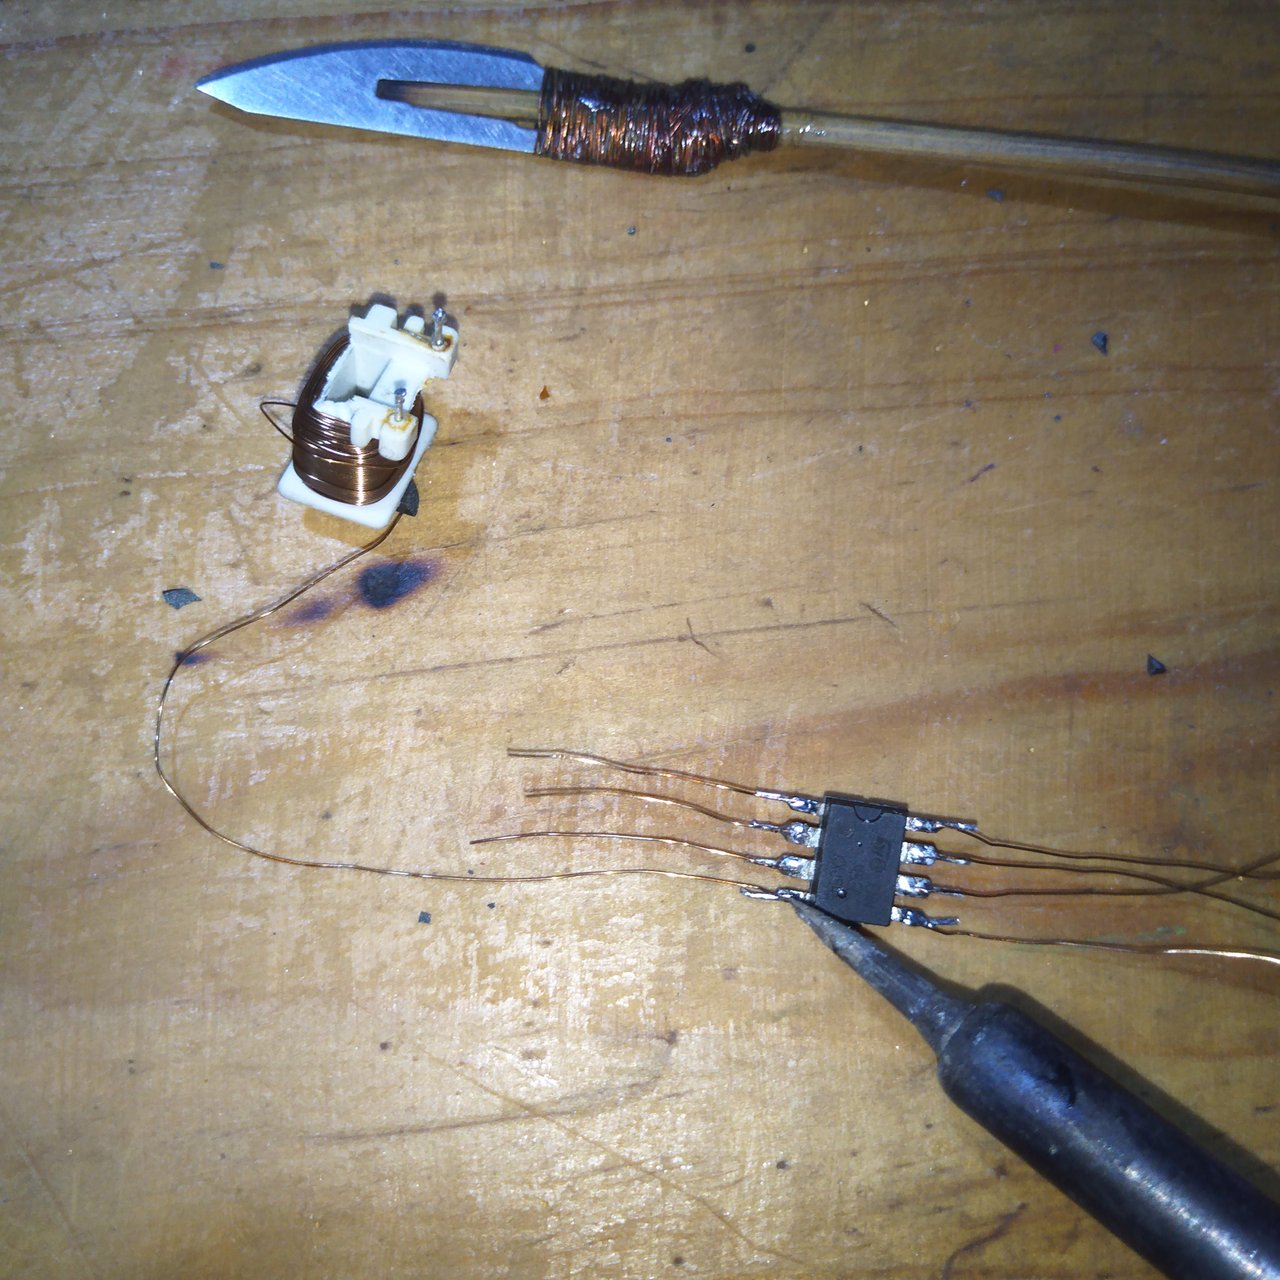
Para poder soldar este alambre de cobre debo raspar el barniz en la punta del alambre para que el estaño de pueda adherir.
With the soldering iron I disassembled the transformer and then I broke its cover in order to get to the copper wire I am interested in.
In order to solder this copper wire I have to scrape off the varnish on the tip of the wire so that the tin can adhere to it.
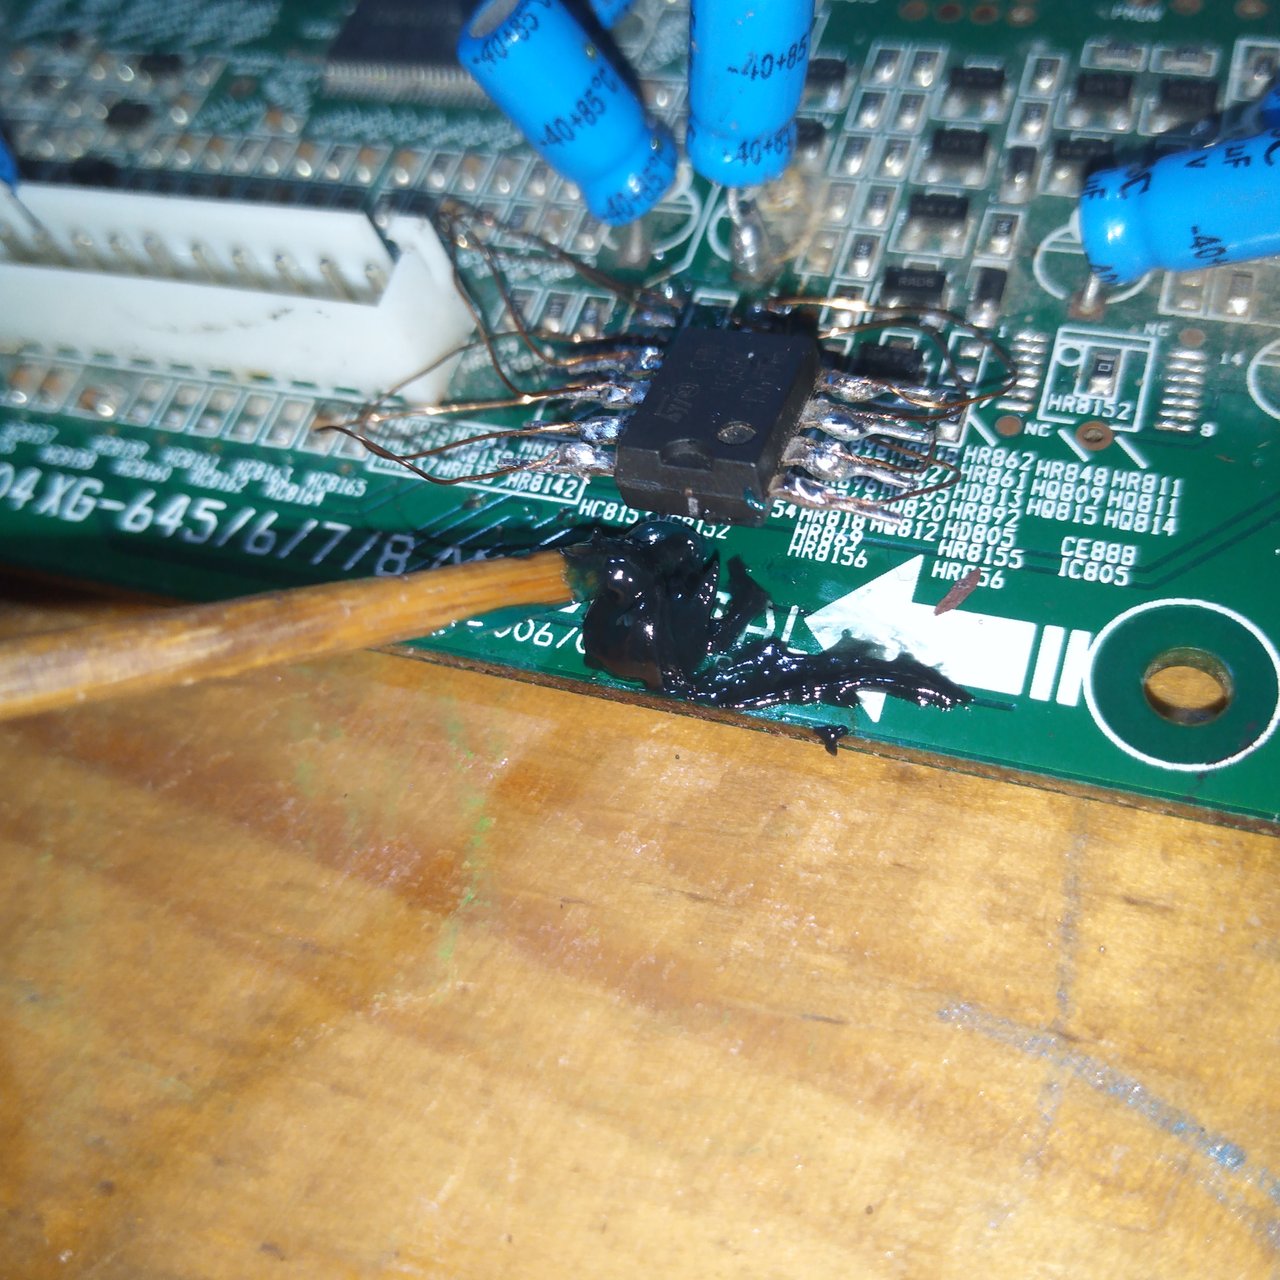
Ubiqué un espacio donde colocar el amplificador operacional, de manera que no haga contacto con los demás componentes.
Ubicado el espacio, empecé a soldar alambre de cobre en cada una de las patillas del amplificador.
I located a space where to place the operational amplifier, so that it does not make contact with the other components.
Once the space was located, I started soldering copper wire on each of the pins of the amplifier.
Al tener todos los alambres soldados, empecé a soldar el extremo de cada uno de ellos en la posición en que estaba el amplificador operacional smd.
No hay forma de confundirse al momento de conectarlo, ya que estos componentes tienen una marca para indicar en la posición que van conectados, esta marca también se encuentra en la tarjeta o placa.
When I had all the wires soldered, I started to solder the end of each one of them in the position where the smd operational amplifier was.
There is no way to get confused when connecting it, since these components have a mark to indicate the position where they are connected, this mark is also on the board.
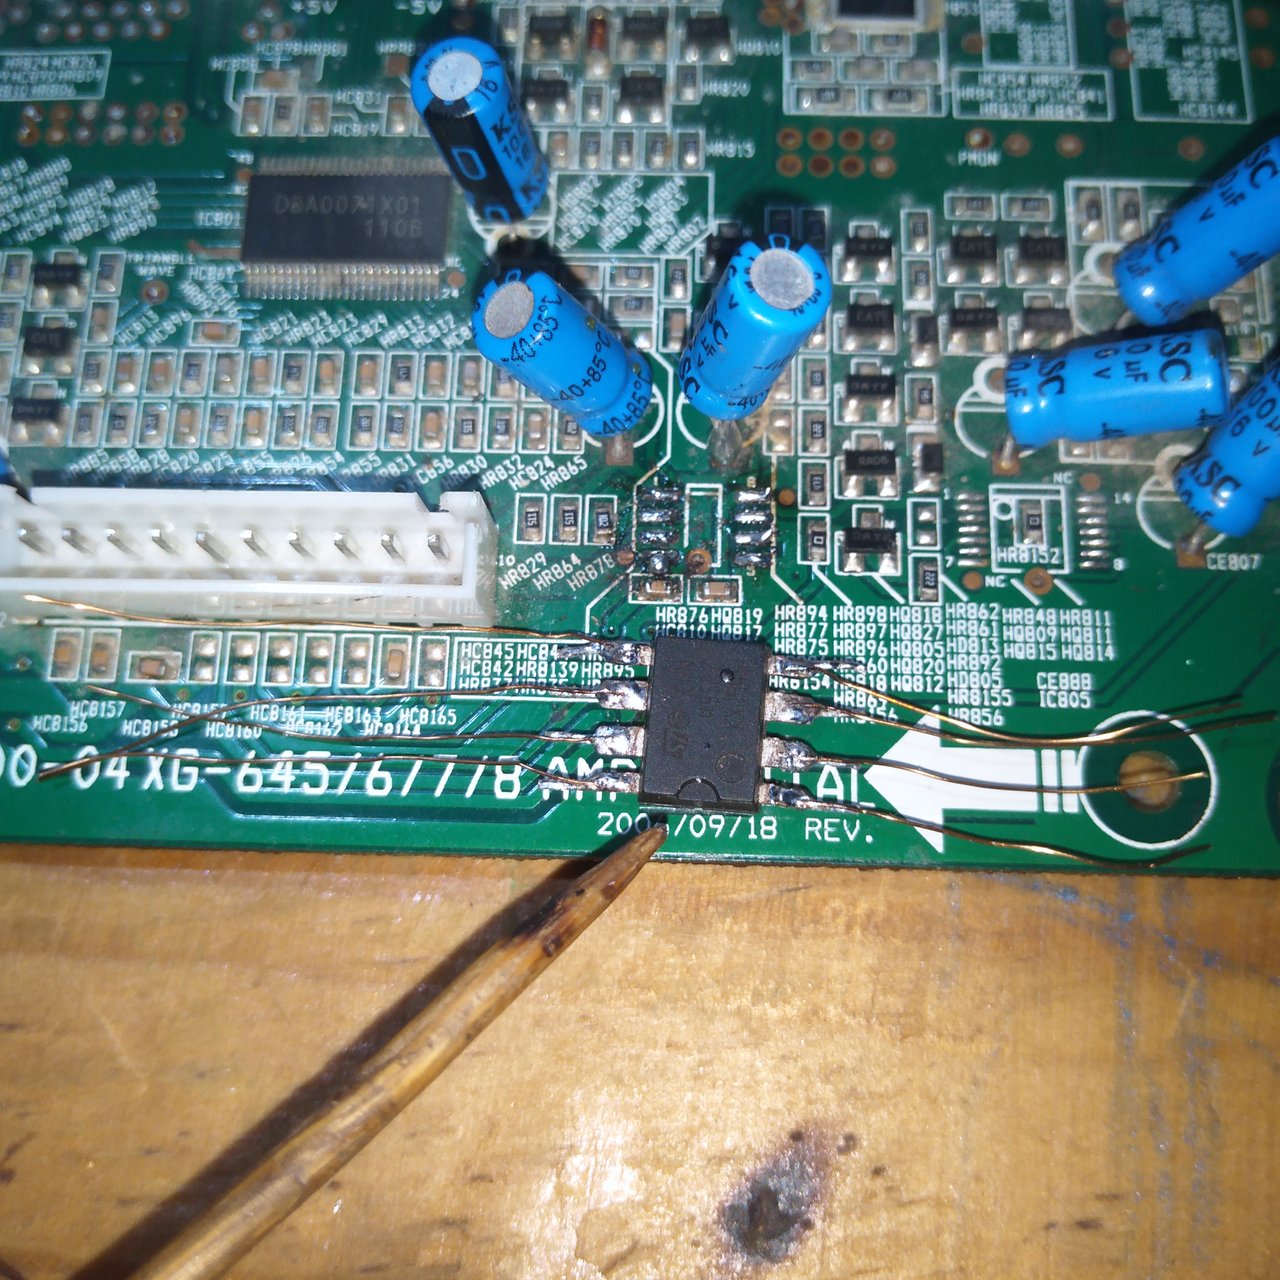
Con ayuda de una pinza fui soldando los delgados alambres en la soldadura de la placa.
Aquí debemos tener cuidado de no soldar el alambre en una posición incorrecta y también tener cuidado que las soldaduras no se unan con las de al lado.
With the help of a tweezers I soldered the thin wires on the solder on the board.
Here we must be careful not to solder the wire in the wrong position and also be careful that the solder joints do not meet with the solder joints at the side.
the welds do not join with those on the side.
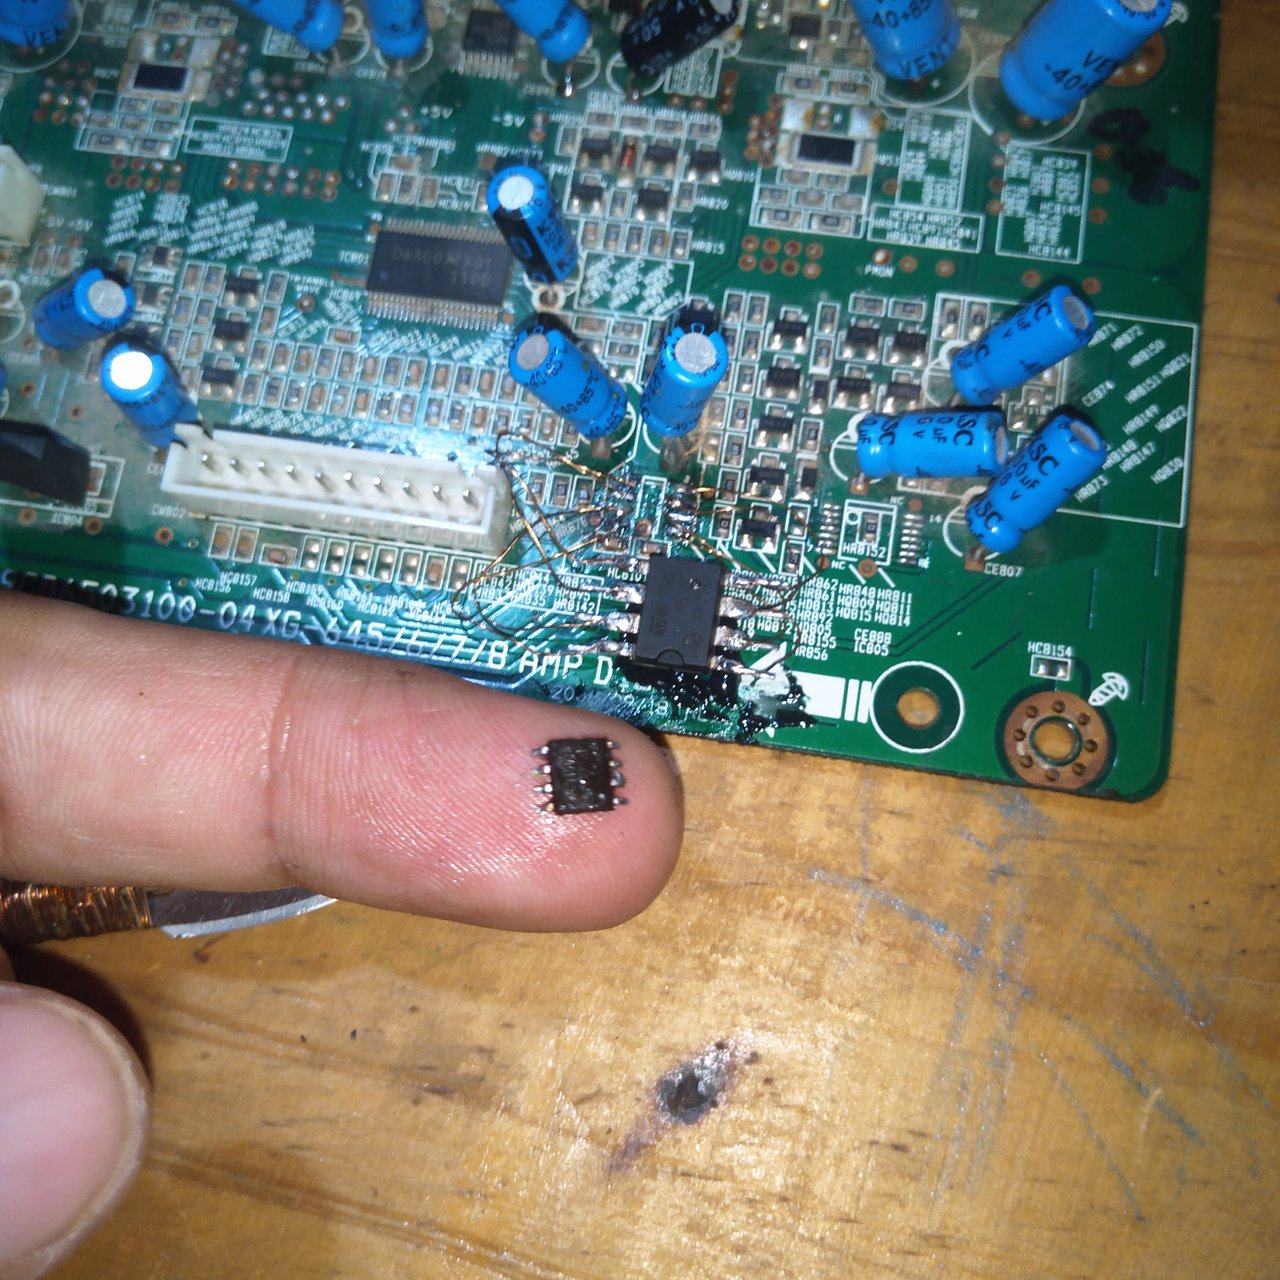
Luego de hacer esto, ya tenemos el amplificador operacional soldado de manera correcta. Probamos que no haya unión de soldaduras con otras y luego empezamos a preparar la mezcla de pega con que vamos a fijar el amplificador en la placa.
After doing this, we have the operational amplifier soldered correctly. We test that there are no solder joints with other solder joints and then we start to prepare the glue mixture with which we are going to fix the amplifier on the board.
Debemos utilizar una pega que sea resistente al calor, ya que este componente se calienta al entrar en operación, por lo tanto no podemos utilizar silicón caliente como en otros casos.
Como verán, hemos reemplazado con éxito un componente o integrado smd por uno de hueco pasante.
We must use a glue that is heat resistant, since this component heats up when it comes into operation, so we cannot use hot silicone as in other cases.
As you will see, we have successfully replaced a smd component or integrated with a through-hole component.
Con algo de ingenio y elementos de reciclaje pude solventar este problema y así realizar con éxito está reparación del amplificador de un equipo de sonido.
Espero tener la fortuna se ser verificado en esta comunidad y de que mi entrada sea válida para este concurso que ha llamado mi total atención.
Gracias a todos los que leerán mi publicación.
With some ingenuity and recycling elements I was able to solve this problem and thus successfully perform this repair of the amplifier of a sound system.
I hope to have the fortune to be verified in this community and that my entry will be valid for this contest that has caught my full attention.
Thanks to all who will read my publication.
Todas las fotografías fueron tomadas con mí Smartphone Huawei Dub-Al00.
Traducido con Deepl https://www.deepl.com/es/translator-mobile