Hello and Greetings Everyone. This is your very own Haidermehdi, Country Representative of Pakistan and Admin Steemit Pakistan.
As stated earlier, I have been trying to explore adobe illustrator and things went well in the first post as many people showed interest. Thus I am now looking forward to bringing it to shape by teaching more :p I have never ever taught anyone so perhaps I feel that I am a bad teacher. But let's see how we go in this course :p

In this post, we will be learning how to use the Shape Merger tool and create different shapes using the Shape merger Tool! It is going to be interesting and I hope and pray for myself that I can explain it to all of you :)
We will start it by merging two similar shapes. If you guys haven't seen the first two lectures of this series, make sure you see them and get hands-on practice with those little tools! It would be extremely easy for you to then match with this lecture!

- First of all, we will open a new file in adobe illustrator. We will move to Print, select A4 size. Set pt to Inches and choose CMYK color combination and then click on create!

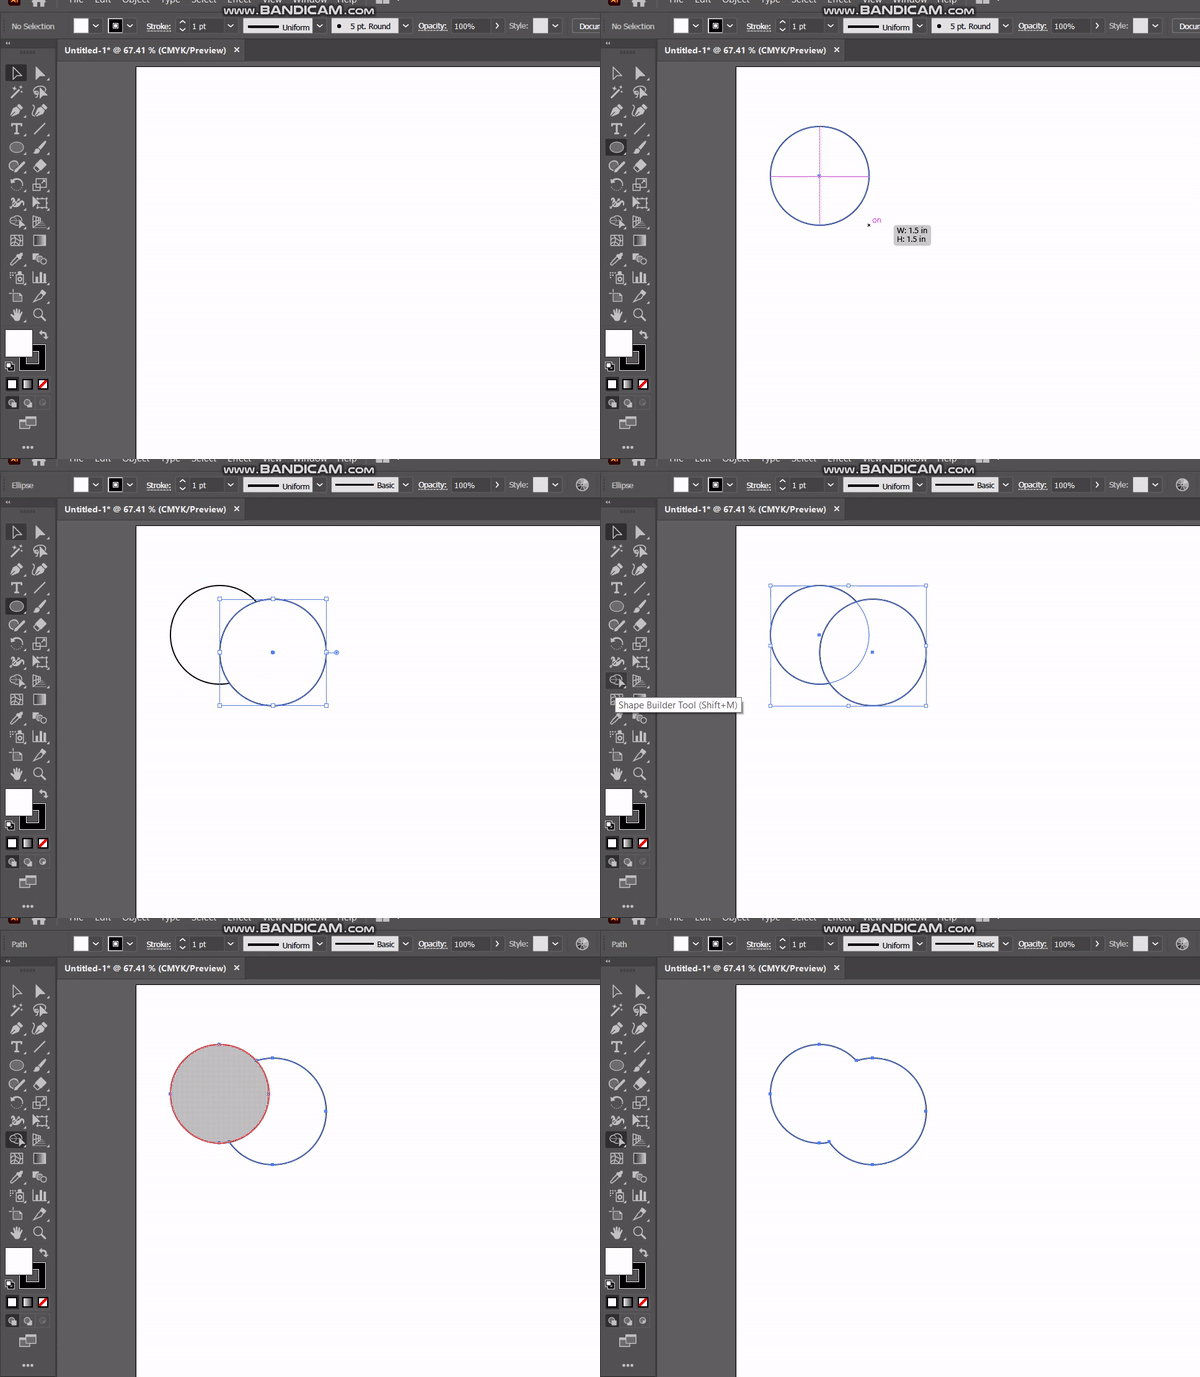
This is the screen that appears first up! Now, We will draw two circles and see how we can merge them together!


BUT WAIT! HOW DID WE DO THIS?
Now the answer to this question is quite simple. You just need to follow the steps below to learn how to use the shape builder tool!
- Draw two circles on the art box.
- Place one circle over the other to make sure that they intersect with each other in whatever shape you want.
- To join two shapes, first you use the Selection tool to select both shapes that are intended to be joint. Then select the Shape Builder tool! I will show you where it is on the interface!
- Now you just have to go the shapes that you want to join, you'll observe that when you take the cursor to that shape, the circle gets grey in color! It shows that you are going to merge these shapes or eliminate the intersecting part!
.gif)
The above video shows the working of the Shape merge tool. We drew two circles, selected them both, and then selected the shape merge tool! Afterward, we merged them by selecting them one after another.
Now let's see what interesting shapes we can make using these simple shapes :p

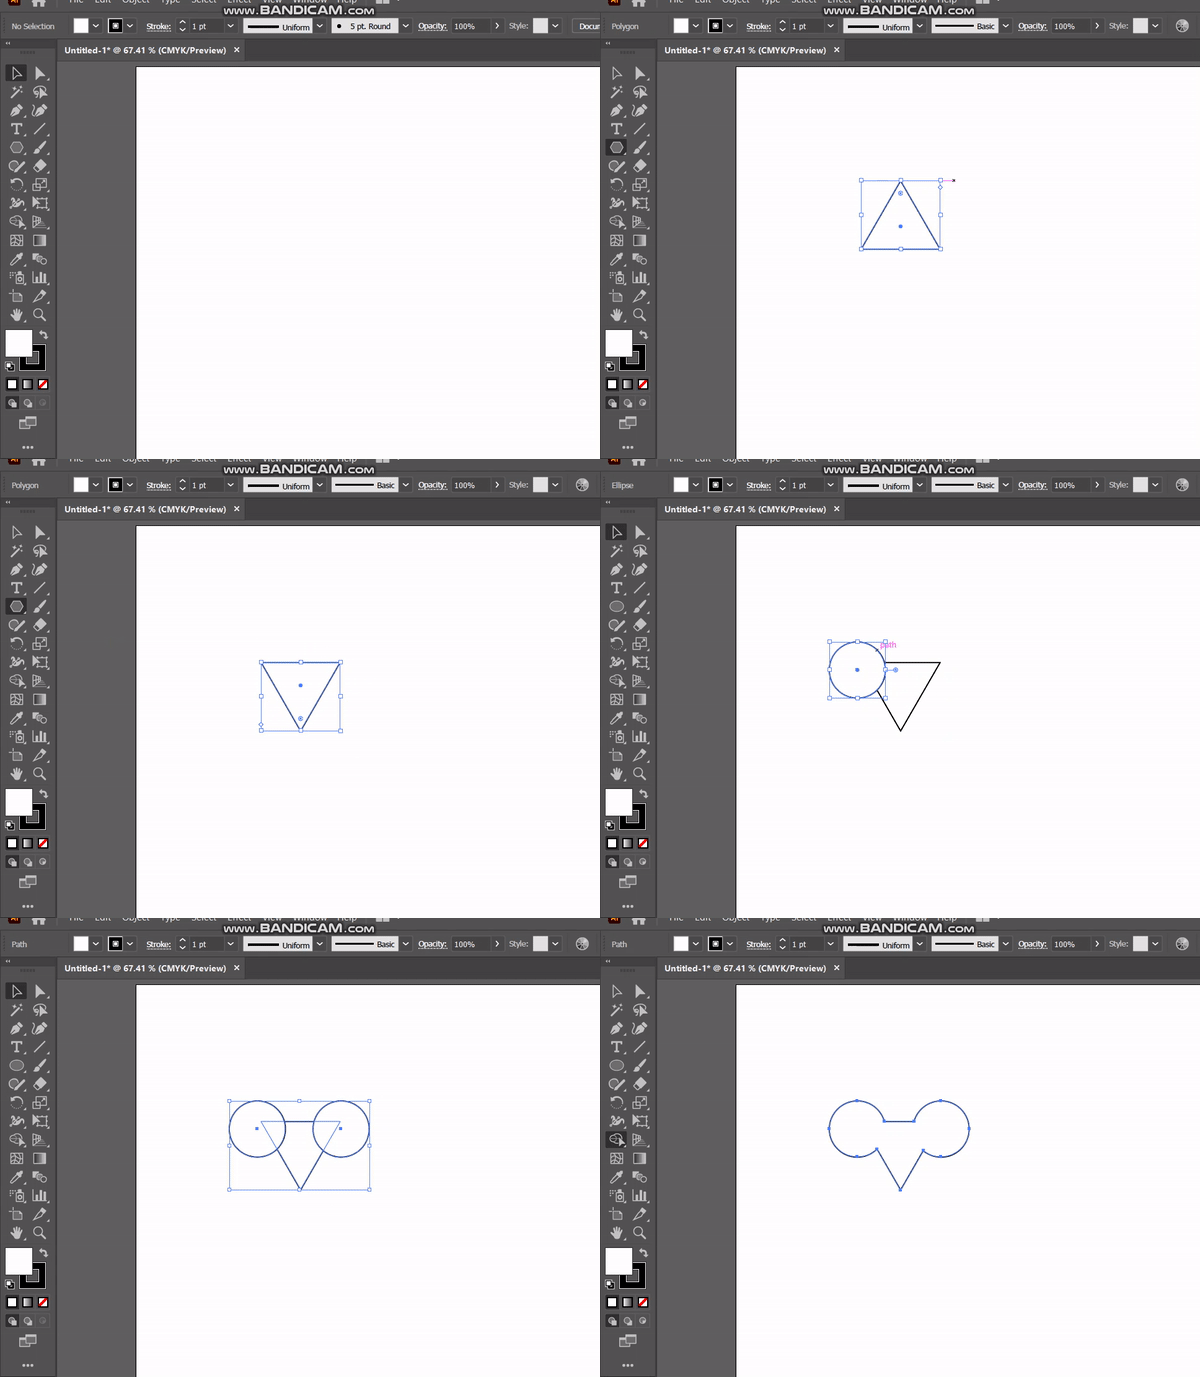
The Mice Using Circle and Traingle!


.gif)
Tip of the day: You may have noticed that I took the cursor to one circle and when I moved it to the other side holding the path value, it produced a duplicate item. That's no magic. When you move the cursor to the shape and it shoes path, hold the alt key and press the mouse left key. Then drag the item to a certain distance and you will see that it copied the shape.

If you guys want to do some practice, I can leave some images for you all as a hint. And would love to see if you people are giving it a try. I would use my steemit-pak delegation rewards(20 steem) to gift to those who are actually following the course and 2 steem extra to the one who does this homework :D
Use can also use the Place option to get the shape on the art box and then draw using the template as we did in the Second lecture!

Again, I hope you all enjoyed this lecture too. I am trying my best to learn as quickly as possible and to teach you all in a little slower place comparatively. I am sure I didn't go fast with this one too :p
We learned how to make the face of a mouse but see where I ended in this day of exploration :p

I am ending the day # 3 post here. Good Luck everyone with your work. We will work over a template in the next day of exploration using the curvature tool. It is the most effective tool on adobe illustrator. Once you learn this, there won't be anything that you can't draw :)!
Till then goodbye and take care. If you are interested in this one and have followed me, I would love to see your homework on doing this task :p Any problems, feel free to ask and we will solve them together :)
Yours, Haidermehdi.
Country Representative Pakistan.
Steem On!
#CLUB100
