Quesillo Prep for Beginners/Vanilla Quesillo Prep for Beginners
Hola, hola integrantes, fanáticos y comensales de la comunidad de #Steemfoods, hoy decidí asumir el reto de preparar un postre para esta hermosa comunidad.
Créanme, si lo puedo hacer yo pues cualquiera puede (de allí lo de principiante), por eso mis respetos a los(as) Chefs de la comunidad y ánimo a los que estamos iniciándonos en esta clase de actividades.
Hello, hello members, fans and diners of the #Steemfoods community, today I decided to take on the challenge of preparing a dessert for this beautiful community.
Believe me, if I can do it, anyone can (hence the of beginner), so my respects to the Chefs of the community and encouragement to those of us who are starting in this kind of activities.

Así que, manos a los utensilios de cocina y empecemos.../So, let's get hands to cooking utensils and get started ...
Empecemos con los ingredientes que necesitarás
Source
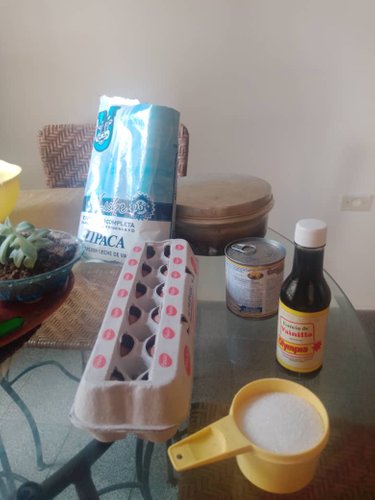
Huevos (yo usé 5), una lata de leche condensada, esencia de Vainilla, leche en polvo y 3/4 taza de azúcar (para realizar el caramelo)
Eggs (I used 5), a can of condensed milk, vanilla essence, milk powder and 3/4 cup of sugar (to make the caramel)
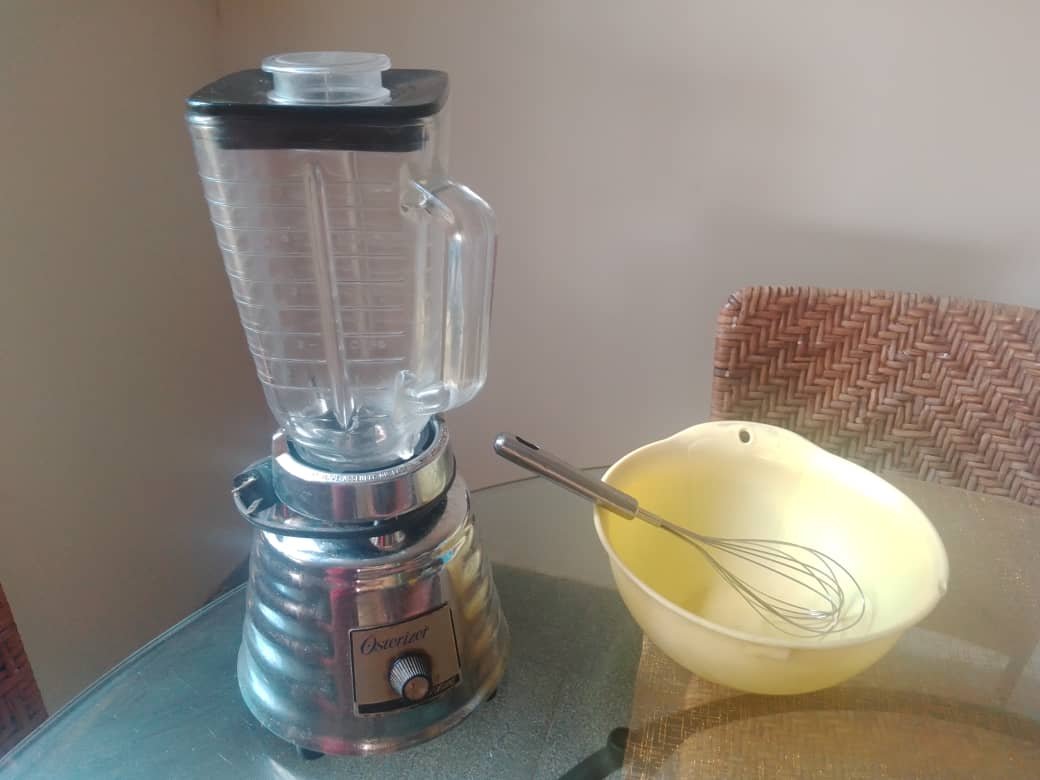
¿Qué utensilios necesitarás para preparar la receta?/What utensils will you need to prepare the recipe?
La preparación de esta receta es tan sencilla que podrás verter todos los ingredientes en una licuadora o usar un batidor manual, en mi caso yo lo hice de manera manual, si es tu gusto realizarlo de esta manera debes ubicar un recipiente hondo que pueda contener los ingredientes sin riesgo de derrame.
The preparation of this recipe is so simple that you can pour all the ingredients into a blender or use a manual mixer, in my case I did it manually, if you like to do it this way you should locate a deep container that can contain the ingredients without risk of spillage.
Vamos con el paso a paso/We go with the step by step
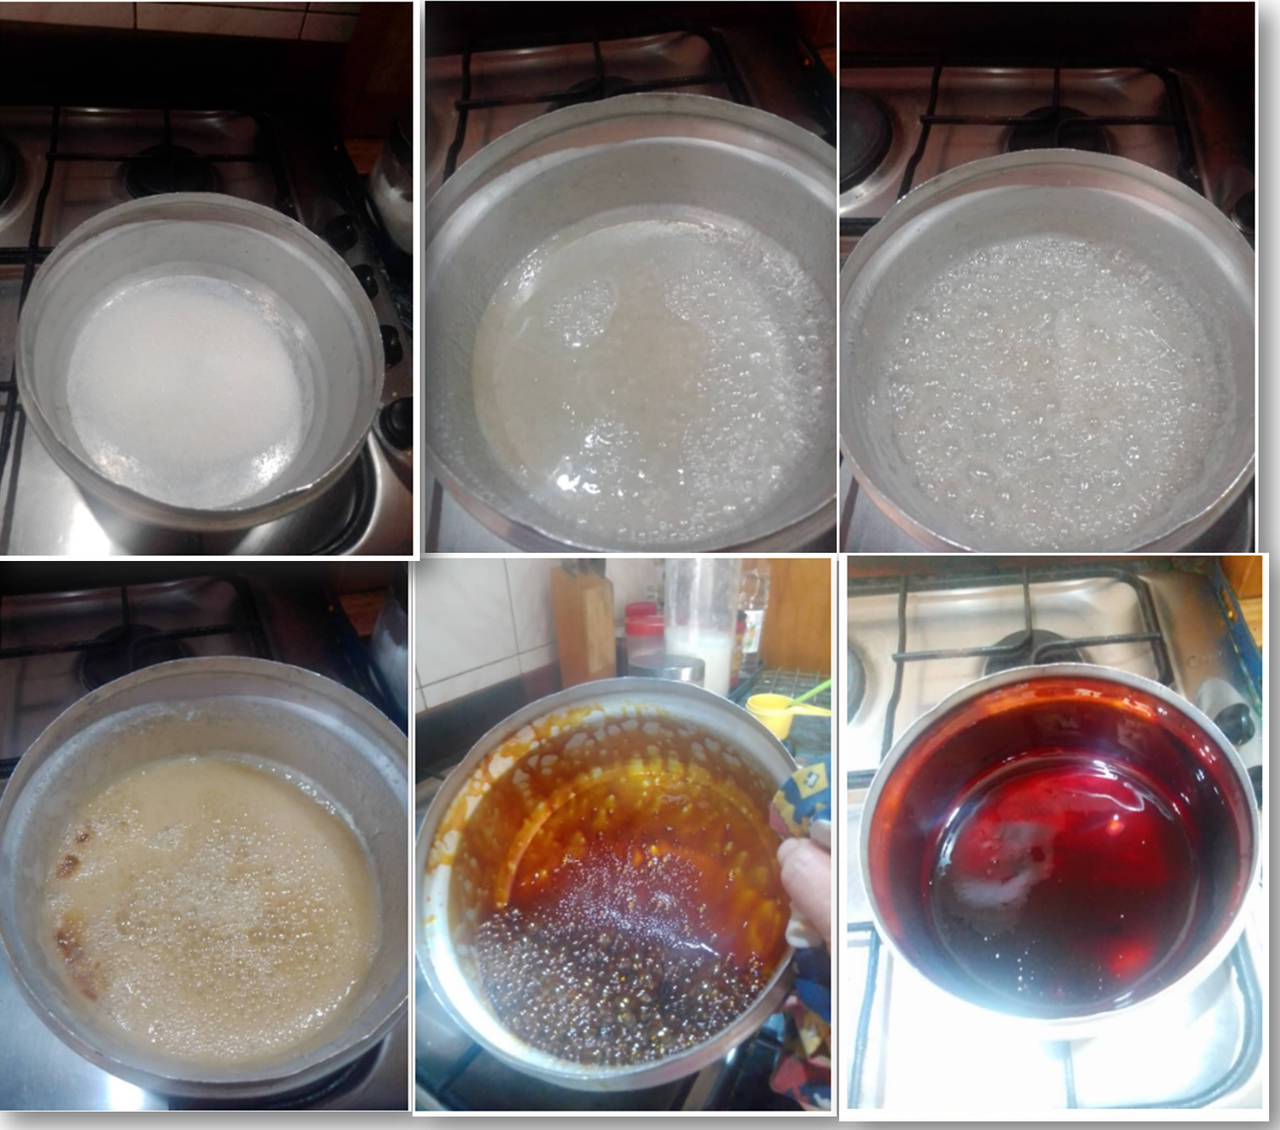
Lo primero que haremos será el caramelo, para ello necesitarás el envase que meterás al horno, nosotros lo llamamos "quesillera", azúcar y un poco de agua. El caramelo será la capa que recubrirá al postre. La preparación del caramelo tomará entre 10-12 minutos, te recomiendo lo hagas a fuego bajo y tengas mucho cuidado porque es el proceso más delicado.
The first thing we will do is the caramel, for this you will need the container that you will put in the oven, we call it "quesillera", sugar and a little water. The caramel will be the layer that will cover the dessert. The preparation of the caramel will take between 10-12 minutes, I recommend you do it over low heat and be very careful because it is the most delicate process.
Preparación del caramelo, foto a foto/Preparation of the caramel, photo by photo
Source
Hablemos sobre el color del caramelo, este dato es muy importante porque afectará el sabor del mismo, el color ideal del caramelo es el de la foto número 5, ya que mientras más oscuro tenderá a tener un sabor amargo, por ello debes estar atento a esto, los segundos cuentan cuando se trata de obtener el acabado perfecto, en mi caso, lo que tardé en tomar una foto para el post contribuyó a obtener un color más oscuro del que había planificado.
Let's talk about the color of the caramel, this information is very important because it will affect the flavor of the caramel, the ideal color of the caramel is that of photo number 5, since the darker it will tend to have a bitter taste, so you should be attentive to this, seconds count when it comes to getting the perfect finish, in my case what it took to take a photo for the post contributed to getting a darker color than I had planned.
Source
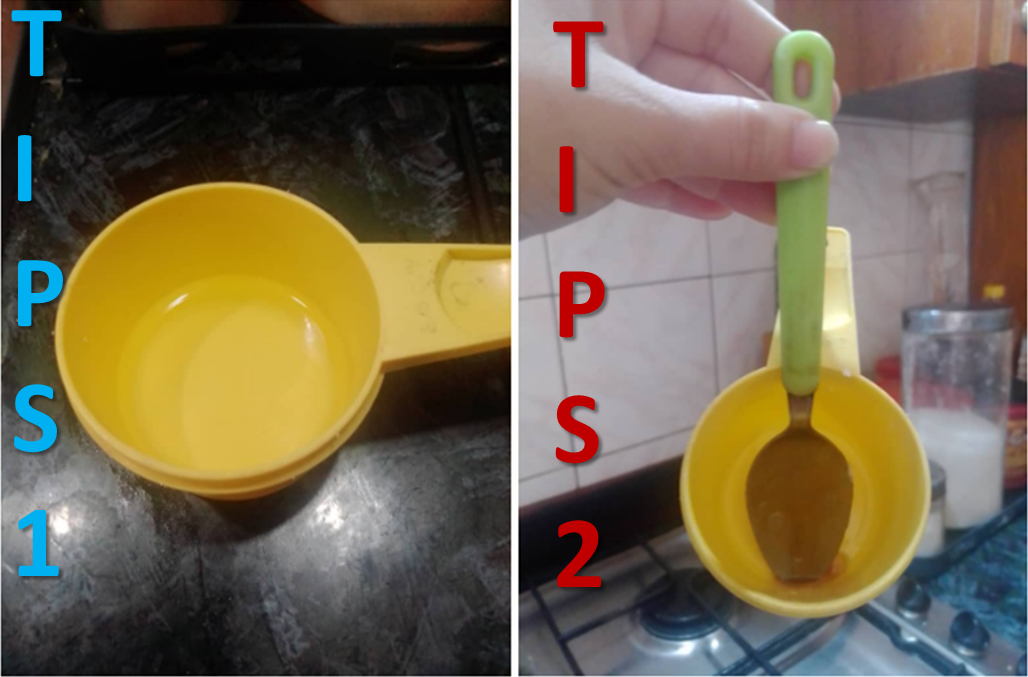
Otro dato importante es la cantidad de agua necesaria para realizar el caramelo, como ya te dije, para 3/4 taza de azúcar necesitarás la cantidad de agua que sale en la foto titulada como "Tips 1", que viene siendo la medida de un dedo de agua. Sabrás que el caramelo está listo cuando se adhiera a las paredes del envase o "quesillera! que llevarás al horno, créeme, esta mezcla tiende a ponerse muy caliente, así que evita quemarte con ella, si quieres verificar como se aferra a lo que toque observa la foto titulada "Tips 2" donde pude alzar la taza ya que la cuchara tenía un poco de caramelo.
Another important piece of information is the amount of water needed to make the caramel, as I already told you, for 3/4 cup of sugar you will need the amount of water that appears in the photo titled "Tips 1", which has been the measure of a finger of water. You will know that the caramel is ready when it adheres to the walls of the container or "quesillera" That you will take to the oven, believe me, this mixture tends to get very hot, so avoid burning yourself with it, if you want to check how it clings to what it touches look at the photo titled "Tips 2" where I was able to lift the cup as the spoon had some caramel on it.
Comencemos con la mezcla/Let's start with the mix
Source
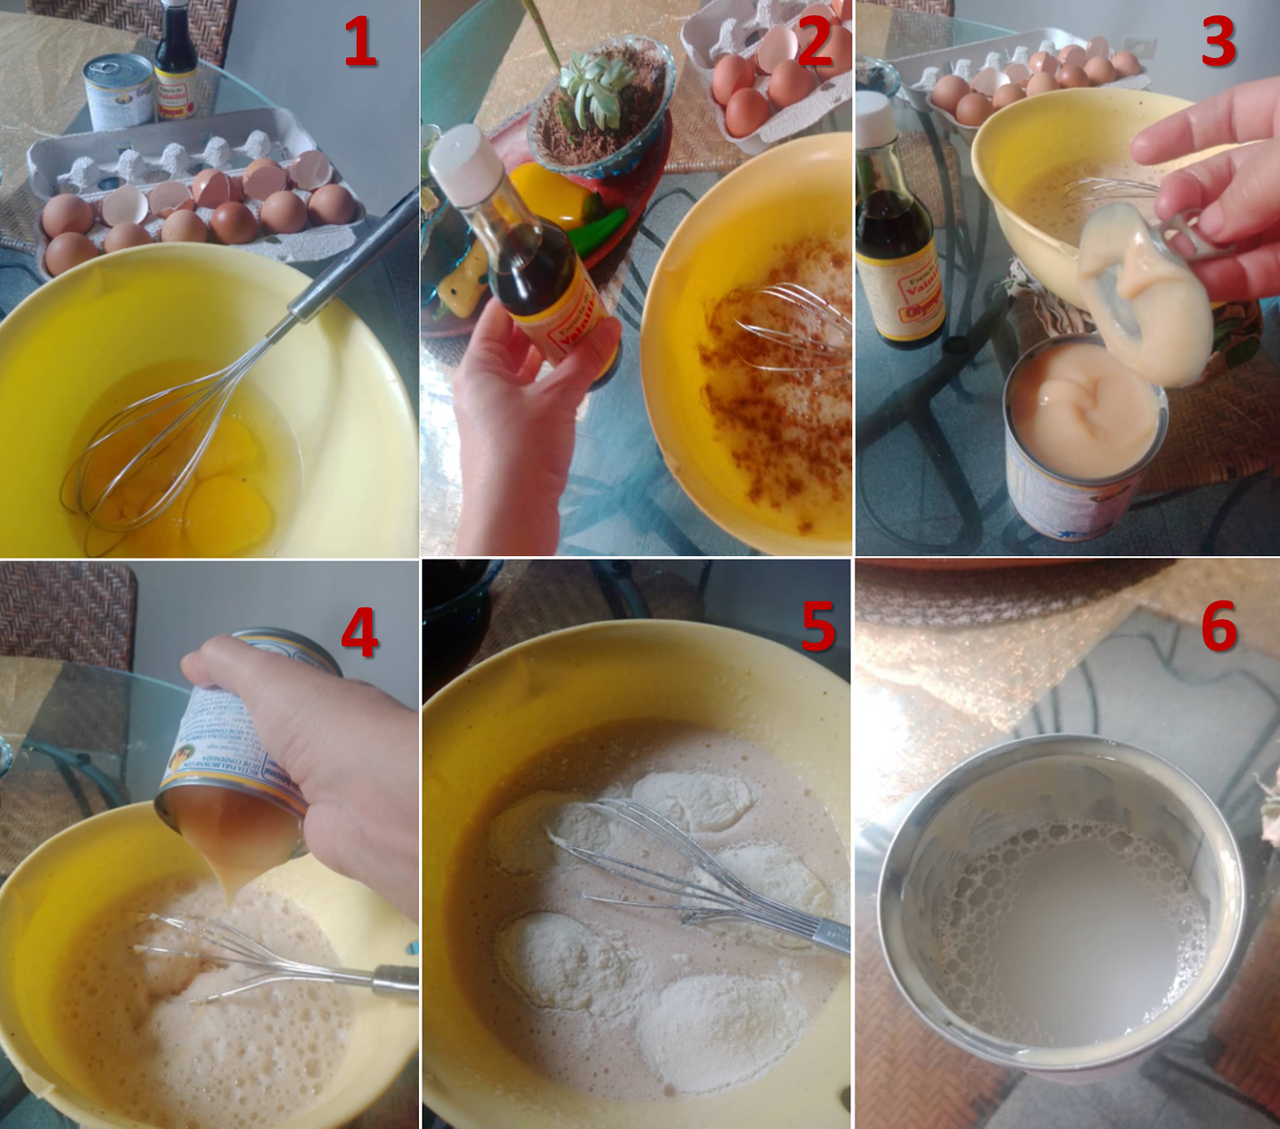
1.-Vierte 5 huevos enteros y empieza a batir.
2.-Agrega esencia de vainilla (al gusto)
3 y 4.-Agrega el contenido de la leche condensada a la mezcla.
5.-Incorpora 5 cucharadas de leche en polvo a la mezcla.
6.-Agrega agua (la cantidad de media lata de leche condensada)
1.-Pour in 5 whole eggs and begin to beat.
2.-Add vanilla essence (to taste)
3 and 4.-Add the content of the condensed milk to the mixture.
5.-Add 5 tablespoons of powdered milk to the mixture.
6.-Add water (the amount of half a can of condensed milk)
Próximo paso: verter y llevar al horno/Next step: pour and bake
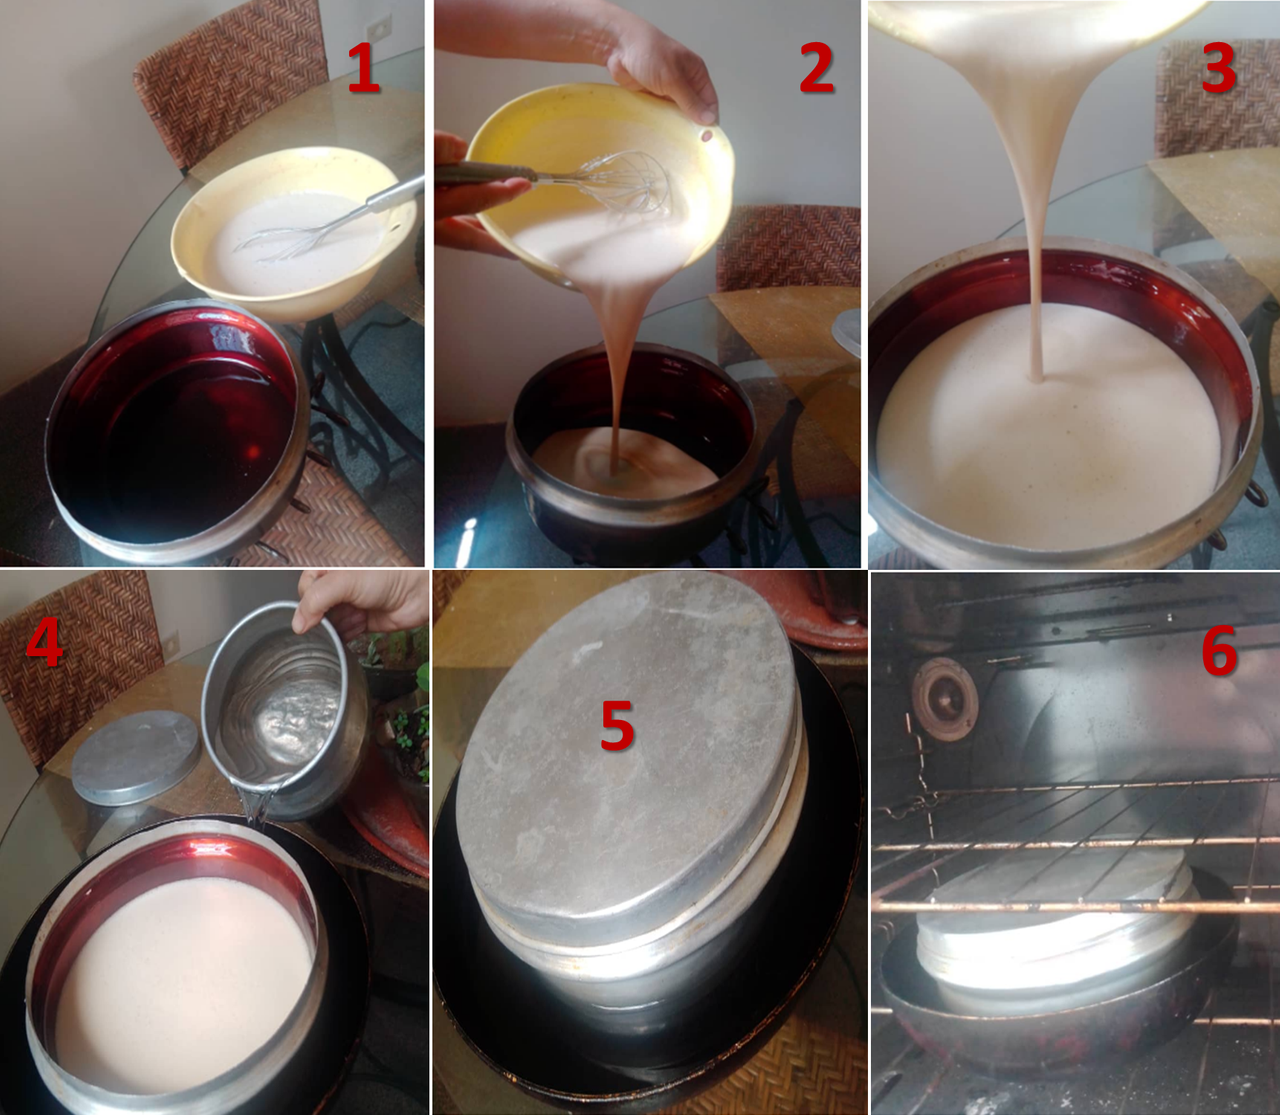
Source
1.-Comprueba que el caramelo haya solidificado,
2 y 3.-agrega la mezcla (no te asustes si escuchas el caramelo crujir),
4.-toma un recipiente más grande y agregale agua, esto se llama "baño de María)
5.-tapa la mezcla, si no tienes tapa puedes usar papel aluminio,
6.-lleva al horno a 200º por el lapso de 45-50 minutos.
1.-Check that the caramel has solidified,
2 and 3.-add the mixture (do not be scared if you hear the caramel crunch),
4.-take a larger container and add water to it, this is called "Bain-Marie")
5.-cover the mixture, if you don't have a cover you can use aluminum foil,
6.-Bake at 200º for 45-50 minutes.
Serve and enjoy/Serve and enjoy
Y llegamos a la parte más emocionante: "contemplar la creación y la obra maestra lograda", alegría a flor de piel por ver hecho realidad un reto. les muestro como quedó:
And we come to the most exciting part: "contemplating the creation and the achieved masterpiece", the joy to the surface when seeing a challenge come true. I show you how the dessert was:
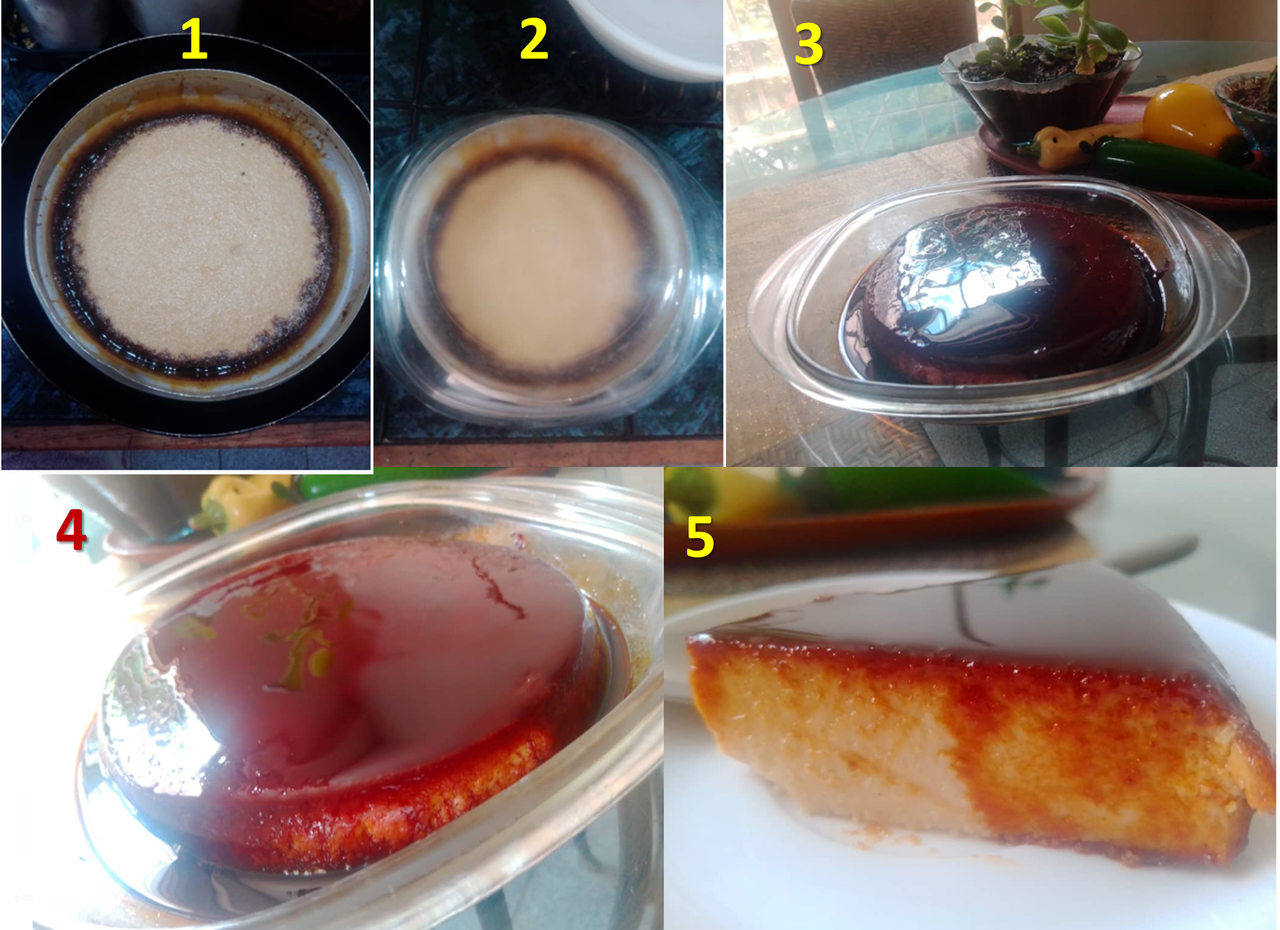
Source
1.-Saca del horno, verifica que el postre haya cuajado y espera que se enfríe,
2.-coloca encima el envase donde servirás el postre y da vuelta
3.-contempla tu obra maestra jajaja
4.-sigue contemplado y refrijera para que se enfríe
5.-sirve el postre cuando esté frío y disfruta
1.-Take out of the oven, check that the dessert has set and wait for it to cool down,
2.-place the container where you will serve the dessert on top and turn
3.-contemplate your masterpiece hahaha
4.-remain contemplated and refrigerate to cool down
5.-serve the dessert when it is cold and enjoy
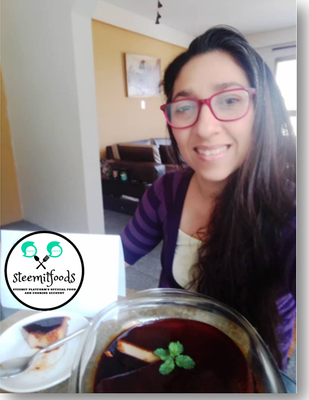
Source
Espero le haya gustado la explicación que he preparado para ustedes, el postre quedó muy sabroso, logré muchas caras felices con mi familia, así que gracias a la comunidad Steemfoods por motivarnos a accionar, compartir y disfrutar con nosotros.
I hope you liked the explanation I have prepared for you, the dessert was very tasty, I achieved many happy faces with my family, so thanks to the Steemfoods community for motivating us to act, share and enjoy with us.


.jpeg)


