INTRODUCTION
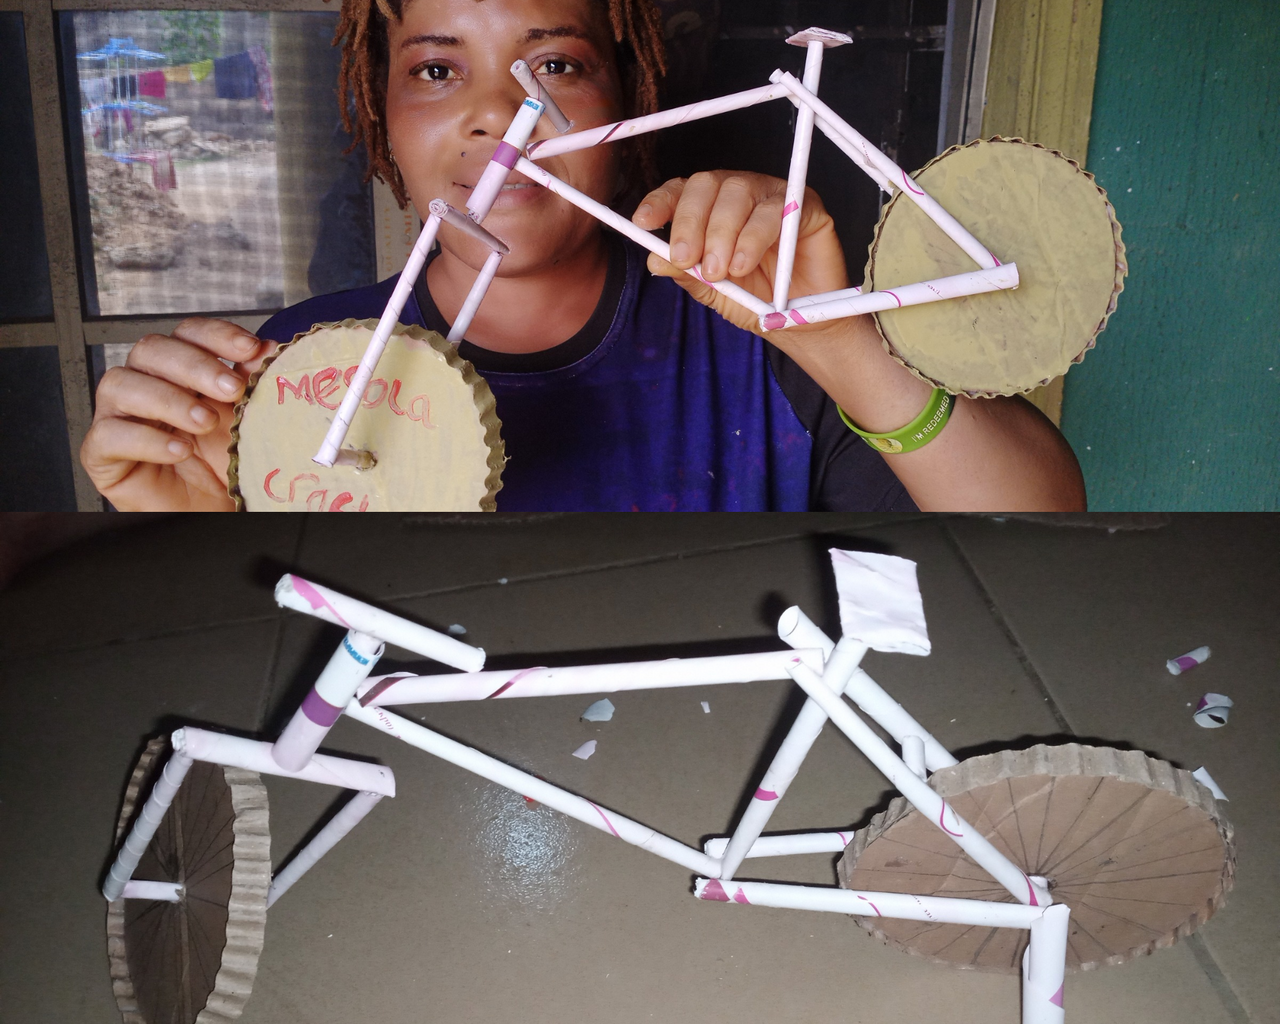
My today's craft is a little bit technical which requires alot of patience, I will be showing you guys how I use carton to make a bicycle craft.
I know very well that you will all love it.
I will be showing the steps I took in accomplishing this goals.

Watch the video for more understanding
Materials needed in making bicycle paper crafts
All what you need is a paper that can roll easily such as newspaper or waste exercise
Scissor
Top Glue and iron Glue
Step one
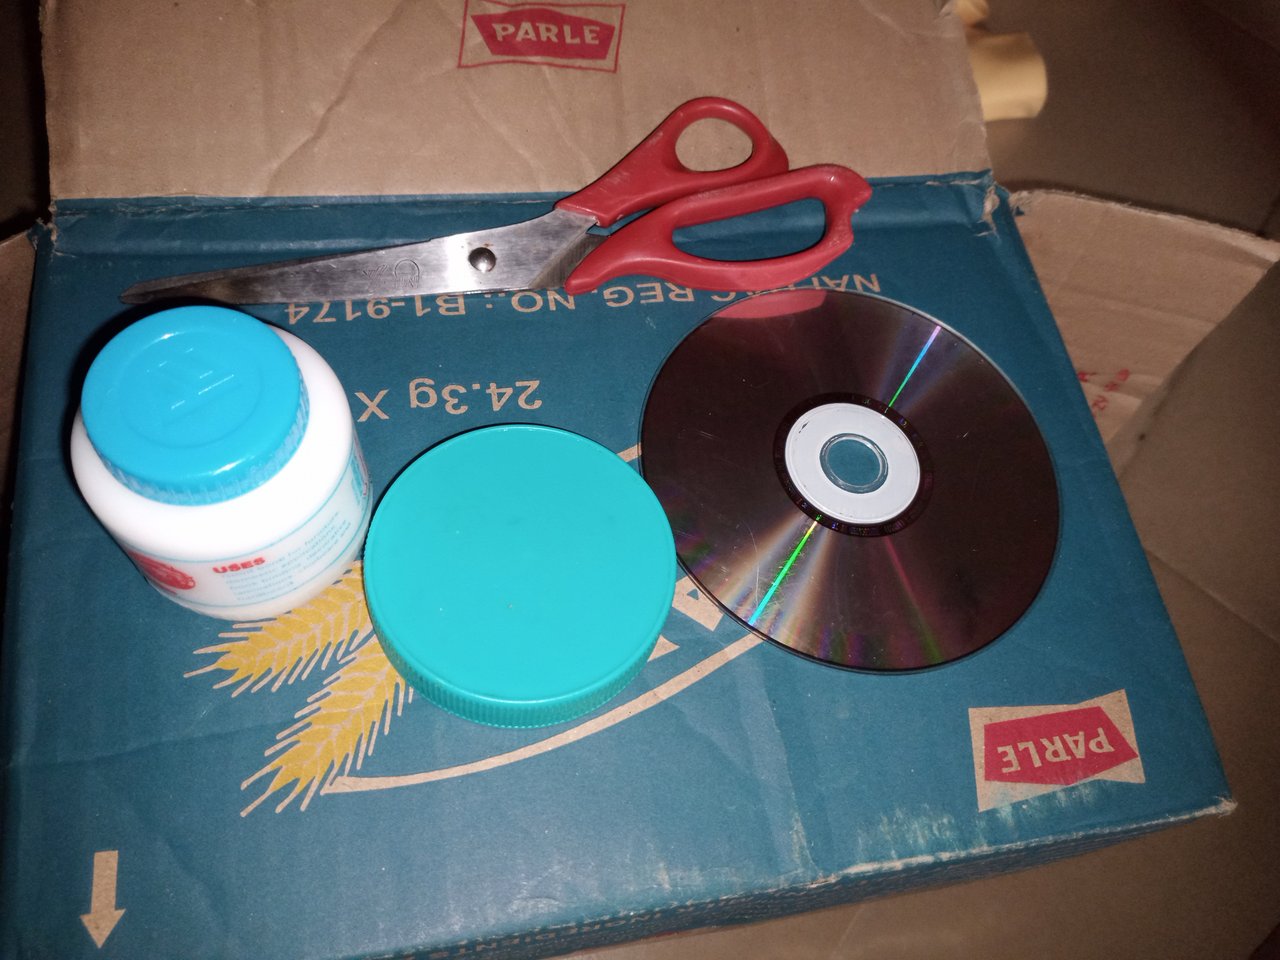
I needed to get a round shape so that I can use it to make the wheel, so I use a CD dics and measure it on a carton and I was able to get a perfect round shape.
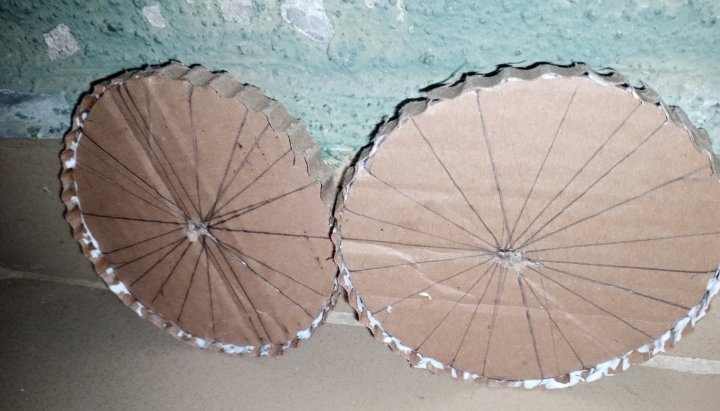
When I was done with this, I get a hole at the middle of my cycle shape, then i use pencil to get the wheel line.
two
I get a 4 size of paper
Cut the paper into stripes, I use a piece of broom to roll the A4 size paper starting from the corner to make a pipe.
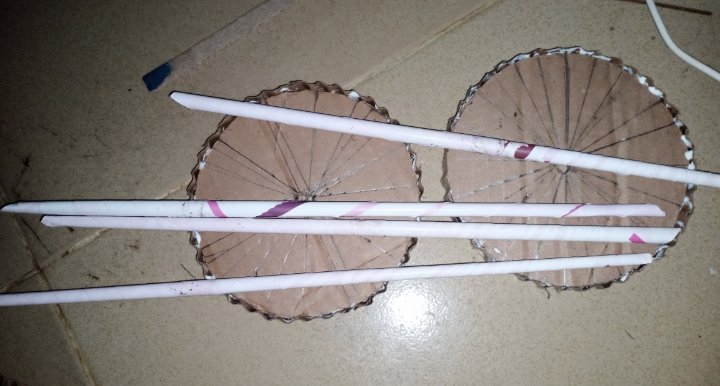
step three
When I was done, I started with the front wheel, but cutting a little pipe and I fixed it at the hole of the cycle shape that I made, I make sure the hole was free so that it will be able to roll, I get another pipe and I measure it like 4cm, and it was 2 pipes so that 1 pipe will be one side and 1 at the other side. I use iron gum to glue it to the small pipe in the cycle shape, I use another pipe to close it.
What I did here was to form the front side of the bicycle.
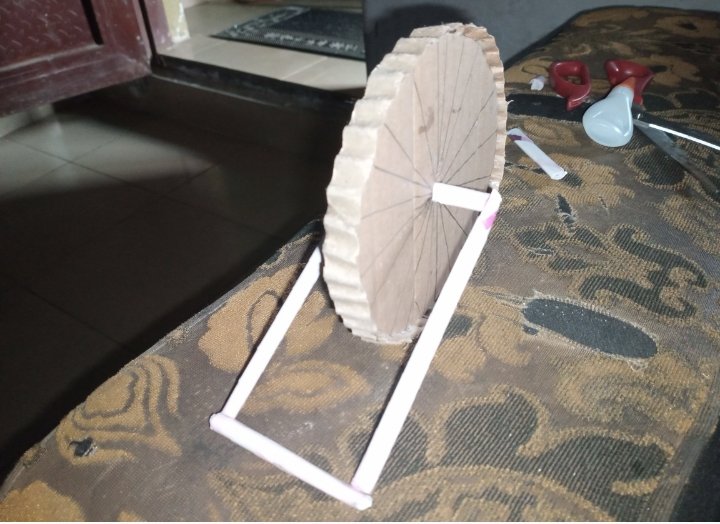
steps 4
When I was done I attached another pipe and the middle of the front wheel, then get another pipe to form the front wheel supporter and the seat, then I keep it aside.
To get the wheel supporter, I use the pipe to form an angle shape. When I was done I took the back wheel and I did the same steps I took wtge front wheel but this time around, I make sure that the pipe space was small but longer than the front wheel.
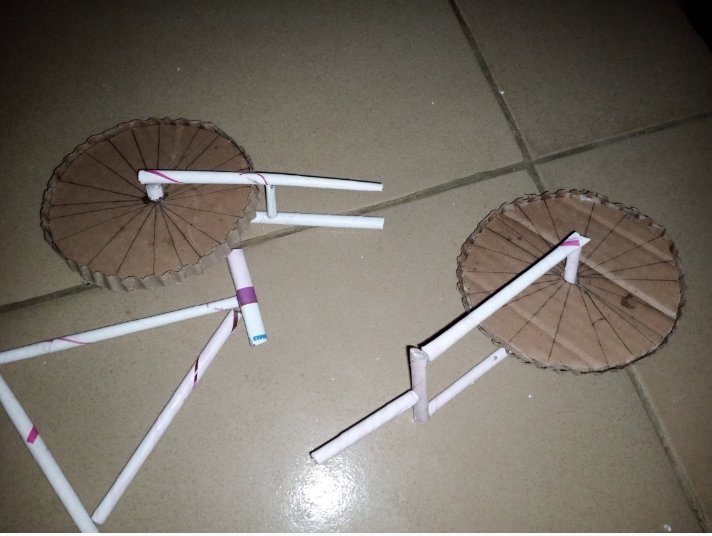
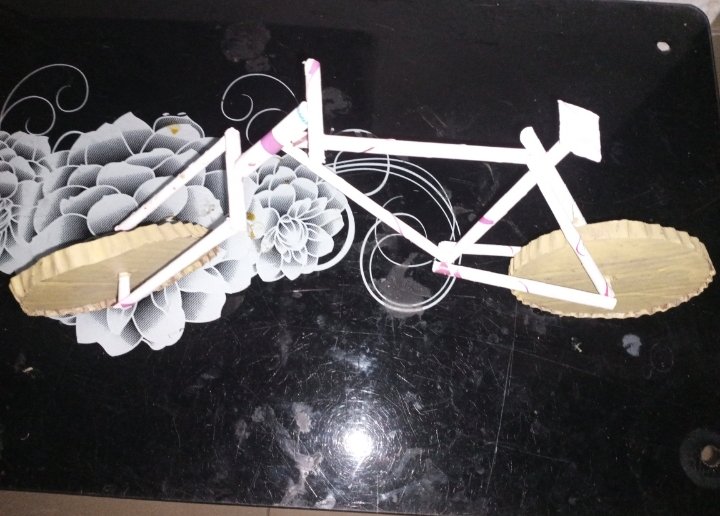
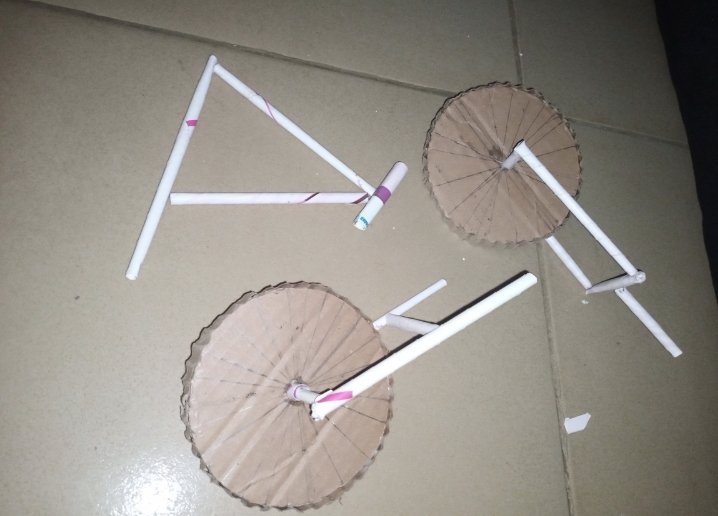
When I was done, I fixed the back wheel to the front wheel and I was able to get the shape of the bicycle, and I use a small pipe to get the stand of the bicycle and I use a flat paper to firm a seat.
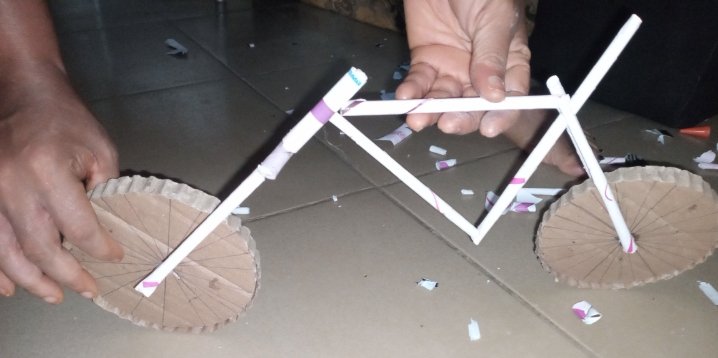
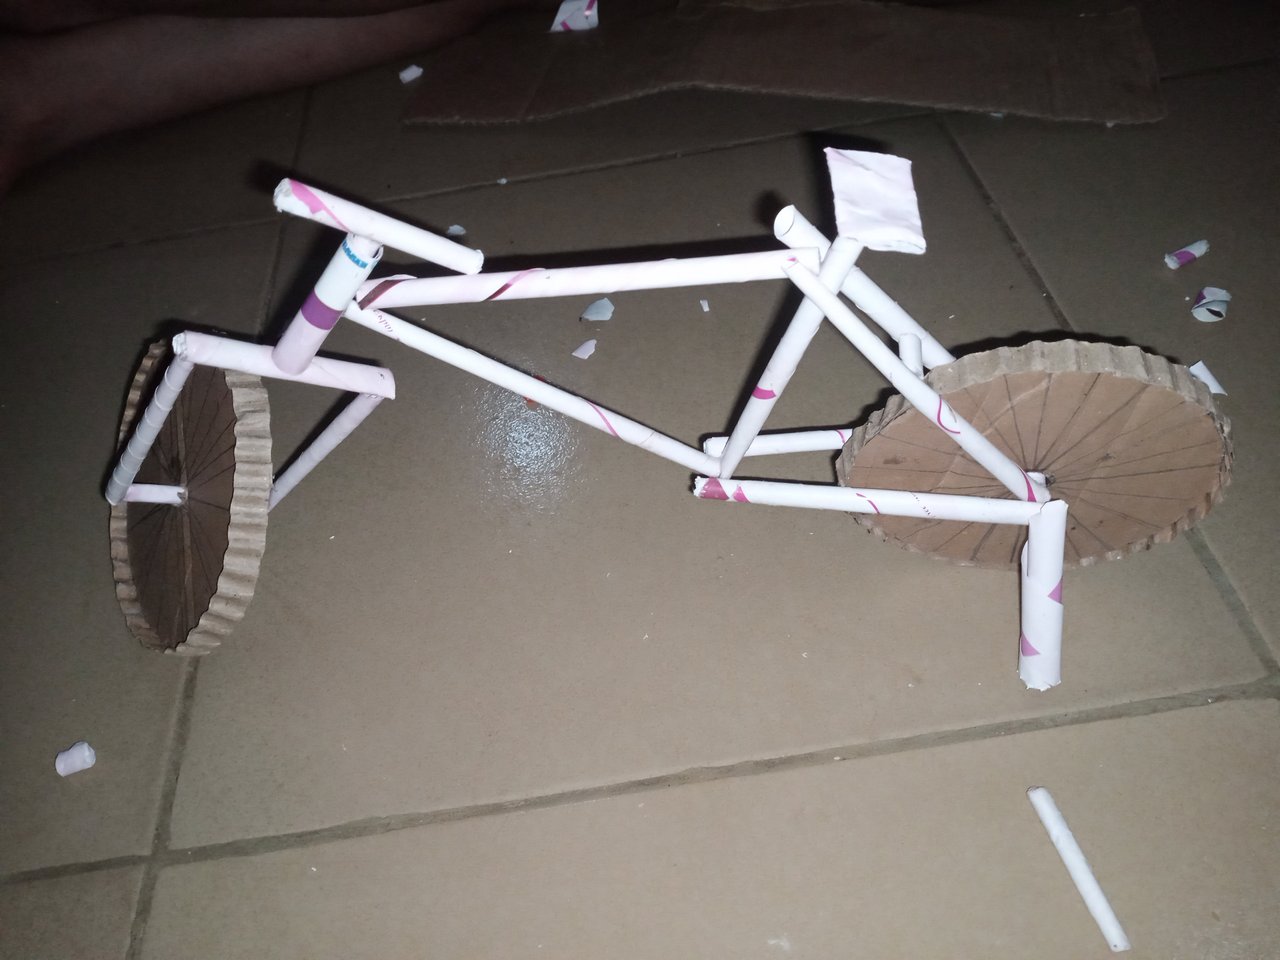
At this point my bicycle was ready, so I use a light yellow paint to paint the wheel and attach it to the table in my sitting room.
You can see the bicycle is standing on its own without any support.
I was so happy that I was able to accomplish this project.
What I just discovered after making this bicycle is that one can walk into a welder shop and give directive on how to get a brand new bicycle.
So dear friend you can see the end point of my craft bicycle.
I will love to invite my friends, @m-fdo, @eliany @goodybest