This is step by step on how to create your own community in Steemit.
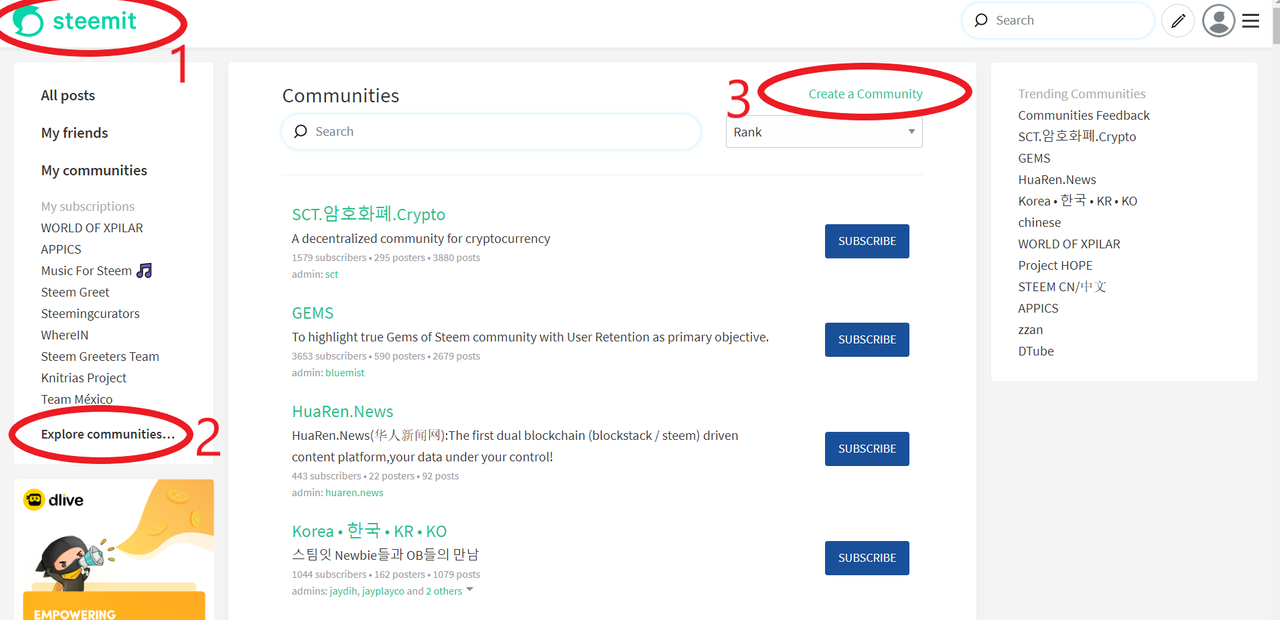
First, click on steemit logo at your left side on the screen then scroll down until you see Explore communities.. then click on that Explore communities
Then at the top on your right side there is Create a community tab, click on it then it will bring you to the next page.
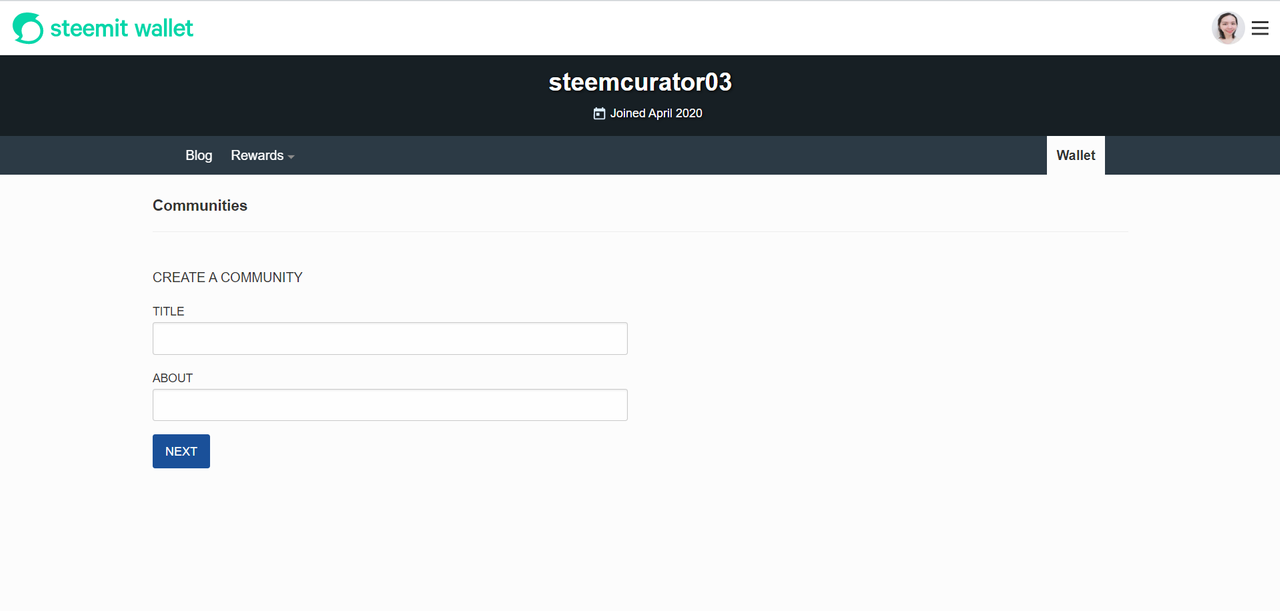
On this next screen page, you will have to fill in your new community name and some description of your new community on the blank boxes. Then click "next"
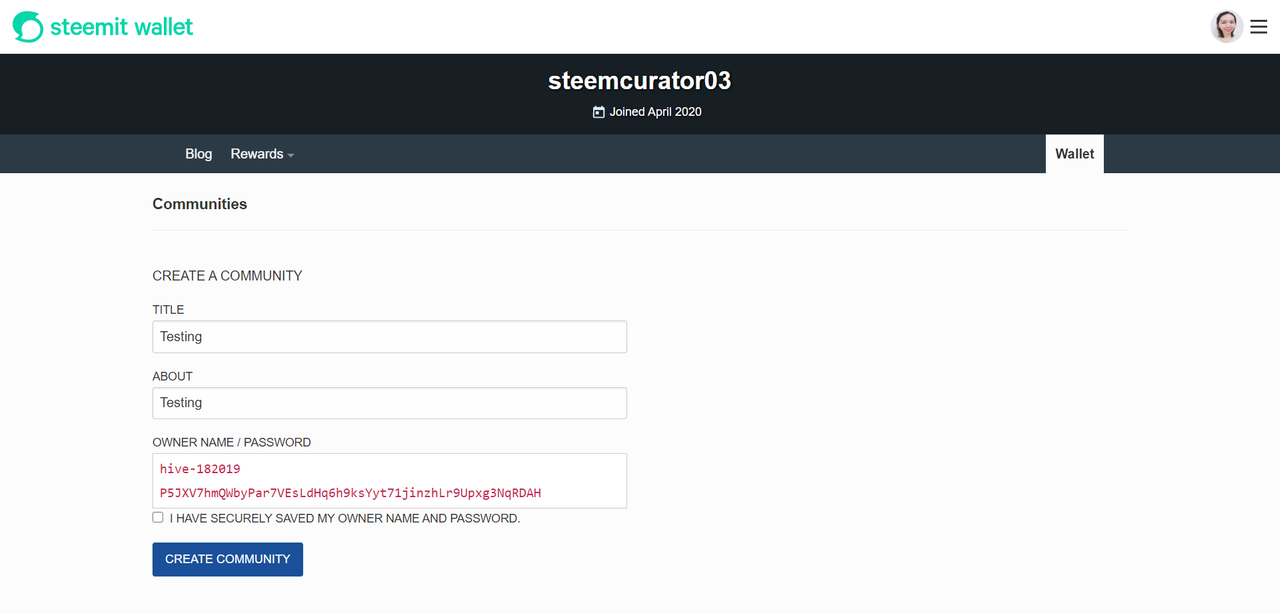
There will be owner name and password generated and you will have to keep this information as you will need this information to log in to your community later. Then click the "create a community" tab.
On the next page you will have to pay 3 STEEM a fees for creating your community.
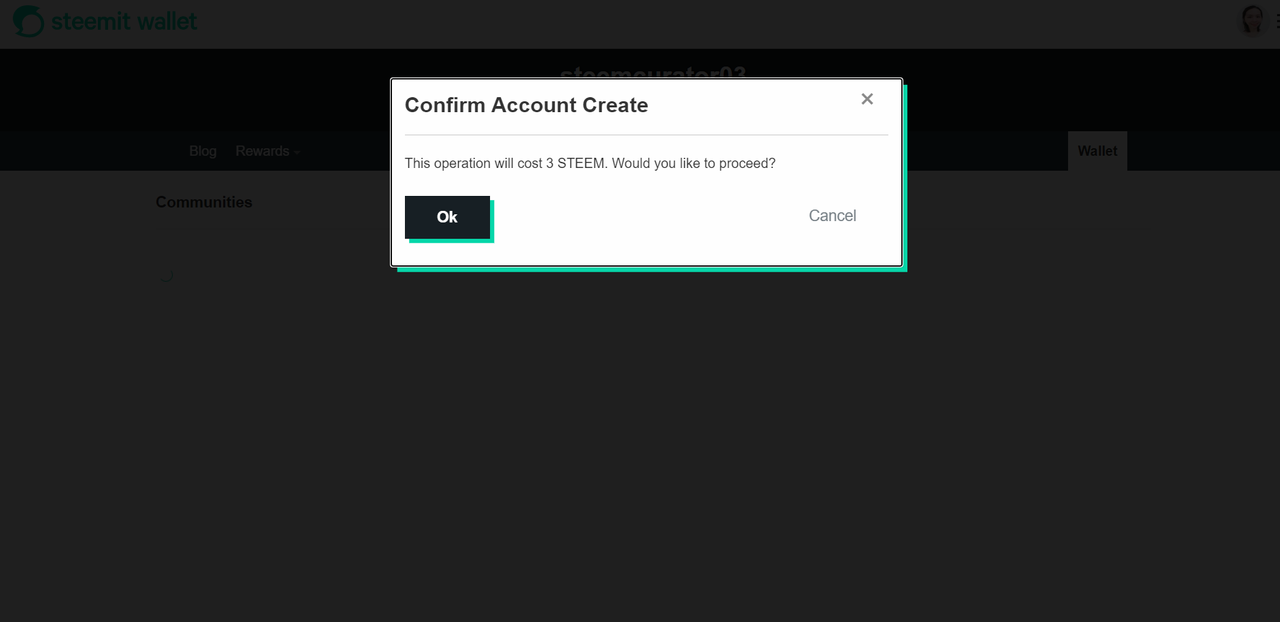
Make the payment then your community is created. You will be an admin of the community by default.
Your community is created. Congratulations! 😃
You will have to login using the owner name and the password in order for you to edit the roles in your community, for example, if you want to add another steem user as an admin in the community that you just have created.
There is another good tutorial made by @sumit10698 here Guide to Steem Communities just in case you create the community through a device such as a smartphone.
Let me know if you have any questions or difficulties in creating your community. Steem On!