Hi, are you a new user on Steemit and you still don't know how the platform works?
Would you like to get in touch with other members of the network to highlight your contents and receive advice on what to do and not to do on the blockchain?
On Discord you can find practically all the groups and communities present on Steem and join the ones you prefer.

Public Domain
Discord is an easy and intuitive instant messaging app, which guarantees good protection of users' personal data and has numerous highly customizable options. In addition, there is no need to associate a phone number to create a profile.
In this post, you find a tutorial that will guide you through the basic steps necessary to start using the program. Since there is a lot of information, I plan to write more than one.
In this first part, we are going to talk about:
how to install the app
how to customize your account
how to join a server
how to type a message
INSTALLATION
You have the possibility to use Discord on PC and on mobile device.
If you want to use it from your PC, here you can download the version compatible with the operating system you use.
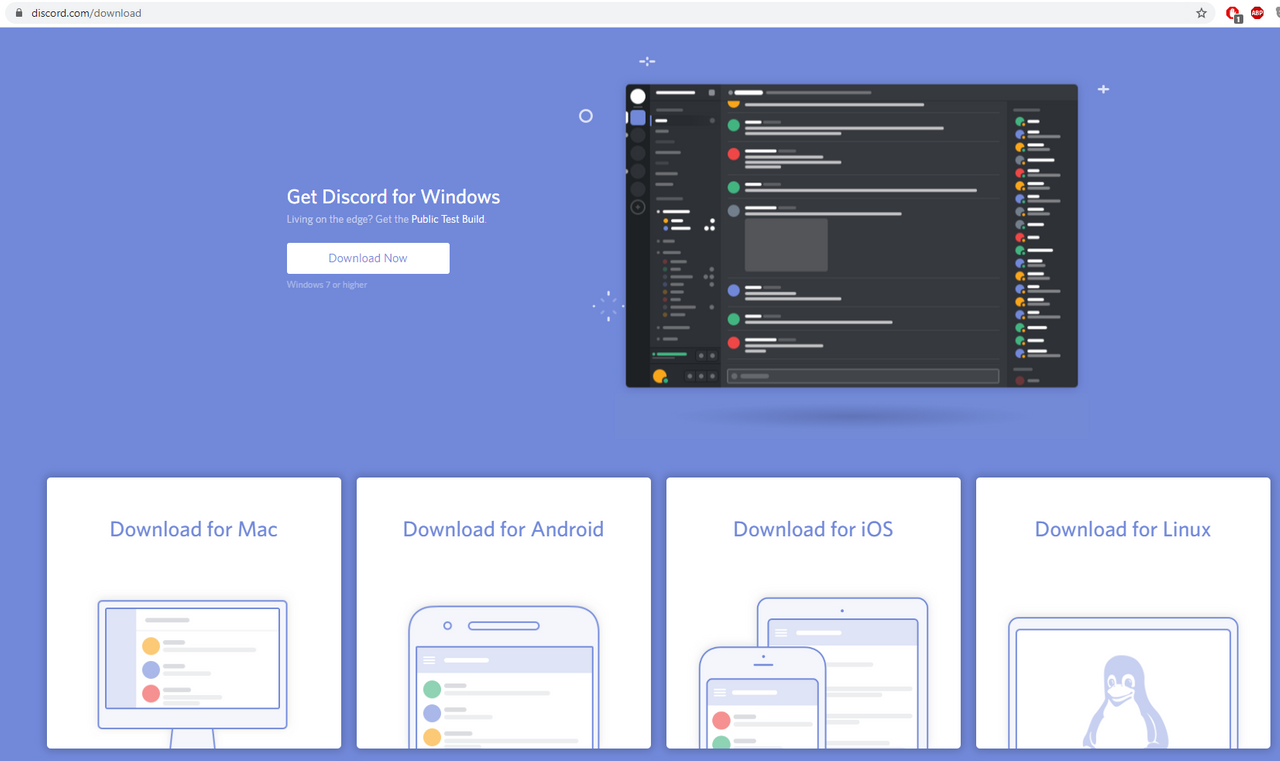
Alternatively, you can log in here using the web client directly from your browser.
If you want to use Discord on a mobile device, you can download the app from the Google Play store or Apple App Store.
By opening the app or the registration page, you will find this screen.
Enter your e-mail address, username and password and create your account.
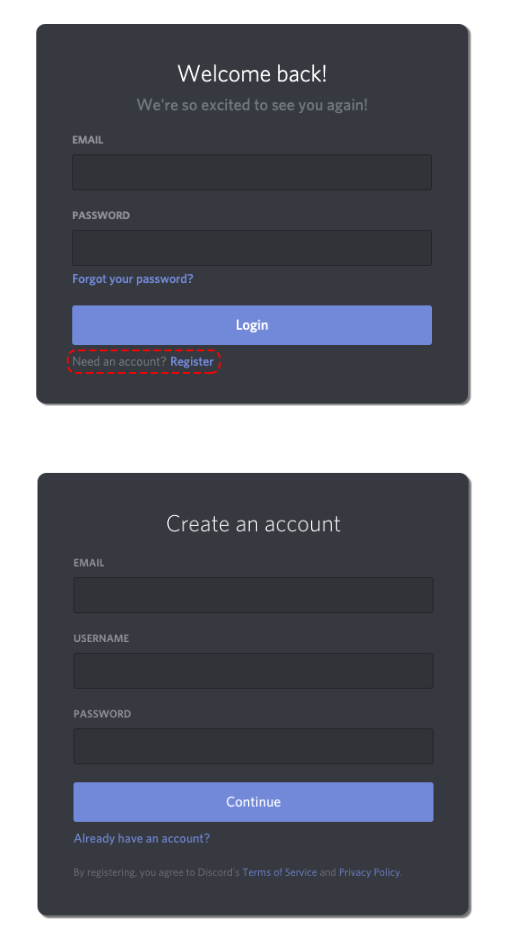
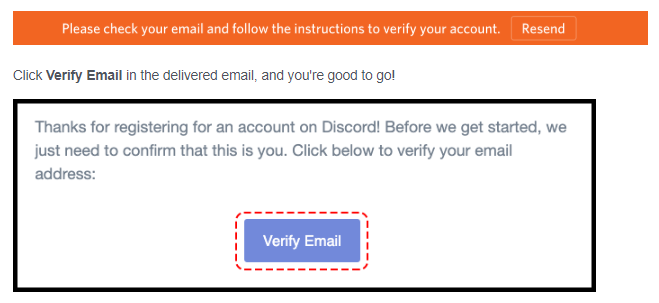
Next, you need to claim your account, verifying your e-mail address.
Also check the junk mail, because the verification message may get there.
FIRST ACCESS/ACCOUNT CUSTOMIZATION
At this point, you are ready to log in for the first time and customize your account.
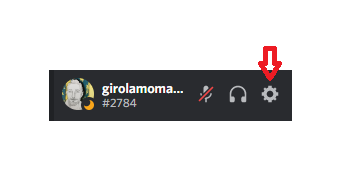
In the lower left part of the screen, you find a gear icon (⚙︎).
By clicking on it, you can access User Settings.
Selecting Edit, you will see this page, where you can choose and edit your avatar and username.
Be careful not to change them too many times, you can do it at most two times per hour.
It is advisable to set the same nickname that you have chosen on Steemit, this will make you more easily recognizable.
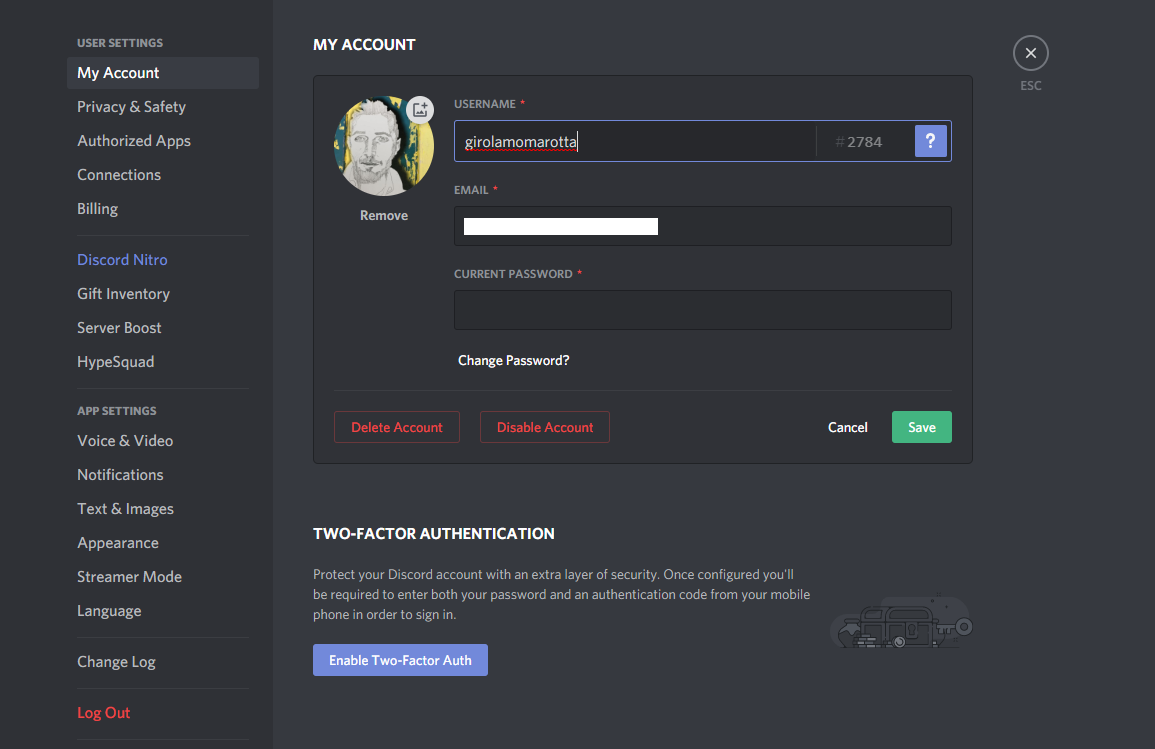
Here you can also change your password, delete or disable your account.
JOIN A SERVER
Now that your account is ready, you can create or join a server.
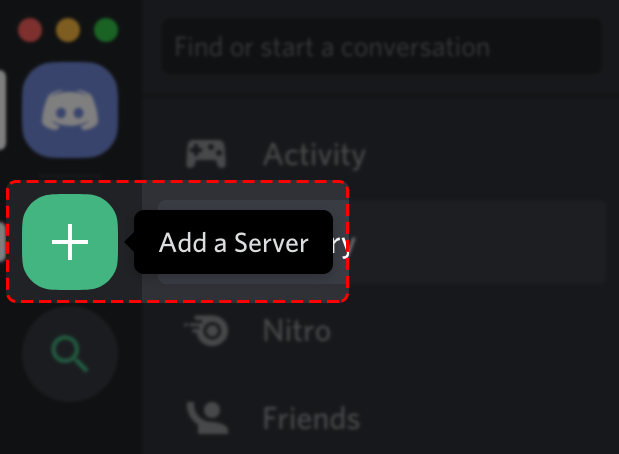
On the left side of the screen, you find a green square with a + in the center.
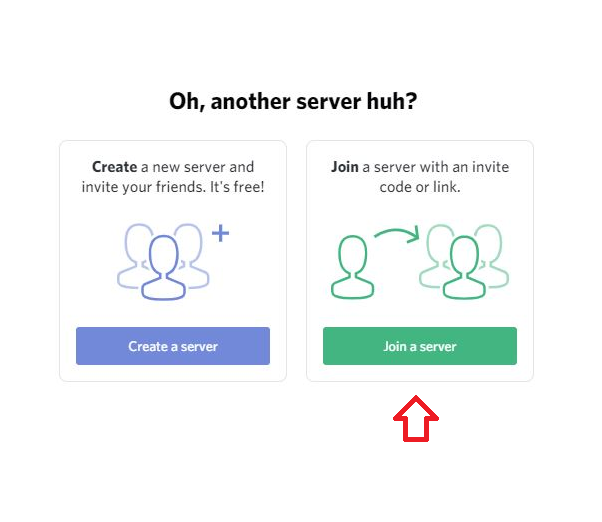
After clicking, this image will appear and you can choose whether to create or join a server.
Here now we talk about the procedure to join an existing server.
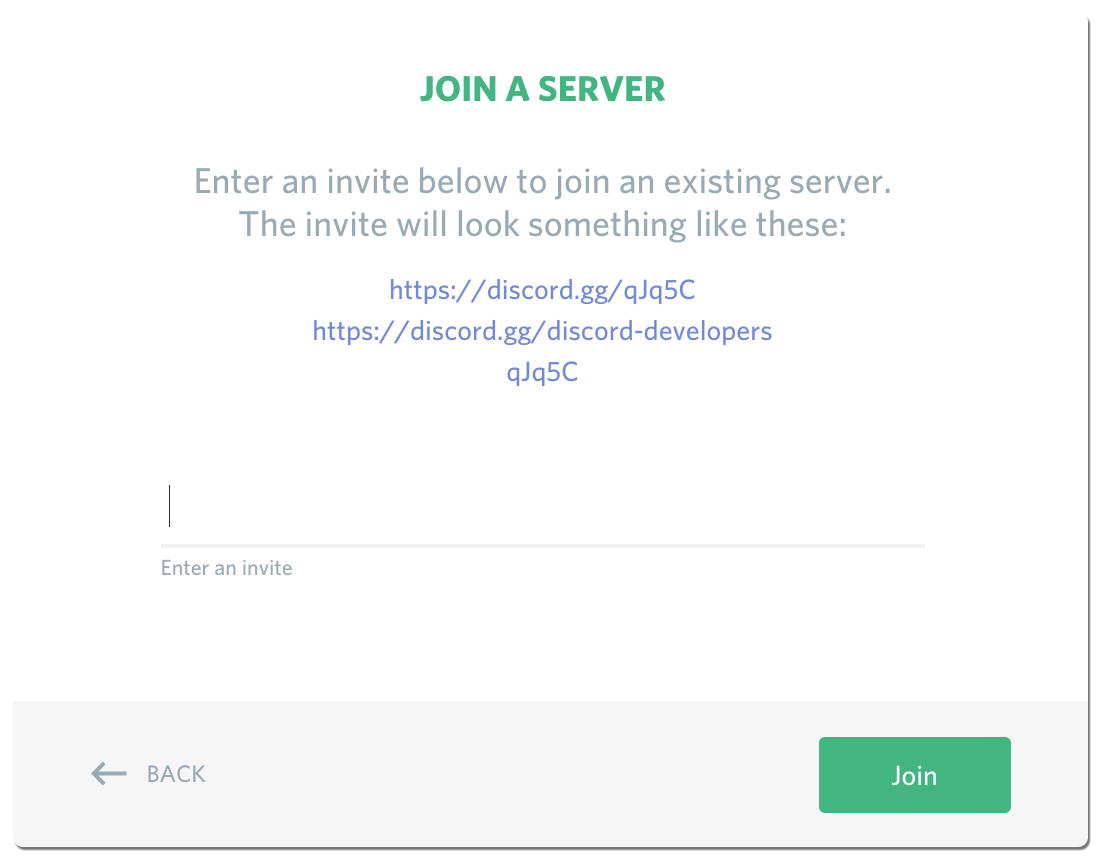
To join a server, you need a server invite link.
Usually, you can find the invitation link in the community profile information.
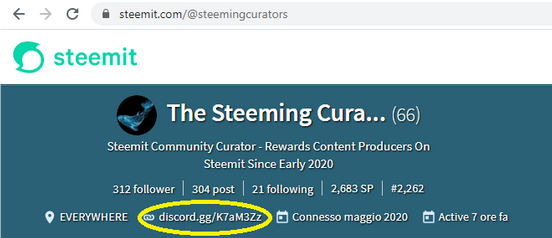
Here, for example, you can see the link to join the steemingcurators server. Simply by clicking, you get access.
This is the direct link, from which you can immediately try to enter ----> https://discord.gg/K7aM3Zz
Another possibility is to be invited by another user who is already present on the server.
In the next post, I will show you how, in a very simple way, you too can invite your friends.
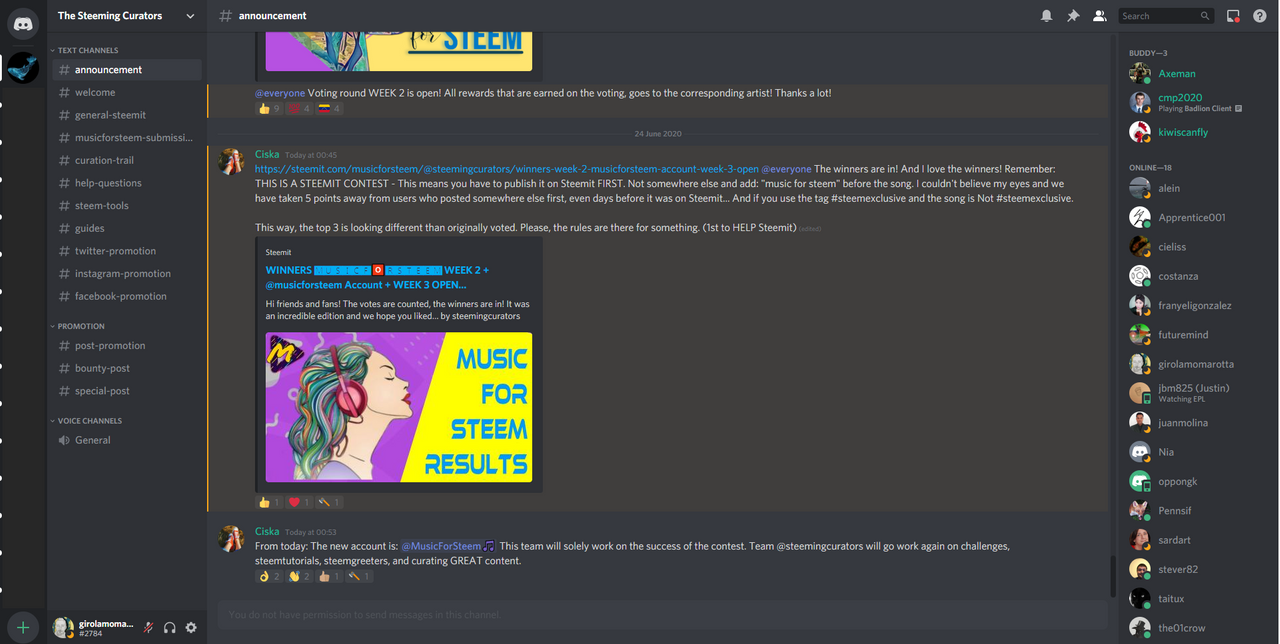
Here you can see an example of what a screen looks like inside a server.
Starting from the left, you find:
- the servers you joined
Just click on the server icon and you will be inside. A vertical white stripe will appear next to the image, indicating which of the servers on your list you are currently in. Unfortunately it is not seen very well from the image, but it is there.
- the list of server channels
By clicking on the # channel-name, you will choose which channel to go to. The one you are in will be highlighted and the name will turn white, the rest will remain gray.
- the body of the chat
It is located in the center of the screen. Above is the description of the channel. Those who create it can choose to write a short text that informs users about the topic being discussed. Below, instead, there is the chat bar, which is used to write your messages.
- the list of users
On the right, we can see the list of users present on the server. Higher up are the users who created and administer the server, then all the others, with precedence for those who have certain roles assigned by the administrators.
TYPE A MESSAGE AND WRITE TO ANOTHER USER
Writing a text message is very simple: just type it into the chat bar.

As you can see from the image, on the left of the bar, there is a +, which you can use for attaching images, videos and other types of files.
If you copied an image or a link to the clipboard, you can paste it directly into the bar and press Enter.
On the right, however, there is a smiley face that you can use to send emojis.
If, on the other hand, you want to write a direct message to a user, just click with the right mouse button on his nickname.
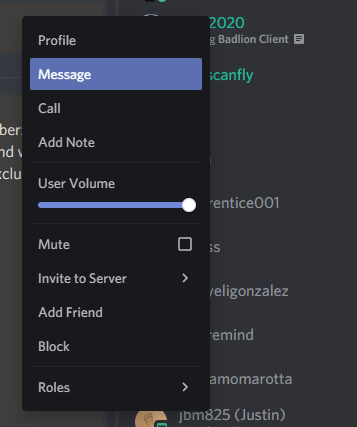
A window opens, and you just have to select Message.
In this way, the direct chat will appear, which will be empty if you have never chatted with that user, otherwise it will contain the message history.
Okay, so let's stop here for now.
In the next posts, I will show you some advanced options regarding messages, notifications and server chats.
I hope the guide has been useful and, if you have any doubts or requests for clarification, I invite you to write me in the comments section.

Thanks to all of you for reading my article.
If you liked it, share it on your blog and write me a comment with your impressions.
See you soon!
GM
The images in this post are screenshots made by me or taken from the Discord Support Site