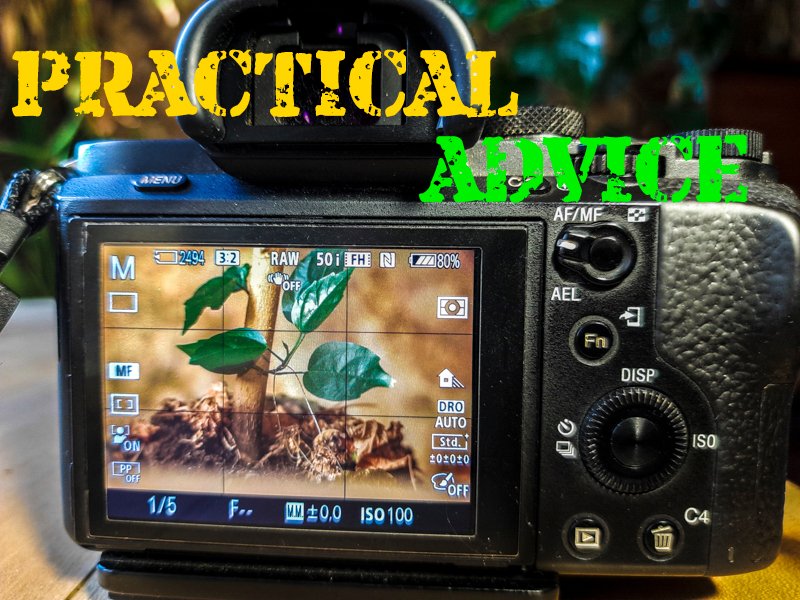
Last time it was about choosing a camera, my main thought was that it doesn't matter which camera you shoot, what matters is what you think and do. And if you already decided to buy a camera, it is important that it has manual settings. In automatic mode, you can also take pictures with your phone. It is not yet known in which case the result will be better. Modern phones have decent cameras and software.
However, real creativity is only possible with manual camera settings. Only in this case you are in control of the final result.
Since I am not sure about the quality of the translation into English, I will keep the further text in the original as well. If any of my phrases are not clear, you can try to translate it in other versions. The truth is somewhere in between.
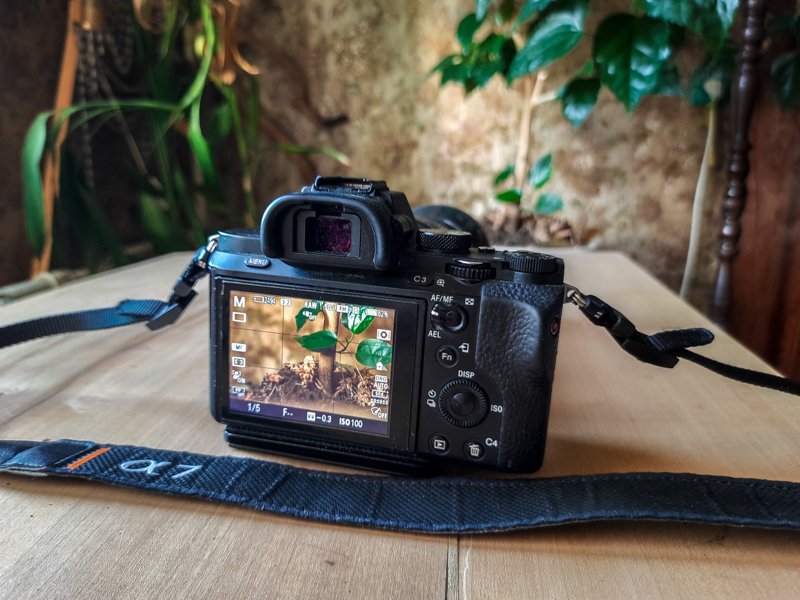
f100mm
So, we will talk about the manual mode of shooting with the camera. In order to understand which setting should be applied in which case, you need to understand the physics and mechanics of the shooting process. When you understand this and put it into practice, you will intuitively adjust the camera to suit your task.
>Итак, речь пойдёт о мануальном режиме съёмки на камеру. Для того, чтобы понимать, какую настройку в каком случае нужно применить, надо понимать физику и механику процесса съёмки. Когда вы это поймёте и примените на практике, вы будете интуитивно настраивать камеру соотвественно вашей задаче.
Of all the possible settings for your camera (and there are actually many), only four are the most important. These are the settings for shutter speed, aperture, sensor sensitivity and white balance. We will analyze what we are talking about.
>Из всех возможных настроек вашей камеры (а их на самом деле много) самыми важными являются всего четыре. Это настройки выдержки, диафрагмы, чувствительности матрицы и баланс белого. Разберём о чём идёт речь
In digital cameras, visual information from the lens enters the surface of the sensor. With the help of the software, this information is converted into a file and recorded in the camera's memory or on a memory card. The quality of the future snapshot depends on how complete the information will be recorded. There are three options.
**1. There is enough light on the sensor and you get enough information to get a good photo.
- Not enough light hit the sensor. You get a dark photo with some areas of black. It is no longer possible to extract any details from these zones of black. Information in the shadows is clipped.
- Too much light hit the sensor. You are getting too light (overexposed) frame. No detail can be extracted from the white areas. The information in the highlights is cut off.**
>В цифровых камерах визуальная информация из объектива попадает на поверхность матрицы. С помощью програмного обеспечения эта информация преобразуется в файл и записывается в память камеры или на карту памяти. КАчество будущего снимка зависит от того, насколько полная информация будет записана. Возможны три варианта.
1.На матрицу попало достаточное количество света и вы получаете достаточно информации для получения хорошего фото.
2.На матрицу попало недостаточное количество света. Вы получаете тёмный кадр с некоторыми зонами чёрного. Из этих зон чёрного уже невозможно извлечь какие-то детали. Информация в тенях отсечена.
3.На матрицу попало слишком много света. Вы получаете слишком светлый (пересвеченный) кадр. Из белых зон невозможно извлечь детали. Информация в светах отсечена.
>Looking ahead, I note that these photos are not completely lost if they are something dear to you and you do not want to throw them in the trash. You can convert these frames to black and white and they might look good. But this is a separate topic.
>
>Забегая вперёд отмечу, что эти кадры не совсем потеряны, если они вам чем-то дороги и вы не хотите выбрасывать их в корзину. Вы можете перевести эти кадроы в режим чёрно-белого и возможно они будут хорошо выглядеть. Но это отдельная тема.


The amount of flow of light to the matrix can be controlled by two settings.
**1. Either make the lens hole (aperture) wider (if dark) or narrow it down to a small hole (if there is a lot of light)
- Either make the shutter speed long (if it's dark), or make the shutter speed short (if it's light).**
>Количество потока света на матрицу можно регулировать двумя настройками.
1.Либо сделать дырку объектива (диафрагму) пошире (если темно) либо сузить до маленькой дырочки (если света много)
2.Либо сделать выдержку длинной (если темно), либо сделать выдержку короткой (если светло).
>Also, if there is too much light (a sunny day on a snowy mountain top), then you may not have enough squeeze (maximum aperture reduction). In this case, different density ND filters can be used. But this is also a separate big topic.
>Кроме того, если слишком много света (солнечный день на снежной вершине горы), то вам может не хватить зажатия (максимального уменьшения диафрагмы). В этом случае можно применять нейтральны серый фильтр разной плотности. Но это тоже отдельная большая тема.
If there is not enough light, you opened the lens and took a sufficiently long exposure (at too long exposures without using a tripod, the end result will show hand tremors, you will get a blurry frame without sharpness), then you can use a third tool - increase the sensitivity of the matrix. This is similar to the operation of a sound amplifier, only here the sensitivity is increased. The matrix begins to generate additional pixels, enhancing the picture. In this case, erroneous pixels (the so-called matrix noise) may appear. The more you set the sensitivity of the matrix (ISO), the more noise. Modern matrices do a pretty good job of increasing the sensitivity, but still there is noise.
>Если освещения не хватает, вы открыли объектив и сделали достаточно длинную выдержку (на слишком длинным выдержках без применения штатива на конечном результате будет заметно дрожание рук, вы получите смазанный кадр без резкости), то можно применить третий инструмент - повысить чувствительность матрицы. Это похоже на работу усилителя звука, только тут усиливается чувствительностьМатрица начинает генерировать дополнительные пиксели усиливая картинку. При этом могут появляться ошибочные пиксели (так называемый шум матрицы). Чем больше вы выставляете чувствительность матрицы (ИСО), тем больше шума. Современные матрицы довольно неплохо справляются с задачей усиления чувствительности, но всё равно шум имеет место быть.
>Забегая вперёд скажу, что для большиства камер оптимальной будет ISO100. Шум проявляется цветными зёрнами на снимке. При значении 100 таких зёрен практически нет.
A few words about how and what your settings affect.
Exposition (shutter speed)
Typically, the shutter speed of cameras ranges from 30 sec to 1/8000, possibly shorter. In addition, many cameras have a shutter speed mode - how long you hold down the shutter release button, the amount of time the shutter speed will be. How does this affect the photo?
There are two options for the picture being shot: all objects are static (for example, subject shooting) and the second, there is some kind of dynamics on the scene. Perhaps a branch or a flower swaying in the wind, perhaps a person or an animal is in motion. As you can imagine, the speed of movement of objects in the frame can be different, from the crawling of a snail to the flight of an arrow at a target.
>Обычно значение выдержки камер колеблется от 30 сек до 1/8000 мозможно и короче. Кроме того у многих камер есть режим произвольной выдержки - сколько времени вы зажимаете спусковую кнопку, столько времени и будет выдержка. Как это влияет на фото?
>Есть два варианта снимаемой картины: все объекты статичны (например, предметная съёмка) и второй, на сцене есть какая-то динамика. Воможно ветви или цветок колышится на ветру, возможно человек или животное находятся в движении. Как вы понимаете, скорость движения объектов в кадре может быть разной, от ползания улитки до полёта стрелы в мишень.
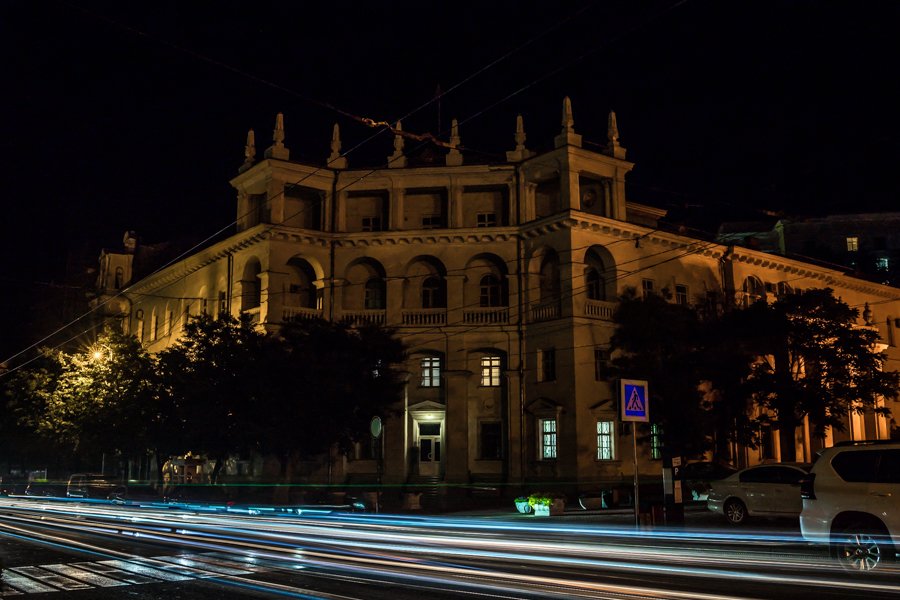
All these considerations indicate that the value of exposure should be selected for a specific scene and your task. In addition, it is necessary to take into account the effect of hand shake on the quality of the sharpness of the picture. Perhaps we will start with this, after which we will take a short break and in the next post we will analyze the work with endurance for various creative tasks.
When you press the shutter release in the camera, a stream of light opens to your matrix. Suppose you opened the curtains for 1 second. The object lying on the table will go nowhere and will look clearly in the photo. The snail will have time to move, but only slightly. The photo can turn out to be clear, maybe there will be a little blur on the snail itself. If an arrow flies past, then you will not see it in the photo at all.
Когда вы нажимаете на спуск в камере открывается доступ потока света к вашей матрице. Предположим, вы открыли шторки на 1 сек. Лежащий на столе предмет никуда на денется и будет выглядеть чётко на фото. Улитка успеет переместиться, но незначительно. Фото может получиться чётким, может быть будет небольшой смаз на самой улитке. Если мимо пролетит стрела, то вы вообще не увидите её на фото.
Все эти рассуждения говорят о том, что значение выдержки надо подбирать под конкретную сцену и вашу задачу. Кроме этого, надо учитывать влияние дрожания рук на качество чёткости снимка. Пожалуй с этого мы и начнём, после чего сделаем небольшой перерыв и в следующем посте разберём работу с выдержкой под разные творческие задачи.
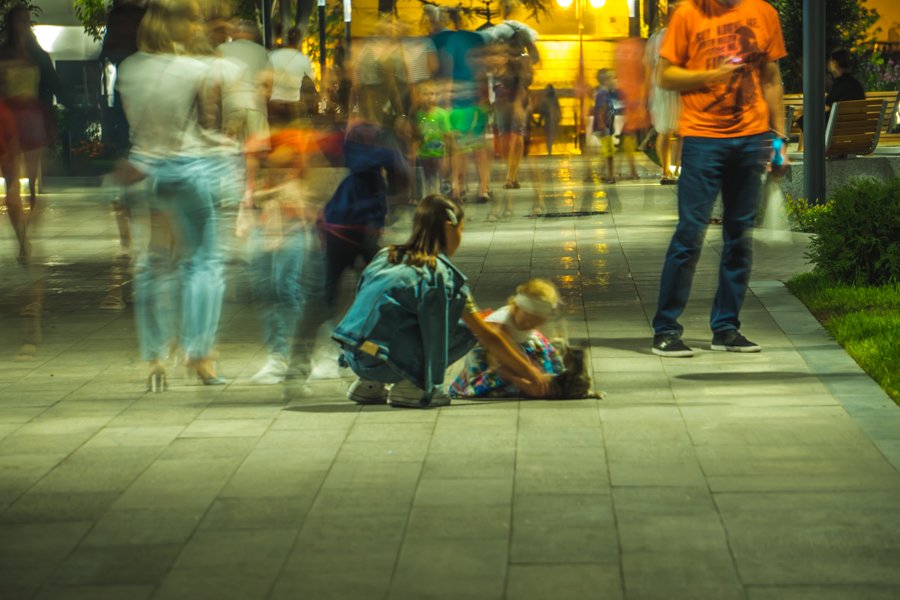
So, even if you have strong hands, the camera has some shake in the hands. As a result, you can get a blurry picture. A few practical tips.
Итак, даже если у вас крепкие руки, камера в руках имеет некоторое дрожание. В результате можно получить смазанную картинку. Несколько практических советов.
1. If you shoot with a shutter speed of 1 / 100-1 / 125, then as a rule this is enough to get a clear picture.
2. Lubrication can occur when pressing the shutter release button if done very quickly. Your finger on the button should work separately from your hand. Only finger and only smooth pressure. While doing this, hold your breath and be calm.
3. Grasp the bottom of the lens with your left hand and rest your left elbow on your thigh (side). This is the first fulcrum. Press the elbow of your right hand against your thigh or right side. This is the second fulcrum. Place the camera viewfinder on your eyebrow. This is the third fulcrum. After completing step 2, you will get a clear photo.
4. In low light conditions, look for an additional fulcrum. It can be a table, a pillar, a tree, a wall, whatever you like, which you can press against or on which you can put the camera. It is best if it is a tripod.
5. It is generally accepted that the value of the shutter speed should not exceed the figure of the focal length of your lens. For example, you have a lens with a focal length of 50mm. This means that shutter speeds slower than 1/50 (1/30, 1/15 ...) can result in blurry frames.
6. The longer the focal length of the lens, the higher the chance of getting a blurry shot. It is much more difficult to get blur on a wide-angle lens (for example f24) than on a telephoto lens (for example f300)
7. Turn on optical image stabilization if your camera and lens have one.
8. As a last resort, raise ISO within reasonable limits
1.Если вы снимаете с выдержкой 1/100-1/125, то как правило этого хватает для получения чёткой картинки.
2.Смаз может произойти при нажатии на кнопку спуска, если это сделать очень резко. Ваш палец на кнопке должен работать отдельно от кисти руки. Только палец и только плавное нажатие. При этом задержите дыхание и будьте спокойны.
3.Обхватите объектив левой рукой снизу и упритесь левым локтем в бедро (бок). Это первая точка опоры.
Локоть правой руки тоже прижмите к бедру или правому боку. Это вторая точка опоры. Видоискатель камеры уприте в бровь. Это третья точка опоры. Выполнив при этом пункт 2 вы получите чёткий кадр.
4.При недостаточной освещённости ищите дополнительную точку опоры. Это может быть стол, столб, дерево, стена, всё, что угодно, к чему можно прижаться либо на что можно поставить камеру. Лучше всего, если это будет штатив.
5.Общепринято, что значение величины выдержки не должно превышать цифру фокусного расстояния вашего объектива. Например, у вас объектив с фокусным расстоянием 50 мм. Это означает, что значения выдержки длиннее чем 1/50 (1/30, 1/15...) могут привести к смазанным кадрам.
6.Чем длиннее фокусное расстояние, тем выше шанс получить смазанный кадр. На широкоугольный объектив (например f24) смаз получить гораздо сложнее, чем на телеобъектив (например f300)
7.Включите оптическую стабилизацию, если она есть в вашей камере и объективе.
8.В крайнем случае повышайте ИСО в разумных пределах
Diaphragm/Диафрагма

Literally two words, more next time.
There is such a thing as depth of field. This is the area in front of your camera where objects appear sharply (in focus). Before this zone and after this zone, objects will have vague indistinct outlines up to the loss of boundaries (possibly up to color spots).
The more you clamp down on the aperture (make the smaller hole), the more the field of focus expands. If you're shooting a landscape and want as much detail as possible, set your aperture to f / 8 to f / 16. The subtleties of this setting also depend on the shutter speed and the lens, but for now you just need to remember this range of values and just try and compare.
If you open the aperture as much as possible, the field of focus becomes very small. Especially if the subject is close enough. For example, shooting a portrait 1-2 meters away with an f85 lens, you can get a sharp outline of the tip of the nose, but the eyes (and this is the most important element of the portrait) will be out of focus. The background in this case is completely blurred.
Буквально два слова, подробнее в следующий раз.
Есть такое понятие, как глубина резкости. Это зона перед вашей камерой, находясь в которой предметы выглядят резко (в фокусе). До этой зоны и после этой зоны объекты будут иметь расплывчатые нечёткие очертания вплоть до потери границ (воpможно до цветовых пятен).
>Чем больше вы зажимаете диафрагму (делаете более маленькое отверстие), тем больше расширяется зона резкости. Если вы снимаете пейзаж и хотите иметь как можно больше деталей, поставьте значение диафрагмы от f/8 до f/16. Тонкости этой настройки зависят от ещё от выдержки и объектива, но вам достаточно пока помнить этот диапазон значений и просто попробовать и сравнить.
Если вы максимально открываете диафрагму, то зона резкости становится очень маленькой. Особенно, если снимаемый объект расположен достаточно близко. Например, снимая портрет на расстоянии 1-2 метра от себя с объективом f85 вы можете получит резкое очертание кончика носа, но при этом глаза (а это самый важный элемент портрета) будут не в фокусе. Задний план при этом будет совершенно размыт.
White balance/Баланс белого
This is the setting that you can safely put into automatic mode. If the camera makes a little mistake, you can easily fix it in the editor during processing. But you can choose from the suggested fixed values: sun, shade, cloudy, incandescent, and so on.
Это та настройка, которую вы смело можете поставить в автоматический режим. Если камера немного ошибётся, вы легко это поправите в редакторе при обработке. Но можно выбирать из предложенных фиксированных значений: солнце, тень, облачно, лампа накаливания и так далее.
Yes ... I forgot to say, first put the camera in manual mode. This is usually the letter "M" on the mode dial / wheel.
Да...забыл сказать, вначале переведите камеру в ручной режим управления. Обычно это буква "M" на диске/колёсике выбора режимов съёмки.

The text that you have read is quite densely saturated with information. If you just read, you don't remember too much. This is one of the reasons why I am ending this post.
To make these tips really practical for you, you need to try each of them in practice. This means that you need to pick up the camera and read a few lines to do what is written there (you don't have to go outside, you have a room with things and a window). In this case, you will move from knowledge to skills.
It's like driving a car. You can read a lot about how to drive a car. But until you get behind the wheel and start driving, you will not have any skills. You will be just a couch expert.
At the same time, at first your actions will be unsure, you will make mistakes and this is normal. Just repeat each action many times. And it will go into an automatic skill. You will make the settings mechanically, and your head will be busy with creativity.
Maybe next time we will even switch to the master class mode. May be. If there is someone who should be.
Текст, который вы прочли, достаточно плотно насыщен информацией. Если вы просто прочли, то запомнить удаётся не слишком много. Это одна из причин, по которой я заканчиваю этот пост.
Чтобы эти советы стали для вас действительно практическими, надо пробовать каждый из них на практике. Это означает, что надо брать в руки камеру и читая несколько строчек выполнять то, что там написано (не обязательно выходить на улицу, у вас есть комната с вещами и окно). В этом случае от знания вы перейдёте к навыкам.
Это похоже на вождение автомобиля. Можно много прочесть о том, как надо управлять машиной. Но пока вы не сядете за руль и не начнёте движение, никаких навыков у вас не будет. Вы будете просто диванным экспертом.
При этом поначалу ваши действия будут неуверенными, вы будете совершать ошибки и это нормально. Просто повторяйте каждое действие много раз. И оно перейдёт в автоматический навык. Настройки вы будете делать машинально, а ваша голова при этом будет занята творчеством.
Может быть в следующий раз мы даже перейдём в режим мастер класса. Может быть. Если это кому-нибудь надо.
If you have any questions, I am ready to answer them ... if I can
Если появятся вопросы, я готов на них ответить... если смогу:)

Post created as part of the WORLD OF XPILAR Community Newbie Support Program.****
>Пост создан as part of the WORLD OF XPILAR Community Newbie Support Program.

| ▽ | ▽ |
|---|---|
| Camera | Sony A7М2 |
| Lens | - |
| Location | Russia |
| Post production | in LR |
Manual processing in Lightroom
From Russia with Love

Regards, @bambuka
