I feel like life has been pretty brutal lately with what has felt like something significant going wrong every day. I've never seen myself as a victim although recently, I'm wondering what I've done to upset the world!
This is a bit of an aside to the topic of my post but I'll go with it anyway...
It all started a few months ago when I got the dreaded call from my mortgage adviser. Our fixed-rate comes to an end at the end of the year and with the Bank of England seemingly at war with our government, interest rates have increased significantly and our mortgage rate would follow - increasing our monthly payment by almost 60%. For our family, this increase is more than significant... more than wiping out all of our disposable income and the discussion as to whether or not we would be able to keep our forever home... the home that we bought for our children to inherit upon our demise 💀
This marked the beginning of our bad luck.
When our boiler stopped working just a few days later and we were told that it would need to be replaced, the world had given us another kick in the nuts.
But with huge expense, comes opportunity so we took the opportunity to move the new boiler into the garage and redo much of our heating and water system, removing the need for the various pumps and installing an unvented water cylinder.
The other opportunity was for me to learn to do a spot of bricklaying - with the old boiler leaving a hole in our wall where the flue once resided. Which finally brings us back on topic.
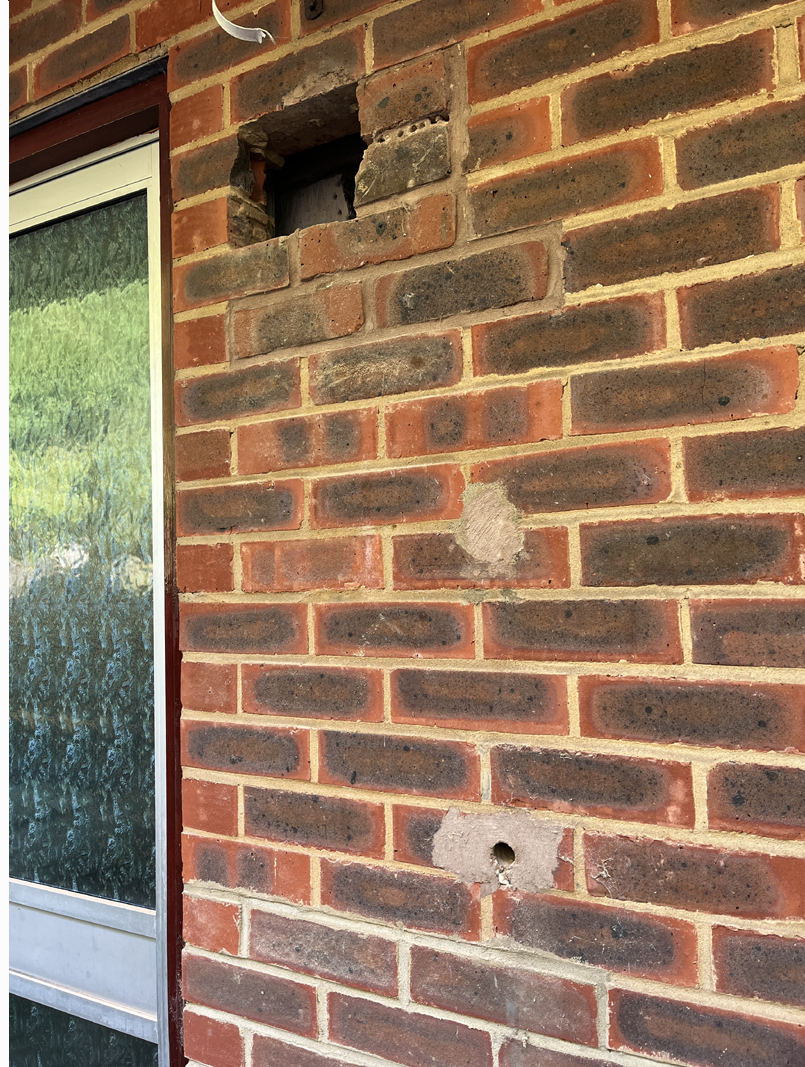

This lovely hole needed filling and polyfilla wouldn't quite make the grade so I donned my DIY hat and gloves to get to work. (I'd already made a start when I took the above photo as you can see from some drilled holes and already broken brick.)
Step 1: Teeth out the existing bricks
It's always best to work with whole bricks and bind them in with the existing brick work, so my first task was to remove the half bricks that had been cut for the flue - a process called "toothing out".
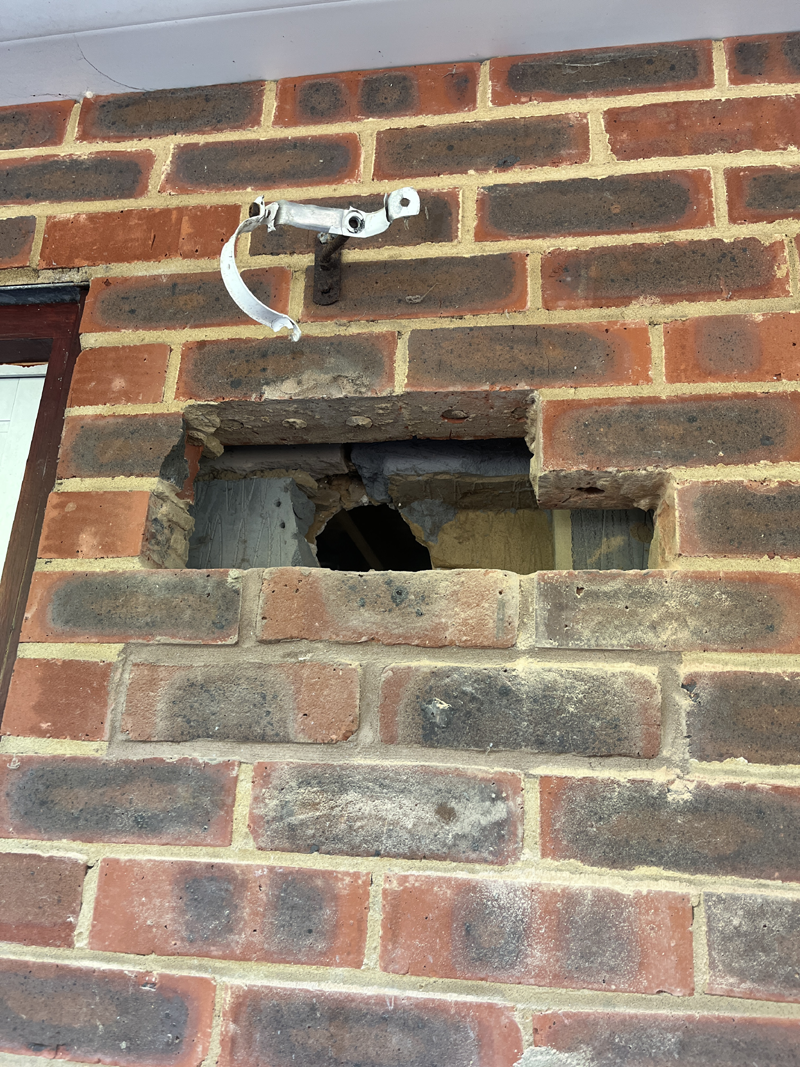
Unfortunately, this didn't go perfectly and the brick in the top left of the picture broke. Careless on my part as I hadn't drilled out the mortar fully before trying to remove the brick underneath.
A pro would probably have removed the rest of the broken brick at this point but since I didn't want to be taking out the corner brick, I decided to leave it in and "reconstruct" the broken brick that had come out.
Step 2: Put it back together again
My new, larger hole was big enough for me to put a new breeze block in from the outside - I initially expected to have to make a bigger mess inside the house to do this but the opportunity presented itself and I took it 🥳
I then had to mix my mortar and for this, I went for a fairly solid mix - roughly 3.5 parts sand to 1 part cement. I read that you can mix anything between 3 parts and 5 parts sand depending upon its use so I went solid 💪
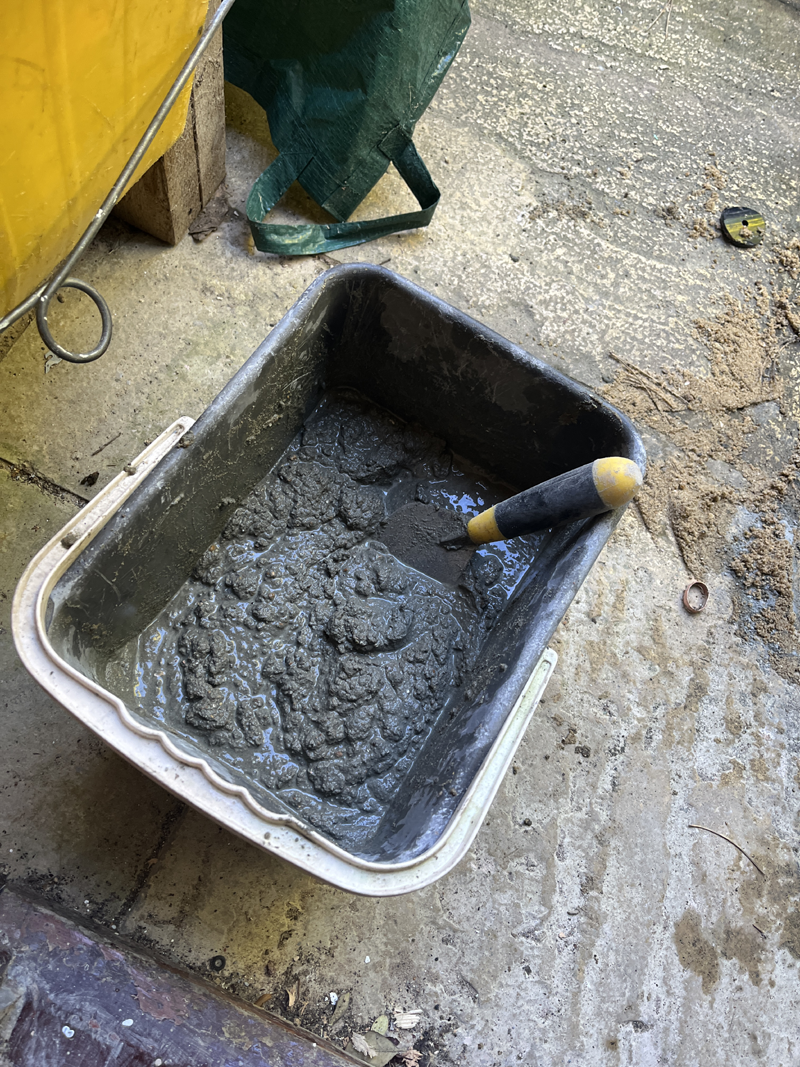
Unfortunately though, whereas new bricks come in a standard size (215 mm x 102.5 mm x 65 mm), my house is older than standardisation so my bricks were slightly wider than those used in its construction. Annoying, but since it was a relatively small area being filled, I was able to trim down one of the bricks by about 10-15mm which did the trick nicely (can you guess which one?)
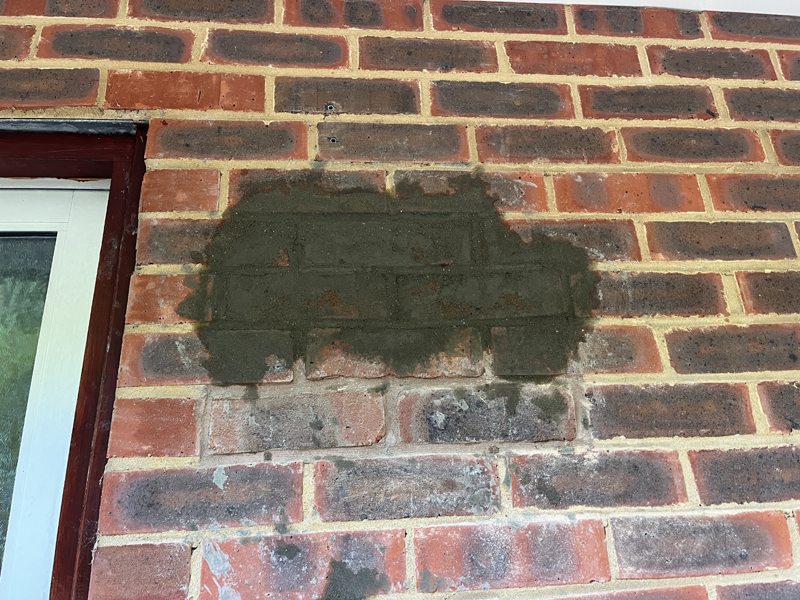
As you can see, a beautifully filled hole.
Ok. It's not beautiful and it highlights another fuck-up on my part. I didn't mind about the layer of mortar that I'd left over my handywork, thinking that I could simply wash it off later. But it turns out that I can't and I need to buy some special acid or something if I want my bricks to be clean.

Apart from this, I'd even go so far as to say that my brickwork is better than whoever did the rows 2 lower than mine, which probably would have benefited from a layer of "masking mortar".
I hope that you've enjoyed reading about my little opportunity which has contributed towards my most recent silence. Hopefully I'll be able to share my "roofing" opportunity with you soon.

the-gorilla's Club Status Tool
In case you didn't know, I've created a tool to help users review their club status - showing them where their power's coming from, how much they're powering up and transferring out amongst other things.
Please use it wisely.
