When we talk about photographing architecture, we are basically referring to capturing images of a specific building, either inside or outside. And for this speciality of photography there are a series of rules that make the result more pleasing to the viewer.
The first thing to pay attention to is perspective. The eye, through the human mind, corrects the perspective of the things we see, and this is especially important when we are talking about buildings. If we do not place our camera sensor completely parallel to the building, the lines of the buildings will leak, since the lens of our camera does not have a correcting brain. We have all seen and taken pictures like these.

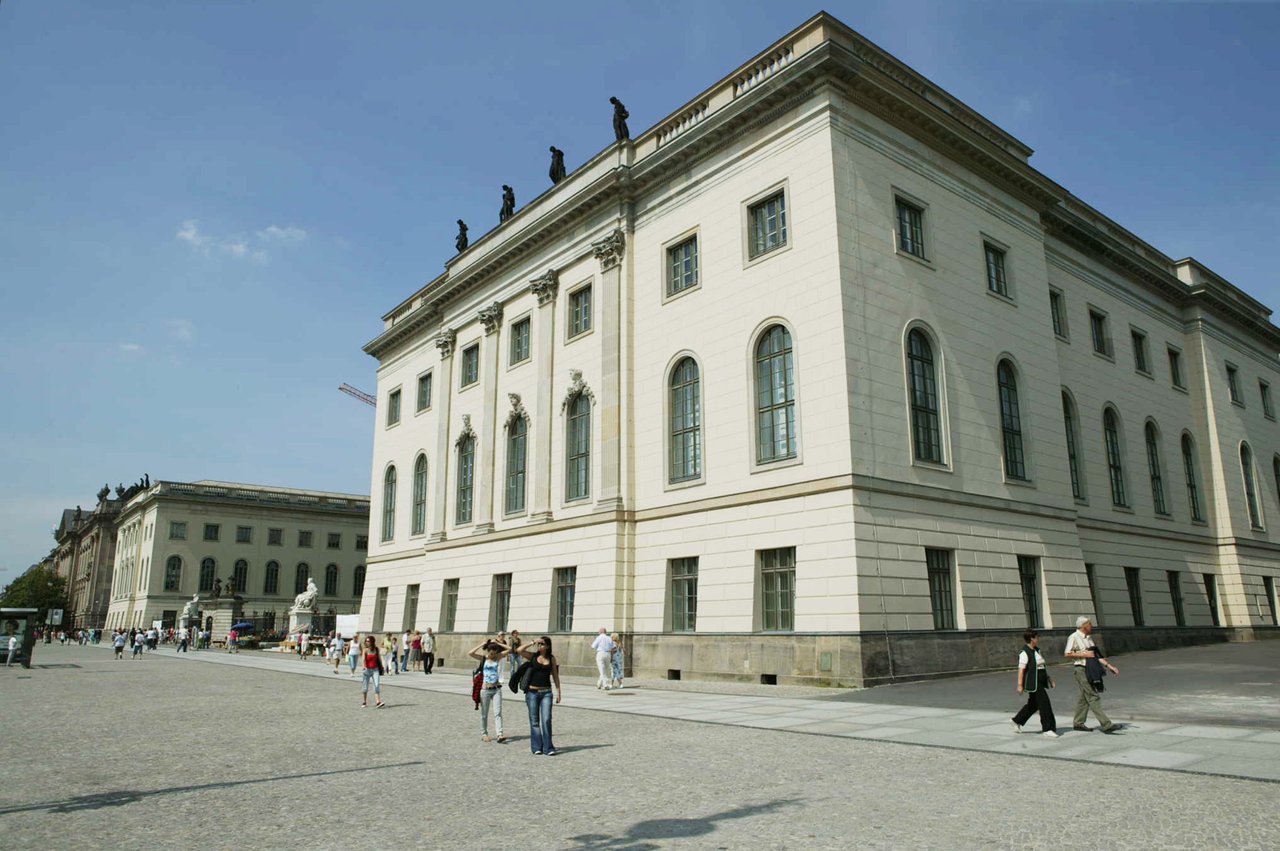
Photo 1 and 2
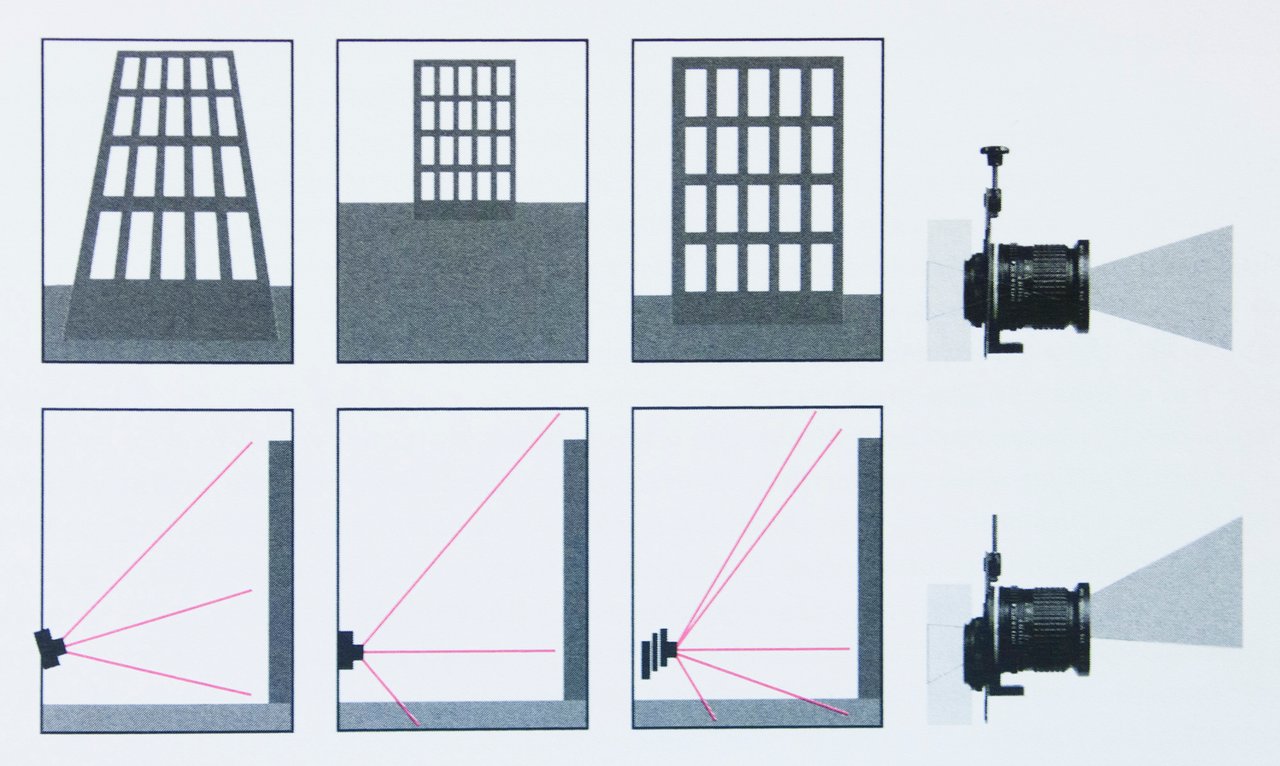
Graphical example of camera tilt with, and without tilt shift lenses.
In a professional environment, these perspective leaks are corrected with specific lenses called tilt-shift, which are expensive and very heavy. But please don't panic, there are several software options for correction, and the good news is that almost all of the ones I'm going to mention are free, and there are even versions for mobile phones and tablets.
Almost everyone will have heard of the most powerful and well-known application for photo retouching, Photoshop. For those of you who have it, it has an excellent perspective correction tool. For mobile devices there is a light version.
Apart from Ps, which is paid, there is a marvellous programme, http://x.photoscape.org/, which in its free version has a lot of possibilities, including, if I remember correctly, lens correction. It is available for Windows and Apple operating systems and its paid version is very reasonably priced and performs at a professional level.
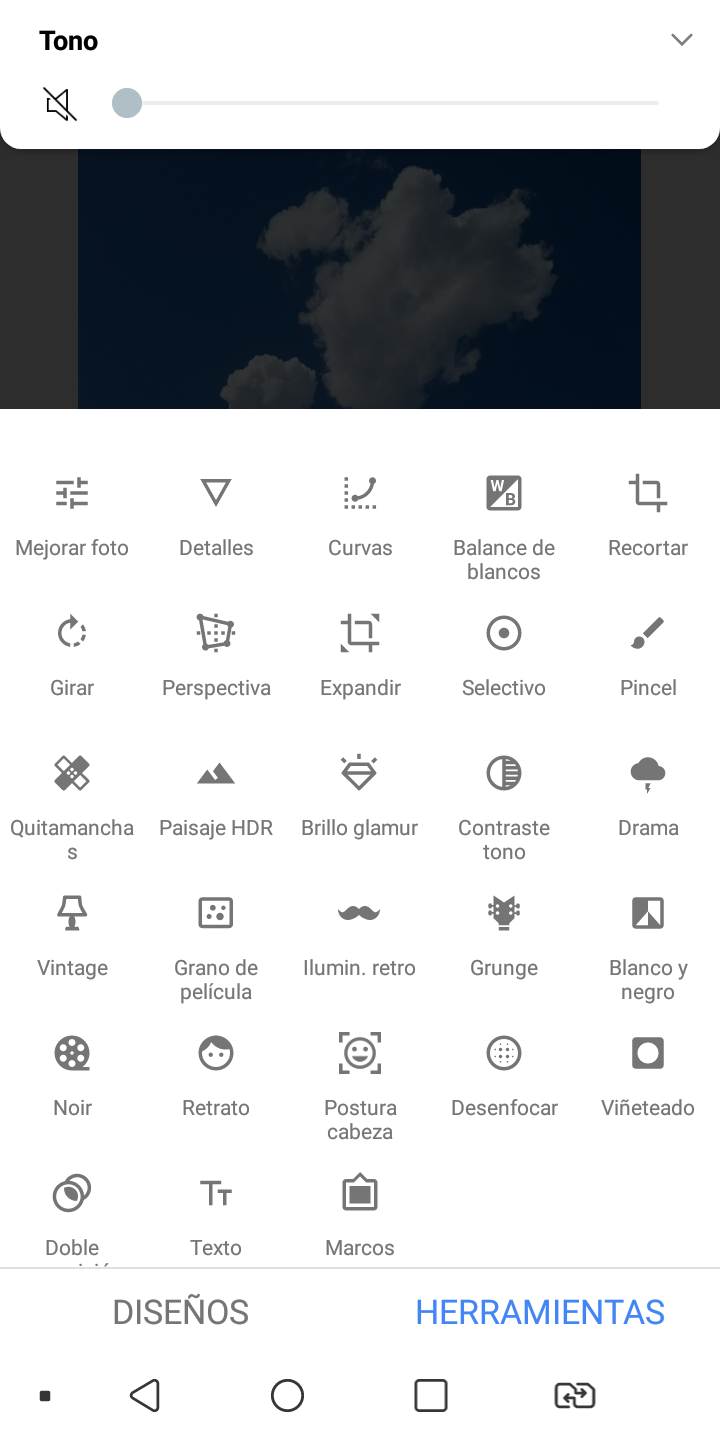
For mobile devices, tablets and phones, the one that works best is Snapseed for Android and Apple. It's simple, but you get pretty decent results and it's free. There is also a version for desktop computers.
Example of correction of photos 1 and 2 made with Photoshop:
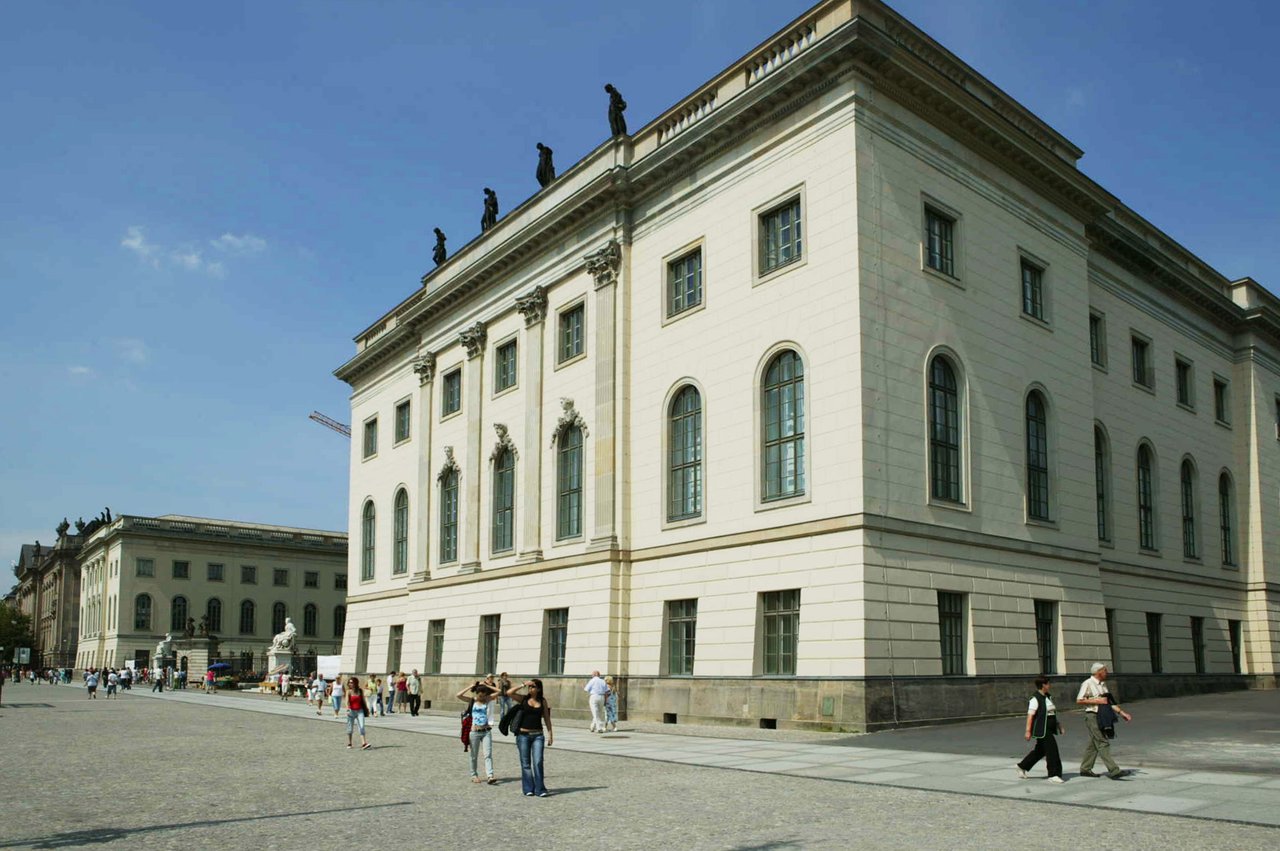
As you can see, in the correction process a small part of the image has been lost, so it is advisable to use angled lenses so that the final photo does not lose too much surface area once cropped.
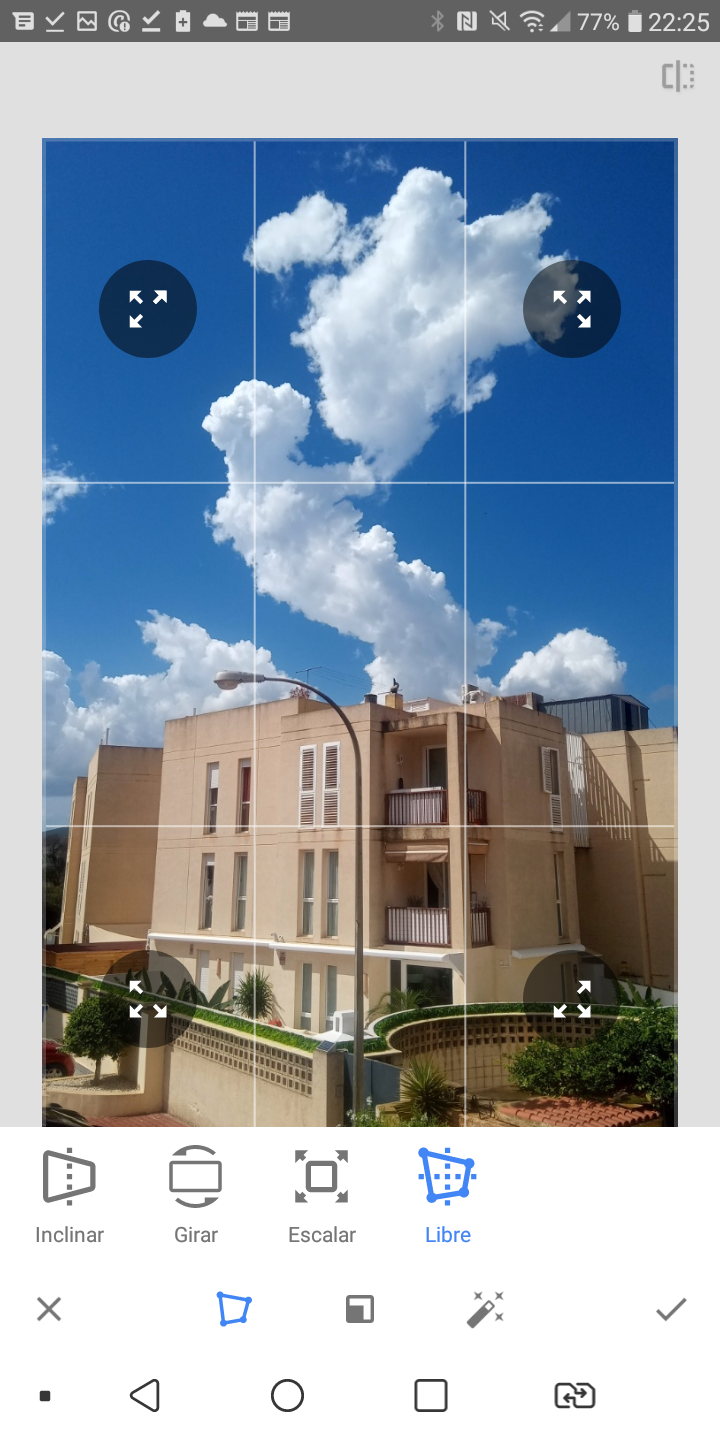
Examples of how SnapSeed works on mobile devices
The tools, where the correction is called perspective.
The image without correction
And the image corrected.
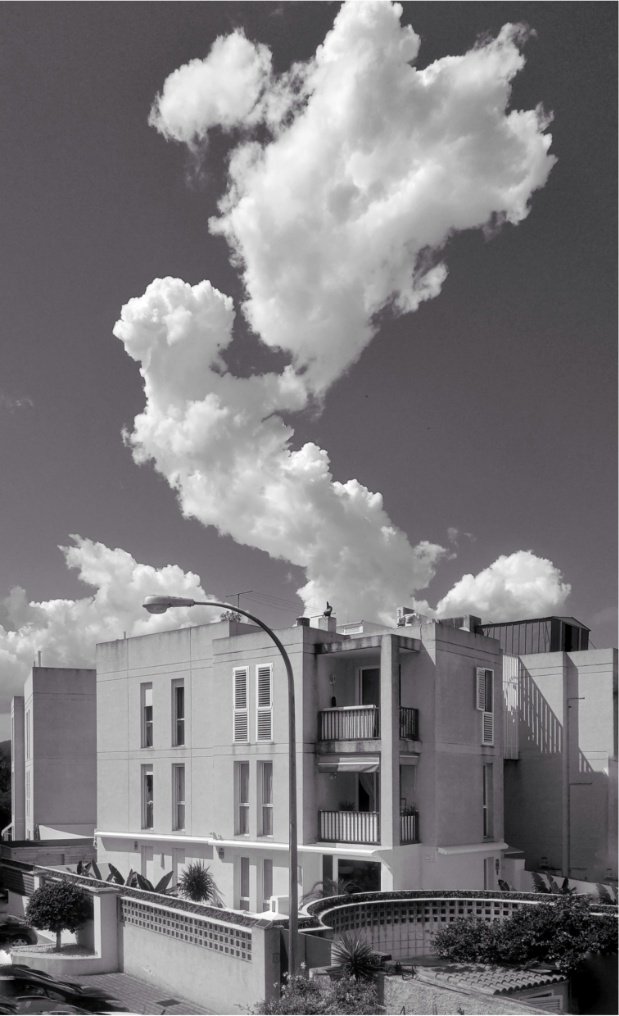
Also inside of buildings is advisable that perspective was corrected. Note the complete verticality of the walls.
In the next issue we will give some more small tips to make our architectural photos look almost professional.
If you are interested, feel free to ask your questions.
Unless stated otherwise, all the pictures and the words are mine.
Do not use this images without my written permission.
Thanks for stopping by and taking a look.
Camera: Canon EOS 5 Mk III
Lens: Canon 16-35 f:2.8 and Canon 24Ts f:3.5
Processed with Capture One
The photos and the correction of the SnapSeed examples are authored by @silviadiez.