
Installing Tron wallet application
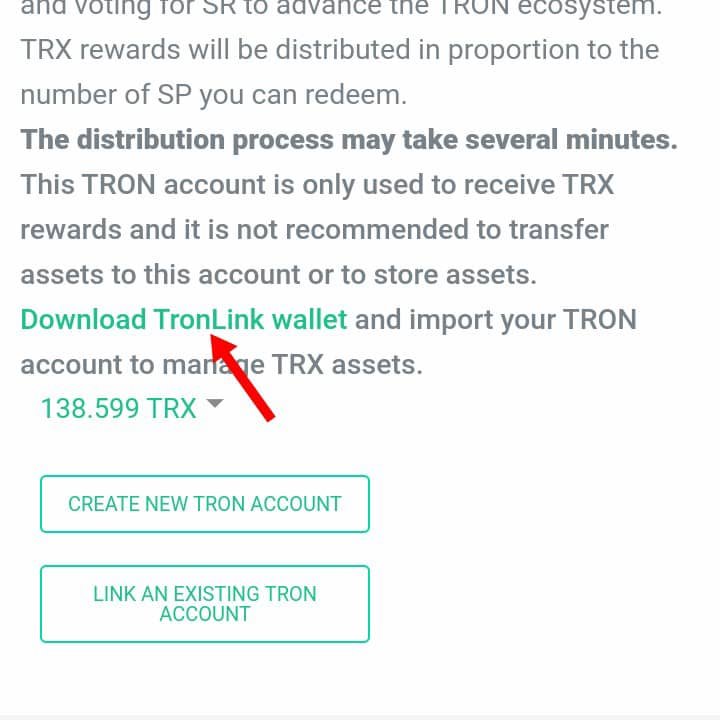
1.open your steemit wallet page and click on the download tron link wallet link.
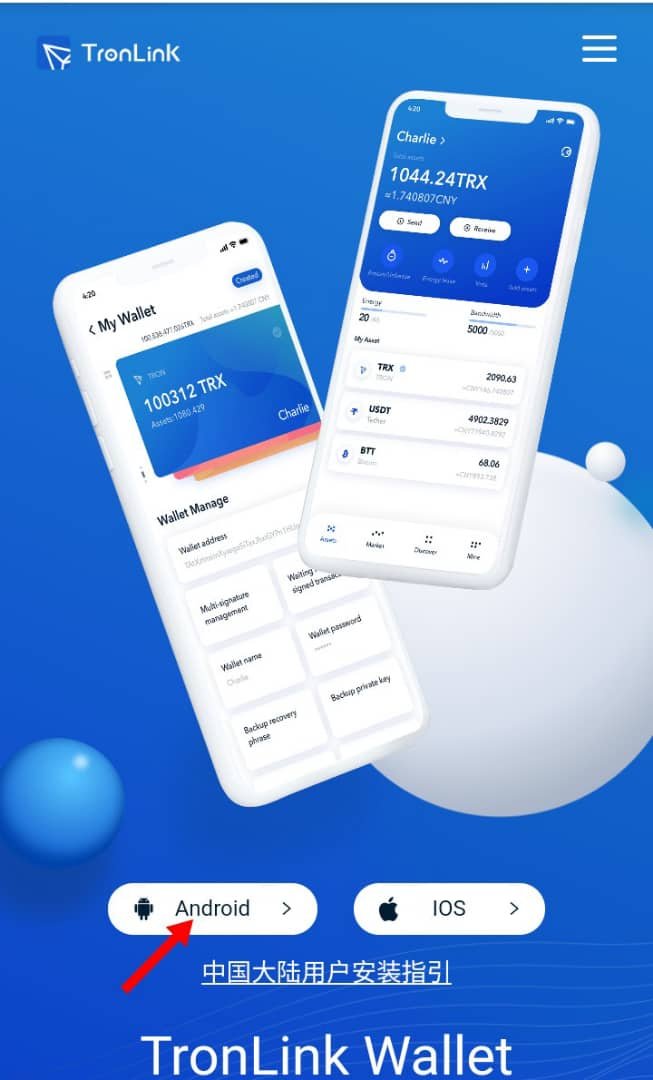
2.click on Android button when using mobile device and select the Google play in the displayed menu.
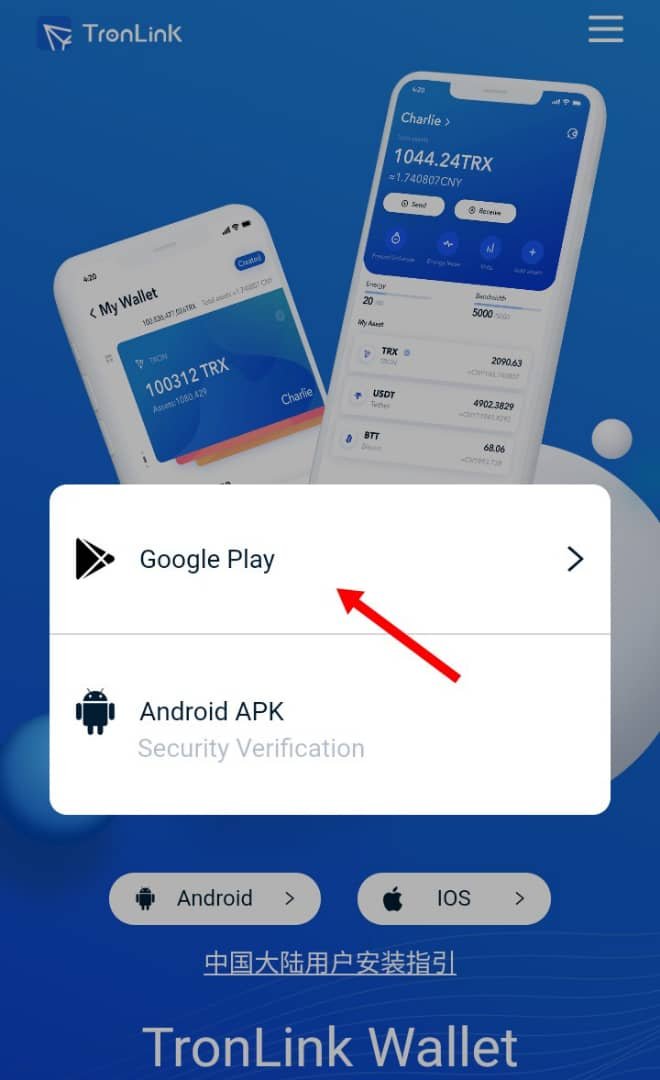
3.click on Google play store button on the next page.
4.click on the tron link wallet install button at play store.
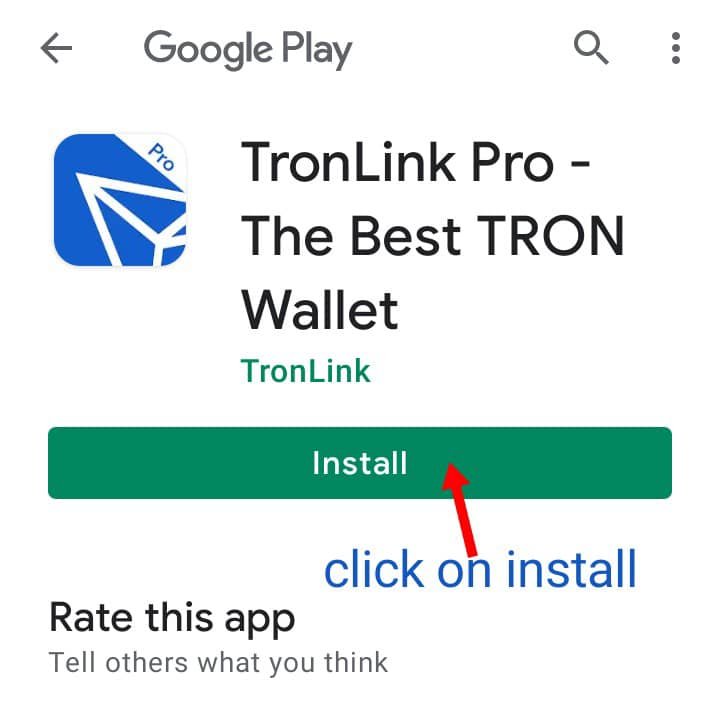
After some time, the application will be installed on your device.
Creating Tron wallet
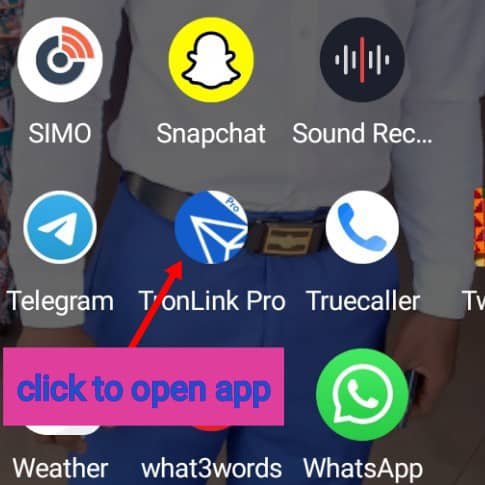
1. Open the tron link wallet application on your device.
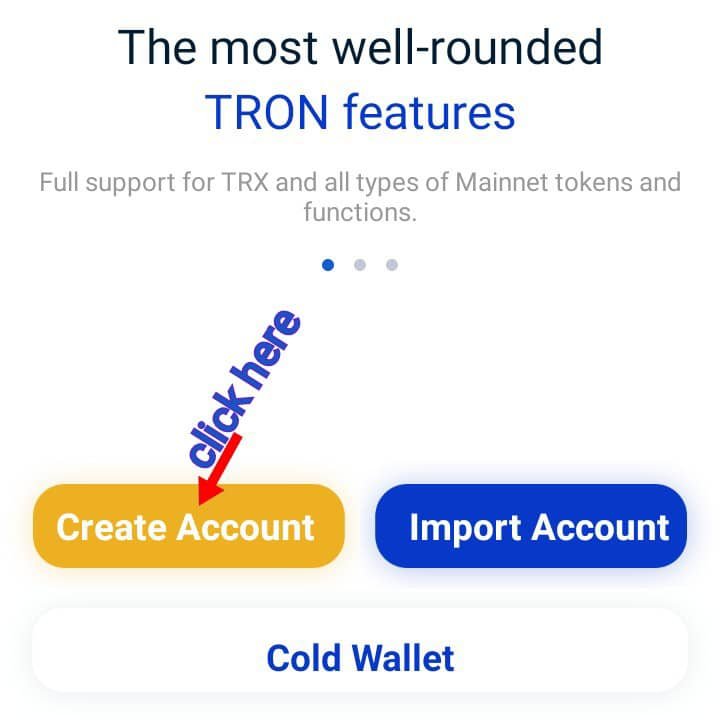
2.click on creat account
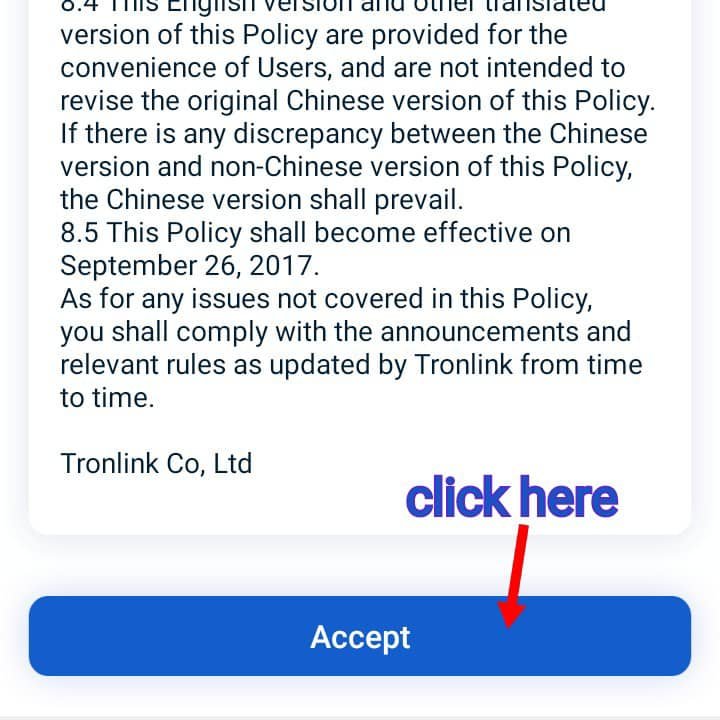
3.Read and click on the accept button at the user privacy agreement page.
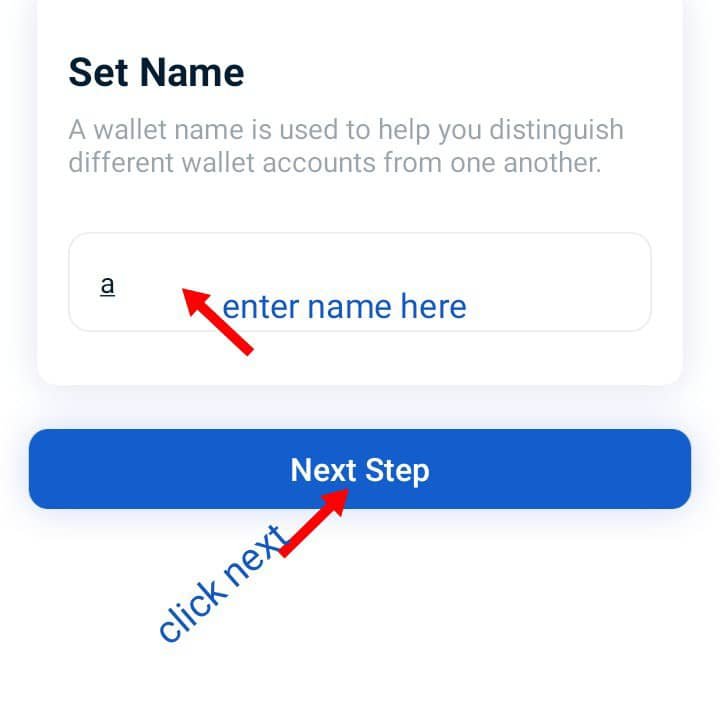
4. Enter your preferred name in the set name box and click next button.
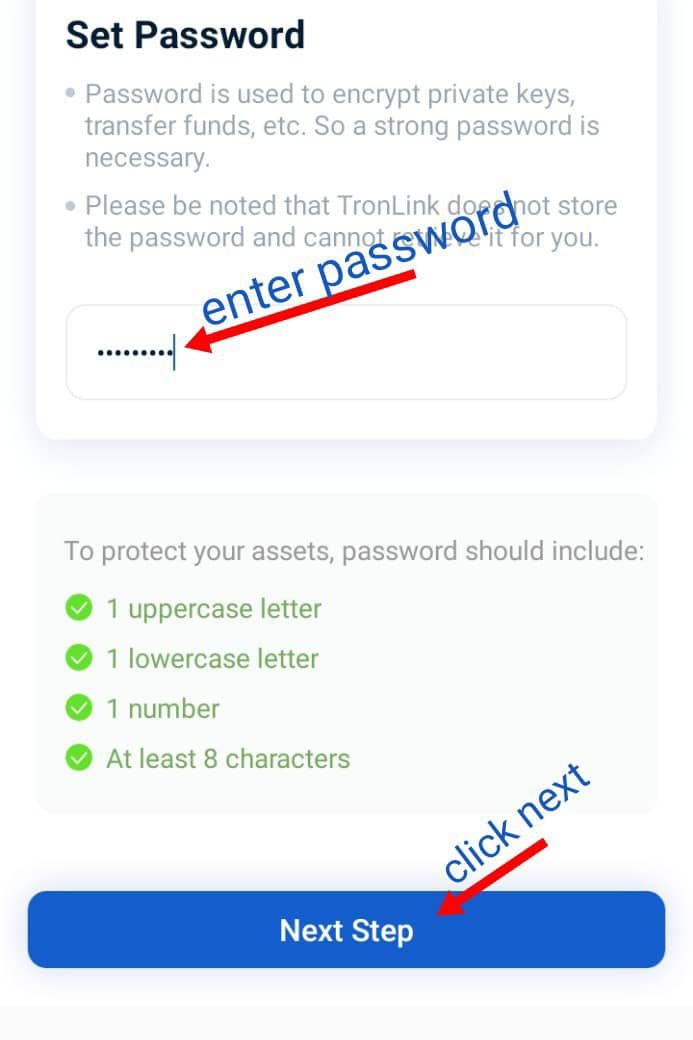
5. Set your password in the the set password box. Password must contain 1upper case letter,1 lower case letter 1 number and must be at least 8 characters.
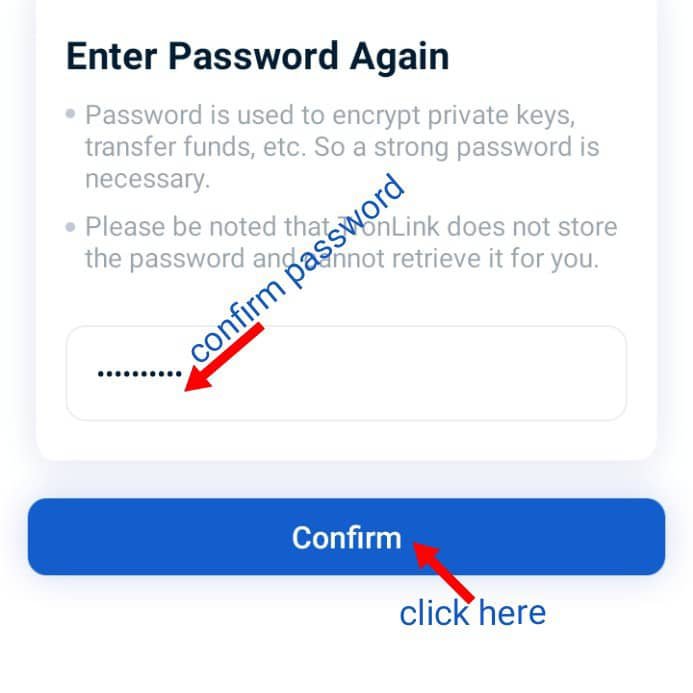
6. confirm password
7. You will be required to backup mnemonic.
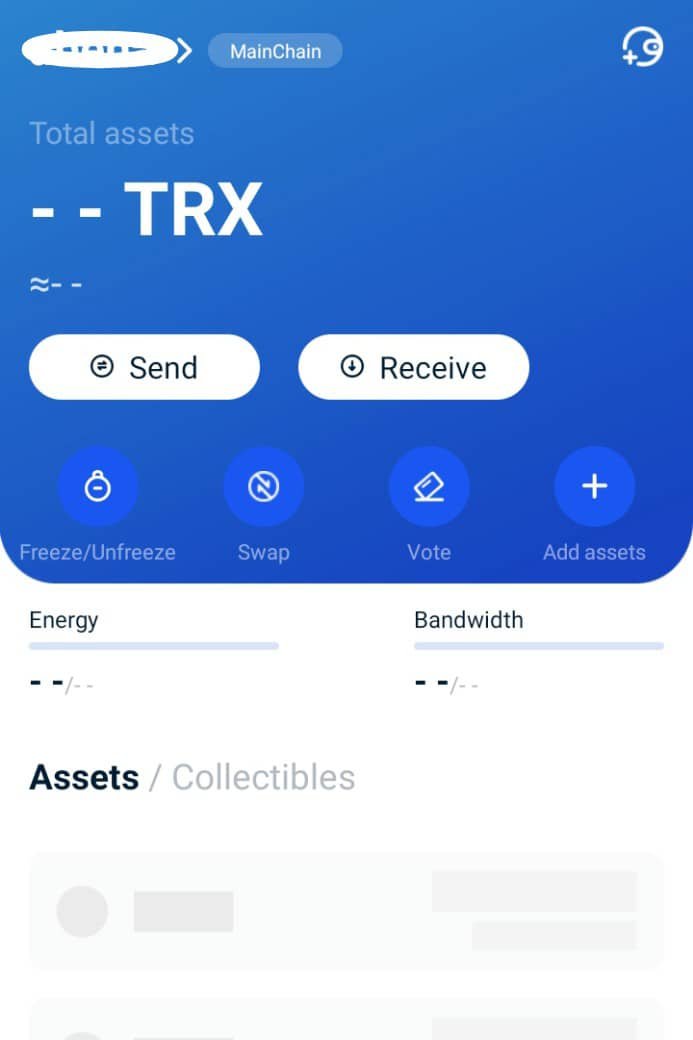
Click on the i have saved it securelybutton and confirm mnemonic then click on next step button. Your account tron link wallet account will be set.
This ends the part 1 tutorial on tron link wallet.
In our next Tutorials we will learn about how to import and transfer your Tron successfully to your TronLink Account.
"This post was Authored by @fortune182 and edited by @oppongk."