Hi there!
A lovely Sunday to you!
Do you have magazines you no longer read and are just lying around, waiting to be recycled?
How about using them to weave a basket which you can then use to store and organize your things?

If you search the internet, there are many weaving styles. For this post, to start off, I will share with you a simple weaving method which you can try.
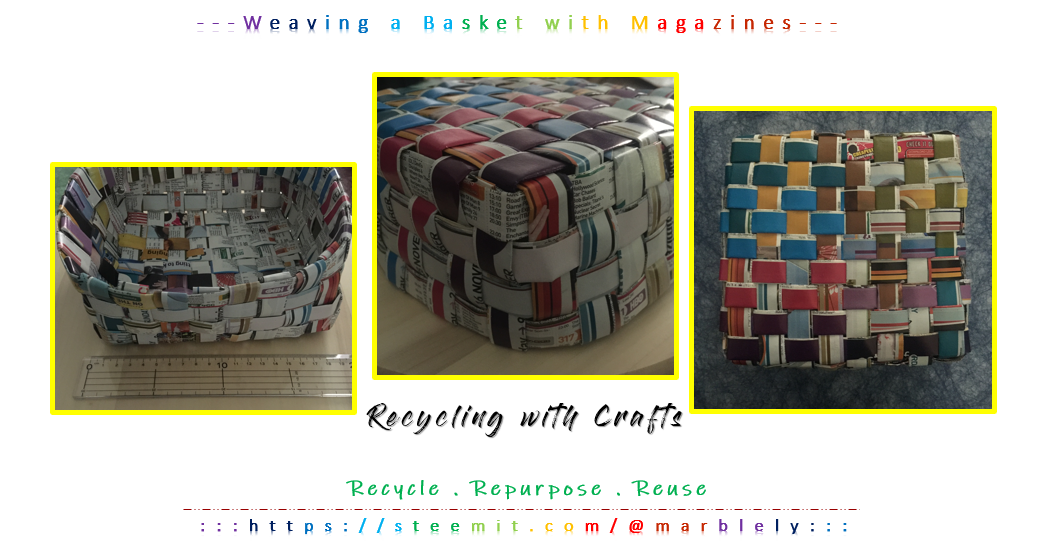
This tutorial makes a basket that is about 19cm x 19cm in size and uses a 27.5cm x 21cm magazine with thin and glossy pages. The basket is quite sturdy in structure and uses about 25 x 2 pages (centerfold) of the magazine. A nice way to recycle, repurpose and reuse 😎🌳.
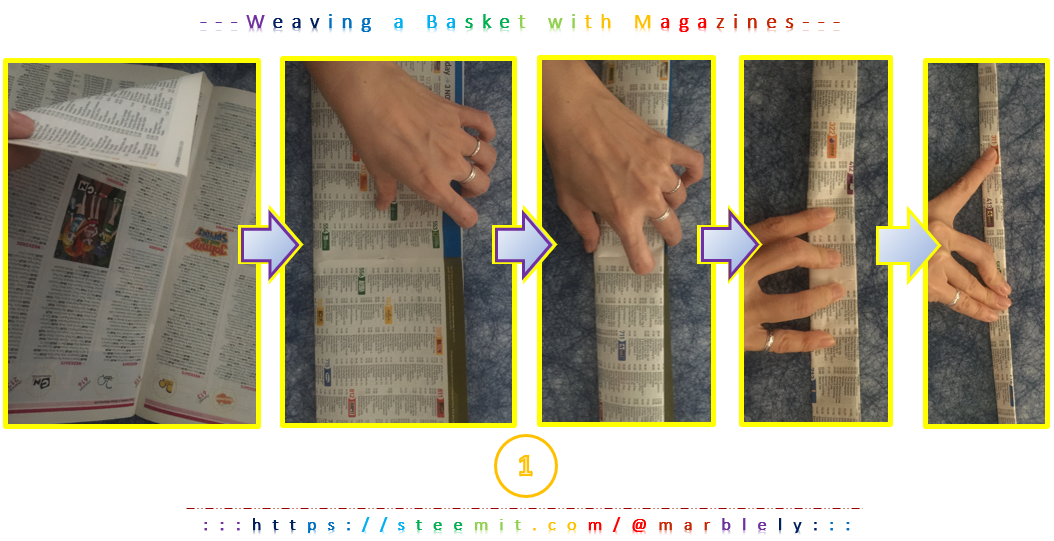
Step 1
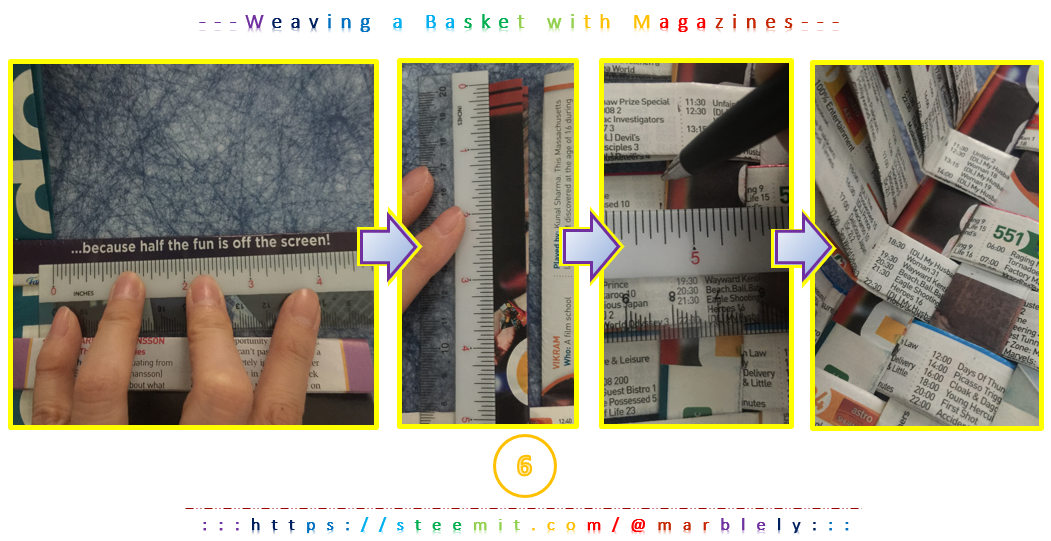
- Take any magazine you no longer read. Tear out the center pages. This will give you 42cm in length for the basket weaving.
- Fold the center pages to half and keep folding half until you get a 2cm x 42cm strips.
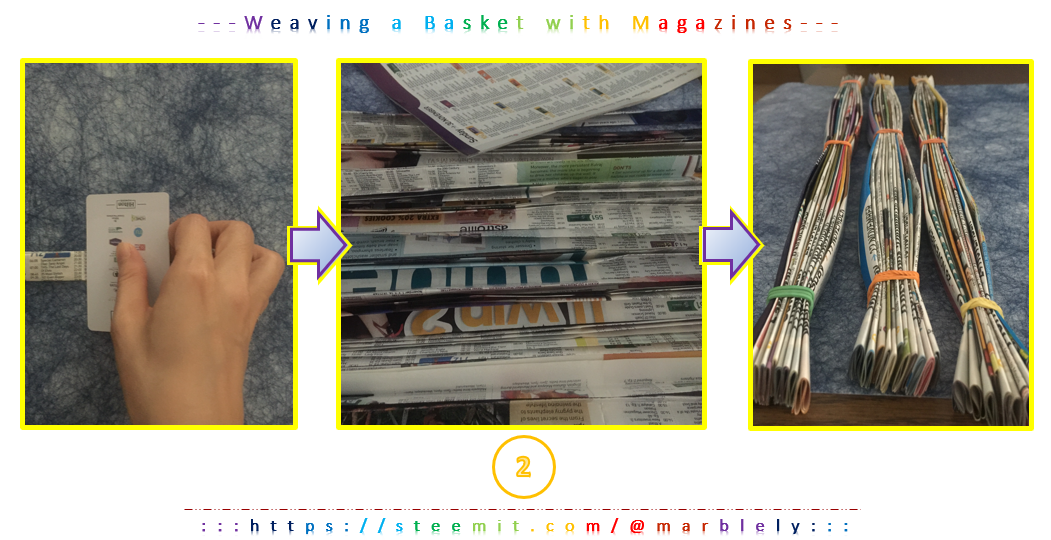
Step 2
- If the magazine is hard to flatten, use an old credit card or any hard card you have, press it down and scrape onto the strip to flatten it.
- Keep repeating Steps 1 and 2 to create about 25 strips.
- I bundled the strips together with rubber bands to keep it flattened.
You can customize the size of your strips to either wider, thinner, depending on your paper texture. The idea is to create a sturdy enough strip to weave a sturdy basket.
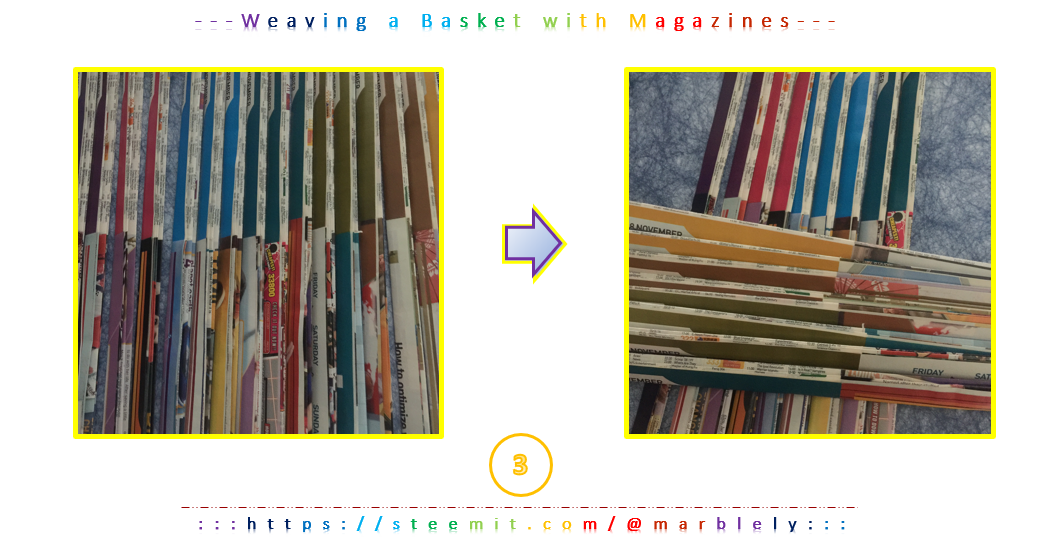
Step 3
- You can arrange the strips according to colour and decide which strip goes where.
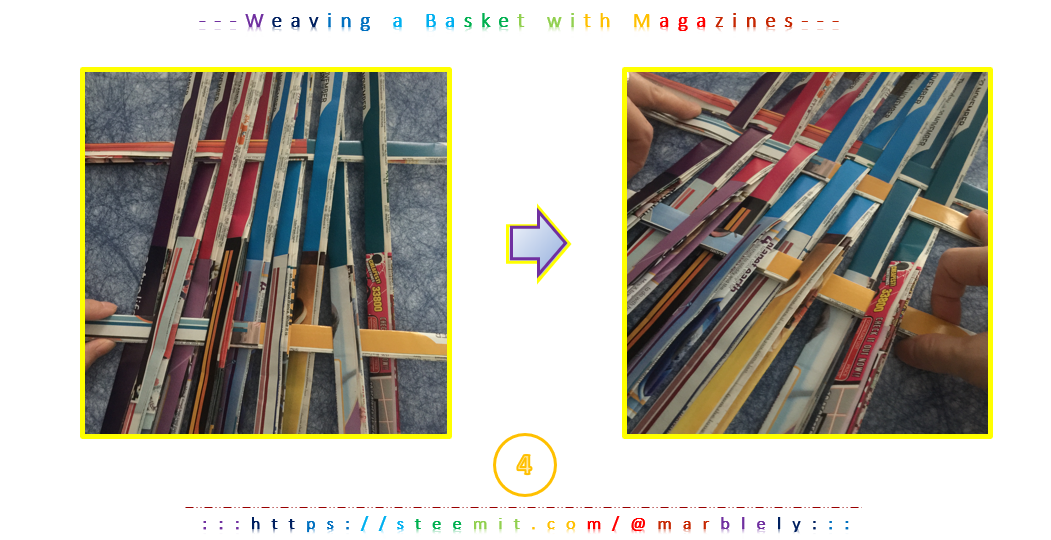
Step 4
- Lay 9 strips side by side vertically.
- Begin weaving by inserting the first loose strip horizontally, placing it under and over the vertical strips until you reach the end of the 9 strips.
- Take the second loose strip and repeat the weaving but this time, place it over and under the vertical strips in a different order as the first strip.
- With the third loose strip, repeat the weaving by following the order of the first strip.
- Use both hands to tighten the weave.
You can customize the size of your basket by laying less strips vertically before you weave and weaving with less horizontal strips.
Step 5
- Continue weaving until you reach the desired basket base size. I used 8 horizontal strips.
- Use your finger to push the weaves tight.
- Compare the weave pattern front and back to decide which side will be the inner side of your basket, and which side will be the outer side of the basket.
- I chose the colourful weaves as the outer side of the basket.
Step 6
- Roughly measure the loose ends to make sure that the weave basket base is in the center. If it is not at the center, slowly move the weaves accordingly to position it at the center.
- Bend the edges of the weave to a 90 degree angle to begin weaving upwards.
Step 7
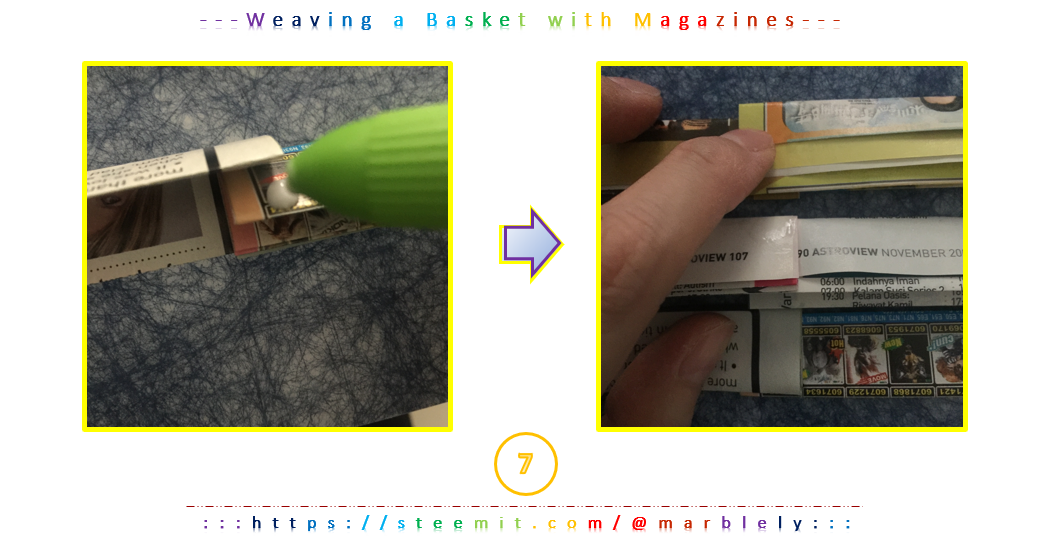
- Prepare the strips to weave upwards by joining and gluing 2 strips ends together. Wait for it to dry.
- I prepared 4 strips of 2s (84cm x 2cm)
You can also do this step before you start weaving. I forgot to do this earlier 😁.
Step 8
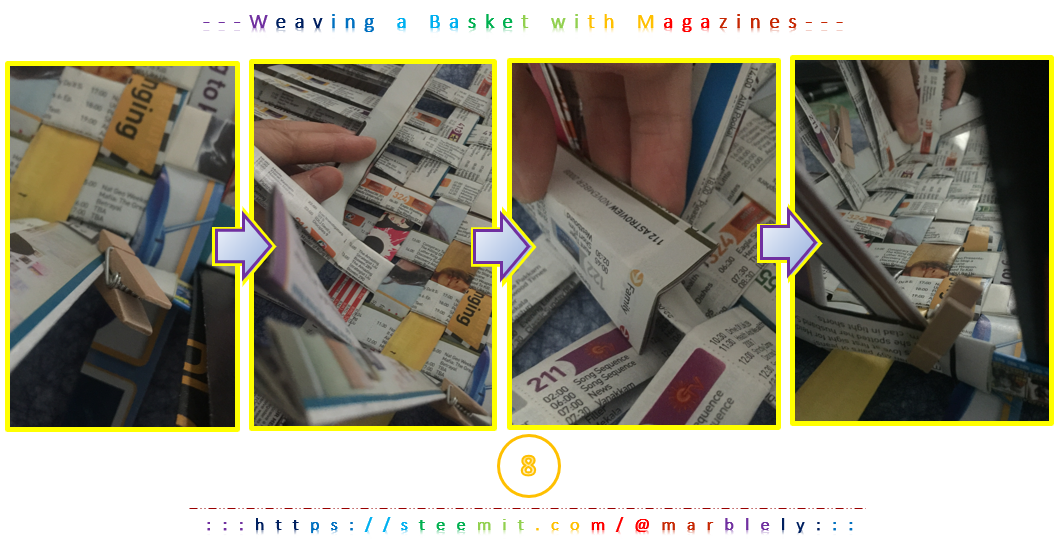
- When you start weaving the first row upwards, using one of the loose 84cm strips, make sure the weave order is in the opposite order from the edge strips to ensure the strips are locked in the weave.
- To join the strip, place one end over the other end.
You may use clothes peg to help secure the strips as you weave upwards the sides.
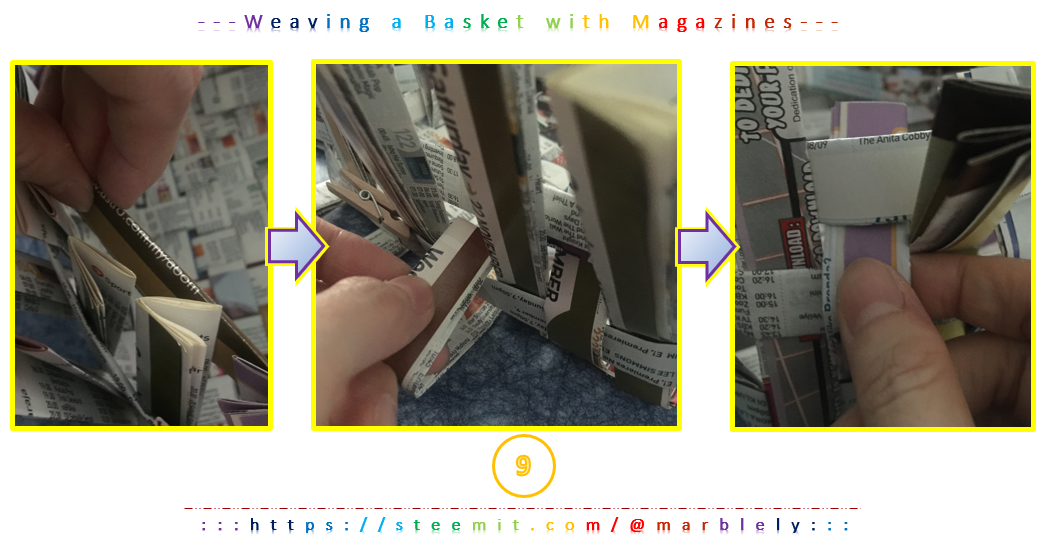
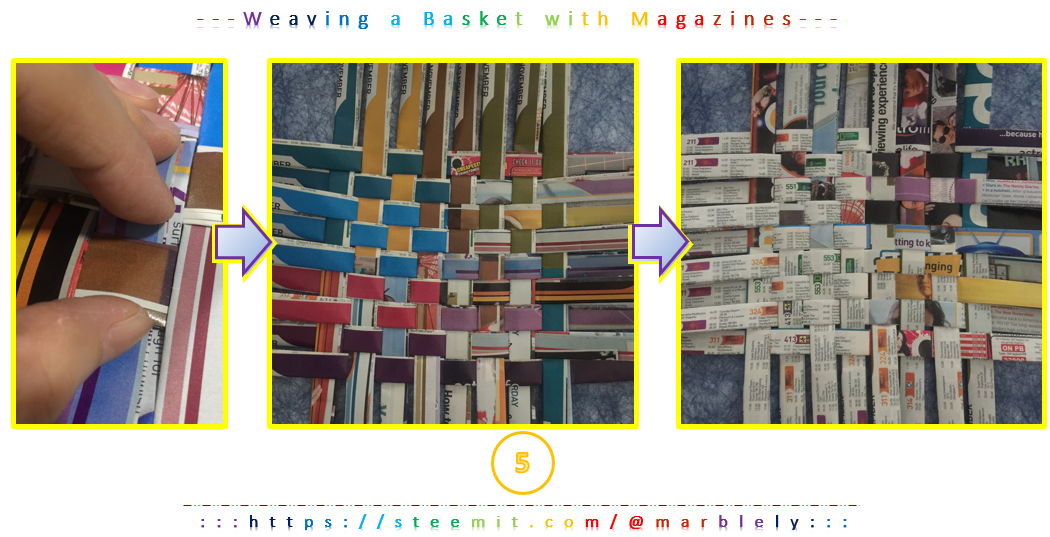
Step 9
- Take a new loose 84cm strip and place it at the center of the basket.
- Begin weaving the second row by inserting the 90 degree bent vertical strips through the horizontal strip in the opposite order from the first row.
- Continue Steps 8 and 9 for the four 84cm strips.
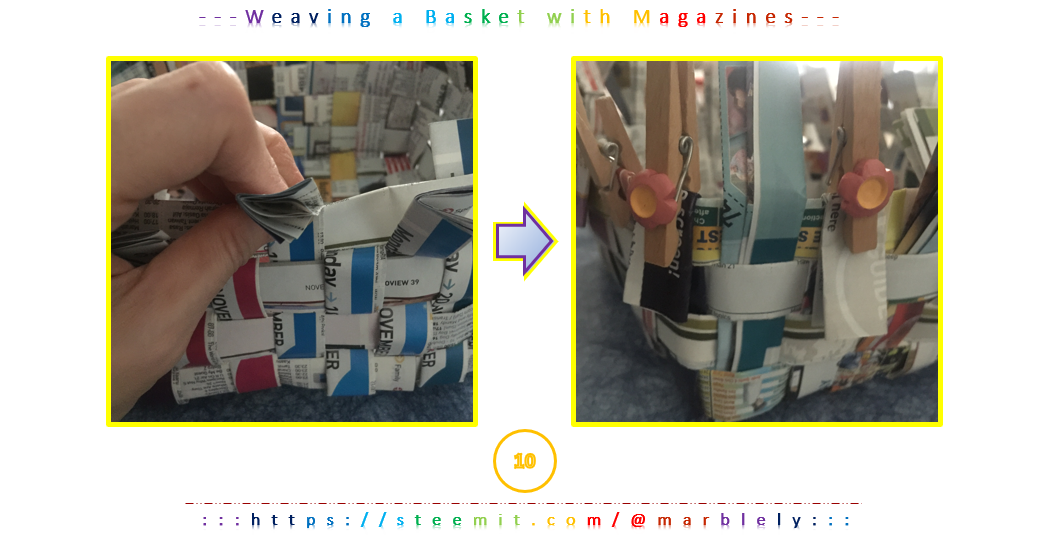
Step 10
- Tighten the weave by pulling, pushing and adjusting each strip.
- Finish the edges by folding each strip downwards and secure it with clothes pegs.
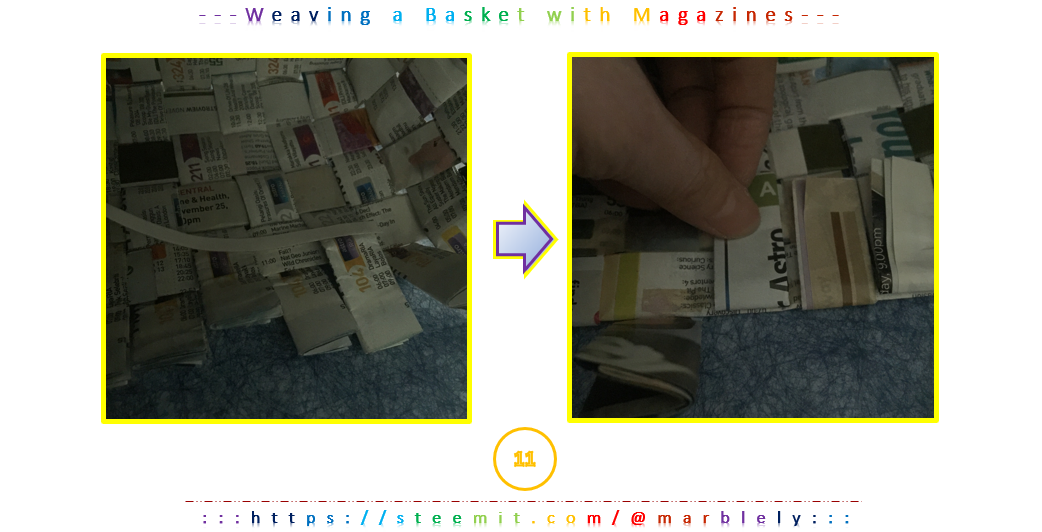
Step 11
- Use double sided tapes to secure the edges, all around the basket.
- You are done! Yay!
There are several ways to end the weaves. You can tuck the edges into the weave (if the weave is thin enough) or staple it all around.
For this tutorial, I stick the edges inward using double sided tapes. Tomorrow I will share with you on how to finish off the basket with a simple fabric lining 🙃.
Hope you will try this. You will get to make many baskets out of magazines you no longer read and have fun doing it with friends and family 😊.
