Hello everyone!! Have a happy #tuesdaybabies to all of you :) Alodia's Crochet will again share another very simple tutorial to all of you!
But before that I would like to share first why #tuesdaybabies? How do I come up with that kind of hashtag?
I created #tuesdaybabies because I decided that every tuesday I am going to share to all of you an item which made of crochet just for babies only!
So every tuesday you can see my post about an artwork for babies, and I hope I could inspire lot of people, especially mommies who would like to learn how to crochet. I also would like to make crochet very more popular to all. It is handmade and it is surely made with love. This #tuesdaybabies hashtag is also a show of support to all mother and every crafter who loves to make an items for their babies or niece/nephew.
Anyone can use this #tuesdaybabies of you would like too and I will be also grateful too.. Hehe!
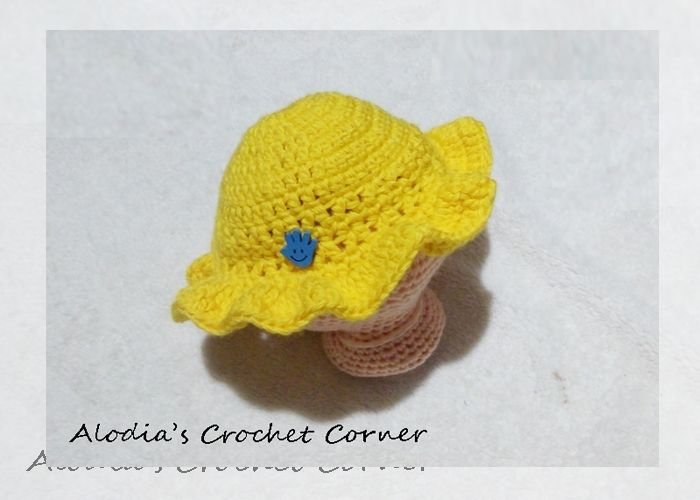
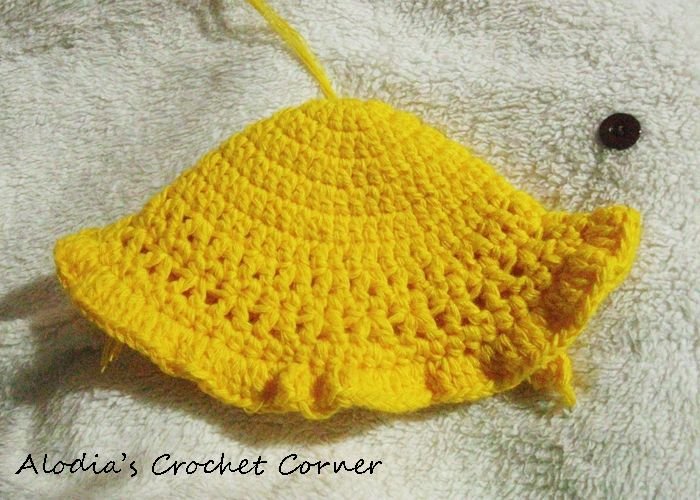
So this is what I have made for today. A crochet baby hat/beanie for newborn.
So it's time to share my tutorial for this day! I am going to make a crochet beanie for a newborn baby. This can be done for about 1 and a half hour.
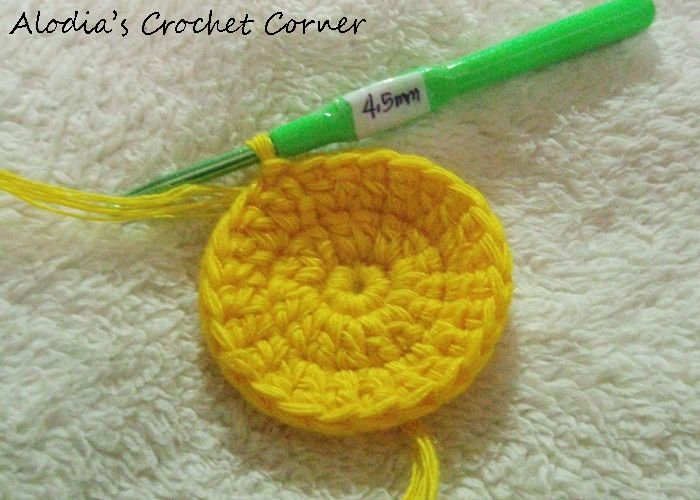
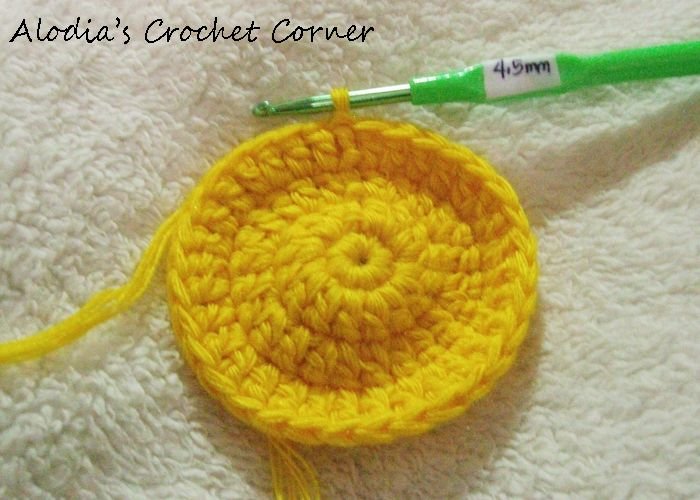
I used an acrylic yarn, and my 4.5mm crochet hook.
This is so simple and very easy. Perfect for a beginner. I hope you would like to try my pattern too.
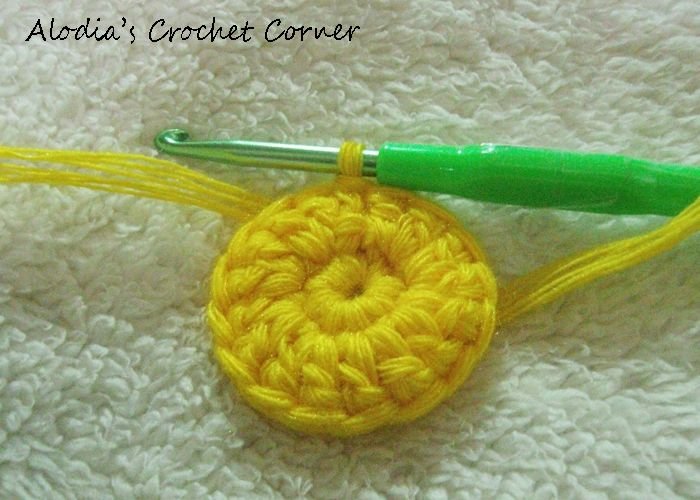
Row 1: make 8 single crochet on the magic ring then slip knot on top of the first single crochet made.
Row 2: chain 2, and make 2 double crochet on each of the stitches then slip stitch. (16 stitches)

| 
|
Row 3: chain 2,
***1 double crochet in the next stitch,
2 double crochet in the next stitch****
(Repeat asterisk until end)
then slip stitch on the top of the chain 2 made.
Row 4: chain 2,
***1 double crochet in the next 2 stitches
2 double crochet in the next stitch****
(Repeat asterisk until end)
slip stitch on top of the chain 2 made.
| 
|
Row 5: chain 2,
***1 double crochet in the next 3 stitches
2 double crochet in the next stitch****
(Repeat asterisk until end)
slip stitch on top of the chain 2 made.
Row 6: chain 2,
***1 double crochet in the 4 stitches
2 double crochet in the next stitch****
(Repeat asterisk until end)
slip stitch on top of the chain 2 made.
| 
|
Row 7: chain 2,
1 double crochet in the next stitches
Slip stitch on top of the chain 2 made.
Row 8: chain 2,
1 double crochet in the first stitch
***skip next stitch
1 double crochet chain 1, 1 double crochet in the next stitch****
(Repeat asterisk until end)
slip stitch on top of the chain 2 made.

| 
|
Row 9: chain 2,
make half double crochet in each of the stitches
Then slip stitch on top of the chain 2.
Row 10-11:
Repeat Row 8 and Row 9

| 
|
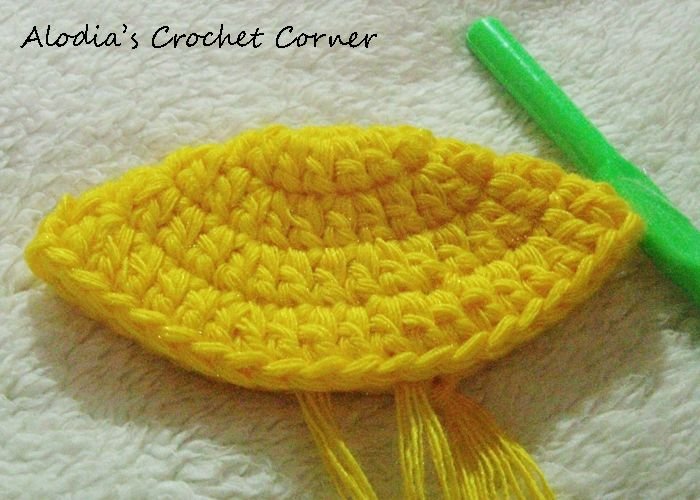
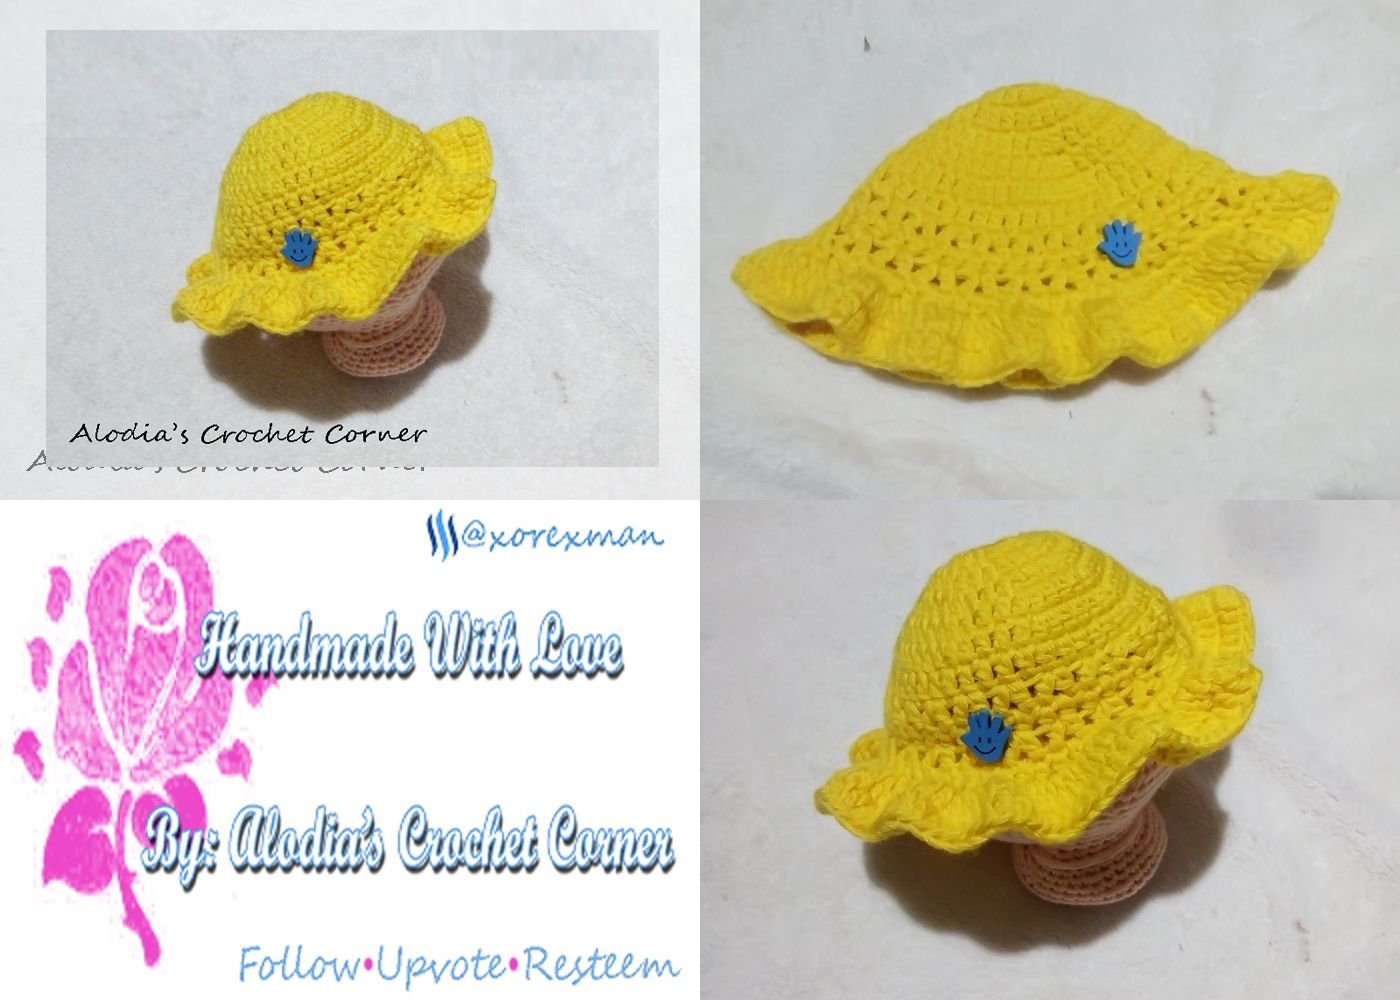
Row 12-13: In this row we are now making the brim. I make a little brim because this beanie is for baby, so if ever baby is will go outside, it can protect the face of the baby from direct sunlight.
A very simple instruction, make a 2 double crochet on each of the stitches. You can see it like a ruffles and it is okay. Then it's up to you if you like to add some rows to make the ruffles/brim longer. (Hehe)
I also put a wooden finger beads to put on the beanie/hat. I think it is so cute.
You can also make a bigger size of this kind of design, you can use 5mm crochet hook and additional rows of increasing before doing the ROW 7.
And that's it #steemians! I hope you like my work for today, and tomorrow is another share of work. Thank you so much. I hope someone would try my pattern and share it here too. Again thank you so much!!


