
¡Hi Steemit!
I hope you are very well, today I come
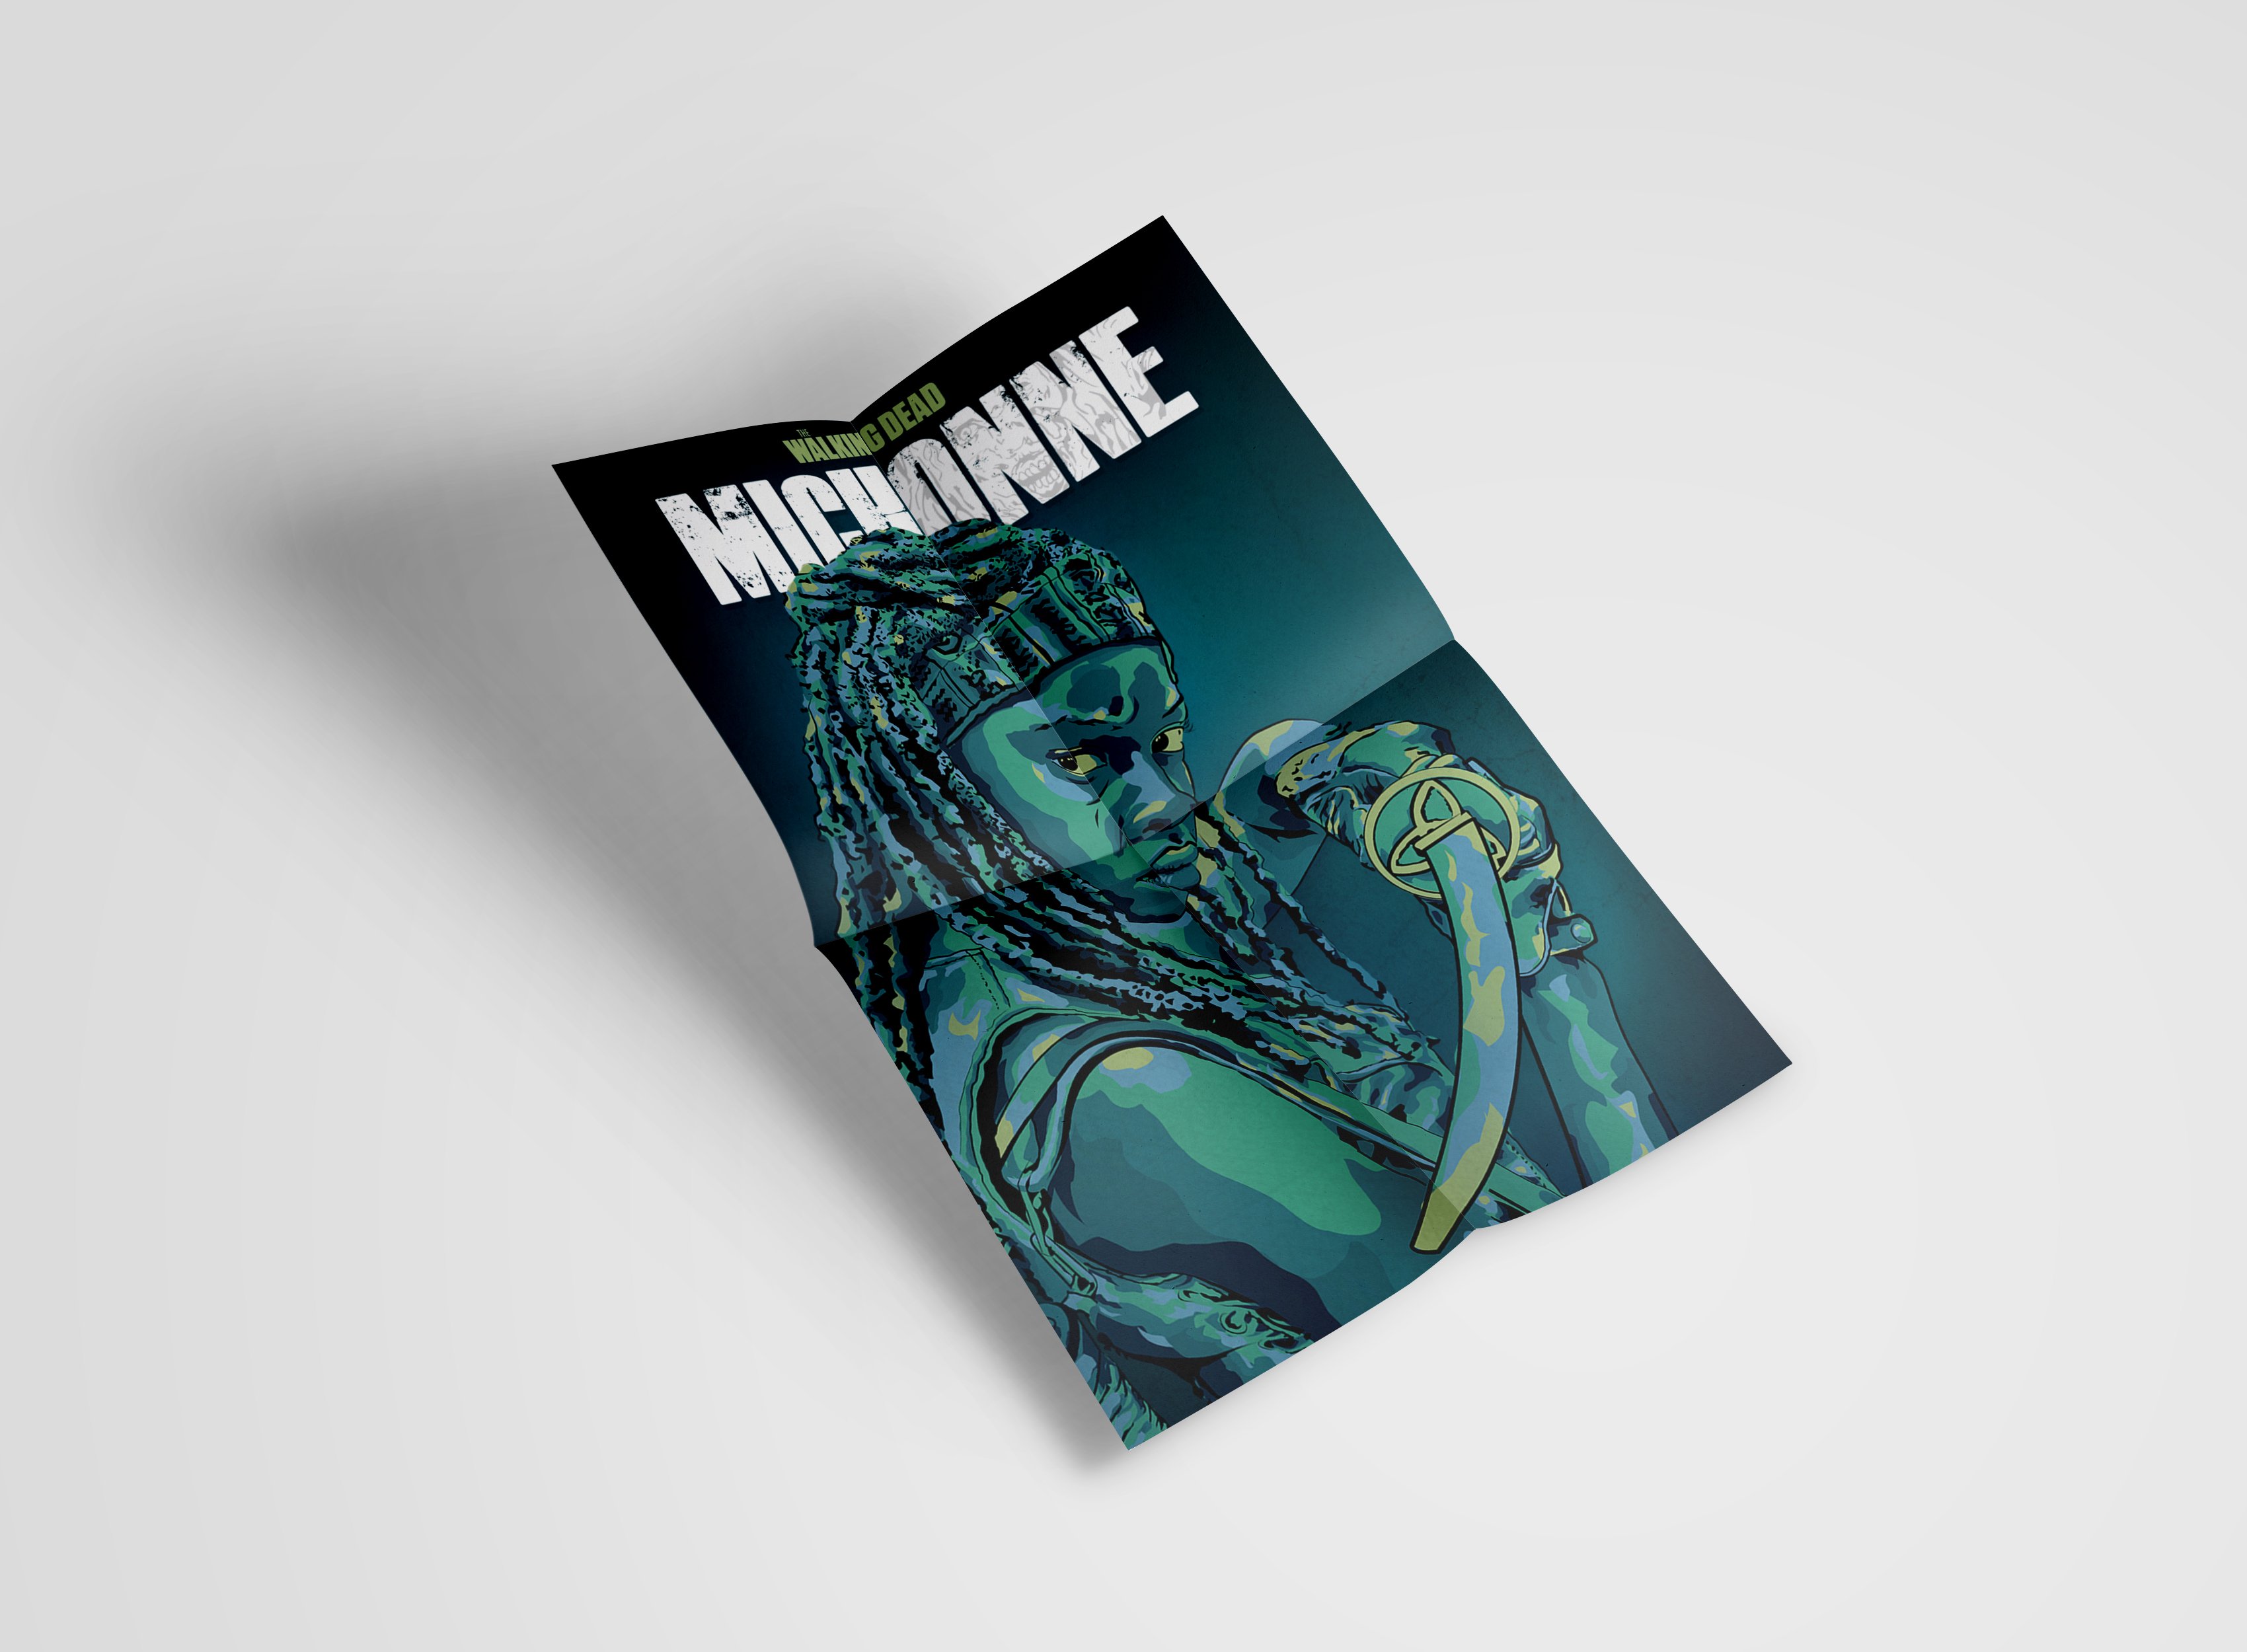
to show you my tribute to one of my favourite character of TV Shows!
Hope you like it!
.png)
@ivan.atman | @antminer | @megy.fine.arts | @bil.prag
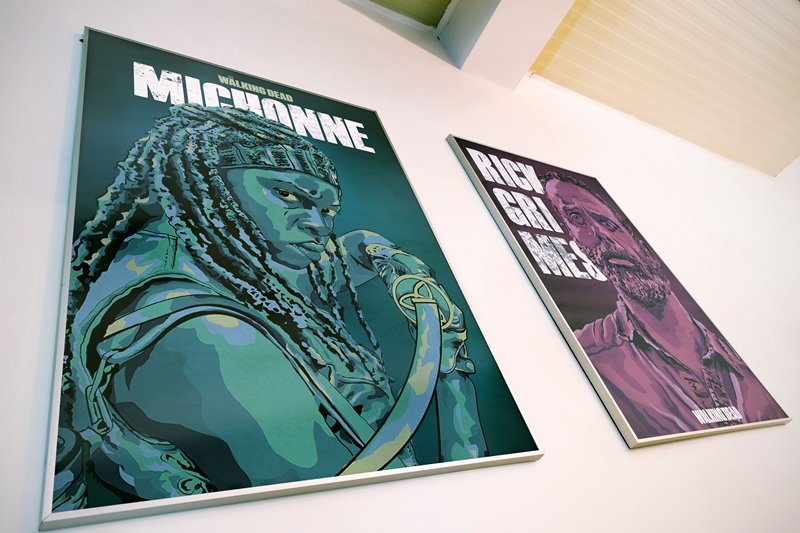
This is my entry for the i- Talent Round 10.
If you want to participate.
I hope my participation is liked by the judges .
Thanx You for create this great opportunity
- Sinopsis -

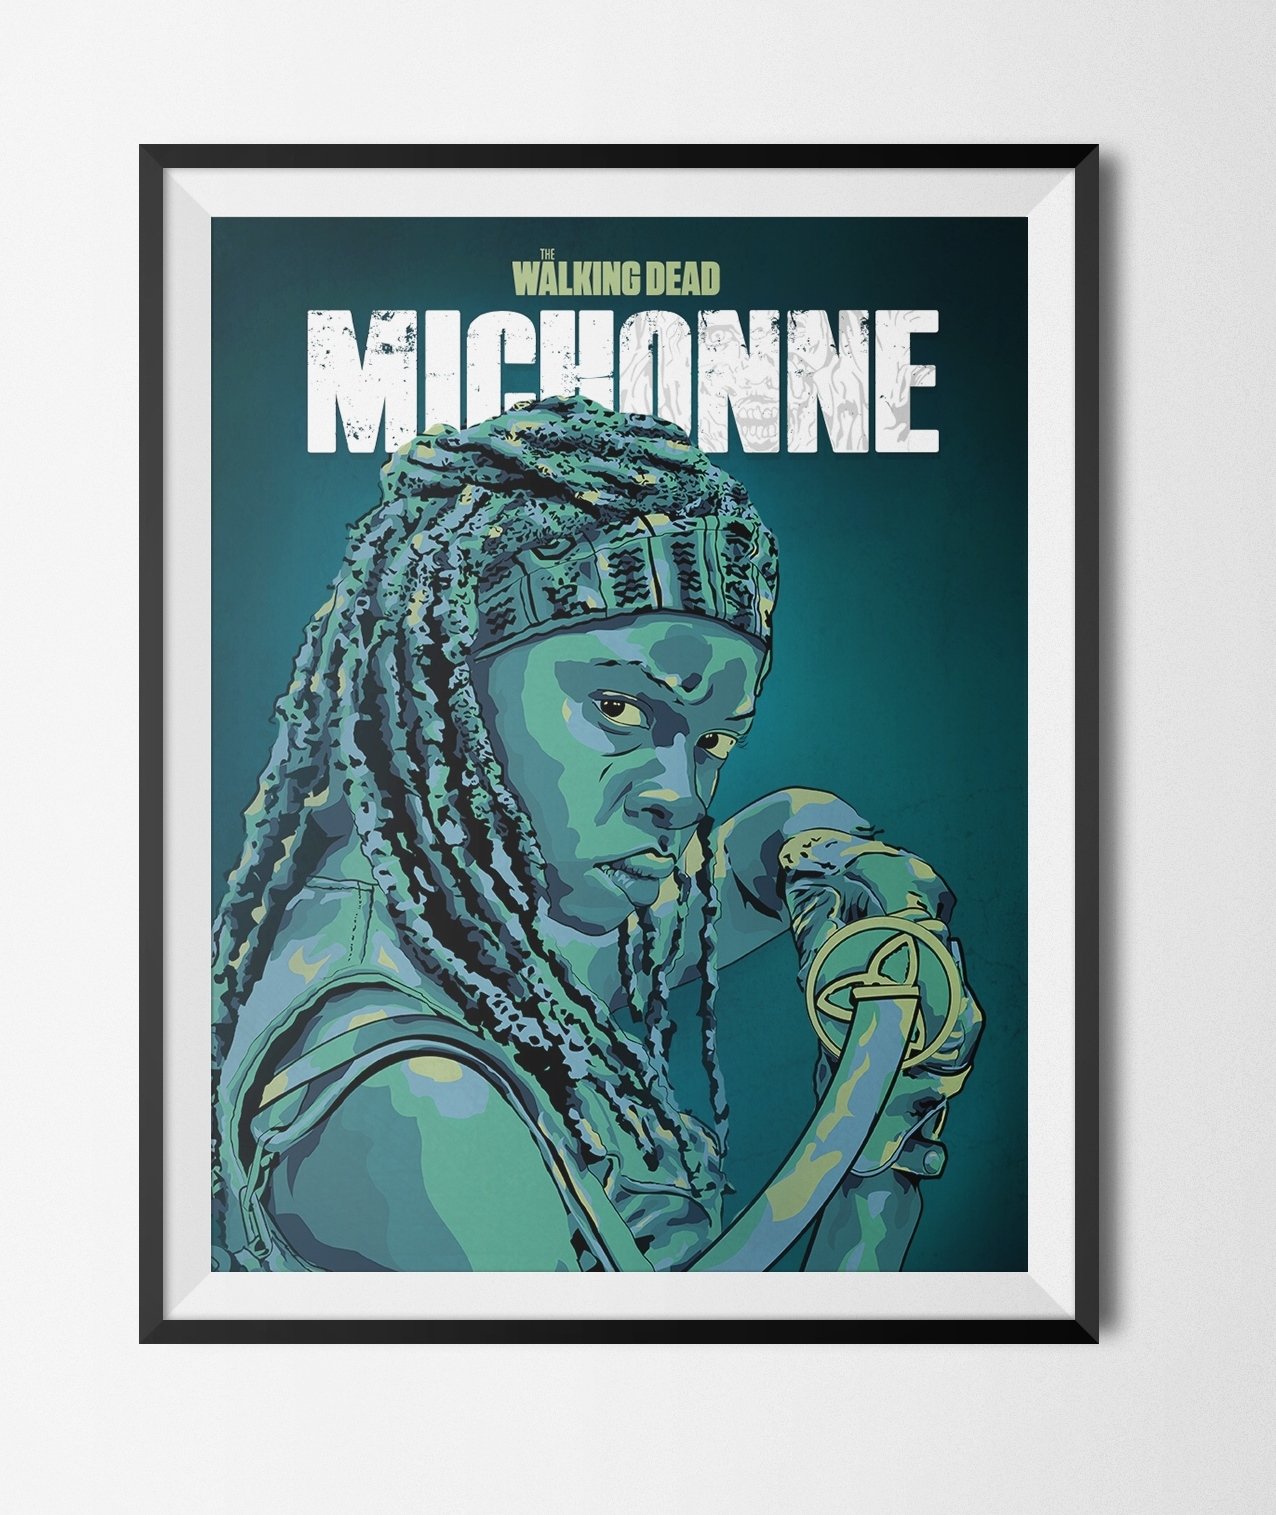
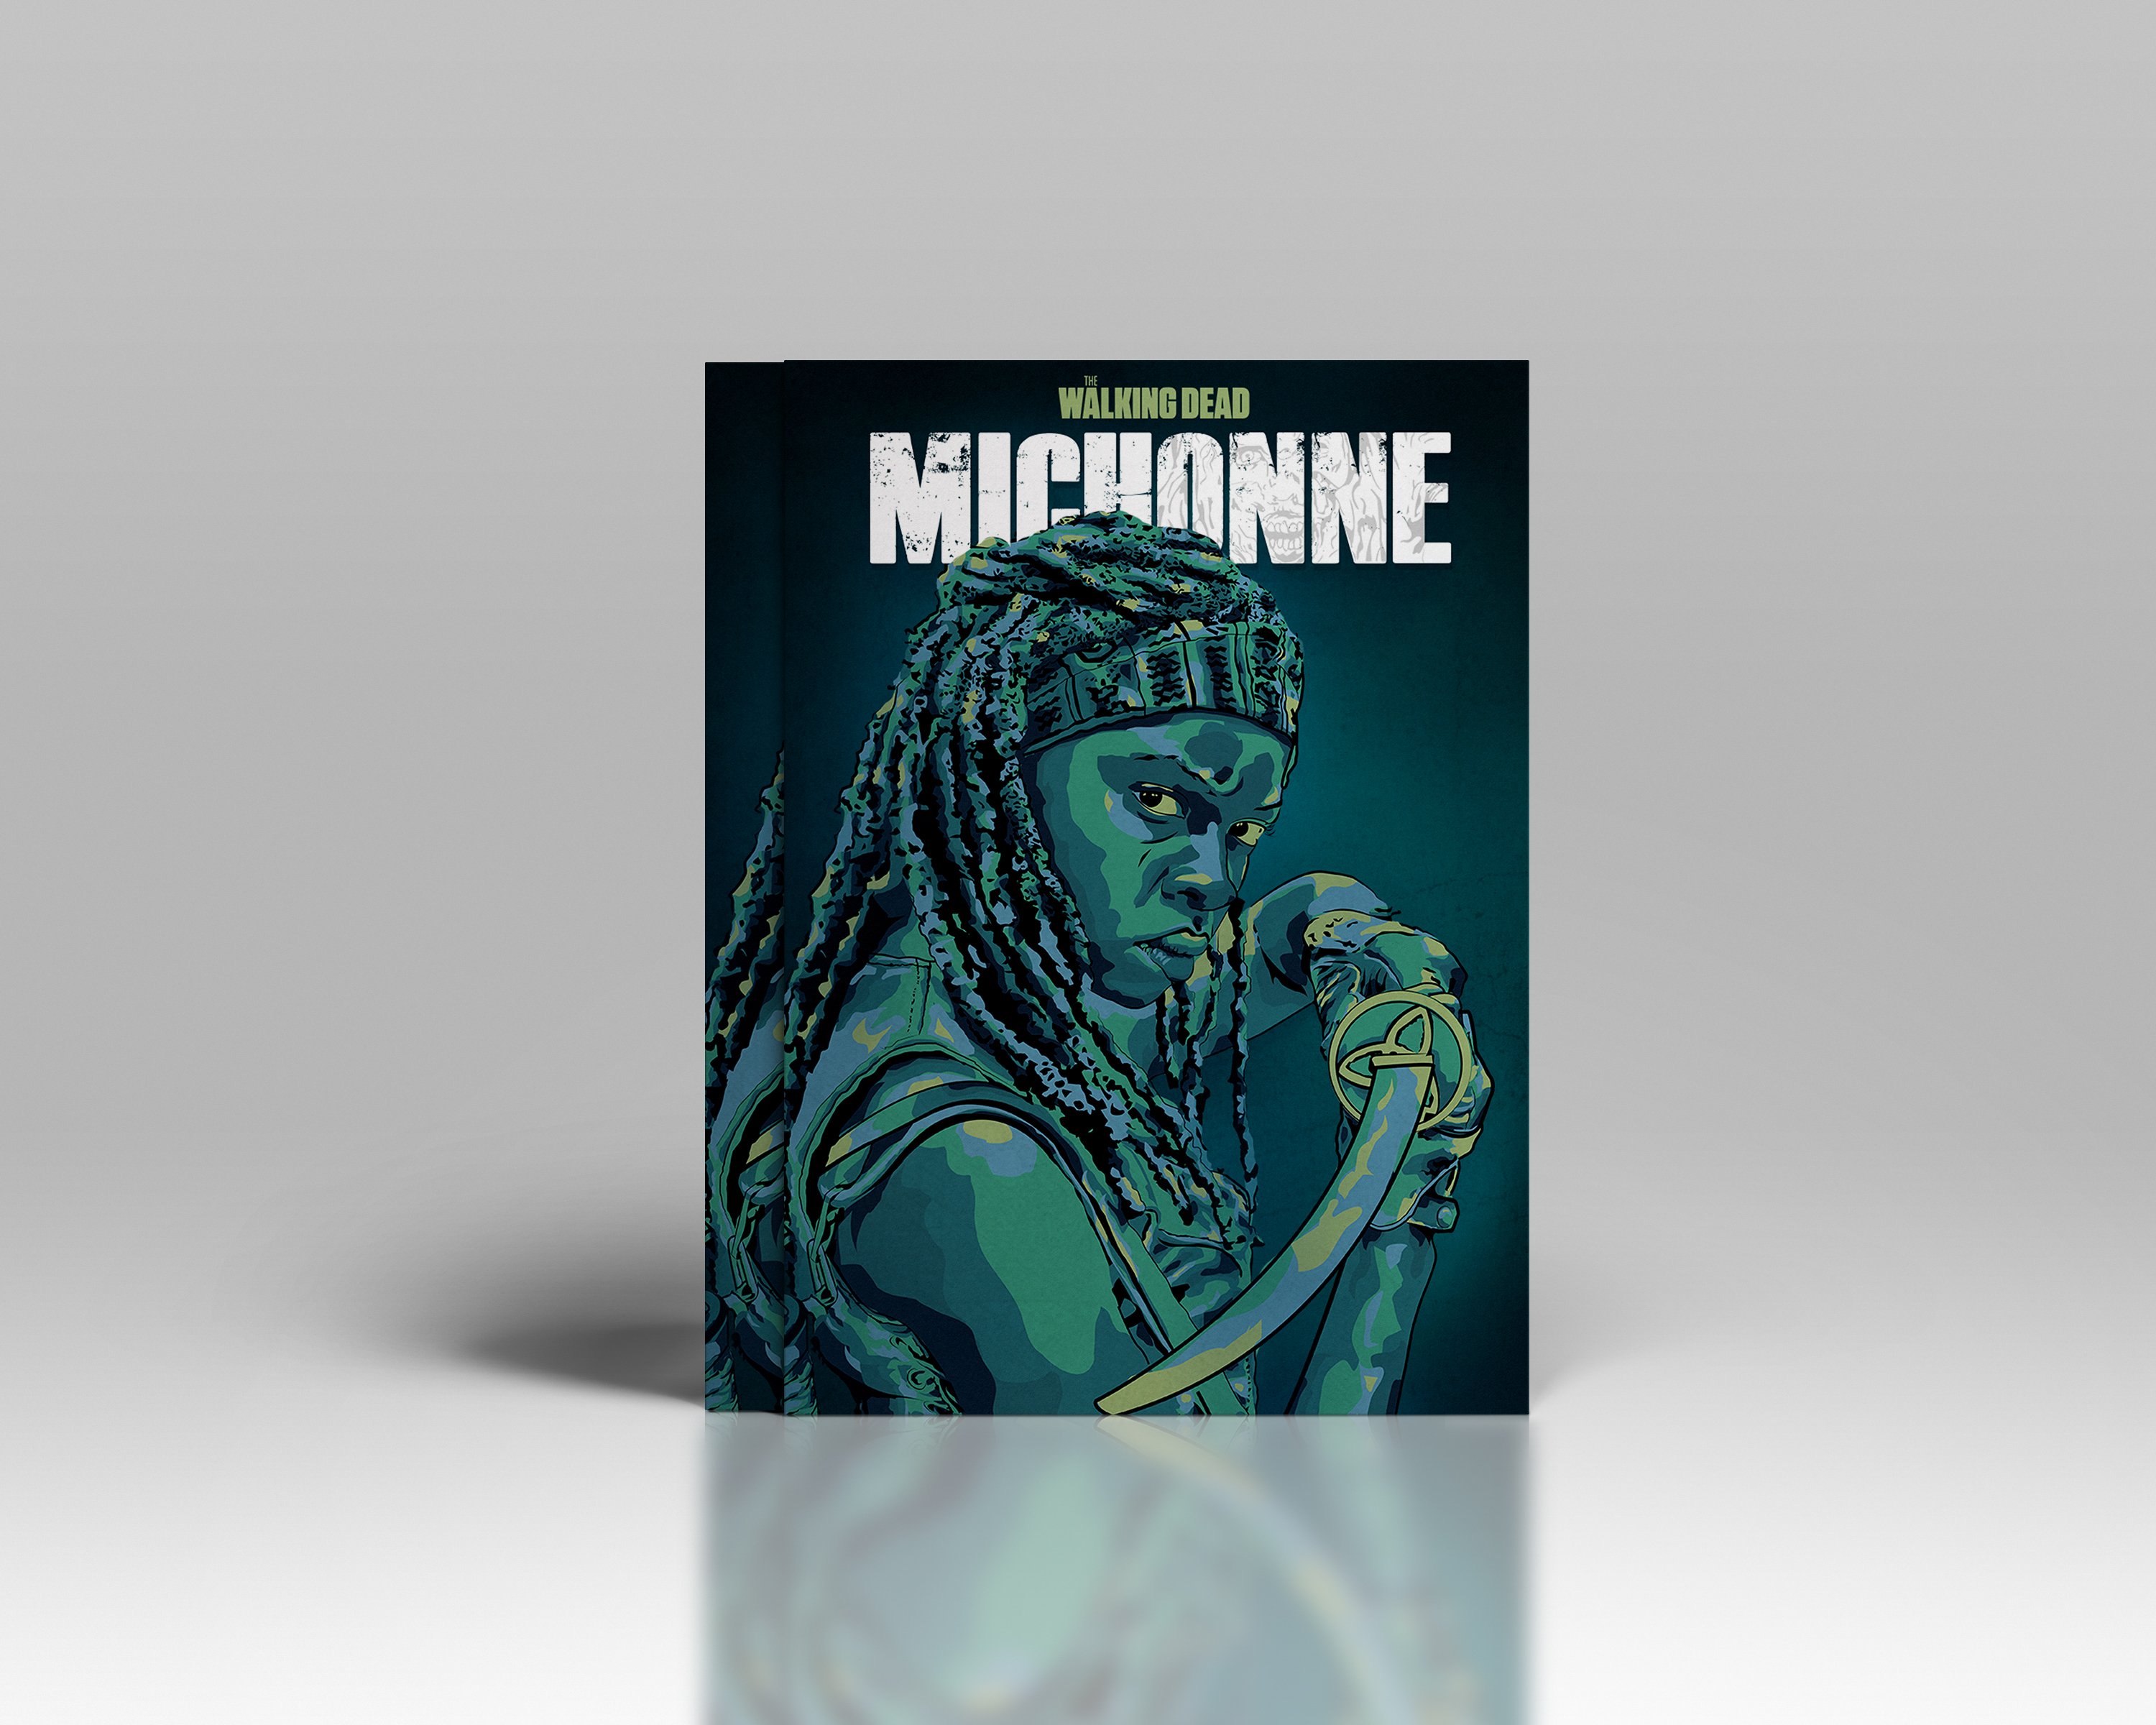
- The poster -
- Creative Process -
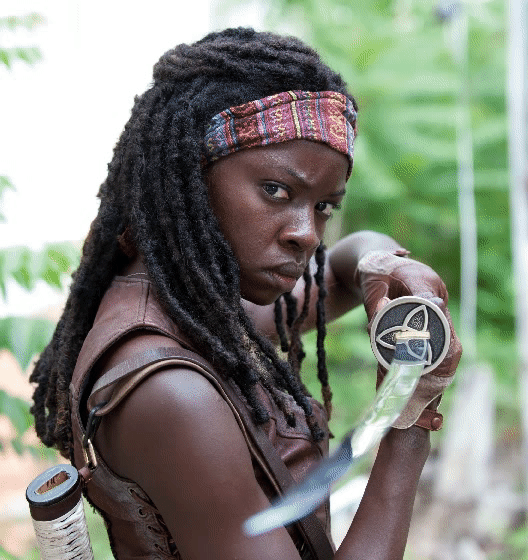
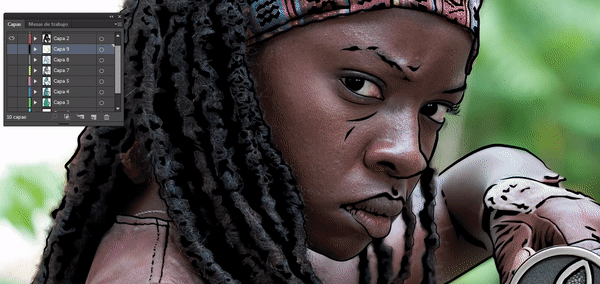
1. Choosing an awesome picture

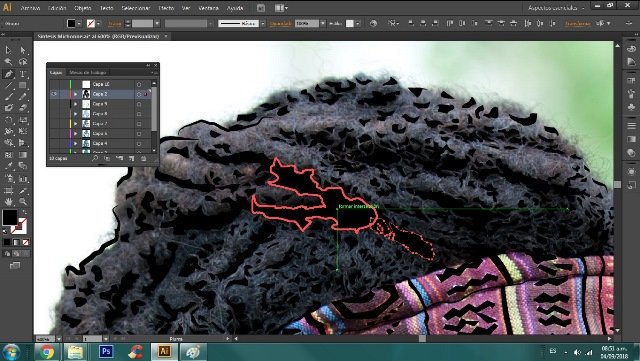
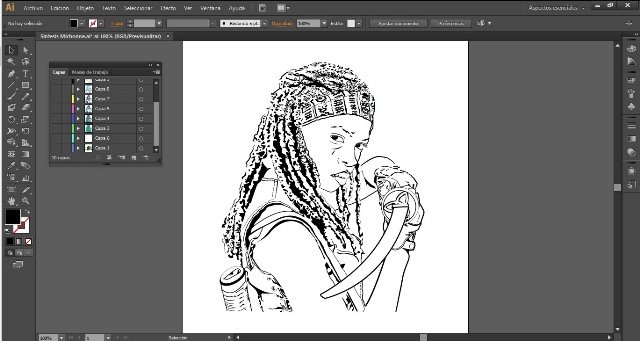
2. Synthesize the blacks
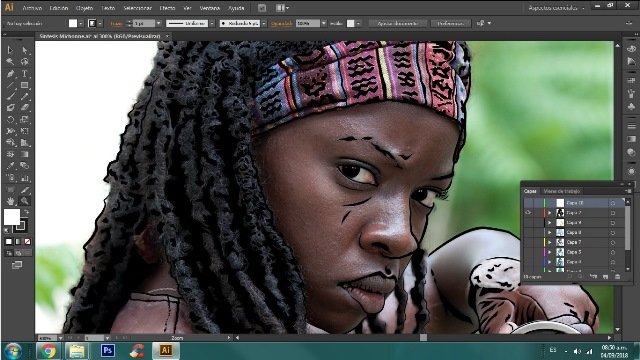
Her hair is not soft, so draw it like this to make that sensation. The clothes is a quite different to her hair, use the border of the vector pen with the curve of the folds.
Here is a look with all the black shape done!
Can you recognize her, right? -
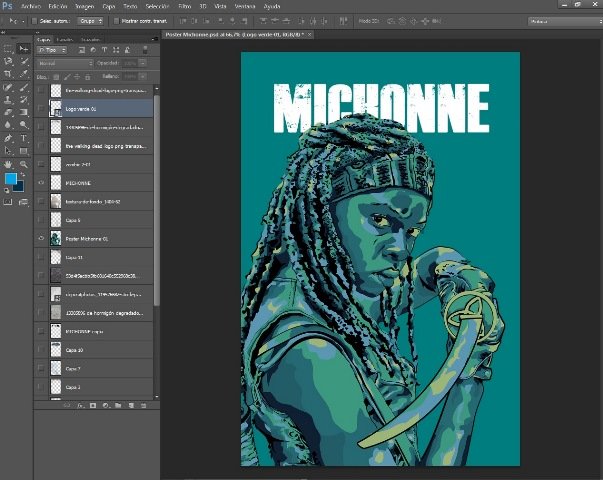
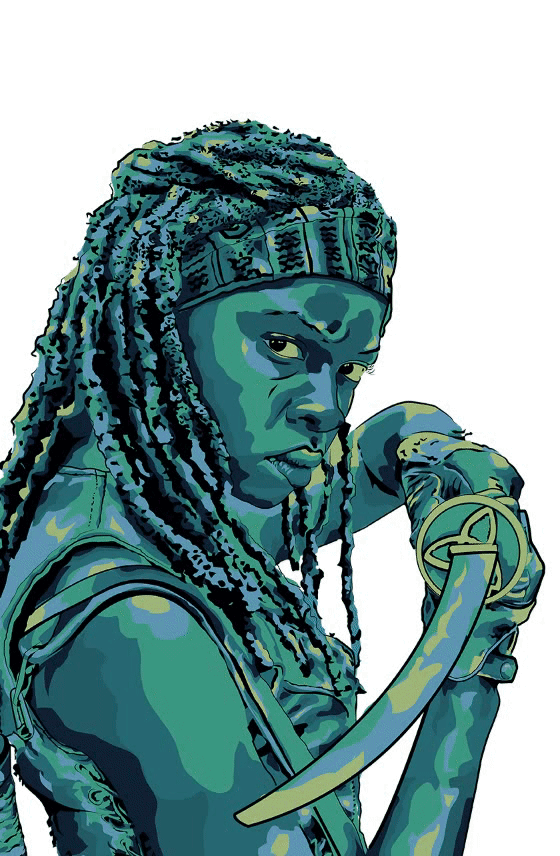
3. The color

She looks plane. But don't worry about that at the beginning. Keep playing with the gradiant of different tones of the same colors .
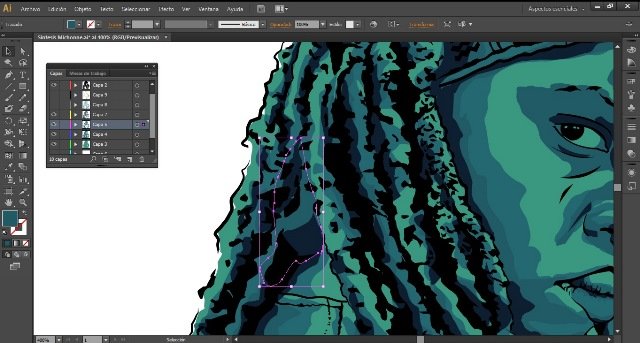
We are almost there! This siynthesize has 5 shapes of color, it will change depending of what level of detail you want. Remember to add the shine with something close to the white.
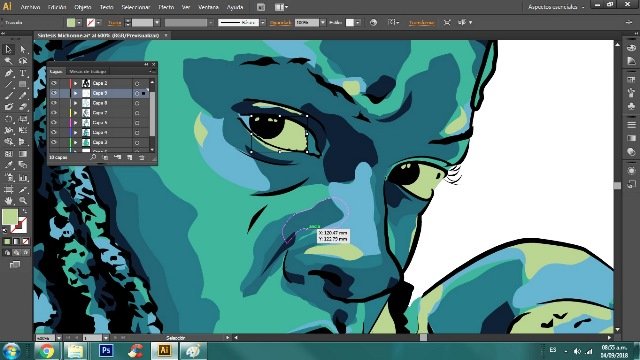
Don't you think that she looks beautiful?
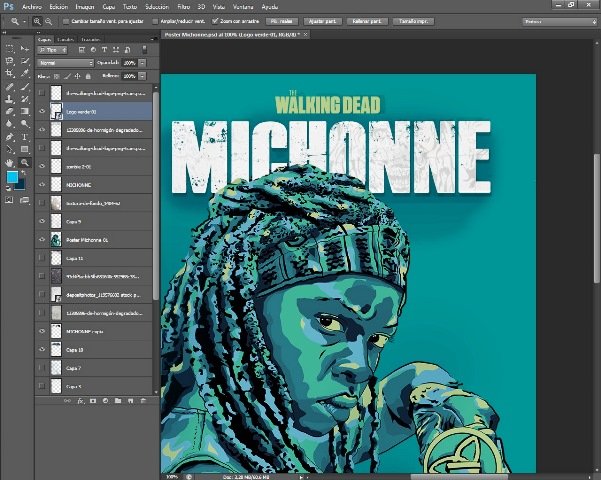
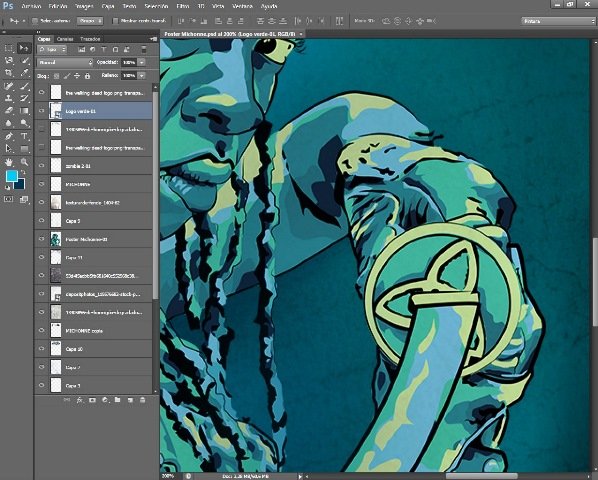
3. Typography
Lets play with the planes now! We have here Michonne on the front, but if we add the text behind her we have 2 planes now creating a cool sensation of a 3D form. The "Walker" is a great touch because it gets darker and more horrifying.
3. Textures


Adobe Photoshop allows you to play with the opacity of the forms, we do not need all the textures at 100% because they are strong. Just melt them with the draw until you get what you wanted.
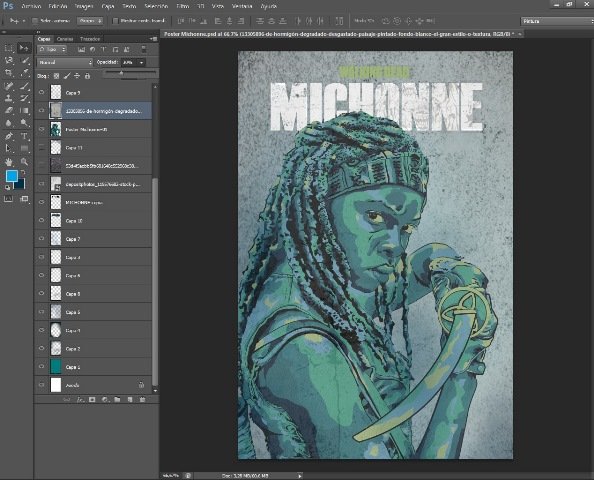
Here is a better look of the new texture layer, remember to mix all you think can help you to give her more expression.
And there you go! Michonne is done.
- See how i made it in a quick video! -
All the vectors are made in Adobe Illustrator CS6 and the photography edition in Adobe Photoshop Cs6. Here is a little video of the project.
Enjoy it!
- The Final Result -

Thank you very much for taking your time and
for letting me share my project with you.
This poster is licensed under a
Creative Commons Attribution 4.0 International License
