Solar energy - it's great, but here's the problem: even a single battery costs a lot of money, and to good effect need not one, or even two. Therefore the idea comes - to collect all by yourself. If you have a small soldering skill - just do it. The entire assembly is connected in series to the elements in the tracks and tracks mounted on the housing. Just say about the price. for a single panel set (36 pieces) costs around $ 70-80. A fully with all the materials of solar cells with their own hands will cost you about $ 120-150. Much less than the factory. But it must be said that they are also less power. On average, each phototransformator produces 0.5 V when connected in series of 36 pieces, it will be of the order of 18 V.
Some theory: types of solar cells
The biggest problem - buy photoelectric converters. These are the silicon wafers, which convert sunlight into electricity. Here you need a little understanding of the types of solar cells. They are produced in two types: monocrystalline, polycrystalline and. Monocrystalline more expensive, but have a high degree of efficiency - 20-25%, polycrystalline - cheaper, but also they have less capacity - 17-20%. How to distinguish them externally? Polycrystalline have a bright blue color. Monocrystalline slightly darker and they are not square, and a multi-faceted shape - a square with cut edges.
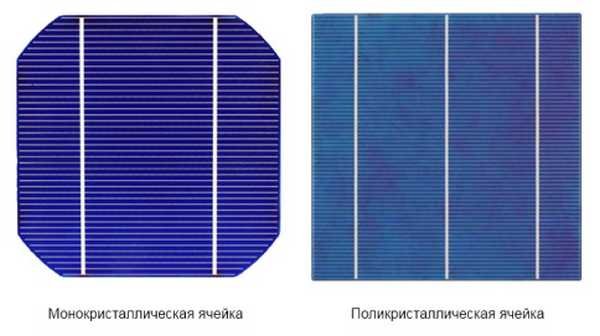
it's not very difficult with photoelectric converters for solar cells: monocrystalline and polycrystalline
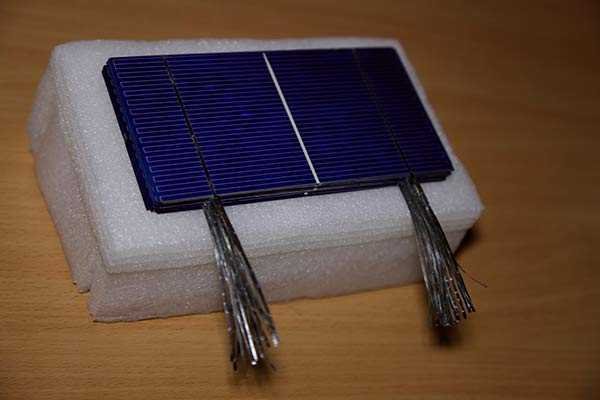
On the issue of the form. There are solar cells with pre-soldered wires, and there are kits, where the wires are attached and all you need to solder yourself. What to buy - everyone decides itself, but it must be said that without the skill-at least one plate you damage, but rather than one. And if they do not know how to solder very ... it is better to pay a little more expensive, but get almost ready-to-use parts.
Make solar cells with their own hands is unrealistic. To do this, we must be able to grow silicon crystals, and then it has to handle. Because you need to know where to buy. This further.
Where and how to buy solar cells
Now about quality. In all Chinese sites such as Ebay and Alibaba sold rejection. Those parts that have not passed the tests in the factory. Because the ideal battery you will not get. But the price they have is not the greatest, so that we can accept. In any case, at first. Collect a couple of test solar cell with his hands, stuff them a hand, and then you can take from the factory.
Some sell solar cells sealed in wax. This prevents damage during transport, but get rid of the wax and not to damage the plate is difficult. We need them all together to dip into the hot, but not boiling water. Wait until the wax has melted, then gently disconnect. Then alternately bathe each plate in hot soapy water and then dipping in clean hot water. Such "ablutions" take a few washes, water and soap solution will have to change, and not once. After the wax, remove, clean plates lay on a terry cloth towel to dry. It is very troublesome case. So you'd better buy without wax. So much easier.
Now purchases on Chinese exchanges. Specifically on Ebay and Alibaba. They tested by thousands of people every day there is something to buy. The system is no different. After registration, as usual, in the search bar type in the name of the element. Then choose liked for some reason the proposal. Be sure to choose one of those options, where there is free shipping (in English free shipping). If this mark is not present, then the delivery will have to pay separately. And it is often more than the cost of goods and certainly greater than the difference between what you gain on price.

With silicon cells must be handled very carefully, they are very fragile
Need be guided not only on price, but the seller's rating and feedback. Carefully read and composition of the product, its parameters, and reviews. It is possible to communicate with the seller, you need only write messages in English.
With regard to payment. It is in these areas translates to the seller only after you unsubscribe to the receipt of the goods. And while there is a service, your money is in the account of the marketplace. Pay card can be. If you are afraid to shine card data, use intermediate services. They are different, but the essence is the same - your card does not light up. There are at these sites and the return of the goods, but it's a long song, so it's better to take from proven vendors (with good ratings and reviews).
Yes. Sending is depending on the region. And it's not so much in how long it will go out of China, both in how soon it will deliver mail. In the best case - three weeks, but it can and a half months.
How to build
Build a solar battery with your hands consists of three stages:
- Production of frame.
- Soldering solar cells.
- Placement in the frame and sealing.
The frame can be manufactured from aluminum or parts of wooden slats. But the form of the frame, the materials depend on the manufacturing sequence of the installation method.
Method one: Set on the window
Battery hang on a window frame on the inside or outside of the room, but also on the box. Then you need to make a frame made of aluminum corner, and stick to it glass or polycarbonate. In this case, even between the photocells remain small gaps through which little light penetrates into the room. frame size is selected based on the size of your solar cells and how you are going to have. Also, a role can play a window size. Note that the plane should be flat - photovoltaic cells are very fragile, and will burst at the slightest misalignment.
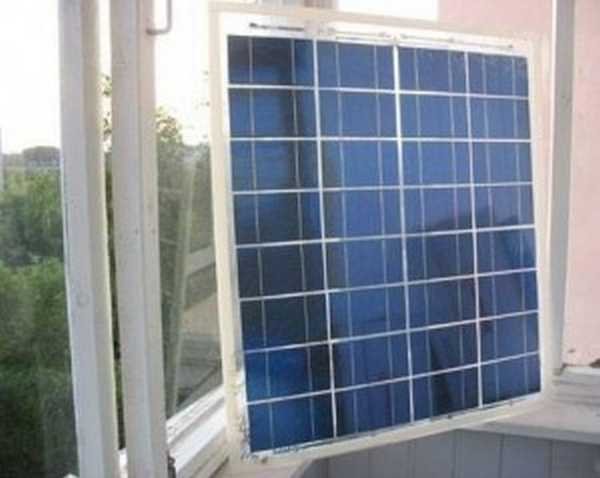
The apartment is only one place for solar installation - on the window
Unfolding the frame finished with glued glass face down on the glass surface, apply a layer of sealant. On sealant again still face down, spread collected from the photocells range.
From thick elastic foam (thickness not less than 4 cm) and a piece of plastic film (200 microns) to make the mat: obtyanut foam foil and seal well. Better polyethylene solder, but you can use the tape, but all joints must be on the same side. The second should be flat and smooth. The size of the mat should be good to go to the frame (without bends and effort).
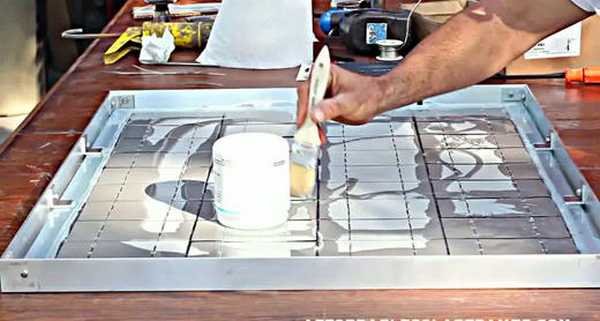
The main trick - pouring sealant
Mat laid on the solar cells, drowned in the sealant. On his board, which is slightly less than the size of the frame, and a solid load board. This simple device will help to expel air bubbles, which were under the photocells. Air reduces performance, and very strong. Because the smaller the bubbles, the better. The entire structure leaving at 12 hours.
Now is the time to remove the goods and unstick mat. You do it slowly and deliberately. It is important not to damage the wires and soldering. Because pull smoothly, without jerks. After the mat was removed, the panel must be left for a while - dosohnut. When the sealant stick stop, you can hang the panel and use.
Instead of time-consuming procedure with the sealant can take a special film for sealing. It is called EVA. Just the top of the assembled and laid on the glass spreads a film battery and warms her hairdryer construction to a complete sealing. Time takes a fraction.
Method two: installation on a wall, roof, etc.
In this case different. The rear wall must be solid and non-conducting. Perhaps - wooden, plywood, etc. Because it makes sense, and a frame made from wooden beams. Only the height of the housing should be small, to the shadow of the flanges do not interfere.
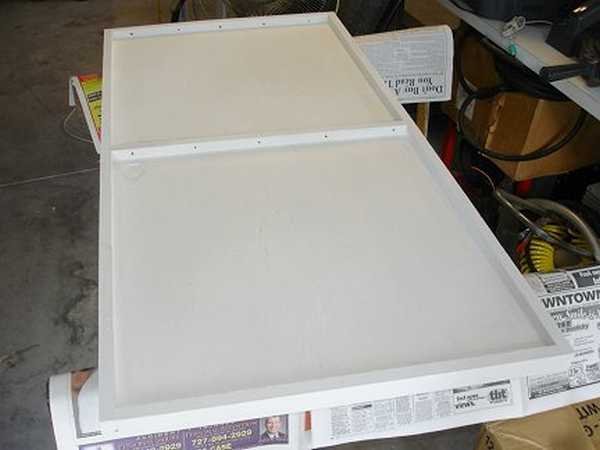
Collect the frame underneath your battery sizes (depending on the size of the solar inverters that you have purchased)
The photo housing consists of two halves, but this is optional. Just easier to assemble and put short lines, but in this case the compounds will be greater. Yes. A few nuances: it is necessary in the body to provide a plurality of holes. At the bottom of the need to exit a few pieces of condensate, as well as two holes for the output wires from the battery.
Then, the battery casing to paint with white paint - silicon wafers have a fairly wide range of operating temperatures, but it is not unlimited: from -40oCdo + 50oC. And in the summer in a closed box + 50oC accumulates easily. Therefore we need a white color, so as not to overheat photovoltaics. Overheating and supercooling both leads to inefficiencies. This, incidentally, may be the explanation incomprehensible phenomenon: midday sun fries, and the battery began to give less electricity. And it just overheated. For the southern regions, probably, it is necessary to lay the foil. It will be more effective. And productivity is likely to increase: more will be captured and reflected light with foil.
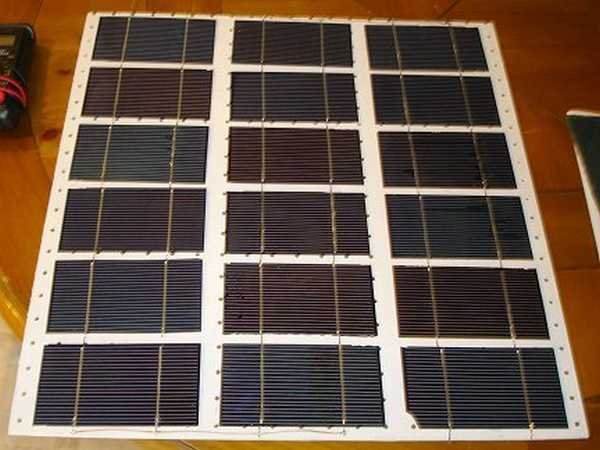
Collect and laid track
After the beauty of dry, can be laid collected tracks. But this time face up. How to fix them? At the drop of a heat-resistant sealant in the middle of each plate. Why not put on the whole surface? Due to the thermal expansion of the plate will change the sizes. If only sticking it in the middle, it does not happen anything. If there is at least two-point - sooner or later it will burst. Because in the middle of gently apply a drop gently pressed against the plate. Do not push - to crush very easily.
In some cases, the plate is first fastened to the base - sheet of chipboard, painted in the same white color. And then based on were fixed to the chassis with screws.
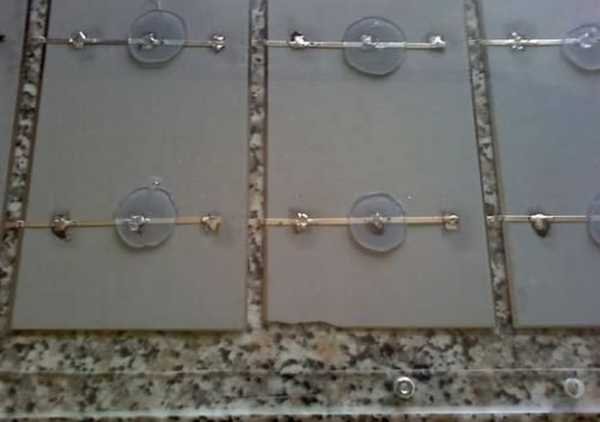
Once all the lines are laid, they are connected in series. To Guides is not hung, they can be fixed with a few drops of sealant. Output wires from the elements can be through the bottom or through a side - how convenient. Pull them through the hole, and then fill the hole in the same sealant. Now you need to give all connections dry. If the cover before the glass and solar cells formed plaque, which greatly reduces the efficiency of the battery. Because waiting for at least a day (or as indicated on the packaging sealant).
solnechnie-batarei-svoimi-rukami-5.jpg
Finale: Set the transparent cover
Now it is small - all covered with glass or transparent plastic. How to fix - your cause. But at first not sealed. At least before the test. Maybe somewhere detect problems.
And one more thing. If you plan to connect the battery to the system, you will need to put a diode, which will prevent the discharge of the battery through the battery at night or in bad weather. It is best to put a diode "Schottky". It is connected to the battery in series. Set inside the structure it better - at high temperatures had reduced voltage drop, ie, in operation it will be less "plant" voltage.
How to solder components for solar
A bit on the treatment of silicon wafers. They are very, very fragile, easy to crack and break. Because you need to handle them with extreme care to keep in tight containers away from the kids.
We must work on a hard, flat surface. If the table is covered with an oilcloth, place a sheet of something solid. The plate does not sag, and the entire surface of the substrate rely strictly. Moreover, the base should be smooth. Experience has shown that the ideal - a piece of laminate. It is hard, smooth, smooth. Solder on the reverse side, not on the face.

All that is needed for the assembly of solar panels with their own hands
To use a soldering flux or rosin can be any of the compositions in the marker for soldering. Here everyone has their own preferences. But it is desirable that the composition does not leave marks on the matrix.
Stacked silicon wafer face up (face - blue side). It has two or three tracks. They are coated with flux or marker alcohol (not water-alcohol) solution rosin. Complete with photoconverters is usually thin adhesive tape. Sometimes it is cut into pieces, and sometimes is in the coil. If the tape is wound on the spool piece cut must equal double solar cell width plus 1 cm.
On the strip treated with flux solder cut piece. The tape obtained is much longer than the plate, the rest is on the one hand. Try to maintain without taking a soldering iron. As much as possible. For better soldering on the tip of the tip, you should have a drop of solder or tin. Then the soldering quality will be. Nepropayannyh places should not be, all good warm up. But do not push! Especially at the edges. This is a very delicate product. Alternately solder ribbons on all the tracks. Phototransformator obtained "tailed".
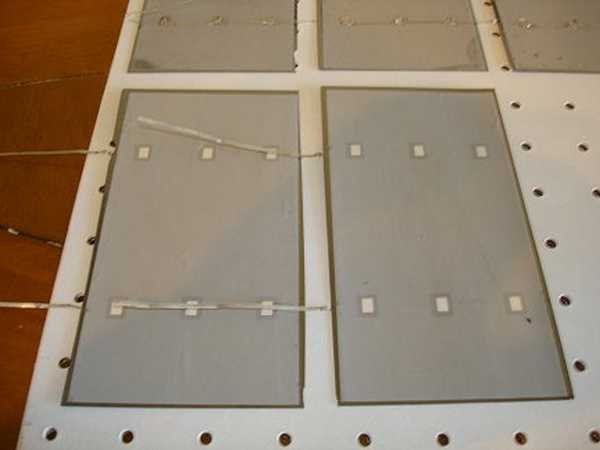
The front side - blue. On it there are a few tracks (two or three) to which you want to solder the wires. Gray - a rear side. To her then soldered wires extending from the plate above
Now, actually, about how to build a solar panel with your hands. Getting to the assembly line. On the reverse side of the plate, too, have a track. Now, the "tail" of the upper plate is soldered to the bottom. The technology is the same: track coat with flux, then propaivaem. So consistently connect the desired number of photovoltaic cells.
In some embodiments, the back side does not track and pad. Then solder less, but the quality of the claims may be greater. In this case, only the flux promazyvayut site. And also just solder them. That's all. Collected tracks can be transferred to the foundation or casing. But there are many tricks.
Plumbing should be on a hard, level surface
So, for example between the photocells must withstand a certain distance (4-5 mm), which is not so easily without fixatives. The slightest imbalance, and it is possible to break the conductor, or break the record. Because to define a certain step on a piece of laminated glued construction crosses (used to fix the tiles), or make the layout.
All the problems that arise in the manufacture of solar cells with their hands, associated with soldering. Because prior to sealing, and better still before moving line on the body, the assembly check the ammeter. If all goes well, we can continue to work.
Results
Now that you know how to make a solar panel at home. It's not the hardest thing, but it requires hard work.
literature:
http://teplowood.ru/solnechnye-batarei-svoimi-rukami.html