About a year ago I made the decision to build out our backyard area into a functional relaxation and entertainment space, we called it the Backyard Oasis Project.
Now we don't have a lot of space in the back, roughly 9ft x 25ft with an A/C unit poorly positioned near the middle. The space was primarily used to grow food in container gardens, but the growing season was limited to 7 months due to the shadow cast down by the second story of our Townhouse during the "winter" months. As I moved into Hydroponics a few years back, I slowly reduced how much food was grown in back yard. The time had come to re-purpose the space.

I created a rough sketch of what I wanted to build and how I wanted to layout the space. When I asked my wife and son for input on what they would like to have, a fish pond was high on the list. With that, I designed the space around a central above ground Koi pond. With a plan in place, I began by building the Koi pond first.
I never thought I would be posting about this build, so the pictures were taken with my cell phone in more of a "text to my wife" progress report style. ;-) So a few steps are missing, but I will explain in the text what I did.

Marking out the shape with string.
I centered the pond in relationship to our view from inside the house and set the side planter column bases first. With the position set, I used a string to mark out a slightly curved shape to the pond. I wanted to have a "pocket" off to the left side that the fish could hide in so I extended that edge more than the right side.
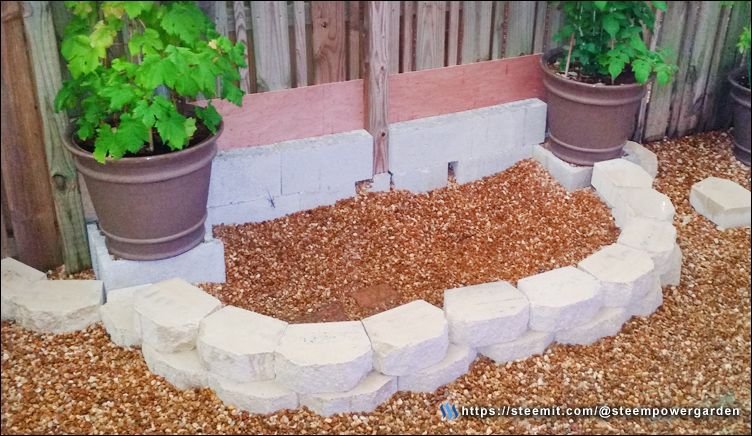
Stacking the blocks and stone to build the structure.
First, I raked out the small river pebbles until I hit dirt to have a solid base, then I began to set the stones. I used thin concrete blocks to created the back wall to save space. To make sure that stayed in place I hammered 2 pieces of 1/2 rebar through the blocks into the ground on each side of the center post. Then I set the retaining wall stones around the front to make the base level. In order to created that side pocket, each level of stone would then step in slightly more until it match up in relation to the right side by the top level. This was my first time ever building something like this so I made it up as I went along.
I back-filled the area with the small river pebbles to make a smooth base and curved transition to the side walls.
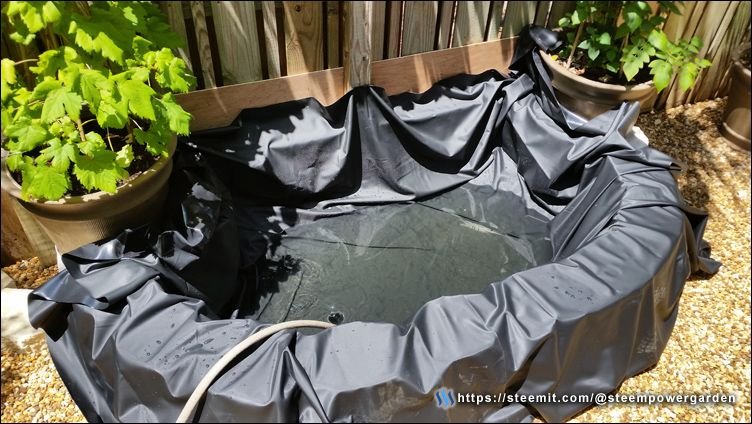
Loosely fitting the liner and filling the pond with water.
Once I got all the stones stacked and glued with construction adhesive, I carefully unfolded the pond liner and filled it up with water. As the water level rises, you need to adjust the liner and work with the overlaps to tuck and fold them as neat as possible. The weight of the water will compress the liner into every corner and make it impossible to adjust later, so you have to get in there and work with it as it fills.
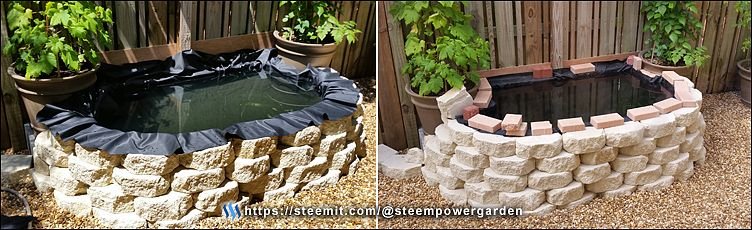
Smoothing out the lining and trimming off the excess.
Once filled, I wrapped the liner over the top, glued it down and trimmed off the excess. I used extra paver bricks to hold the liner down while the adhesive dried.
Chiseling the cap stones to fit the curve of the pond.
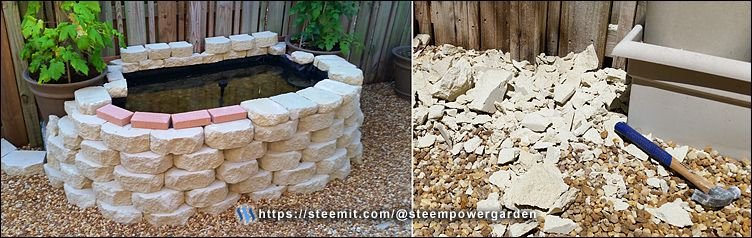
Adding the cap stones was the most difficult part of this whole project. I have to chisel each stone by hand to get an exact fit around the curve of the pond and to make the cut edges look natural. I did not want to use a machine saw to cut the stone and lose the natural edge look. I cracked a lot of stones on accident during the process. If this is how the pyramids were actually build, I feel their pain.
I worked my way around from back to front, right to left, and glued down the stones as I went along. I then went back in with an exterior stone grout to fill in the spaces to make a smooth top.
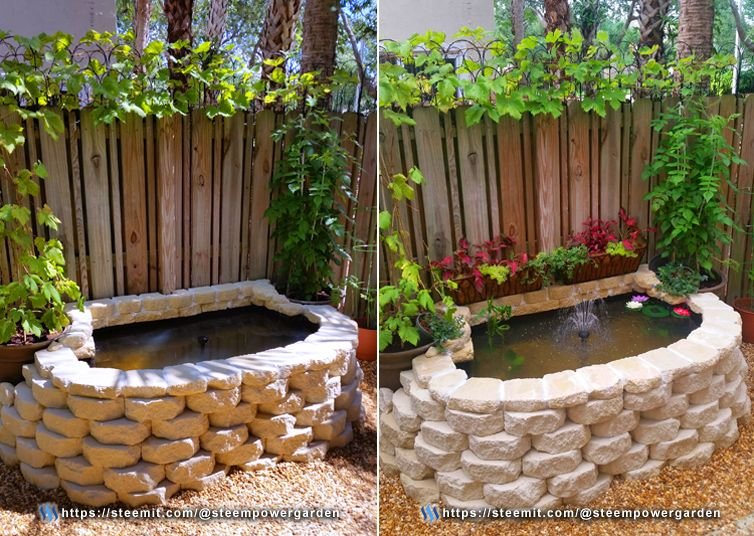
Completed pond up and running.
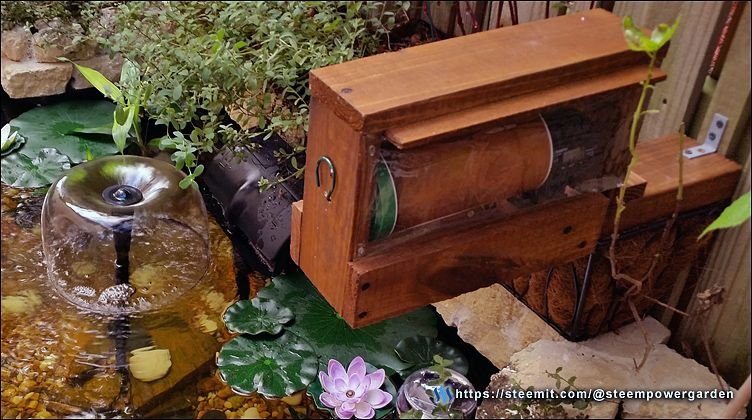
Once completed, I added in a 250 gph submersible pump wrapped in a mesh bag to keep out debris and buried it under river rocks. I also added in underwater LEDs that turn on/off with a remote.
I then mixed in water purification additives and let the pump run for about a week before adding in the plants. I have a mix of living and artificial plants in the pond. The final step before I added the Koi fish was to install a charcoal filter system in the back of the pond, I use a Tetra Whisper EX70 dual-sided filter. It is designed for large indoor aquarium tanks, but it's been over a year now and it works great with my pond with no issues. I replace the filters once a month.
I have a mix of edible and non-edible plants around the pond. Currently we have blackberries, strawberries, basil, and oregano, the grapes in the picture (left pot) did not survive the summer heat in containers.
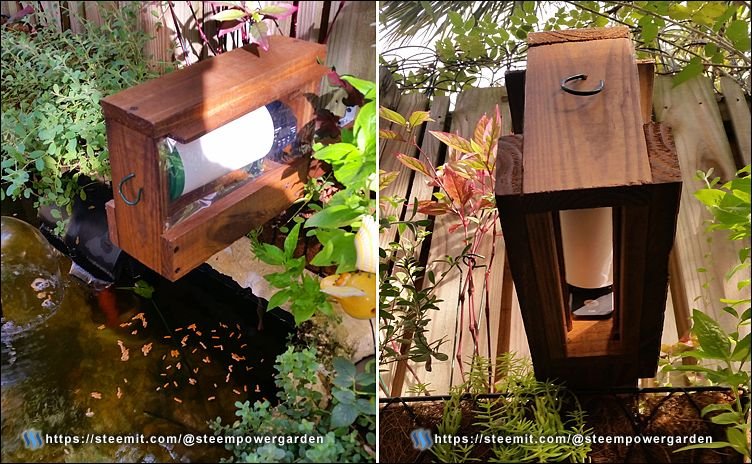
Custom-built automatic feeder being tested.
Having realized I just added 6 more mouths to feed, I needed an automatic feeder system to delegate that responsibility to. I researched a lot of larger Koi pond feeders but non of them fit how I wanted, nor would they blend into the pond the way I wanted so i decided to build my own.
I purchased a small $20 feeding timer on Amazon design for small tanks and fish flakes and using one of the Koi food containers made a large capacity feeder that could ration of larger types of food. I built a wooden cover box with plastic fronts to protect it from rain. I went out every morning for 2 weeks to watch and verify it was working correctly and giving out the right amount of food.
Automatic feeder with bamboo sticker to make it look nice.
Once I was sure the feeder worked perfectly, I took the time to wrap the container in one of my faux-bamboo vinyl wraps to make it look good. It's the same sticker wraps I use on my garden system pipes.
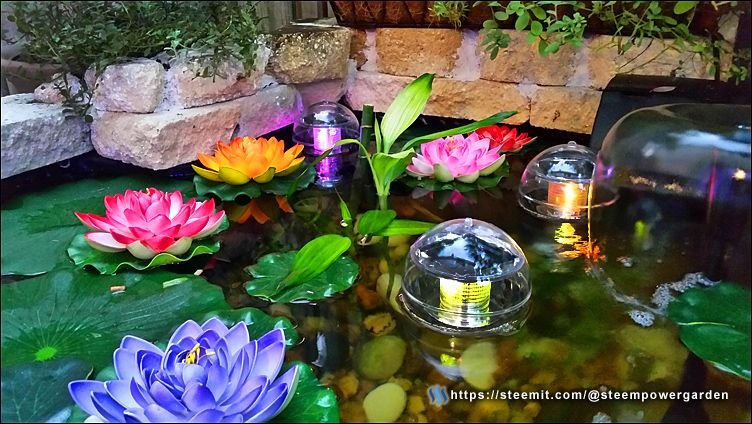
Solar Powered LED Light Spheres
The newest addition to out pond is floating solar powered LED lights that I also bought on Amazon. They are very bright and add a really nice colorful glow to the pond at night. They batteries lasts about 4 hours after sunset, which is long enough for any evening get-togethers we have here, then they recharge in the sun by day.
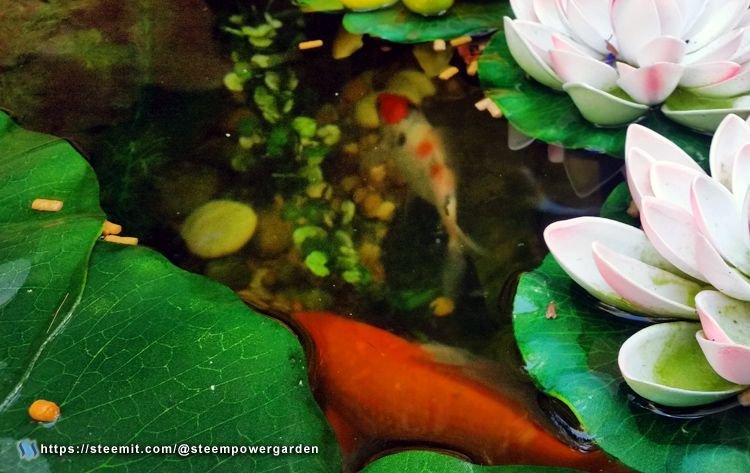
Happy Koi swimming around in our pond.
We have 5 different color Koi, 1 large long-tail Goldfish, and 1 Plecostomus (suckermouth catfish) in our pond.
I hope you enjoyed taking a look at our backyard Koi pond and learning how I built it.
I'm happy to announce I have become an Official Community Advocate for the the Looking For Niche (LFN) project. The purpose is to help connect people with similar interests here on Steemit. Simply join the LFN Discord, it's free, and use the friendly WhaleBoT to enter your interest or "niche". It will reply with a list of other users registered with the same niche.
Example: Whalebot LFN Gardening
WhaleBoT will reply with: These other users are also interested in talkin' about "gardening"!
Find the Looking For Niche Discord Here:
If you think others will enjoy this Please ReSteem it!
If you have any questions or comments, just drop a reply below.
As always, please upvote this post and follow me if you like my work and want to see more.
Thanks for reading, now get out there and get GROWING!