Last week, I shared about this linear stitch, originally it was a mending technique, and nowadays it is beyond and expanding. Today I want to share its further technique.
Basically, it is all lines. All you need to do is do a running stitch.
So how to sew them? In which order?
Not necessary to do as it seems. To tell you the truth, there is no correct way, but you try to sew them the most efficient way and least cutting the thread!!
Which is....
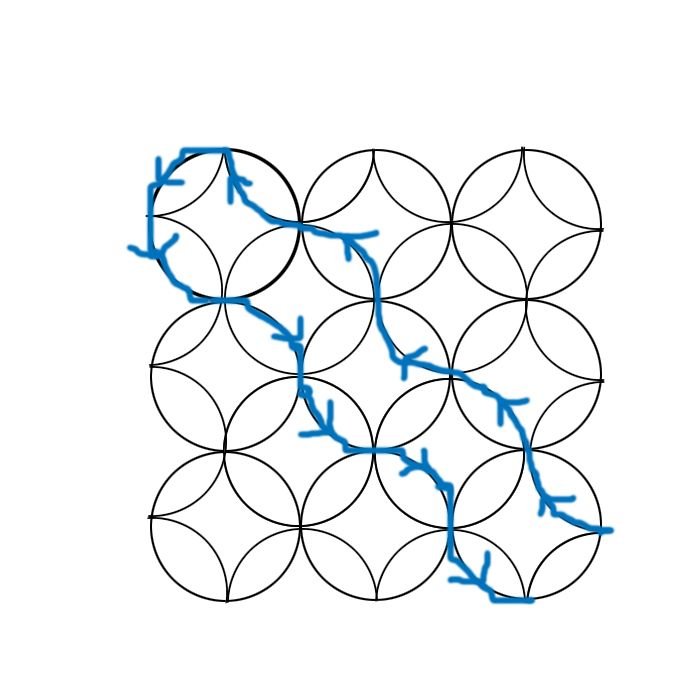
Like this.
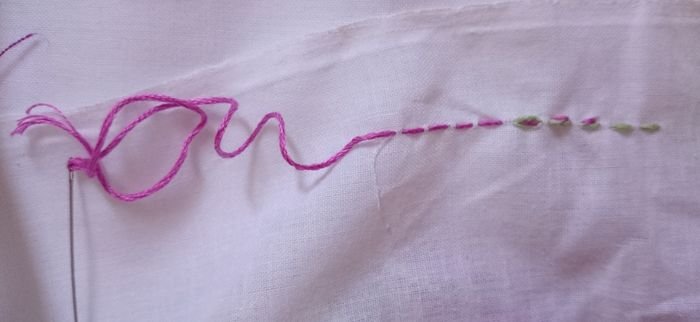
Each of us have our own favorite way, and I like to do parallel lines first.
Again, there is no right or wrong, you could proceed to adjacent line as well. Choose your path!
And if the next start is just 1 inch or 3cm away, no need to cut the thread.
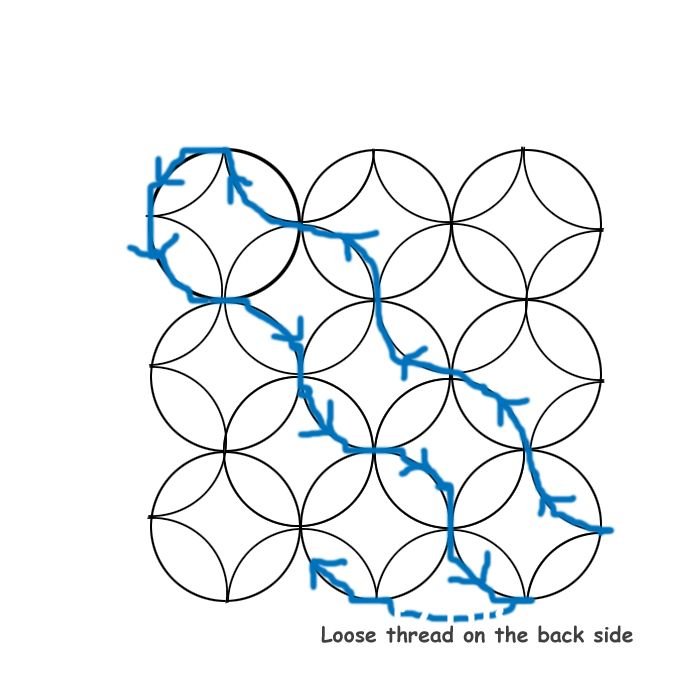
You loosen the thread at the back side a bit and continue. If it is tight, it might shrink and fabric will have wrinkles.
Of course, if you are not comfortable with that, do the back stitch to cut the thread.
======================
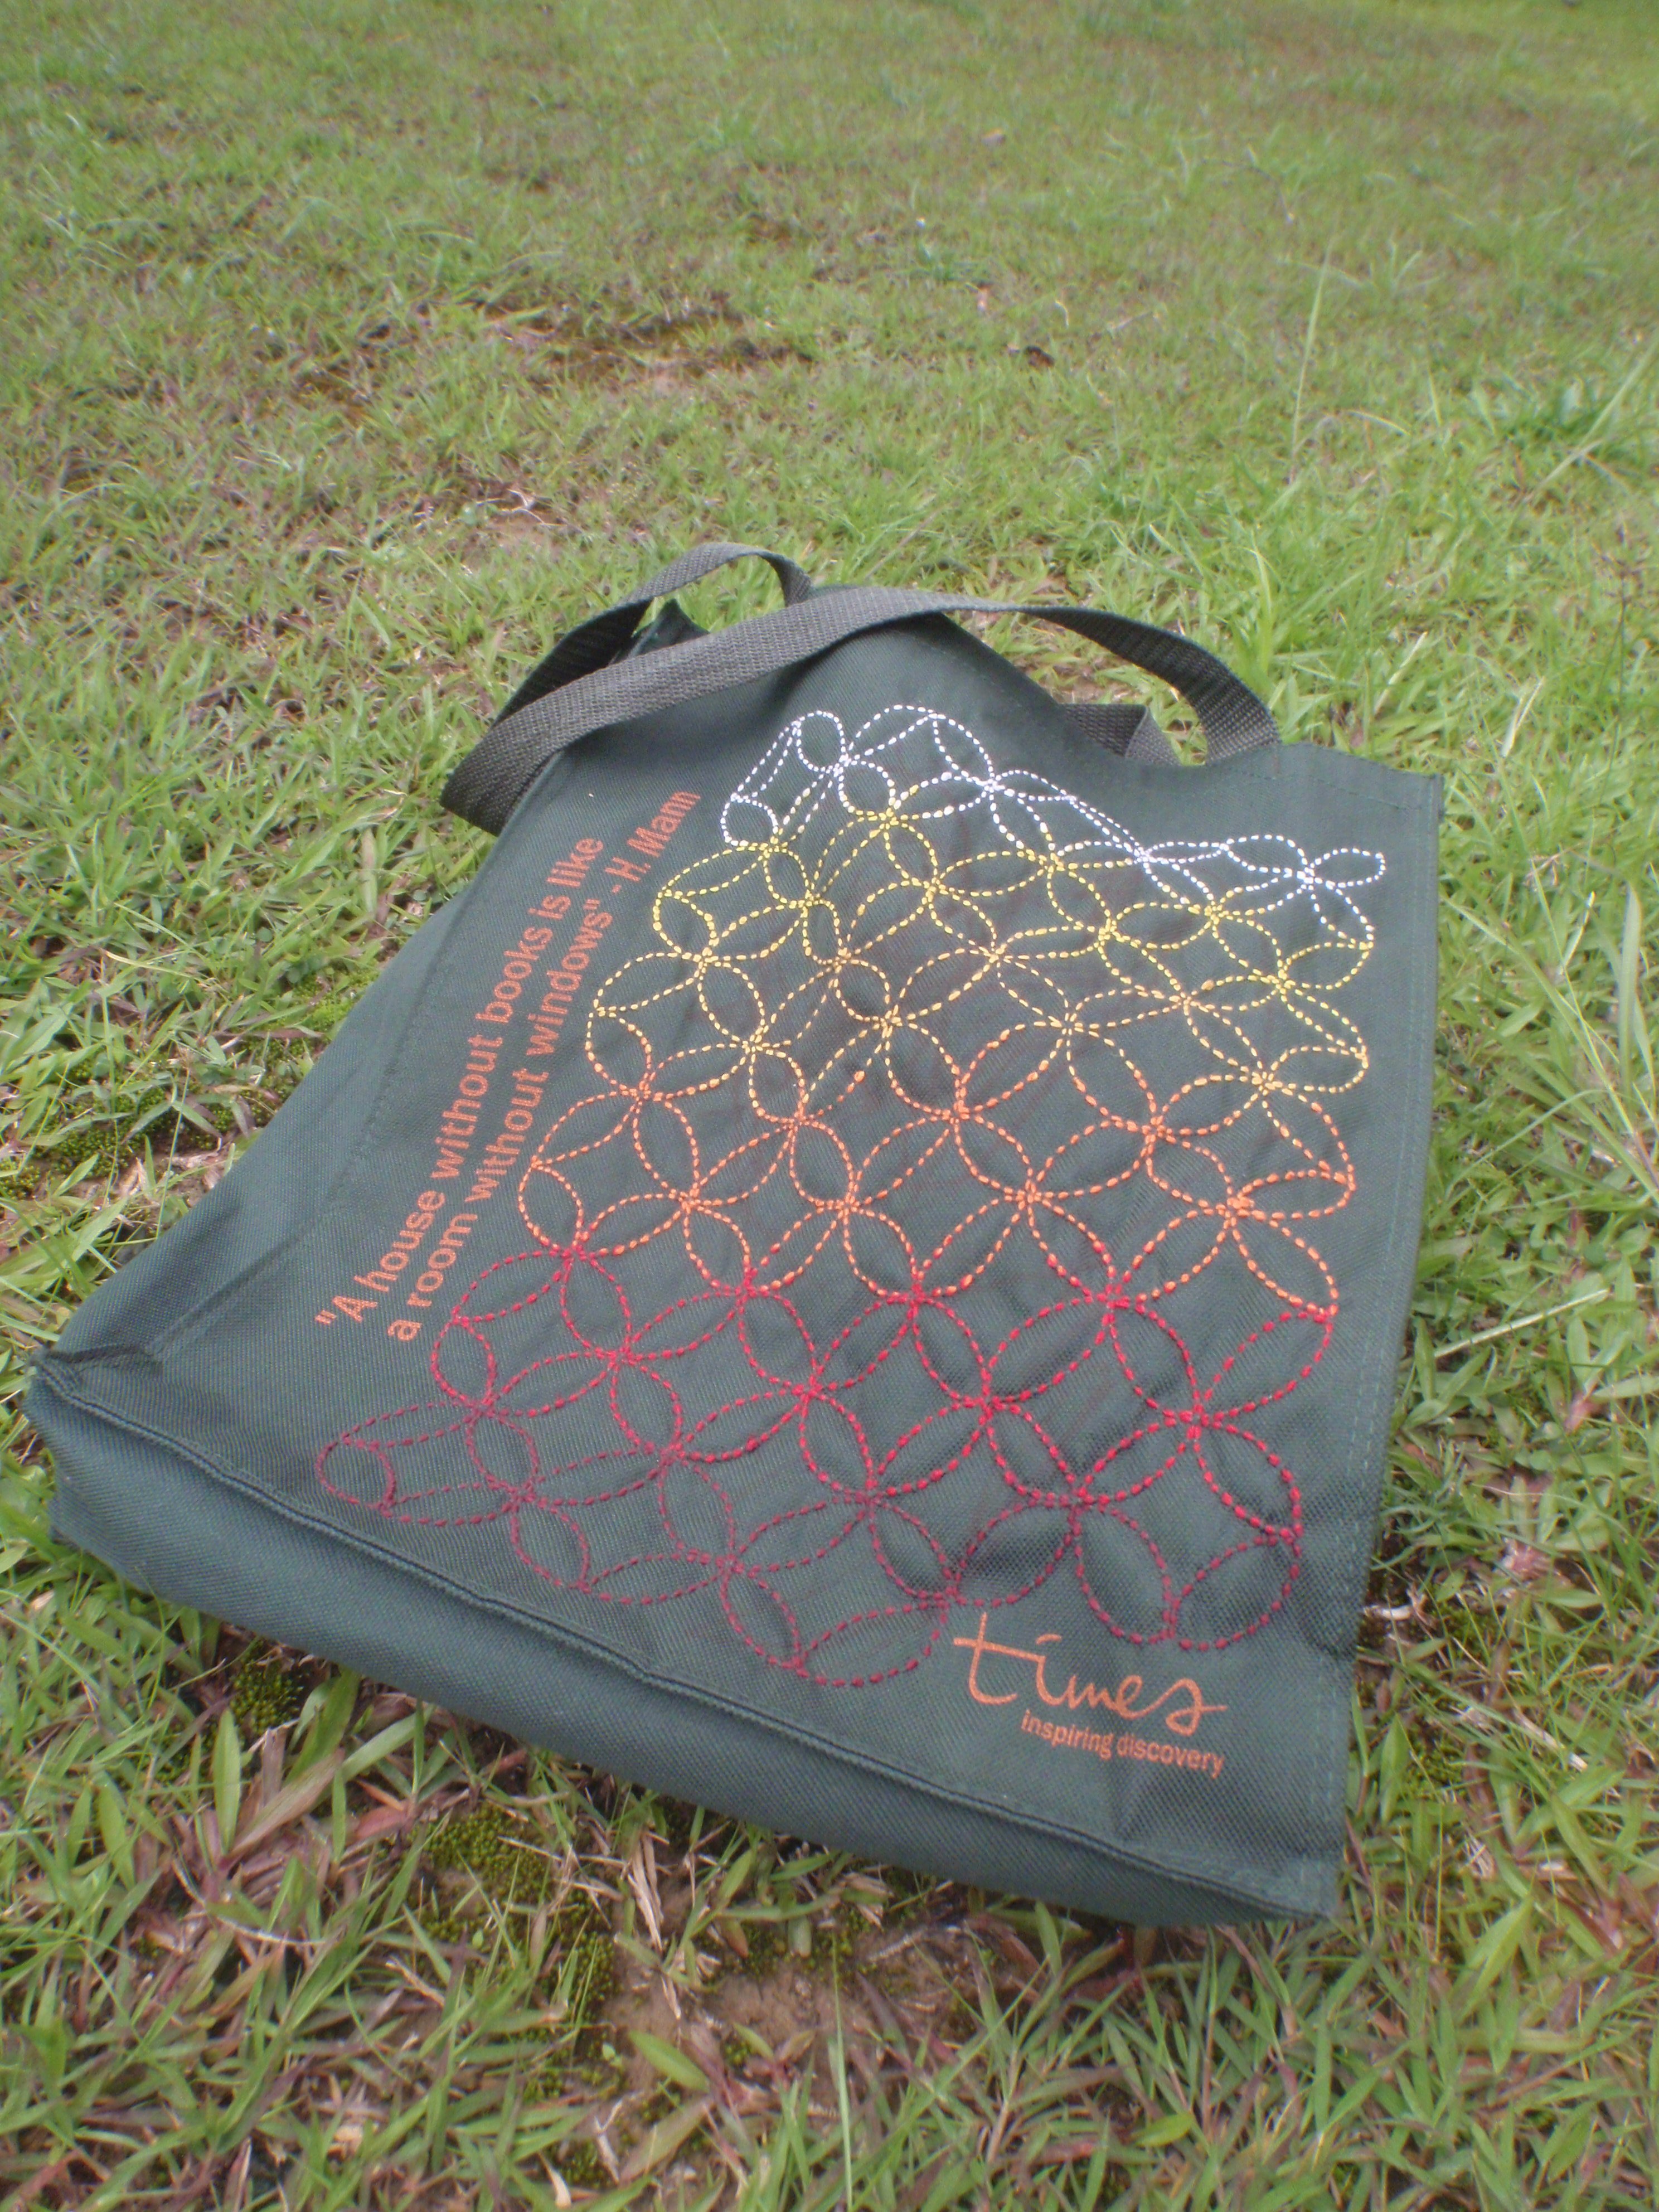
And here is how to change the thread color in the middle of the the running stitch like my green bag.

Where you want to stop, do 1 back stitch.
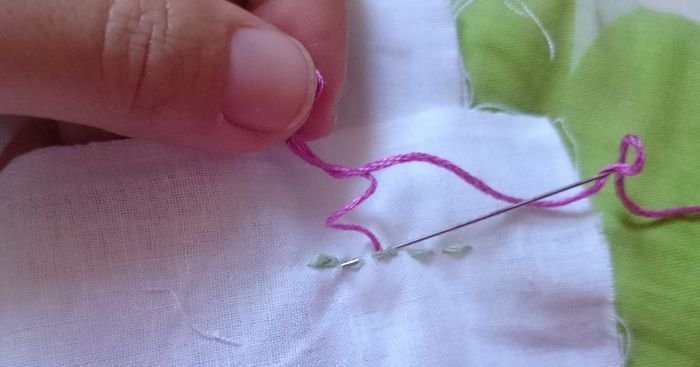
Prepare the next color. Go to 3 stitch behind, and do 1 back stitch.
Then just keep on going!!
===========================
This is my free hand.... I collected all the pots and pans, lids and plates all over my house!
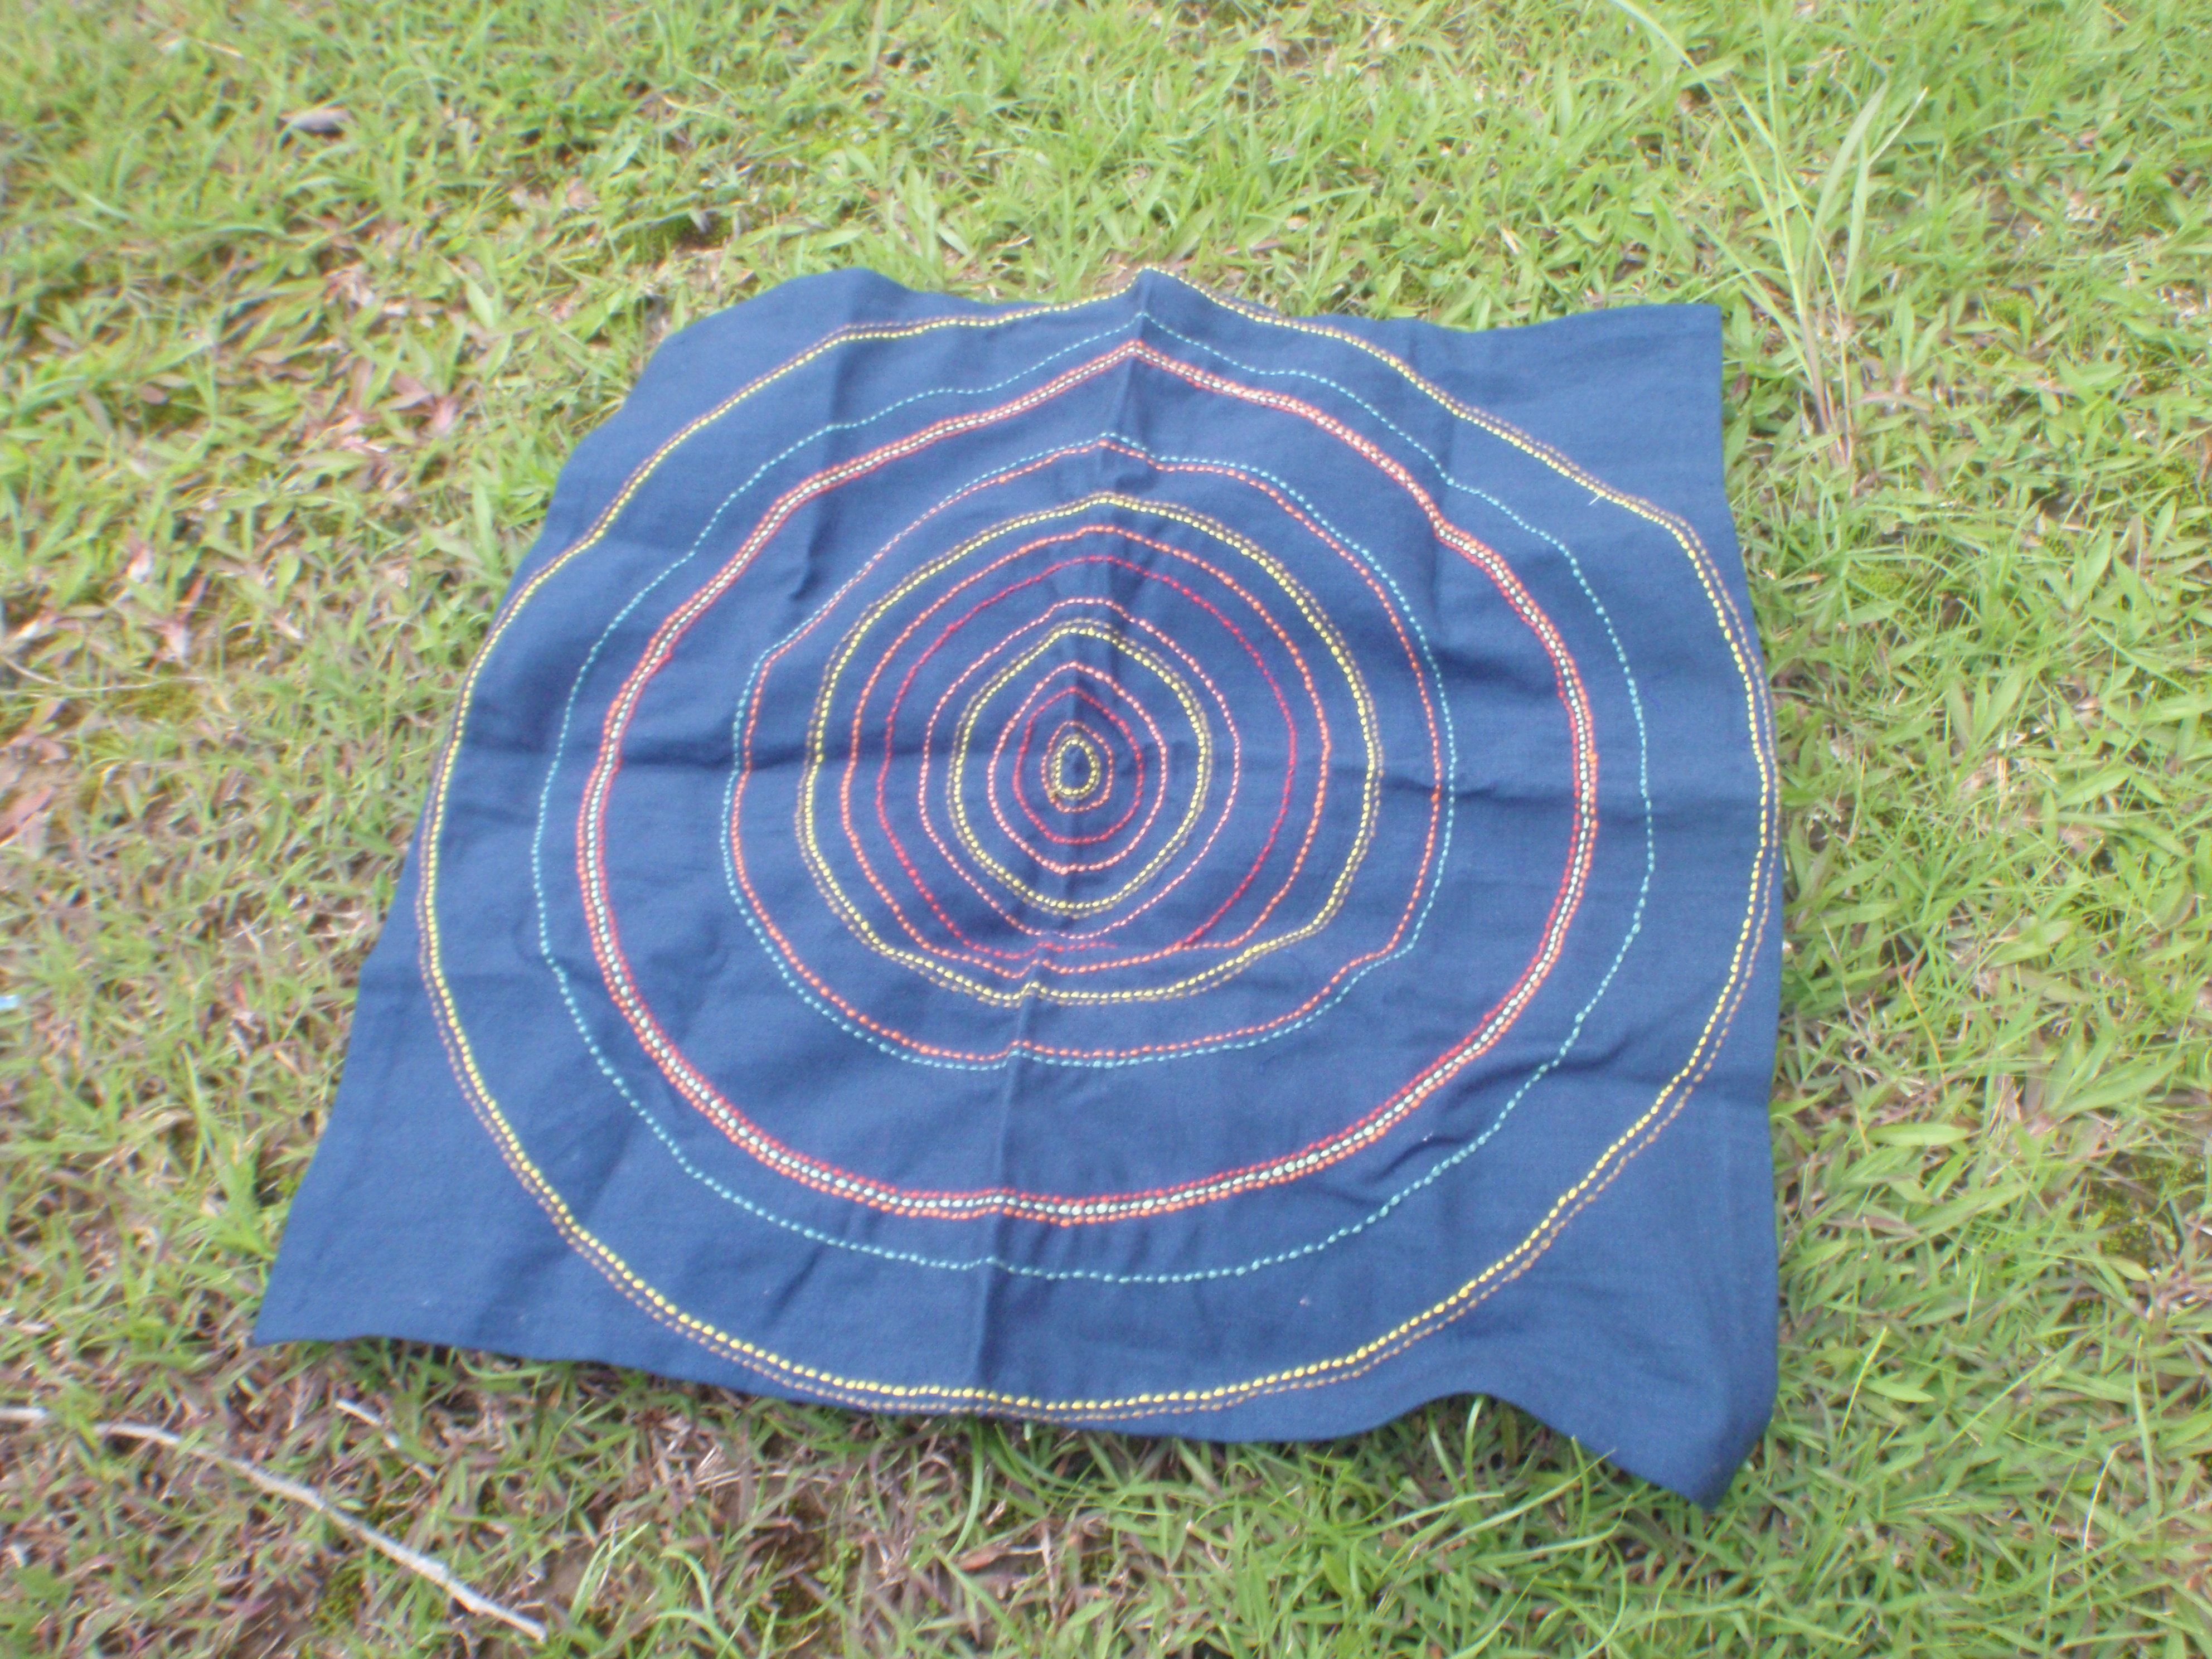
Lastly, my master piece.
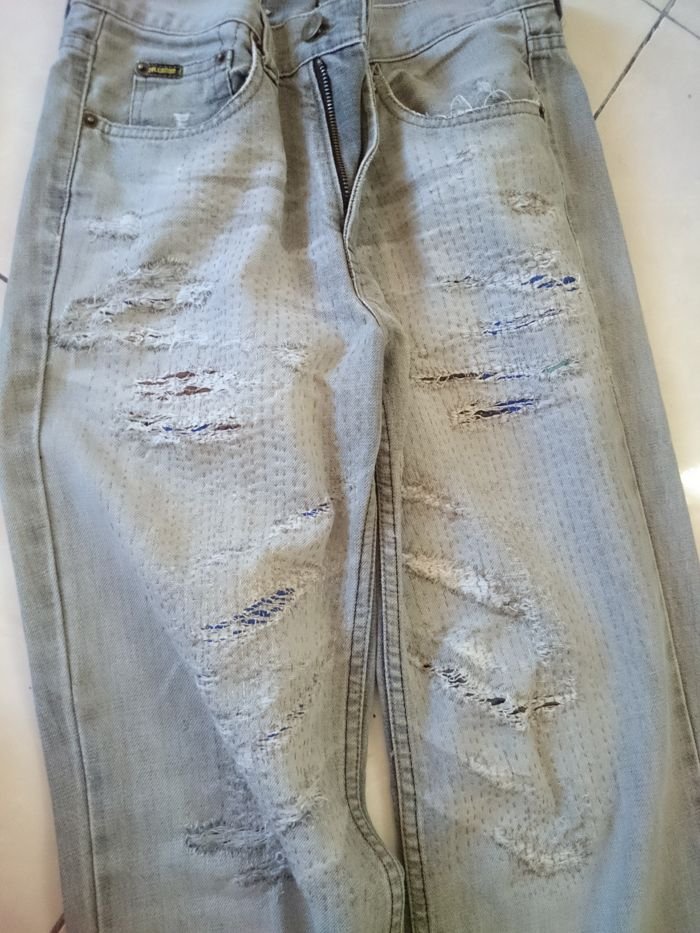
Real mending over here!!!
I must say, my husband is glued to his jeans. I mean, he never wants to let it go.
It's very old, I don't know how many times I mended...chaotic...
Does any of you or your family member are like my hubby?