Two Hours at Bow Summit
I want to bring you along for an evening of photography at one of the most iconic locations in the Canadian Rockies: Peyto Lake, seen from Bow Summit. I'm going to share with you my process of "working a scene" in changeable conditions, showing how I go through a series of different techniques when I'm in the same spot for a couple of hours waiting for the best light. This scenario is typical of my travels, as I routinely arrive early, stay late and take many, many photos. Typically only one or two make the final cut to be edited and shared, but the numerous images here will demonstrate the trial and error that often leads to the final "hero" image. Sure, sometimes I drive up, find my angle and take the picture within a few minutes, job done, go home, but more often it's like this.
I deliberately chose a popular location for the subject of this post, one with a very obvious and distinct view, because the purpose of the tutorial is not how make ten completely different photos in one place - I want instead to focus on the process of using different techniques and subtle changes in composition to make the most of a specific scene.
About the location
Bow Summit is a tourist destination in the Canadian Rockies, a high place with a beautiful view of the picturesque mountain-backed Peyto Lake, a distinctive feature of the Icefield Parkway in Banff National Park. What does the shape of the lake remind you of?
Peyto Lake is one of those photo hotspots that was high on my must-see list despite its popularity. The view from Bow Summit could rightly be called an epic vista, and is worth experiencing at least once. The lake is a striking turquoise in the daytime (sorry, I was here too late), and the scene becomes magical after a fresh snowfall, but the timing didn't work out for me; I had to be content with blue water and old snow on the ground - hey, it's still pretty!
THE ESTABLISHING SHOT
The first thing I do when I go to a location like this is to take the snapshot. Go to the main viewing area, quickly compose, take the same photo as everyone else. Boom, done, I have something I can show back home. Now I'm free to take my time, get creative and create something unique.
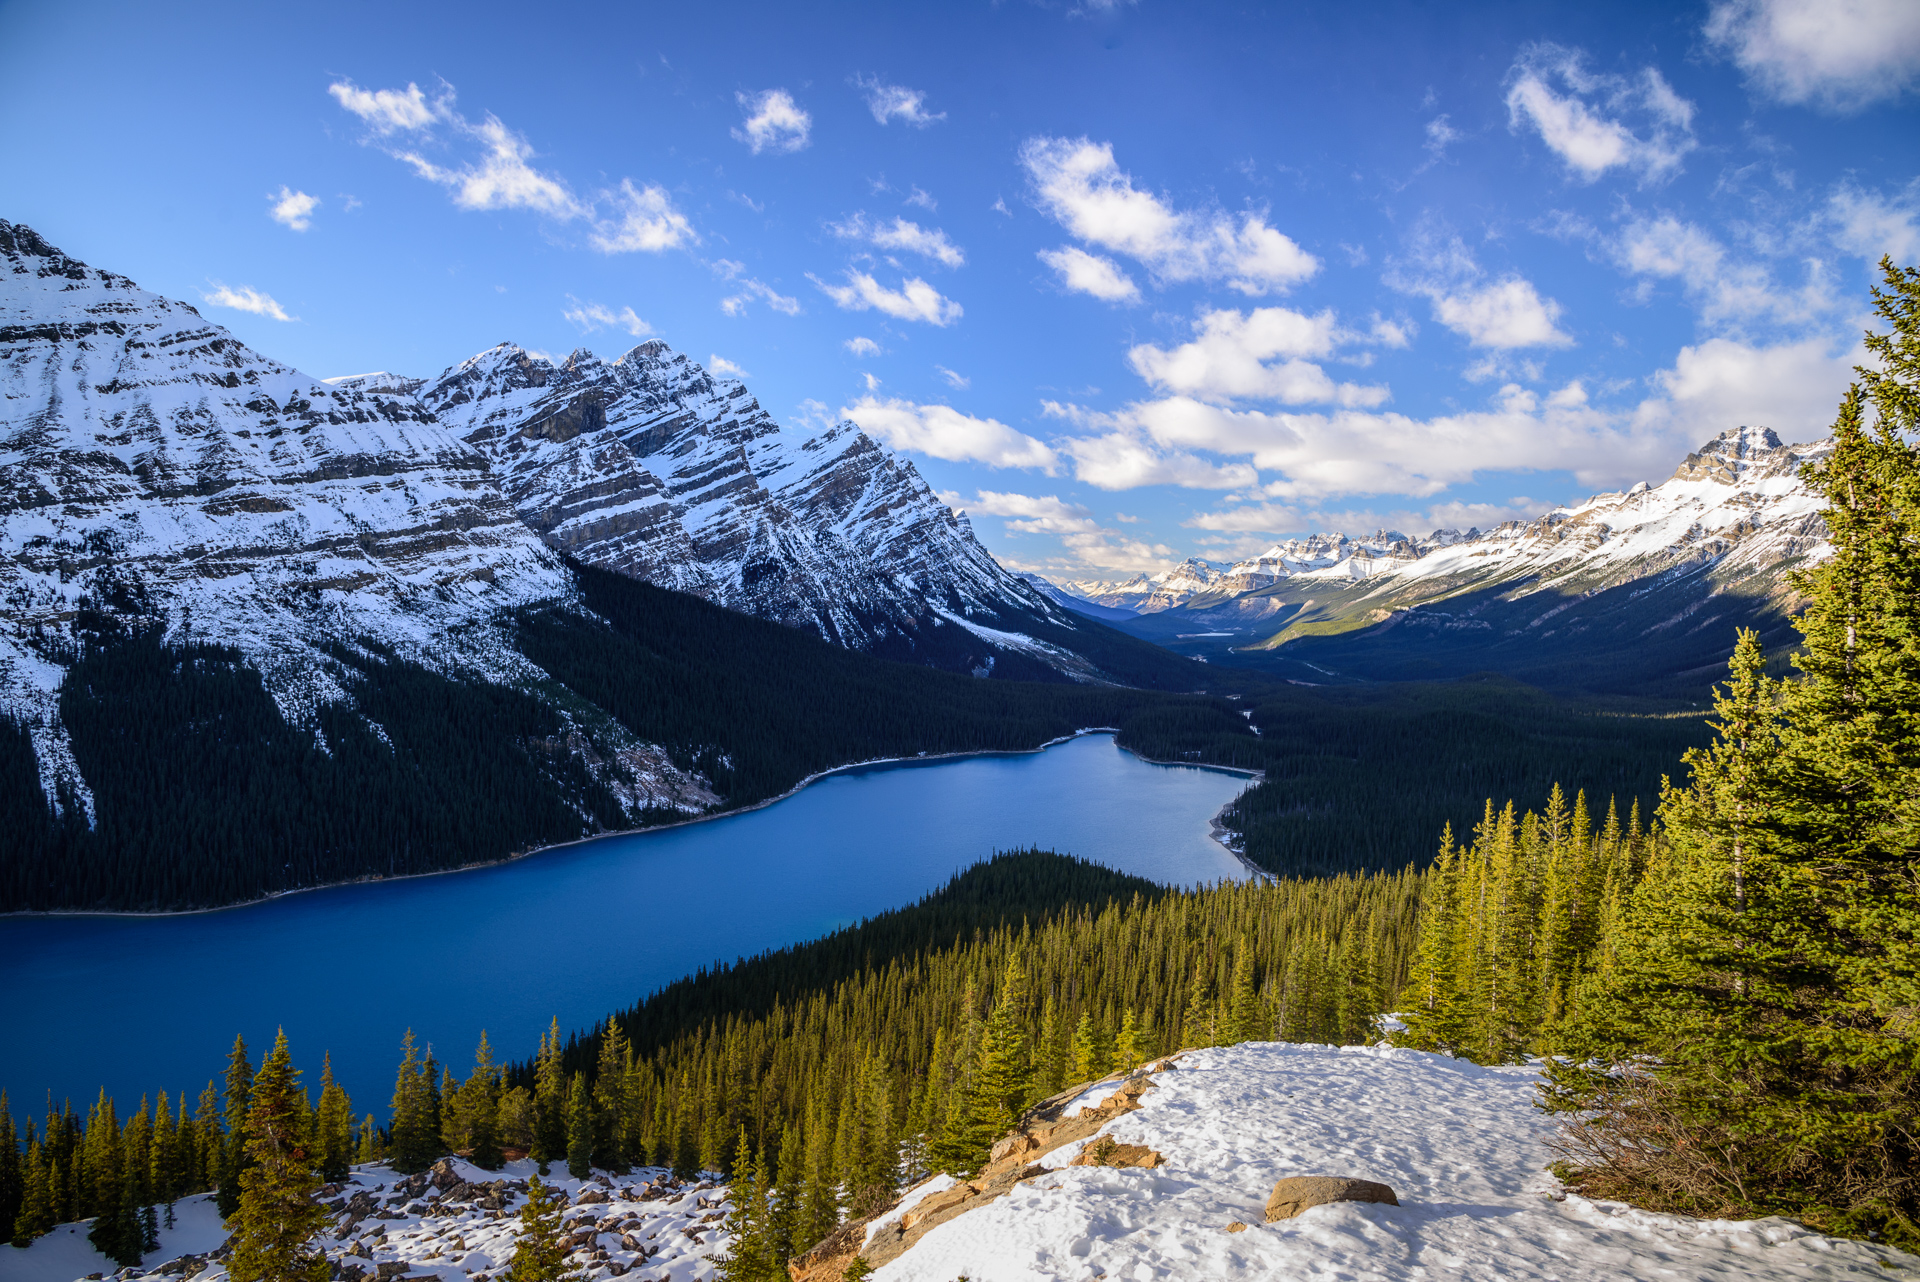
Gorgeous. And the same as a hundred other people's photos that day.
Technique #1 - CHANGING THE ANGLES
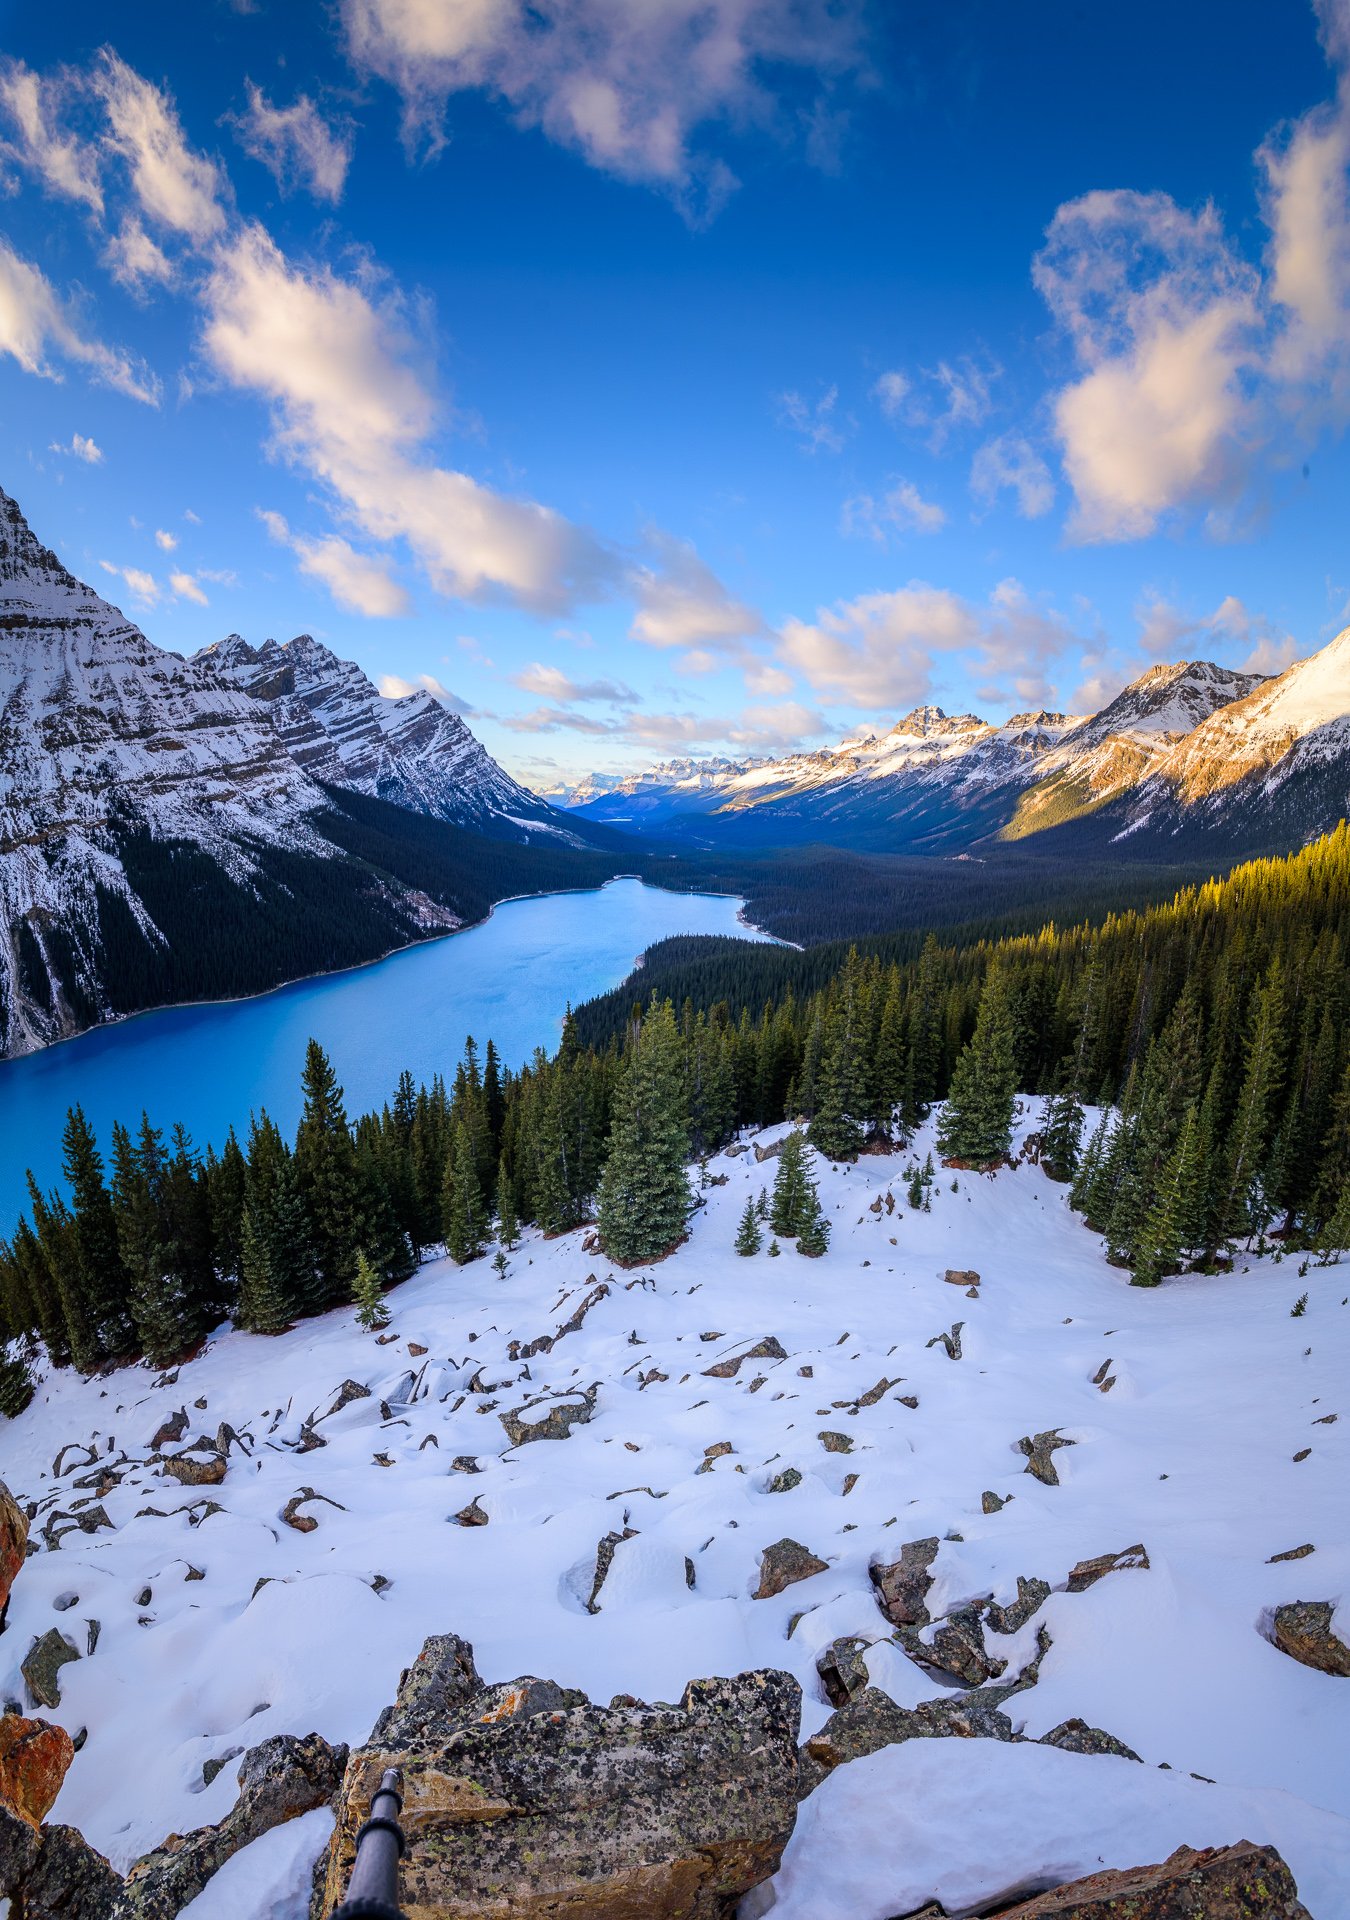
Composition is the key to any location. Sometimes it's fairly easy and obvious, sometimes you are overwhelmed with angles to choose from. As I said in the introduction, I picked Peyto Lake as the subject of this article because the general composition here is pretty straightforward - the best view is in one direction, towards the head of the lake and the mountains behind it - but that doesn't mean you can just plant the tripod in the first place you come across and leave it there. Instead of remaining at the more popular tourist area, I walked up the trail a short ways, testing a couple of spots but ending up at a rocky outcropping that made for a better foreground (in my opinion). Only a handful of people came by in the two hours I remained here. Much better than fighting the tour bus crowd on the observing deck.
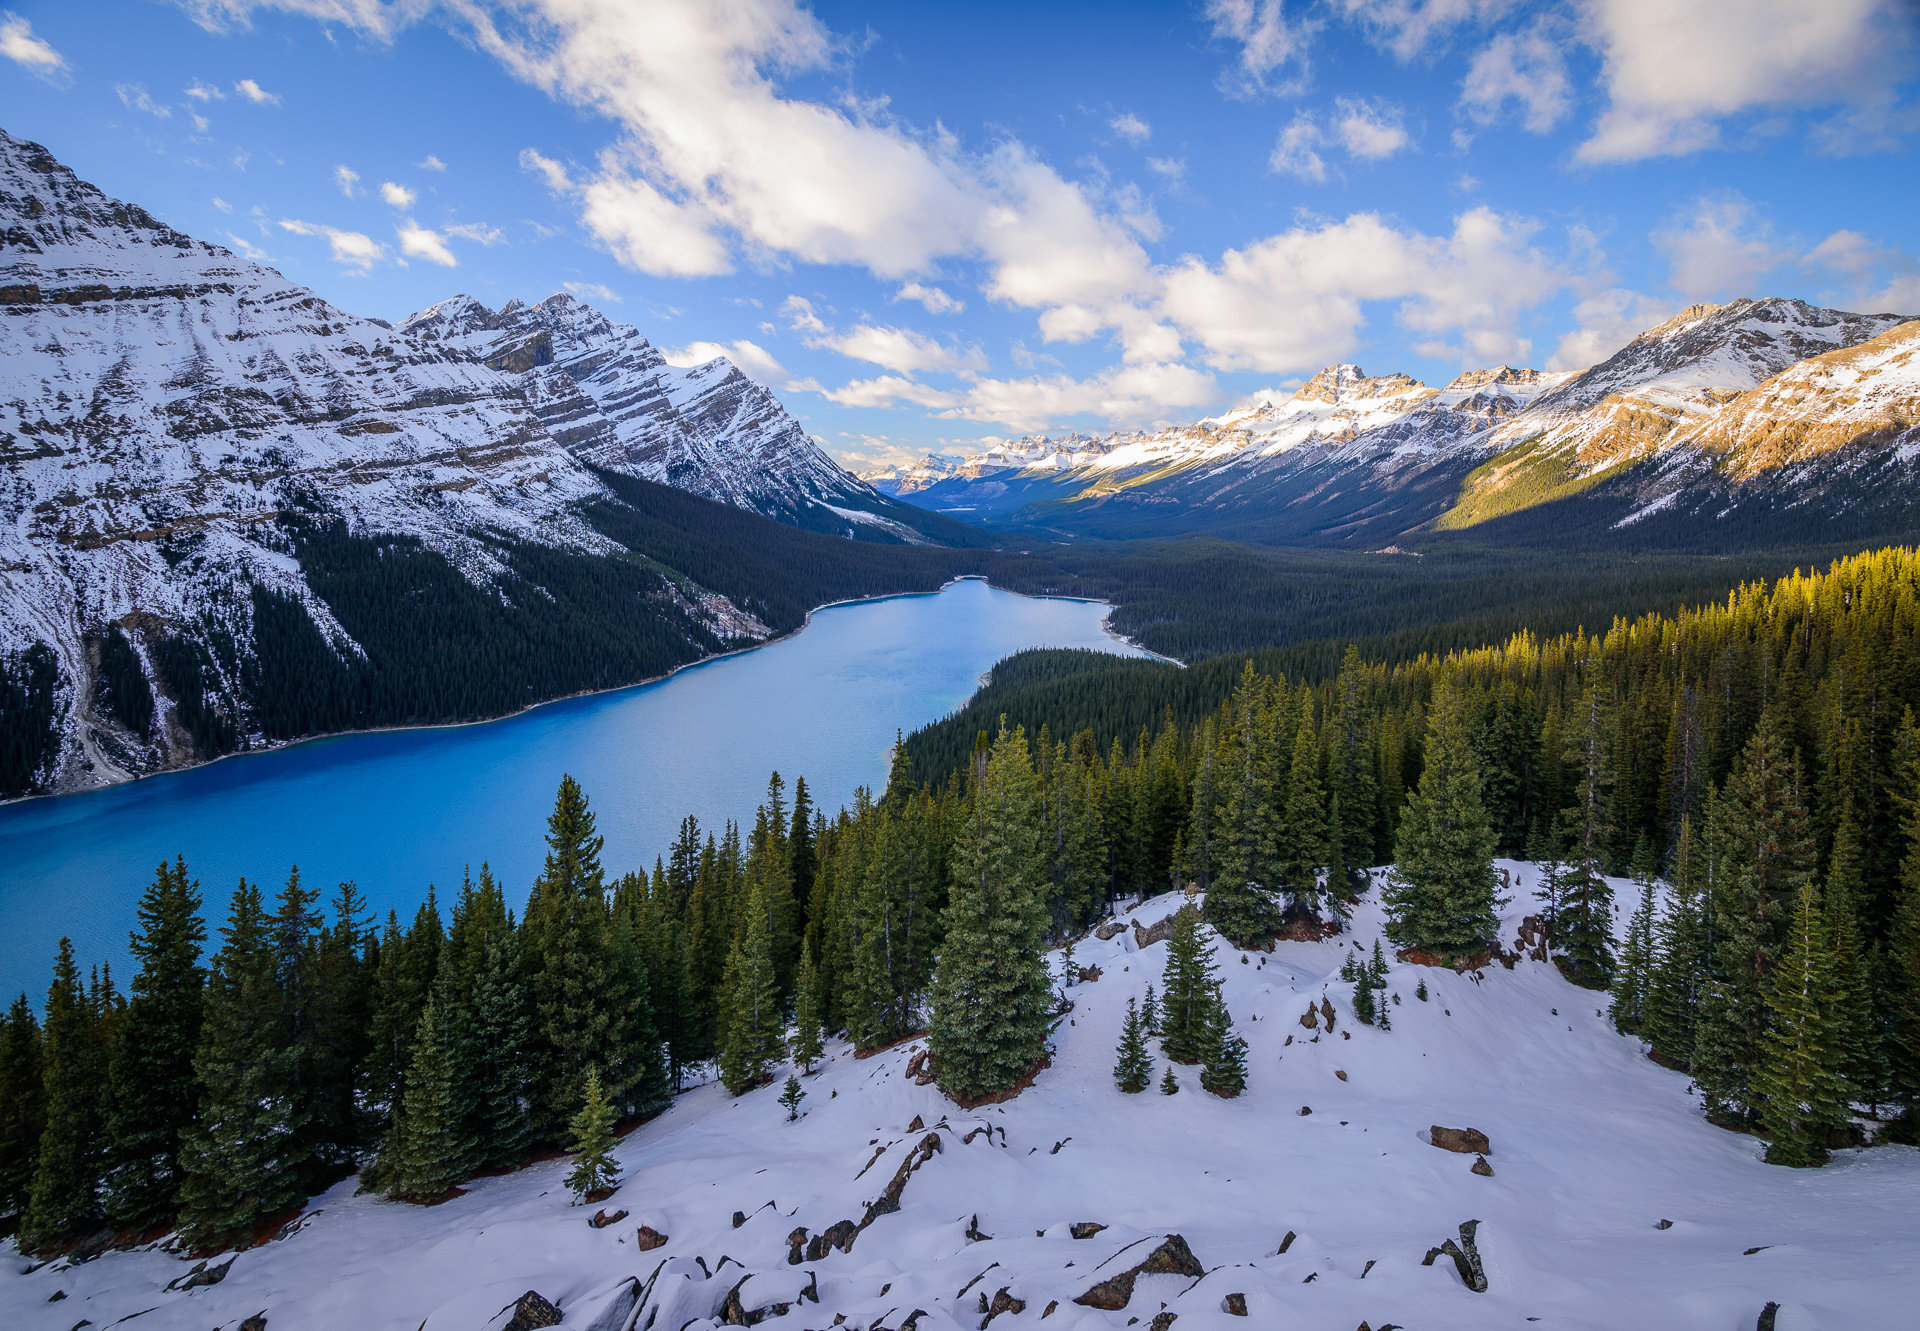
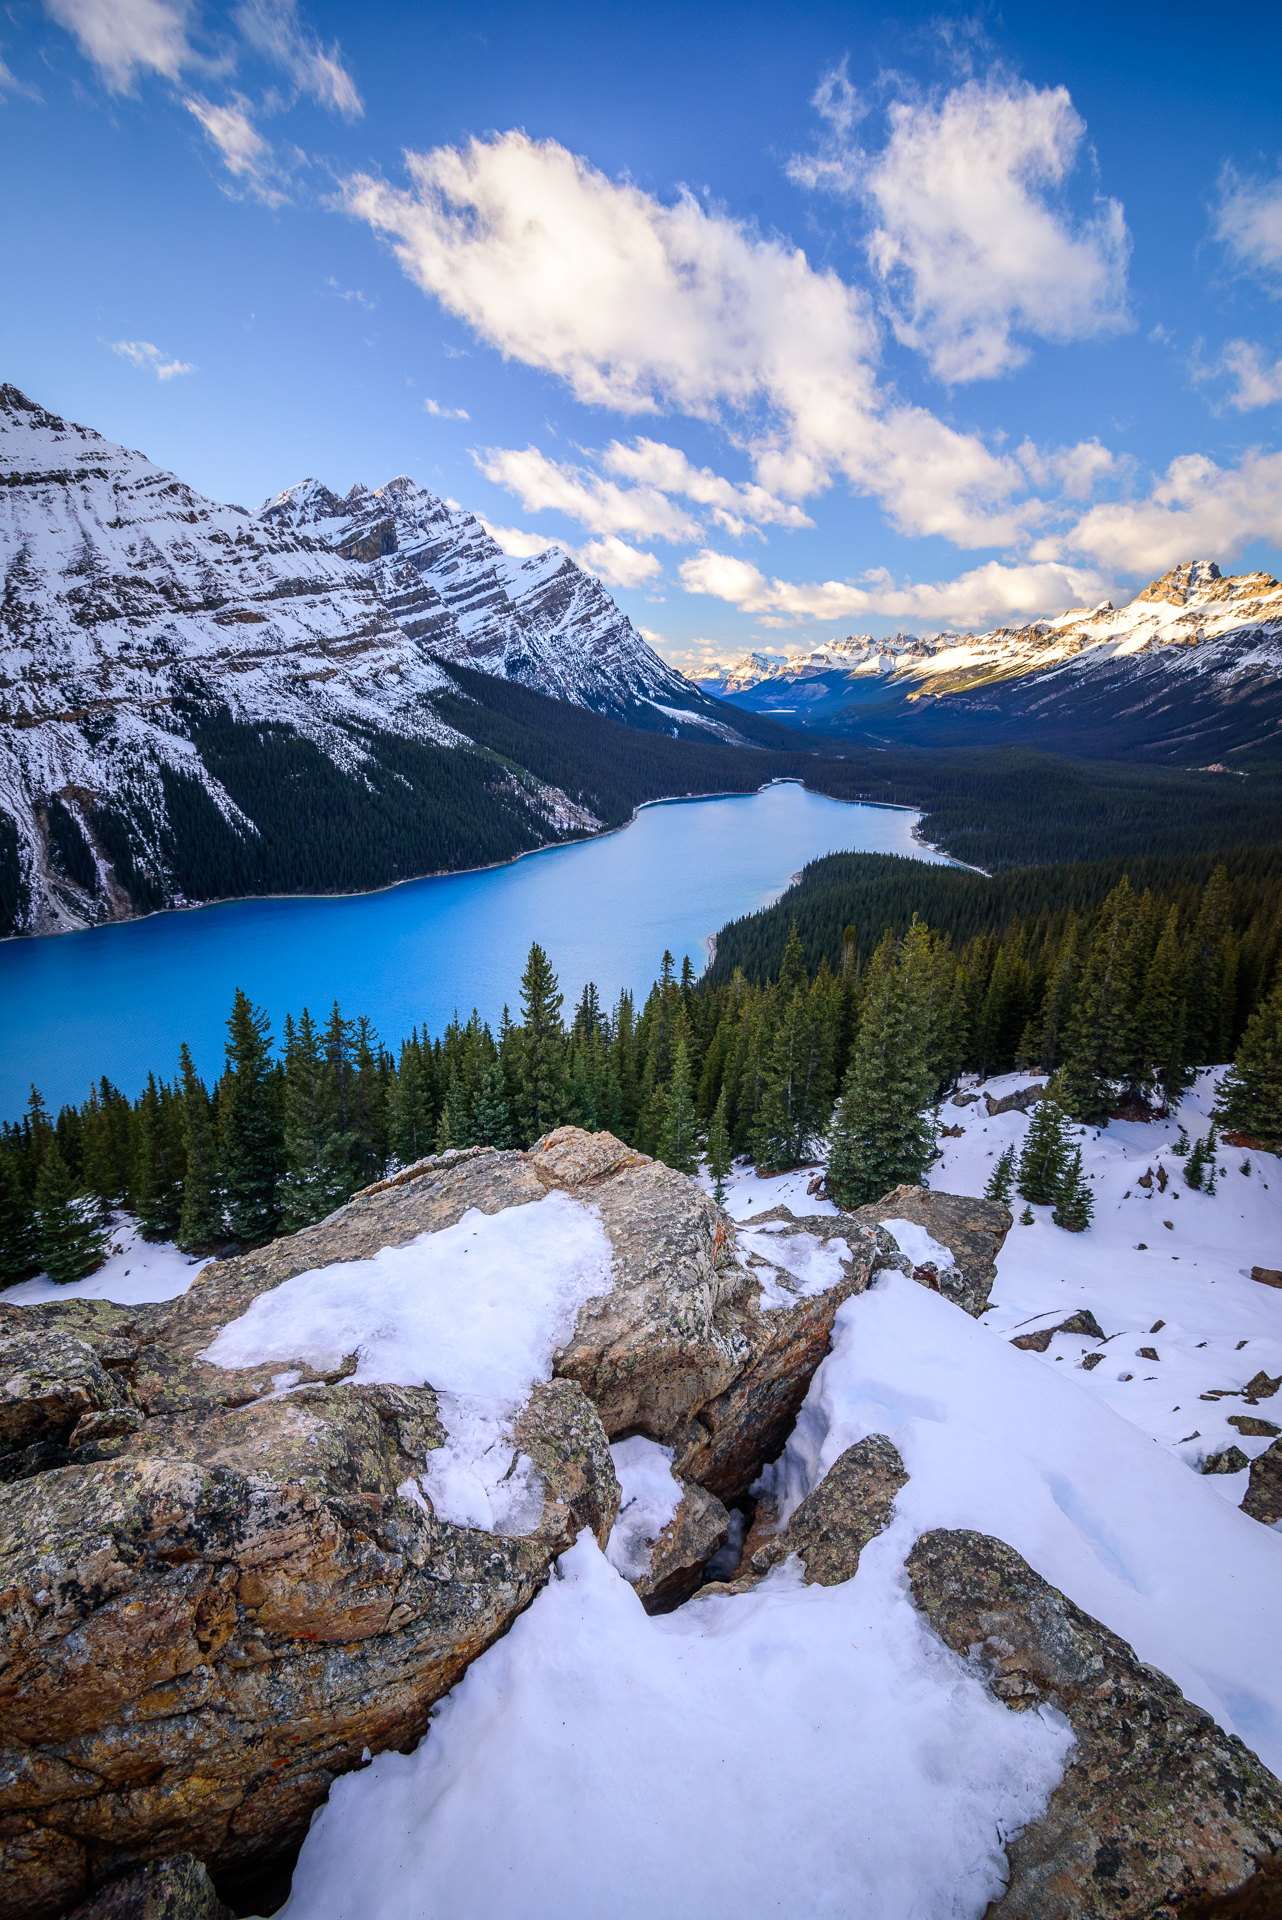
After scouting out general area, I hunt for specific angles, comparing them on the back of the camera. I keep a few in mind because I don't know what the clouds or sunlight will do later, and it's nice to have options in your back pocket. Don't neglect the verticals, you never know when a magazine will ask for a cover shot!
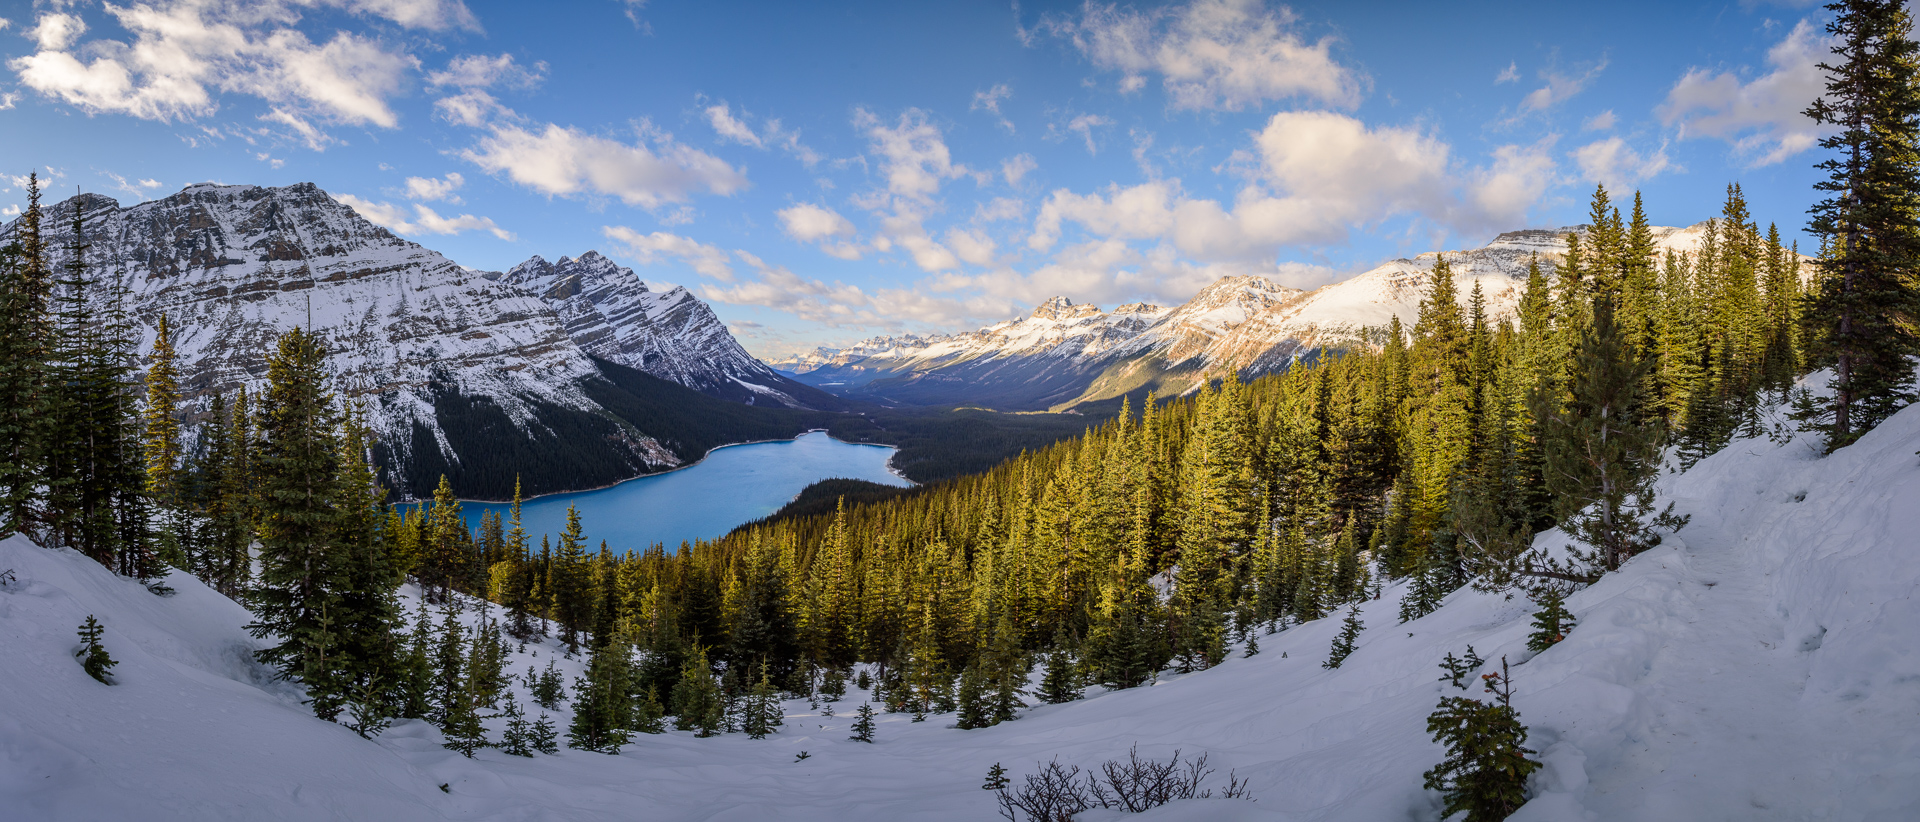
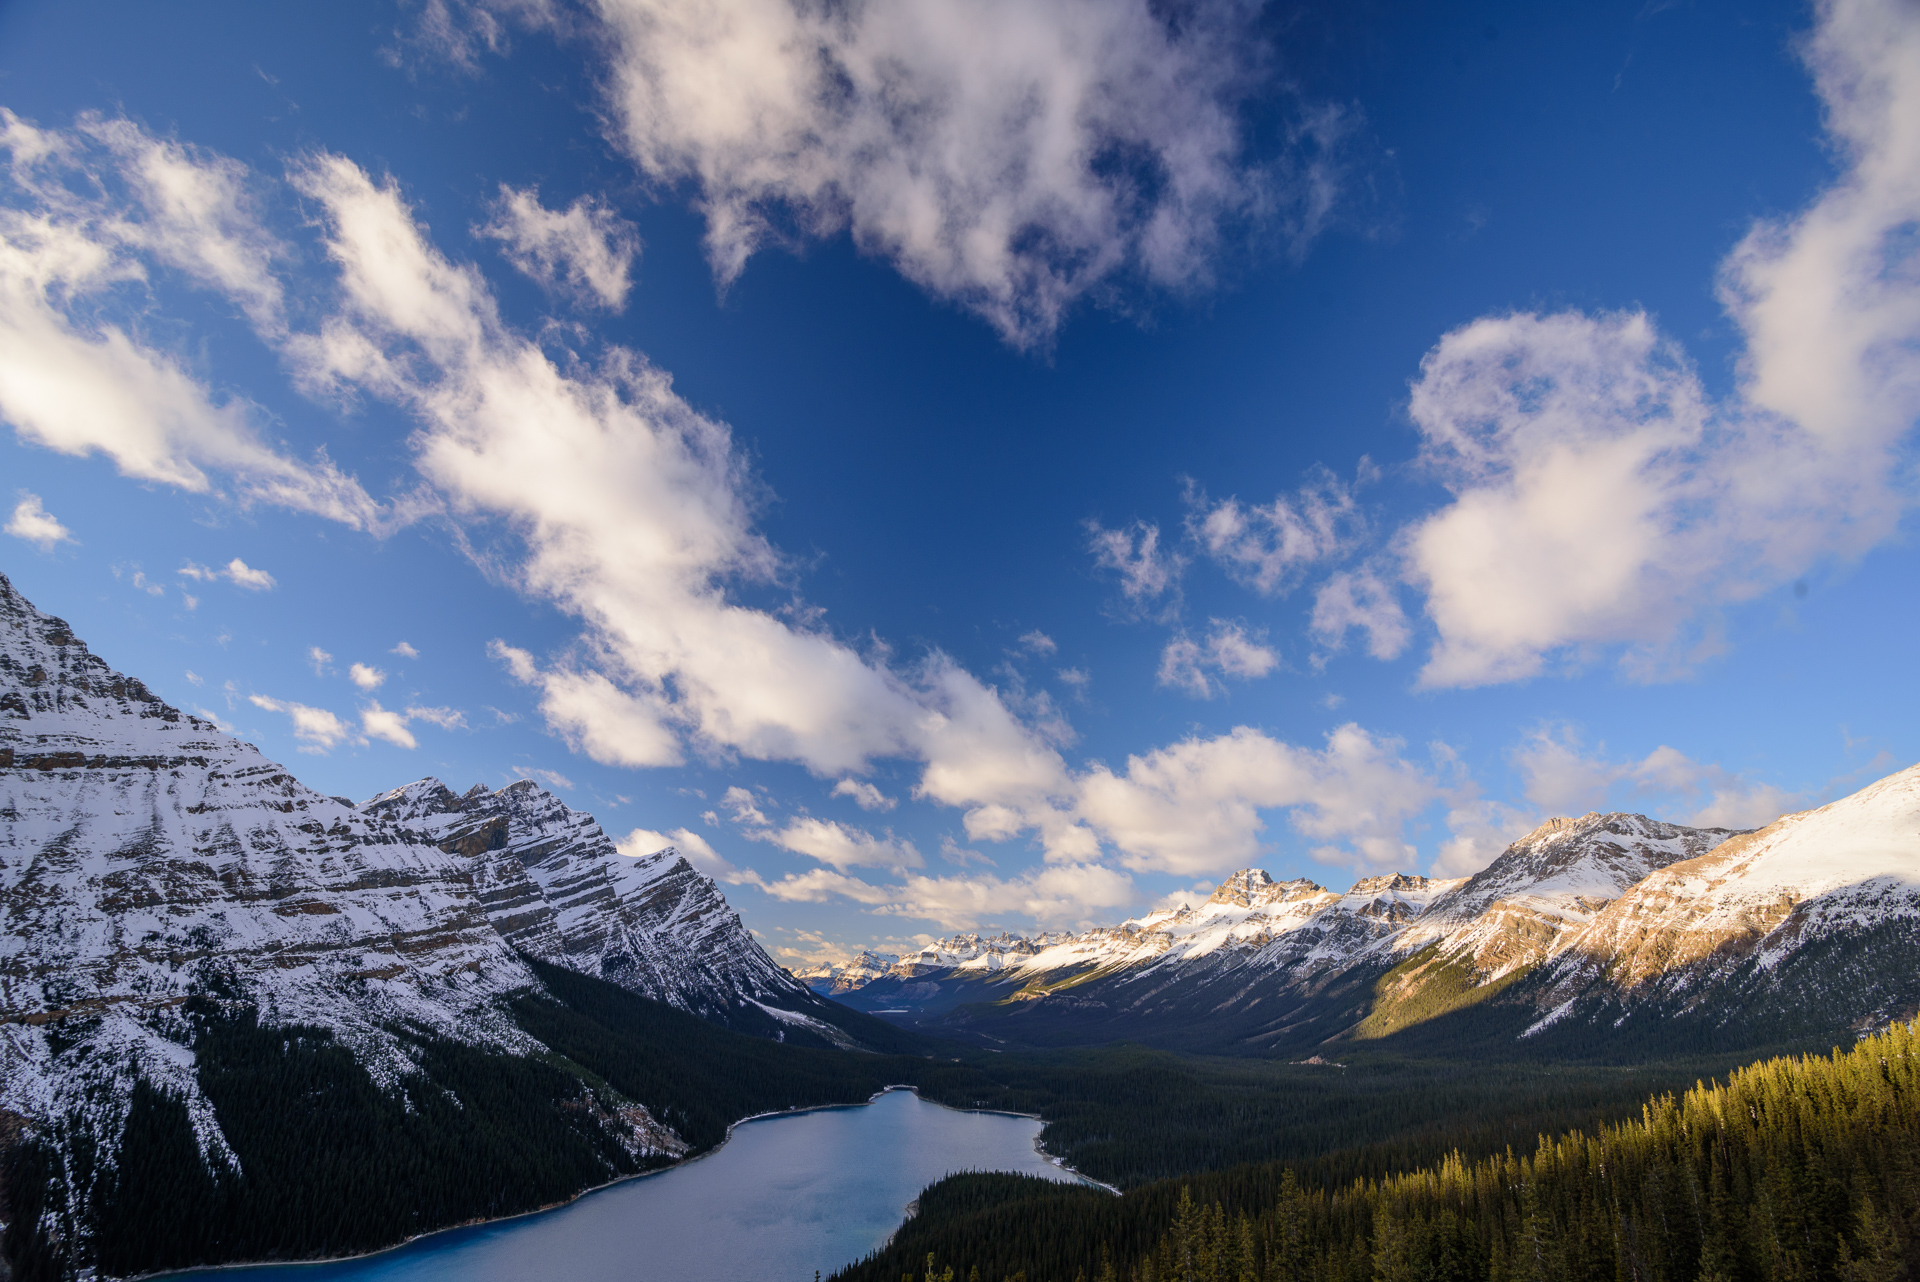
Technique #2 - PANORAMAS
There are two main reasons I make panoramas: to broaden the field of view when one lens just isn't wide enough, and to increase the resolution of the final image. I'll talk about using panos to create super-high-resolution images another time, but Bow Summit was such a wide vista that even a 14mm lens couldn't capture the full extent of the scene. Panoramas allowed me to greatly expand the perspective, resulting in a completely different composition.
I personally think that wide-angle panoramic photos like this are more immersive, as they show you what you would see if you were standing in a place and turning your head side to side or up and down (as you naturally do when you're confronted with so much open space), rather than standing and staring straight ahead of you at one isolated part of the scenery.
6 vertical frames at 24mm:
3 horizontal frames at 17mm (for demonstration purposes only - you can see a tripod leg if you look carefully):
Technique #3 - A POLARIZING ISSUE
To polarize or not to polarize? When I'm traveling I have a circular polarizer on the front of my lens most of the time (except at night) because of the way it cuts down on glare and increases saturation (especially for waterfalls) and dramatically darkens the sky (the part of the sky that is 90 degrees from the Sun).
At a place like Peyto Lake I will experiment and take photos with and without the polarizer, because I can't always tell which effect I will prefer when I get home and start editing. Here's a comparison, the first one is NATURAL, the second is POLARIZED:
Big difference, right? Notice how the contrast between the clouds and the sky flips? Not everyone likes the polarized look because it's unnatural. I love the drama but sometimes I get home and realize the effect was too much, so I'll take photos with and without and sometimes in between, to give myself options later.
One problem to be aware of when using polarizers with a wide angle lens is that the darkening is not uniform across the whole sky - it is greatest at a 90 degree angle from the Sun. See the gradient hole in this photo taken at 17mm? You may be able to minimize this
in post, but it's usually better to avoid it.
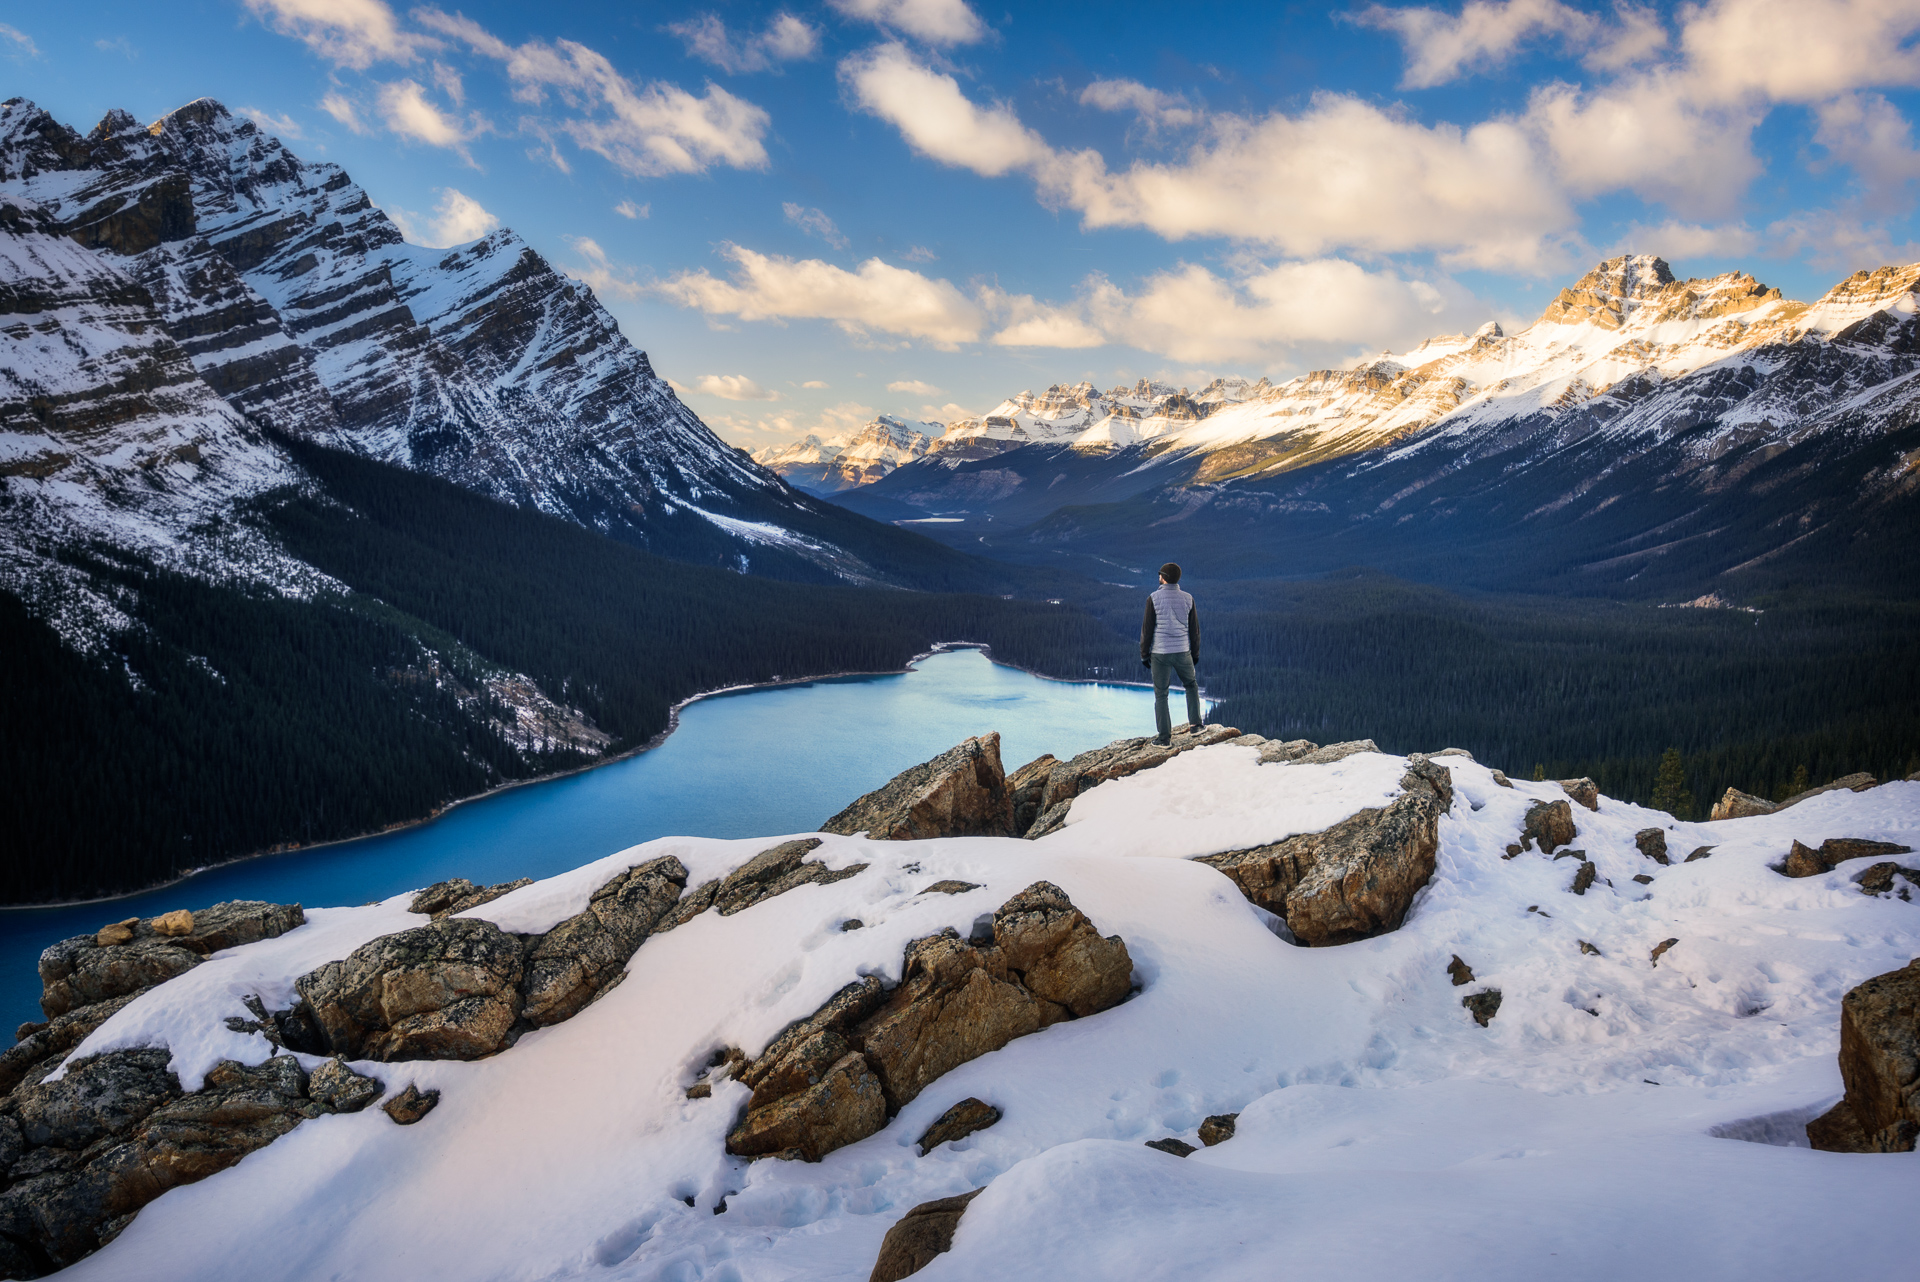
Technique #4 - SELFIE
It's useful to add a person for scale and interest, and when I'm the only person around...
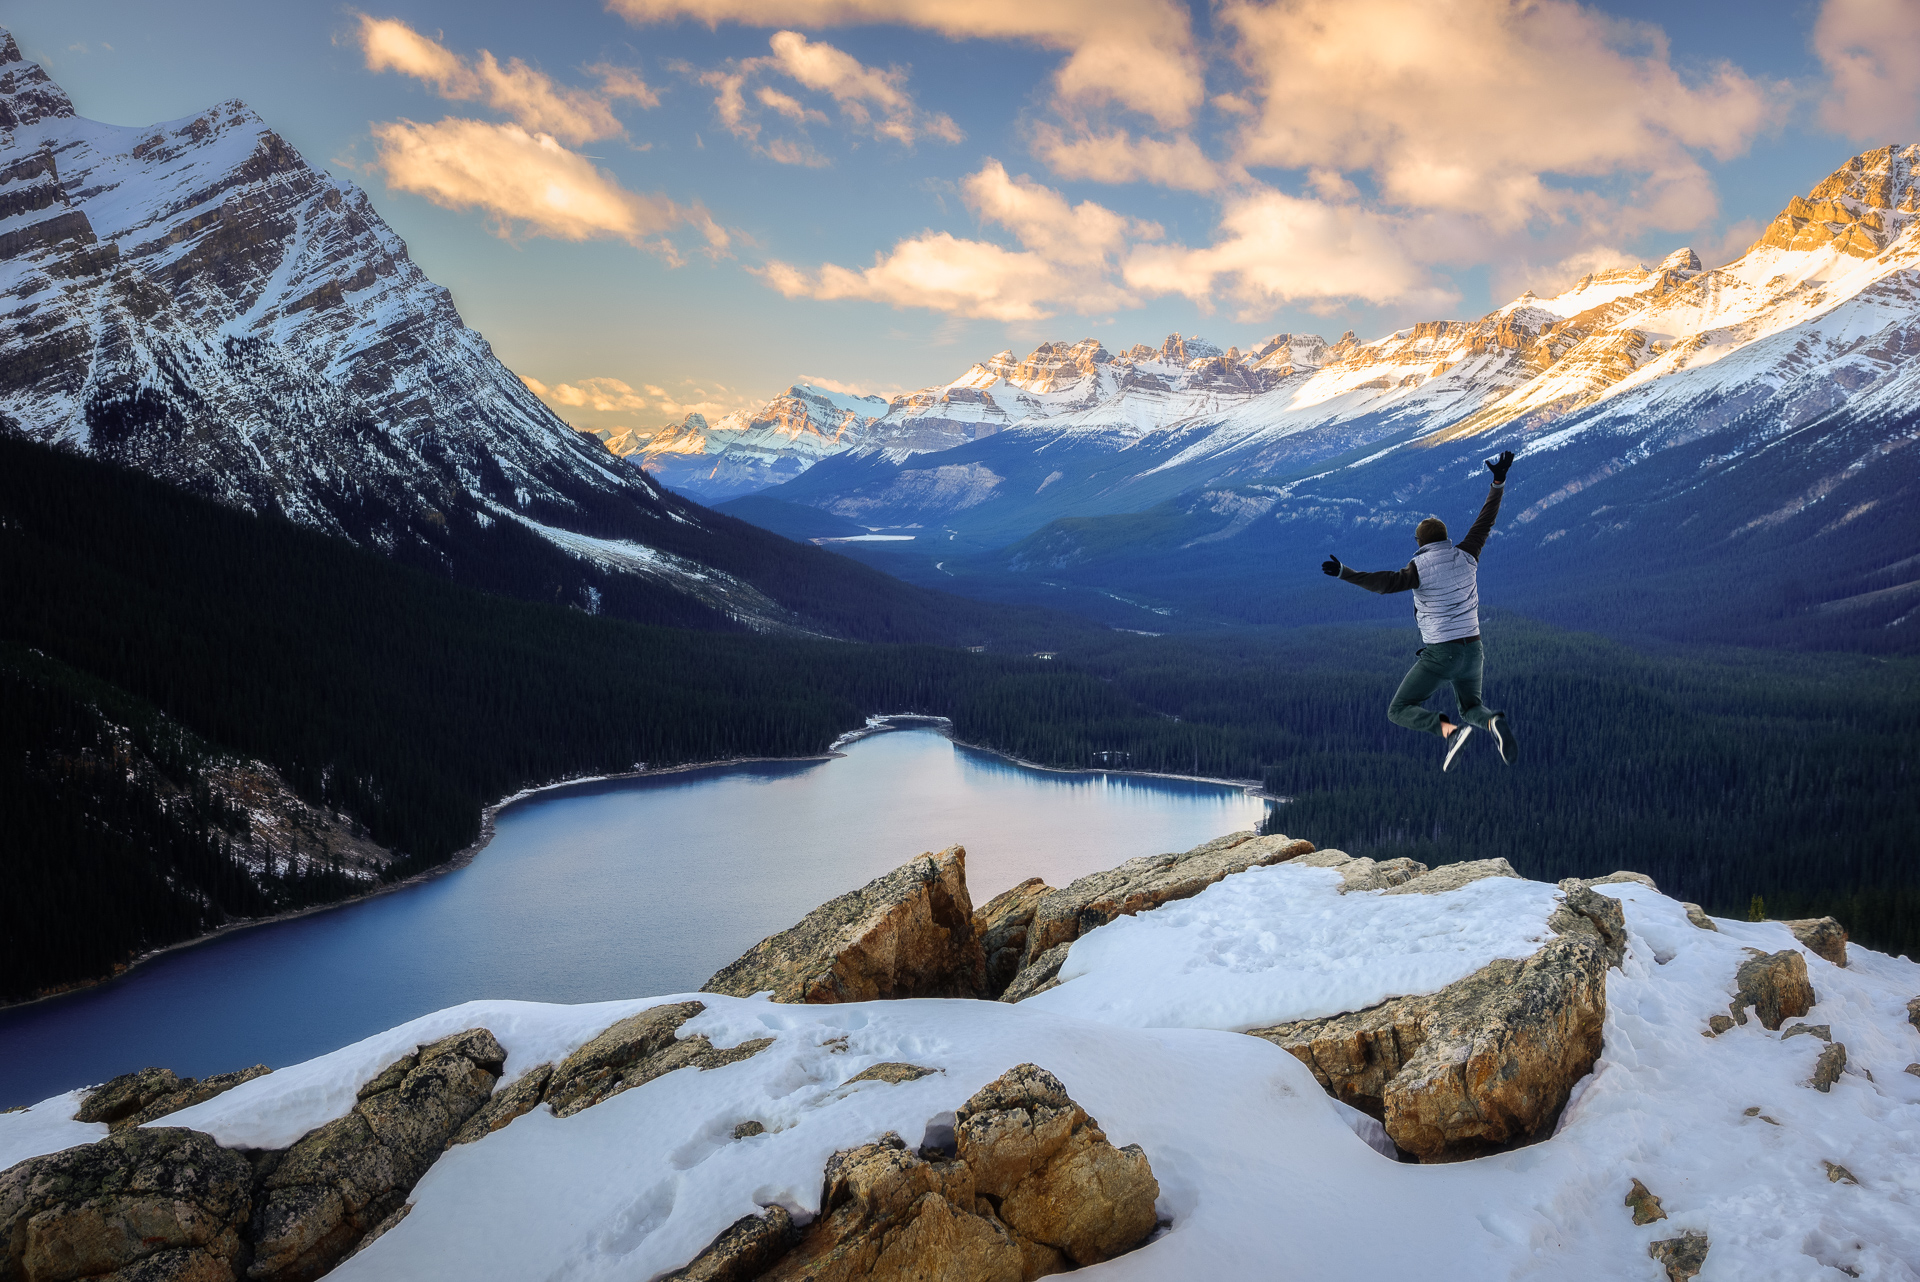
And the obligatory jumping pic, although this looks more like I'm jumping off the cliff than jumping for joy...oops.
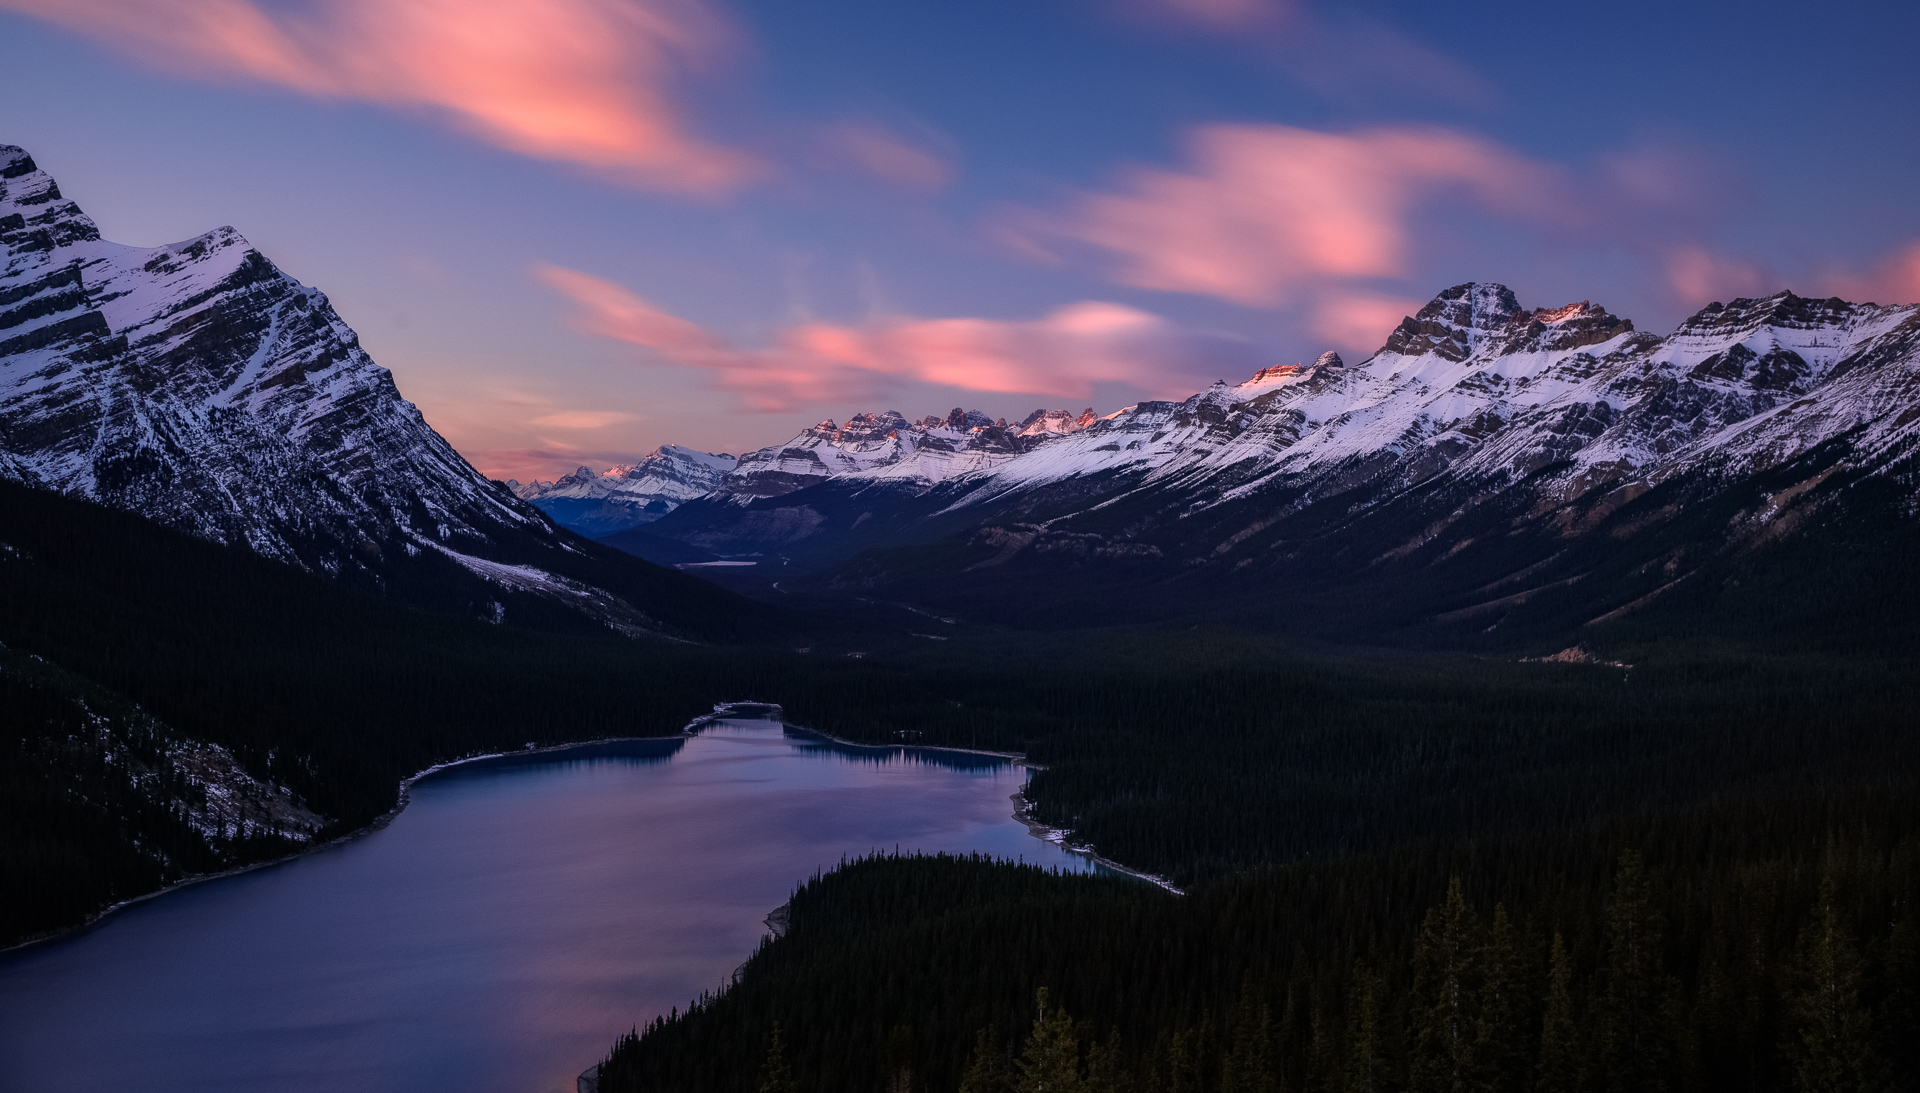
Technique #5 - LONG EXPOSURE
Want to completely change the look and feel of your photo and introduce a little surrealism? Remove the scene from the normal flow of time by using a 10-stop neutral density filter. If there are moving parts within the frame (i.e. clouds), you can achieve some special results. This is definitely not a snapshot.
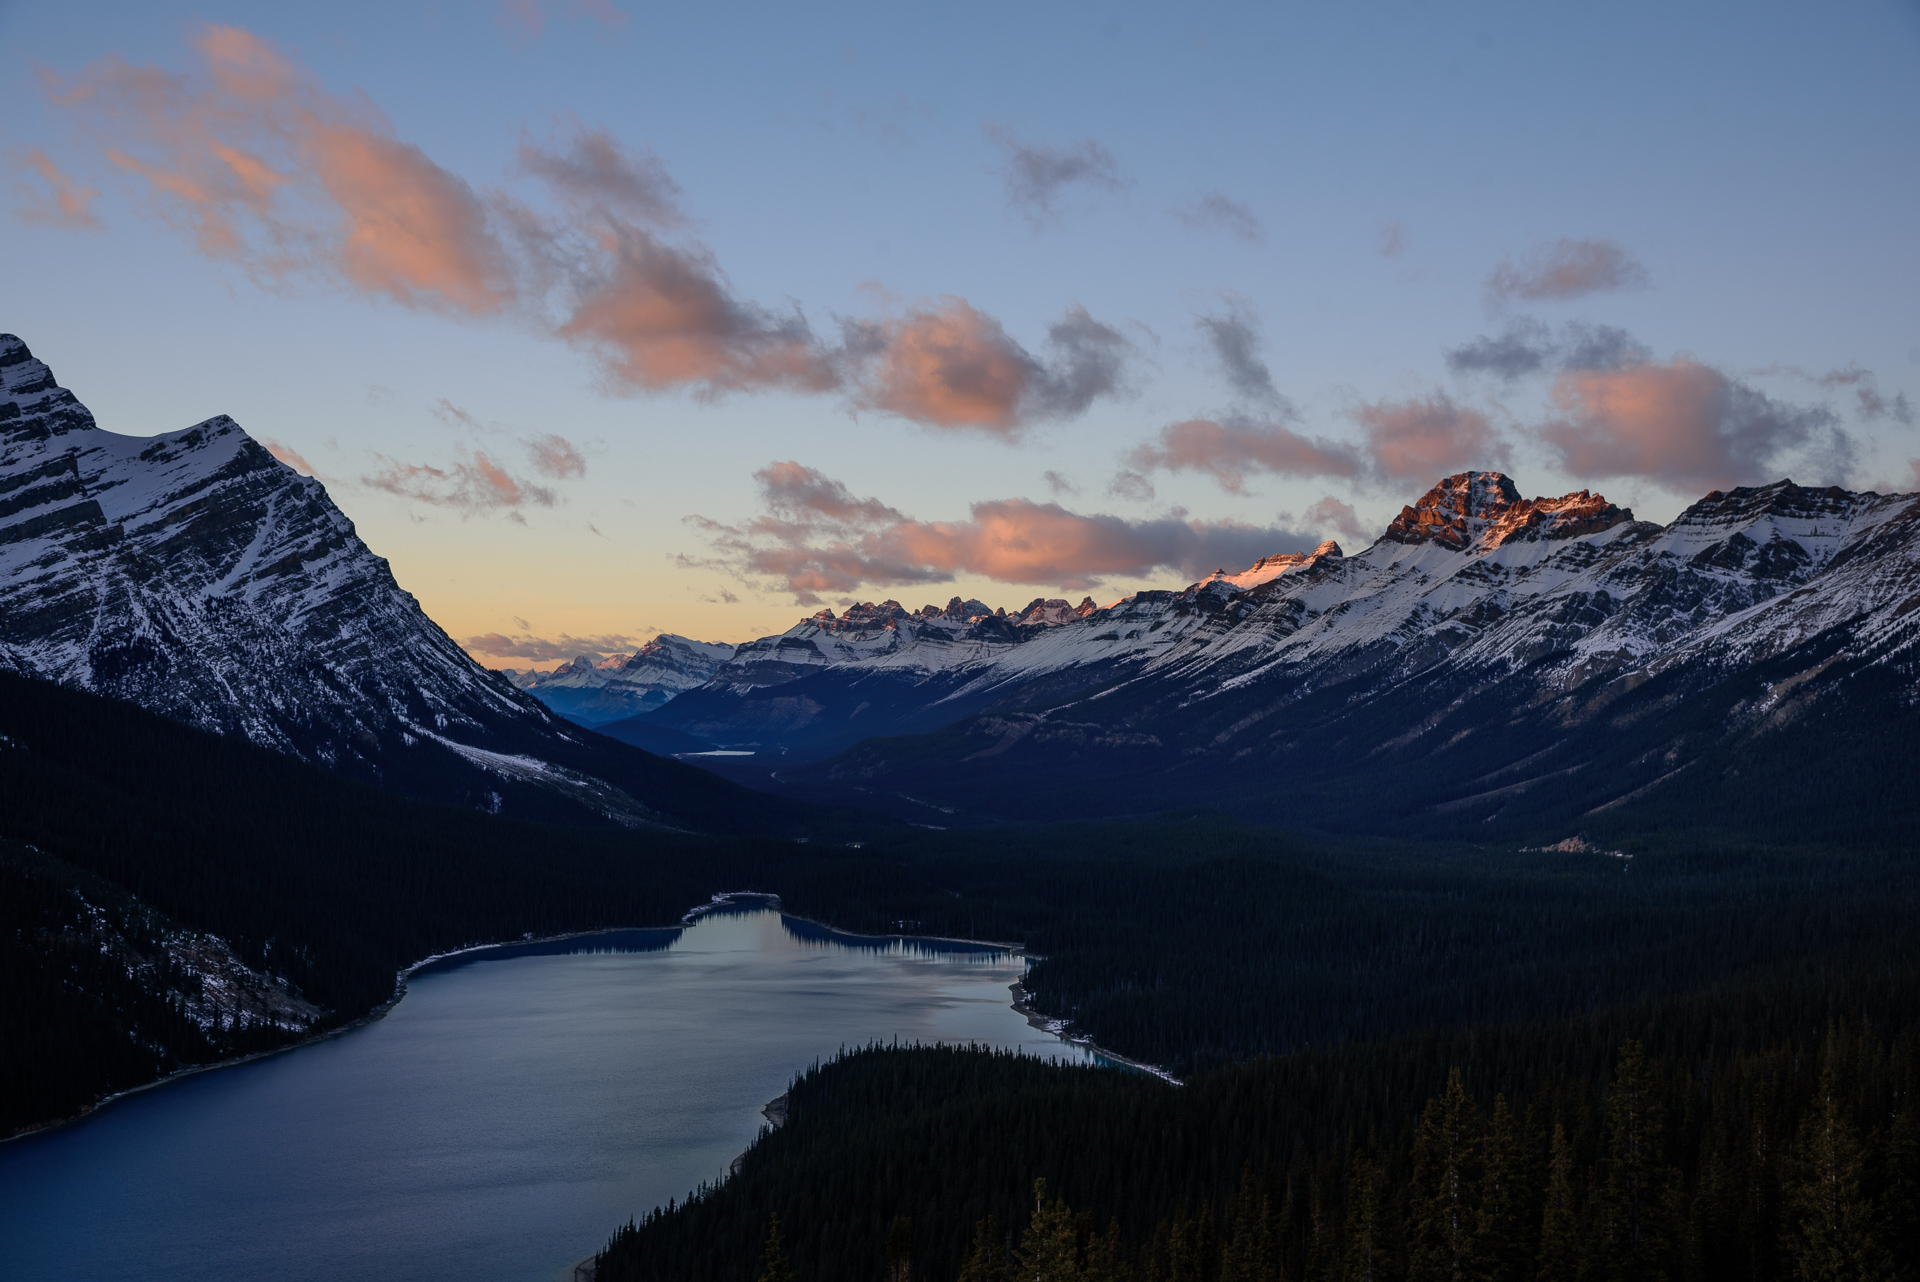
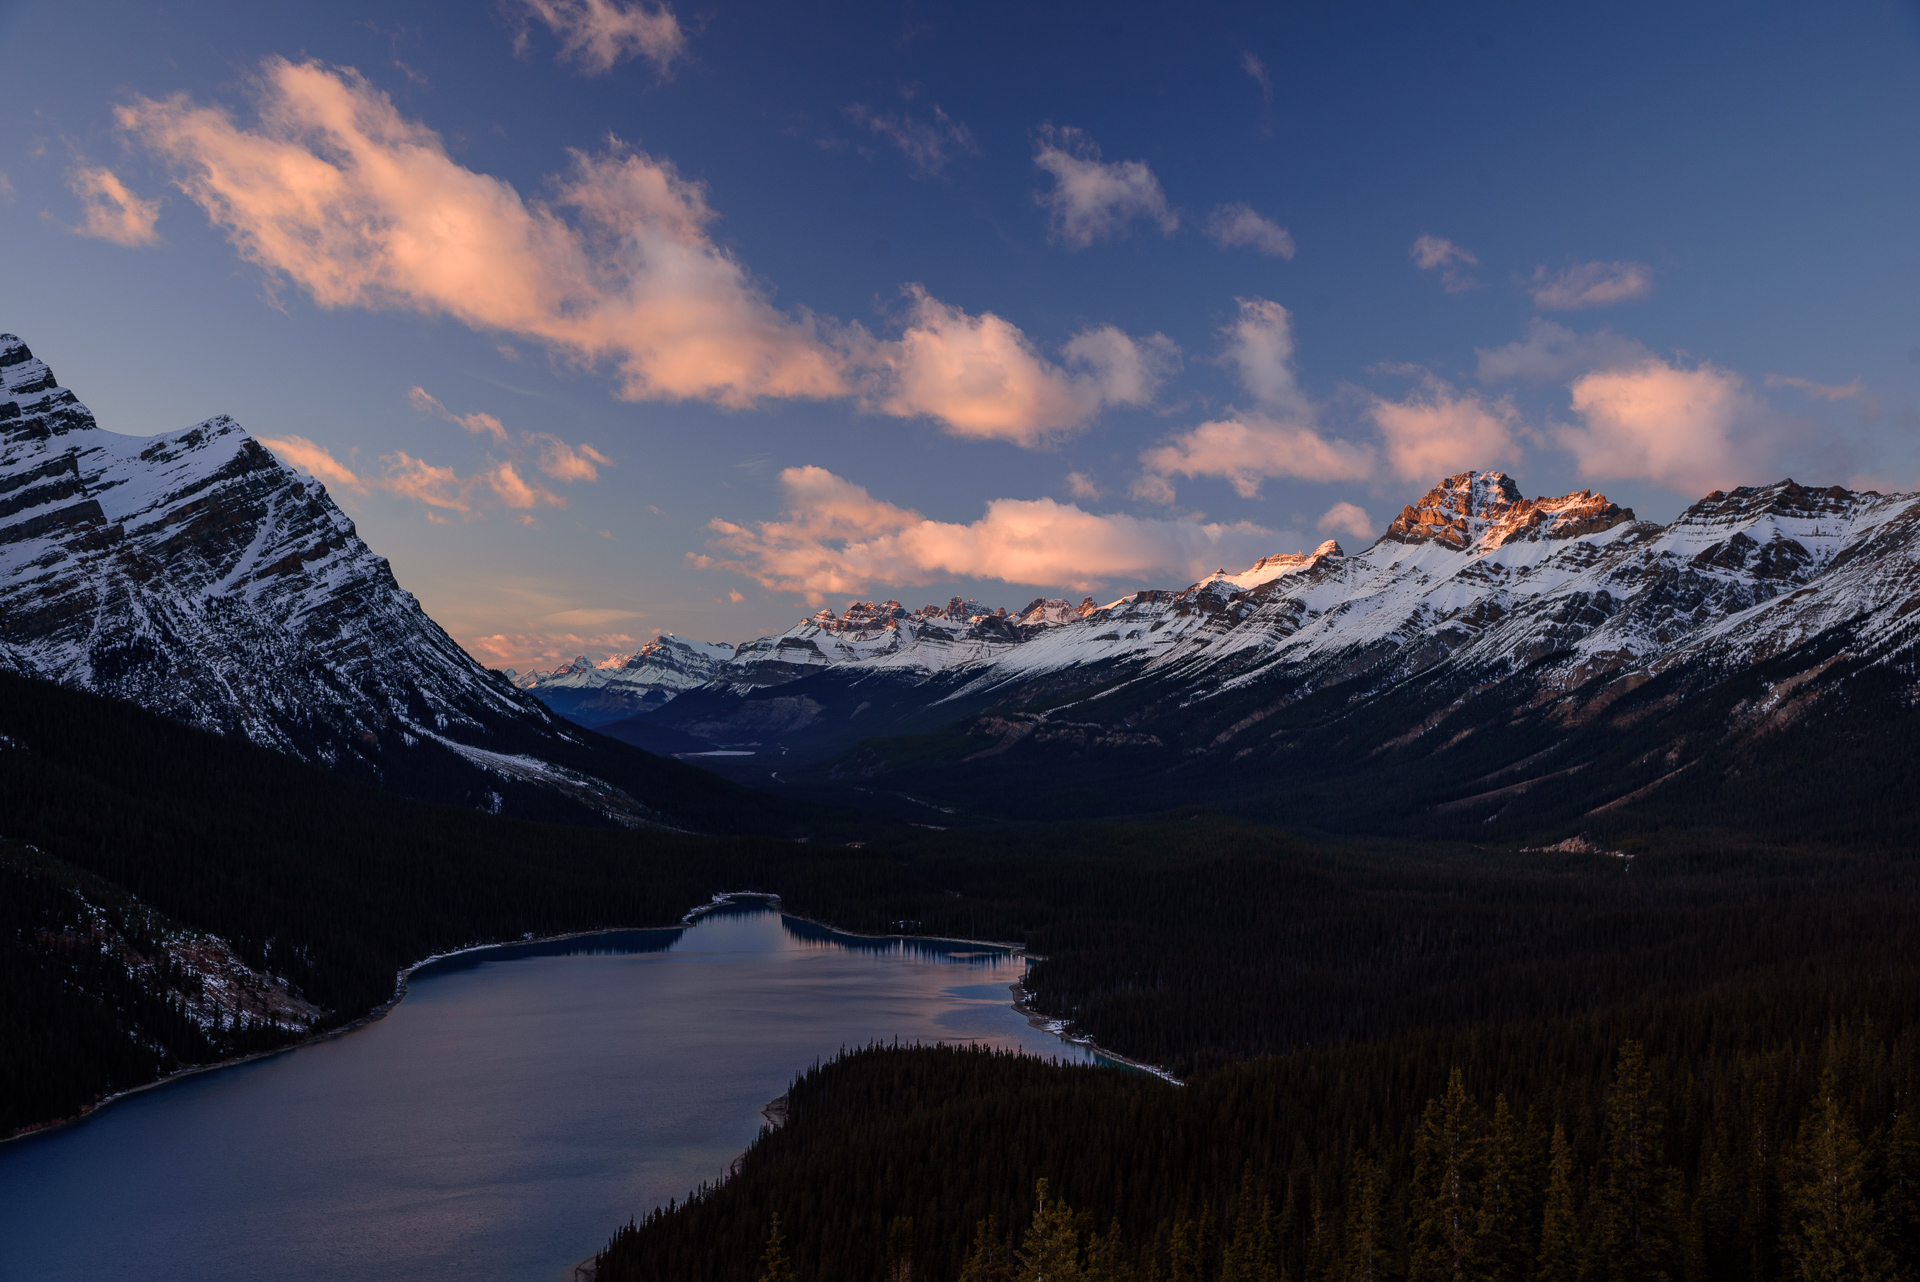
Here's a 91-second exposure as the sun was setting (using a polarizer as well as the ND filter). Dreamy:
BE THE LAST TO LEAVE
Sunset is over, the pink glow on the clouds is gone...time to pack up? Not so soon! Twilight is alright, and sometimes there's still color in the sky to play with in post. The photo below is an HDR that was taken half an hour after the long exposure photo above.

FINAL THOUGHTS
I use one or some combination or all of these techniques when traveling on location, to optimize my chances of coming home with the best possible image - I even write them down on a list so I don't forget any when I'm half asleep and hungry and overwhelmed by the scale of the scenery. During these two hours at Bow Summit I took over 650 frames (many of that for panoramas), but I only wanted one: the ever-illusive perfect image. I didn't get it, but I created some decent ones in the attempt, and when I return to Peyto Lake I'll have a more informed gameplan. Landscape photography is an art, but underlying that art is a process and a methodology. Behind the "magic" is a whole lot of trial and error.