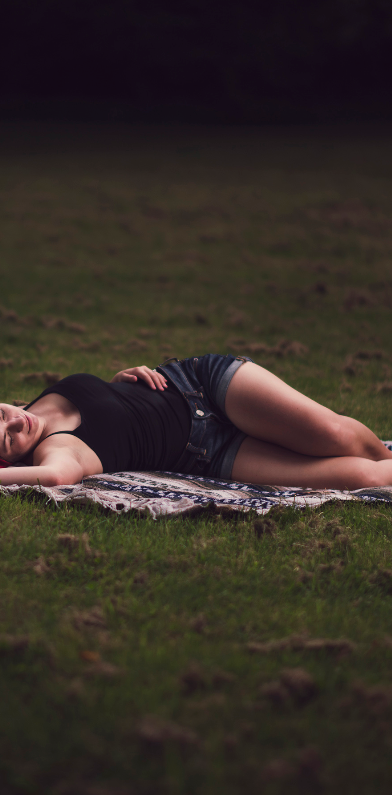
I took these photos about a year ago as an experiment shooting in bright, hard, ugly midday sun. My goal was to achieve a "confusing" look with the photos. Because of the time of day the surroundings are naturally lit in a specific light from a very specific direction, in this case the sun was almost directly camera center and very high in the sky, typically not a great way to shoot since it will create very bright highlights and very dark shadows.
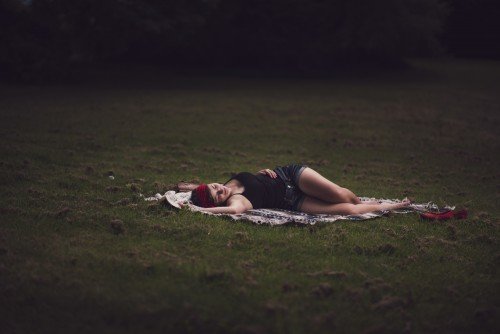
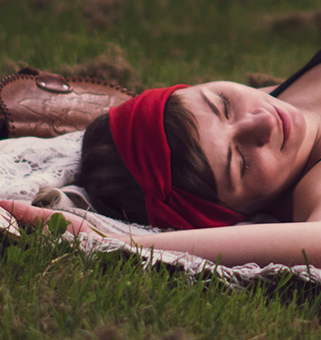
In the first image, if it were to be shot completely with available light (sunlight in this case) Sabrina's face would be very very bright on the upturned side, with a very hard edged shadow fading quickly into almost black on the downturned side. The soft shadows on her legs would have rendered more as very stark, hard edged lines with a very sudden difference between the brights and darks.
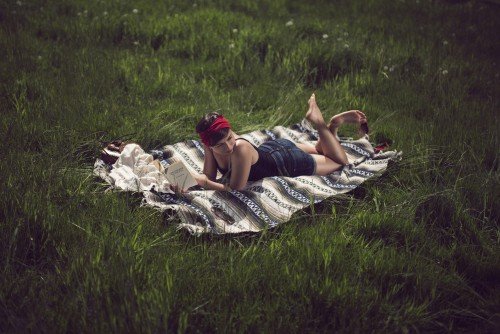
You can see this more clearly in the second image if you look at the shadow on her left (closest) leg. There is a strong shadow coming across her lower thigh.
If you look you can also see quite clearly a very hard edged shadow making up a perfect outline of her upper body on the blanket.
With such a hard shadow you would naturally assume a single, very bright and (relatively) small light source, yet we also see that there is a shadow going over her left ankle obviously caused by her crossed leg.
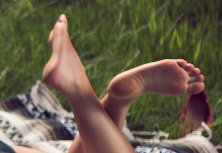
Where is this shadow coming from? And come to think of it, how is the camera facing side of her body not in shadow, yet it is still casting a shadow on the blanket? Why is her upper body casting a shadow on the blanket but her legs aren't?
What the heck is going on here??
I'll tell you what's going on here. I've got a very powerful artificial light with a giant soft light modifier on it directly to the right of the camera, just out of the frame. For you gearheads out there the strobe is an Alienbees B800 with a Silver 64" PLM and white diffuser.
In this image I've tried to balance the brightness of the sun with the output of my artificial light, creating an image that essentially has properly exposed areas that it naturally shouldn't.
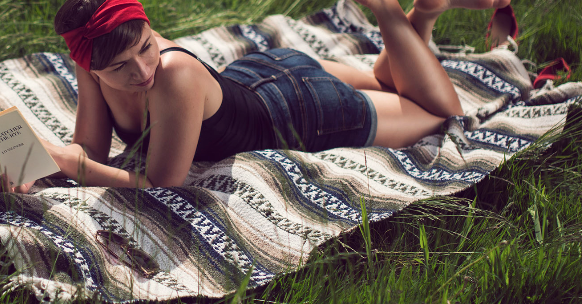
Back to the first image
The first photo is my favorite, and I feel like it is more subtle than the second, which I like. In this image you can see that the background and foreground are much darker than the subject.
I wanted the light source to be very specific, but still give that "odd" look by having the surroundings uniformly lit. I was able to turn my light up to a level that actually overpowered the brightness of the sun. This gave me the desired effect of essentially turning my own light into the "key" or main light source of the image, and turning the sun into my secondary light source. I positioned my strobe high above and to the right, angled down towards Sabrina, in effect mimicking the way the sun shines, but from a different direction and with much more pleasing shadows. In my opinion it is a much simpler image, but you can still see the peculiarities of the light which is what I was going for.
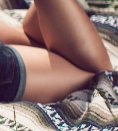
I shot these images with a very shallow depth of field (f1.4 actually) and used a very strong neutral density filter to help me achieve that. I also exaggerated the effect of the light quite extensively using photoshop to manually brush in the less noticeable highlights and shadows. If you look closely you can see it here
and here
By exaggerating the highlights and shadows of wrinkles in fabric and lines of the body you can make an image look almost 3D. It gives a lot of depth to a shot if it is done properly, not that I have necessarily done it properly here, I'm an amateur at this type of photography, but I think I didn't muck it up too badly ;)
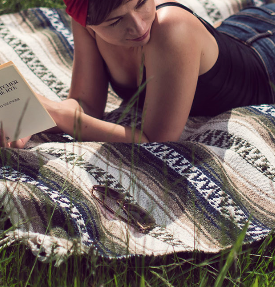
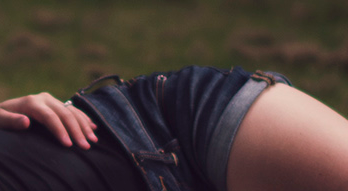
You can also use this process to create some depth in your photos by bringing out more subtle parts of the image like I did here:
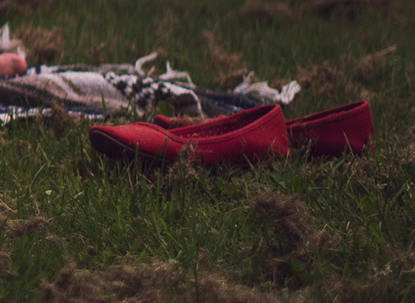
The shoes were originally quite flat looking, but I was able to really bring them out in the photo by exaggerating the highlights along the top lines, and darkening the shadows a touch.
In the day's of film this process was done as well, it was known as dodging and burning, and it still is called that by some, but it's now mostly done digitally.
Conclusion
I just wanted to put that there so that I didn't give such a jolt to the end of this post. I never know how to properly conclude a post so I mostly just stop typing, put in tags, and throw it out there... I really gotta work on that. Anyhow I hope you enjoyed the photos and my breakdown of how I shot them! As always if you like my post feel free to toss me one of those sweet sweet up votes, and be sure to follow me @dexter-k on Steemit for more original work coming up all the time.
Thanks for reading!
- Dexter