RAW Can Reveal Detail You Never Thought Existed
|
Today I got up at 4 am and drove to a geological park in northeastern Taiwan (Google map) to try my luck at a sunrise photo. I had checked the weather forecast the night before, and there was a chance of rain, but should turn clear by 7 am. It turned out luck was not on my side today, as the weather was pretty bad and the rain was persistent. However, there were some breaks in the clouds resulting in some color in the sky and thanks to the RAW file, I was able to post-process one shot into a semi-decent photo.
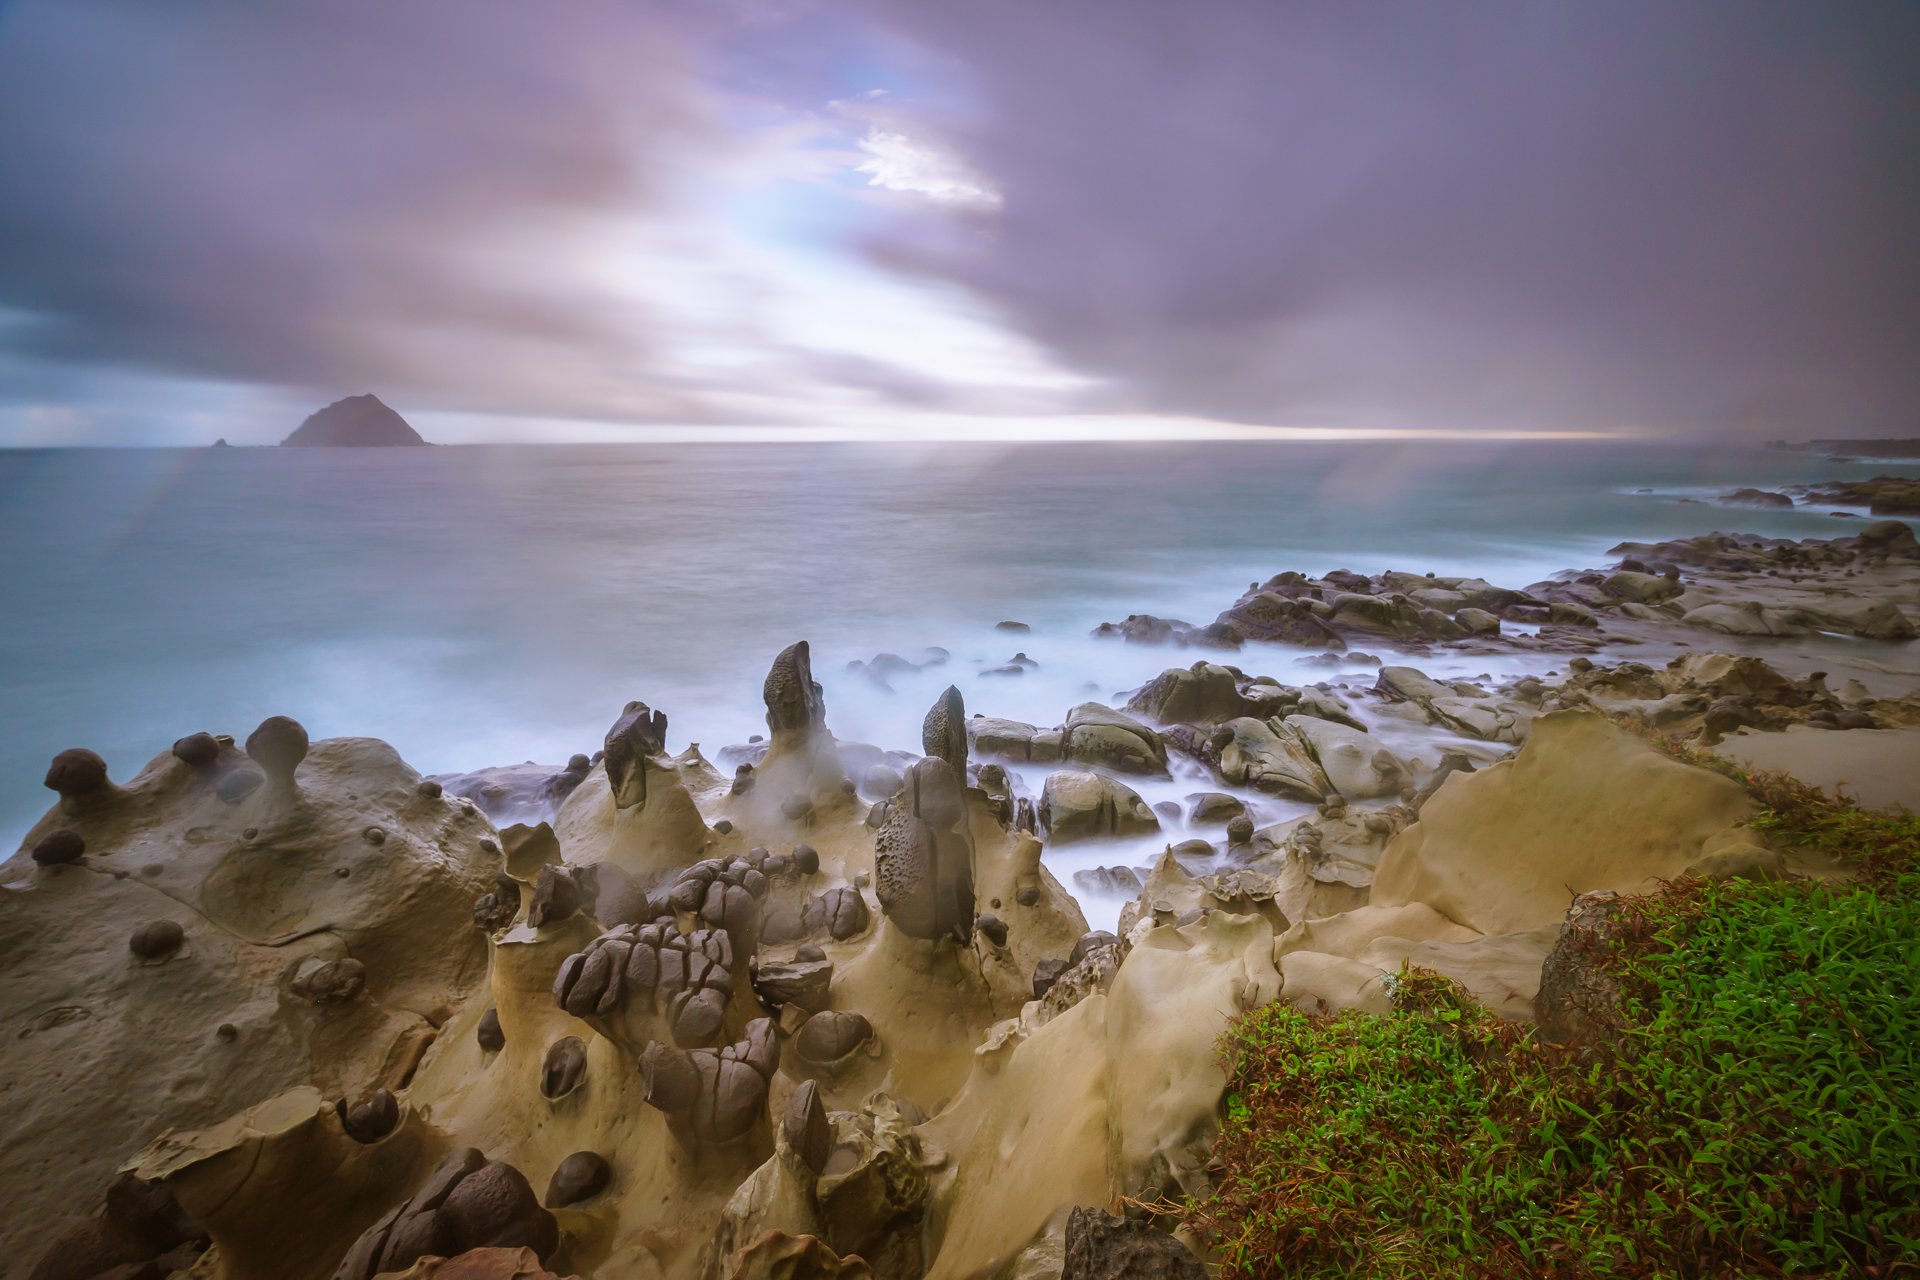
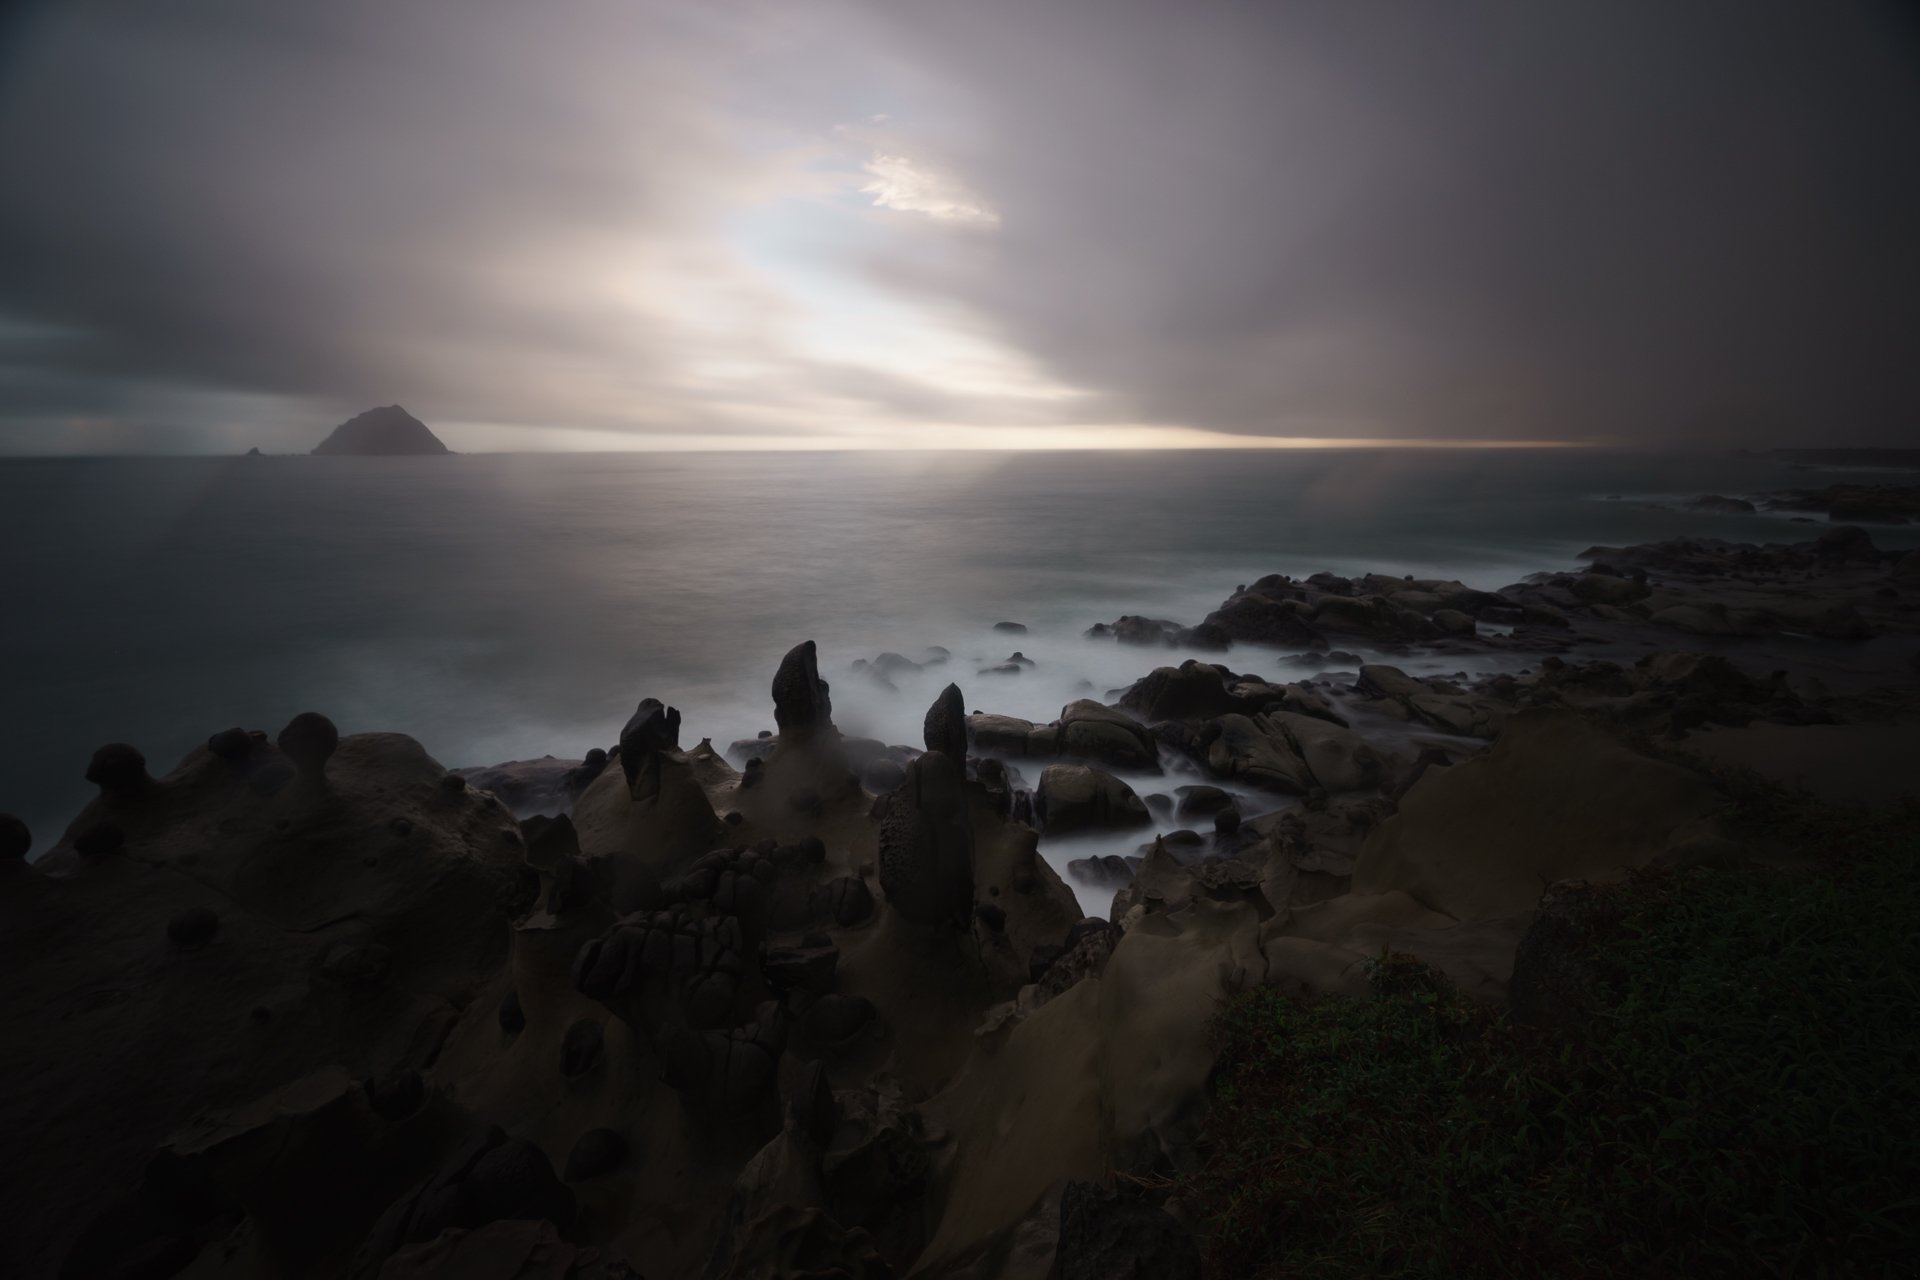
Here's the comparison of before and after:
Before editing |
After editing |
The basic steps I took to edit the RAW file in Adobe Lightroom was as follows:
- Increased base exposure by 2.3 stops.
- Reduced highlight by 100.
- Added a graduated filter to darken the sky even more.
- Increased the vibrance by 29.
- Increased exposure in the shadows by 31.
- Bumped up saturation to 64.
- Brought down saturation for yellows by 27.
- Added a graduated filter for the rocky cliffs to shift its color temperature slightly.
- Increased clarity by 21.
- Added some slight dodging and burning to bring focus more towards the rocks in the middle.
- Added some sharpening and noise reduction.
The color shift introduced by the 10 stop ND filter brings a more interesting sky, and I didn't correct for it. However, I corrected the color shift in the rocky cliffs.
And that's it, usually when there is nice weather and nice light, I don't have to manipulate so much. But when faced with challenging shooting conditions, shooting in RAW usually can save the day.
