Since there is a JavaScript library for Steem (Steem.js), it is [relatively] easy to create a web application to consume data from the Steem blockchain - very much like the Steemit.com website itself does.
Let's build an application to query and display data!
Base HTML Template
For this tutorial, we'll include Bootstrap's CSS and FontAwesome for styling, as well as some helpful JavaScript libraries (Bluebird.js for Promises, Lodash for its Swiss Army Knife of useful functions, and Vue.js to help glue our HTML to the JavaScript code.
<!DOCTYPE html>
<html>

<head>
  <title>A Steemit Web App</title>
  <meta charset="utf-8">
  <meta name="viewport" content="width=device-width, initial-scale=1, shrink-to-fit=no">
  <link rel="stylesheet" href="//maxcdn.bootstrapcdn.com/bootstrap/4.0.0-alpha.6/css/bootstrap.min.css">
  <link rel="stylesheet" href="//maxcdn.bootstrapcdn.com/font-awesome/4.7.0/css/font-awesome.min.css">
</head>

<body>
  <div id="container" class="container">

  // Content goes here

  </div>
  <script src="//cdnjs.cloudflare.com/ajax/libs/bluebird/3.5.0/bluebird.min.js"></script>
  <script src="//cdnjs.cloudflare.com/ajax/libs/lodash.js/4.17.4/lodash.min.js"></script>
  <script src="//cdn.steemjs.com/lib/latest/steem.min.js"></script>
  <script src="//unpkg.com/vue"></script>
  <script>

  // Our script goes here

  </script>
</body>

</html>
Using the Library
Replace the placeholder script block in the HTML with the following:
  <script>
    {
      let vm = new Vue({
        el: '#container',
        data: {
          user: 'jfollas',
          userData: {
            profile_image: "",
            level: 0,
            xp: 0,
            power: 0
          }
        },
        watch: {
          user: function (u) {
            setDefaultUserProfilePic()
            refreshAccountData(u)
          }
        }
      })

      function calcLevel(v) {
        return Math.floor(calcReputation(v))
      }

      function calcXP(v) {
        let r = calcReputation(v);
        return 100 * (r - Math.floor(r))
      }

      function log10(str) {
        let $str = str.toString()
        const leadingDigits = parseInt($str.substring(0, 4))
        const log = Math.log(leadingDigits) / Math.log(10)
        const n = $str.length - 1
        return n + (log - parseInt(log))
      }

      function calcReputation(value) {
        if (value == null || value == 0) return 0;

        let neg = value < 0
        let reputation_level = log10(value) - 9;
        if (reputation_level < 0) reputation_level = 0;
        if (neg) reputation_level *= -1;

        return reputation_level * 9 + 25;
      }

      function setDefaultUserProfilePic() {
        vm.$set(vm.userData, 'profile_image', 'https://www.gravatar.com/avatar/000000000000000000000000000000000?d=mm&f=y')
      }

      function refreshAccountData(accountName) {
        return steem.api.getAccountsAsync([accountName])
          .then(function (result) {
            if (result.length == 0) {
              vm.userData = {
                profile_image: "",
                level: 0,
                xp: 0,
                power: 0
              }
              return
            }

            try {
              let profile = JSON.parse(result[0].json_metadata).profile

              if (profile.profile_image != null) {
                vm.$set(vm.userData, 'profile_image', profile.profile_image)
              }
            }
            catch (err) {
              do_setDefaultUserProfilePic()
            }

            vm.$set(vm.userData, 'level', calcLevel(result[0].reputation))
            vm.$set(vm.userData, 'xp', calcXP(result[0].reputation))
            vm.$set(vm.userData, 'power', result[0].voting_power / 100)
          })
          .catch(console.error)
      }

      refreshAccountData(vm.user)
    }
  </script>
Breakdown of what the script does
The first part of the script just sets up a viewmodel for Vue.js. This defines our page's data structure and sets up a watcher to detect when the user changes the username (i.e., when they want to query a different user).
calcReputation is the function that takes the raw reputation value like 5,044,141,002 and converts it into the friendlier value of 31.325.
calcLevel and calcXP are helper functions to break down that resulting simple reputation number. I think of this like a game where you must level up your character, so the "Level" is the whole number part of the Reputation score, and the "XP" is the percentage through that level.
Finally, refreshAccountData is a function that actually queries the Steem API for a given account, and sets the various properties in our viewmodel.
If you refer to the Steem.js documentation, you won't actually find a method named steem.api.getAccountsAsync([accountName]). But, you will find this:
steem.api.getAccounts(names, function(err, result) {
  console.log(err, result);
});
The pre-built library at http://cdn.steemjs.com/lib/latest/steem.min.js will be promisified by Bluebird when it loads, so all Node-style callbacks are also available as Promises simply by adding "Async" to the method name.
The .then() function of the Promise will be passed the success result from the callback, and the .catch() function of the Promise will be passed the error object from the callback, like this:
steem.api.getAccountsAsync(names)
  .then(function(result) {
    console.log(result);
  })
  .catch(function(err) {
    console.error(err);
  });
So, in our code, we call that API function with an array of account names to fetch (must be an array, even if there's only one name, like in our example). When the data comes back from the server, our then() function is called.
If the result is empty for some reason, then the code sets a default value for the viewmodel data, and returns. Otherwise, it first tries to parse the profile metadata property of the returned data in order to get the user's picture URL. This data is not always present, and the JSON is not always valid, so be sure to wrap it in a try-catch. In this event, a default "mystery man" image from Gravatar is used (the reason why will make more sense in the next tutorial).
Finally, we calculate and set the Level and XP (described above) as well as the Voting Power using data from the account object.
Displaying the Data
What good is fetching the data if you cannot see it? Add the following HTML inside of the <div id="container"> tag:
<div class="row">
<div class="form-group col-6">
<label>User Name</label>
<input class="form-control" type="text" v-model.lazy="user">
</div>
</div>
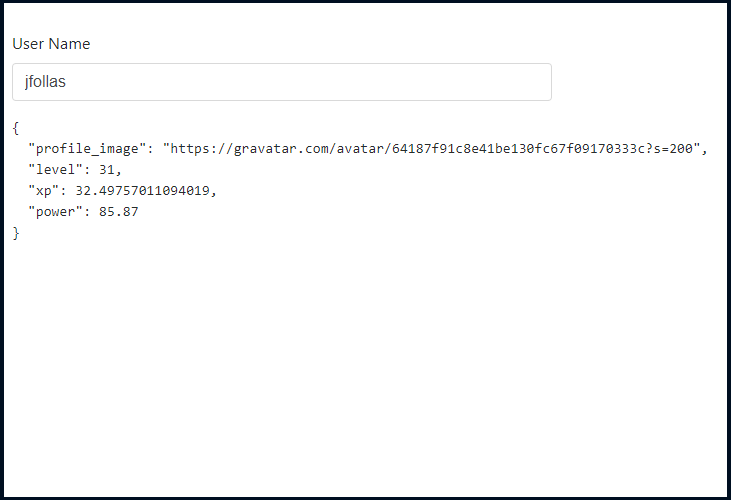
<pre>{{ userData }}</pre>
Breakdown of what the HTML does
This HTML snippet is very basic Bootstrap and Vue.js markup. Using Bootstrap styling, we render a textbox and bind it to our viewmodel's user property. We use a lazy binding here so that our watcher function doesn't fire off with each keystroke (it will fire once the control loses focus).
Then, for simplicity, we use a "Mustache" template to render the userData object from the viewmodel. Vue.js will stringify this for us, resulting in a nicely formatted JSON string within the <pre></pre> element.
Example:
(Next Post: Part 2)