Contribution to the Open Source Software - Audacity

For many years, I have used Audacity for my video teaching, particularly in the area of recording piano songs for my music students. It is true that we can use midi to record our music with our synthesizer and then change the midi files to mp3 files. Still, the quality of the recording is not the same as when my piano recording is done in a hall using external microphones.
The problem many people face is that there are usually a lot of background noise when we do external mic recording. The cars would be beeping. The water will be running in the background. Someone is hammering upstairs. The baby crying in the next room. The taps in the washroom are on. The cars are honking outside. The ambulance suddenly appears. So how can we get rid of these annoying background noise?
Audacity software is the solution to remove background noise.
Audacity is an open source cross platform audio software
You can find the open-source code in the Github website here:
https://github.com/audacity/audacity
As you can see, we can use audacity for multi- purpose. You can do multi-track recording and editing. The editing itself is a school of learning on its own and you get better at it with experience.
Why is there the need to clean the files?
For this post, I want to concentrate on teaching you how you can 'remove' background noises from your recording using Audacity. For those of you who teach online schools, you need to clean up your audio files so that your students have good experiences following your lectures.
Cleaning up audio files is not just for music producers, but also for everyday online teachers who need to upload lecture videos onto their online school.
Step 1 Download the Audacity Software
Here is the Homepage of Audacity Platform:
http://www.audacityteam.org/
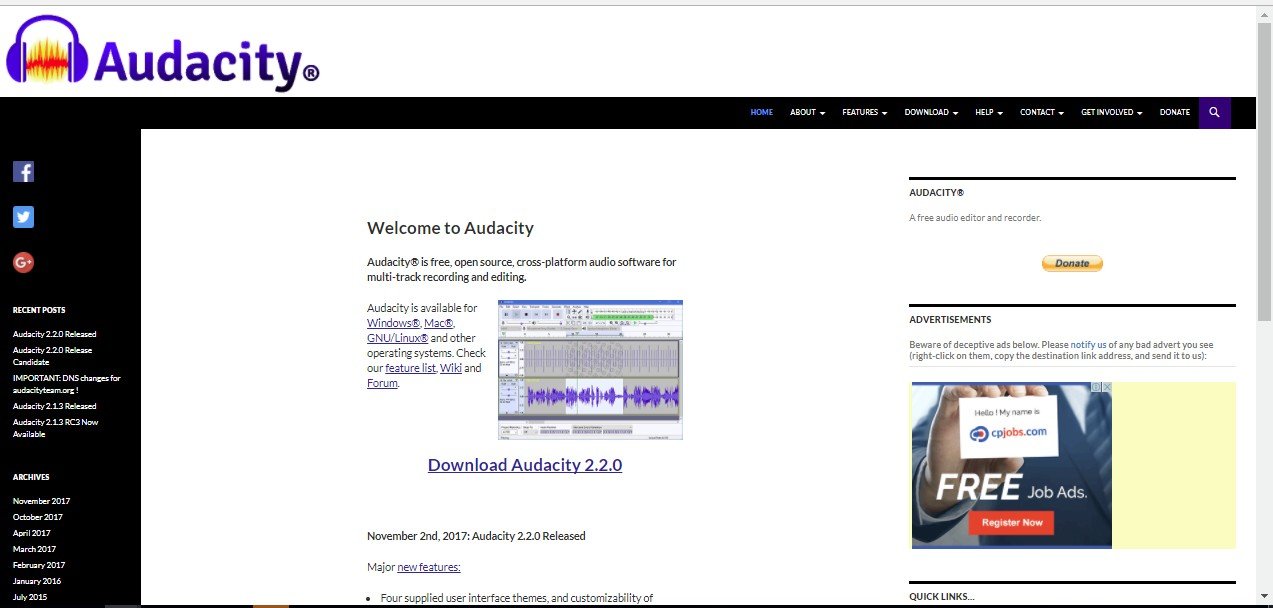
You can download the software by clicking onto the following link:
http://www.audacityteam.org/download/**
The newest release now is Audacity 2.2.0
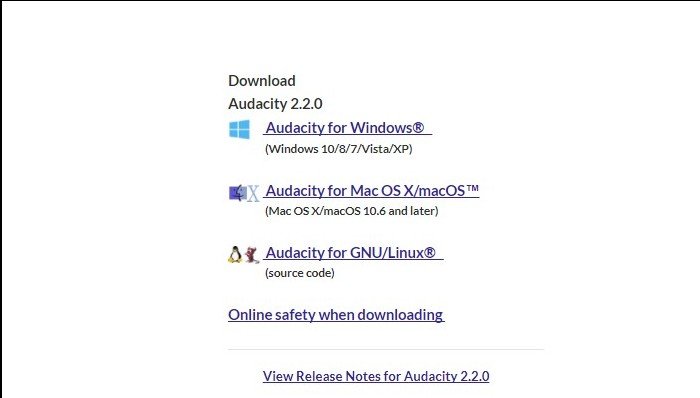
Step 2: Download this extra plug-in
Since we are working with mp3, you also need to download this special plug-in for audacity to work for you.
The plugin is called Lamemp3 Encoder.
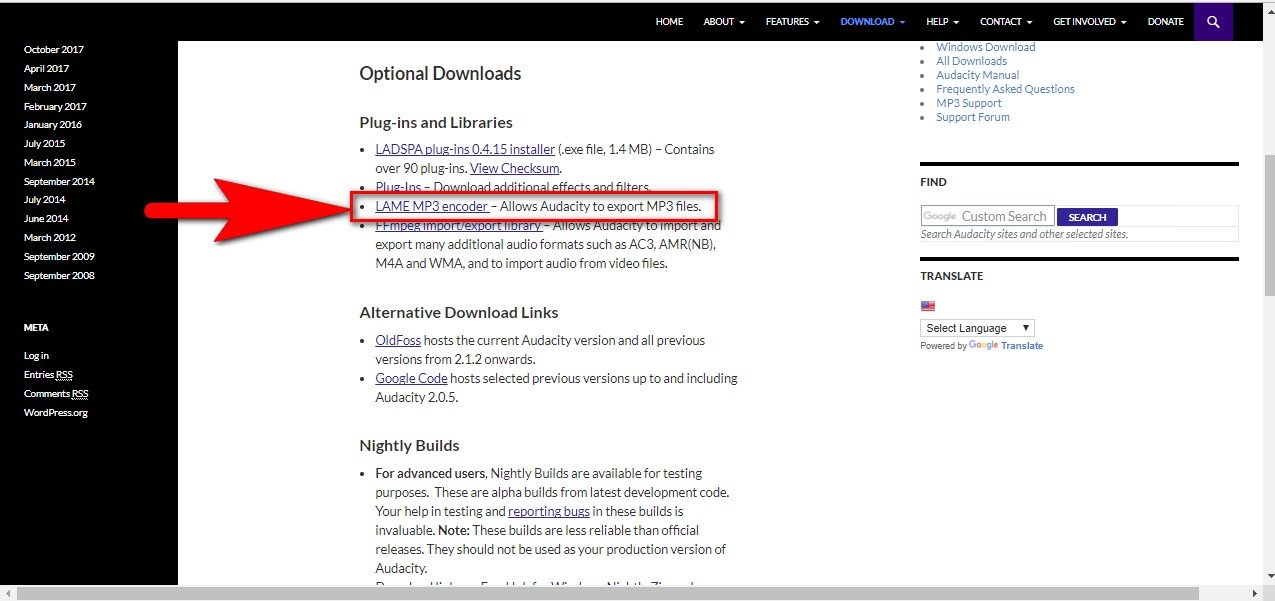
I put in the red box for you so that you can click on that link to download the plug in. Without this plug in, the mp3 will not get exported when you finish the audio cleaning.
Step 3: Install the software into your comupter
Install both the software and plugin to your computer and you are all set to go.
Step 4: Upload Your Recorded File in .wav format:
Choose from your computer the wav file that you want to clean up.
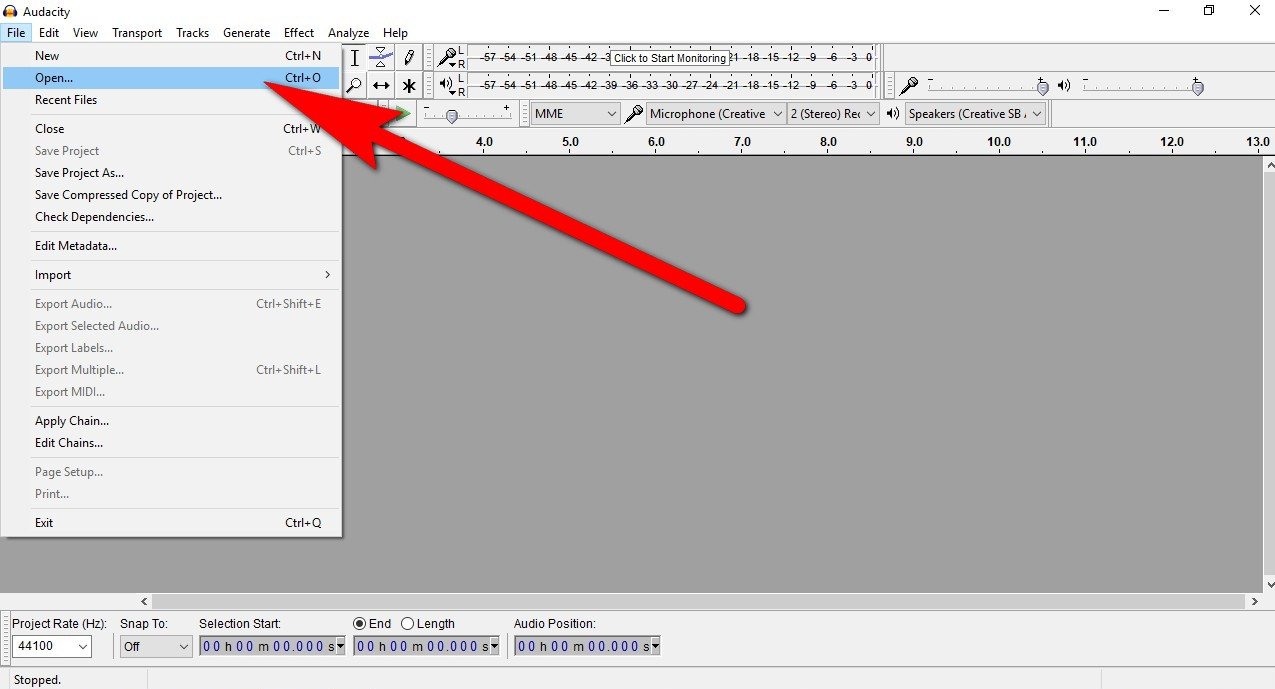
- Choose File.
- Click Open.
Step 5: The wav file
After you have uploaded your wave file onto the audacity program, you will see the waves in this kind of format on your screen.
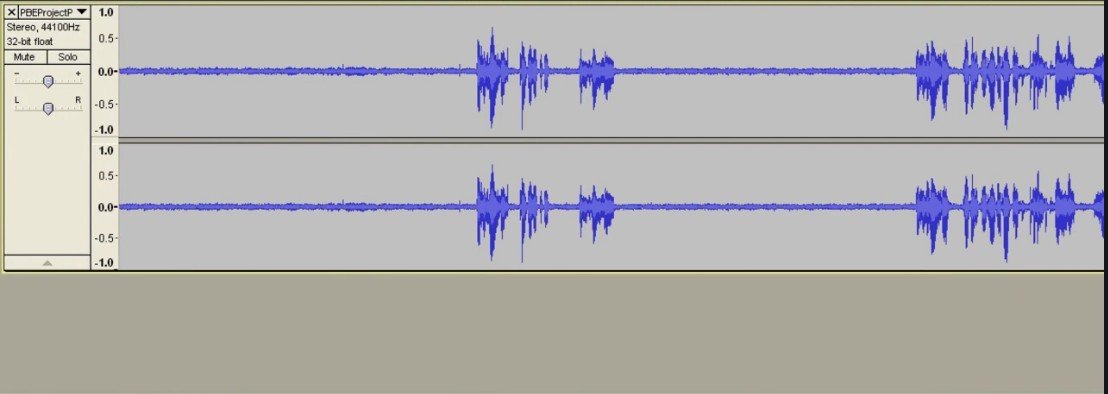
The waves show the audio part where you are speaking. The other fuzzy parts with no waves are background noise. As you can see, they create 'noise' that are not pleasant.
Step 6: Highlight part of the Background waves
Now you need to get a profile of the background noise that is recorded in your audio.
The following screen will show you what to do.
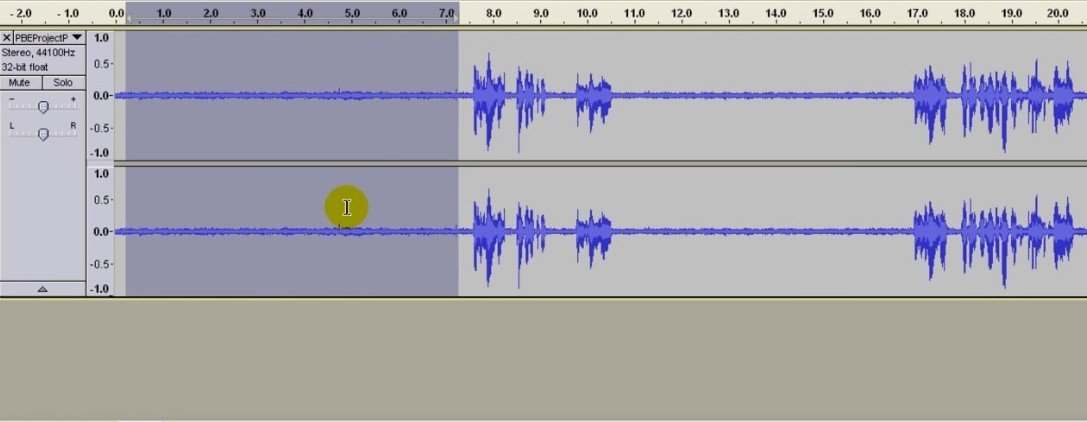
Left click your cursor and drag the cursor to cover a part of the background noise. You want to get a sample of this background noise for audacity to clean up your file.
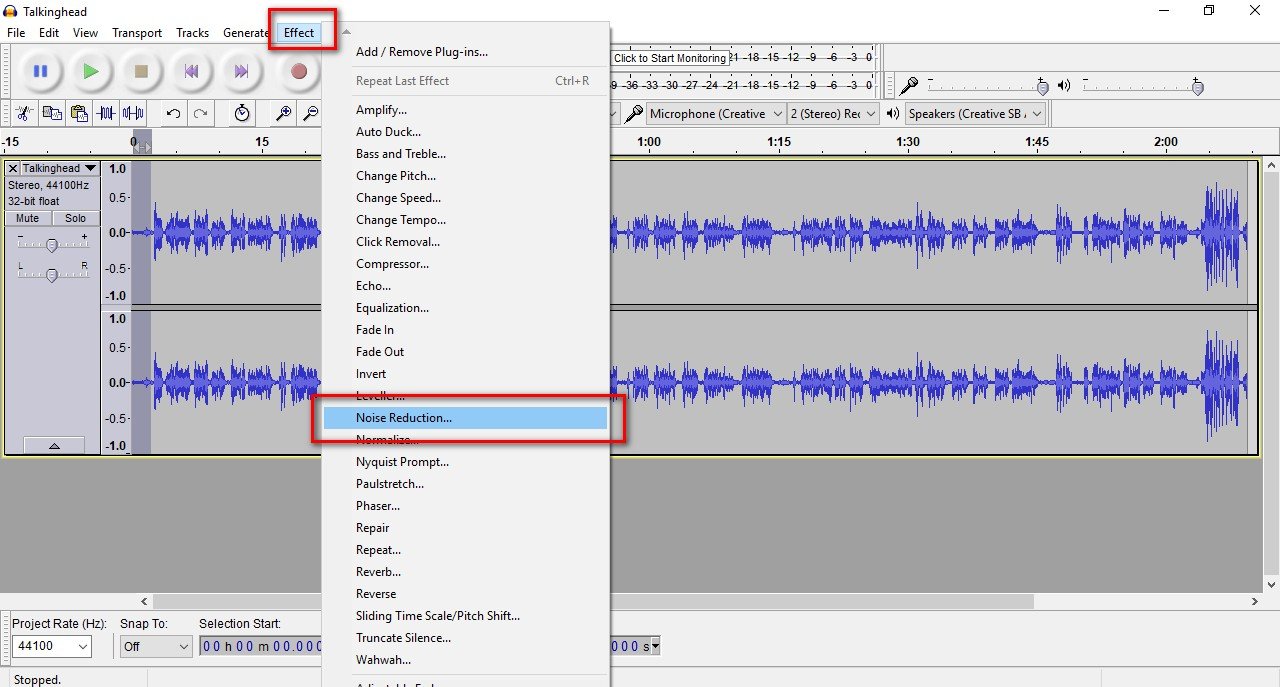
Step 7 Choose Effect + Noise Reduction
After you have highlighted a sample of noise background, go to Effect in the upper row.
A menu will drop down from there.
Then choose "Noise Reduction.
Take a look at the following screen shot and you will know what to do:
Step 8: Get Noise Profile
When you click on the Noise Reduction, the following screen will pop up.
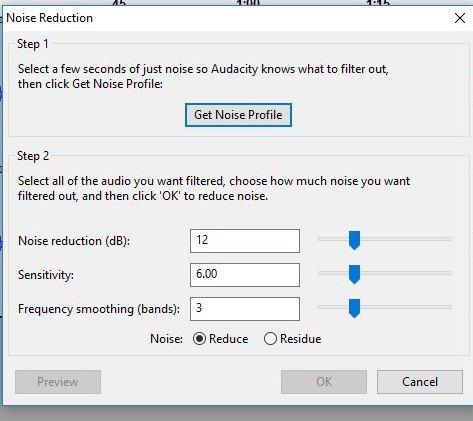
The setting I have there in the screen shot is as follows. These numbers will serve the purpose for you:
Noise reduction dB: 12
Sensitivity: 6
Frequency Smoothing Band: 3
Step 9: Click Noise Profile
After you checked that the settings are all correct, you are now ready to click on the Noise Profile Box.
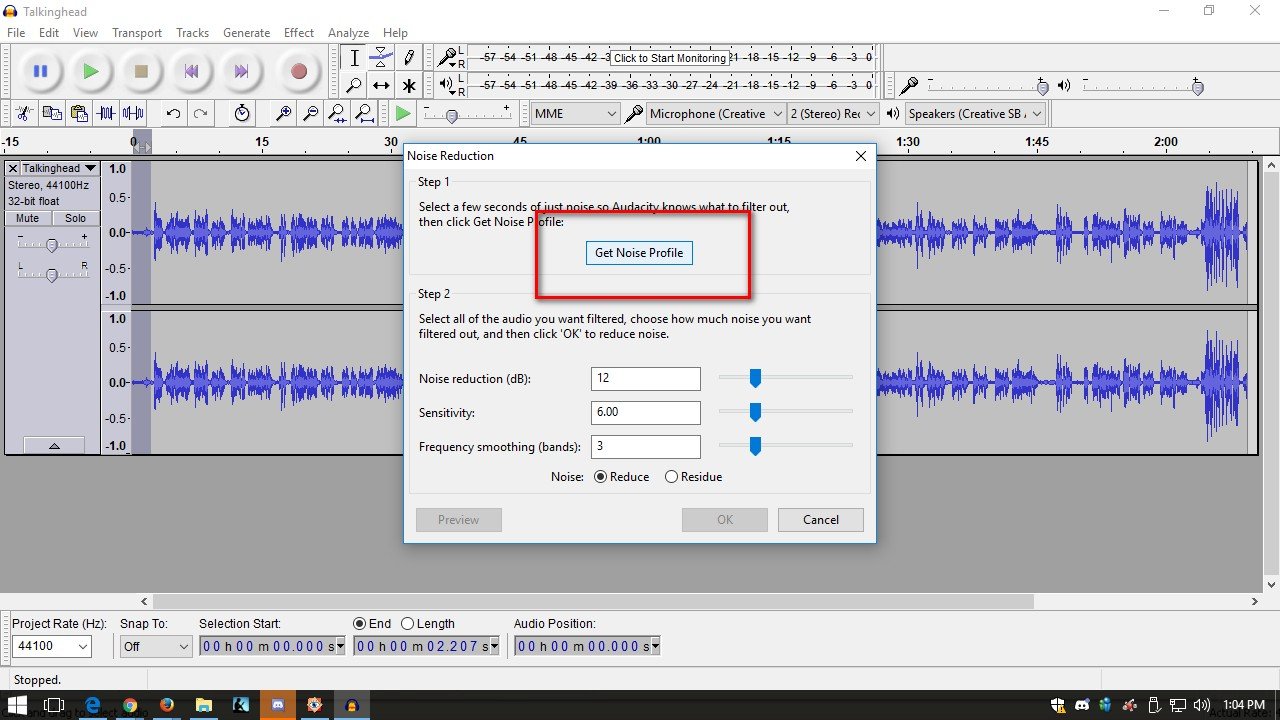
The above screen shot is what you see on your computer with the audacity program there. By clicking on the Noise Profile, it registers those noise waves for audacity to clean up.
Step 10 - Highlight the Entire Wave File
After you got the Noise Profile, it will take you back to your wave file in the audacity program.
What you need to do now is HIGHLIGHT then entire file by using Ctrl + A.
In that way, the entire wave file is highlighted.
Take a look at the following screen shot:
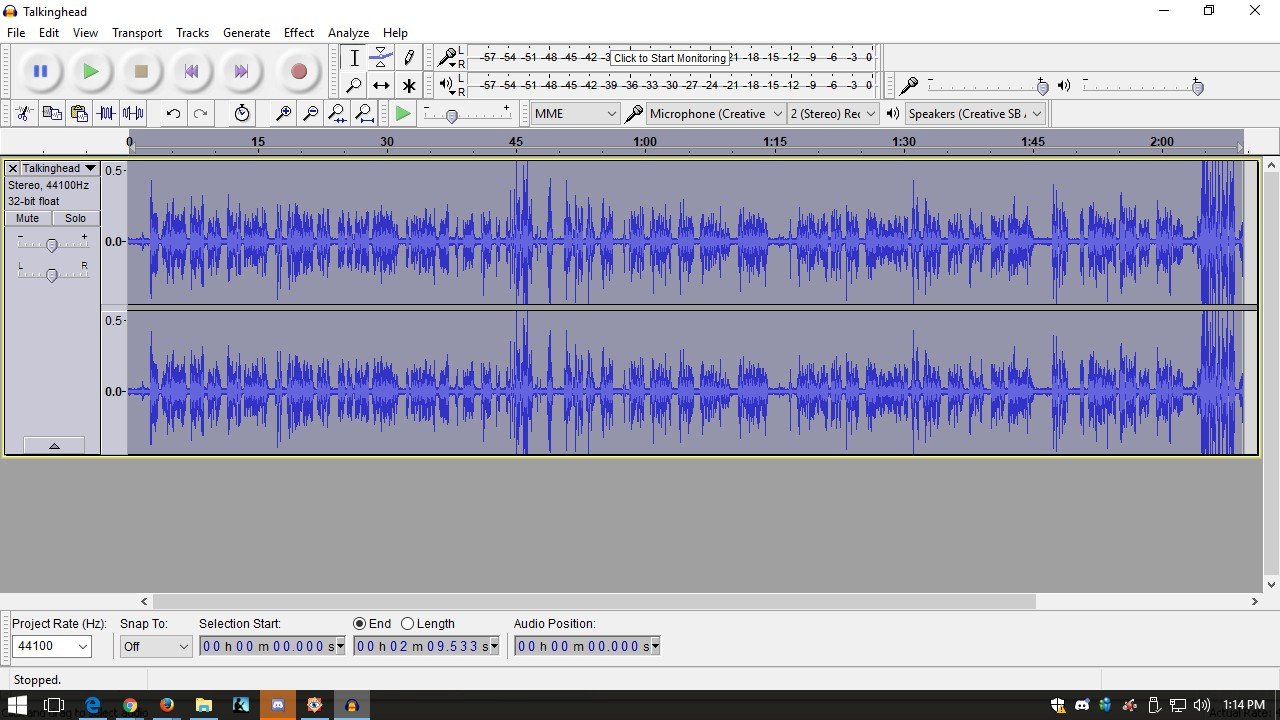
You can see that the entire wave file is completely Highlighted. Make sure you do that because you want to clean up the ENTIRE wave file, and not just one section.
You have already gotten the noise profile and you want this noise profile to apply to the entire wave file to clean up the noise.
Step 11- Go Back to Effect + Repeat Noise Reduction
You can now move on to the next step to tell audacity to clean up the entire audio removing all the background noise.
- Go to Effect
- Click on Repeat Noise Reduction
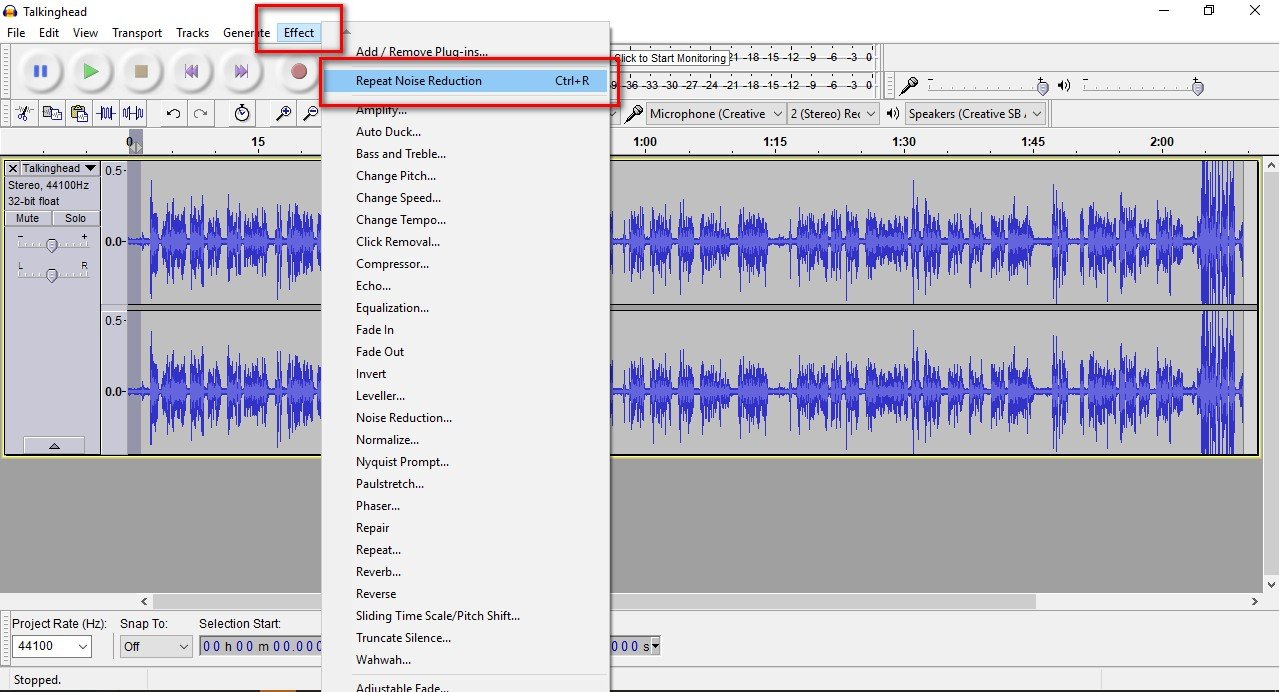
Step 12 - Noise Reduction Cleaning
When you reach this step, this step does the cleaning of your audio for you.
A box will pop up to show you that cleaning is in progress.
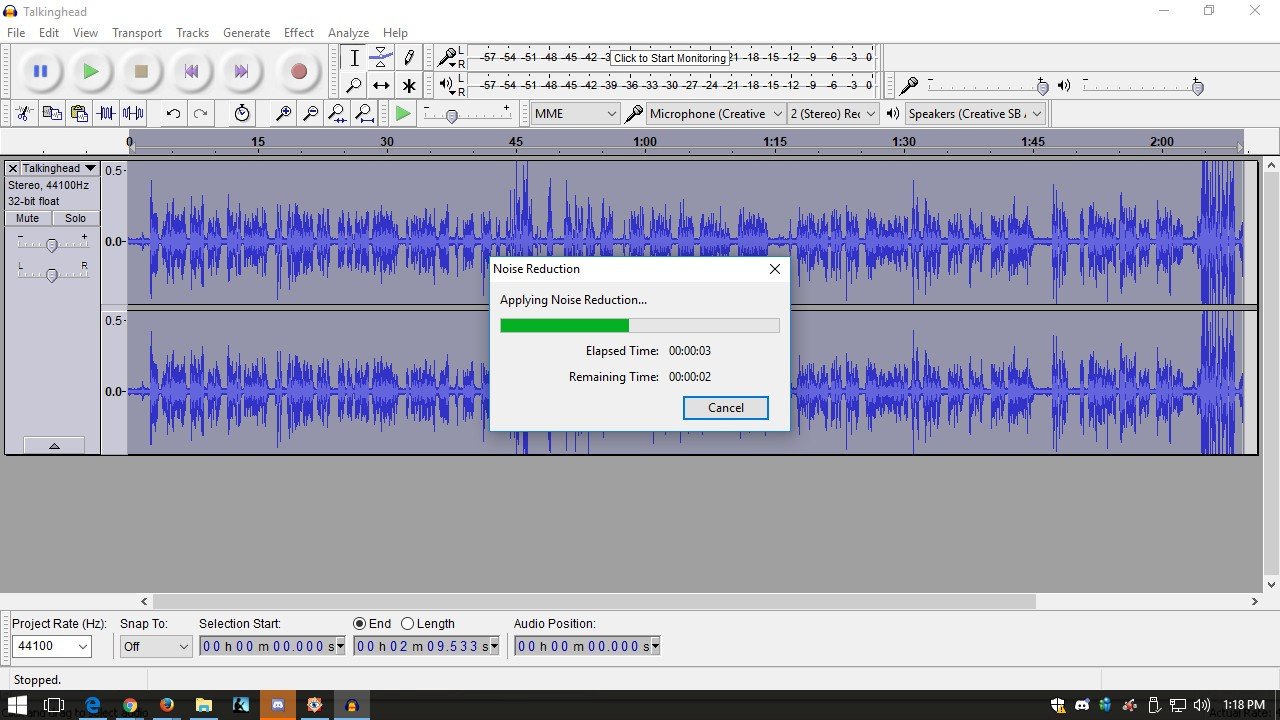
The Audacity program is now applying the noise reduction for you.
Step 13 - Wave File Complete Clean
In the following screen shot, you can see that the wav file is completely clean up and the background noise is all removed.
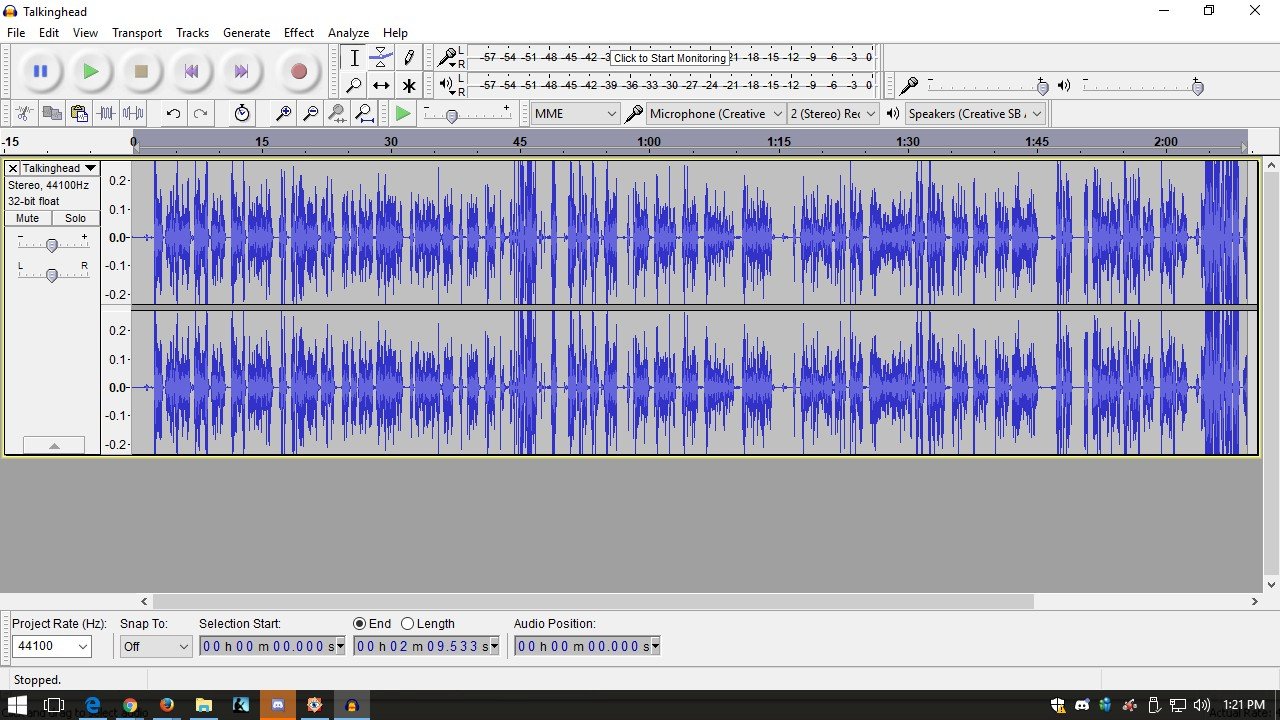
Do you notice that the line has thinned out in between waves?
When the background noise was there, you see short fuzzy waves there.
But now all these short waves are removed and clean.
It looks like a clean straight line.
Step 14 - Export your clean file to mp3
Go to the upper left hand corner to fine the File Tab.
A menu will come down for you to choose: Export Audio
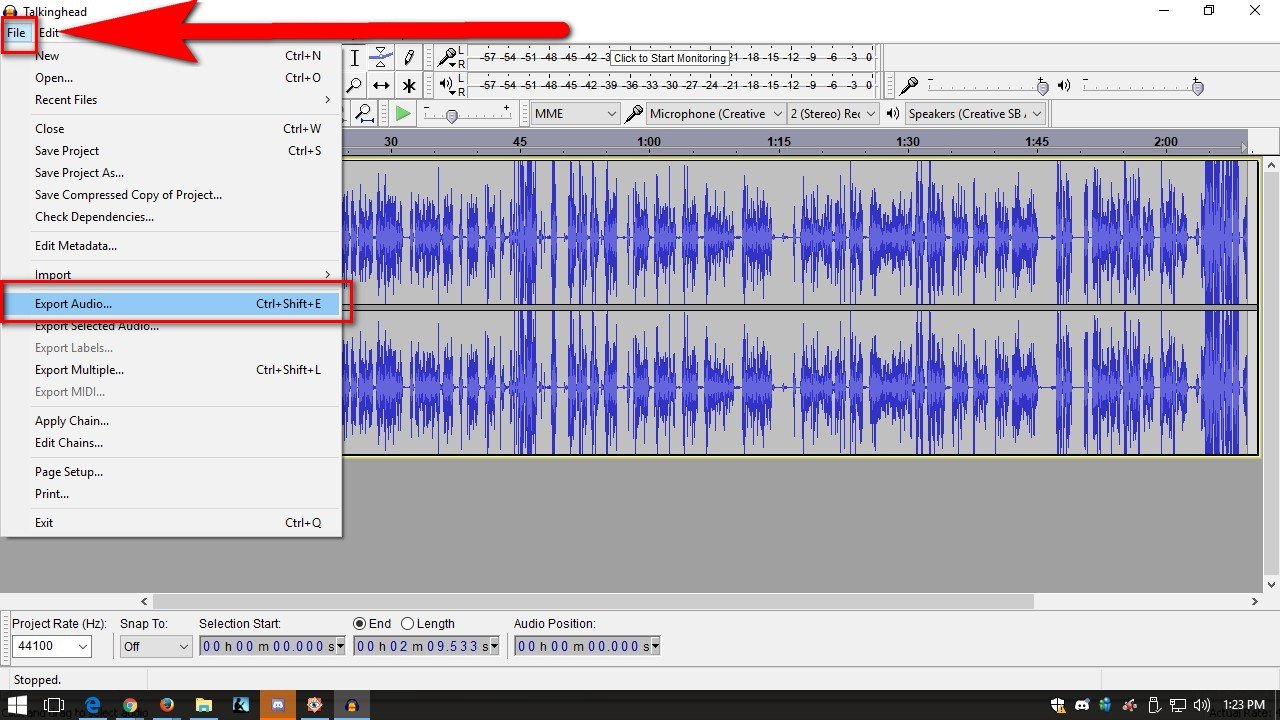
When you click onto the Export Audio, it will open to your computer files and you can choose where you want to save your file in.
Conclusion
That's it! If you just follow the simple above steps, you can clean up all your audio files for people to enjoy listening to your recording, whether it is music or voice recording. If you are an online instructors, make sure you that you clean up all your audio files effectively to give your students an enjoyable experience.
I hope you have enjoyed reading this Tutorial that I created for you today.
Thank you for your attention,
Rosa
@rosatravels
Thank you for reading this post!
谢谢你的阅读!希望你喜欢。如果你喜欢我的分享, 请点赞并跟随我。
You can contact me at Utopian here: @rosatravels
You can contact me at Steemit here: @rosatravels
You can contact me at my Website here: http://LearnPianoWithRosa.com/
Posted on Utopian.io - Rewarding Open Source Contributors
