Hi, I hope today you dare to learn with me this wonderful technique that is the soutache, this day I have brought you a pretty practical tutorial to make some beautiful tendrils are medium sized approximately 4.5 cm long by 3 cm wide this technique is simple all it is in practice and the love that you dedicate to doing everything is in you. It is always wonderful to learn something new, every day I am innovating and creating new designs this more than my work is my passion I am not the best in this and like everyone I learn more every day, I do it with love and with that same love and enthusiasm I teach you how little I am with my personal touch and my desire to help.
Let's start ...
MATERIALS:
Soutache thread or Rayón braid (varies the name according to your Country)
Scissors
Liquid silicone
Yesquero
16 laminated balines 2 mm
4 balines 4 mm
2 Base for Flat Tendrils
2 Apply drop type 1.2 cm
10 cm approx. of Strass of 4 mm
2 Earplug stopper
Thick or semi-leather fabric for the base
Anime
Fine tip eyebrow tweezers

STEP 1: We will cut 2 pieces of leather approximately 6 cm high by 5 wide. to 1.5 cm from the top we introduce the base of tendril by placing a little liquid silicon between the leather and the tendril base so that the base is fixed and will not be damaged or move with the use of the tendril, then we will place liquid silicon in the top part of the base.
STEP 2: We will cut an 11 cm long strip, at the top we will give it 3 turns with the help of our fingers, leaving a gap of approximately 5 mm in the middle so that we can place the 4 mm balin at the end. When the circle has been dried a little above we will place liquid silicon below and with the help of the eyebrow tweezer we will make a smaller circle in the bottom part also leaving a space in between to place the balin. Below these circles that we have just done we must place more liquid silicon and proceed to stick the drop applique.
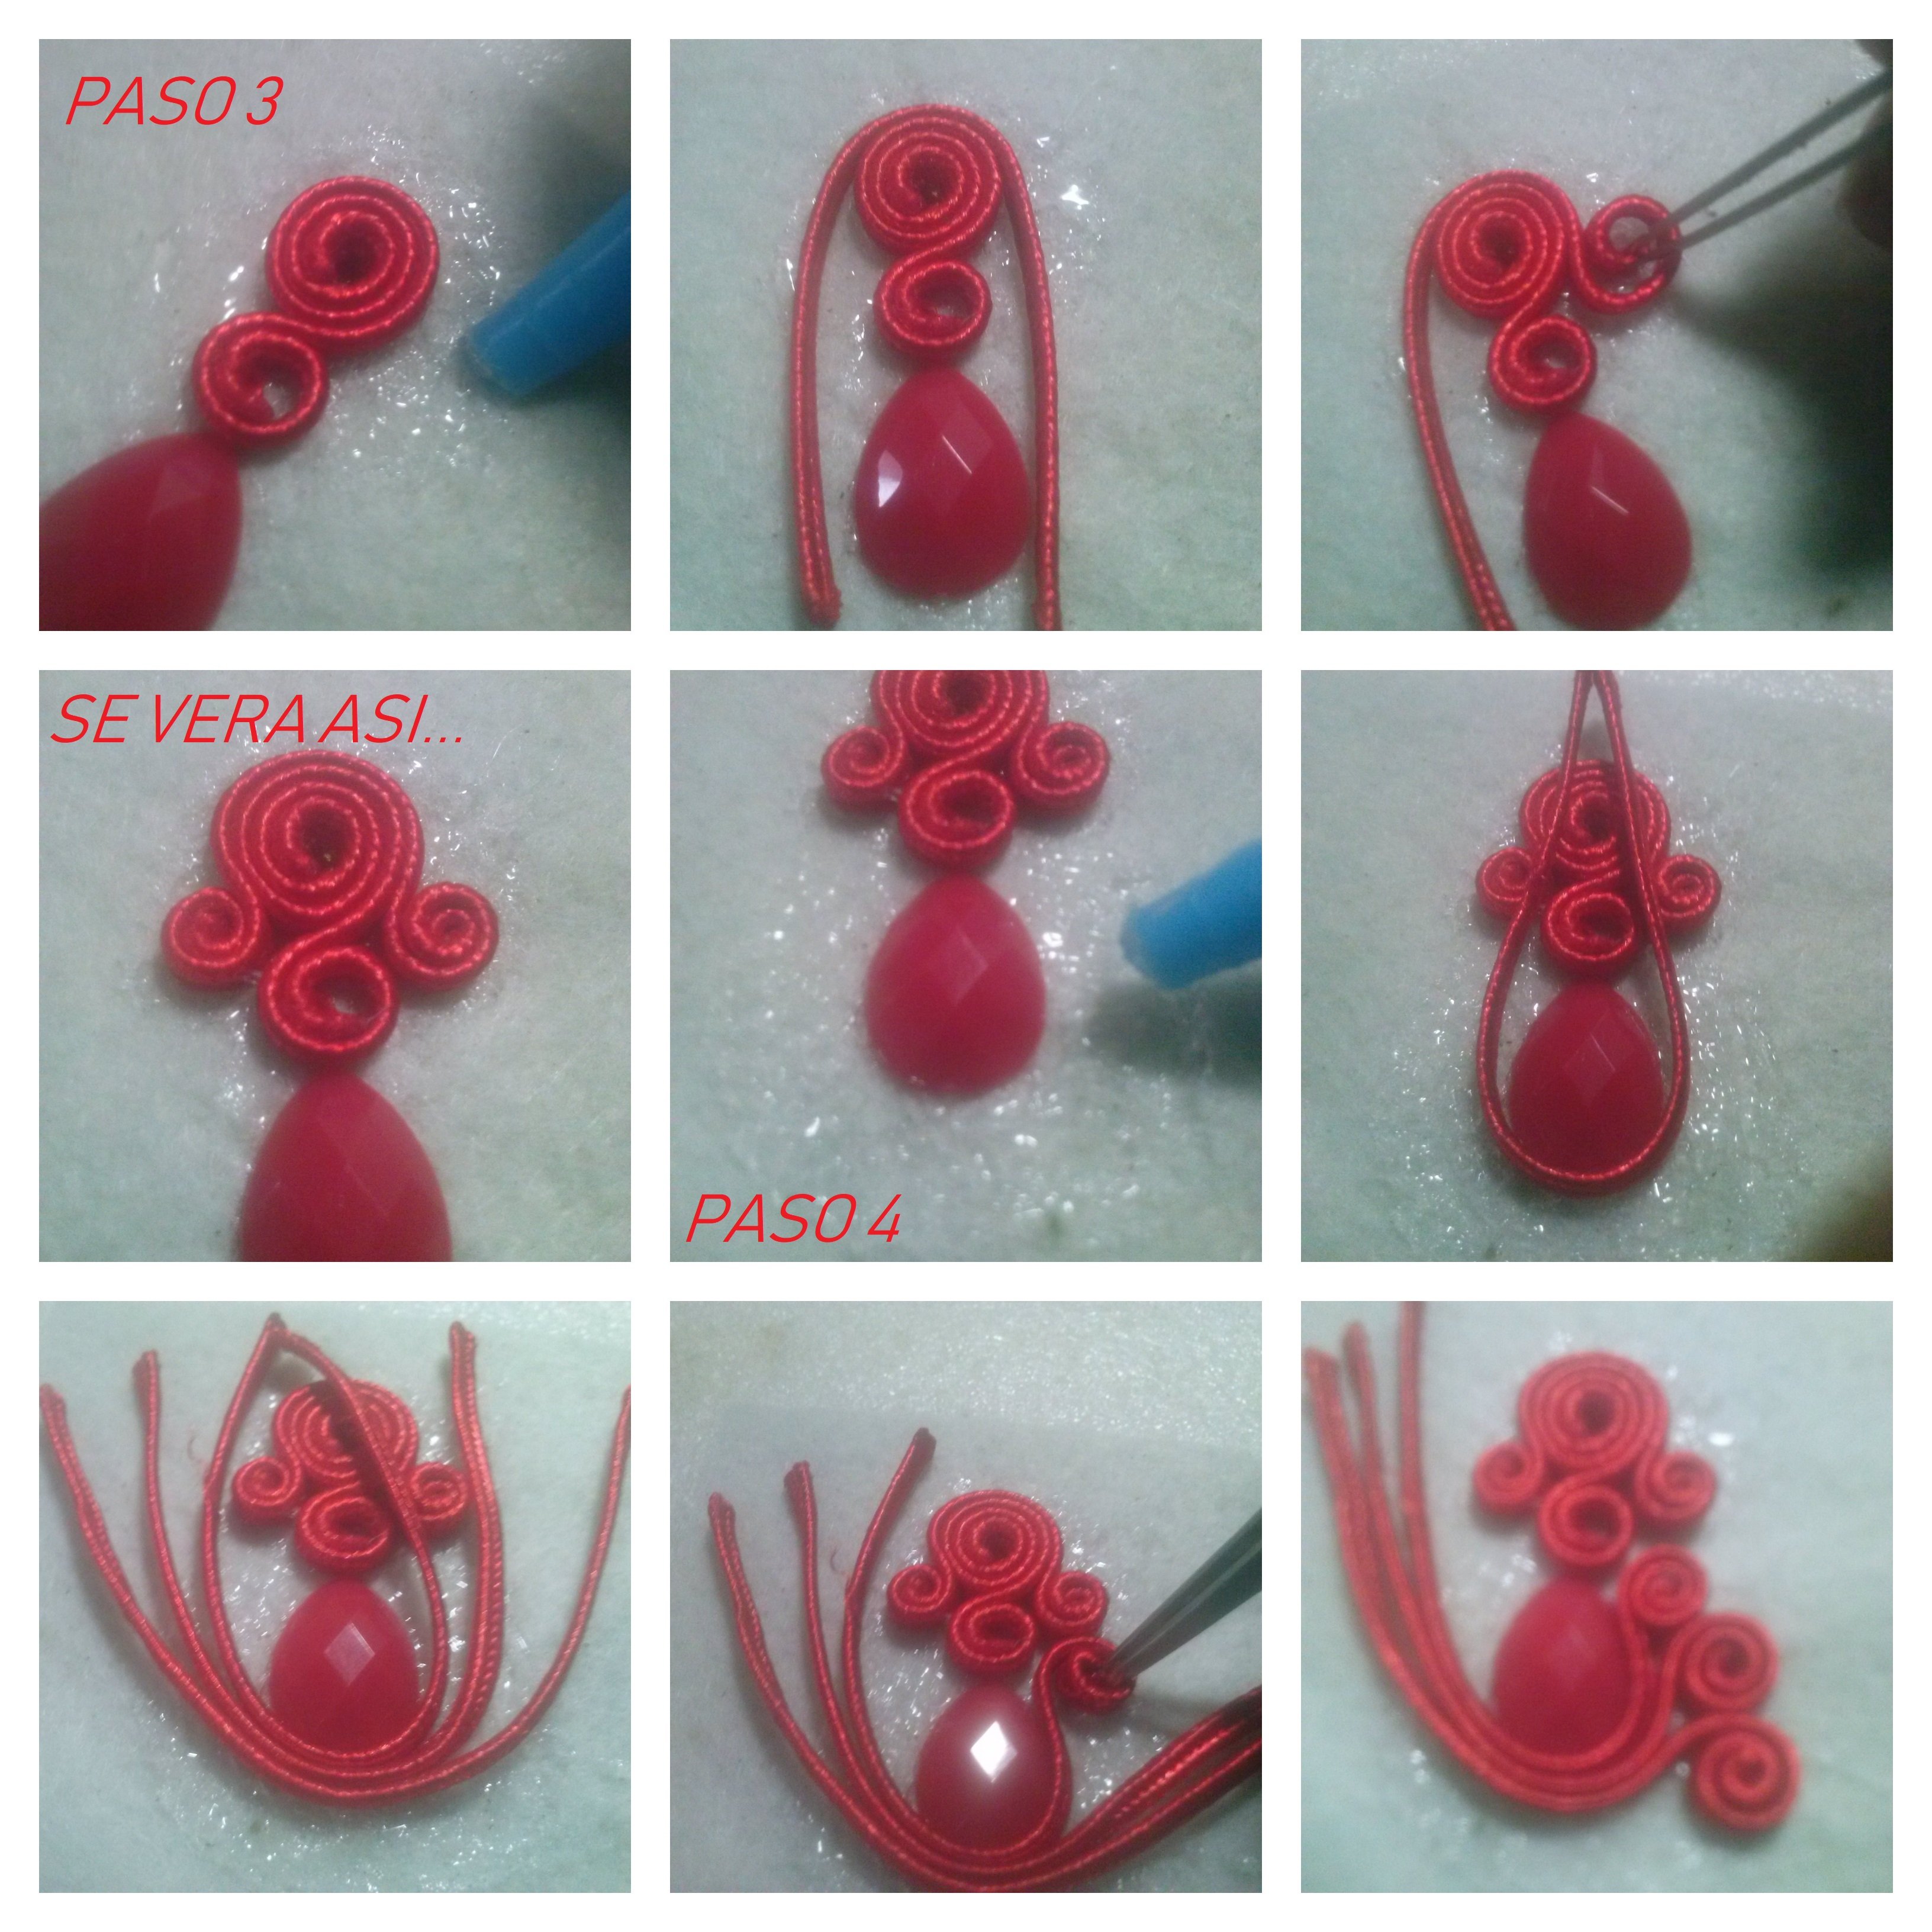
STEP 3: Place liquid silicon around the thread that we already stick and cut a 9 cm long thread, put it tipped and stick it right in the middle so that it is the same size on both sides with the help of the clip starts to roll it from both sides, it will look like I show you in the next image.
STEP 4: Around the applique place more liquid silicon and proceed to cut 3 threads of 11 cm each, put a pointed end and stick the thread right in the middle as I show in the image following step 4, then paste the other 2 threads and with the help of the clip begins to wind the threads leaving a mini circle in the middle where later we will hit a balin.

STEP 5: Carry out the same procedure as in step 4 on the other side, trying to make both sides equal, in the lower part we will place liquid silicon and stick 4 4 mm thick strass stones, then we will place a little liquid silicon in each circle and with the help of the clamp we will stick a balin in each one of them in the circles of in the middle we will stick the bigger balls, and in the smaller circles the small balls. Now we just need to cut the leftover leather and with the tinderbox pass the low flame through the tendril to seal the thread so you will have your tendrils ready.