Continuing from my previous article Astronomical Imaging: Using just a Smartphone I discussed how to take wide angle images of the sky using just a smartphone by itself. However, to get much better resolution we can use a telescope in a technique called afocal imaging or “digiscoping” . Although it sounds complicated, it is really identical to how we use our eyes to view through a telescope as can be seen in the next diagram.

When using a phone camera, we simply place the camera at the same place as we had our I eye, as you can see in the following diagram.

In practice it is harder than it seems, as you must hold the camera very steadily in the right position and requires considerable dexterity! It can be done, but it is strong recommended that the camera is secured to the eyepiece/telescope.
The Setup
You can buy commercial adapters that will mount a smartphone to the telescope’s eyepiece. For example, Celestron offer the following adapter that positions the phone’s camera at the telescope eyepiece.
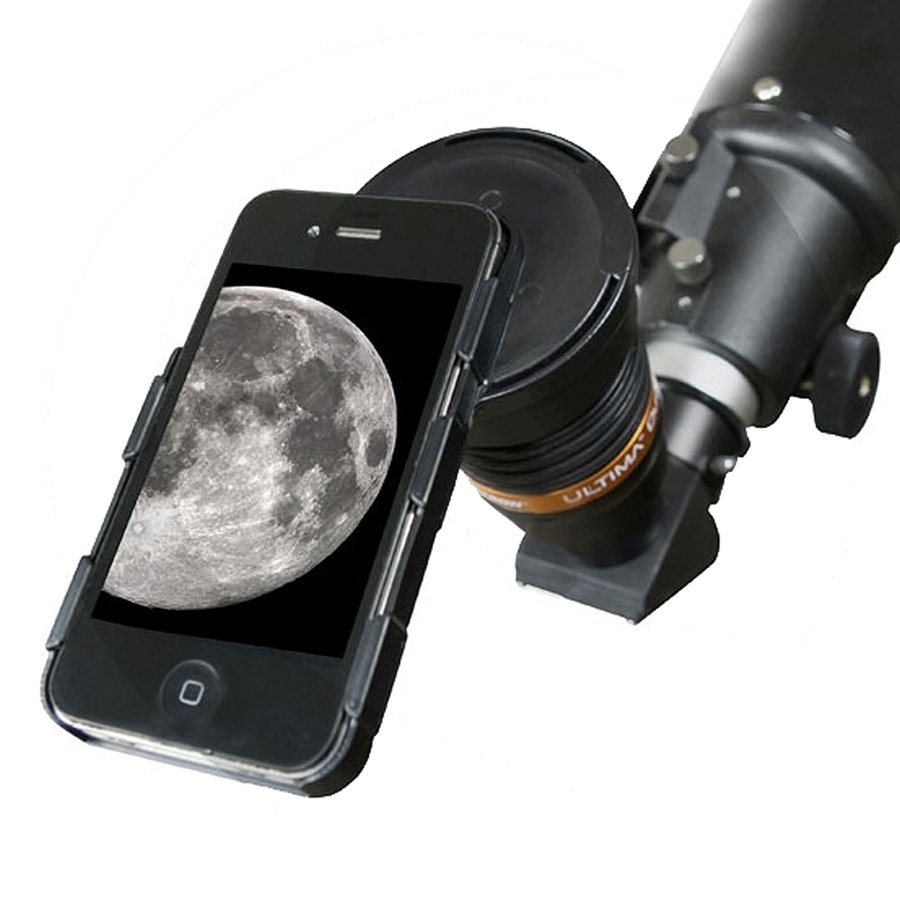
Commercial phone to telescope adapter – Credit: Celestron
As they are simple to make, I made one from some plywood and PVC water pipe I had lying around as scrap. It may not be pretty, but it works just as well as the bought one! Here you can see I've mounted it to the back of my C8 telescope, with the camera place over the eyepiece.
The complete setup
The following pictures show how it fits together. The first image below shows the base telescope setup with the eyepiece at the rear of the telescope. The 90-degree bend between the telescope and the eyepiece is a mirror diagonal which makes it easier to access the camera when the telescope is pointed upwards.
The Telescope's eyepiece, where we need to place the camera
Here you can see the adapter attached to the eyepiece, sans the smartphone. The design has a tube fits over the eyepiece with nylon locking screws (there are 6 screws total which provides some alignment fine tuning). The spring-loaded phone clamping mechanism is visible to the left. This is just one of many ways you could tackle designing the adapter, and it was mainly influenced by what parts are had readily available.
Telescope with adapter mounted to eyepiece
The phone is then shown in place as in the following picture.
Telescope with camera mounted to eyepiece
The tricky part is getting the camera and eyepiece aligned, and this takes some practice, requiring small adjustments It is best to do this in the daytime rather than fumbling in the dark. During the daytime use a distance object so that not only can the alignment be check but the focus can be adjusted so that is close to what it will be for the stars. Watch the image on the phone screen using the built in Camera App, until the image is a centred as possible.
Camera is aligned with eyepiece. When the camera is aligned correctly, you will see a nice uniform image
Sample Results
The following is an example of some of the results that were obtained with an iPhone 4s and 6s, using a Celestron C8 telescope mounted on Vixen Sphinx Mount. I plan to post more result’s in the future. The amount of detail visible in the image can easily match or exceed what can be seen directly by eye.
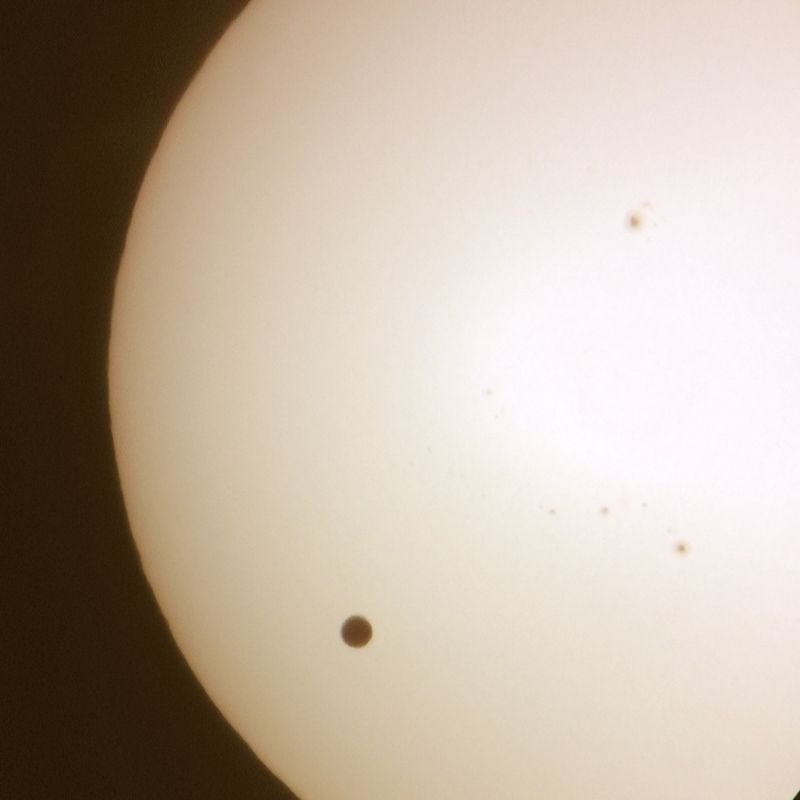
The sun and the transit of Venus in June 2012. iPhone 4s + 10mm eyepiece + Celestron C8 telescope. This image was made just holding phone up to the eyepiece - but it took a number of attempts to get right
Here is the planet Jupiter and 3 of its moon’s Callisto, Ganymede and Europa. This image was processed using Autostakkert and Gimp.
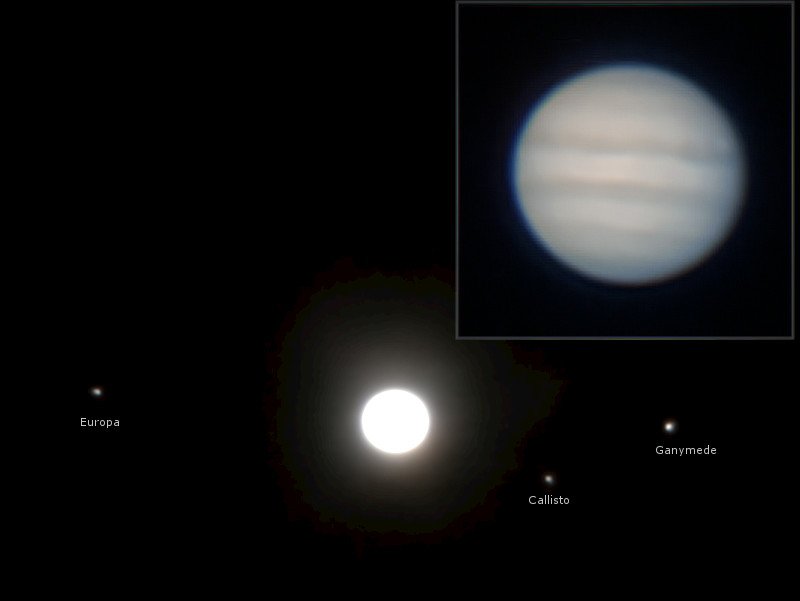
Jupiter and 3 of its Moons. Image insert shows Jupiter imaged to bring out cloud detail - 600 frames processed from a 1 minute movie. Movie acquired in NightCap Pro. Celestron C8 + 9mm Plossl + iphone 6s
Going further afield here is the globular cluster NGC104, the second brightest globular cluster, and although 13,000 light years distance is clearly split into it's constituent stars. It should be noted a tracking mount is necessary at this point since the exposures are too long to avoid trailing (see my article here for more information).
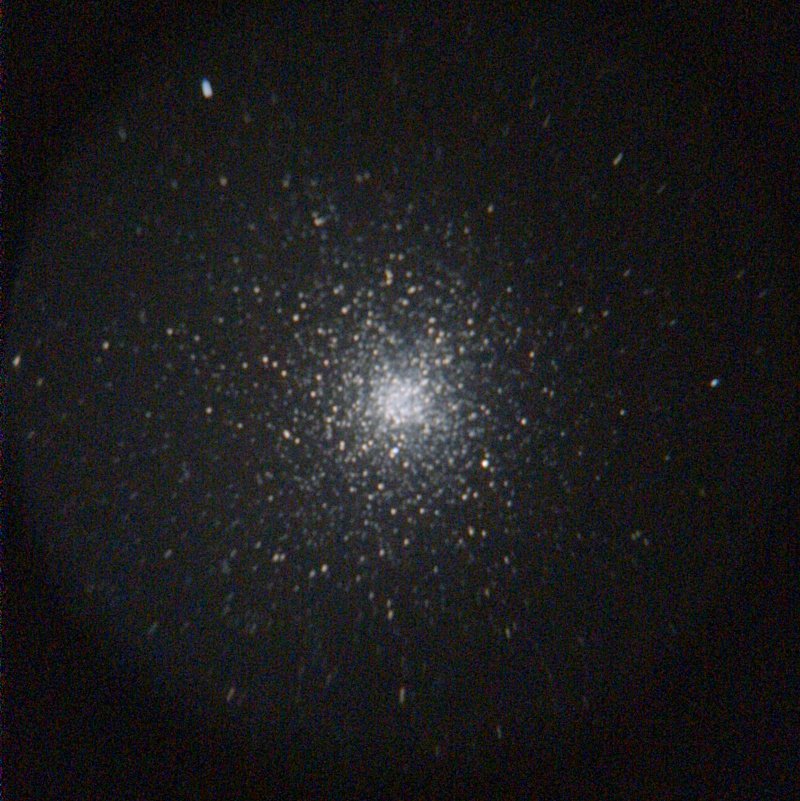
Star cluster NGC104. iPhone6s + 9mm Plossl + Celestron C8. 17 x 4sec exposures
One of the most interesting objects in the Sky is the Orion Nebula, and here we managed to capture a lot of detail in the central areas of the nebula.
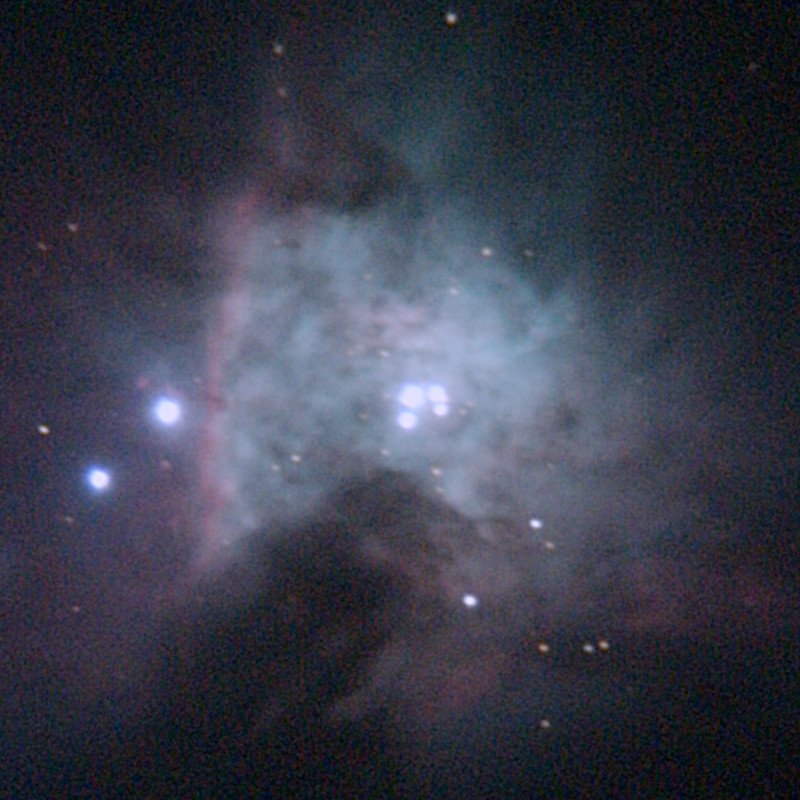
Orion Nebula M42. iPhone6s + 9mm Plossl + Celestron C8. 17 x 4sec exposures
Calculating Magnification and Focal Length
One point that will be of interest, is how magnification do we achieve with this technique. In photographic parlance we typically don’t refer to magnification, but to focal length. The longer the focal length the stronger the magnification.
With the afocal setup described in this article, the effect of the Telescope eyepiece and the camera lens is to amplify the telescope’s focal length by the ratios of camera and eyepiece focal lengths. Refer to the diagram below which describes this.
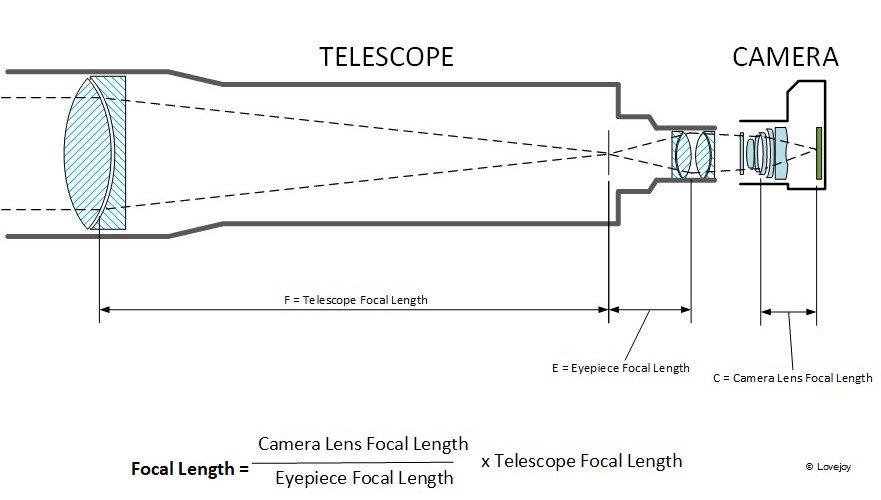
Looking at a worked example, if we use an iPhone 6s coupled with an 2030mm focal length Celestron C8 telescope (the setup used for this article). The Data is then:
Telescope focal length = 2030mm
Eyepiece focal length = 9mm
Camera lens focal length = 4.15mm (obtained from EXIF data, as well as other online various sources)
So therefore the final focal length = ( 4.15mm / 9mm ) x 2030mm = 936mm
What about magnification? Well if we have increased from the iPhone’s native focal length of 4.15mm to 936mm, then we can say magnification = 936mm / 4.15mm = 225. So with this setup we have increased the magnification over the standard iPhone camera lens by a factor of 225 times!
Conclusion
Coupling a smartphone to a telescope allows you to capture many different types of astronomical objects, with surprisingly good results. Even though I have access to various types of cameras, including a number of purpose built camera's, I still find it a lot of fun using my phone to do astrophotography! I hope I have encouraged some of you to get out there and try it yourself.
References
- Image Methods. http://www.televue.com/engine/TV3b_page.asp?id=85
- Smartphone Astrophotography: How I Capture the Moon and Planets with My Phone. https://petapixel.com/2015/02/20/smartphone-astrophotography-how-i-capture-the-moon-and-planets-with-my-phone/
Please note: All images are my own unless otherwise noted
